

Page 1

User Manual
Battery Charger / Maintainer
For 6 / 12 Volt lead-acid batteries
1 Amp
Model No.CM1A (0757-13CEC)
1
Page 2

WARNING - RISK OF EXPLOSIVE GASES WORKING IN VICINITY OF A LEAD-ACID
THIS MANUAL CONTAINS IMPORTANT SAFETY AND
OPERATING INSTRUCTIONS
READ ENTIRE INSTRUCTION BEFORE USE
BATTERY IS DANGEROUS. EXPLOSIVE GASES DEVELOP DURING NORMAL BATTERY
OPERATION. IT IS IMPORTANT THAT EACH TIME BEFORE USING YOUR CHARGER, YOU
READ THIS MANUAL AND FOLLOW THE INSTRUCTIONS EXACTLY.
To reduce risk of battery explosion, follow these instructions and those published by battery
manufacturer and manufacturer of any equipment you intend to use in vicinity of battery. Review
cautionary marking on these products and on engine.
Do not expose charger to rain, snow, or liquids.
Use of an attachment not recommended or sold by the battery charger manufacturer may result
in a risk of fire, electric shock, or injury to persons.
To reduce risk of electric shock, unplug charger from AC outlet before attempting any
maintenance or cleaning.
To reduce risk of damage to electric plug and cord, pull by plug rather than cord when
disconnecting charge
An extension cord should not be used unless absolutely necessary. Use of improper extension
cord could result in a risk of fire and electric shock. If extension cord must be used, make sure
that pins on plug of extension cord are the same number, size and shape as those of plug on
charger and that the extension cord is properly wired and in good electrical condition and that the
wire size is large enough for A.C. ampere rating of charger as specified in the following table:
RECOMMENDED MINIMUM AWG SIZE FOR
EXTENSION CORDS FOR BATTERY CHARGERS
Length of cord (feet): 25 50 100 150
AWG size of cord: 16 16 16 14
If charger is equipped with an input power cord, do not operate charger with damaged cord or
plug - replace the cord or plug immediately.
Do not operate charger if it has received a sharp blow, been dropped, or otherwise damaged in
any way; take it to a qualified serviceman.
Do not disassemble charger; take it to a qualified service center when service or repair is required.
Incorrect reassembly may result in a risk of electric shock or fire.
Appliances incorporating batteries which contain materials hazardous to the environment.
Batteries contain lead and dilute sulfuric acid. Dispose of the battery in accordance with federal,
state and local regulations. Do not dispose of the battery in a landfill, lake or other
Scrap and replace the VRLA battery at or before the time indicated on the battery or in the user's
manual. Usage beyond the required time of service can cause fluid leakage due to damages to
the container, or cause fire due to power leakage.
PERSONAL PRECAUTIONS
The appliance is not intended for use by young children or infirm persons without supervision;
young children should be supervised to ensure that they do not play with the appliance.
When the battery charger is charging for automobile batteries, the following steps should
be done:
The battery terminal is not connected to the chassis has to be connected first. The other
connection is to be made to the chassis, remote from the battery and fuel line. The battery charger
is then to be connected to the supply mains.
After charging, disconnect the battery charger from supply mains, and then remove the chassis
connection and the battery connection, in this order.
For
appliance with type Y attachment:
If the supply cord is damaged, it must be replaced by the manufacturer or its service agent or
similarly qualified person in order to avoid a hazard.
Someone should be within range of your voice or close enough to come to your aid when you
work near a lead-acid battery. Have plenty of fresh water and soap nearby in case battery acid
2
Page 3

contacts skin, clothing or eyes. Wear complete eye and clothing protection. Avoid touching eyes
while working near battery.
If battery acid contacts skin or clothing, wash immediately with soap and water. If acid enters
eye, immediately flush eye with running cold water for at least 10 minutes and get medical
attention immediately.
NEVER smoke or allow a spark or flame in vicinity of battery or engine.
Be extra cautious to reduce risk of dropping a metal tool onto battery. It might spark or short-
circuit battery or other electrical part that may cause explosion.
When working with a lead-acid battery, remove personal metal items such as rings, bracelets,
necklaces, watches, etc. A lead-acid battery can produce a short-circuit current high enough to
weld a ring or the like to metal, causing a severe burn.
It is not intended to supply power to a low voltage electrical system other than in a power supply
application. Do not use battery charger for recharging dry-cell or non-rechargeable
batteries that are commonly used with home appliances. These batteries may burst and cause
injury to persons and damage to property. While charge the impropriety type of battery will
cause battery serious damage.
NEVER charge a frozen battery.
NEVER charge the impropriety type of battery.
NEVER charge the impropriety Voltage of battery.
NEVER block off the ventilation louver of the chrger.
PREPARING TO CHARGE
If necessary to remove battery from vehicle to charge, always remove grounded terminal from
battery first. Make sure all accessories in the vehicle are off, so as not to cause an arc. Be sure
area around battery is well ventilated while battery is being charged. Gas can be forcefully
blown away by using a piece of cardboard or other non-metallic material as a fan.
Clean battery terminals. Be careful to keep corrosion from coming into contact with eyes. Add
distilled water in each cell until battery acid reaches level specified by battery manufacturer. This
helps purge excessive gas from cells. Do not overfill. For a battery without caps, carefully follow
manufacturer's recharging instructions.
Study all battery manufacturers’ specific precautions such as removing or not removing cell caps
while charging and recommended rates of charge.
Determine voltage of battery by contacting battery manufacturer and make sure it matches output
rating of battery charger.
CHARGER LOCATION
Locate charger as far away from battery as dc cables permit.
Never place charger directly above battery being charged; gases from battery will corrode and
damage charger.
Never allow battery acid to drip on charger when reading gravity or filling battery.
Do not operate charger in a closed-in area or restrict ventilation in any way.
Do not set a battery on top of charger.
DC CONNECTION PRECAUTIONS
Connect and disconnect DC output terminals only after removing charger from AC outlet.
Never allow DC output terminals to touch each other.
If problems arise connecting the output leads, solicit the aid of your Dealer from whom you
purchased this product or the charger manufacturer for finding a suitable connection device for
your application.
FOLLOW THESE STEPS WHEN BATTERY IS INSTALLED IN VEHICLE. A SPARK NEAR
BATTERY MAY CAUSE BATTERY EXPLOSION. TO REDUCE RISK OF A SPARK NEAR
BATTERY:
Position AC and DC cords to reduce risk of damage by hood, door or moving engine part.
Stay clear of fan blades, belts, pulleys, and any other parts that can cause injury to persons.
Check polarity of battery posts POSITIVE (POS., P, +) post usually has larger diameter than
NEGATIVE - (NEG., N, -).
Determine which post of battery is grounded (connected) to chassis.
For negative-grounded vehicle, first connect POSITIVE (RED) clip from charger to POSITIVE
3
Page 4

(POS., P, +) ungrounded post of battery. Then connect NEGATIVE (BLACK) terminal to vehicle
chassis or engine block away from battery.
For positive-grounded vehicle, connect NEGATIVE (BLACK) clip from charger to NEGATIVE
(NEG., N, -) ungrounded post of battery. Connect POSITIVE (RED) clip to vehicle chassis or
engine block away from battery keeping the battery terminal well removed there from.
Do not connect any charger clips to carburetor, fuel lines, or sheet-metal body parts. Connect to
a heavy gauge metal part of the frame or engine block.
Connect charger AC supply cord to electric outlet.
When disconnecting charger, turn switches (if supplied) to off, disconnect charger from AC power,
remove clip from vehicle chassis, and then remove clip from battery terminal. See operating
instructions for length of charge information.
FOLLOW THESE STEPS WHEN BATTERY IS OUTSIDE VEHICLE. A SPARK NEAR THE
BATTERY MAY CAUSE BATTERY EXPLOSION. TO REDUCE RISK OF A SPARK NEAR
BATTERY:
Check polarity of battery posts. POSITIVE (POS., P, +) battery post usually has a larger diameter
than NEGATIVE (NEG., N, -) post. Some batteries are equipped with 'Wing-Nut' terminals
allowing for easy placement of the terminals to these posts.
Attach at least a 24-inch long 18-gauge (AWG) insulated battery cable to NEGATIVE (NEG., N,
-) battery post.
Connect POSITIVE (RED) charger terminal to POSITIVE (POS., P, +) post of battery.
Position yourself and free end of cable as far away from battery as possible - then connect
NEGATIVE (BLACK) terminal to free end of cable.
Do not face battery when making final connection.
Connect charger AC supply cord to electrical outlet
When disconnecting charger, always do so in reverse sequence of connecting procedure and
break first connection while as far away from battery as practical
A marine (boat) battery must be removed and charged on shore. To charge it on board requires
equipment specially designed for marine use
MAIN FEATURES:
Automatic Switching Mode Battery Charger & Maintainer
Easy to Use: The Battery Charger is easy to operate and requires no technical experience.
Charge & Maintain - Automatic Charge: On power up, the charger will automatically go to
charging system, then could be left unattended and never overcharge your batteries.
Charge & Maintain - Automatic Maintenance: When the battery is charged to "full" state,
the charger automatically switches to maintain the battery. It will monitor the battery voltage
and continue to peak performance to the battery.
Short circuit protection: The charger will automatically turn off when the output short circuit
occurred and prevent any damage
Reverse polarity protection : The charger can automatically shut off when the output polarity
is reversed and without damage
SAFETY & TEMPERATURE FEATURES:
Never overcharge your battery
Output short circuit protection
Output overload protection: The charger employs the use of a ‘Solid State Circuit Interrupter’
that opens under severe overload. This condition may occur if attempting to charge any
severely discharged or heavily sulfated battery. Once the Interrupter opens, the charger will
stop charging for a short period and then resume charging automatically and the yellow. L.E.D.
will be OFF, until resume charging. Overloading could be due to an external load, remove the
load condition prior to attempting to recharge the battery.
Reserve Battery / Overload Condition: The charger has reverse battery and short circuit
4
Page 5

protection. If a reverse battery condition exists (White L.E.D. will turn RED, only, while output
Charge Current:
1A
Battery Capacity: Charging:
3 - 20AH
Battery Capacity: Maintaining:
3 - 60 AH
Input Connector:
UL 2pin plug
Output Cord:
10 feet with Quick Connector
Extend Cord:
2 feet with Trailer Connector + Battery Clamp
Extend Cord:
2 feet inline 3A fused with ring terminals
leads are connected backwards), simply unplug charger from AC power and properly remake
the connections as described in this manual
Internal over heat protection: Chargers have an internal overheat protection. The power will
be reduced of the ambient temperature is raised.
Corrosion-resistant output connectors
Output clips and ring terminals provided: It comes with a quick connect fly lead and 2
different kinds of connectors, crocodile clips and a ring terminals. The ring terminals are
perfect for permanent connection to your battery. You can connect the lead to the battery
and tuck the lead away while you are using your vehicle and when you get back to your
garage simply plug the lead back into the charger
BATTERY TYPES & CAPACITY:
Suits all Lead Acid Type Batteries. (Conventional, AGM & Gel)
Battery Capacity:
o The following maximum AH capacities are to be used as a general guide only: some
batteries maybe able to handle a higher Charge Current. Check with the battery
Manufacturer when charging batteries with small capacity.
ELECTRICAL PARTS:
Delivered with:
ENVIRONMENTAL CHARACTERISTICS:
Operating Temperature: -10 to 45° C
Storage Temperature: -25 to 85°C
Operating Humidity Range: 0 to 90% RH
Cooling: Passive / Natural
5
Page 6
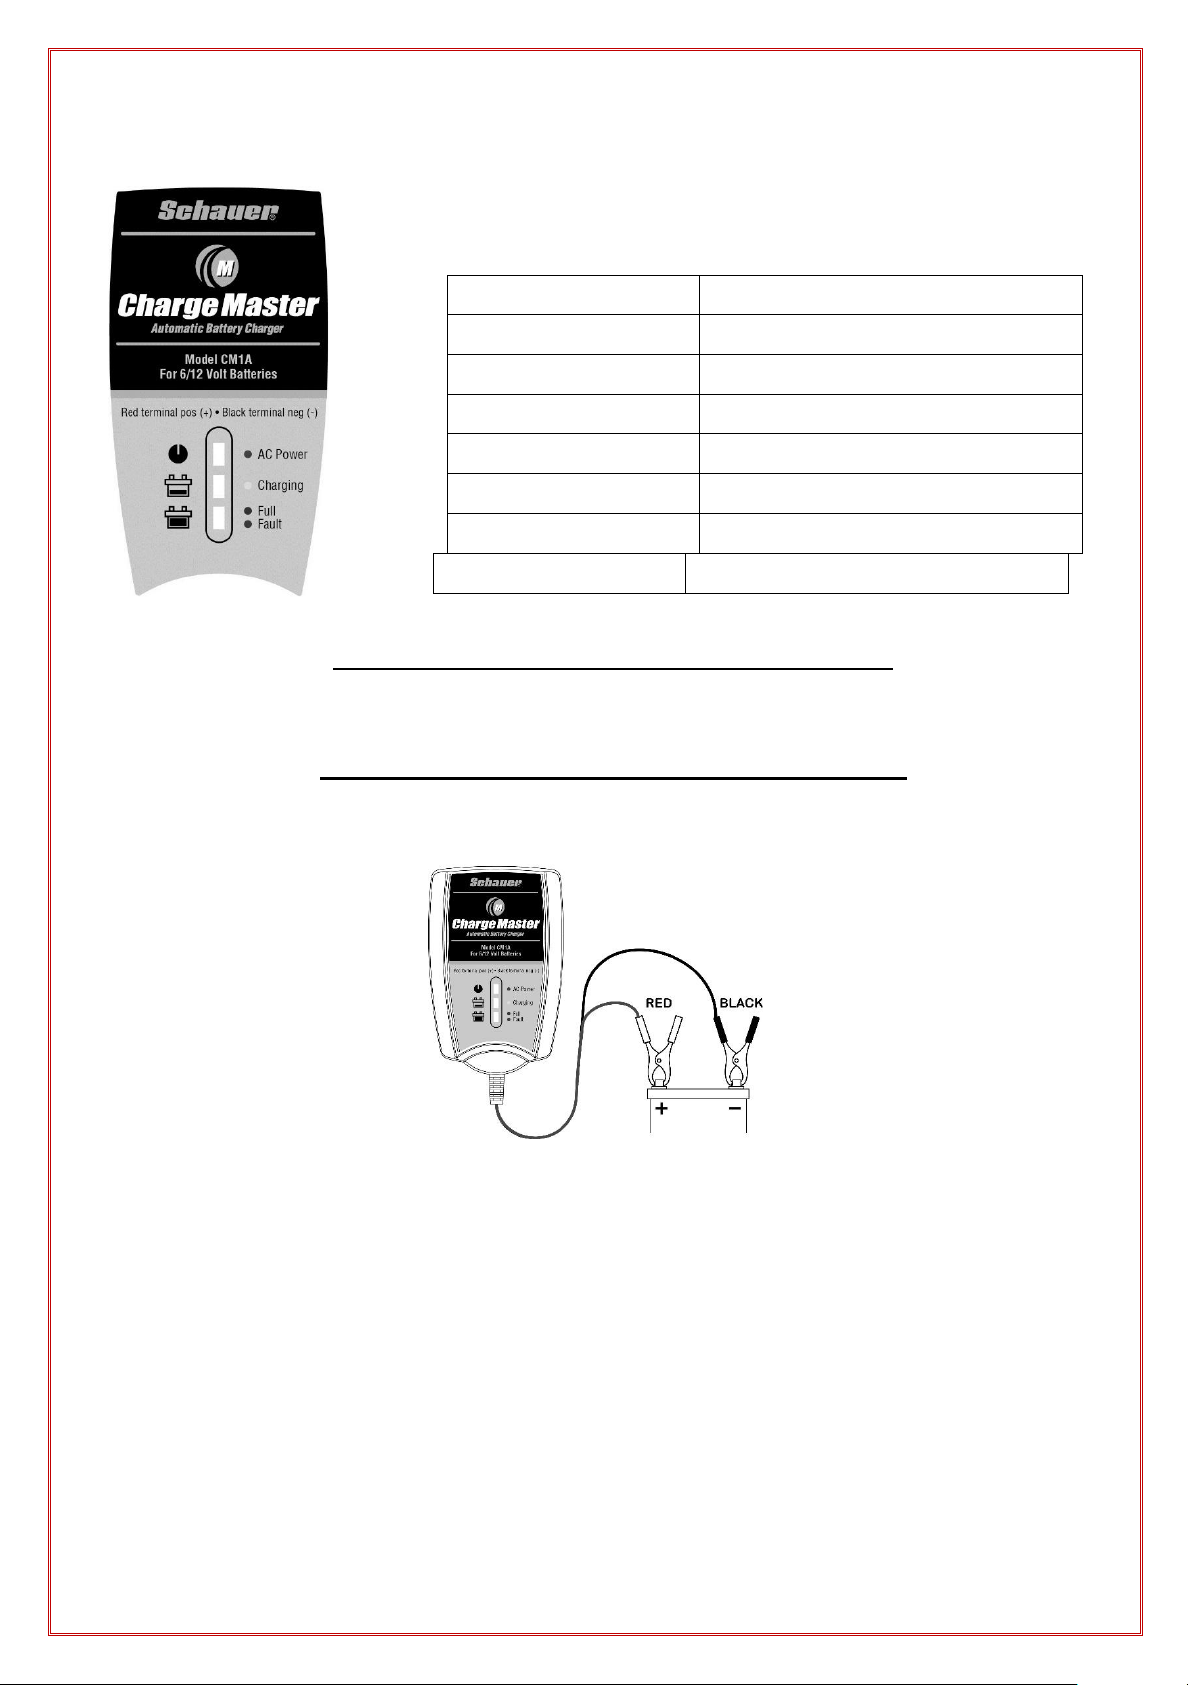
TECHNICAL SPECIFICATIONS:
Part Number
CM1A
Type
Automatic
Input Voltage Range
100~120Vac
Input Frequency
50/60Hz
Output
1A @ 6V/12V
Size (L*W*H)
100 x 65 x 36 mm
Weight
0.4Kg
Approvals
UL/cUL, FCC, CEC
CHARGING INSTRUCTIONS:
STEP 1 - Pre Charge Check & Electrolyte Level Check
Check the Battery Electrolyte level (Not required on sealed & Maintenance Free Batteries).
If necessary, remove the vent caps and add distilled water so the levels are halfway between
the upper and lower fill lines.
STEP 2 - Connecting the Battery charger to your Battery
If the Battery is out of the vehicle:
o Connect the Red lead from the charger to the positive (+) battery terminal.
o Connect the Black lead from the charger to the negative (-) battery terminal.
If the Battery is still in the vehicle, determine if the vehicle is positively (+) or negatively (-)
earthed.
o If Negatively Earthed (Most Common) – FIRST Connect the Red (+) battery charger
lead to the positive (+) Battery post and then connect the Black (-) battery charger
lead to the vehicle’s chassis and away from the fuel line.
6
Page 7
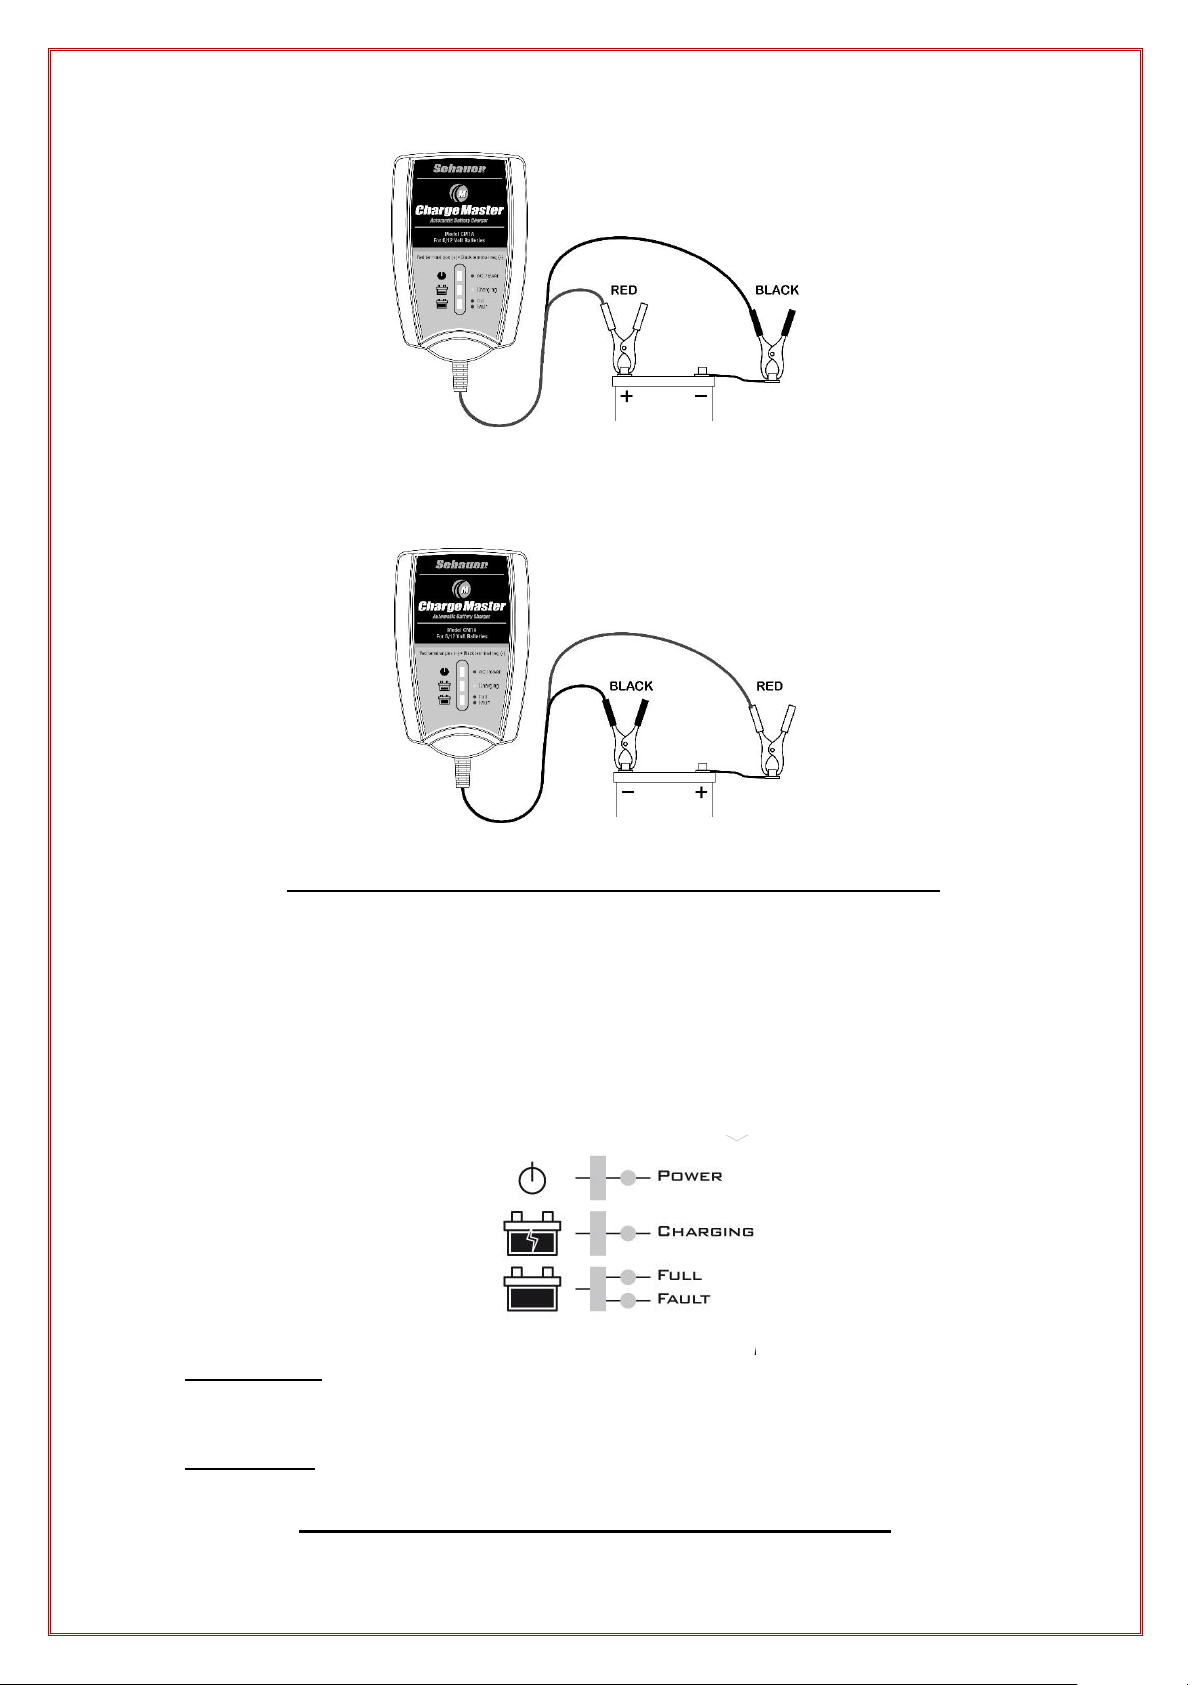
Connection in Vehicle (Negatively Earthed)
o If Positively Earthed – FIRST Connect the Black (-) battery charger lead to the
Negative (-) battery post and then connect the Red (+) battery charger lead to the
Vehicle’s chassis and far away from the fuel line.
Connection in Vehicle (Positively Earthed)
STEP 3 - Connect the battery charger to Mains Power (120Vac)
Connect the battery charger to a 120VAC Mains Powered socket.
Turn on the 120VAC Mains Power.
The Charger will automatically start when AC power is connected and switched on.
(Note: If the Fault Indicator LED illuminates Red, please check your connections as it’s likely
that the Positive and Negative Leads are reversed. Refer to Trouble Shooting Page for further
information)
THE CHARGING PROCESS:
The charging stages are as follows:
Bulk Charge:
Charges using a constant maximum current (1A) until the battery reaches 7.2V(6 Volt Batteries) / 14.4V
(12 Volt Batteries) - (LED Color - Yellow)
Fully / Float:
Battery is fully charged and is being maintained. (LED Color - GREEN)
STEP 4 - Disconnecting the Battery charger from Battery
7
Page 8

If the Battery is out of the vehicle.
Power
Charging
Full
Fault
(Red)
(Yellow)
(Green)
(Red)
A.C. Power connected, battery disconnected
ON
OFF
OFF
OFF
Bulk Charging
ON
ON
OFF
OFF
Level 1 Charging
ON
ON
OFF
OFF
Level 2,3 Charging
ON
OFF
ON
OFF
Battery Reverse polarity connection
ON
OFF
OFF
ON
A.C. Power OFF
OFF
OFF
OFF
OFF
CHARGING CURVE (VOLTAGE):
Types of
Problems
Indication
Possible Causes
Suggested Solution
Charger does
not work?
No Indicator
lights on
- No AC power
- Check AC connections and make
sure Power Point is switched ON
Charger has
no DC output?
Fault LED is
On.
- Reverse polarity connection to
Battery
- Check that the crocodile clips
haven’t fallen off the battery.
- Check that the crocodile clips /
ring terminals are connected to the
correct polarity.
o Switch OFF and Remove the AC Power Socket from the outlet.
o Remove the Black lead and then the Red lead.
o Check electrolyte levels if possible.
(As they may need topping up with distilled water after charging)
LED STATUS INIDICATOR TABLE:
TROUBLE SHOOTING
MAINTENANCE
The charger is maintenance free. If the power cord is damaged, the charger must be left to
the reseller for maintenance. The case should be cleaned occasionally. The charger should
be disconnected from the power while cleaning.
702-000465-01-R
8
 Loading...