

Page 1
Tools needed for
assembly:
2 Adjustable Wrenches
7/16” Open-End Wrench
Flat Screwdriver
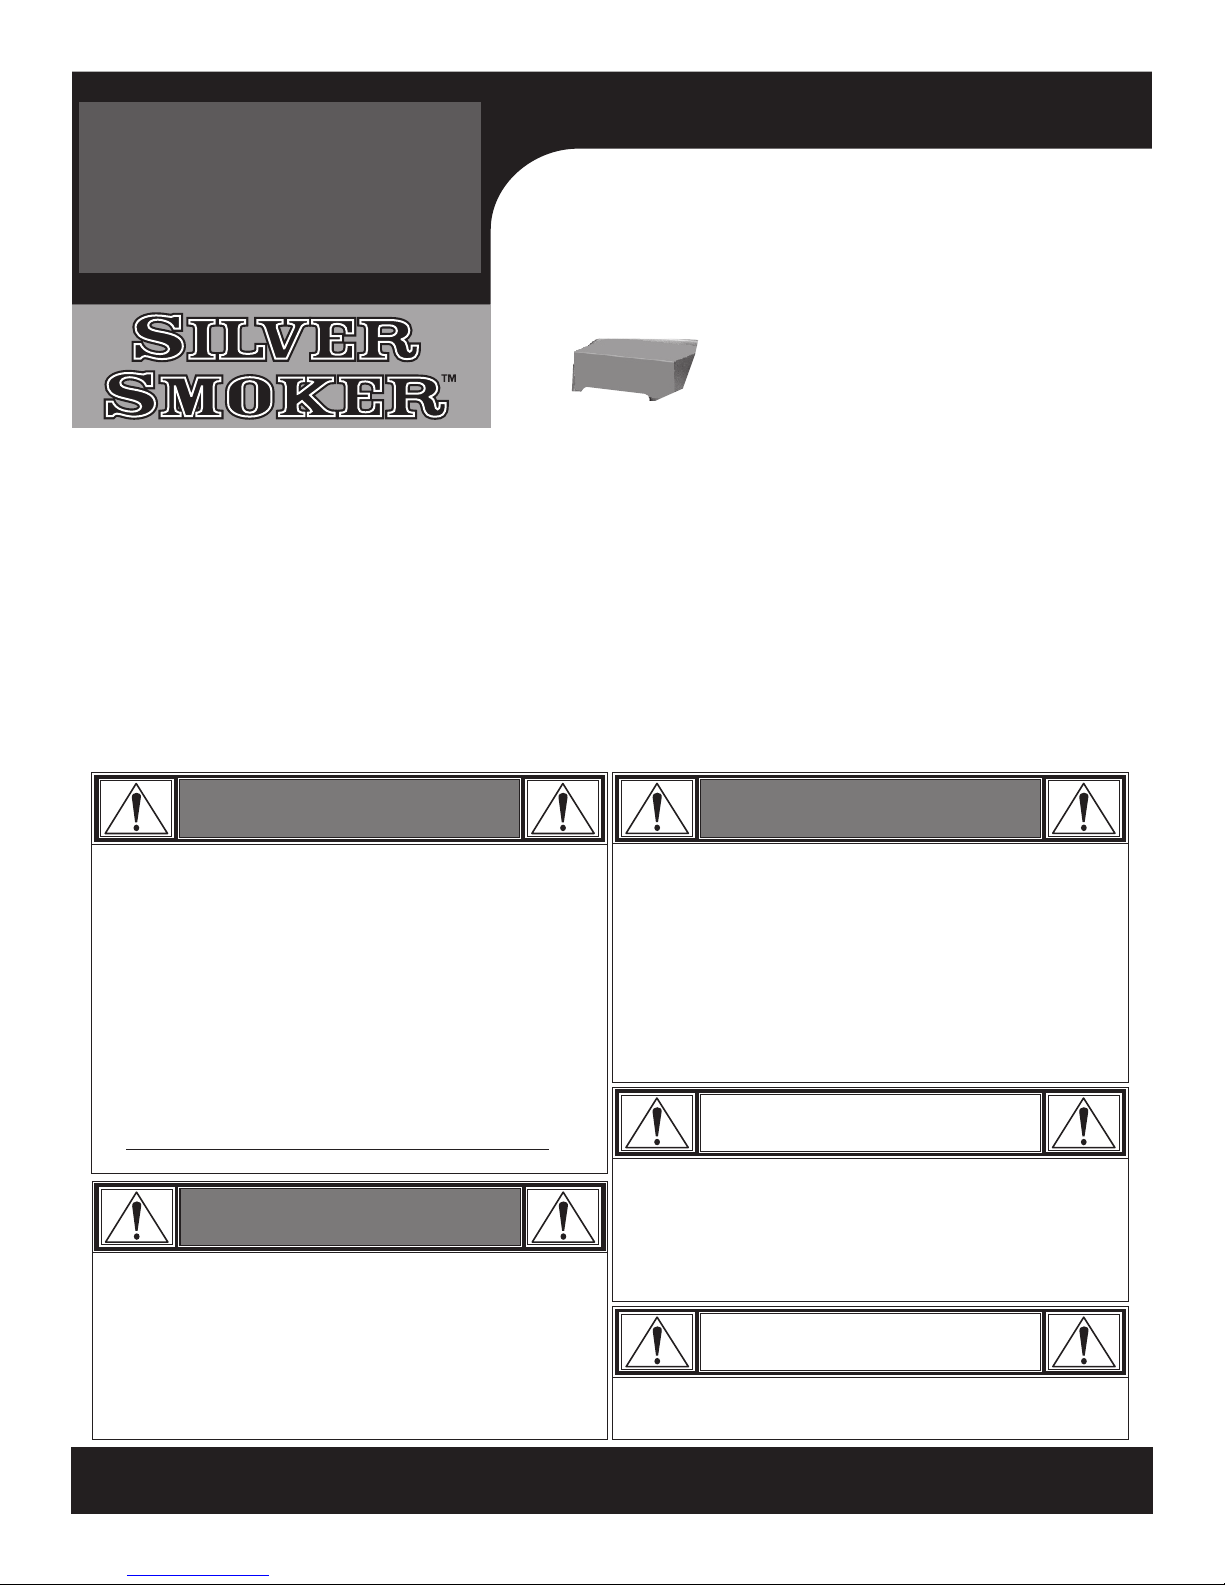
07201560
04201101
Smoker, BBQ and Grill
WARNING
CALIFORNIA PROPOSITION 65
1. This product is produced with or contains
chemicals known to the State of California to
cause cancer, birth defects, or other reproductive
harm.
2. This product contains chemicals, including lead
and lead compounds, known to the State of
California to cause cancer, birth defects or other
reproductive harm.
Wash your hands after handling this product.
WARNING
All surfaces can be hot during use. Use protection
as required to prevent burning.
Do not use this unit on or near combustible surfaces
or structures such as wood decks, dry leaves or
grass, vinyl or wood siding, etc.
SEE OWNERS MANUAL FOR IMPORTANT SAFETY
INFORMATION.
WARNING
CARBON MONOXIDE HAZARD
Burning charcoal inside can kill you. It gives off
carbon monoxide, which has no odor. NEVER burn
charcoal inside homes, vehicles or tents.
NEVER LEAVE FIRE UNATTENDED!
Do not allow small children near flame. Hot embers
can fly out in breezy conditions. Adequate fire
extinguishing material should be readily available.
CAUTION
Some parts may contain sharp edges. Wear
protective gloves if necessary.
Read and follow all safety statements, warnings,
assembly instructions and use & care directions
before attempting to assemble and cook.
CAUTION
THIS UNIT IS HEAVY!
DO NOT assemble without a helper.
If you have questions or need assistance during assembly, please call .
To insure your satisfaction and for follow-up service, register your grill online at www.grillregistration.com
P/N 42804297 (10-02-07)
1-800-241-7548
Page 2
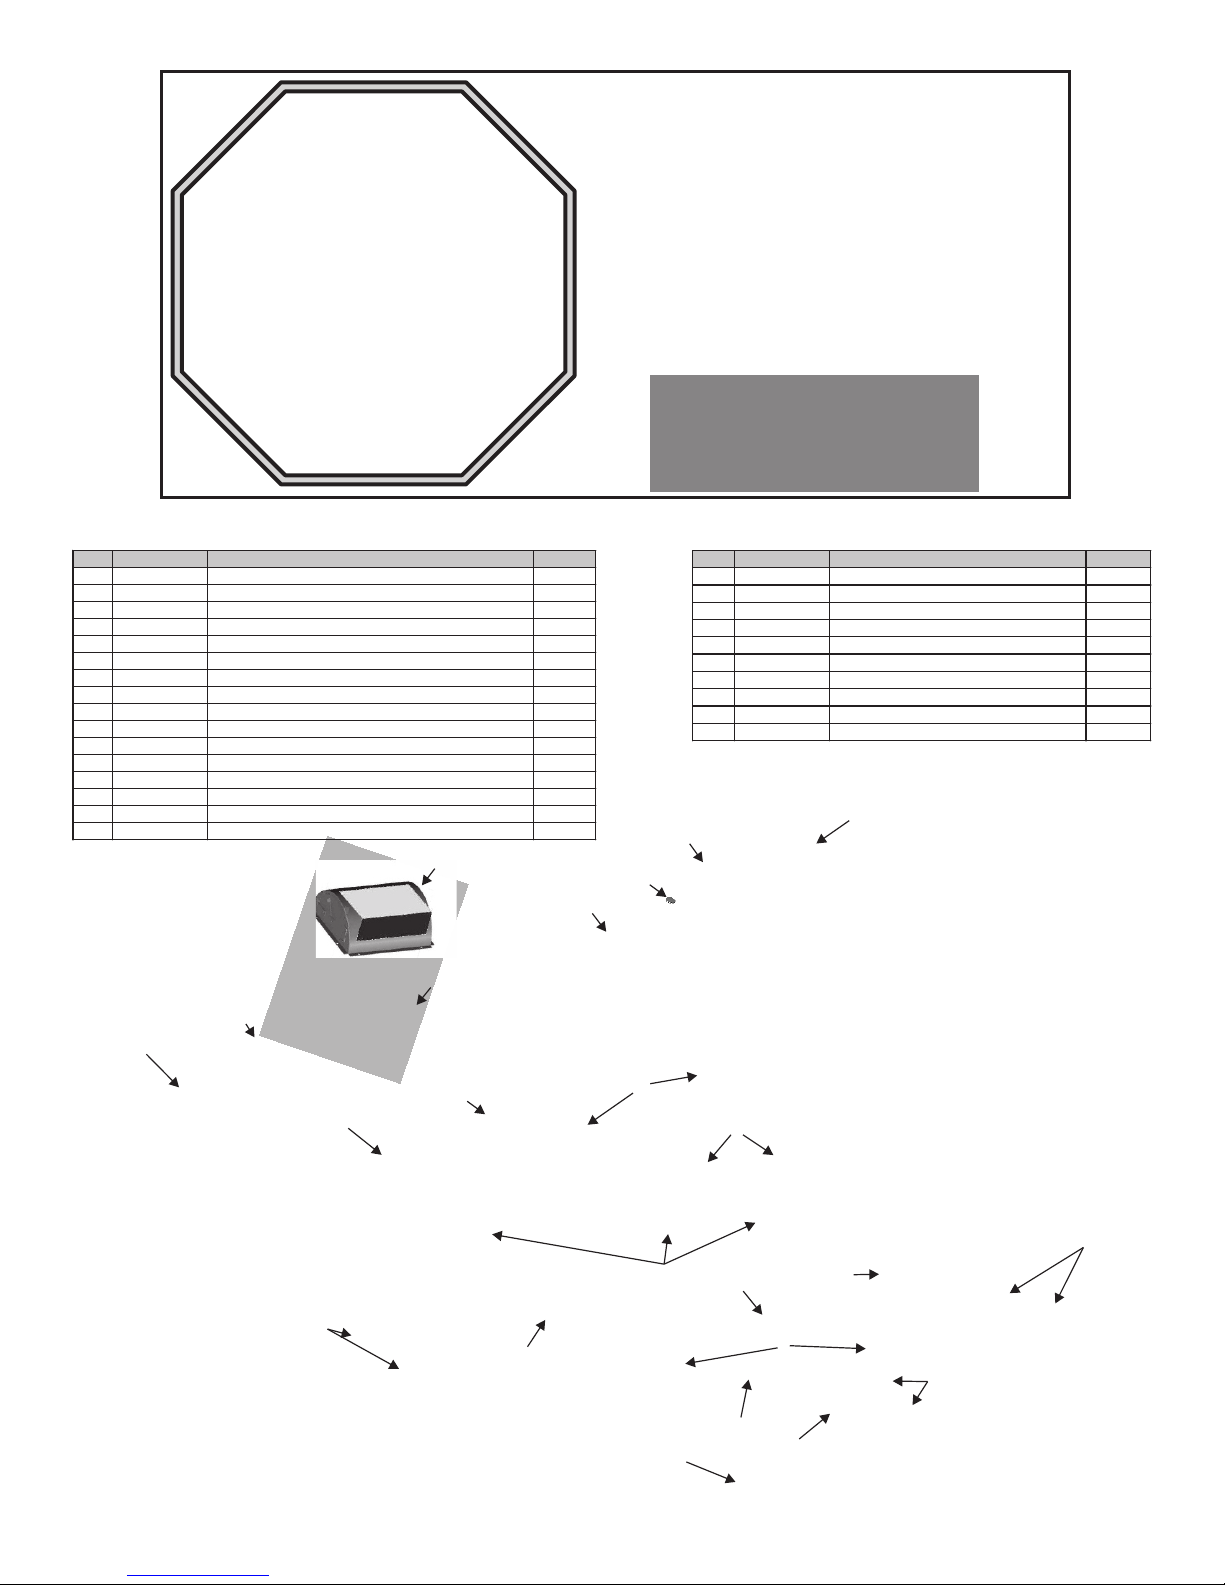
Key # Pa rt Number Description Quantity
A 55710232 SILVER SMOKE CHAMBER KIT 1
B 29001712 FIREBOX TOP 1
C 55710234 FIREBOX BOTTOM KIT 1
D 55710235 WOOD SHELF KIT 1
E 55700442 AXLE KIT 1
F 55700443 WHEEL KIT 1
G 55700183 LEG BRACE KIT 2
H 55710236 SMOKESTACK KIT 1
I 55710237 SHORT LEG KIT 2
J 55700186 LONG LEG KIT 2
K 55700187 SHELF BRACKET KIT 2
L 24810036 HOLE PLUG 1
M 55710238 DOOR LATCH KIT 1
N 55710239 LOGO PLATE KIT 1
O 55710204 DELUXE HANDLE KIT, WOOD SPACERS 2
P 55700192 BUTTERFLY DAMPER KIT 2
Key # Part Number Description Quantity
Q 29101311 WIRE FIRE GRATE 3
R 40009916 GRATE, COOKING, SMOKER 2
S 40009925 GRATE, COOKING, FIREBOX 1
T 44830150 GREASE CLIP 1
U 46030090 RACK, WOOD 1
V 44810036 FIREBOX COVER PLATE 1
… 40003010 OPTIONAL TEMP GAUGE 1
… 42030350 SNAP BAG 1
… 42804297 INSTRUCTION ASSEMBLY 1
… 40053116 OUTER CARTON 1
STOP!
Missing a part?
No need to go back to the store!
Call Grill Service Center for Help and Parts
• If you need assistance with your product or warranty
parts call 1-800-241-7548. Hours of Service
Center Operation are 8:00 A.M. To 6:00 P.M. EST
Monday - Friday.
The store where you made your purchase
does not stock parts for this item. If you
need parts, whether they are missing or
damaged, call the Customer Service toll
free Help Line.
Call us and we will gladly ship
the part you need.
PARTS LIST
B
• To order non-warranty replacement parts or
accessories please visit us on the web at
www.charbroil. com or call
1-800-241-7548 and one of our friendly and
knowledgeable agents will be glad to assist you.
H
N
L
A
C
M
P
V
S
J
O
R
I
Q
G
D
K
T
U
G
F
E
Page 3

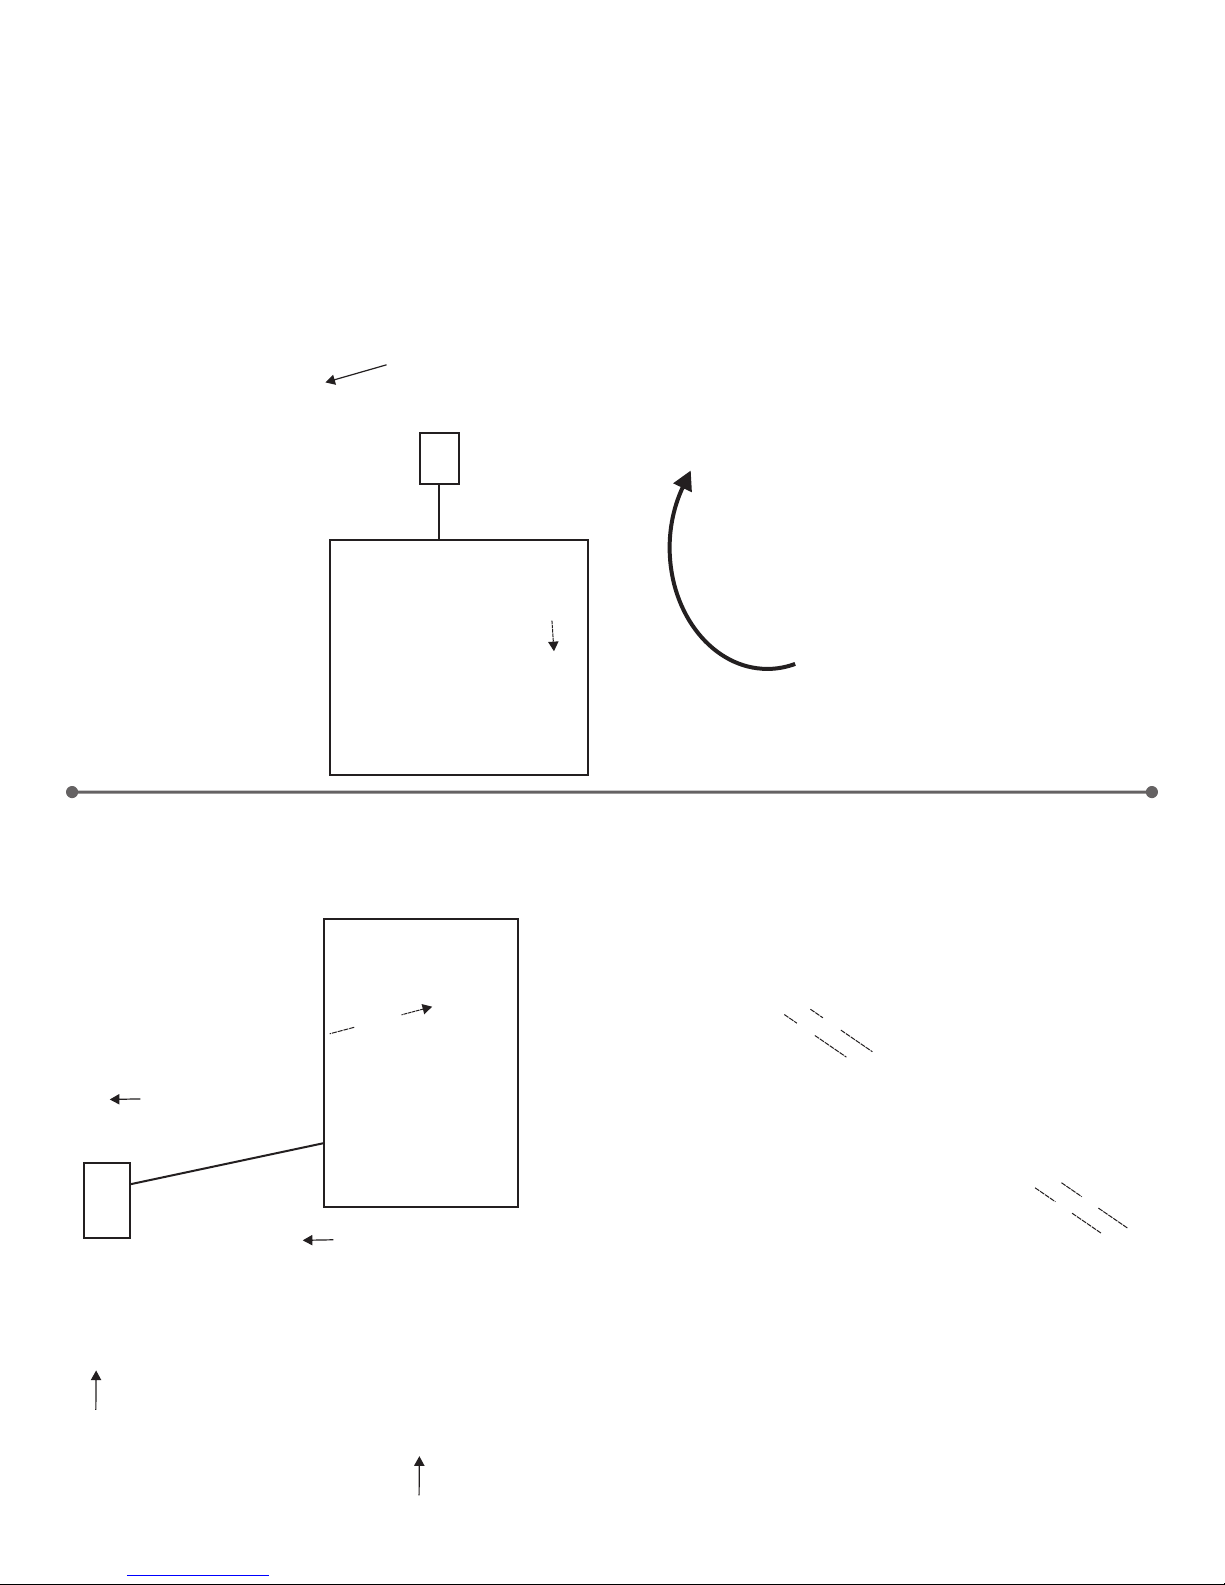
1
FIRST, GET A HELPER! This unit is heavy and requires a second person for lifting and moving. NEXT, pick a suitable
location to work. Open the carton and slit the corners so that the carton lays flat. This will give you a protective work surface
during assembly.
TO BEGIN ASSEMBLY, build two leg assemblies by sliding the long leg sections into the short leg sections.
Short leg section
2
Long leg section
Attach leg braces to the outside of one leg assembly using #10-24x1-3/4” screws and #10-24 flange nuts. Make sure
slotted (oval) hole is toward bottom of leg. DO NOT FULLY TIGHTEN screws until Step 6 is complete.
Leg brace
Leg brace
Do not fully tighten screws
until Step 6 is complete.
Slotted
hole
Page 4
3
Lay the leg assembly on its side with legs braces pointing upward. Insert the wood rack hooks into leg holes and swing rack
upward, parallel to leg braces.
Wood rack
4
With the aid of a helper, place leg holes of remaining leg assembly over wood rack hooks and rotate leg assembly until it
meets the leg braces. Make sure both short legs are at one end of the rack and both long legs at the other end. Attach to leg
braces using #10-24x1-3/4” screws and #10-24 flange nuts. DO NOT FULLY TIGHTEN screws until Step 8 is complete.
Do not fully tighten screws
until Step 6 is complete.
Short leg
Long leg
Short leg
Long leg
Page 5

5
Insert a cotter pin into the hole at one end of the axle and bend the ends of the pin back so that it cannot be removed. Slide
a wheel onto the axle. Slide the axle through the holes at the ends of the short legs. Slide remaining wheel onto axle and
secure with remaining cotter pin.
Cotter pin
Axle
6
Cotter pin
NOTE: Smoker chamber door not pictured
for clarity.
Stand the leg assembly on end, wheels
down. Stand the smoker chamber on its
solid end, open end up. Place leg assembly
against chamber, aligning holes in legs with
holes in chamber. Attach legs to chamber
using four 1/4-20x2” screws and 1/4-20
flange nuts. Insert screws from outside,
flange nuts inside chamber.
FULLY TIGHTEN ALL
SCREWS AND NUTS AT
THIS TIME.
Wheels down
Open end up
Smoker chamber
Page 6

7
Attach Firebox Top Assembly to Firebox Bottom Assembly using eight 1/4-20x3/4” hex-head
bolts as shown below.
Firebox Top Assembly
Firebox Bottom Assembly
8
NOTE: Smoker chamber and firebox doors not pictured for clarity.
Diamond Fire Plate Installation - For models without Diamond Fire ignitor accessory,
part number 22504850.
For models that feature the Diamond Fire ignitor accessory, supplemental instructions
are included with ignitor.
First, locate the cover plate in the hardware box. At the bottom right end of the
firebox there is an opening for the Diamond Fire ignitor accessory. Install the
cover plate over the opening using two #8-32x1/2” screws and #8-32 lock nuts.
Second, align the hole pattern on the firebox with the pattern on the
smoker chamber. The firebox should be slightly offset from the smoker
chamber. Attach using six 1/4-20x3/4” hex-head bolts and flat washer
inside firebox and 1/4-20 flange nuts inside smoker chamber.
TM TM
TM
TM
Firebox
Firebox
Cover Plate
Page 7

9
NOTE: Smoker chamber door not pictured for clarity.
From inside the smoker chamber, slide the smokestack through the large hole. Align the two holes in the smokestack plate
with the holes in the chamber and secure with two 1/4-20x3/4” hex-head bolts outside the chamber and 1/4-20 flange nuts
inside.
Smokestack
10
Smokestack plate
NOTE: Firebox and smoker chamber not pictured for clarity.
Attach wood handle to smoker chamber door using two 1/4-20x4” screws, wood handle spacers, fiber washers and 1/4-20
flange nuts, as shown below. Repeat to attach handle to firebox door.
Smoker Chamber
Door
Fiber Washer
Firebox
Door
Handle
Wood Handle Spacer
Page 8

11
NOTE: Smoker chamber door not pictured for clarity.
Install grate support screws in the four rear holes and two
front-center holes in the smoker chamber. Use six #10-24x1”
screws and #10 flange nuts.
12
NOTE: Smoker chamber door not pictured for clarity.
Attach shelf brackets to outer holes on front of smoker chamber
using two 1/4-20x1-1/4” hex-head bolts and 1/4-20 flange nuts.
DO NOT FULLY TIGHTEN until Step 13.
Do not fully tighten
until Step 13.
Shelf bracket
Page 9

NOTE: Smoker chamber door not pictured for clarity.
13
2nd
Tighten bracket bolts.
First, attach shelf slats to the two outer holes in shelf brackets using
two #10-24x1” screws and #10-24 flange nuts per slat. DO NOT
FULLY TIGHTEN SCREWS.
Second, fully tighten hex-head bolts on shelf brackets (installed in
previous step).
Third, attach remaining shelf slat to brackets with two #10-24x1”
screws and #10-24 flange nuts. FULLY TIGHTEN ALL SHELF
SLAT SCREWS.
3rd
Attach inner slat.
Fully tighten all
slat screws.
1st
Attach two outer
shelf slats. Do not
tighten.
14
If you have purchased the optional 3” Temperature Gauge,
part number 40003010, remove the attached nut, insert
gauge stem into large hole in cooking chamber door and
attach nut to gauge on inside of door. DO NOT
OVERTIGHTEN NUT. Make sure text and graphics are
aligned for easy viewing.
If you do not have a temperature gauge, install the chrome
hole plug (provided) into temperature gauge hole in cooking
chamber door.
If you would like to purchase the optional 3” Temperature
Gauge, part number 40003010, call 1-800-241-7548.
Hole plug
Page 10

15
Hang grease clip from holes on bottom right side of smoker chamber. A 12 oz. soup or vegetable can will fit nicely into clip to
collect grease.
Grease
Clip
16
If logo plate is not already installed, insert logo plate pins into two holes in lower right corner of smoker chamber door. Press
logo plate clips onto pins until snug against inside of door.
Logo plate
Logo plate clip
Page 11

17
NOTE: Smoker chamber door not pictured for clarity.
If you wish to grill in the smoker chamber, place two of the three
wire fire grates into bottom of smoker chamber. Place two large
porcelain cooking grates into chamber, resting them on the grate
support screws.
Wire Fire Grate (2)
Grate Support
Screws
18
Large Porcelain
Cooking Grate (2)
Firebox Fire Grate Installation for Smoking or Grilling:
NOTE: Firebox side door not pictured for clarity.
Place remaining wire fire grate into bottom of firebox through firebox door.
Wire Fire Grate (1)
Page 12

Firebox Cooking Grate Installation for Grilling:
19
NOTE: Firebox door not pictured for clarity.
Insert small porcelain cooking grate into firebox.
Small Porcelain
Cooking Grate (1)
Page 13

HARDWARE LIST
Hardware is shown actual size. You may have spare hardware after assembly is complete.
Leg Cap
Qty: 2
(Already installed)
Wood Handle Spacer
Fiber Washer
Qty: 4
Qty: 4
Flat Washer
Qty: 14
(4 already installed)
Hole Plug
Qty: 1
1/4-20
Flange Nut
Qty: 18
Logo Plate Clip
Qty: 2
1/4-20
Hex Nut
Qty: 2
(Already installed)
#10-24
Flange Nut
Qty: 24
Cotter Pin
Qty: 2
#8-32
Lock Nut
Qty: 2
1/4-20x4”
Machine Screw
Qty: 4
1/4-20x2”
Machine Screw
Qty: 4
MOST SURFACES ON THIS UNIT ARE HOT WHEN IN USE.
USE EXTREME CAUTION. KEEP OTHERS AWAY FROM UNIT.
ALWAYS WEAR PROTECTIVE CLOTHING TO PREVENT INJURY.
#10-24x1¾”
Machine Screw
Qty: 8
WARNING
1/4-20x1¼”
Hex-Head Bolt
Qty: 2
#10-24x1”
Machine Screw
Qty: 16
1/4-20x3/4”
Hex-Head Bolt
Qty: 10
(2 already installed)
#8-32x1/2”
Machine Screw
Qty: 2
Page 14

Preparing and Using Your Silver Smoker
Before cooking with your Silver Smoker, the following steps should be closely followed to both cure the finish and season
the interior steel. Failure to properly follow these steps may damage the finish and/or impart metallic flavors to your first
foods.
1. Brush all interior surfaces including grills and grates with vegetable cooking oil.
2. Build a small fire on the fire grate, being sure not to lay coals against the walls.
3. Close door. (Position butterfly damper and smokestack damper approximately at one quarter open.) This burn
should be sustained for at least two hours, the longer the better. Then, begin increasing temperature by opening the
butterfly damper and smokestack damper half-way and adding more charcoal. Your Silver Smoker is now ready for
use.
Rust can appear on the inside of your smoker. Maintaining a light coat of vegetable oil on interior surfaces will aid in the
protection of your unit. Exterior surfaces of smoker may need occasional touch up. We recommend the use of a
commercially available black high temperature spray paint. NEVER PAINT THE INTERIOR OF THE UNIT !
GRILLING
Wood is recommended, however charcoal or a combination of both may be used as the fuel source for grilling, with the
fuel source placed and ignited on the fire grate. Do not build too large of a fire. We recommend starting a fire with no
more than 4 pounds of charcoal (approximately 60 briquets) and adding more as needed during cooking. After allowing
the fire to burn down, place the cooking grills in the smoker. Failure to read and follow instructions for lighting charcoal
may result in serious personal injury and/or property damage.
GRILL MAINTENANCE
Frequency of cleanup is determined by how much your smoker is used. Make sure coals are completely extinguished
before cleaning inside of smoker. Inside surfaces may be cleaned with a strong solution of detergent and water applied
with a scrub brush. Thoroughly rinse with water and allow to air dry before using again.
If a bristle brush is used to clean any of the grill cooking surfaces, ensure no loose bristles remain on cooking surfaces
prior to grilling. It is not recommended to clean cooking surfaces while grill is hot.
SMOKING AND SLOW COOKING
If using the Silver Smoker as a smoker or slow cooker, remove the cooking grill from the firebox and build your fire on top
of the fire grate in the firebox. Either charcoal or wood may be used, but wood is the recommended fuel for it’s rate of
burn and the flavor it imparts to the food being cooked. Most seasoned hardwoods are good for smoking such as hickory,
mesquite, pecan, oak, and many other fruit woods. The firebox will accommodate most split fireplace size logs (16”).
Bark should be avoided or burned off first as it contains a high acid content and imparts an acrid flavor.
After allowing the fire to burn down, close the doors and control the temperature and smoke with the dampers located on
the firebox and atop the smokestack. Smoke is contained within the chambers, which will reduce burn while imparting
more smoke flavor. Do not operate the Silver Smoker with temperatures exceeding 450 degrees in the smoker chamber.
Place the food in the smoker chamber and monitor the temperature. Cooking and smoking are taking place using indirect
heat. There is no need to worry about a grease fire flare-up ruining the food. Do not place food within 6” of the opening
from the firebox into the smoker chamber. A general rule of thumb for cooking is about 1 hour per pound for smoking
large cuts of meat. Refer to a cook book for specific cuts of meats. Limit the number of times you open the smoker
chamber door as this will allow heat to escape and extend the cooking time.
HELPFUL HINTS
• If food seems to be getting too smoky or brown before the cooking time is finished, cover it loosely with heavy duty
aluminum foil.
• Remove the ash after each use.
• Covered side dishes can be warmed in smoker chamber.
• To prevent flare-ups, brush meat lightly with oil before grilling.
• Keep a small squirt bottle of water handy for grilling flare-ups.
Page 15

Limited Warranty
Manufacturer warrants to the original consumer-purchaser only that this product shall be free from defects in workmanship and materials after
correct assembly and under normal and reasonable home use for the periods indicated below beginning on the date of purchase.
The manufacturer reserves the right to require that defective parts be returned, postage and or freight pre-paid, by the consumer, for review and
examination.
90 Days LIMITED warranty
Upon consumer supplying proof of purchase as provided herein, Manufacturer will repair or replace the parts listed below which are proven
defective during the applicable warranty period. Parts required to complete such repair or replacement shall be free of charge to you except for
shipping costs. The original consumer-purchaser will be responsible for all shipping charges of parts replaced under the terms of this
limited warranty.
This limited warranty is applicable in the United States and Canada only, is only available to the original owner of the product and is not
transferable. Manufacturer requires reasonable proof of your date of purchase. Therefore, you should retain your sales slip or invoice and register
your new product immediately. Defective or missing parts subject to this limited warranty will not be replaced without registration and proof of
purchase. Register online at http://www.charbroil.com or complete and return via mail the Product Registration Card located on the last page of the
Use & Care manual included with this product and retain your sales receipt for proof of purchase.
This limited warranty applies to the functionality of the product ONLY and does not cover cosmetic issues such as scratches, dents, corrosions
or discoloring by heat, abrasive and chemical cleaners or any tools used in the assembly or installation of the appliance, surface rust, or the
discoloration of stainless steel surfaces.
This limited warranty will not reimburse you for the cost of any inconvenience, food, personal injury or property damage.
If an original replacement part is not available, a comparable replacement part will be sent. You will be responsible for all shipping charges of
parts replaced under the terms of this limited warranty.
ITEMS MANUFACTURER WILL NOT PAY FOR:
1. Service calls to your home.
2. Repairs when your product is used for other than normal, single-family household or residential use.
3. Damage resulting from accident, alteration, misuse, abuse, fire, flood, acts of God, improper installation, installation not in accordance with
electrical or plumbing codes, or use of products not approved by the manufacturer.
4. Any food loss due to product failures.
5. Replacement parts or repair labor costs for units operated outside the United States or Canada.
6. Pickup and delivery of your product.
7. Repairs to parts or systems resulting from unauthorized modifications made to the product.
8. The removal and/or reinstallation of your product.
9. Shipping cost, standard or expedited, for warranty and replacement parts.
DISCLAIMER OF IMPLIED WARRANTIES; LIMITATION OF REMEDIES
Repair or replacement of defect parts is your exclusive remedy under the terms of this limited warranty. Manufacturer will not be responsible for
any consequential or incidental damages arising from the breach of either this limited warranty or any applicable warranty, or for failure or damage
resulting from acts of God, improper care and maintenance, grease fire, accident, alteration, replacement of parts by anyone other than
Manufacturer, misuse, transportation, commercial use, abuse, hostile environments (inclement weather, acts of nature, animal tampering), improper
installation or installation not in accordance with local codes or printed manufacturer instructions.
THIS LIMITED WARRANTY IS THE SOLE EXPRESS WARRANTY GIVEN BY THE MANUFACTURER. NO PRODUCT PERFORMANCE
SPECIFICATION OR DESCRIPTION WHEREVER APPEARING IS WARRANTED BY MANUFACTURER EXCEPT TO THE EXTENT SET FORTH
IN THIS LIMITED WARRANTY. ANY IMPLIED WARRANTY PROTECTION ARISING UNDER THE LAWS OF ANY STATE, INCLUDING IMPLIED
WARRANTY OF MERCHANTABILITY OR FITNESS FOR A PARTICULAR PURPOSE OR USE, IS HEREBY LIMITED IN DURATION TO THE
DURATION OF THIS LIMITED WARRANTY.
Neither dealers nor the retail establishment selling this product has any authority to make any additional warranties or to promise
remedies in addition to or inconsistent with those stated above.
Manufacturer’s maximum liability, in any event, shall not exceed the documented purchase price of the product paid by the original consumer.
This warranty only applies to units purchased from an authorized retailer and or re-seller.
NOTE: Some states do not allow an exclusion or limitation of incidental or consequential damages, so some of the above limitations or
exclusions may not apply to you. This limited warranty gives you specific legal rights as set for herein. You may also have other rights which vary
from state to state. In the state of California only, if refinishing or replacement of the product is not commercially practicable, the retailer selling this
product or the Manufacturer will refund the purchase price paid for the product, less the amount directly attributable to use by the original consumerpurchaser prior to discovery of the nonconformity. In addition, in the state of California only, you may take the product to the retail establishment
selling this product in order to obtain performance under this limited warranty.
If you wish to obtain performance of any obligation under this limited warranty, you should write to:
Char-Broil Consumer Relations
P. O. Box 1240
Columbus, GA 31902-1240
Consumer returns will not be accepted unless a valid Return Authorization is first acquired by calling 1-800-241-7548 and then clearly marked
on the outside of the package and the package is shipped freight/postage pre-paid to the address above.
Page 16

Char-Broil, LLC • Columbus, GA 31904 • Assembly Instructions © 2007
Printed in China
 Loading...