

Page 1
Grilling's Juicy Little Secret TM
®
Serial number I Num6ro de s6rie I NOmero de eerie
See rating Labe[ on gri[[ for seria[ number.
Ce num6ro se trouve sur K6tiquette signal6tique situ6e eur Kapparei{.
E{nt_mero de serie se eneuentra en [a etiqueta de especificaciones
de [a parri{[a.
Date purchased I Dated'chat I Fechadecompra
If you have questions or need assistance
during assembly, please call 1-800-241-7548.
Si vous avez des questions ou besoin d'aide pendant
I'assemblage, S'il vous plait appelez 1-800-241-7548
Si tiene a[guna pregunta o si Necesita ayuda
durante el Ensamblado, 119menosAI 1-800-241-7548
©
@
@2013 Char-Broil, LLC. Columbus, GA, 31902. Printed in China. Imprim6 en Chine. Impreso en China
@2013 Assembly instructions. @2013 Assemb[6e des instructions. 02013 Instrucciones de ensamb[ado,
10/29/13. G432-001-490801
Page 2
For YourSafety................................ 2
GrillingGuide................................ 3-4
Use andCare ............................... 5-7
LimitedWarranty .............................. 8
Parts List................................... 23
Parts Diagram................................ 26
Assembly................................. 27-36
Troubleshooting............................ 37-38
RegistrationCard ............................. 43
Failureto followall manufacturer'sinstructionscould
resultinseriouspersonalinjuryand/orproperty
damage.
y[ c,,,uT,o.D
For residential use only. Do not usefor
commercial cooking.
E_
cAuT,o.
Grease Fires
• Putting out grease fires by closingthe lid is
not possible, Grills arewell ventilated for
safety reasons,
• Do not usewater on a grease fire. Personal injury
may result, Ifa greasefire develops, turn knobs
and LP tank off,
• If grill has not beenregularly cleaned, agrease fire
can occur that maydamage the product. Payclose
attention while preheating or burning off food
residue to insure that a grease fire does not
develop. Follow instructions on General Grill
Cleaning andCleaning The Burner Assembly to
prevent grease fires.
oThebestway to preventgreasefires is
regular cleaningof the grill.
Safety Symbols
Thesymbolsand boxesshownbelowexplainwhateach
headingmeans.Readandfollowall ofthemessagesfound
throughoutthemanual.
CAUTION:Indicatesa potentiallyhazardoussituation
or unsafepracticewhich,if notavoided,mayresultin
minoror moderateinjury.
WARNING: Indicatesa potentiallyhazardoussituation
which,if notavoided,couldresultin deathor serious
injury.
DANGER: Indicatesanimminentlyhazardoussituation
which,if notavoided,will resultindeathor seriousinjury.
INSTALLER/ASSEMBLER:
Leavethismanualwithconsumer.
CONSUMER:
Keepthis manualforfuturereference.
If you smell gas:
Readand followall safetystatements,assembly
instructions,anduseandcare directionsbefore
attemptingto assembleand cook.
Somepartsmaycontainsharpedges.Wear
protectiveglovesif necessary.
CALIFORNIAPROPOSITION65
1,Combustible by-products produced when using
this product contains chemicals known to the State
of California to causecancer, birth defects, or other
reproductive harm.
2,This product contains chemicals, including lead
and leadcompounds, known to theState of
California to cause cancer,birth defects or other
reproductive harm.
Washyour hands after handling this product.
Donot attempt to repair or alter the
hose/valve/regulator for any "assumed" defect.
Any modification to this assembly will void your
warranty andcreate the risk of a gas leak andfire,
Useonly authorized replacement parts supplied by
manufacturer.
CAUTION
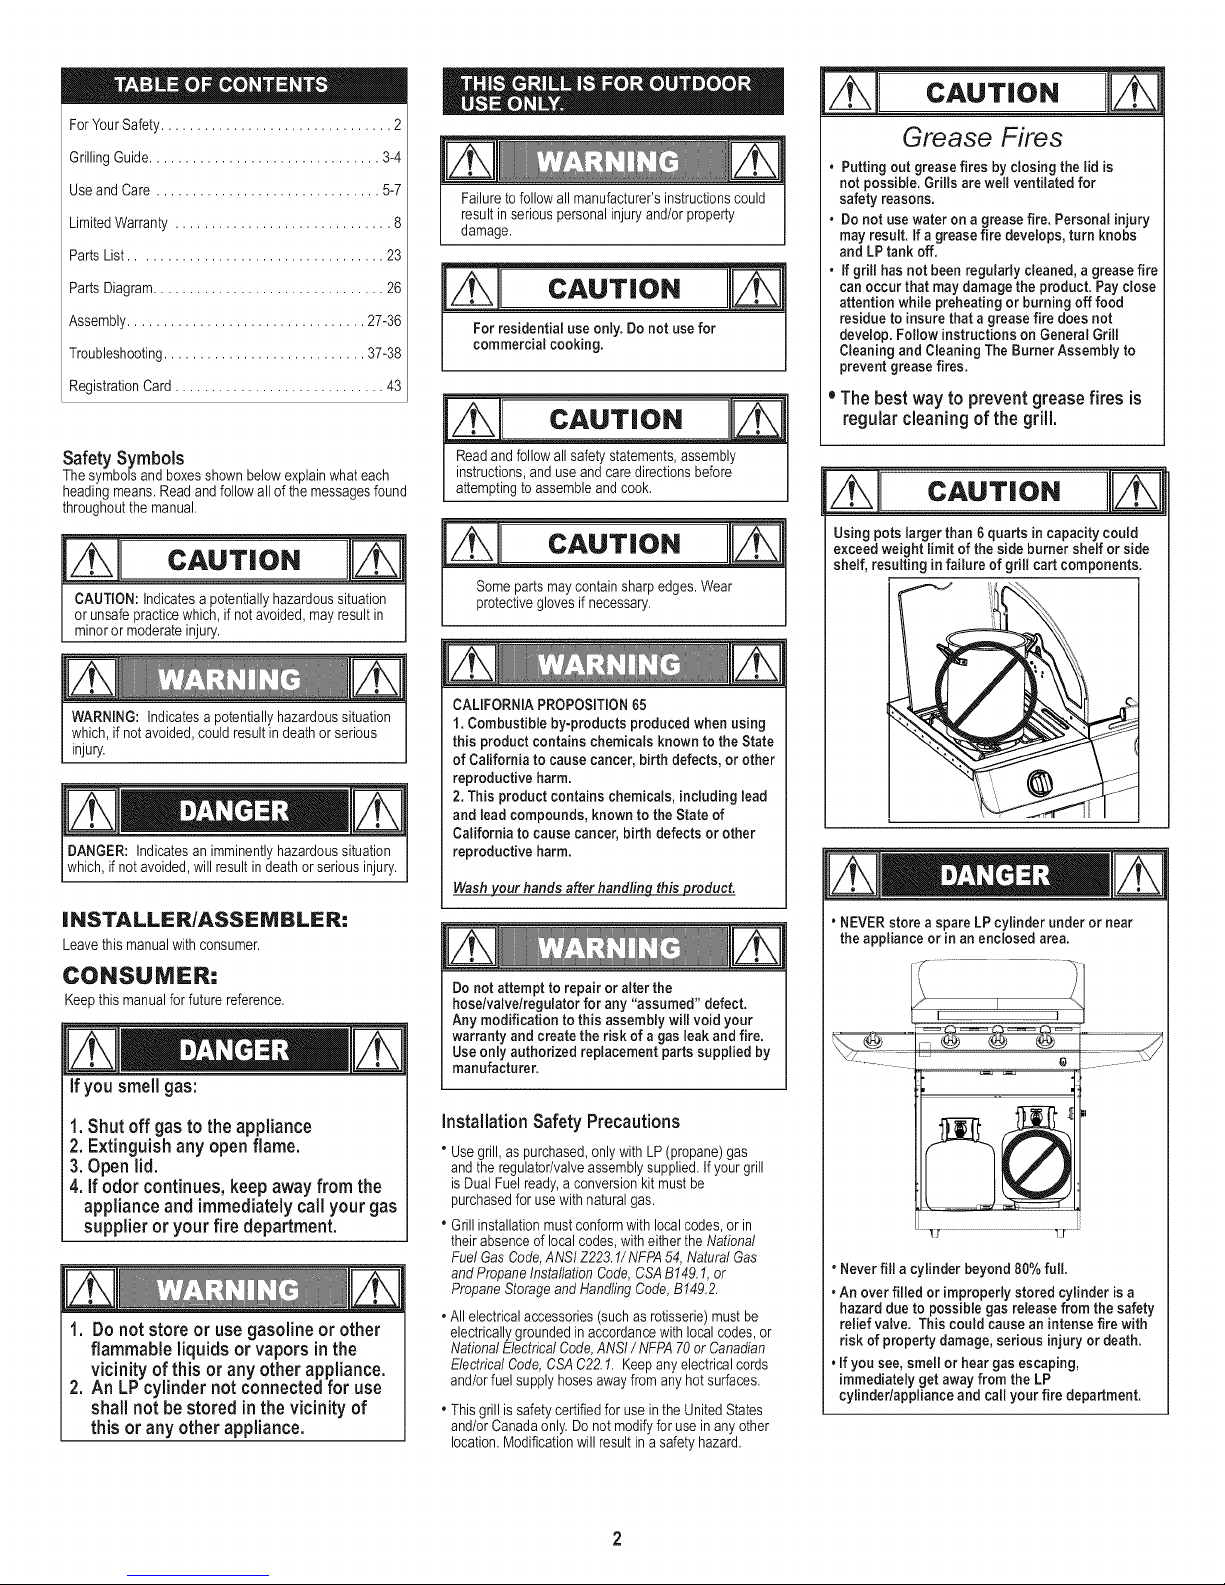
Using pots larger than 6quarts incapacity could
exceedweight limit of the side burnershelf or side
shelf, resulting in failure of grill cart components.
• NEVERstore aspare LPcylinder under or near
the appliance or in anenclosed area.
1.Shut off gasto the appliance
2. Extinguish any openflame.
3.Openlid.
4. If odor continues,keepawayfrom the
applianceand immediatelycall your gas
supplier or your fire department.
1. Donot store or usegasolineorother
flammableliquids or vapors in the
vicinity ofthis or anyother appliance.
2. An LPcylindernot connectedfor use
shall not be stored in the vicinity of
this orany other appliance.
Installation SafetyPrecautions
" Usegrill,as purchased,onlywith LP(propane)gas
andthe regulator/valveassemblysupplied.Ifyour grill
is DualFuel ready,aconversionkit mustbe
purchasedfor usewithnaturalgas.
• Grill installationmustconformwith localcodes,or in
theirabsenceof localcodes,witheither theNational
FuelGas Code,ANSIZ223.1/NFPA54,NaturalGas
andPropaneInstallationCode,CSAB149.1,or
PropaneStorageandHandlingCode,B149.2.
• All electricalaccessories(suchasrotisserie)must be
electricallygroundedinaccordancewith localcodes,or
NationalElectricalCode,ANSI/NFPA 70or Canadian
ElectricalCode,CSAC22.1. Keepany electricalcords
and/orfuel supplyhosesawayfromanyhotsurfaces.
• Thisgrillis safetycertifiedfor useinthe UnitedStates
and/orCanadaonly. Donot modifyfor useinany other
location.Modificationwillresultinasafety hazard.
• Neverfill acylinder beyond80%full.
• An overfilled or improperly stored cylinder is a
hazard due to possible gas releasefrom the safety
relief valve, This could cause anintense fire with
risk of property damage, serious injury or death.
• If you see, smell or hear gas escaping,
immediately get awayfrom the LP
cylindedappliance and call your fire department,
Page 3
FirstTimeUse
ReadyourAssemblyManualand ensurethegrillis put
togetherproperly. RemoveallPoint-of-Purchase
advertisingmaterialfrom allgrillsurfacesbeforefirstuse.
We recommendoperatingyourgrillonitshighestsettingfor
15-20minutespriorto yourfirst use. This aidsinremoving
theoils usedduringmanufacturing.
LavaRock/Briquettes
Thisgas grill hasbeendesigned,engineered,andtestedto
beusedwith heattentsto providemoreevenheating,
improvethecleaningprocess,andreduceflare-ups. The
additionof after marketlavarocks,charcoal,orbriquettes
ofany typewill causepoorcombustionandincreasethe
likelihoodofa greasefire,andis notrecommended.Using
briquettes,lavarock,or charcoalinthis grillwillvoidyour
warranty.For extrasmokeflavor,we recommendusinga
smokerboxwithwood chips.
Pre-HeatingYourGrill
Justlike yourhomeoven,your grill shouldbepre-heated
to provideoptimumperformance.Pre-heatthegrill on high
for 10-15minutes- longerif weatherconditionsrequire.
Pleasereferto thelightinginstructionsinsidetheProduct
Guideif youhavequestionsabout howto lightyourgrill. A
match-lightchainandholeisprovidedfor your
convenience.
Outdoorgrillingis reallyquitesimple. You'llsucceedwith
burgers,dogs,or steaksusuallyonyourveryfirsttry.
Withexperience,youwill learnhowtoworkwith yourgrill,
creatingmoreimaginativemealsallthetime. This
knowledgemakesuptheartof grilling. Beforeyou start
grilling,organizeyourfood accordingto cooking
techniqueandrequiredcookingtime,andoptimizethe
useofyourgrillingarea.
Direct Cooking
Directcookinginvolvesgrillingyour meatdirectlyover
highheat, It isperfectforsearingsteaks,chops,and
othersmaller piecesof meatandvegetablesthatquickly
maketheirway tothetable.
, H,A,'V''/
<t"t _ ;Y
Rotisserie Cooking
Rotisseriecookingis bestfor'round'meat,suchaslarge
roasts,wholepoultry,andpork. Itgenerallyrequiresan
accessorymotorand spitrodthat allowsthe meattobe
turnedata constantspeed. Rotisseriecookingisbest
donein frontofa specialrotisserieburner,or utilizingan
indirectcookingburnerarrangement.A pancanbe
placedunderneaththemeatto catchgreaseandfood
drippings,andhelpsminimizeclean-up.
Temperature- ConvectiveGrillsONLY.
Thetemperaturegauge inthehood ofyournewgrill
measuresair temperature.Theair temperatureinsideyour
grillwillneverbeas hotasthe temperatureatthecooking
surface.
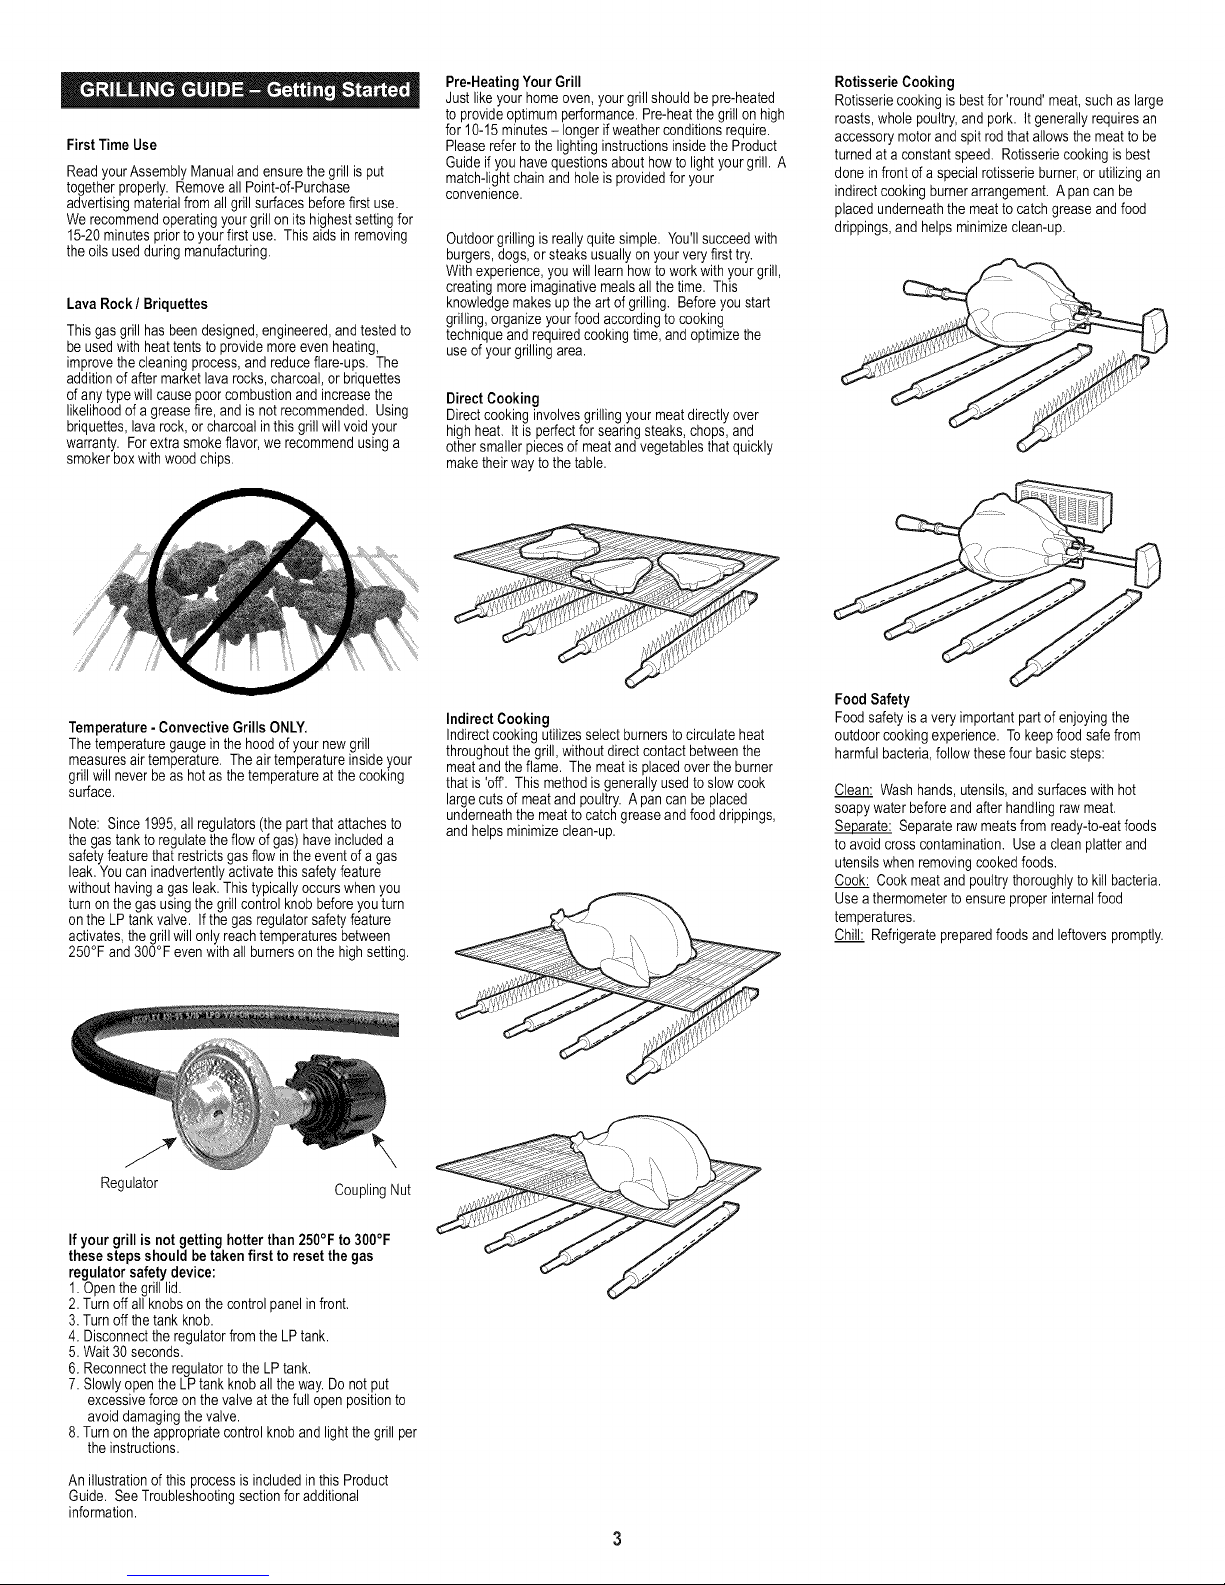
Note: Since 1995,allregulators(the partthatattachesto
thegastank toregulatethe flow ofgas) haveincludeda
safetyfeature that restrictsgasflow in theeventofagas
leak.Youcan inadvertentlyactivatethissafetyfeature
withouthavingagas leak.Thistypicallyoccurswhen you
turnonthegas usingthegrill control knobbeforeyouturn
onthe LP tankvalve. Ifthegas regulatorsafetyfeature
activates,thegrillwillonlyreachtemperaturesbetween
250°Fand 300°F evenwithall burnersonthehighsetting.
Regulator
If yourgrillis notgetting hotterthan250°Fto 300°F
thesestepsshould betakenfirst toresetthe gas
CouplingNut
regulatorsafetydevice:
1.Openthegrilllid.
2.Turnoffall knobsonthe control panelinfront.
3.Turnoffthetank knob.
4. Disconnectthe regulatorfromtheLP tank.
5.Wait30seconds.
6. Reconnectthe regulatortothe LPtank.
7.Slowlyopenthe LPtank knoball theway.Donotput
excessiveforceon thevalveat thefullopenpositionto
avoiddamagingthevalve.
8.Turnontheappropriatecontrolknobandlightthegrill per
the instructions.
Indirect Cooking
Indirectcookingutilizesselectburnersto circulateheat
throughoutthe grill,withoutdirectcontactbetweenthe
meatand theflame. Themeat isplacedoverthe burner
thatis 'off'. Thismethodisgenerallyusedtoslowcook
largecuts of meatandpoultry.A pancanbe placed
underneaththemeattocatch greaseand food drippings,
andhelps minimizeclean-up.
,.,,q,/,,'_,?s''*''''
,));J
,,,'i 7 ?
Food Safety
Foodsafetyisa veryimportantpartof enjoyingthe
outdoorcookingexperience. Tokeepfood safefrom
harmfulbacteria,followthesefourbasicsteps:
Clean: Washhands, utensils,andsurfaceswithhot
soapywaterbeforeand afterhandlingrawmeat.
Separaterawmeatsfrom ready4o-eatfoods
toavoidcrosscontamination.Useacleanplatterand
utensilswhen removingcookedfoods.
Cook: Cookmeatand poultrythoroughlytokill bacteria.
Usea thermometertoensureproperinternalfood
temperatures.
Chill: Refrigeratepreparedfoodsand leftoverspromptly.
Anillustrationof thisprocessisincludedin thisProduct
Guide. SeeTroubleshootingsectionfor additional
information.
Page 4
Cookingonyournewgrillisahands-onexperience,anditis
recommendedtoremainoutsidewithyourgrillwhile
cooking.Grillingcanbeaffectedbymanyexternal
conditions.Incoldweather,youwillneedmoreheatto
reachanidealcookingtemperature,andgrillingmaytake
longer.Themeat'sinternaltemperatureandthicknesscan
alsoaffectcookingtimes.Coldandthickermeatswilltake
longertocook.
InternalMeatTemperatures
Meatcookedona grilloftenbrownsveryfaston the outside.
Therefore,usea meatthermometertoensure ithas
reachedsafeinternaltemperatures.
USDA Recommended Safe Minimum
Internal Temperatures
Beef,Veal,Lamb,Steak,Roasts,& Whole Pork 145° F
(witha 3minuterest time)
Fish 145° F
Beef,Veal, Lamb,andPork -Ground 160° F
Egg Dishes 160° F
Turkey,Chicken& Duck Whole,Pieces&Ground 165° F
Pleaserefertothe USDAfor complete,up4o-date
information.Our internaltemperaturechartis basedon
USDAstandardsformeat doneness. Checkitoutat
www.isitdoneyet.gov
Sauces
Saucescontainingsugarsandfatscan causeflare-ups,and
yourfood mayburn. Ingeneral,applythesesaucesduring
thefinal 10minutesofcooking. Keepin mind,useof
excessivesaucesorglazeswill alsorequireextra cleaning
afterwards.
Marinadesand Rubs
Toenhancetheflavorofgrilledfoods, a liquidmarinadeor
dry rubcanbe usedpriorto cooking. Meatcan beeither
soakedor injectedwithliquidmarinadeupto24hoursprior
to grilling. Dryrubs canbe applieddirectlytothemeat
immediatelybeforegrilling.
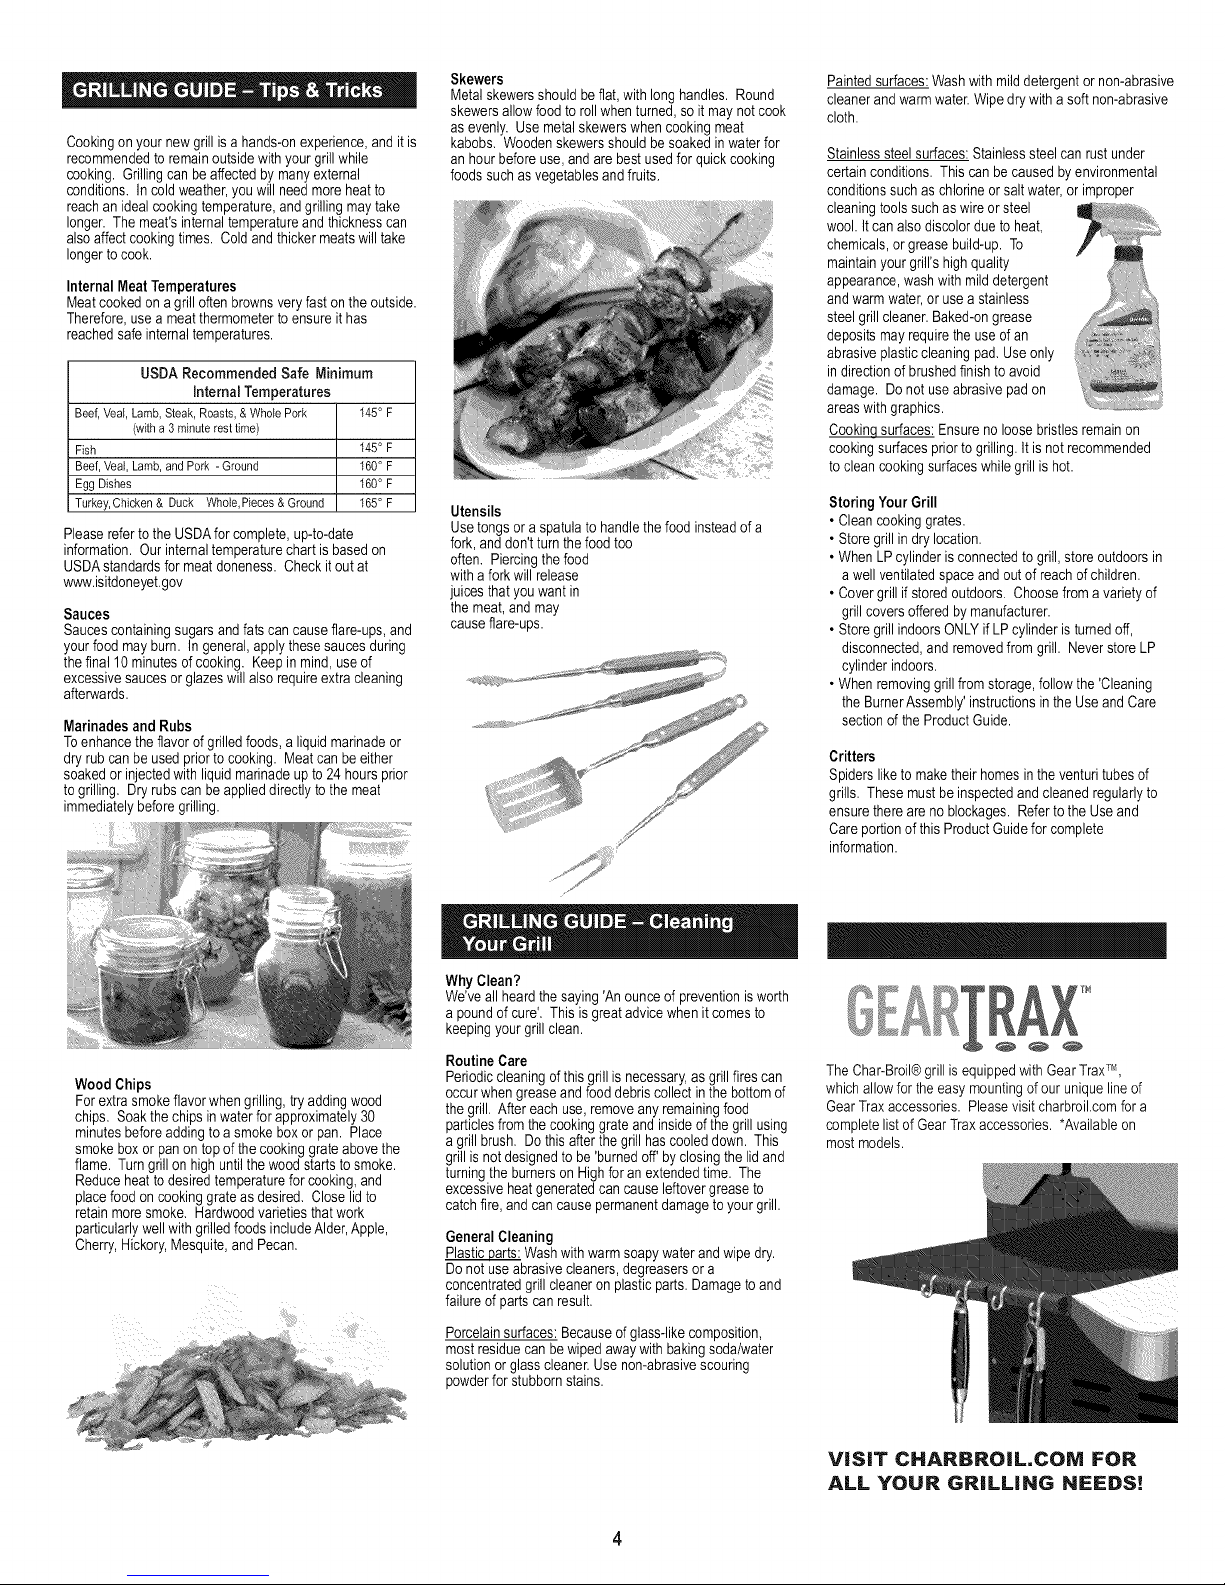
Skewers
Metalskewersshould beflat,with longhandles. Round
skewersallowfood toroll whenturned, soit maynotcook
as evenly. Usemetalskewerswhencookingmeat
kabobs. Woodenskewersshouldbesoakedinwaterfor
anhourbeforeuse,andare bestusedfor quickcooking
foods suchasvegetablesandfruits.
Utensils
Usetongsor aspatulato handlethe food insteadof a
fork,and don'tturnthe foodtoo
often. Piercingthefood
with a forkwill release
juicesthatyouwantin
themeat,andmay
causeflare-ups.
Paintedsurfaces:Washwith milddetergentornon-abrasive
cleanerandwarmwater.Wipedry witha soft non-abrasive
cloth.
Stainlesssteelsurfaces:Stainlesssteelcan rustunder
certainconditions. This canbecausedby environmental
conditionssuchaschlorineor salt water,orimproper
cleaningtoolssuchas wireor steel
wool.It canalsodiscolordue to heat,
chemicals,orgreasebuild-up. To
maintainyourgrill'shighquality
appearance,washwithmild detergent
andwarmwater,or usea stainless
steelgrillcleaner.Baked-ongrease
depositsmay requiretheuseof an
abrasiveplasticcleaningpad.Useonly
in directionof brushedfinishto avoid
damage. Donot useabrasivepadon
areaswithgraphics.
Cookinqsurfaces:Ensurenoloosebristlesremainon
cookingsurfacespriorto grilling.It isnot recommended
tocleancookingsurfaceswhilegrill ishot.
StoringYour Grill
• Cleancookinggrates.
• Storegrill indrylocation.
• WhenLPcylinderisconnectedto grill,store outdoorsin
a wellventilatedspaceandout ofreachof children.
• Covergrill ifstoredoutdoors. Choosefroma varietyof
grillcoversoffered bymanufacturer.
• Storegrill indoorsONLYif LPcylinderisturnedoff,
disconnected,and removedfrom grill. NeverstoreLP
cylinderindoors.
• Whenremovinggrillfromstorage,followthe 'Cleaning
the BurnerAssembly'instructionsin the UseandCare
sectionoftheProductGuide.
Critters
Spiderslike tomake their homesinthe venturitubesof
grills. Thesemustbeinspectedandcleanedregularlyto
ensurethere are no blockages.RefertotheUse and
Careportionof this ProductGuideforcomplete
information.
Wood Chips
For extrasmokeflavorwhen grilling,try adding wood
chips. Soak the chipsinwaterfor approximately30
minutesbeforeadding to a smokeboxor pan. Place
smokeboxor panontopof thecooking grate abovethe
flame. Turngrill on highuntilthe woodstartsto smoke.
Reduceheatto desiredtemperatureforcooking,and
placefood on cookinggrate asdesired. Closelidto
retain moresmoke. Hardwoodvarietiesthatwork
particularlywellwithgrilledfoods includeAlder,Apple,
Cherry,Hickory,Mesquite,andPecan.
Why Clean?
We'veall heardthesaying'An ounceof preventionisworth
a poundof cure'. This isgreatadvicewhenitcomes to
keepingyour grillclean.
RoutineCare
Periodiccleaningofthisgrill isnecessary,as grill firescan
occurwhengreaseandfooddebriscollect in thebottomof
thegrill. Aftereach use,removeanyremainingfood
particlesfrom thecookinggrateandinsideofthe grillusing
a grillbrush. Dothisafterthe grillhascooleddown. This
grillis notdesignedto be'burnedoff' byclosingthe lid and
turningthe burnersonHighfor an extendedtime. The
excessiveheatgeneratedcancauseleftovergreaseto
catchfire,and cancausepermanentdamagetoyour grill.
GeneralCleaning
Plasticparts:Washwithwarmsoapywaterand wipedry.
Do notuseabrasivecleaners,degreasersor a
concentratedgrillcleaneron plasticparts.Damagetoand
failureofparts canresult.
Porcelainsurfaces:Becauseofglass-likecomposition,
most residuecanbe wipedawaywith bakingsoda/water
solutionorglasscleaner.Use non-abrasivescouring
powderfor stubbornstains.
@ @ @
The Char-Broil®grillisequippedwith GearTraxTM,
whichallowfor theeasymountingof our uniqueline of
GearTraxaccessories. Pleasevisitcharbroil.cornfor a
completelistof GearTraxaccessories. *Availableon
mostmodels.
VISIT CHARBROIL.COM FOR
ALL YOUR GRILLING NEEDS!
Page 5

LPCylinder Removal,TransportandStorage
,TurnOFF allcontrolknobsandLP cylindervalve.Turn
couplingnutcounterclockwiseby handonly- donotuse
toolstodisconnect.Loosencylinderscrewbeneath
bottomshelf ordisconnectotherretentionmeans,thenlift
LPcylinderup andandoutof cart. Installsafetycaponto
LPcylindervalve. Alwaysusecapand strapsupplied
with valve.Failureto use safety capas directed may
result in seriouspersonal injuryand/or property
damage,
,AdisconnectedLP cylinderin storageor being
transportedmusthavea safetycapinstalled(as
shown). Donot storeanLP cylinderinenclosed
spacessuchas a carport,garage,porch,coveredpatio
or otherbuilding.NeverleaveanLPcylinderinsidea
vehiclewhichmaybecomeoverheatedby thesun.
,Do notstore an LPcylinderinan area where childrenplay.
LPCylinderValve ,_f_-_\
_ Safety Cap
"" RetainerStrap
LPCylinder
•The LP cylinder used with your grill must meet
thefollowing requirements:
•UseLP cylindersonlywith these required
measurements:12"(30.5cm)(diameter)x 18"(45.7
ore)(tall)with20 lb. (9kg.) capacitymaximum.
,LPcylindersmustbeconstructedandmarkedin
accordancewithspecificationsforLPcylindersof the
U.S.DepartmentofTransportation(DOT)orfor Canada,
CAN/CSA-B339,cylinders,spheresandtubesfor
transportationofdangerousgoods,TransportCanada
(TC).See LPcylindercollarformarking.
•LPcylindervalvemusthave:
,Type 1 outlet compatiblewith
regulatororgrill.
,Safetyreliefvalve. OPD HandWheel
,ULlistedOverfillProtectionDevice(OPD).This OPD
safetyfeature is identifiedby a uniquetriangularhand
wheel,Useonly LP cylinders equippedwith this
type ofvalve.
,LP cylindermustbearrangedforvaporwithdrawal
andincludecollarto protectLPcylinder valve.
Always keepLPcylindersin uprightposition
duringuse,transitorstorage.
LPcylinderin uprightpositionfor
vaporwithdrawal
LP(Liquefied PetroleumGas)
•LPgasis nontoxic,odorlessand colorlesswhen
produced.ForYour Safety, LPgas hasbeen givenan
odor(similarto rotten cabbage)sothatit canbe smelled.
•LPgasis highlyflammableandmayigniteunexpectedly
whenmixedwith air.
LPCylinder Filling
•Useonlylicensedandexperienceddealers.
•LPdealermust purge newcylinder beforefilling.
•DealershouldNEVERfill LPcylindermorethan80%of
LPcylindervolume.Volumeofpropanein cylinderwill
vary bytemperature.
•Afrostyregulatorindicatesgasoverfill.Immediatelyclose
LPcylindervalveandcall localLP gasdealerfor
assistance.
,Donotreleaseliquidpropane(LP)gas intothe
atmosphere.This isa hazardouspractice.
,To removegasfromLPcylinder,contactanLPdealeror
calla localfiredepartmentfor assistance.Check the
telephonedirectory under"GasCompanies"fornearest
certifiedLPdealers.
LPCylinder Exchange
,Manyretailersthatsell grillsofferyou theoptionof
replacingyouremptyLPcylinderthroughan exchange
service.Useonly those reputableexchangecompanies
thatinspect,precisionfill, testand certifytheircylinders.
Exchange your cylinder only for anOPDsafety
feature-equipped cylinder as described in the "LP
Cylinder" section of this manual.
•Alwayskeep newandexchangedLP cylindersin upright
positionduringuse,transitor storage.
.Leaktest new and exchangedLPcylinders BEFORE
connecting to grill,
,Placesafetycaponcylindervalveoutletwheneverthe
cylinderis notinuse.Onlyinstallthetypeofsafetycap
onthe cylindervalveoutletthatis providedwith the
cylindervalve.Othertypesof caps orplugsmayresultin
leakageof propane.
LP Cylinder Leak Test
For your safety
•Leaktest mustbe repeatedeachtimeLP cylinderis
exchangedor refilled.
•Do not smokeduringleaktest.
•Do not usean openflameto checkforgas leaks.
•Grillmustbeleaktestedoutdoorsin a well-ventilated
area,awayfrom ignitionsourcessuchas gasfiredor
electricalappliances.Duringleak test,keepgrillaway
fromopenflamesor sparks.
,Use a cleanpaintbrushand a 50/50mildsoapandwater
solution.Brushsoapysolutionontoareas indicatedby
arrowsin figure below.
A Donot use household cleaning agents. Damageto
gas traincomponentscanresult.
If "growing"bubblesappeardonot useor movethe LP
cylinder.Contactan LPgassupplieror yourfire
department!
ConnectingRegulator tothe LPCylinder
1.LPcylinder mustbe properlysecuredontogrill.(Refer
toassemblysection.)
2.Turnall controlknobsto theOFFposition.
3.TurnLPcylinderOFFbyturninghand-wheelclockwise
toa full stop.
4.Removethesafety capfromLP cylindervalve.Always
usecapandstrapsuppliedwith valve.
_ _"_ /_ OPD HandWheel
on outside
SafetyRelief Valve
5.Holdregulatorand insert nippleinto
LPcylindervalve.Hand-tightenthe
couplingnut,holdingregulatorina
straightlinewith LPcylindervalve
soas nottocross-threadthe
connection.
Nipple hasto becentered
into the LPcylinder valve.
6.Turnthecouplingnutclockwiseandtighten to a full stop.
Theregulatorwill sealon the back-checkfeatureinthe
LPcylindervalve,resultinginsome resistance.An
additional one-half to three-quarters turn is required
to complete the connection. Tighten by hand only -
do not use tools.
NOTE:
Ifyou cannotcompletethe connection,disconnect
regulatorandrepeatsteps5 and6. Ifyouare stillunable
tocompletetheconnection,do not use this regulator!
, Donotinsertanytoolorforeignobjectintothevalve
outletorsafety reliefvalve.You maydamagethe
valveand causea leak.Leakingpropanemayresult
in explosion,fire,severepersonalinjury,or death.
?_ _rPe_ outlet with
Strap andCap
Donot usea POLtransport
plug (plastic part with
externalthreads)! It will
defeat the safety feature of
the valve.
Couplingnut
Holdcoupling nut
and regulator as
shown for proper
connection to LP
cylinder valve.
Page 6
.Donotusegrilluntilleak-tested.
.Ifaleakisdetectedatanytime,STOP!
.IfyoucannotstopagasleakbyclosingtheLPcylinder
valveleaveareaandcallyourfiredepartment!
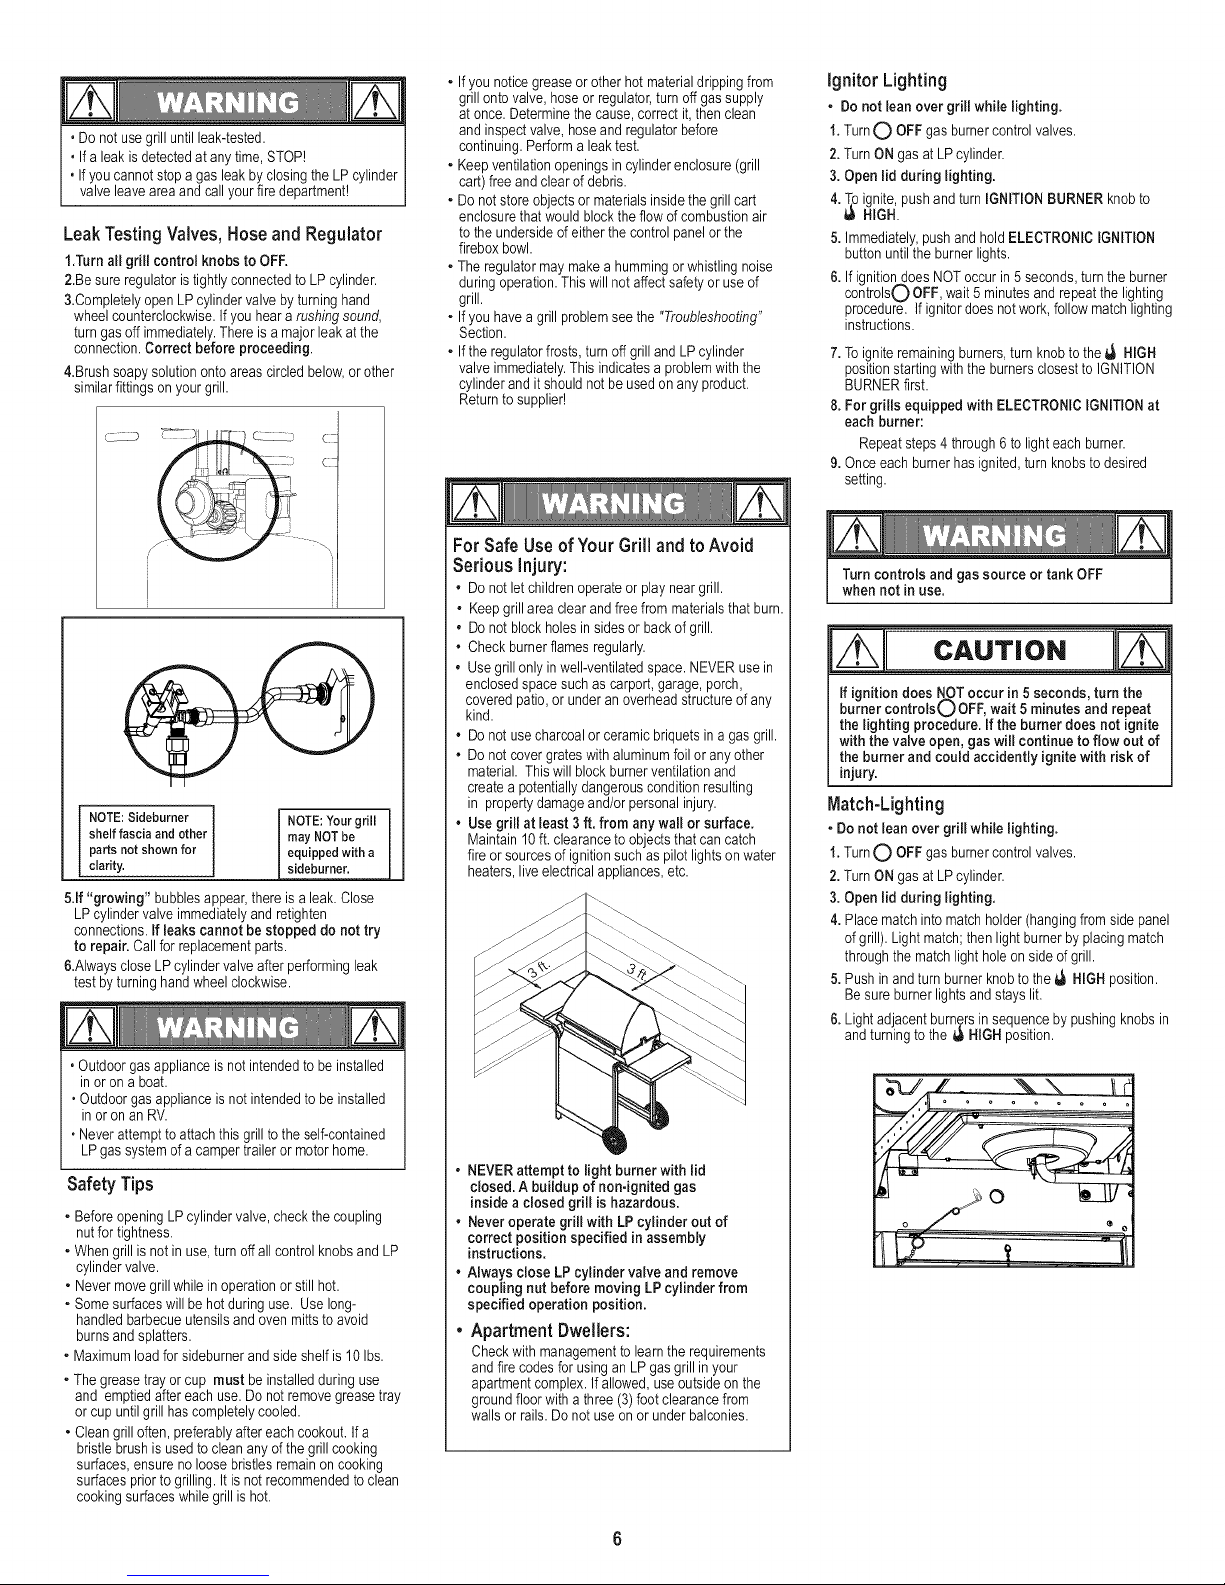
LeakTestingValves, HoseandRegulator
1,Turnall grill control knobs to OFF.
2.Besure regulatoristightlyconnectedto LPcylinder.
3.CompletelyopenLPcylindervalve byturninghand
wheel counterclockwise.If youheara rushingsound,
turngasoff immediately.Thereis amajorleakat the
connection.Correct before proceeding.
4.Brushsoapysolutionontoareas circledbelow,orother
similarfittingson yourgrill.
_LD
NOTE: Sideburner
shelf fascia and other
parts not shown for
clarity.
5.If"growing" bubblesappear,thereis aleak.Close
LPcylindervalveimmediatelyandretighten
connections.Ifleakscannot be stopped do not try
to repair.Callfor replacementparts.
&AlwayscloseLPcylindervalveafterperformingleak
testbyturninghandwheelclockwise.
. Outdoorgasapplianceisnotintendedto be installed
in oron a boat.
. Outdoorgasapplianceisnotintendedto beinstalled
inor onan RV.
. Neverattempttoattachthisgrilltothe self-contained
LPgassystemofacampertraileror motorhome.
SafetyTips
oBeforeopening LPcylindervalve,checkthe coupling
nutfor tightness.
oWhengrillis notinuse,turnoffall controlknobsand LP
cylindervalve.
oNevermovegrillwhile in operationorstill hot.
oSomesurfaceswill behot duringuse. Uselong-
handledbarbecueutensilsand ovenmitts to avoid
burnsand splatters.
oMaximumloadforsideburnerand side shelfis 10Ibs.
oThe greasetrayor cup must beinstalledduringuse
and emptiedaftereachuse.Do notremovegreasetray
or cupuntilgrill hascompletelycooled.
oCleangrill often, preferablyaftereachcookout.Ifa
bristlebrushisusedto cleananyof the grillcooking
surfaces,ensurenoloosebristlesremainoncooking
surfacespriorto grilling.Itis notrecommendedtoclean
cookingsurfaceswhilegrill is hot.
NOTE:Your grill
may NOTbe
equipped with a
sideburner.
- If younoticegreaseor otherhot materialdrippingfrom
grillonto valve,hoseor regulator,turn offgassupply
atonce.Determinethecause,correct it,then clean
andinspectvalve, hoseandregulatorbefore
continuing.Performa leaktest.
oKeepventilationopeningsincylinderenclosure(grill
cart)freeandclearofdebris.
oDo notstoreobjectsor materialsinsidethegrillcart
enclosurethatwouldblockthe flow ofcombustionair
totheundersideofeitherthe control panel orthe
fireboxbowl.
oThe regulatormay makea hummingorwhistlingnoise
duringoperation.Thiswill not affectsafetyoruseof
grill.
o Ifyouhavea grillproblemsee the "Troubleshooting"
Section.
o Ifthe regulatorfrosts,turnoffgrilland LP cylinder
valveimmediately.Thisindicatesa problemwith the
cylinderandit shouldnotbeusedonanyproduct.
Returntosupplier!
For Safe Use of Your Grill and to Avoid
Serious injury:
• Do not letchildrenoperateor play neargrill.
• Keepgrillareaclearandfreefrommaterialsthatburn.
• Do not blockholesinsidesor backof grill.
• Checkburnerflamesregularly.
• Usegrillonlyinwell-ventilatedspace.NEVERusein
enclosedspacesuchas carport,garage,porch,
coveredpatio,orunderanoverheadstructureof any
kind.
• Do not usecharcoalorceramicbriquetsin a gasgrill.
• Do not covergrateswith aluminumfoilor anyother
material.Thiswillblockburnerventilationand
createa potentiallydangerousconditionresulting
in propertydamageand/orpersonalinjury.
• Usegrill at least 3 ft, from anywall or surface.
Maintain10ft.clearanceto objectsthat cancatch
fireor sourcesofignitionsuch as pilotlightsonwater
heaters,liveelectricalappliances,etc.
• NEVERattempt to light burner with lid
closed. A buildup of non-ignited gas
insidea closedgrill is hazardous.
• Neveroperate grillwith LP cylinder out of
correct position specified in assembly
instructions,
• Always close LP cylindervalve andremove
coupling nut before moving LPcylinder from
specified operation position.
, Apartment Dwellers:
Checkwith managementto learntherequirements
andfire codesfor usingan LPgasgrill inyour
apartmentcomplex.If allowed,useoutsideon the
groundfloor with athree(3) footclearancefrom
wallsor rails.Donot use onor underbalconies.
Ignitor Lighting
o Donot lean over grill whilelighting.
1,TurnO OFFgas burnercontrolvalves.
2.TurnONgas atLPcylinder.
3.Open lid during lighting.
4.T,oignite,pushand turnIGNITIONBURNERknobto
HIGH.
5. Immediately,pushand hold ELECTRONICIGNITIOa
buttonuntil theburnerlights.
6. IfignitionddoesNOToccurin5 seconds,turnthe burner
controls(..,)OFF,wait 5 minutesandrepeatthe lighting
procedure. If ignitor doesnot work,followmatchlighting
instructions.
7. Toigniteremainingburners,turn knobto the _ HIGH
positionstartingwiththe burnersclosestto IGNITION
BURNERfirst.
8. Forgrills equippedwith ELECTRONICIGNITIONat
eachburner:
Repeatsteps4 through6to lighteachburner.
9. Onceeach burnerhasignited,turn knobstodesired
setting.
Turncontrols and gas source or tank OFF
whennotin use,
cAuT,o.11!2
If ignition does NOToccurin 5 seconds,turn the
burner controls(,,)OFF,wait 5 minutesand repeat
the lighting procedure. If the burner does not ignite
with the valve open,gas will continue to flow out of
the burner and could accidently ignitewith risk of
injury.
Match-Lighting
oDonot lean over grill whilelighting.
1,TurnO OFFgas burnercontrolvalves.
2.TurnONgas atLPcylinder.
3.Open lid during lighting,
4. Placematchintomatchholder(hangingfromsidepanel
ofgrill).Lightmatch;thenlightburnerby placingmatch
throughthe matchlight holeon side of grill.
5. Pushinand turn burnerknobto the_ HIGHposition.
Besureburnerlightsand stayslit.
6. Lightadjacentburngrsinsequencebypushingknobsin
andturningto thet,bHIGHposition.
Page 7
NOTE:Your grill may NOTbeequippedwith a
Sideburner!
SidebumerignitorLighting
• Do notleanovergrillwhile lighting.
1.TurnO OFFgas burnercontrolvalves.
2.TurnONgasat LPcylinder.
3.Open sideburner lid.
4.Turnsideburnerknobto the _ HIGHposition,push
andholdELECTRONICIGNITORbutton.
5.If sideburnerdoes NOTlightwithin5seconds,turn
knobtoO OFF,wait 5minutes,then repeat lighting
procedure.
Sideburner MatchLighting
• Donot leanovergrill whilelighting.
1.TurnO OFFgas burnercontrolvalves.
2.TurnONgasat LPcylinder.
3. Opensideburner lid.
4. Placelitmatchnearburner.
5.Turnsideburnerknobto the_ HIGHposition. Besure
burnerlightsand stayslit.
Burner FlameCheck
, Removecookinggratesandheattents.Lightburners,
rotateknobsfrom HIGHto LOW.Youshouldseea
smallerflamein LOWpositionthanseenonHIGH.
Performburnerflamecheckon sideburner,also.Always
checkflame priorto eachuse.If onlylow flame is seen
referto "Suddendropor lowflame"inthe
TroubleshootingSection.
HIGH
LOW
TurningGrillOff
, Turnall knobsto the O OFFposition.TurnLP cylinder
OFFbyturning hand-wheelclockwiseto afullstop.
Ignitor Check
• Turngas off at LPcylinder. Pressand hold
electronicignitorbutton. "Click"shouldbe heardand
sparkseeneachtime ineachcollectorboxor
betweenburnerandelectrode.See"Troubleshooting"
if no clickor spark.
ValveCheck
• Important: Makesure gas isoff at LPcylinder
before checking valves. Knobslock inOFFposition.
Tocheckvalves,firstpushin knobsandrelease,knobs
shouldspringback. If knobsdonotspringback,
replacevalve assemblybeforeusinggrill. Turnknobs
to LOWpositionthenturn backto OFFposition.Valves
shouldturnsmoothly.
HoseCheck
• Beforeeachuse, checkto seeifhoses arecut orworn
or kinked.Replacedamagedhosesbeforeusinggrill.
Use only valvelhose/regulatorspecifiedby
manufacturer.
SPIDER ALERT!
SPIDERAND WEBS
Ifyour grill is gettinghardto lightor theflameisweak,
checkandcleanthe venturisandburners.
Spidersorsmall insectsareknownto create
"flashback"problemsbybuildingnestsand laying
eggsinthe barbeque'sventurior burner,obstructing
theflow ofgas. The back-upgascanignite behind
the controlpanel. Thisflashbackcan damageyour
barbequeandcauseinjury. Topreventflashbacks
andensuregoodperformancethebumer and venturi
tubeassemblyshouldberemovedand cleanedwhen
everthe barbequehasbeenidlefor anextended
periodof time.
.............................................................................. J
GeneralGrillCleaning
, Donotmistakebrownor blackaccumulationof grease
andsmokeforpaint. Intedorsofgasgrillsare not
paintedatthefactory(and should never be painted).
Applya strongsolutionofdetergentandwater oruse a
grillcleanerwith scrubbrushoninsidesofgrill lidand
bottom.Rinseandallowtocompletelyairdry.Do not
apply acaustic grill/oven cleanerto painted
surfaces.
. Plastic parts: Washwithwarmsoapywater andwipe dry.
• Do not usecitrisol, abrasivecleaners,degreasersora
concentratedgrillcleaneron plasticparts.Damageto
andfailureofpartscan result.
• Porcelain surfaces: Becauseofglass-likecomposition,
mostresiduecan bewiped awaywithbaking
soda!watersolutionorspeciallyformulatedcleaner.Use
nonabrasivescouringpowderfor stubbornstains.
• Painted surfaces:Washwithmilddetergentor
nonabrasivecleanerandwarmsoapywater. Wipe dry
witha softnonabrasivecloth.
• Stainless steelsurfaces:Tomaintainyourgrill'shigh
qualityappearance,washwith milddetergentand
warmsoapywaterandwipe drywith a softclothafter
eachuse.Baked-ongreasedepositsmayrequirethe
useof anabrasiveplasticcleaningpad. Useonlyin
directionof brushedfinishto avoiddamage.Donot
useabrasivepad on areaswithgraphics.
• Cooking surfaces: Ifa bristlebrush isusedto clean
any ofthe grillcookingsurfaces,ensurenoloose
bristlesremainon cookingsurfacespriortogrilling.It is
NOTrecommendedtoclean cookingsurfaceswhile
grill ishot.
Storing YourGrill
, Cleancookinggrates.
, Storeindry location.
, WhenLPcylinderisconnectedto grill, storeoutdoors
ina well-ventilatedspace and outof reachof
children.
, Covergrillif storedoutdoors.Choosefromavarietyof
grillcoversofferedbymanufacturers.
, Storegrill indoorsONLYifLPcylinderisturnedoffand
disconnected,removedfromgrillandstoredoutdoors.
, Whenremovinggrillfromstorage,follow "Cleaningthe
BumerAssembly' instructionsbeforestartinggrill.
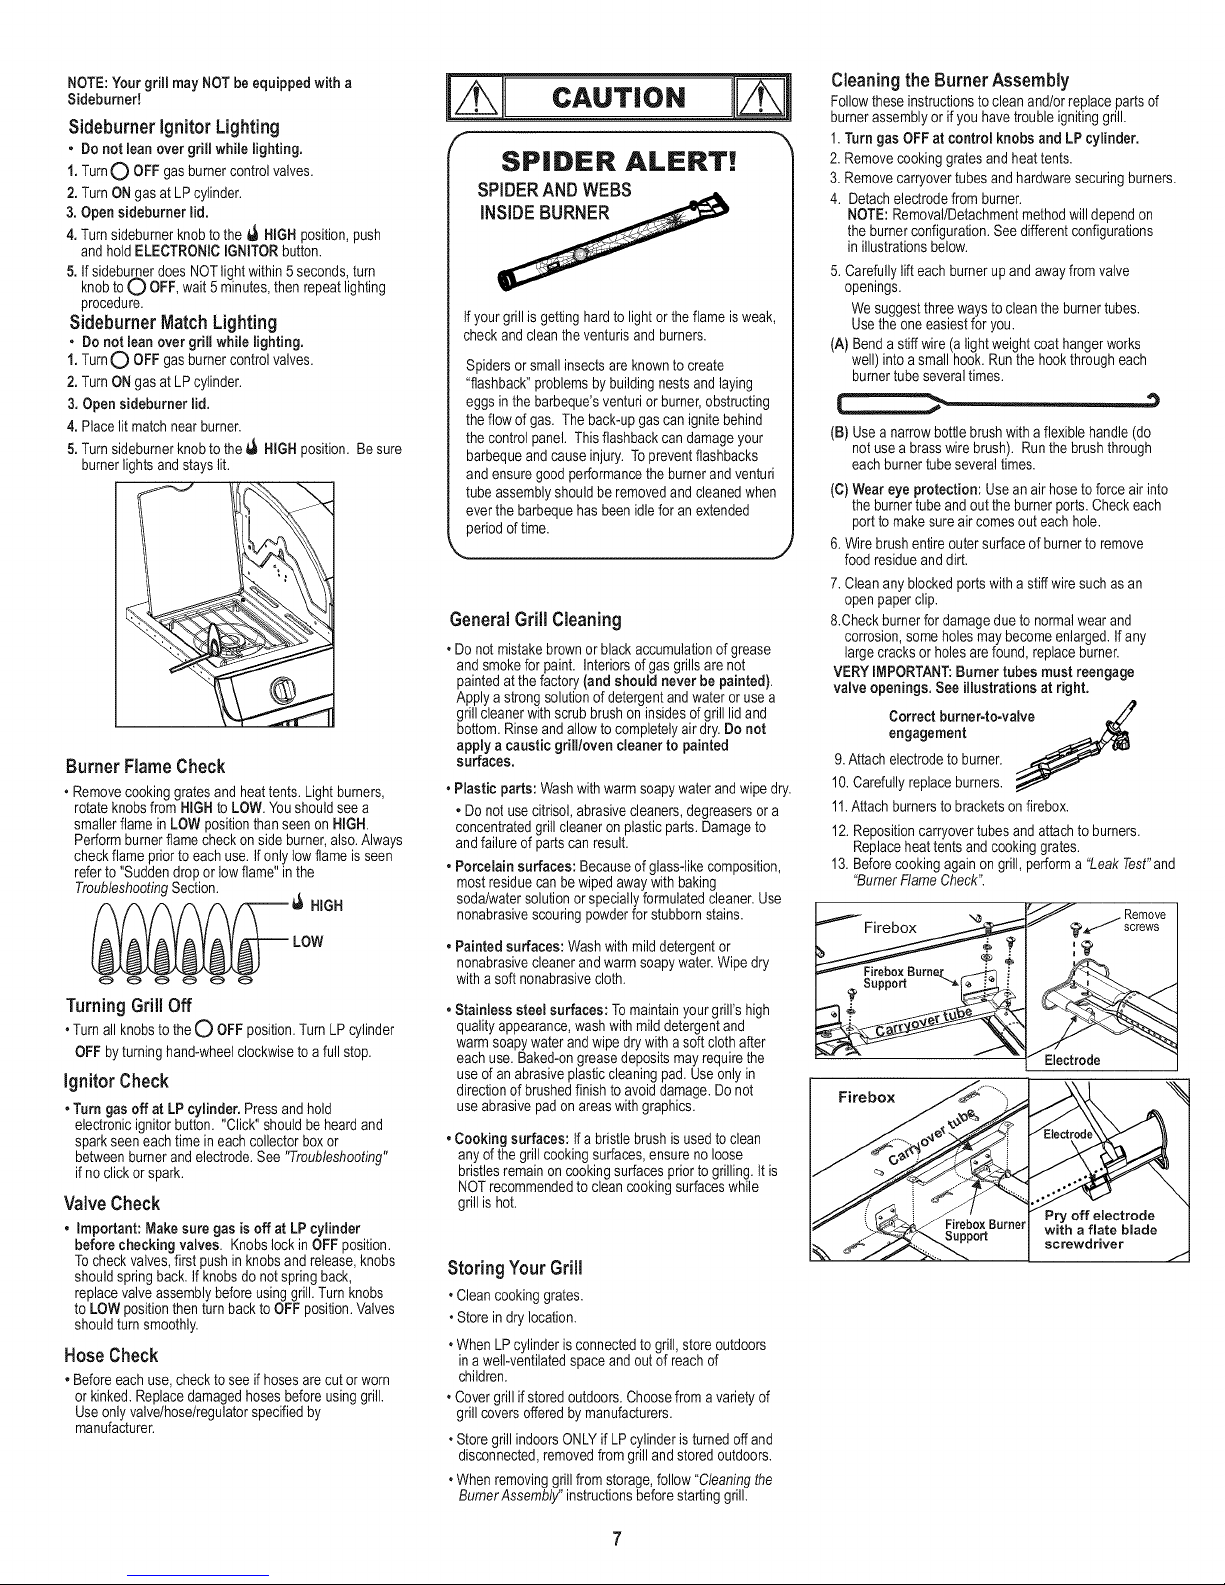
Cleaningthe BurnerAssembly
Followtheseinstructionstoclean and!orreplacepartsof
burnerassemblyor ifyouhavetroubleignitinggrill.
1.Turn gas OFFatcontrol knobsand LP cylinder.
2. Removecookinggratesand heattents.
3. Removecarryovertubesandhardwaresecuringburners.
4. Detachelectrodefromburner.
NOTE: Removal!Detachmentmethodwilldependon
theburnerconfiguration.See differentconfigurations
in illustrationsbelow.
5. Carefullylifteachburnerupandawayfromvalve
openings.
We suggestthreewaystocleanthe burnertubes.
Usethe oneeasiestforyou.
(A) Bendastiffwire(alightweightcoathangerworks
well) intoasmall hook.Runthe hookthrougheach
burnertubeseveraltimes.
(B) Useanarrowbottlebrushwith a flexiblehandle(do
notuse abrasswirebrush). Runthe brushthrough
eachburnertube severaltimes.
(C)Wear eye protection: Usean airhosetoforceair into
theburnertubeandouttheburnerports.Check each
portto makesureaircomesouteachhole.
6. Wirebrushentire outersurface of burnerto remove
foodresidueanddirt.
7. Cleananyblockedportswitha stiffwiresuchas an
openpaper clip.
&Check burnerfor damageduetonormalwearand
corrosion,someholes maybecomeenlarged.Ifany
largecracksor holesarefound,replaceburner.
VERYIMPORTANT:Burner tubes must reengage
valve openings. Seeillustrationsat right.
Correct burner-to-valve J
engagement
9.Attachelectrodeto burner.
10.Carefullyreplaceburners.
11.Attachburnersto bracketsonfirebox.
12.Repositioncarryovertubes andattachto burners.
Replaceheat tentsand cookinggrates.
13.Beforecookingagainon grill, performa "Leak Test"and
"BurnerFlameCheek".
Firebox
Suppo_
Page 8
This warranty only applies to units purchased from an authorized retailer. ManuFacturer warrants to the oxiginal consumer-purchaser only that this
product shall be free from defects in workmanship and materials after correct assembly and under nolTnal and reasonable home use for the periods
indicated below beginning on the date of purchase*. The manufacturer reserves the right to require that defective parts be returned, postage and or
fieight pre-paid by the consumer for review and examination.
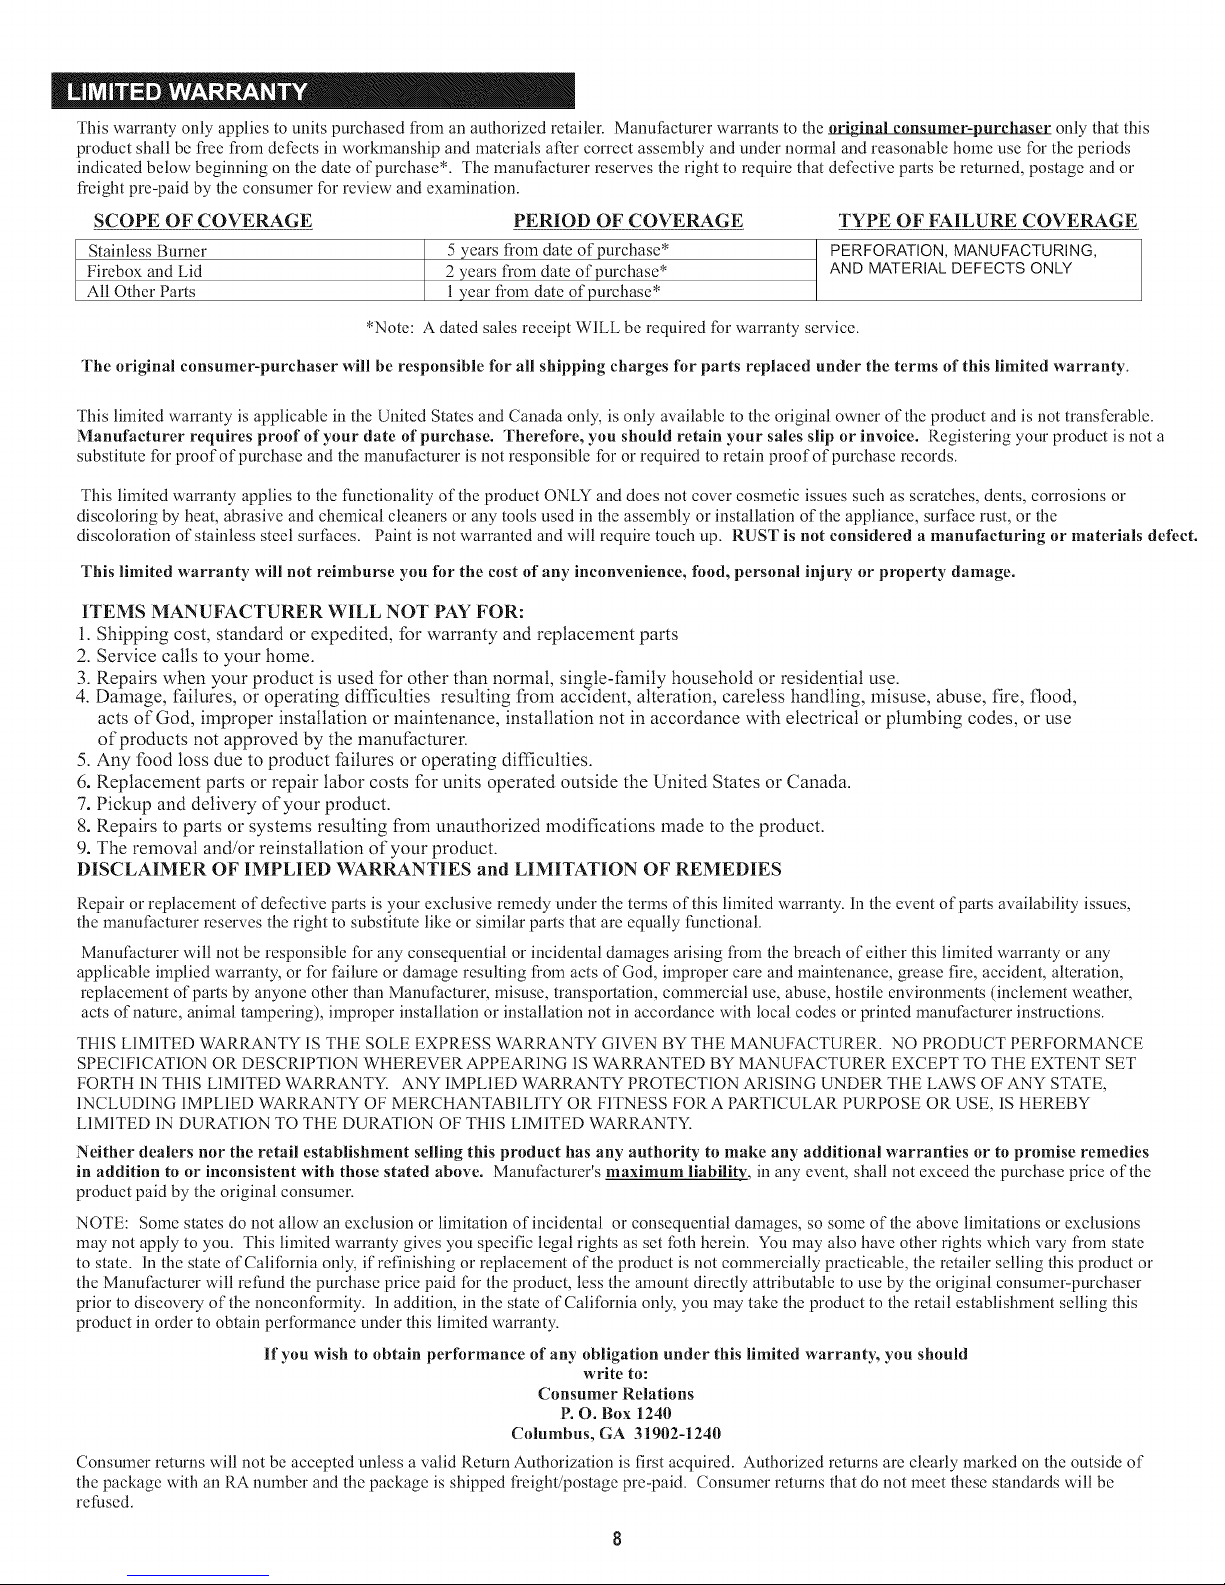
SCOPE OF COVERAGE PERIOD OF COVERAGE TYPE OF FAILURE COVERAGE
Stainless Burner
Firebox and Lid
All Other Parts
*Note: A dated sales receipt WILL be required for wananty service.
The original consumer-purchaser will be responsible for all shipping charges for parts replaced under the terms of this limited warranty.
5 years from date of purchase*
2 years fiom date of purchase*
l year fiom date of purchase*
PERFORATION, MANUFACTURING,
AND MATERIAL DEFECTS ONLY
This limited warranty is applicable in the United States and Canada only, is only available to the original owner of the product and is not transferable.
Manufacturer requires proof of your date of purchase. Therefore, you should retain your sales slip or invoice. Registering your product is not a
substitute for proof of purchase and the mauut_acturer is not responsible for or required to retain proof of purchase records.
This limited warranty applies to the functionality of the product ONLY and does not cover cosmetic issues such as scratches, dents, corrosions or
discoloring by heat, abrasive and chemical cleaners or any tools used in the assembly or installation of the appliance, surl_ace rust, or the
discoloration of stainless steel surPaces. Paint is not warranted and will require touch up. RUST is not considered a manufacturing or materials defect.
This limited warranty will not reimburse yon for the cost of any inconvenience, food, personal injury or property damage.
ITEMS MANUFACTURER WILL NOT PAY FOR:
1. Shipping cost, standard or expedited, for warranty and replacement parts
2. Service calls to your home.
3. Repairs when your product is used for other than normal, single-family household or residential use.
4. Damage, Paitures, or operating difficulties resulting t?om accident, alteration, careless handling, misuse, abuse, fire, flood,
acts of God, improper installation or maintenance, installation not in accordance with electrical or plumbing codes, or use
of products not approved by the manufacturer.
5. Any food loss due to product failures or operating difficulties.
6. Replacement parts or repair labor costs for units operated outside the United States or Canada.
7. Pickup and delivery of your product.
8. Repairs to parts or systems resulting t?om unauthorized modifications made to the product.
9. The removal and/or reinstallation of your product.
DISCLAIMER OF IMPLIED WARRANTIES and LIMITATION OF REMEDIES
Repair or replacement of defective parts is your exclusive remedy under the terms of this limited warranty. In the event of parts availability issues,
the manufacturer reserves the right to substitute like or similar parts that are equally functional.
Manufacturer will not be responsible for any consequential or incidental damages arising from the breach of either this limited warranty or any
applicable implied warranty, or for failure or damage resulting from acts of God, finproper care and maintenance, grease fire, accident, alteration,
replacement of parts by anyone other than Manufacturer, misuse, transportation, commercial use, abuse, hostile environments (inclement weather,
acts of nature, animal tampering), improper installation or installation not in accordance with local codes or printed manufacturer instructions.
THIS LIMITED WARRANTY IS THE SOLE EXPRESS WARRANTY GIVEN BY THE MANUFACTURER. NO PRODUCT PERFORMANCE
SPECIFICATION OR DESCRIPTION WHEREVER APPEARING IS WARRANTED BY MANUFACTURER EXCEPT TO THE EXTENT SET
FORTH IN THIS LIMITED WARRANTY: ANY IMPLIED WARRANTY PROTECTION ARISING UNDER THE LAWS OF ANY STATE,
INCLUDING IMPLIED WARRANTY OF MERCHAN'IABILITY OR FITNESS I:ORA PARTICULAR PURPOSE OR USE, IS HEREBY
LIMITED IN DURATION TO THE DURATION OF THIS LIMITED WARRANTY:
Neither dealers nor the retail establishment selling this product has any authority to make any additional warranties or to promise remedies
in addition to or inconsistent with those stated above. Manufacturer's maximum liabilitg, in any event, shall not exceed the purchase price of the
product paid by the original consumer.
NOTE: Some states do not allow an exclusion or limitation of incidental or consequential damages, so some of the above limitations or exclusions
may not apply to you. This limited warranty gives you specific legal rights as set foth herein. You may also have other rights which vary from state
to state. In the state of California only, if refinishing or replacement of the product is not commercially practicable, the retailer selling this product or
the Manufacturer will refund the purchase price paid for the product, less the amount directly attributable to use by the original consumer-purchaser
prior to discovery of the nonconformity. In addition, in the state of California only, you may take the product to the retail establishment selling this
product in order to obtain performance under this limited warranty.
If you wish to obtain performance of any obligation under this limited warranty, you should
Columbus, GA 31902-1240
Consumer returns will not be accepted unless a valid Return Authorization is first acquired. Authorized returns are clearly marked on the outside of
the package with an RA number and the package is shipped freight/postage pre-paid. Consumer returns that do not meet these standards will be
refused.
write to:
Consumer Relations
P. O. Box 1240
Page 9
Pourvotresecurit6 ............................. 9
Guidede cuisson........................... 10-11
Utilisationetentretien ....................... 12-14
Garantielimitee............................... 15
Nomenclaturedes pi@es....................... 24
Schemades pi@es ........................... 26
Assemblage............................... 27-36
D@annage ............................... 39-40
Fiched'enregistrement......................... 43
Symboles de s6curit_
Voustrouverezci-dessousuneexplicationdusensde
chaquesymbole.Lisezetrespecteztoutesles consignes
qui apparaissentpartout dansce guide.
ATTENTION: indiqueunesituationpotentiellement
dangereuseouune pratiquea risquequi, sielle n'est
pas@itee,pourraitentra'fnerdes blessuresmineuresou
mod@ementgraves.
AVERTISSEMENT:indiquedes conditionsqui
represententunrisqued'accident;adefautde prendreles
mesurescorrectivesappropriees,lamortoudegraves
blessuress'ensuivront.
Nepassuivretouteslesinstructionsdufabricantpourrait
causerdes prejudicesphysiquesgraveset des
dommagesmat@iels.
.TTE.T,o.
Pourutilisation domestique uniquement. Ne pas
utiliser _ desfins commerciales.
1|
Lireet respectertoutesles consignesde s@urite,les
instructionsd'assemblageet lesdirectivesd'emploiet
d'entretienavantd'essayerd'assemblercet appareilou
de I'utiliserpourla cuisson.
,..-,o.
Certainespi@espeuvent_tremuniesde bords
coupantsl.Portezdesgantsde protectionaubesoin.
CALIFORNIAPROPOSITION65
1.Les sous-produits decombustion gen_r_s Iorsde
I'utilisation de ce produit contiennent des produits
chimiques qui, scionI'Etat de la Californie, causent
le cancer, des anomalies congenitales ou d'autres
dangers pour la reproduction.
2.Cetarticle contient des produits chimiques, y
compris du plombet descomposes de plomb, qui,
scion I'Etat de la Californie, causent le cancer,des
anomalies congenitalesou d'autres dangers pour
la reproduction.
Veuillezvous laver les mains apr_savoir manipul_
cej_produit.
ATTENTION __
Incendies de Graisse
IIn'est pas possible d'eteindre des incendies de
graisse enfermant le couvercle. Leegrils sont
bien acrespour des raisons de s_curit_,
Si legril n'a pas erenettoye r_gulierement, un feu
de graisse pourrait s'ensuivre et endommager le
produit, Surveillez bien legril durant le
pr_chauffage ou Iorsquevous brOlezdes r_sidus
d'aliments au cas ou unfeu de graisse se
produirait. Suivez lee instructions d'entretien
general du gril et de nettoyagedesbr_leurs afin
de pr_venir lesfeux degraisse.
N'utilisez pas d'eau pour eteindre un incendiede
graisse. Cela pourrait causer des blessures. Si
un incendie de graisse sedeclare,fermez les
boutons et I'alimentation en gaz du reservoir de
GPL.
, La meilleurefa§on deprevenirlesfeux
diegraisse est de nettoyer
reguli_rementvotre griL
ATTENTION __J
Utiliser despots de plus de 6quarts de lacapacite
pourrait d_passerle poids limite du plateau brOleur
lat@alou C6t_plateauce qui entra'inela defaillance du
gril partier composants.
DANGER:indiquedesconditionsquirepresententun
dangerimminent;adefautde prendrelesmesures
correctivesappropriees,la mortou degravesblessures
s'ensuivront.
|NSTALLEUR / ASSElVIBLEUR :
Vousdevezlaisserlepr6sentmanuelauclient.
CLIENT :
Conservezcemanuelpourconsultationfuture.
S'il y a une odeur degaz :
!, CoupezI'admission degaz de I'appareil.
2. Eteindre route flamme hue.
3. Ouvrirle couvercle.
4. SiI'odeur persiste, _loignez-vous deI'appareil et
appelez immediatementlefournisseur de gaz ou
le service d'incendie,
1. Nepas entreposer ni utiliser de I'essence ni
d'autres vapeurs ou liquides inflammables dartsle
voisinage de I'appareil, nide tout autre appareil.
2. Une bouteille de propane qui n'est pas raccord_e
en rue son utilisation, ne doit pas 6tre entreposee
darts le voisinage decet appareil ou detout autre
apparei.
N'essayezpas der_parer ou de modifier le tuyau, le
systeme de valveou le regulateur pour corriger un
defaut _presume _, Toutemodification a cet
assemblageannule votre garantieen plus de creer un
risque defuite degazet d'incendie. N'utilisezquedes
pieces de rechangeapprouvees, fournies par le
fabricant.
IVlesuresde securit6 pendant I'installation
Utilisezgrill, comme I'achat,avecseulementLP
(propane)dugazet le regulateur/valve demontage
fourni.Si votre barbecueest pr6tDualFuel,un kitde
conversiondolt_tre achetepourune utilisationavec
dugaznaturel.
L'installationdugril doltse conformerauxcodes
Iocaux,ou en leurabsence,auNationalFuelGas
Code,ANSIZ223.1/NFPA54,NaturalGasand
PropaneInstallationCode,CSAB149.1,auCodesur
le dockage et lamanipulationdupropaneB149.2
Tousles accessoireselectriques(lar6tissoire,par
exemple)doivent_tre misa la terreconformementaux
codesIocauxouauNationalElectricalCode,ANSI/
NFPA70 ouau Codecanadiende1'6lectricit_CSA
C22.1.Tenezlescordonsd'alimentationet lestuyaux
d'alimentationencombustibleloindetoute surface
chaude.
C,egril esthomologueenmati@edesecurit6aux
Etats-UnisouauCanadaseulement.Ne lemodifiez
pas pourune utilisationdans unautreendroit.Toute
modificationcreeraunrisqued'accident.
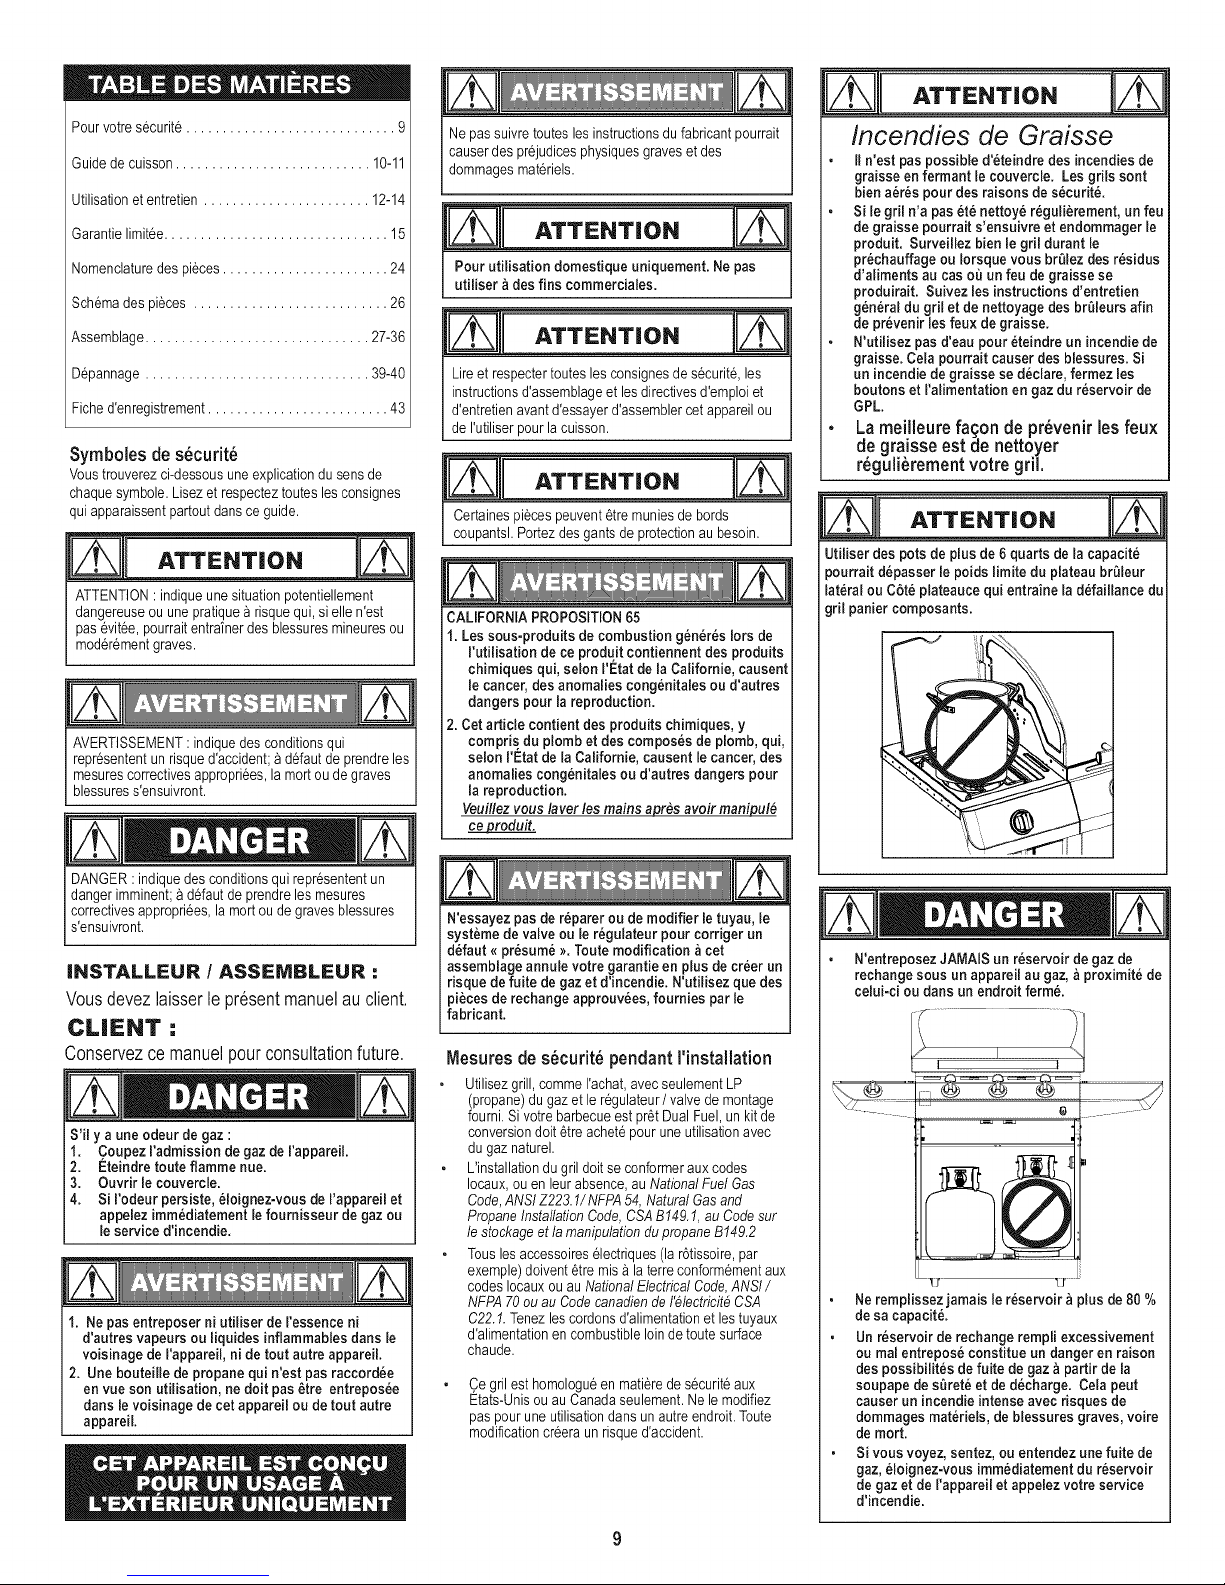
N'entreposezJAMAIS un r_servoir degaz de
rechangesous un appare[Iau gaz,a proxJmitede
celui-ci ou darts un endroitfermi.
Neremplissez jamais lereservoir _ plus de 80 %
desa capacite.
Un r_servoir derecbange rempli excessivement
ou mal entreposeconstitue undangeren raison
despossibilites de fuite de gaz _partir de la
soupape des_rete et dedecharge, Cela peut
causer unincendie intenseavec risques de
dommages materiels, de blessures graves, voire
de mort.
Si vous voyez,sentez, ou entendez une fuite de
gaz, eloignez-vous imm_diatement du r_servoir
de gazet de I'appareil et appelezvotre service
d'incendie.
Page 10
Premiere utilisation
Lisezle manueld'assemblageetassurez-vousquevotre
grilestassemblecorrectement. Retireztous lesmat@iaux
publicitairesde pointde ventedetouteslessurfacesdu gril
avantd'utilisercelui-cipour la premi@efois. Nousvous
recommandonsdefairefonctionnervotregril ason reglage
le plus elev6pendant15 a 20 minutesavantdeI'utiliser
pourla premi@efois. Celaaide a eliminerleshuiles
utiliseesIorsdela fabrication.
Plerres de lave et briquettes
Cegril augaza et6 concu,fabriqueet testepourune
utilisationavecdestentesdechaleurafinde produireune
chaleurplusuniforme,d'ameliorerleprocessusde
nettoyageet de reduirelesembrasementssoudains.
L'ajoutde pierresdelave d'apr_s-march&de charbonou
debriquettesde n'importequeltype reduiralacombustion,
augmenteralerisqued'incendieprovoqueparla graisse,et
enconsequencen'estpasrecommand& L'utilisationde
briquettes,de pierresdelaveou de charbondansce gril
annuleravotregarantie. Sivous voulezune plusgrande
saveurdefumee, nousvousrecommandonsI'utilisation
d'unfumoir avecdescopeauxdebois.
Tpr6chauffage devotre gril
Toutcommevotre fourde cuisine,votregrildoit _tre
pr@hauffeafindeproduireun rendementoptimal.
Pr@hauffezle grila temp@atureelev6ependant10 a 15
minutes,ou plusIongtempssi lesconditions
met6orologiquesI'exigent. Veuillezvousreporteraux
instructionsd'allumagequi figurentdansleguide
d'utilisationduproduitsivous avez desquestionsace
sujet. Unporte-allumettesaveccha;neetun orificesent
fournispourplusdecommodit&
Lacuissona I'ext@ieuresttr_sfacile. Fn gen@al,vous
reussireza fairecuire deshamburgers,deshot-dogsou
dessteaksdes votrepremieressai. Lorsquevousprendez
deI'exp@ience,vousapprendeza mieuxutiliservotregril
etvousferez preuvede davantaged'imaginationpour
creerdesrepas. Ces connaissancesconstituentI'artdu
gril. Avantde commencerlacuisson,organisezles
alimentsselonla techniquede cuissonet letempsde
cuissonn@essaireetoptimisezI'utilisationde lasurface
decuisson.
Cuisson directe
Lacuissondirecte consisteafairegrillervotreviande
directementau-dessusd'unesourcede chaleur elev6e.
Cettetechniqueest idealepoursaisirles steaks,les
c6telettes,depetits morceauxdeviandeet des legumes
quifiniront sur latableenpeu de temps.
2,,,,,,,_iv' , ,Y
Cuisson au moyende la r6tissoire
Lacuissonau moyende la r6tissoireestapproprieesurtout
pourdes pi@esde viande_<rondes>>,tellesquelesgros
r6tis,lesvolaillesenti@eset le porc. File necessite
gen@alementun moteuraccessoireetune tigequi
permettentdefairetournerla viandeaunevitesse
constante. Lacuissonau moyendela r6tissoirese fait
I'aided'unbrt_leurspecialdela r6tissoireou d'un
arrangementde brt_leurspourla cuissonindirecte.Un
recipientpeut6tre placesousla viandeafinderecueillirla
graisseet lesparticulesde nourriture,minimisantle
nettoyagenecessaire.
Temperature
Lajauge detemp@aturequi setrouve danslecouvercle
devotrenouveaugrilmesurelatemp@aturedeI'air. La
temp@aturede I'air a I'int@ieurdevotregrilne serajamais
aussielev6equela temp@aturedela surfacede cuisson.
Remarque:depuis 1995,tousles regulateurs(la pi@e
fixeeau reservoirdegaz pourcontr61erle debitdu gaz)
comprennentune caract@istiquedes@uritequi limitele
debitdugazen casdefuite. IIestpossibled'activercette
caract@istiqueaccidentellement,sans qu'iln'y ait defuite.
Celase produitgen@alementIorsquevousouvrezlegaz
I'aidedu boutondereglagedugrilavantd'ouvrirle robinet
degazdu reservoirdeGPL.Sicettecaract@istiquede
securit6s'active,le griln'atteindraquedes temp@atures
entre250°Fet 300 °F, m6meIorsquetousles br01eurs
sentaureglageelev&
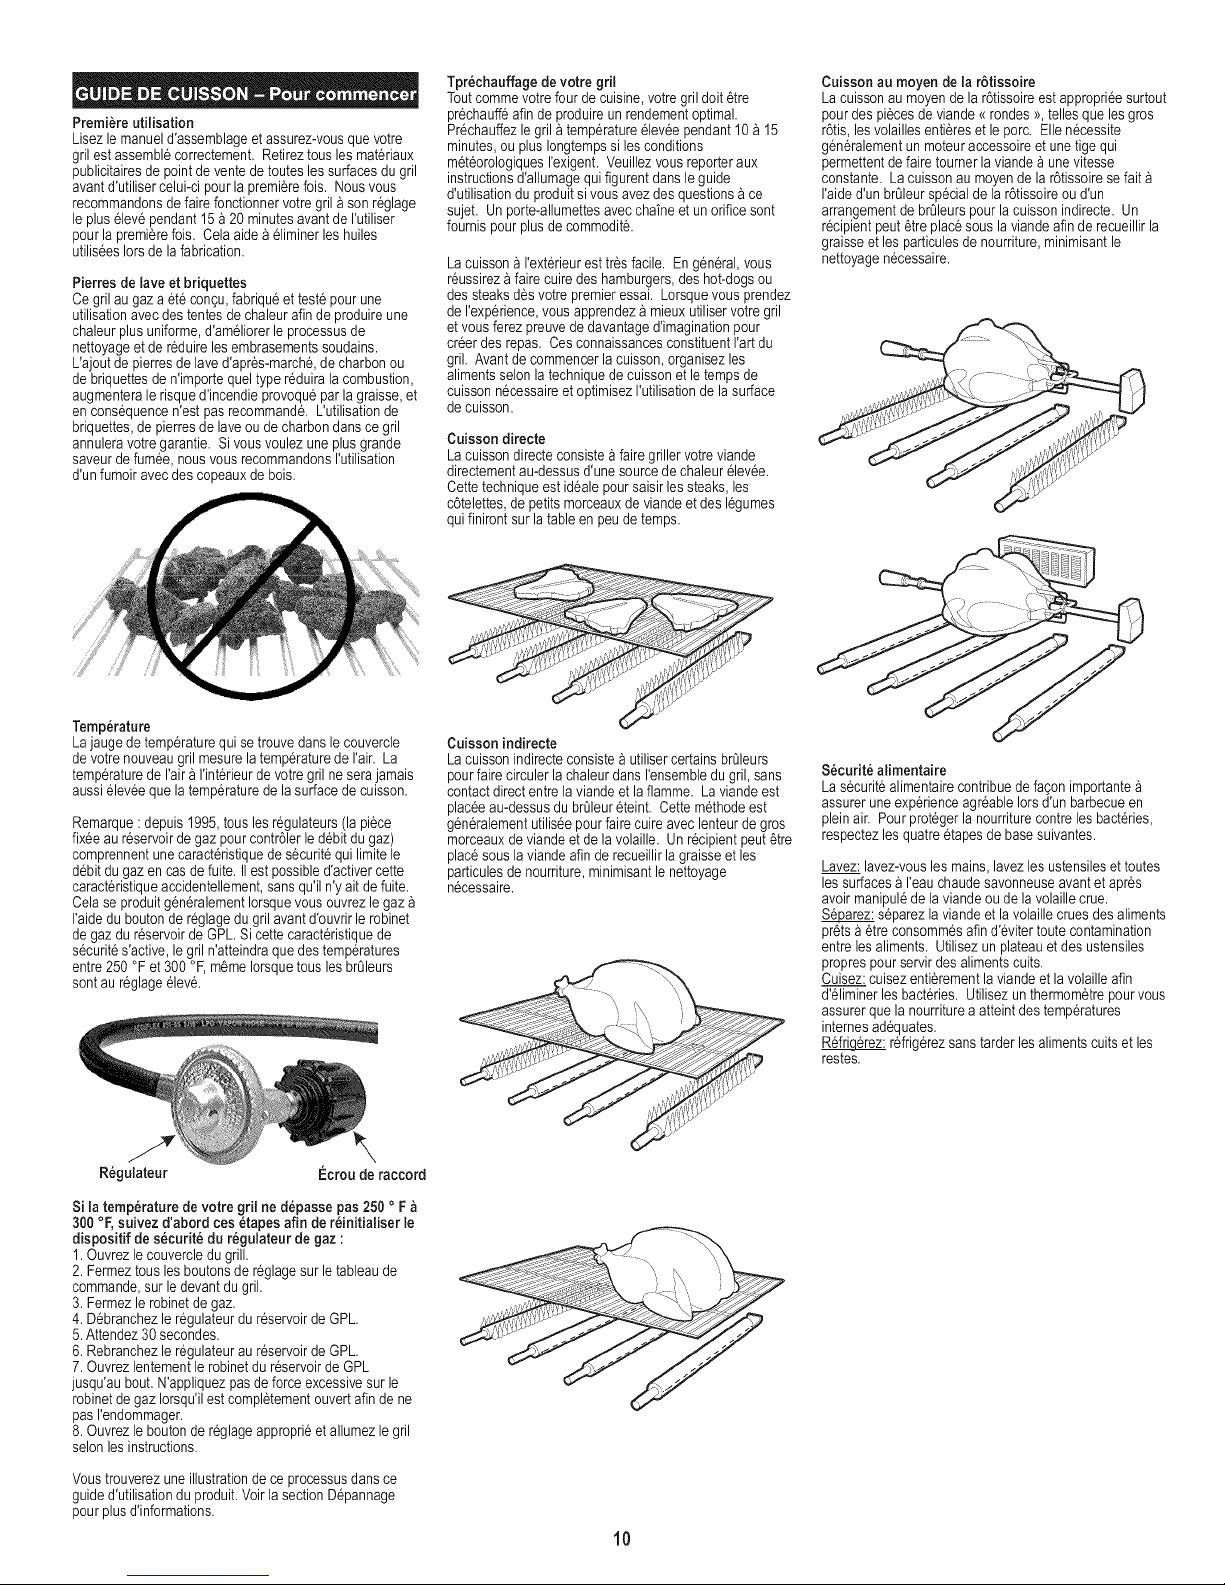
Regulateur Ecrou de raccord
Si latemperature devotre gril ne d@asse pas 250 ° F
300°F,suivez d'abord ces _tapes afin de reinitialiser le
dispositif de s_curite du regulateur degaz :
1.Ouvrezle couvercledugrill.
2.Fermeztousles boutonsdereglagesurle tableaude
commande,surledevantdugril.
3.Fermezle robinetde gaz.
4.Debranchezleregulateurdu reservoirde GPL.
5.Attendez30 secondes.
6.Rebranchezleregulateurau reservoirde GPL.
7.OuvrezlentementlerobinetdureservoirdeGPL
jusqu'aubout.N'appliquezpasdeforce excessivesurle
robinetde gazIorsqu'ilest completementouvertafindene
pasI'endommager.
8.Ouvrezle boutonde reglageapproprieetallumezle gril
selonlesinstructions.
Voustrouverezuneillustrationdece processusdansce
guided'utilisationduproduit.VoirlasectionD@annage
pourplusd'informations.
Cuisson indirecte
Lacuissonindirecteconsisteautilisercertainsbrt_leurs
pourfairecirculer lachaleurdansI'ensembledugril,sans
contactdirectentrela viandeetla flamme. La viandeest
placeeau-dessusdu braleureteint. Cettemethodeest
gen@alementutiliseepour faire cuireavec lenteurdegros
morceauxde viandeetdela volaille. Unrecipientpeut_tre
placesous la viandeafin derecueillirlagraisseetles
particulesdenourriture,minimisantlenettoyage
necessaire.
10
S6curite alimentaire
Lasecuritealimentairecontribuedefagonimportante
assurerune exp@ienceagreableIorsd'unbarbecueen
pleinair. Pourprotegerla nourriturecontrelesbact@ies,
respectezles quatreetapesde basesuivantes.
Lavez:lavez-vouslesmains,lavezlesustensilesettoutes
lessurfacesa I'eauchaudesavonneuseavantet apr_s
avoirmanipulede la viandeou de lavolaillecrue.
s@arez laviandeet la volaillecruesdesaliments
pr_tsa _treconsommesafind'@itertoute contamination
entrelesaliments. Utilisezun plateauet desustensiles
proprespourservirdes alimentscuits.
Cuisez:cuisezenti@ementla viandeetla volailleafin
d'eliminerlesbact@ies.Utilisezun thermom_trepourvous
assurerque lanourriturea atteintdestemp@atures
internesadequates.
Refri_ refrig@ezsanstarder lesalimentscuitset les
restes.
Page 11
Lacuissonsur votrenouveaugril estuneexperiencequi
necessitevotrepresence,et nousvousrecommandonsde
restera I'exterieur,a proximitedevotre gril,pendantla
cuissondesaliments. Plusieursconditionsexterieures
peuventavoiruneffet sur lacuissonau gril. Partemps
froid,une chaleurplusimportanteseranecessaireafin
d'atteindrelatemperaturedecuissonoptimale,et la duree
dela cuissonserapeut-_treprolongee.Latemperature
interneet I'epaisseurdela viandeontegalementun effet
surle tempsdecuisson. Les viandesfroideset epaisses
mettrontplus de tempsa cuire.
Temperatureinternede la viande
Laviandecuite augrilbrunitsouventtr_sviteensurface.
Enconsequence,vousdevez utiliserun thermom_tre
viandepourvous assurerque la viandeaatteint une
temperatureinternesansdanger.
TEMPERATURESINTERNESMINIMALES
RECOMMANDEESPARLE MINISTEREAMERICAIN
DE L'AGRICULTURE(USDA)
Bceuf,veau,agneau,steaks,r6tiset porcentier 63° C
(AVECUNDELAID'ATTENTEDETROISMINUTES)
Poisson 63° C
Bceuf,veau,agneauet porchache 71° C
Platsa based'oeufs 71° C
Dinde,pouletetcanard- enentier,en morceaux
ouhaches 74° C
Veuillezconsulterle site WebdeI'USDApourobtenirles
informationscompleteslesplusrecentes. Notretableau
destemperaturesinternesestbasesur lesnormesde
I'USDArelativesa la cuissondela viande. Voustrouverez
cesinformationsa I'adressewww.isitdoneyet.qov.
Sauces
Lessaucescontenantdusucreet desgraissespeuvent
causerdes embrasementssoudainsetvosaliments
peuventbraler. Engen6ral,badigeonnezlesalimentsavec
cessaucespendantles 10derni_resminutesdecuisson.
N'oubliezpasquedesquantitesexcessivesdesaucesou
deglacacenecessiterontegalementunnettoyageplus
importantpar lasuite.
Marinadeset epices _ frotter
Pourrehausserlasaveur desalimentsgrilles,une
marinadeliquideou desepicesafrotter peuvent_tre
appliqueesavantla cuisson. Unemarinadeliquidepeut
6treinjecteedans laviande,ou celle-cipeuttremperdans
la marinadependantunmaximumde24heuresavantla
cuisson. Lesepicesa frotterpeuvent6treappliquees
directementsurlaviande,immediatementavantlacuisson.
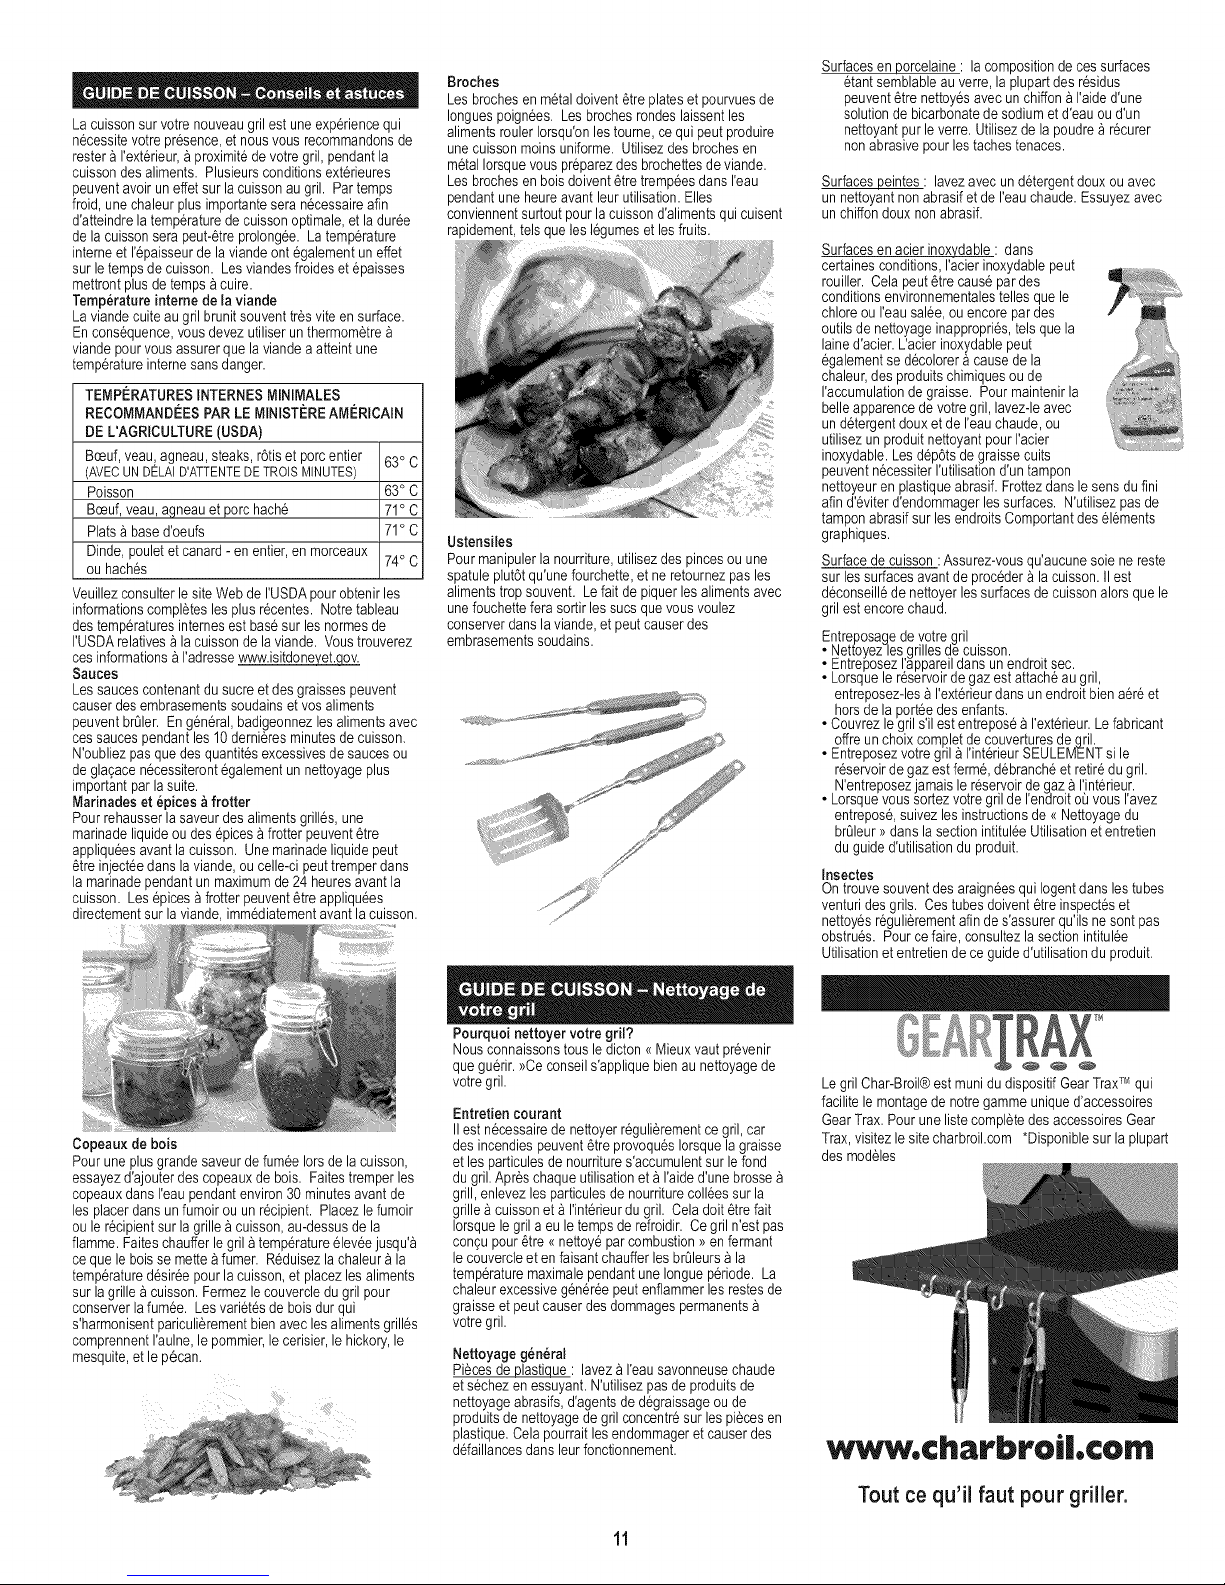
Broches
Les brochesenmetaldoivent6treplateset pourvuesde
Ionguespoignees. Lesbrochesrondeslaissentles
alimentsroulerIorsqu'onlestourne, cequi peutproduire
unecuissonmoinsuniforme. Utilisezdes brochesen
metalIorsquevouspreparezdes brochettesdeviande.
Les brochesenboisdoivent_tre trempeesdansI'eau
pendantuneheureavantleurutilisation.Elles
conviennentsurtoutpourla cuissond'alimentsquicuisent
rapidement,telsque les legumeset lesfruits.
Ustensiles
Pourmanipulerlanourriture,utilisezdespincesouune
spatuleplut6tqu'unefourchette,et ne retournezpas les
alimentstropsouvent. Lefait depiquerles alimentsavec
unefouchettefera sortirles sucsquevous voulez
conserverdanslaviande, etpeutcauserdes
embrasementssoudains.
Surfacesen porcelaine: la compositiondeces surfaces
etantsemblableau verre,laplupartdesresidus
peuvent_tre nettoyesavec un chiffona I'aided'une
solutiondebicarbonatedesodiumetd'eauou d'un
nettoyantpur leverre.Utilisezdela poudrea recurer
nonabrasivepourlestachestenaces.
Surfacespeintes: lavezavecundetergentdouxouavec
un nettoyantnon abrasifet de I'eauchaude.Essuyezavec
unchiffondoux nonabrasif.
Surfacesen acierinoxvdable: dans
certainesconditions,I'acierinoxydablepeut
rouiller. Celapeut _trecause pardes
conditionsenvironnementalestellesquele
chloreouI'eausalee,ou encorepardes
outilsde nettoyageinappropries,telsque la
lained'acier.L'acierinoxydablepeut
egalementsedecolorera causede la
chaleur,des produitschimiquesoude
I'accumulationde graisse. Pourmaintenirla
belleapparencedevotregril, lavez-leavec
undetergentdouxet de I'eauchaude,ou
utilisezun produitnettoyantpourI'acier
inoxydable.Lesdep6tsde graissecuits
peuventnecessiterI'utilisationd'untampon
nettoyeuren plastiqueabrasif.Frottezdanslesens du fini
afin d'eviterd'endommagerlessurfaces.N'utilisezpasde
tamponabrasifsur les endroitsComportantdeselements
graphiques.
Surfacedecuisson:Assurez-vousqu'aucunesoienereste
surlessurfacesavantdeprocederala cuisson.IIest
deconseilledenettoyerlessurfacesdecuissonalorsquele
gril estencorechaud.
Entreposaqede votre gril
• Netfoyez-lesgrillesdecuisson.
• EntreposezI'appareildansun endroitsec.
• Lorsquele reservoirde gazest attacheaugril,
entreposez-lesa I'exterieurdansun endroitbienaereet
horsde la porteedesenfants.
• Couvrezle grils'ilestentreposea I'exterieur.Lefabricant
offreunchoix completde couverturesde.qril.
• Entreposezvotregril aI'interieurSEULEMENTsi le
reservoirdegazestferme,debrancheet retiredu gril.
N'entreposezjamais lereservoirdegaza I'interieur.
• Lorsquevoussortezvotregril deI'endroitoQvousI'avez
entrepose,suivezlesinstructionsde<<Nettoyagedu
brQleur>>danslasectionintituleeUtilisationetentretien
duguided'utilisationduproduit.
Insectes
On trouvesouventdesaraigneesquiIogentdansles tubes
venturidesgrils. Cestubesdoivent_treinspecteset
nettoyesreguli_rementafinde s'assurerqu'ils ne sontpas
obstrues. Pource faire,consultezlasectionintitulee
Utilisationet entretiende ce guided'utilisationduproduit.
Copeauxde bois
Pourune plusgrandesaveurdefumeeIorsde la cuisson,
essayezd'ajouterdescopeauxde bois. Faitestremperles
copeauxdansI'eaupendantenviron30minutesavantde
lesplacerdansunfumoir ou unrecipient. Placezle fumoir
oule recipientsur lagrilleacuisson,au-dessusde la
flamme.Faiteschaufferlegril atemperatureelev6ejusqu'a
ceque le boisse metteafumer. Reduisezlachaleur a la
temperaturedesir6epourla cuisson,et placezlesaliments
surla grillea cuisson.Fermezle couvercledugrilpour
conserverlafumee. Lesvariet6sde boisdurqui
s'harmonisentpariculi_rementbienaveclesalimentsgrilles
comprennentI'aulne,lepommier,le cerisier,le hickory,le
mesquite,etlep6can.
Pourquoi nettoyer votre gril?
Nousconnaissonstousle dicton<<Mieuxvautprevenir
queguerir.>>Ceconseils'appliquebienaunettoyagede
votregril.
Entretien courant
IIest necessairedenettoyerr6guli_rementcegril, car
des incendiespeuvent_treprovoquesIorsquela graisse
etles particulesde nourritures'accumulentsurlefond
dugril.Apr_schaqueutilisationeta I'aided'unebrosse
grill,enlevezles particulesde nourriturecolleessur la
grillea cuissoneta I'interieurdugril. Cela doit_trefait
Iorsquelegril aeu letempsderefroidir. Cegril n'estpas
concN pour_tre <<nettoyeparcombustion>>enfermant
le couvercleet enfaisantchaufferlesbrQleursa la
temperaturemaximalependantuneIongueperiode. La
chaleurexcessivegenereepeutenflammerles restesde
graisseet peut causerdesdommagespermanents
votregril.
Nettoyagegeneral
Pi_cesde plastique: laveza I'eausavonneusechaude
etsechezenessuyant.N'utilisezpasdeproduitsde
nettoyageabrasifs,d'agentsde degraissageou de
produitsdenettoyagede grilconcentresurlespi_cesen
plastique,Celapourraitlesendommageretcauserdes
defaillancesdans leurfonctionnement.
11
Legril Char-Broil®est munidu dispositifGear TraxTM qui
facilitele montagede notre gammeuniqued'accessoires
GearTrax. Pour unelistecompletedes accessoiresGear
Trax,visitezle sitecharbroil.corn *Disponiblesur la plupart
des modules
.¢h rbroi|,¢om
Tout ce qu'il faut pourgriller.
Page 12
Demontage, transport et entreposage du
r6servoir de gaz
FERMEZtousles boutonsdereglageet lavalvedu
reservoirdegaz. Tournezala mainrecrou
d'accouplementdansle sonscontraltodesaiguilles
d'unemontre;n'utilisezpasd'outilspourdebrancherle
reservoir. Desserrezlavisdu reservoirsitueesousla
tabletteinf@ieureoudeconnectezlesautresdispositifs
de retenue,puis soulevezle reservoirde gaz etretirez-
le du chariot.Installezlecapuchonde@rotesurla
valvedu reservoira gaz. Utiliseztoujoursle capuchon
et labretellede retenuefournisaveclavalve. Faute
d'utJlJserJecapuchonde s_ret_selon les
consignes, des blessures gravesetdes dommages
materiels pourraient s'ensuivre..
Un reservoirdegazqui aet6debranch6pourle
transportou pour rentreposagedolt comporterun
capuchonde securit6(telqu'illustre).N'entreposezpas
un reservoirdegazdans unendroitfermetel qu'unabri
d'auto,ungarage,unporche,un patiocouvertou
d'autresconstructions.Nelaissezjamais un reservoir
degaz dansun vehiculequipourraits'echaufferau
soleil.
N'entreposezpasunreservoirde gazdansunendroit
ot_lesenfantsjouent.
Valve du reservoir Capuchon des_rete
de gaz
Bretelle de retenue
R_servoir de c
. Le r_servoir deGPLutilis_ avecvotre gril doit
satisfaireaux exigencessuivantes :
• Utilisezseulementunreservoirde GPLavec les
dimensionssuivantes:diam_trede30,5cm (12pc)x
hauteurde45,7 cm(18pc)et de capacitemaximalede
(20 Ib).
' Lesreservoirsde GPLdoivent_trefabriqueset etiquet6s
conformementaux sp@ificationspourlesreservoirsde
GPLdu minist@eduTransport(Departmentof
Transportation:DOT)des Etats-Unisou,au Canada,des
normesCAN/CSA-B339relativesauxcylindres,sph@eset
tubespourletransportdes mati@esdangereusesde
TransportCanada(TC). Voirretiquettesurle collierdu
reservoirdeGPL.
• La valvedu reservoirde GPLdolt comporter:
• Un orificede sortiedetype 1
compatibleavec le regulateurou legril.
•Une soupapedest_ret6et de decharge.
• Undispositifde protectioncontrele
remplissageexcessifhomologueUL.
Cedispositifdesecurit6est identifie
parununiquevolantde manoeuvre
triangulaire.Utilisez seulementdes
reservoirs dotes de cetype de
valve..
' LereservoirdeGPLdolt6tredisposedemani@e
permettrereliminationdes vapeursetdolt comporterun
collierde protectionde lavalvedu reservoir.Gardez
toujourslesreservoirsde GPLa la verticaleIorsde
rutilisation,dutransportetde rentreposage.
Reservoirdegaza laverticale
pourpermettrerelimination
desvapeurs
Volant de
manoeuvredu
dispositif de
protection
contre le
remplissage
excessif
GPL(Gazde p_troleliqu6fi& ougazpropane
liquide)
• Le GPL n'est pastoxique;ilestincoloreetinodoreIorsqu'il
est produit.Pourvotre propre protection, une odeur est
ajouteeauGPL(semblablea rodeurdechoupourri)afin
quevous puissiezle sentir.
• LeGPL est tr_sinflammableetpeuts'allumerde mani@e
inattendue
Remplissagedu r6servoirdeGPL
Nefaitesappelqu'auxservicesdedistributeurs
autorisesd'exp@ience.
LereservoirdeGPLdoit _tre purgeavantle
remplissage.
LedistributeurNEdolt JAMAIS remplirle reservoirde
GPLa plusde80 %desa capacitevolumetrique,Le
volumede propanedansun reservoirvarieselonla
temp@ature.
Lapresencede givresur leregulateurindiqueun
remplissageexcessif.Fermezimmediatementla
valvedu reservoirde GPL et appelezvotre
distributeurdeGPL localpourobtenirde raide.
Nerel_chezpasde gazde petroleliquefi6(propane)
dans rair.Celaconstitueunepratiquedangereuse.
Pourviderle gazcontenudans unreservoirdeGPL,
demandezraided'un distributeurdeGPLoudu service
d'incendielocal.Regardezdansrannuairetel@honique
sous<<Fournisseursdegaz >>afinde Iocaliserle
distributeurdegaz agre6le plusprochedechez vous.
I_changede r_servoirdeGPL
. Plusieurscommergantsqui vendentlauniteoffrentla
possibilitede souscrirea unserviced'echangede
reservoirsvides.Nefares appelqu'auxservices
d'entreprisesdignesde confiancequisoumettentleurs
bouteillesde gaza desinspectionsetdesessaisetqui
certifientleursbouteillesdegaz. N'echangezvotre
r_servoir que contre unr_servoir equipe d'un
dispositif de protection contre le remplissage
excessif tel que decrit darts lasection sur Je<<
R6servoir de GPL>>du present guide.
• Gardeztoujours le reservoirdeGPLneufou @hangeen
positionverticaleIorsdeson utilisation,desontransport
etdeson entreposage.
. Effectuez un essai d'etanch_ite des r_servoirs deGPL
neufs et _changesAVANTde los connecter _l
I'appareil,
• Mettre capuchondest_reteantipoussi@esur lasortiedu
robinetd'une bouteillequin'estpas utilisee,Utiliser
uniquementletypecapuchonde st_reteantipoussi@e
fourniavec lerobinetde labouteille.D'autrestypes de
bouchonspourraientnepas_treetancheset permettre
desfuitesdepropane.
Essaid'etanch_ited'unr_servoirde GPL
Pour votrepropres6curit_
• II est necessairede procedera unessaid'etancheite
chaquefoisquele reservoirde GPLestechangeou
rempli.
• Ne fumez paspendantressaid'etancheit&
• N'utilisezpasde flamme nuepourdetecterunefuite de
gaz.
• L'essaid'etancheitederappareildoltse fairea rext@ieur,
dansunendroitbienventil& loindesourcesd'ignition
tellesque lesappareilsmenagersfonctionnantaugaz ou
relectricit&Au coursde ressai d'etancheit&gardez
rappareilloindesflammesnuesetdes etincelles.
. Utilisezunpinceaupropreetune solutionamesures
egalesd'eauet d'un savondoux.Appliquezla solution
savonneusesur les endroitsmarquesd'unefleche surle
schemaci-dessous,
• N'utJlisez pasde produits d'entretien m_nagers.IIs
pourraientendommagerdescomposantsdu circuitde
gaz.
Si desbulles<<moussantes>>apparaissent,n'utilisezpas
le reservoirde GPLet ne led@lacezpas.Appelezun
fournisseurde GPLou votreserviced'incendie!
Connexion duregulateurau reservoir de
GPL
1. Le reservoirde GPLdolt _treattachea rappareilde
fagonsecuritaire.(Reportez-vousa la sectionsur
rassemblage.)
2. FERMEZtousles boutonsde reglage.
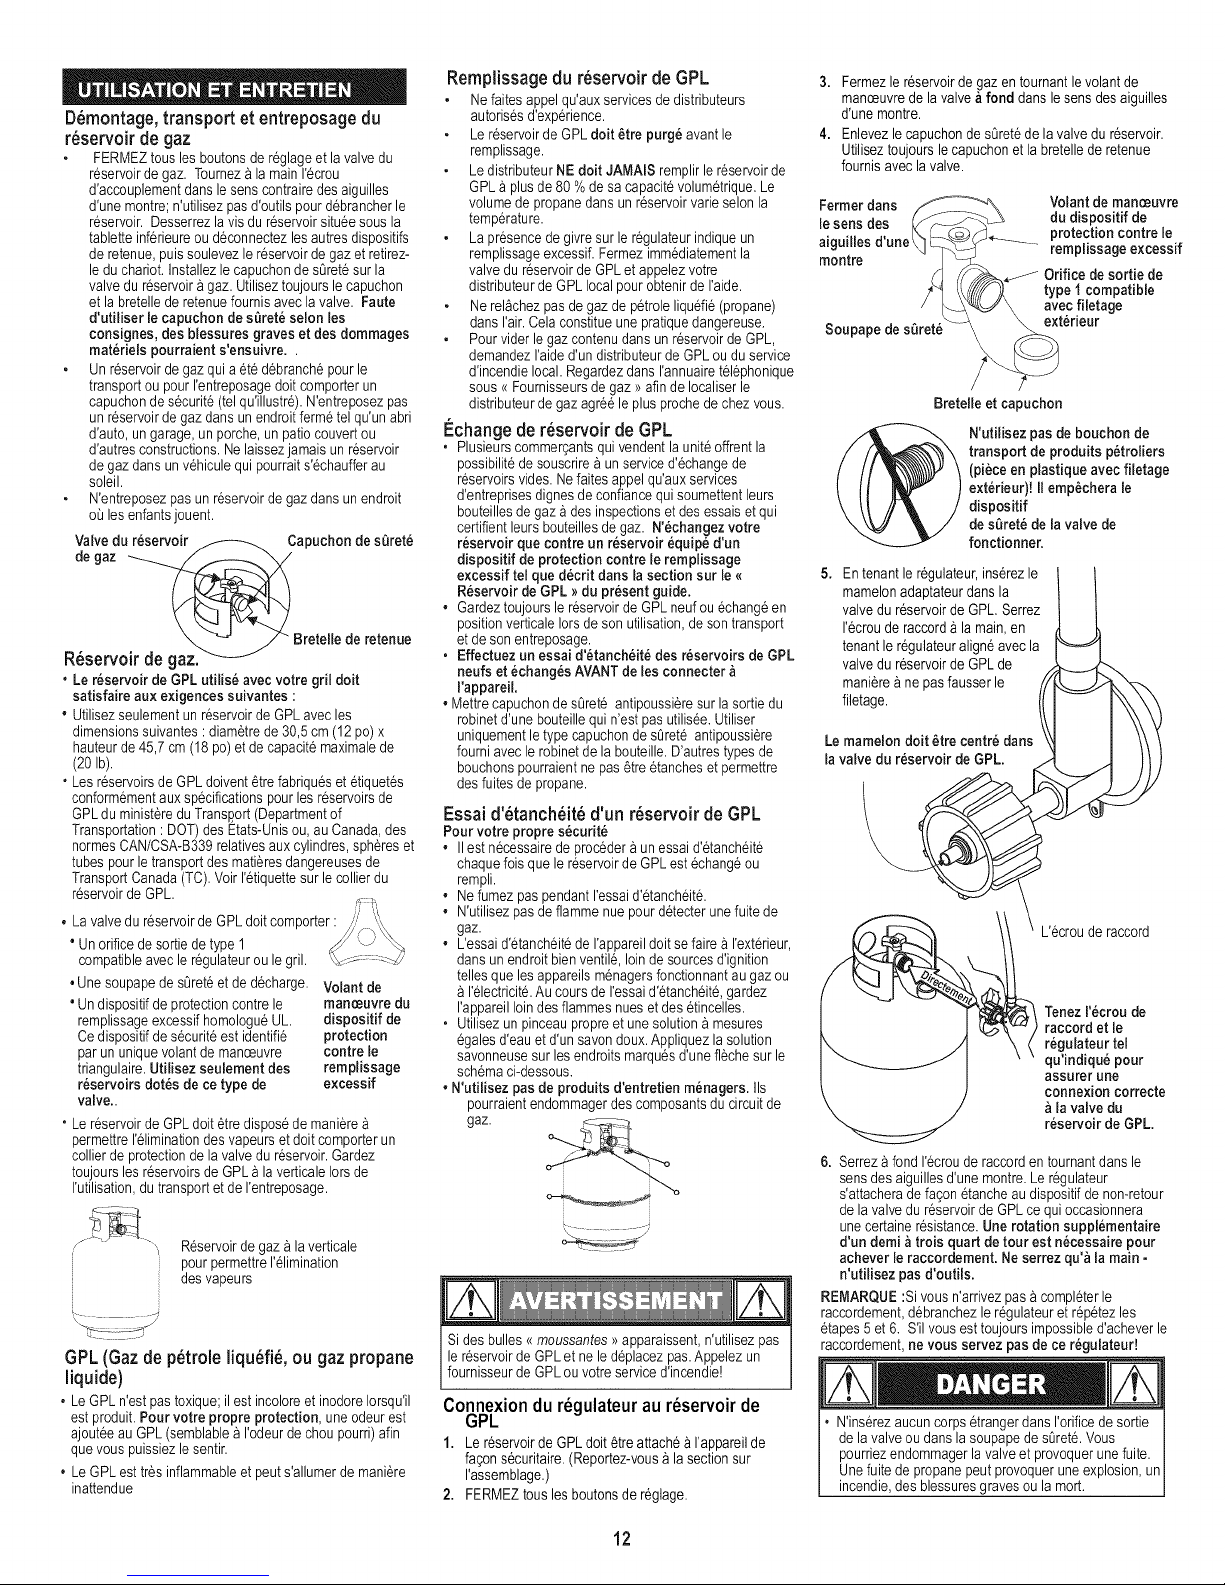
3. Fermezlereservoirdegaz entournantle volantde
manoeuvredela valveafond dans lesens desaiguilles
d'unemontre.
4. Enlevezle capuchonde s0retede la valvedureservoir.
Utiliseztoujoursle capuchonet la bretellederetenue
fournisavecla valve.
Fermerclans __ Volant demanoeuvre
lesens des (_ _ du dispositif de
.... [X___@ _ protection contrele
a_gu_Hesa une_._L_---_% "-_ remplissage excessif
montre S] _ _ Orifice desortie de
4"I _\_'_//_-_,[ type 1compatible
/ ____ \,_,,_\ avecfiletage
Soupape des_rete _\ _terJeur
Bretelle et capuchon
N'utilisez pas debouchon de
transport de produits p6troliers
(pieceen plastique avec filetage
ext_rieur)! IIemp6chera le
dispositif
des=3ret_dela valve de
fonctionner.
5. Entenantle regulateur,ins@ezle
mamelonadaptateurdansla
valve dureservoirde GPL Serrez
recrouderaccorda lamain,en
tenant le regulateuraligneavecla
valve dureservoirde GPLde
manierea nepasfausser le
filetage.
Lemamelon doJt6tre centre clans
la valve du reservoir de GPL.
L'ecrouderaccord
TenezI'ecroude
raccord et le
r_gulateur tel
qu'indique pour
assurer une
connexioncorrecte
_llavalve du
r_servoir de GPL.
6. Serreza fond I'ecrouderaccordentournantdansle
sensdesaiguillesd'une montre.Leregulateur
s'attacheradefaconetancheaudispositifde non-retour
dela valvedu reservoirdeGPLce quioccasionnera
unecertaineresistance,Une rotation suppl_mentaire
d'un demi _ trois quart de tour est necessaire pour
achever leraccordement. Neserrez qu'_lla main -
n'utilisez pas d'outils.
REMARQUE:Sivousn'arrivezpasa completerle
raccordement,debranchezleregulateuretr@etezles
etapes5 et6, S'ilvousest toujoursimpossibled'acheverle
raccordement,ne vous servez pasde ce regulateur!
N'ins@ezaucuncorpsetrangerdans rorificede sortie
dela valveoudansla soupapedest_ret&Vous
pourriezendommagerlavalveetprovoquerunefuite.
Unefuite depropanepeut provoqueruneexplosion,un
incendie,des blessuresgraves ou lamort.
12
Page 13

D_squ'unefuite estd@elee,ARRETEZ!
i 'utilisezpaslegrilavantd'enavoirv@ifieI'etanch6it&
Si vousn'arrivezpasa arr6terunefuite de gazen
fermantla zonede conge de vannede la bouteillede
GPLetappelezle serviced'incendie!
Essai d'etanch_it_ dies valves, des tuyaux et
du r6gulateur
1.Tournez tous los boutons de reglageen position
d'arr_t (OFF).
2.Assurez-vousquele regulateurest attachedefacon
etanchea lavalvedu reservoir.
3. Ouvrezla valvedu reservoircompletementen la tournant
danslesens contrairedesaiguillesd'unemontre.Si vous
entendezunsouffleou unsifflement,fermez
immediatementla valvedugaz. Celaindiquequele
raccordcomporteunefuite importante.Corrigez le
probleme avantde poursuivre.
4. Badigeonnezlesraccordssuivantsdesolution
savonneuse:ou d'autresaccessoiressurvotregrille.
REMARQUE:bordurede la
tablettedubraleurlat@alet I REMARQUE:Votre
d'autrespartiesnon gril peutnepas
represent6espourplusde avoirun braleurde
Carte: I c6ted'eta,q@e.
5. Si desbulles <_moussantes >_apparaissent,c'estqu'il
aunefuite. Fermezimmediatementlavalvedu reservoir
degazet resserreztousles raccords.Si vous n'arrivez
pas_arr_ter losfuites, n'essayez pas delos colmater
vous-m_me.Appelez-nouspourobtenirdes pi_cesde
rechange.Pourcommanderdespi_cesde rechange,
appelezleCentredeservicepourgrilset donnezle
num@odes@ie,le mod_leetle noradespi@esdent
vousavezbesoin.
6. Fermeztoujoursla valvedureservoirde GPLapr_s
chaqueessaid'etanch6it6en tournantlevolantde
manoeuvredanslesens desaiguillesd'unemontre.
o Sivousremarquezquedela graisseouqu'uneautre
mati@echaudes'egouttedugril sur lavalve,letuyauou
le regulateur,coupezimmediatementI'alimentationen
gaz.DeterminezI'origineduprobleme,corrigez-le,puis
nettoyezet inspectezlesyst#mede valve,letuyauou le
regulateuravantde continuer.Effectuezunessai
d'etancheit&
o Nettoyezsouventlegril, depref@enceapr_schaque
emploi.Si unebrosseavec solesestemployeepour
nettoyerlessurfacesde cuissondu gril,assurez-vous
qu'aucunesolenerestesur lessurfacesavantdeproceder
lacuisson. IIestdeconseillede nettoyerlessurfacesde
cuissonalorsquele grilest chaud.
o Gardezlesorificesducylindre(chariotdugril)degageset
libresde tout debris.
o Nerangezpasd'objetsou de mat@iauxa I'int@ieurdu
chariotdugril etcontribuanta bloquerlacirculationd'air
dans lapartieinf@ieuredutableaudecommandeou de
la cuvettedufoyer.
o Le regulateurpeutemettre unbourdonnementou un
sifflementencoursdefonctionnement. Celan'affecteni la
securitenile bon fonctionnementdu gril.
o Encas de problemeavecvotregril,consultezla section
<<O@annage)>.
o Si dugivrese formesur leregulateur,fermezlegril
immediatement,ainsiquela valvedureservoirde GPL.
Cela indiquequele reservoirestdefectueuxetqu'il ne
fautI'utiliseravecaucunappareil.Adressez-vousau
fournisseurde gaz!
Pourutiliser votre gril enroute securit_ et
_oureviter des blessuresgraves :
Nelaissezpaslesenfants utiliserle griloujouer
proximitedecelui-ci.
GardezI'espaceautourdu gril propreetlibredetout
mat@ielinflammable.
Nebouchezpaslestrous situessur les c6tesou
I'arri@edugril.
Wrifiez p@iodiquementlesflammesdubn_leur.
Nevousservezdu grilque dansun endroitbiena@&
NeI'utilisezJAMAISdansunendroitfermecommeun
abrid'auto, un garage,unporche,un patiocouvertou
soustoute surfacesurplombantequelle qu'ellesoit.
N'utilisezpasde charbonnidebriquettesen c@amique
dansungrila gaz.
Necouvrezpas lesgrillesavecdes feuillesd'aluminium
outout autre mat@iau.Cela emp_cheralaventilation
du brOleuret seraaI'originede conditions
potentiellementdangereusespouvantentra;nerdes
dommagesmat@ielsoudes blessuresgraves.
Gardezunedistance d'aumoins 1 m(3 pieds) entre
le gril et tout mur ousurface, Gardezune distance
de3 m(10pi)entrele grilet tout objetinflammableou
toutesourced'ignitiontelleque la veilleused'un
chauffe-eau,unappareilelectromenagersoustension,
etc
Allumage
- Nevous penchez pasau-dessus du grilIors de
I'allumage.
1. Mettretouteslesvalvesde contr61edu bn_leur
augaz a O ARRET.
2. OuvrirI'alimentationdegaz a lasourceouau reservoirON.
3. Ouvrir lecouvercle durant rallurnage.
4. Pourallumer,pousseret tournerle boutond'allumage
du bn_leura _ maximale.
5. Imm6diatement,appuyersur leboutond'allumage
electroniqueetle maintenirenfonc&
6. Sile bn_leurnes'allumePASdans les 5secondes,
metteztouslesboutonsdecontr61edesbn_leursen
positionO d'arr_t,attendez5minutes,puis r@etez
la procedured'allumage.Si I'allumeurnefonctionne
pas,suivezcorrespondreinstructionsd'allumage.
7. Pourallumerlesautres brOleurs,tournera
maximale encommencantpar lesbrt_leurssituesle
pluspr6s du BRULEURD'ALLUMAGE.
8. Pourdes grilsequipes deI'ALLUMAGE
ELECTRONIQUE_ chaque br_leur :
R@etez les etapes4 a 6 pourallumer chaquebrOleur
9. Unefoisque chaquebrOleura misa feu, tournezles
boutonsa I'arrangementdesir&
Fermezles boutons de contr61eet le gazau niveau du
reservoir ou de la source d'alimentation quand
I'appareil n'est pas utilis&
ATTENTION ]_
Sile br_leur nes'allumePASdansles 5 secondes,
mettez tousles boutons de contr_le des br_leurs en
position O d'arr_t, attendez 5minutes, puis r@_tez
la procedure d'allumage. Sile br_leur nes'allume pas
Iorsque la valveest ouverte, le gazcontinuera de
s'echapper du br_leur et pourrait s'enflammer
accidentellement et causer des blessures.
Allumage avec uneallumette
oNevous penchez pasau-dessus du grilIorsde
I'allumage.
1. Mettretouteslesvalvesde contr61edu brOleur
augazaO ARRET,
2. OuvrirI'alimentationdegaz alasourceou au reservoirON.
3. Ouvrirle couvercledurantI'allumage.
4. PlacezI'allumettedansle supportd'allumette(pendant
dupanneaulat@aldugauchedu gril).Allumez
I'allumette; allumezalorsle brt_leuren plagant
rallumetteparle troude lumi@ed'allumettedugauche
dugril.
5. EnfoncezettournezJeboutondubn31eura I'extr_me
gaucheenposition_ maximale.Assurez-vousquele
bn_leurs'estallume etqu'ille reste.
6. Allumezlesbn_leursadjacentsun apr_sI'autreen
enfongantet entournantlesboutonscorrespondantssur
la position_ maximale.
concupour6tre installesurou dansunbateau.
L'appareild'utilisationext@ieuredu gazn'est pas
congupour6tre installesurou dansunYR.
I! 'appareild'utilisationext@ieuredugazn'estpas
Netentez amaisde raccordercegrilausyst_medeGPL
autonomedunetente-caravaneoud uneautocaravane.
Consignes des6curite
oAvant_'ouvrirla valvedu reservoirde GPL,v@ifiezque
I'@roude raccordest bienserr&
oLorsquevousn'utilisezpasle gril,metteztousles boutons
de reglageet lavalvedu reservoirdeGPL en position
d'arr_t.
o Ned@lacezjamais legril Iorsde I'utilisationou pendant
qu'il estencorechaud.
o CertainessurfacesserontchaudespendnatI'utilisationde
I'appareil. Utilisezdesustensilesdecuissona long
mancheetdes gantsafind'eviterlesbn_luresetles
eclaboussures.
oLebn_leurlat@alet la tablettelat@alesupportentune
chargemaximalede 10 lb.
o Leplateauou le reservoird'ecoulementde lagraissedolt
6treenplacequandvousutilisez legril et_tre vide apr_s
chaqueutilisation.N'enlevez pasleplateauou le
reservoird'@oulementdelagraisseavantquelegril ne
soitcompletementrefroidi.
N'essayezJAIViAISd'allumerun br_leur Iorsque le
couvercle dugril est form& Uneaccumulation de
gaz non br_l_ _rinterieur d'un grilferme constitue
un danger.
N'utilisez pas legrilIorsque le r_servoir deGPL n'est
pas dartslaposition appropriee telle que specifiee
dartslos instructionsd'assemblage,
Refermeztoujours la valve du r_servoir et enlevez
I'ecrou deraccord avant de deplacer le r_servoir de
GPLdesa position de feactionnement.
Residentsd'appartements:
Renseignez-vousaupr_sde I'administrationpour
conna;trequellessentlesexigenceset lescodes
d'incendieapplicablesaI'utilisationd'ungril agaz dans
votreimmeuble.Si I'utilisationdu gril estpermise,
utilisez-lea I'ext@ieurau rez-de-chausseea une
distancede 1m(3 pi)destours oudesrampes.Ne
I'utilisezpassurun balconouendessousde celui-ci.
13
Page 14
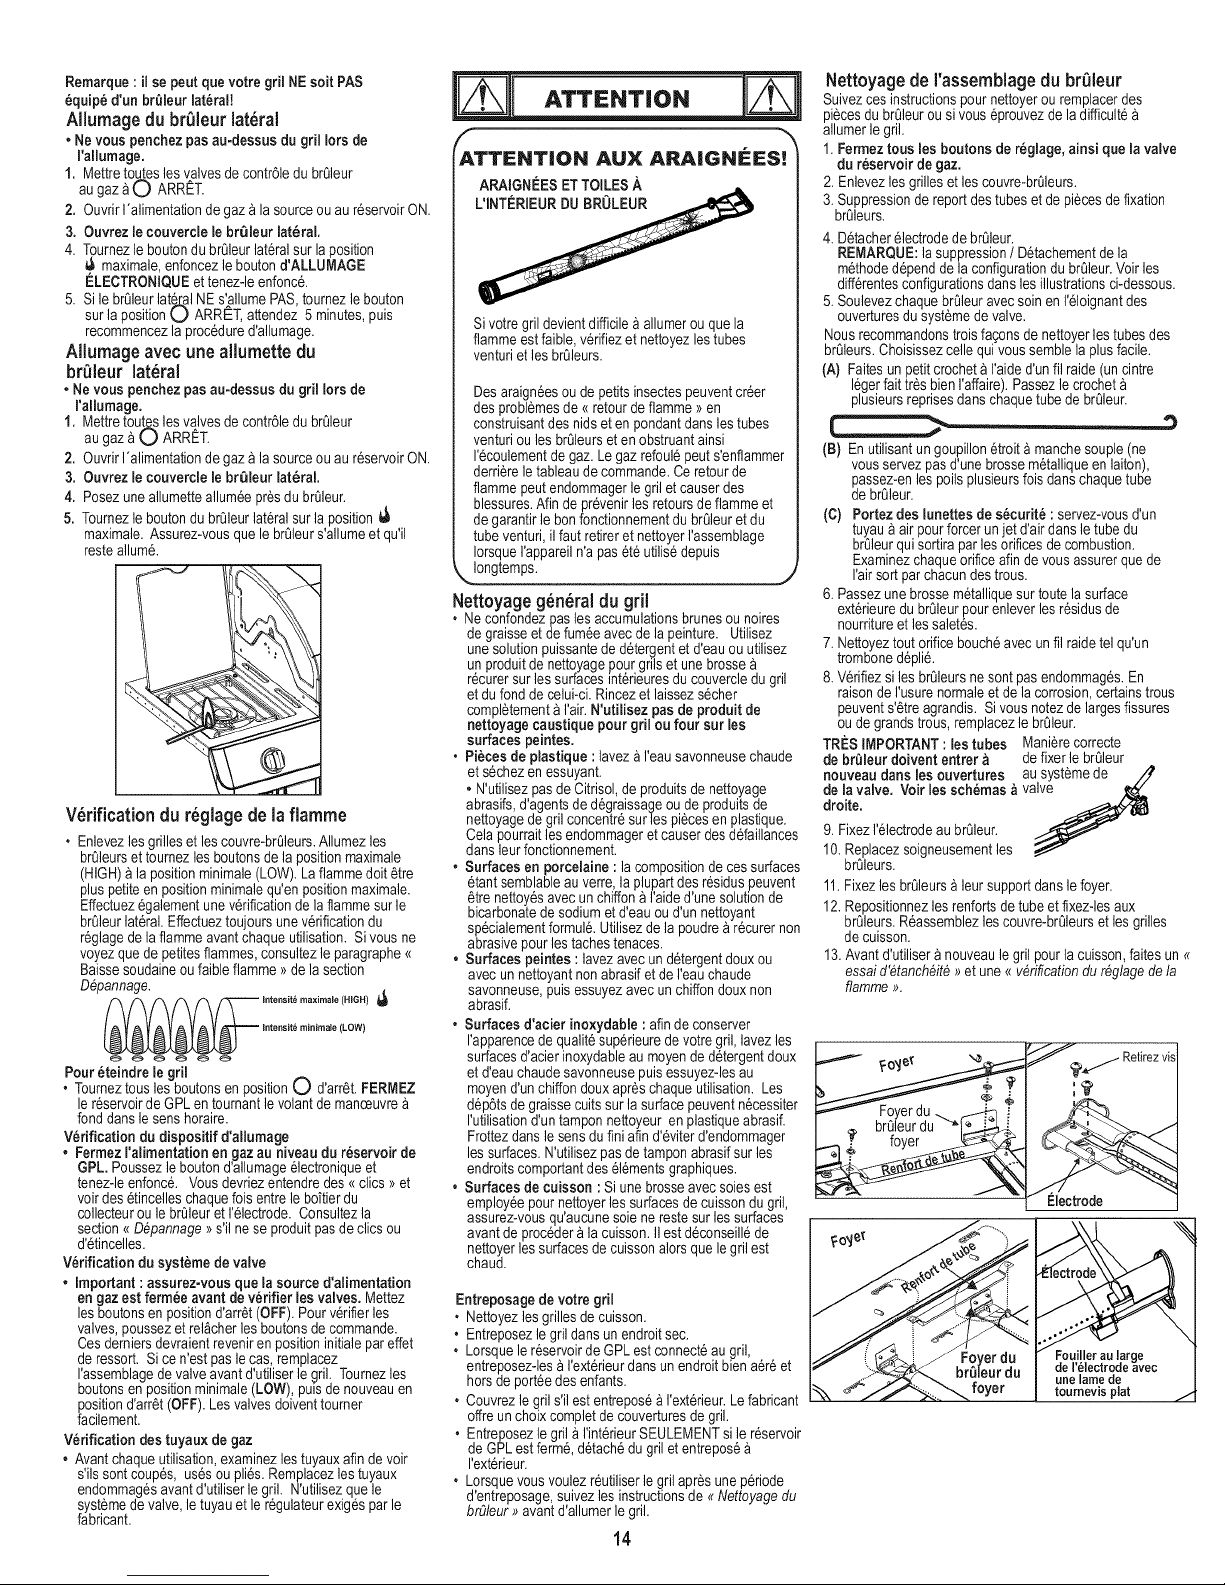
Remarque: il se peutquevotregrilNE soitPAS
_quipe d'unbr_leurlateral!
Allurnagedubr_leurlateral
• Ne vouspenchezpasau-dessus dugrilIors de
I'allumage.
1. Mettretouteslesvalvesde contr61edu brGleur
augaz aO ARRET.
2. OuvrirI'alimentationdegaz a lasourceouau r6servoirON.
3. Ouvrez le couvercle le brQJeurJat_raL
4. Tournezleboutondu brGleurlat@alsur la position
maximale,enfoncezleboutond'ALLUMAGE
€:LECTRONIQUEet tenez-leenfonc6.
5. Si lebrGleurlat_l NEs'allumePAS,tournezle bouton
surla positionU ARRET,attendez 5 minutes,puis
recommencezla proc6dured'allumage.
Allumageavecuneallumette du
br01eur lateral
• Ne vouspenchezpasau-dessus dugril Iorsde
I'aliumage.
1. Mettretout_ les valves decontr61edu br01eur
augaza U ARRET.
2. OuvrirI'alimentationdegaz alasourceou au r6servoirON.
3. Ouvrez ie couvercle le brl31eurlateral
4. Posezune allumetteallum6eprosdu brt_leur.
5. Tournezleboutondu brt_leurlat@alsurla position
maximale.Assurez-vousquele brGleurs'allumeetqu'il
resteallum6.
V_rificationdu r6glagede laflamme
, Enlevezles grillesetlescouvre-br01eurs.Allumezles
brGleursettournezlesboutonsdela positionmaximale
(HIGH)a lapositionminimale(LOW).La flammedolt6tre
pluspetiteenpositionminimalequ'enpositionmaximale.
Effectuez6galementune v@ificationde la flammesurle
brGleurlat@al.Effectueztoujoursunev@ificationdu
r6glagedelaflamme avantchaqueutilisation. Sivousne
voyezquede petitesflammes,consultezle paragraphe_<
Baissesoudaineoufaibleflamme>>dela section
D@annage.
_ ntensit_ maximale (HIGH)
Poureteindre le gril
, Tourneztousles boutonsenpositionO d'arr6t.FERMEZ
ler6servoirde GPLen tournant levolantde manoeuvre
fonddansle senshoraire.
Verification du dispositif d'allumage
• FermezI'alimentationengaz au niveaudu r_servoir de
GPL. Poussezleboutond'allumage61ectroniqueet
tenez-leenfonc6. Vousdevriezentendredes <<clics >>et
voir des6tincelleschaquefois entrelebottlerdu
collecteuroule brGleuret 1'61ectrode.Consultezla
section<_D@annage>>s'ilne se produitpasdeclics ou
d'6tincelles.
V_rificationdusystemede valve
• Important : assurez-vous que la sourced'alimentation
en gazest ferm_eavant deverifier lesvalves. Mettez
lesboutonsenpositiond'arr6t (OFF).Pourv@ifierles
valves,poussezetrel_cherlesboutonsdecommande.
Ces derniersdevraientrevenirenpositioninitialepareffet
de ressort. Si cen'estpaslecas, remplacez
rassemblagedevalveavantd'utiliserle gril. Tournezles
boutonsenpositionminimale(LOW), puisdenouveauen
positiond'arr6t(OFF).Les valvesdoiventtourner
facilement.
Verificationdes tuyau× de gaz
• Avant chaqueutilisation,examinezles tuyauxafin devoir
s'ils sontcoup6s, us6s oupli6s.Remplacezlestuyaux
endommag6savantd'utiliserle gril. N'utilisezquele
syst_medevalve,letuyauet le r6gulateurexig6sparle
fabricant.
intensit_ minimaie (LOW)
r
ATTENTION ALl]( ARAIGNEES!
ARAtGNEESETTOILESA
Si votregril devientdifficile_allumerou quela
flammeestfaible,v@ifiezet nettoyezlestubes
venturietlesbr01eurs.
Des araign_esoude petitsinsectespeuventcrier
des probl_mesde_{retourde flamme>>en
construisantdes nidsetenpondantdanslestubes
venturioulesbrt_leurseten obstruantainsi
I'_coulementdegaz.Le gazrefoul_peuts'enflammer
derri@eletableau de commande.Ceretourde
flammepeutendommagerle griletcauserdes
blessures.Afin depr@enirles retoursdeflammeet
degarantir lebonfonctionnementdubrOleuret du
tubeventuri,il fautretireretnettoyerI'assemblage
IorsqueI'appareiln'apas_t_utilis_depuis
Nettoyageg_n_ral dugril
, Neconfondezpasles accumulationsbrunesounoires
degraisseet defum_eavec de lapeinture. Utilisez
unesolutionpuissanteded_tergentetd'eauouutilisez
unproduitdenettoyagepourgrilset une brosse
r_curersurles surfaces_nt@ieuresducouvercledugril
etdufond decelui-ci.Rincezet laissezs_cher
compl_tementa I'air.N'utilisez pas de produit de
nettoyage caustique pour gril oufour sur les
surfacespeintes.
, Pieces depiastique : lavezaI'eausavonneusechaude
et s_chezenessuyant.
• N'utilisezpasde Citrisol,deproduitsdenettoyage
abrasifs,d'agentsde d_graissageou de produitsde
nettoyagede gril concentr_surles pi_cesen plastique.
Celapourraitlesendommageretcauserdesd_faillances
dansleurfonctionnement.
• Surfaces en porcelaine :la compositiondeces surfaces
_tantsemblableau verre,laplupartdesr_siduspeuvent
_tre nettoy_savec un chiffonaI'aided'une solutionde
bicarbonatedesodiumetd'eauou d'un nettoyant
sp@ialementformula.Utilisezde la poudrear_curernon
abrasivepour les tachestenaces.
• Surfaces peintes : lavezavec un d_tergentdouxou
avecunnettoyantnon abrasifetdeI'eauchaude
savonneuse,puis essuyezavecunchiffondouxnon
abrasif.
• Surfaces d'acier ino×ydable : afinde conserver
rapparencede qualit_sup@ieuredevotregril,lavezles
surfacesd'acierinoxydableaumoyende d_tergentdoux
etd'eauchaudesavonneusepuisessuyezdesau
moyend'unchiffondouxapr_schaqueutilisation.Les
d@6ts degraissecultssurla surfacepeuventn_cessiter
rutilisationd'untamponnettoyeur enplastiqueabrasif.
Frottezdansle sens dufiniafin d'@iterd'endommager
lessurfaces.N'utilisezpasde tamponabrasifsurles
endroitscomportantdes_l_mentsgraphiques.
• Surfaces de cuisson : Si unebrosseavec solesest
employeepournettoyerlessurfacesdecuissondu gril,
assurez-vousqu'aucunesole ne restesurlessurfaces
avantdeproc_dera la cuisson.IIest d_conseill_de
nettoyerlessurfacesde cuissonalors que legril est
chaud.
Entreposagede votre gril
, Nettoyezlesgrillesde cuisson.
, Entreposezle gril dansun endroitsec.
, Lorsquele r_servoirde GPL est connect_augril,
entreposez-lesaI'ext@ieurdansunendroitbiena@_et
horsde port_edesenfants.
, Couvrezle grils'il estentrepos_a I'ext@ieur.Lefabricant
offreunchoixcompletde couverturesde gril.
, Entreposezlegrila I'int@ieurSEULEMENTsile r_servoir
deGPLest fermi, d_tach_du grilet entrepos_
I'ext@ieur.
, Lorsquevousvoulezr_utiliserle grilapr_s unep@iode
d'entreposage,suivezles instructionsde _ Nettoyagedu
br_leur_ avantd'allumerlegril.
14
Nettoyagede rassernblagedu br_leur
Suivezcesinstructionspournettoyerou remplacerdes
pi_cesdubrOleurousi vous@rouvezdela difficult_
allumerle gril.
1.Fermeztousles boutons de reglage, ainsique lavalve
du reservoir degaz.
2. Enlevezlesgrillesetlescouvre-brOleurs.
3.Suppressionde reportdestubeset depi_cesde fixation
brOleurs.
4.D_tacher_lectrodedebr_leur.
REMARQUE:lasuppressionI D_tachementdela
m_thoded@enddela configurationdu brOleur.Voirles
diff@entesconfigurationsdanslesillustrationsci-dessous.
5.Soulevezchaquebrt_leuravecsoinenI'_loignantdes
ouverturesdusyst_medevalve.
Nousrecommandonstrois fagonsdenettoyerlestubesdes
brOleurs.Choisissezcellequivoussemblela plusfacile.
(A) Faites un petitcrocheta I'aided'un fil raide(uncintre
I_gerfaittr_sbien I'affaire).Passezlecrochet
plusieursreprisesdanschaquetubede brt_leur.
(B) Enutilisantun goupillon@oit amanchesouple(ne
vousservezpasd'unebrossem_talliqueen laiton),
passez-enlespollsplusieursfoisdanschaquetube
debrQleur.
(C) Portezdes lunettesde s_curit6 : servez-vousd'un
tuyaua airpourforcerunjet d'airdansle tubedu
brQleurquisortirapar lesorificesde combustion.
Examinezchaqueorifice afindevous assurerquede
rairsortparchacundestrous.
6.Passezune brosse m_talliquesurtoutela surface
ext@ieuredubr_leurpour enlever les r_sidusde
nourritureetlessalet_s.
7.Nettoyeztout orificebouch_avecunfil raidetel qu'un
tromboned_pli_.
8.V@ifiezsiles brQleursnesontpas endommag_s.En
raisondeI'usurenormaleet delacorrosion,certainstrous
peuvents'_treagrandis. Sivousnotezdelargesfissures
oudegrandstrous,remplacezle brQleur.
TRESIMPORTANT: lestubes Mani@ecorrecte
debr_leur doivententrer _ defixer lebr_leur
nouveau dartsles ouvertures au syst_mede ,/,7
delavalve. Voir lesschemas_ valve _/
droite.
9. FixezI'_lectrodeaubr_31eur.
10.Replacezsoigneusementles
brt_leurs.
11.Fixez les brt_leursa leur supportdans lefoyer.
12. Repositionnezlesrenfortsdetube etfixezdesaux
brt_leurs.R@ssemblezlescouvre-breleurset les grilles
de cuisson.
13.Avantd'utilisera nouveaulegrilpourla cuisson,faitesun_
essaid'etanch_ite_et une<<v_rificationdureglagedela
flamme_.
tournevis plat
Page 15

La presente garantie n'est valide que pour les appareils achetes aupres d'un detaillant autorise. Le fabricant garantit a I'acheteur initial, et uniquement
celui-ci, que le produit est exempt de tout defaut de materiel et de main-d'ceuvre, dans la mesure oQ il a et6 assemble correctement, qu'il est utilise de fa(_on
normale et raisonnable a des fins personnelles, et ce, pendant la duree de la periode indiquee ci-dessous et commen#ant le jour de la d'achat du produit*.
Le fabricant se reserve le droit de demander au client que les pieces defectueuses lui soient expedi6es, port ou fret prepay6, pour fins d'examen.
Pottle de la eouverture
Brfileur en acier inoxydable
fen et couvercle
Reste des pibces
*Remarque :dans la mesure oO le client inscrit le produit et fournit un exemplaire du regu de caisse ou de la facture portant la date de I'achat, la periode de
couverture de la garantie sera etendue de fa(_on a commencer a la date d'achat du produit.
L'acheteur initial assume la responsabilite de I'ensemble des frais d'expedition pour le remplacement de pieces en vertu des modalites de la
presente garantie limitee.
Cette garantie limitee n'est valide qu'aux Etats-Unis et au Canada; elle n'est en vigueur que pour I'acheteur initial du produit et n'est pas transferable, Le
fabricant exigera une preuve de la date d'achat. Par consequent, vous devez conserver votre regu de caisse ou votre facture. L'enregistrement
du produit ne constitue pas une preuve d'achat. IIn'appartient pas au fabricant de tenir un dossier des achats des clients.
La presente garantie limitee vise UNIQUEMENT le fonctionnement du produit et elle ne touche donc pas les questions esthetiques, telles les
egratignures, les bosses, la corrosion ou la decoloration causee par la chaleur, des nettoyants abrasifs ou chimiques, quelque outil que ce soit employe
Iors de I'assemblage ou de I'installation de I'appareil, la rouille en surface, ni la decoloration des surfaces en acier inoxydable. La peinture n'est pas garatie
et requiert des retouches. Rouille n'est pas considere comme un materiel de fabrication ou de defaut.
La presente garantie limitee ne couvre pas le remboursement de frais associes _ un inconvenient, _ une perte de nourriture, _ des
blessures personnelles ou au bris de biens materiels.
I_LI_MENTS NON REMBOURSf2S PAR LE FABRICANT :
1. Frais d'expedition, service regulier ou accelere, tant pour une piece couverte par la garantie que pour une piece de mchange.
2. Visite d'un reparateur a votre domicile.
3. Les reparations Iorsque le produit est employe a des fins autres qu'un usage normal residentiel pour une seule famille.
4.Des dommages, des defaillances ou des difficultes de fonctionnement decoulant d'un accident, d'une modification, d'une manipulation negligente, d'une
mauvaise utilisation, d'un usage abusif, d'un incendie, d'une inondation, d'une catastrophe naturelle, d'une installation ou d'un entretien inadequats, d'un
montage non conforme aux codes de I'electricite et de plomberie en vigueur, ou de I'utilisation de produits non approuves par le fabricant.
5. Toute perte de nourriture causee par une defaillance du produit ou des difficultes de fonctionnement.
6. Les pieces de rechange ou les coots de la main-d'ceuvre pour un appareil ayant fonctionne hors des Etats-Unis ou du Canada.
7. Le ramassage et la livraison du produit.
8. La reparation de pieces ou de systemes suite a des modifications non autorisees apportees au produit.
9. Le demontage ou la reinstallation de I'appareil.
STIPULATION D'EXONE_RATION DE GARANTIES et LIMITATION DES RECOURS
5 ans/_ compter de la date d'achat *
2 ans/_ compter de la date d'achat *
l an/_ compter de la date d'achat *
P&riode de eouverture
X_y_pe de d_faillances couvertes
Perforation, Defauts de
fabrication et de materiel
Uniquement
La reparation ou le remplacement d'une piece defectueuse constitue votre seul recours en vertu des modalites de la presente garantie limitee. En cas de
problemes de disponibilite des pieces, le constructeur se reserve le droit de remplacer des pieces similaires qui sont egalement fonctionnels. Le fabricant
n'assume aucune responsabilite pour tout dommage consecutif ou accessoire decoulant d'une violation soit de la presente garantie soit de toute autre
garantie tacite, ou pour une defaillance ou des dommages resultant d'une calamite naturelle, d'un entretien inadequat, d'un incendie de graisse, d'un
accident, d'une modification apportee a I'appareil, du remplacement de pieces par une personne autre que le fabricant, d'un mauvais usage, du transport,
d'une utilisation commerciale, d'un usage abusif, de la presence d'environnements hostiles (temps non clement, catastrophes naturelles, alteration par les
animaux), d'une installation inadequate ou non conforme aux codes Iocaux, ou des instructions imprimees du fabricant.
LA PRESENTE GARANTIE LIMtTEE CONSTITUE L'UNIQUE GARANTIE EXPLICITE EMISE PAR LE FABRICANT. LE FABRICANT NE FORMULE
AUCUNE DECLARATION NI DESCRIPTION DE RENDEMENTASSOCIC:EAU PRODUIT, PEU IMPORTE O0 CELLE-Cl POURRAIT FIGURER, SAUF
DANS LES ENONCES DE LA PRESENTE GARANTIE LIMITEE. TOUTE PROTECTION DE GARANTtE TACITE DECOULANT DES LOIS D'UN €:TAT
OU D'UNE PROVINCE, Y COMPRIS LES GARANTIES IMPLICITES DE QUALITE MARCHANDE OU D'ADAPTATION A UN USAGE OU OBJECTIF
PARTICULIER., SE LIMITE _,LA DURC:E DE LA PRESENTE GARANTIE LIMITEE.
Ni les representants commerciaux ni les detaillants vendant I'appareil n'ont I'autorisation de produire une garantie supplementaire ni de promettre des
recours s'ajoutant a ceux mentionnes ci-dessus, qu'ils soient ou non compatibles avec ceux-ci. Darts tousles cas, la responsabilite maximale du fabricant
ne pourra depasser le prix d'achat de I'appareil paye par I'acheteur initial.
REMARQUE : certains Etats ou certaines provinces n'autorisent pas les exclusions ou les restrictions de dommages consecutifs ou accessoires, de sorte
qu'il est possible que certaines des restrictions ou exclusions ci-dessus ne s'appliquent pas a vous. La presente garantie limitee vous donne des droits
juridiques specifiques qui sont exposes aux presentes. IIest possible que vous disposiez d'autres droits qui peuvent varier d'un Etat et d'une province
I'autre. Dans I'Etat de Californie uniquement, si la remise en etat ou le remplacement du produit n'est pas commercialement possible, le detaillant ayant
vendu I'appareil ou le fabricant rembourseront le montant paye par I'acheteur, et deduiront une somme directement proportionnelle a I'utilisation par
I'acheteur initial avant la decouverte de la non-conformite. De plus, dans I'etat de Californie uniquement, vous pouvez rapporter I'appareil au detaillant qui
vous a vendu le produit afin de beneficier des privileges que vous donne la presente garantie limitee.
Si vous desimz qu'une obligation, quelle qu'elle soit, soit executee en vertu de la presente garantie limitee, vous devez ecrire a :
Les retours de marchandise des clients ne seront acceptes que si une autorisation de retour (Return Authorization) valide a ete obtenue au prealable. Les
retours autorises doivent etre clairement identifies par leur numero sur I'exterieur de I'emballage. De plus, le fret ou les frais d'expedition doivent 6tre
prepayes. Tout retourde marchandise d'un client qui ne satisfait pas aces criteres sera refuse.
Consumer Relations
P. O. Box 1240
Columbus, GA 31902-1240
15
Page 16

Persu propiaseguridad....................... 16
Guiaparaasara la parrilla.................. 17-18
Usey mantenimiento...................... 19-21
Garantialimitada............................ 22
Listade piezas.............................. 25
Vistaesquematicadelas piezas................ 26
Armado ................................ 27-36
Resoluci6ndeproblemas................... 41-42
Tarjetade inscripci6n......................... 43
Simbolos de seguridad
Lossimbolosy lascasillasilustradasmasadelante
explicanIo que significacadaencabezado.Leay cumpla
Ioindicadoenlos mensajesque se encuentranen todo
el manual.
PELIGRO:Indicauna situaci6npeligrosainminente
que,de no evitarse,ocasionaralamuerteo lesiones
graves.
El nocumplir con todas instrucciones del
fabficante puede ocasionar gravesy/o daSos
materials,
S61oparauso particular.No Io useparafines
comerciales.
ADVERTENC|A
Antesdeempezara ensamblarla parrillaycocinar,
leay sigatodaslasindicacionesdeseguridad,las
instruccionesde ensambladoy lasinstruccionesde
useydecuidado
Antesdeempezara ensamblarla parrillaycocinar,
lea ysigatodaslasindicacionesdeseguridad,las
instruccionesde ensambladoy lasinstruccionesde
usey decuidado
CiertasI?uedentener bordescortantes. Si es
necesano,useguantes protectores.
I ["DW"TE"C'"I
FuegodeGrasa
• No es posible apagarlos fuegos provocados por
la grasa cerrando la tap& Por razonesde
seguridad, las parfillas tienen aberturas de
ventilaci6n.
• No use aguaparaapagar los fuegos provocados
pot la grasa, Esto puedeocasionar lesiones, Si
surge unfuego provocado pot la grasa, cierre las
peri!lasy eltanque degas.
• Siel asador no seha limpiado regularmente,
podria ocurrir fuego causado pot la grasa que
podria da_ar el producto, Prestemucha
atenci6n mientras precalienta o quemalos
residuos de comida para asegurarque no se
causefuego debido a la grasa,Siga las
instrucciones de Limpiezageneral del asador y
deLimpieza del conjunto del quemador para
prevenir fuego causado por grasas.
•Lamejor formadeprevenk fuegos
causadospor grasas es la limpieza
regular delasador.
m m
El usode macetas demasde6 cuartos de la
capacidad podriasuperar limitede peso delado el
quemador plataforma o lado plataforma Io que
resulta enelfracaso dela parrilla cardto
componentes.
ADVERTENClA:Indicaunasituaci6n
potencialmentepeligrosaque,de no evitarse,
podria causarla muerteo lesionesgraves.
[ ADVERTENCilA
ADVERTENCIA:Indicauna situaci6npotencialmente
peligrosao unapracticainseguraque,de noevitarse,
podriacausar lesionesleveso menores.
A LA PERSONA QUE |NSTALE
O ENSAN|BLE ESTA PARR|LLA:
Dejeestemanualal cliente.
AL CONSUIVI|DOR:
ConserveestemanualparaqueIopueda
consultarenelfuturo.
Si sienteolora gas:
1, Cierre el paso degas al aparato.
2. Apague toda llamaal descubierto.
3. Abra la tap&
4. Si el olor continea,guarde lejos de la
aplicaci6n y Ilame inmediatamentesusurtidor
del gasosu cuerpo de bomberos.
1. Noguardeni use gasolinani otros gaseso
liquidos inflamables cercade esteni de
cualquier otto aparato.
2. Noguarde un tanque de gas propano, que no
esteconectado, cerca deeste ni decualquier
ottoaparato,
PROPOSICION65DELESTADODE
CALIFORNIA
1. Enel estadodeCalifornia se sabe que los
subproductos de iacombusti6n, que se
producen al usareste producto, contienen
substancias quimicas quecausan cancer,
defectos congenitos u otras lesiones al
aparato reproductor.
2. Esteproducto contiene substancias
quimicas, incluyendo el plomo y compuestos
de plomo, queen el estadode California se
sabeque las causancancer, defectos
congenitos uotras lesiones al aparato
reproductor.
Lavese/as manos despu_sde manipular este
Nointente reparar ni modificar la unidad de la
manguera/lavalvula/el regulador debido aun
"supuesto" defecto. Toda modificacion a esta
unidad anularala garantiay crearael fiesgo de una
fuga degas eincendio, Use _nicamente repuestos
autorizados, suministrados por el fabficante.
Medidasdeseguridad paralainstalacion
• Utilice laparrilla,talcomese compr6,s61ocon LP
(propano),elgas yel regulador/valvulade montaje
suministrado.Si su parrillaes dedoblecombustible
listo,un kitde conversi6ndebeseradquiridopara su
usecongas natural.
• La instalaci6ndela parrilladebecumplirconlas
disposicionesde losc6digoslocales,o,en su defecto,
conel NationalFuel Gas Code (oC6digo nacional
sobre gases combustibles), y las normas NFPA54/
ANSIZ223.1 yNatural Gas and PropaneInstallation
Code(C6digo de la instalaci6n del gas natural ydel
propano), CSAB149,1.
. Todoslosaccesorioselectricos(talcome el asador)
debenestar conectadosa tierrade conformidadcon
losc6digoslocales,ocon elNational Electrical Code
(Codigo nacional sobre electrieidad),ANSI/ NFPA
70. Mantengatodocableelectricoo tuberiade
suministrodecombustiblealejadosde lassuperficies
calientes.
. Estaparrillat]nicamentecuentaconla certificaci6nde
seguridadparaser usadaen losEstadosLlnidos.Nola
modifiqueparausarlaen ningt]notroluganCualquier
modificaci6npuedeponeren peligrosuseguridad.
16
• NUNCAguarde los cilindros de gas de repuesto
debajo delaparato, cerca del mismo, ni enareas
cerradas.
I I
• Nunca cargue el tanque con mas det80%de su
capacidad.
• Los tanques degas propano de repuesto
sobrecargados o mal Ilenadosson peligrosos, ya
que lav_lvula deseguridad puededejar salir gas.
Esto puedeprovocar incendios intensos que
pueden causar daSos materiales, lesiones graves
o lamuerte,
• Si observa, hueleo escuchauna fugade gas,
alejese de inmediatodet cilindro y detaparato, y
Hamea los bomberos,
Page 17

Cuandola useporprimeravez
LeaelManualdearmadode la unidady verifiqueparrilla
estecorrectamentearmada.Antesde usarlaparrilla por
primeravez,retirede las superficiesdela mismatodoel
materialpublicitariosobreel lugardeventa. Le
recomendamosque,antesde usarlaper primeravez,la
hagafuncionaren lagraduaci6nmasalta duranteunos
15o20 minutos. Estoayudaraa eliminarlos residues
delaceite utilizadodurantelafabricaci6n.
Piedrasdielava/ briquetas
Estaparrillaagas hasidedisei_ada,fabricaday probada
paraserusadacontiemdasde calorparaofrecerun
calentamientomasuniforme,mejorarel procesode
limpieza,y reducirlasIlamaradas. Elagregarpiedrasde
lava,carb6no briquetasdecualquiertipoocasionarauna
deficientecombusti6ny aumentaralasprobabilidadesde
quese incendielagrasa,yrecomendamosqueno se
haga. El usede briquetas,piedrasde lavao carb6nen
estaparrillaanularasugarantia.Paraunsaborahumado
masacentuado,recomendamosquese useun
ahumadorconastillasdemadera.
Temperatura-SOLOconvectiva Pardllas
El medidordetemperaturaubicadoenla tapade la
parrillamidelatemperaturadelaire. Latemperatura
interiorde laparrillanosera nuncatanalta comela de la
superficiedecocinar.
Nota:Desde1995,todoslos reguladores(la parte que se
acoplaal tanquedegas pararegularelflujode gas)
tienenincorporadoundispositivode seguridadquelimita
el flujo degasen case dequese produzcaunafuga.
Ustedpuedeactivarsin darsecuentaestedispositivode
seguridad,aunquenoexistaningunafuga de gas.Esto
ocurregeneralmentecuandoustedabreel gasdesdela
perillade control de laparrillaantesdeabrir lavalvuladel
tanquede gas.Si seactivael dispositivodeseguridad
del reguladordegas, laparrillas61osecalentaraa una
temperaturade entre 250° F y 300° F,at]ncuandotodos
losquemadoresestenen lagraduaci6nalta.
Comocalentar laparrilla
ComoIohacecon elhornode la cocinadesu casa,debe
calentarsu parrillaantesde usarla,paraquefuncione
6ptimamente.Caliente laparrillaenla graduaci6nde
llamaalta duranteunos10o 15minutos,o mastiemposi
lascondicionesdeltiempoIoexigen,Si tienealguna
preguntasobrec6moencenderla,consulteenla Guiadel
productolas instruccionesdeencendidodela parrilla.
Parasucomodidad,laparrillatrae unacadenay un
orificioparaelencendidoconf6sforos.
Verdaderamente,el asaralaire librees bastantesimple.
Podrapreparardeliciosassalchichas,hamburguesaso
filetes decarnedesdela primeravezqueIo haga. Con
la experiencia,aprenderaa usarsuparrillapara
preparartodoel tiempocomidascreativasy originales.
Elartede cocinarsebasaen esteconocimiento.Antes
deempezara cocinaren la parrilla,organicesu comida
seg_nel metododecocci6ny eltiemponecesarioy
prepareelareaparacocinardemaneraeficiente.
Cocci6n directa
Lacocci6ndirectaconsisteencocinarlacarne
directamentesobre lallama,aalta temperatura. Esla
forma perfectadedorarr@idamentelosfiletes decarne,
laschuletasy trozosde carney verdurasdemenor
tamaSoquepuedeservirr@idamente.
J-r
d
Cocci6n indirecta
Paralacoccionindirectaseusanalgunosquemadores
parahacercircularel calorportoda la parrilla,sin
contactodirectoentre la carney lallama. Lacarnese
colocasobreel quemadorque estaapagado. Este
metodoseutilizageneralmenteparacocinarcortes
grandesdecameyde aves. Debajode la carne,se
puedecolocarunrecipienteparalagrasay eljugode la
carne,para ayudaraminimizarel trabajodelimpieza.
_JJ
i,_' ' d_ _
Para cocinar en asador
Lamejormaneradecocinarcarnes en piezas
'redondas',come asadosgrandes,avesenterasy
cerdo,es usandoelasador. PorIogeneralsenecesita
unmotorauxiliary unabarrade asar quepermitegirar la
carnea velocidadconstante.Se cocinamejorconel
asadorinstaladodelantede un quemadorespecialpara
asador,o conuna instalacionde quemadorparacocci6n
indirecta. Debajode la carne,se puedecolocarun
recipienteparala grasay eljugo dela carne,para
facilitareltrabajode limpieza.
Seguridadconlos alimentos
Laseguridadconlosalimentoses unapartemuy
importantedeldisfrute de suparrilladaalairelibre.
Sigaestoscuatro pasosbasicosparaprotegera los
alimentoscontralas bacteriasnocivas:
Laveselas manos,lave losutensiliosy las
superficiesconaguajabonosacaliente,antesy
despuesde manipularcamecruda.
S&EaLacZOJ_Mantengalascarnesseparadasde los
alimentoslistosparacomer,paraevitarlacontaminaci6n
cruzada. Usebandejasy utensilioslimpiosparaservir
losalimentospreparados.
Cocinebienlas carnesylaspiezasdeave,
paramatarlasbacterias. Useunterm6metropara
verificarque losalimentosalcancenla temperatura
internaadecuada.
Refrigeraci6n:Refrigereconprontitudlos alimentos
preparadosylas sobras.
Regulador Tuercadeuni6n
Si su parrilla no secalienta a masde 250° F o 300° F,
deberealizar los siguientes pasos parareinicializar el
dispositivo de seguridad:
1.Abrala tapadela parrilla.
2.Cierretodaslas perillasdeltablerode control.
3.Cierrela perilladeltanque.
4.Desconecteel reguladordel tanquedegas.
5.Espere30segundos.
6.Vuelvaaconectarel reguladoral tanque.
7.Lentamente,abra percompletolaperilladel tanque.
Nohagademasiadafuerzasobrela valvulaenla
posici6nde aperturatotal,paraevitardaSarla.
8.Abrala perilladecontrolque corresponday encienda
la parrilla seg0n las instrucciones.
Enlaguia delproductose incluyeunailustraci6nsobre
esteproceso. Leamayor informaci6nenla secci6n
referenteala resoluci6ndeproblemas
17
Page 18

Laexperienciaencocinaralaparrillaseadquiereconla
practicayesaconsejablequesequedejuntoalaparrilla
mientrascocine.Elasaralaparrillaesunaactividadque
dependedetouchesfactoresexternos.Entiempofrio,
necesitaraunamayorcantidaddecalorparaalcanzarla
temperaturadecocci6nideal,ypuedetomarmastiempo
elcocinarlacarne.Latemperaturainternayelgrosorde
lacarnepuedentambi@afectareltiempodecocci6n.
Tomamastiempococinarlostrozosdecarnefriesomas
gruesos.
Temperaturainternadelacame
Elexteriordelascarnespreparadasalaparrillaa
menudosedorar@idamente.Portanto,useun
term6metroparacarnesparaverificarquelacarnehaya
alcanzadouna temperaturadecocci6ninternaadecuada.
USDA Temperaturas Internas Minimas
SegurasRecomendadas
Carnedevaca,Ternera,Cordero,Filetes, 145° F
Asado,y LomodeCerdo (con3 minutos
derepose)
Pescado 145° F
Carne,Ternera,Cordero,y Cerdo- Molido 160° F
Platosde Huevo 160° F
Turquia,PolIoy PatoEntero,Pedazosy Tierra 165° F
Consulteconel MinisteriodeAgriculturade EEUUpara
obtenerinformaci6ncompletayactualizada. Nuestra
tabladetemperaturasse basaen las normasdel
MinisteriodedeAgriculturadeEE UUpara establecerel
gradedecocci6nde lacarne. Verifiquelasen
www.isitdoneyet.gov
Salsas
Lassalsasquecontienenaz0carygrasapuedenproducir
Ilamaradasy quemarlacomida. Engeneral,aplique
estassalsasdurantelos 01times10minutosdecocci6n.
Tengaencuentaque aplicarmuchasalsao glaseadova a
exigirdespuesunmayortrabajode limpieza.
Adobos y alifioe
Paramejorarel saborde la comidapreparadaa la parrilla,
debeaplicarseleunadobeliquidoo un aliSosecoantes
decocinarla. Lacarnese puededejarremojaren el
adoboo se lepuedeinyectarel adobehasta24 horas
antesdecocinarlaa la parrilla.Los aliSossecosse
puedenaplicardirectamentea lacarneinmediatamente
antesdecocinarlaa la parilla.
Astillas de madera
ParaIograrunmayorsabera ahumadoalcocinara la
parrilla,pruebeusar astillasdemadera. Empapeen
agualas astillasduranteunos30 minutesantesde
colocarlasenelahumadoroelrecipiente. Coloqueel
ahumadoro recipientesobrelapartesuperiorde la
parrilladecocci6n,encimade la llama. Enciendala
parrillahastaquela maderacomienceaahumar.
Reduzcala llamaa latemperaturanecesariapara
cocinar,ycoloquela comidasobrelaparrillade cocci6n,
distribuyendolacomedesee. Cierre la tapaparaatrapar
el humo. Lasmaderasdurasespecialmenteadecuadas
paracocinarsonlasdealisos, manzanos,parras,nogal
americano,mezquites,y pacana.
Brochetas
Lasbrochetasde metaldebenser planas,de mango
largo. Lasredondasdejanque lacomida girecuandose
voltean,per Ioque es posiblequenose cocinen
uniformemente.Usebrochetasdemetalcuandococine
kebabsdecarne. Las brochetasde maderadeben
empaparseenaguadurante unaheraantesde usarlas,
y son maspracticasparacomidasquese preparan
r@idamente,comoverdurasyfrutas.
Utensilios
Enlugarde untenedor,usetenazaso una espatulapara
manipularla comida,y no volteela comidademasiadas
veces.El perforarlacomidacon untenedorhacequela
carne pierdasu jugo,y puedeproducirIlamaradas.
LPor quelimpiarla?
Todosconocemoselantiguodiche,'masvaleprevenir
quelamentar',queviene muyal casecuandosetratade
limpiarla parrilla.
Limpieza habitual
Esimportanteynecesariala limpiezaperi6dicade la
parrilla,puesse puedenproducirincendiossise acumula
grasay restosde comidaenel fondode la parrilla.Cada
vez,despuesde usarla,limpiecon uncepillopara
parrillaslos restos de comidaquequedanenla rejillade
cocci6ny dentrode laparrilla. Hagaestodespuesde
quela parrillasehayaenfriado. Estaparrilla no haside
diseSadapara"quemar"losresiduoscerrandolatapay
dejandoencendidoslosquemadoresduranteuntiempo
prolongado.El excesivocalorque se producepuede
provocarelincendiode lagrasay causardaSos
permanentesasu parrilla.
Limpieza general
PiezasDlasticas:Lavelas conaguajabonosatibiay
sequelasconun paso.No use productosde limpieza
abrasives,desgrasadoresniproductosde limpiezade
parrillaconcentradosparalaspiezasplasticas.Las
mismasse puedendaSarycausarfallas.
SuperficiesDorcelanizadas:Debidoa su composici6n
vitrea,la mayoriade los residuesse puedeeliminarcon
unpasoempapadoen unasoluci6nde bicarbonatode
sodayagua,o conun productode limpiezaparavidrios.
Use un polvodelimpiezano abrasiveparalasmanchas
dificilesdeeliminar.
18
SuperficiesDintadas:Lavelasconun detergentedelicado
ounproductodelimpiezano abrasivoy aguatibia.
Sequelascon un pasosuave,noabrasive.
Superficiesde aceroinoxidable: En
determinadascondiciones,elacero
inoxidablesepuedeoxidar. Esto
puededeberseafactoresdel medio
ambiente,comela presenciadecloroo
desal enel agua,o 0tilesde limpieza
inapropiados,comealambreo
esponjasde acero.Tambiense puede
decolorardebidoalcalor,las
substanciasquimicaso la acumulaci6n
degrasa. Paraconservarel aspecto
dealta calidadde suparrilla,lavelacon
undetergentesuavey con aguatibia,o
con unproductode limpiezapara
parrillasdeaceroinoxidable.Esposible
queparalosdep6sitosde grasa
quemadadebausar unaalmohadillade
limpiezaabrasivadeplastico.Para
evitarquese daSe,0sela Onicamente
en ladirecci6ndel pulidodel acabado.
Nousealmohadillasabrasivasenlas
areas dondehayandibujos.
Superficiesparacocinar:Antesdeusar la parrilla
verifiquequenoquedencerdassueltassobreestas.Se
recomiendanolimpiarlassuperficiesparacocinar
cuandola parrillaeste aOncaliente
Comoguardar su parrilla
oLimpielas parrillasdecocci6n.
oGuardelaen un lugarseco.
oCuandoel tanquede gasesteconectadoa laparrilla,
guardelaalaire libre, en unlugar bienventiladoy
fueradelalcancede losniSos.
o Cubralaparrillasila guardaalaire libre. Elfabricante
tieneasu disposici6nunavariedadde cubiertaspara
parrillas.
oGuardelaparrillabajotecho0NICAMENTEsi ha
cerradolavalvuladel tanquedegasv Ioha
desconectadoyretiradodela parrills. Nuncaguarde
untanquedegas bajotecho.
• Cuando retirelaparrilla del lugardondela tiene
guardada,sigalas instruccionesde 'limpieza de la
unidaddel quemador'en lasecci6ntituladaUsey
mantenimientodela guiadel producto.
Bichos
Lasarahassuelenconstruirsusnidosen lostubes
Venturidelasparrillas. Estostubosdebenexaminarsey
limpiarseregularmenteparaevitarquese produzcan
obstrucciones.Leatoda la informaci6nsobreeste
asuntoenla secci6ndeesta guiatituladaUsey
mantenimiento.
ParrilladeChar-Broil@estaequipadocon GearTraxTM,
quepermiteel montajefacil denuestraexclusivalineade
accesoriosGearTrax.Visitecharbroil.cornpara ver la
listacompletadeaccesoriosGearTrax. *Disponibleen
la mayoriadelos modelos
w w.¢harbroil.¢om
TodoIo quenecesiteparacocinar ala
parrilla
Page 19

Remoci6n,transporteyalmacenamiento
deltanquedegaspropano
.CIERREtodas las perillasde controly lavalvuladel
tanque.Girela tuercadeuni6nen sentidocontrarioalas
agujasdel reloj,a manosolamente;nouseherramientas
paradesconectarla.Aflojeel tornillo,ubicadodebajode
la repisa,o desconecteeldispositivode retenci6ndel
tanque,luego levanteel tanquedegas parasacarlodel
carrito. Instalelatapa deseguridadenla valvuladel
tanquede gas.Usesiemprela tapay lacorreaque
vienencon lavalvula.Si latapa de seguridad no se
usa talcomo seindica, esto puedeocasionar
lesiones o da_os materialesgraves.
.Lostanquesdegasdesconectados,guardadosoen
transporte,debentener instaladalatapa deseguridad
(comose ilustra).Noguardeel tanquedegasensitios
cerrados,talescomococheras,garajes,porches,patios
techadosu otrasedificaciones.
.Noguardeuntanquedegas enunareadondeeljuegan
nifios.
V_lvuladel _ ff.____.._'_ Tapa de seguridad
tanque de ga
Tiradesujeci6n
Tanquediegaspropano
• El tanque de gas que usecon su parrilla debe
cumplir los siguientes requisitos:
• Uset]nicamentetanquesdegasquetenganlas
siguientesmedidasobligatorias:12 PULGADAS(30.5
ore)(diametro)x 18PULGADAS(45.7cm) (altura),con
unacapacidadmaximade20 lb. (9kg).
. Lostanquesde gaspropanodebenserfabricadosy
codificadossegt]nlasespecificacionesparatanquesde
gaspropanodel DepartamentodeTransportede los
EstadosUnidos(DOT),oenCanada,segt]nlasnormas
CAN/CSA-B339,sobrecilindros,esferasy tubosparael
transportede mercanciaspeligrosas delMinisteriode
Transportesde Canada(CT).El c6digose encuentraen
el collarindeltanquede gas.
• La valvuladeltanque degasdebetener:
.Unasalidadetipo 1,compatible
conelreguladoro laparrilla.
.Unavalvulade paso
deseguridad. Manilladel dispositivo de
.Undispositivode seguridadvolumetrica(OPDpor
sussiglasen ingles)certificadopor UL. Esta
caracteristicadeseguridadOPDse identifica
medianteuna manillade forma triangular.Use
_nicamente tanques equipados con v_lvulas de
este tipo.
, El tanquedegasdebe tener un dispositivodeextracci6n
del vaporyvenircon uncollarinparaprotegersu
valvula.Siempremantengalostanquesdegas en
posici6nverticaldurantesu uso,su transporteo su
almacenamiento.
seguridad volum_trica
Tanquedegasen posici6n
verticalparaextraerel vapor
r_f
Cargade los tanques de gas propano
•Recurrasolamenteavendedoresautorizadosy con
experiencia.
•Elvendedordegasdebe purgar el tanque nuevo
antesdecargarlo.
•Elvendedornodebe cargarNUNCAeltanquedegas
conmas del80%desu volumen.Elvolumende propano
enel tanquepuedevariarcon latemperatura.
•Siel reguladoresta empafiado,eso indicaqueel tanque
estasobrecargado.Cierrede inmediatolavalvuladel
tanquey soliciteayudadel vendedordegas propano.
.Nodejeescapargas propanoala atm6sfera.Estaes
unapracticapeligrosa.
.Soliciteayudadelvendedorde propanoo delos
bomberos,paravaciarel gasde su tanque.Identifiquea
los vendedoresautorizadosde propanodesuregi6nen
la secci6nde"compafiiasdegas" de laguia telef6nica.
Cambio deltanquede gas
.Muchoscomerciantesminoristasquevendenparrillas,
le ofrecenlaopci6nde cambiarsu tanquedegasvacio
medianteunservicioderecambio.Empleeunicamente
empresasde recambiode buenareputaci6n,que
inspeccionen,carguencon precisi6n,verifiqueny
certifiquensuscilindros.Cambiesu tanque solo pot
otrostanques equipadoscon eldispositivo de
segurJdadvolumetrica quesedescribeen la
secci6n de tanques degas de estemanual,
•Siempremantengalostanquesde gas,nuevosy de
repuesto,en posici6nverticaldurantesu uso,su
transporteo su almacenamiento.
.Verifique que el tanquede gas, nuevo o de
recambio, notenga fugas ANTESdeconectarlo a la
parrilla.
-Coloque latapadeseguridadsobrela salidade la
valvuladeltanquede gascuandono Iouse. Instale
t]nicamenteel tipo detapadeseguridadqueviene
conlavalvuladel tanque.Losotrostiposdetapaso
taponespuedendejarescaparel gaspropano.
Pruebaparadetectarfugas deltanque de
gas propano
Porsu propia su seguridad
•Sedebeefectuarlapruebaparadetectarfugas cada
vezquese cambieo se recargueeltanque.
•Nofume durantela pruebaparadetectarfugas.
•No useuna llamaal descubiertoparacomprobarsi el
tanquetienefugas.
•Lapruebaparadetectarfugas de laparrillase debe
efectuaralaire libre,en un area bienventilada,alejada
detoda fuentedeignici6ntal comolosartefactosagaso
electricos.Durantela pruebaparadetectarfugas,
mantengalaparrillaalejadadelasllamasal descubierto
o delaschispas.
.Use una brochade pinturalimpiayunasoluci6nde
50/50de aguayjab6nsuave. Pinteconla soluci6n
jabonosalas areas indicadaspor lasflechasen la
ilustraci6nquesigue.
A Nouse productos de limpiezadel hogar. Esto
puededaSarloscomponentesdelcircuitode gas.
b .............
2.Giretodas lasperillasde control a laposici6n
APAGADO(OFF).
3,ClERREel tanquedegas,girandola manillade la
valvulaenel sentidodelasagujasdelreloj,hastaque
se detenga.
4,Retirelatapaseguridaddelavalvuladeltanque de
gas.Usesiemprelatapay lacorreaquevienenconla
valvula.
Cierre enel ff- _,\-_\ dispositivo de
sentido de las[ S--_ _q_ sequridad
agujasdel _ L_<_ "_-_- vol-umetrJca
reloj f] _,,j_
_--,_ Manilla del
_,_ (,/_/,_,. Salida tipo 1,con
/ _[_(_sca e×terJor
seguridadf _L?"_
Correa y tapa
iNo use untap6n POL para
transporte (la piezade
pl_stJcocon roscas enel
exterior)!Anulara la
caracteristica de seguridad
de la valvula.
5.Sostengaelreguladore inserteel
manguitodeuni6nen la valvuladel
tanquede gas.Aprietea manola tuerca
deuni6n,mientrassostieneel regulador
enlinearectacon la valvuladeltanque,
paranosaltarningunaroscadela
conexi6n.
El manguito de union debe
quedar centrado en la
valvula del tanque de gas.
Tuercade uni6n
Sostengala tuerca deuni6n y
el regulador, como se ilustra,
paraconectarlos bien a la
v_lvula del tanque.
6,Girelatuercade uni6nenel sentidode lasagujasdel
reloj,apretandolahastaquenose muevamas.El
reguladorformaraun selloenel dispositivodeseguridad
dela valvuladeltanque,Ioque crearaciertaresistencia.
Sedebera hacer girar la tuerca entre uncuartoy tres
cuartos de vuelta adicionales, para completar la
cone×i6n.Apri_tela a mano, no useherramientas.
NOTA:Sino puedecompletarla conexi6n,desconecteel
reguladorrepita lospasos5y 6. Sia pesarde haberlo
hecho,todaviano puedecompletarlaconexi6n ino use
este regulador!
Elgas propano (GLP)
•Esat6xico,inodoroe incoloroenel momentoenquese
produce.Parasu seguridad, al gas propanose le ha
incorporadounolor (parecidoal delacol podrida),de
modoque sepuedaoler.
•Elgas propanoessumamenteinflamabley se puede
encenderenformainesperadaalmezclarsecon elaire.
Si aparecenburbujasqueaumentande tamafio,no
use nimuevael tanquede gas.iComuniqueseconel
proveedordegaspropanoocon los bomberos!
Comoconectar el regulador altanquedie
gaspropano
1.Eltanquede gasdebequedarbienfijado a laparrilla.
(Lealasecci6ndeensamblado.)
19
. Nointroduzcaningunaherramientani ningun
objetoextrafioen lasalidadela valvulanien la
valvuladeseguridad.Puededafiarlay causaruna
fuga.Lasfugasde gaspropanopuedencausar
explosiones,incendios,lesionesgravesola muerte.
Page 20

oNouselaparrillasinanteshaberverificadoqueno
tengafugas.
oEncasodedete,ctarunafugaencualquier
momento,iDETENGASE!
oSinopuededetenerunafugadegascerrandola
zonabajavavledeltanquedegasyIlamealos
bomberos.
Pruebapara detectarfugas de las
valvulas, lasmanguerasy el regulador
1,Cierretodas lasperiflas de control de la parrflla.
2.Cerci6resede que elreguladorestebienconectadoal
tanquede gas.
3.Abraporcompletolavalvula deltanque,girandola
manillaensentidocontrarioalas agujasdelreloj.Si
escuchaunsonido de rafaga,cierredeinmediatoel
pasodegas. Laconexi6ntieneunafugaconsiderable.
Corrija estasituaci6nantes decontinuar.
4.Apliquesoluci6njabonosacon la brocha,en lasareas
marcadascon uncirculoenla ilustraci6nquesigue, u
otrosaccesoriossimilaresen su parrilla.
* Limpiela parrillaconfrecuencia;depreferenciacada
vez despuesde usarla. Si utilizauncepillode cerdas
paralimpiarlassuperficiesparacocinar,antesde usar
laparrilla verifiquequeno quedencerdassueltas
sobre estas.Serecomiendanolimpiarlas superficies
paracocinarcuandola parrillaest6a0n caliente.
- Siobservaquede la parrillacaengotasde ,qrasau
otrassustanciascalientessobrela valvula,[a
mangueraoel regulador,cierre inmediatamenteel
pasodegas.Establezcalacausa,corrijael problema,
limpiee inspeccionelavalvula,la mangueray el
regulador,antesde proseguir.Hagaunapruebapara
detectarfugas.
- Mantengalimpiasy sin residuoslasaberturasde
ventilacl6ndel reclnto parael cilindrodegas (del
carrito de laparrilla).
- Noguardeobjetosni materialesdentrodelcarritode
la parrillacluepuedanbloquearla circulaci6ndel aire
de la combusti6na laparteinferiordeltablerode
controlode lacaja de lacamaradecombusti6n.
- Elreguladorpuedeemitirunsonidozumbanteo
sibilantedurantesu uso.Estonoafectarala
seguridadni elusodela parrilla.
- Si tieneunproblemacon la parrilla,lea lasecci6nde
Resoluci6ndeproblemas.
- Siel reguladorseempaSa,apagueinmediatamentela
parrillay cierrela valvuladeltanquedegas.Esto
indicaqueexisteunproblemacon el tanquey no
debeser usadoen nlngOnotroproducto,iDevuelvalo
al proveedor!
C6mousarel encendedor
- 11ose incline sobre laparrilla cuando Jaeste
encendJendo,
1,ApagueO lasvalvulasdecontroldelmecherode gas.
2.Enciendael gas enel cilindrodelLP.
3.Abra latapa durante Jailuminacion.
4.Paraencender,empujarydar vueltaa la perilladela
hornillade ignici6nal _ ALTA.
5.1nmediatamente,empujey sostengael bot6n
ELECTRONICOde laIGNICIONhastaquela hornilla
se encienda.
6.Si laignici6nno ocurreen 5segundos,apagueO los
controlesde lahornilla,espere5 minutosy repitael
procedimientodela iluminaci6n.Siel quemadorno
funciona,siga lasinstruccionesdelailuminaci6ndel
f6sforo.
7.Paraencenderlas hornillasrestantes,devueltaa la
perillaa la posici6ndel_ ALTAquecomienzacon
lashornillasmascercanasa lasHORNILLASde
IG111CIONprimero.
8.Paralas ,parrillasequipadas de laIGNICION
ELECTRONICAen cada hornJlla:
Repitalospasos4 a6 paraencendercadahornilla.
9.Unavezquecada hornillahaencendido,de vuelta a
lasperillasalajustedeseado.
NOTA: Paramayorclaridad, NOTA:Su parrilla
no se ilustralamascarade puedeno tener
del estantedel quemador una hornilla
lateral yotraspartes, lateral.
5.SiaparecenburbujasqueaumentandetamaSo,existe
unafuga. Cierrede inmediatolavalvuladel tanquede
gasyvuelvaa apretarlasconexiones.Si nopuede
elimJnarlas fugas, no intenterepararlas. Solicite
unapiezade repuesto.Encarguelaspiezasnuevas
indicandoel n0merodeserie,demodeloy el nombre
delas piezasquerequiera(vea lalistade piezas),
Ilamandoalcentrode serviciopara parrillas
6.Despuesdehaceruna pruebaparadetectarfugas,
cierresiempre lavalvuladel tanquede gas,girandola
manillaenel sentidodelasagujasdelreloj.
oElaparatoa gasparauso alaire librenoha sido
diseSadoparaserinstaladoenembarcaciones.
oElaparatoa gasparausoal aire libreno hasido
diseSadoparaserinstaladoenvehiculosderecreo.
oNuncatratede conectarestaparrillaal sistemade
gas propanoindependientedeunremolquede
recreoode unacasa rodante.
Consejos de seguridad
- Verifiquequela tuercadeuni6nestebienapretada
antesdeabrirla valvuladeltanquedegas.
- Cuandonouselaparrilla,cierre todaslas perillasde
controly la valvuladel tanquedegas.
- Nuncamuevala parrillacuandola esteusandoo
mientrasestecaliente.
- Algunassuperficiespuedenestar calientesduranteel
uso. Useutensiliosparaparrillade mangolargoy
guantesparahornear,paraevitarquemadurasy
salpicaduras.
- Elpesomaximoque soportanelquemadorlateraly la
repisalateralesde 10 lb.
- La bandejao el recipienteparala ,qrasadebe estar
colocadosiempreque usela parr[lla,y Iodebe vaciar
cadavezdespuesde usarla.1/oretirela bandeiao el
recipienteparala grasahastaque la parrillase haya
enfnadoporcompleto.
Parausar su parrilla en formaseguray
paraevitar lesionesgraves:
. Nodejeque]osniSosusenlaparrillaniquejueguencercade
lamisma,
* Mantengael area de laparrillalimpiaysin
materialescombustibles.
*Noobstruya losorificios lateralesni losde laparte
posteriorde laparrilla.
* Reviseperi6dicamentelasllamasdelquemador.
* Uselaparrilla s61oen lugaresbienventilados.
NUNCAlauseen lugarescerradostales como
cocheras,garajes,porches,patiostechadoso
debajodesuperficiesde ningOntipo.
*Nousecarb6nni briquetasdeceramicaen una
parrillaa gas.
" Nocubra lasreillascon papelaluminioniconningOn
otromatera. Esteboqueara avent ac6n de
quemadory crearasituacionespeligrosasque
podrian provocardaSosmaterialeso lesiones
corporales.
*Use laparrilla al menos a3 pies dedistancia de
cualquier paredo superficie. Deeun espaciode 10
piesentrelaparrillaylosobjetosquepuedan
incendiarseoque seanfuentesde ignici6n,talcomo
lasllamaspilotodecalentadoresdeagua,aparatos
electricosconectadoseta
• NUNCAtrate de encender el quemadorcon la
tapacerrada.LasacumulacJonesde gas no
encendidoen Jasparriflas tapadas son
pelJgrosas.
• Nunca use Japarrillasi eJtanque de gas no
esta en laposici6n correcta que se especifica
en lasinstrucciones dearmado,
• Siempre cierre la valvula del tanque de gasy
retire Jatuercade uni6n antes de mover el
tanque del sitio especifico deuso.
• Para personas que riven en apartamentos:
Pidaleal administradorque le indiquelos requisitos
y los c6digoscontra incendiosque correspondenal
usodeparrillasde gas propanoen un edificiode
apartamentos.Si sele permiteusarla,hagaloal aire
libre,enla planta baja,dejandoun espaciolibrede
tres(3)piesentrela parril/ay lasparedeso las
barandillas.Nola useen ba[conesodebajode los
mlsmos.
20
CIERRElos controles y la fuente de suministro
degas cuando no la use.
ADVI=RTI=NCiA
Si NOse enciendeen 5segundos, gireIo_
controJesdel quemador a la posici6n de(J
APAGADO,espere 5 minutosy repita el proceso
de encendido, Siel quemador no seenciende
con la v_lvula abierta,el gas continuara saliendo
por el mismo y puedeencenderse
accidentalmente, con el riesgo de ocasionar
lesiones.
Encendidocon f6sforos
- Nose incfinesobre la parrilla cuando la este
encendiendo,
1,ApagueO lasvalvulasdecontroldel mecherode gas.
2.Enciendael gasenel cilindrodel LP.
3.Abra[atapa durantelailuminaci6n,
4.Lugarpartidoenpartidotitular(colgandodeizquierda
panellateraldela parrilla).Coincidencon laluz,
entoncesla luzquemadorpartidocolocandoel partido
atravesdela luzagujeroa la izquierdadela parrilla.
5.Presioneygirela perilladel quemadordelextremedel
izquierdoa laposici6nde llama _ ALTA.Verifiqueque
el quemadorse encienday quepermanezcaencendido.
6.Enciendalosquemadoresensecuenciaoprimiendolas
perillasygirandolasala graduaci6n_ ALTA.
O _
rO ,,,f ® o
Page 21

Nora:Esposiblequesu parrillaNOvengaequipada
conun quemadorlateral.
Encendido con ei encendedor dei quemador
latera!
• Nose inclinesobre la parrillacuando laeste
encendiendo.
1.ApagueO las valvulasdecontroldel mecherodegas.
2.Enciendaelgas enel cilindrodel LR
3.Abrala tapadel quemador lateral.
4.Girela perilladel quemadorlateralala graduaci6nde
ama_ ALTA,oprmay mantengaoprmdoe bot6n
del ENCENDEDORELECTRONICO.
5.Siel quemad_orno se enciende,girela perillaa la
posici6ndeUAPAGADO, espere5 minutosy repitael
procedimientodeencendido.
Eneendido con f6sforos de! quemador lateral
• Nose inclinesobre la parrilla cuando la est_
encendiendo.
1.ApagueO las v_lvulasdecontroldel mecherodegas.
2.Enciendaelgas enel cilindrodel LR
3.Abrala tapadel quemador lateral.
4.Coloqueelf6sforoencendidocercadel quemador.
5.Girela perilladelquemadorlaterala lagraduaci6n
ALTA.Verifiquequeel quemadorseencienday que
permanezcaencendido.
Control de la llama del quemador
, Retirelasparrillasdecocci6ny losreguladoresde
llama.Enciendalosquemadoresy girelas perillas,dela
graduaci6nALTAa lagraduaci6nBAJA.Deber_veruna
llamam_sreducidaenla graduaci6nBAJAqueen la
graduaci6nALTA.Hagauncontrolde lallamaenel
quemadorlateral.Controlesiemprelasllamasantesde
cadauso.Si s61ose observanllamasbajas,lea Io
referenteala Caidarepentinadelasllamasollamas
bajasen la secci6ndeResoluci6nde problemas.
ALTA
BAJA
C6mo apagar la parri!la
, Giretodaslas perillasde control a laposici6n,de (_
APAGADO.Cierreel tanquedegas,glrandolamanllla
dela v_lvulaenel sentidodelasagujasdel reloj,hasta
quesedetengapor completo.
Control del eneendedor
• Cierre el pasode gas desdeel tanque.Oprimay
mantengaoprimidoel bot6ndel encendedor
electr6nlco. Deber_oirun chasquidoy verchispas
cadavez,entrela caja derecolecci6no el quemadory
el electrodo.Encasode no oir chasquidosni ver
chispas,lea lasecci6nde Resoluci6ndeproblemas.
Control de la v_lvula
• Importante: Cerci6reeede babercerrado el pasode
gas desdeel tanqueantes de revisar lasv_lvulas.
Easperillassetraban al Ilegarala posici6nde
APAGADO.Pararevisar las v_lvulasprimeropresione
lasperillasy luegosu61telas;lasperillasdebenregresar
asu posici6noriginal.DeIo contrario,cambielaunidad
dela v_lvulaantesde usarlaparrifla.Girelasperillasa
lagraduaci6nBAJA y luego regr6selasa laposici6nde
APAGADO.Lasv_lvulasdebengirarsuavemente.
Control de la manguera
• Cada vez,antesde usarla parrilla, verifiquequelas
manguerasnotenqancortes,no est6ndesgastadas,ni
est6nretorcidas.Cambielas manguerasdafiadas
antesdeusar la parrilla.Uses61ola v_lvula/la
manguera/ el reguladorespecificadoporel fabricante.
iALIERTA CONTRA LAS
DENTRODELQUEMADOR
Siesta experimentando dificultades para
encender su parrilla, o si la llama es d6bil,
inspeccione y limpie los quemadores y los
tubos Ventud.
Se ha comprobado que las araSas y los
pequeSos insectos generan problemas de
"fogonazos" al construir sus nidos y poner
huevos en los quemadores o los tubos
Venturi puesto que obstruyen el flujo de
gas. El gas que se acumula puede
encenderse en la parte posterior del tabJero
de control. Estos fogonazos pueden daSar
su parrJlJa y causar Jesiones. Para evitar los
fogonazos y garantizar un buen
funcionamiento, retire y Jimpie la unidad de
quemador y tubo Venturi si no ha usado la
_parr!!!a durante un t!empo pro!ongado. J
Limpieza general de la parri!la
, Noconfundala acumulaci6nde grasay de humo,de
colormarr6no negro,conlapintura. La parte intema
delasparrillasagasno vienenpintadasdef_brica(y
nunca sedebenpintar). Apliqueuna soluci6n
concentradade detergentey de agua,o useun
limpiadorparaparrillasconunceplllodecerdas , ,
resistentes,cepillandolaparteinternadela tapaaela
parrillay el fondode la mlsma.Enju_guelosydeje que
sesequen completamentealaire. Noaplique
productos de limpieza c_usticosparaparrillas/
productosde limpiezadehornos alas superficies
pintadas.
, Piezasplasticas: Lavelascon aguajabonosatibia y
s6quelasconunpaso.
A Nousecitrisol,productosde limpiezaabrasivos,
desgrasadoresniproductosde limpiezadeparrillas
concentradosparalaspiezasplasticas.Lasmismasse
puedendaSarycausarfallas.
• Superficies porcelanizadas: Debidoasu
composici6nvitrea, lama)!oriadelosresiduosse
puedeeliminarconun panoempapadoenuna soluci6n
debicarbonatode soday agua,ocon unlimpiador
especialmenteformulado.Useun polvolimpiadorno
abrasivopara las manchasdificilesdeelim_nar.
• Superficies pintadas: L_velasconun detergente
suaveoun limpiadornoabrasivoyagua tibia
jabonosa.S6quelasconunpaso suave,no abrasivo.
• Superficies deacero inoxidable:Paraconservarel
aspectode altacalidaddesuparrilla,I_velaconun
detergentesuaveycon aguajabonosatibiay fr6tela con
unpasosuaveparasecarla,cadavezdespu6sde
usarla.Es posiblequeparalosdep6sitosdegrasa
quemadadebausar una almohadillade limpieza
abrasivadepl_stico.Paraevitarquese dafie, t)sela
0nicamenteen ladirecci6nde pulidodelacabado.No
usealmohadillasabrasivasenlas _reasdondehayan
dibujos.
• Superficies para cocinar: Si utilizauncepillode
cerdasparalimpiarlassuperficiesparacocinar,antes
deusar laparrillaverifiquequeno quedencerdas
sueltassobre6stas.Se recomiendano limpiarlas
superficiesparacocinarcuandolaparrilla est6at]n
caliente.
C6mo guardar su parrilla
, Limpielasparrillasdecocci6n.
, Gu_rdelaenunlugarseco.
, Cuandoeltanquede gasest6conectadoalaparrilla,
gu&rdelaal airelibre,en unlugarbienventiladoy fuera
del alcancede los nifios.
,Cubra laparrillasila guardaalaire libre.Elfabricante
tienea sudisposici6nunavariedaddecubiertaspara
parrillas.
, SOLOguardelaparrillabajotechosi sehacerradoel
pasoy [desconectadoeltanquedegas,retir_ndolode
laparrilla y guard_ndoloal alre libre.
, Si.qalas instruccionessobreC6molimpiarla unidad,
ddlquemadorantesdeencenderla parrilla,cuando_a
mismahayaestadoguardada.
21
C6molimpiar la unidad delquemador
Sigaestasinstruccionesparalimpiarocambiarpiezas
dela unidaddelquemador,o sitiene problemaspara
encenderla parrifla.
1.Cierre elpaso de gasen lasperillas de control y
desdeeltanque de gas.
2. Retirelasparrillasdecocci6ny losreguladoresde llama.
3. Quitarlostubosde pr6rrogay piezasde fijaci6n
quemadores
4.Separarelectrodode lesi6ndel plexobraquial.
NOTA:La eliminaci6n1Destacamentom_todo
depender_delaconfiguraci6ndelquemador.V6ase
diferentesconfiguracionesenlas ilustracionesa
continuaci6n.
5. Levantey retire cuidadosamentecadaquemadorde
lasaberturasde lav_lvula.
Sugerimostresmanerasdelimpiarlostubosdel
quemador.Sigala quele seam_sf_cil.
(A) Dobleunalambrerigido (unganchode alambre
pararopasirvebien) paraformat ungancho
pequefio.Pasevariasvecesel ganclioa trav6sdel
tubode cada quemador.
(B) Useuncepillodelgadode botella,demangoflexible
(nouseun cepillo[dealambredelat6n), p_selo
variasvecesatrav6sdeltubodecadaquemador.
(C)Useprotectores para la vista: Conunamanguera
neum_tica,fuerceel pasodel airea trav6sdertubo
y de los puertosdel quemador.Examinecada
puertoparaverificarque elaire salgaa trav6sde
cadaorificio.
6.Cepilleconun cepillode alambretoda lasuperficie
exteriordelquemadorparaeliminarlos residuosde
comiday lasuciedad.
7. Limpietodo puertoqueest6atascadoconun
alambrerigido,talcomounsujetapapeles.
8.Examineel quemadorparadetectardaSos;algunos
orificiospuedenalargarsedebidoaldesgastenormaly
a lacorrosi6n.Si observagrietasu orificlosgrandes,
cambieel quemador.
MUYIMPORTANTE:Lostubos del quemador se
debenvolvera conectaren las aberturas de la
v_lvula. Vealas ilustracionesa laderecha.
Conexi6n correctadel
quemador y lav_lvula
9. Fijeel electrodoenel quemador.
10.Vuelvaa colocarcuidadosamente
los quemadores.
11.Fijelos quemadoresalos soportesdela c_marade
combusti6n.
12.Vuelvaa colocarlostubosdearrastrey fije los
quemadores.Cambielosreguladoresde llama ylas
parrillasde cocci6n.
13.Efect0eun controlde lallamadel quemadory unaprueba
para detectarfugas,antes devolver a cocinar en la
parrilla.
,._..--C_mara de "e_-
combusti6_
_ Retireel
tornillo
17
quemadorde la I_"-_,
carnaratie I_._
C_mara de J"_""'_ /
combustidnJ ._,:_ y
_-J" quemadordela
" _<<_<... c_ma_a._e
electrodo con un
destornillador de
hoja plana ./
Page 22

Esta garantfa es vfilida finicamente para las unidades adquiridas de los distribuidores autorizados. E1f:abricante le garantiza finicamente al consumidor-comprador
_, que este producto no presentarfi defectos de mano de obra ni de materiales por el peHodo indicado a continuacidn, contado desde la fecha de compra*, si se
arma correctamente y se usa en el hogar, en condiciones normales y razonables. E1 Pabricante se reserva el derecho de exigir la devolucidn de las piezas defectuosas,
enviadas con el porte o el tiete pagado por el consumidor, para ser revisadas y examinadas.
ALCANCE DE LA COBERTURA PLAZO DE COBERTURA TIPO DE FALLAAMPARADA
Quemador de acero inoxidable
Fuego caia y tapa
Todas las demfis partes
*Nota: A fecha de recibo de compra serfin necesarios para el servicio de garantfa.
Son de responsabilidad del consumidor-comprador original todos los gastos de envlo de las piezas cambiadas en virtud de las condiciones de esta
garantla limitada.
Esta garantfa limitada es vfilida finicamente en Estados Unidos yen Canadfi, se ofrece finicamente al propietario original del producto y es intransferible. El
fabricante exige la presentacidn de evidencia de la fecha de la compra. Pot tanto, debe conservar el recibo o la factura de la compra, ga inscripcidn del
producto no reemplaza al comprobante de compra, y el fabricante no se hace responsable ni estfi obligado a llevar un registro de dichos comprobantes.
Esta garantia limitada atafie [)NICAMENTE al funcionamiento del producto y no ampara rayones, abolladuras, corrosidn ni decoloracidn ocasionada por el
calor, los productos de limpieza abrasivos y qufmicos, ni por las herramientas usadas en el armado o en la instalacidn del aparato, oxidacidn de las superficies ni
decoloracidn de las superficies de acero inoxidable. La pintura no esta garantizada y requerira retoques. RUST no se eonsidera una de fabrieaei6n o materiales
defecto.
Esta garantla limitada no ampara el costo ca el que se incurra pot inconvenientes, alimentos, lesiones ni dafios a la propiedad.
EL FABRICANTE NO PAGARA LOS SIGUIENTES RUBROS:
1. E1 costo de envfo normal o acelerado de piezas y repuestos amparados por la garant_a
2. Las llamadas de servicio tdcnico a domicilio.
3. Reparaciones de productos que hayan sido usados para fines distintos a los normales, en casas de mils de una familia o no domdsticos.
4. Dafios, fallas, o dificultades para hacerlo funcionar, ocasionadas por accidentes, modificaciones, manipulacidn descuidada, uso indebido, abuso, incendio,
inundacidn, casos fortuitos, instalacidn o mantenimiento inadecuados o que no se realicen de conformidad con las disposiciones de los cddigos de instalaciones
eldctricas o sanitarias, o uso de productos no autorizados por el fabricante.
5. Pdrdida de alimentos debidos a f:allas del producto o a la dificultad para hacerlo funcionar.
6. E1 costo de las piezas de repuesto ni de la mano de obra para la reparacidn de unidades instaladas fuera de Estados Unidos o de Canadfi.
7. La recogida y el envfo de su producto.
8. Las reparaciones de piezas o de sistemas que hayan suflido dafios por alteraciones no autorizadas hechas en el producto.
9. La remoci6n y/o la reinstalaci6n de su producto.
5 Afio de fecha de compra *
2 Afio de fecha de compra *
l Afio de fecha de compra *
SOLO DEFECTOS DE PERFORACION,
DE FABRICACION Y DE MATERIALES
ESTIPULACIONES DE EXONERACION DE GARANTIAS IMPLICITAS; LI[MITACION DE LOS RECURSOS
E1finico recurso del que usted dispone en virtud de esta garantfa limitada es la reparacidn o el cambio de las piezas defectuosas. En cas de probl_mes de
disponibilitd des places, le constructeur se rdserve le droit de remplacer des pi_ces similaires qui sont dgalement fonctionnels. E1fabricante no serfiresponsable
por ningfin tipo de dafio accesorio o indirecto ocasionado por el incumplimiento de lo estipulado ya sea en esta garantfa limitada o en alguna garantfa implicita
perlinente, ni por las Pallaso los dafios ocasionados por actos fortuitos, cuidado y mantenimiento inadecuados, fuego provocado por la grasa, accidentes,
modificaciones, cambio de piezas por cualquier persona que no sea el fabricante, uso indebido, transporte, uso con fines comerciales, abuso, ambientes hostiles
(condiciones inclementes del tiempo, fen6menos naturales, acci6n de los animales), instalaci6n inadecuada o instalaci6n que no se realice de conformidad con las
disposiciones de los c6digos locales o las instrucciones impresas del fabricante.
ESTA GARANTiA L1M1TADA ES LA t)N1CA GARANTiA EXPLiC1TA OFREC1DA POR EL FABR1CANTE. EL FABR1CANTE NO GARANT1ZA
N1NGUNA ESPEC1F1CAC10N O DESCR1PCI()N DE REND1M1ENTO DEL PRODUCTO, 1NDEPEND1ENTEMENTE DEL LUGAR DONDE APAREZCAN,
SALVO EN LA MED1DA SENALADA EN ESTA GARANTiA L1MITADA. POR EL PRESENTE, EL PLAZO DE VIGENC1A DE LA PROTECC10N QUE
OTORGAN LAS GARANTiAS 1MPLJ.C1TAS, EN V1RTUD DE LAS LEYES DE CUALQU1ER ESTADO, 1NCLUYENDO LA GARANTiA IMPLiCITA
ACERCA DE LA 1DON E1DAD DEL PRODUCTO PARA SU COMERCIALIZACION O PARA ALGr0N PROPOSITO DETERMINADO, QU EDA
LIM1TADO AL PLAZO DE V1GENCIA DE ESTA GARANT1A LIMITADA.
Ni los distribuidores, ni el negocio minorista que vende este produeto, estfin autorizados para ofrecer ninguna garantla ni para prometer reeursos
adicionales o ineongruentes con los arriba indicados. En todo caso, el lfmite mfiximo de responsabilidad del fabricante no serfi mayor que el precio de compra
pagado por el consumidor original.
NOTA: Algunos estados no pemfiten la exclusidn ni la limitacidn de dafios accesorios o indirectos, de manera que es posible que las limitaciones o exclusiones
arriba sefialadas no correspondan en su caso. Esta garantla le otorga derechos especfficos, sefialados aquL Es posible que usted tenga otros derechos que pueden
variar de un estado a otro. $61o en el estado de California, en el caso en que no sea comercialmente viable reparar o cambiar el acabado del producto, el minorista
que vende este producto o el Pabricante le reembolsarfin el precio de compra pagado por el mismo, menos la cantidad directamente atribuible al uso dado por el
consumidor-comprador original, antes de haber descubierto la falla. Ademfis, y finicamente en el estado de California, usted podrfi llevar el producto al negocio
minorista que venda este producto para solicitar servicios en virtud de esta garantla limitada.
Si desea obtener algfin servicio en virtud de esta garantla limitada, debe
No se aceptarfin las devoluciones por parte del consumidor a menos que haya obtenido primero una autorizacidn vfilida de devolucidn. Debe rotular de manera
legible la parte exterior del paquete de devoluci6n autorizada con su nfimero de autorizaci6n de devoluci6n y remitir dicho paquete con el flete o el porte pagado.
Se rechazarfi toda devoluci6n del consumidor que no cumpla con las reglas anteriores.
dirigir su eorrespondeneia a:
Consumer Relations
P. O. Box 1240
Columbus, GA 31902-1240
22
Page 23

1 1 FIREBOX
2 4 TUBEBURNER
3 1 ELECTRODE,MAINBURNER
4 3 CARRYOVERTUBE
5 1 CONTROLPANEL,MAIN
6 1 ELECTRONICMODULE,W/BU-I-rON
7 1 BU-I-rON,F/ELECTRONICMODULE
8 1 VALVE/HOSE/REGULATOR
9 5 BEZELF/KNOB
10 5 CONTROLKNOB
11 1 GRILLLID
12 1 LOGOPLATE
13 1 TEMPERATUREGAUGE
14 1 BEZEL,F/THERMOMETER
15 2 LIDBUMPER,RECTANGLE
16 1 GRILLLIDHANDLE
17 1 TOPLIDHARDWARE
18 4 HEATTENT
19 3 COOKINGGRATE
20 1 SWINGAWAYGRID
21 1 LEFTSIDESHELF
22 1 DRIPPANF/SlDEBURNER
23 1 SlDEBURNERLID
24 1 CONTROLPANELF/LEFTSHELF
25 1 SlDEBURNERGRATE
26 1 SlDEBURNER
27 1 ELECTRODE,F/SB
28 1 RIGHTSIDESHELF
29 1 CONTROLPANELF/RIGHTSIDESHELF
30 1 CART,RIGHTSIDE
31 1 MATCHHOLDER
32 1 CART,LEFTSIDE
33 2 FRONTPANEL
34 1 REARBRACE
35 1 BOTTOMSHELF
36 2 WHEEL
37 1 AXLE,F/WHEEL
38 1 GREASEHOOK
39 1 GREASECUP
40 2 TANKEXCLUSION
41 2 LEGEXTENDER
42 1 WINGSCREWF/ TANK
43 2 LIDBUMPER,ROUND
44 1 HEATSHIELDF/El MODULE
45 1 ELECTRODEWIRE,F/SlDEBURNER
46 2 LEGCAP
NOTPictured
... 1 VENTURICLIPF/SB
... 1 HARDWAREPACK
... 1
ASSEMBLYMANUAL,ENGLISH,SPANISH,
FRENCH
r
23
Page 24

1 1 FOYER
2 4 BROLEURTUBULAIRE
3 1 I_LECTRODE,BROLEURPRINCIPAL
4 3 TUBEDERENFORT
5 1 TABLEAUDECOMMANDEPRINCIPAL
6 1 MODULEI_LECTRONIQUEAVECBOUTON
7 1 BOUTONDUMODULEI_LECTRONIQUE
8 1 VALVE/TUYAU/RI_GULATEUR
9 5 COLLERETTED'ENCASTREMENTDUBOUTON
10 5 BOUTONDERI_GLAGE
11 1 COUVERCLEDUGRIL
12 1 PLAQUEDULOGO
13 1 JAUGEDETEMPI_RATURE
14 1 COLLERETTED'ENCASTREMENT,JAUGEDE
TEMPI_RATURE
15 2 BUTOIRDUCOUVERCLE,RECTANGULAIRE
16 1 POIGNI_EDUCOUVERCLEDUGRIL
17 1 FERRURESDUCOUVERCLESUPI_RIEUR
18 4 COUVRE-BROLEUR
19 3 GRILLEDECUISSON
20 1 GRILLE-RI_CHAUDPIVOTANTE
21 1 TABLETTELATI_RALEGAUCHE
22 1 PLATEAUD'I_COULEMENTDELAGRAISSEPOUR
BROLEURLA_RAL
23 1 COUVERCLEDUBROLEURLA_RAL
24 1 TABLEAUDECOMMANDEPOURTABLETTEDE
GAUCHE
25 1 GRILLEDUBROLEURLA_RAL
26 1 BROLEURLA_RAL
27 1 I_LECTRODEDUBROLEURLA_RAL
28 1 TABLETTELATI_RALEDEDROITE
29 1 TABLEAUDECOMMANDEDELATABLETTE
LATI_RALEDEDROITE
30 1 CHARIOT,C0_ DROIT
31 1 PORTE-ALLUMETTES
32 1 CHARIOT,C0_ GAUCHE
33 2 PANNEAUAVANT
34 1 RENFORTARRII_RE
35 1 TABLETTEINFI_RIEURE
36 2 ROUE
37 1 TIGED'ESSlEU,POURROUE
38 1 AGRAFEPOURRI_ClPIENTAGRAISSE
39 1 RI_ClPIENTAGRAISSE
40 2 EXCLUSIONDURI_SERVOIR
41 2 SURI_Lt_VATEURDEPIEDS
42 1 VlSAOREILLESDURI_SERVOIR
43 2 BUTOIRDUCOUVERCLE,ROND
44 1 I_CRANTHERMIQUEPOURMODULEAE
45 1 FILDUI_LECTRODE,BROLEURLA_RAL
46 2 CAPUCHONDEPIED
NONillustre
... 1 AGRAFEDUTUBEVENTURIDUBROLEURLA_RAL
... 1 SACDE FERRURES
... 1
MANUELD'ASSEMBLAGE,ANGLAIS,FRANQAIS,
ESPAGNOL
24
Page 25

1 1 CAMARADECOMBUSTION
2 4 QUEMADOREDETUBO
3 1 ELECTRODO,QUEMADOREPRINCIPAL
4 3 TUBODEARRASTREDELQUEMADOR
5 1 TABLERODECONTROLPRINCIPAL
6 1 MODULODE ENCENDIDOELECTRONICO
7 1 BOTONDELMODULODEENCENDIDO
ELECTRONICO
8 1 UNIDADDEMANGUERAiVALVULA/REGULADOR
9 5 MARCO,PERILLADECONTROL
10 5 PERILLADECONTROL
11 1 TAPASUPERIOR
12 1 PLACADELLOGOTIPO
13 1 MEDIDORDETEMPERATURA
14 1 MARCOPARAELMEDIDORDETEMPERATURA
15 2 TOPERECTANGULARDECAUCHOPARALATAPA
16 1 ASA DETAPASUPERIOR
17 1 HERRAJES,TAPASUPERIOR
18 4 CUBIERTACONTRAELCALOR
19 3 REJILLADECOCCION
20 1 REJILLAPARACALENTARALIMENTOS
21 1 REPISADELLADOIZQUlERDO
22 1 REClPIENTEPARAJUGOS,QUEMADORLATERAL
23 1 TAPA,QUEMADORLATERAL
24 1 TABLERODECONTROL,REPISADELLADO
IZQUlERDO
25 1 REJILLA,QUEMADORLATERAL
26 1 QUEMADORLATERAL
27 1 ELECTRODO,QUEMADORLATERAL
28 1 REPISADELLADODERECHO
29 1 TABLERODECONTROL,REPISADELLADO
DERECHO
30 1 PANELDELLADODERECHODELCARRITO
31 1 PORTAFOSFOROS
32 1 PANELDELLADOIZQUIERDODELCARRITO
33 2 PANELDELANTERO
34 1 ESTRIBOTRASERO
35 1 REPISAINFERIOR
36 2 RUEDA
37 1 VARILLADEEJE
38 1 PRESlLLAPARAELREClPIENTEPARALA GRASA
39 1 REClPIENTEPARALA GRASA
40 2 ALAMBRESDESEPARAClONDELTANQUEDE
GAS
41 2 EXTENSORDEPATA
42 1 TORNILLOPARAELTANQUE
43 2 TOPEREDONDODECAUCHOPARALA TAPA
44 1 PROTECTORCONTRAELCALOR,MODULODE
ENCENDIDOELECTRONICO
45 1 CABLEDELELECTRODO,QUEMADORLATERAL
46 2 EXTREMODEPATA
NOse ilustra
... 1
... 1 PAQUETEDE HERRAJES
... 1
PRESlLLAPARATUBOVENTURI,QUEMADOR
LATERAL
MANUALDEL PRODUCTO,INGLI_S,FRANCI'S,
CASTELLANO
25
Page 26

#8
\
_'##15 #15
#14 #13
\
#17
#12
\
0/#7
#44
\
#38
#32_
#40
#36 #36/@
\
/
#46
#39
#42
26
Page 27

NOTE:DO NOTovertightenscrews andwashersthat comeintocontactwithporcelaincoatedsurfaces.Overtighteningmaycausethe porcelaincoatingtocrack andbreak,resultingin
exposedmetalthat willbepronetorust.
REMARQUE:NEserrezPASexcessivementlesvis etles rondellesquisont en contactaveclessurfacesaurev_tementenporcelaine.Unserrageexcessifpeutfissurer ou briserle
rev_tementen porcelaine,entrdnant rexpositiondumetalqui pourraitrouiller.
Nora: NOaprietedemasiadolostornillosy arandelas queentrenencontactocon las superficiesrevestidasde porcelana.Silosaprietademasiado,se puedequebraryromperel
revestimientode porcelanaIoquedejaraexpuestoel metalalprocesode oxidaci6n.
©
®
O
1/4-20X1-1/2"Screw
Qty: 4
Vis &m_taux1/4-20×1-1/2po
Qt& 4
Tornilloparametales
de 1/4-20x 1-1/2"
Cant.4
O
#30
1/4-20Flange Nut
Qty: 4
#crou &embase1/4-20
Qt& 4
Tuercaconbridade 1/4-20
Cant.4
27
Page 28

®
#8X3/8" SheetMetalScrew
Qty: 9
Visa t61eno8 x 3/8 po
QtY.g
Tornillosparalaminas
met_licasNo.8de 3/8"
Cant.9
®
/
#33
°®
#30
/
#33
28
Page 29

#34
Qty:2
(_) Pallierde roue
AxleSpacer
Qte:2
Separadordeleje
Cant 2
®
1/4-20Xl/2" Screw
Qty:4
Vis &m_taux1/4-20×1/2po
Qt& 4
Tornilloparametales
de 1/4-20x 1/2"
Cant 4
o
/#41
#41
AxleWasher
Qty:l
Rondelled'essieu
Qt6:1
Arandelaparael eje
Cant.1
HitchPin
Qty:l
Tigediefixation
Qt_: 1
Pasadordeacoplamiento
Cant.1
©
®
29
Page 30

#4O
#33
/
#33
./
y*
#34
#34
#4o\
30
Page 31

®
1/4-20Xl/2" Screw
Qty:4
Visa m_tal1/4-20×1/2po
Qt6.4
Tornillosparametalesde
1/4- 20x ½"
Cant.4
®
@
@
@
|
31
Page 32

#28
o oO o o
®
®
1/4-20Xl/2" Screw
Qty:2
Visa m_tal 1/4-20×_/2po
Qt_ :2
Tornillosparametalesde1/4-20x 1/2"
Cant.2
#8X3/8" Sheet MetalScrew
Qty: 2
Vis &t61eno8x3/8po
Qt_:2
Tornilloparai_minasmet_licas
No.8de 3/8"
Cant.2
O
® Tightenthescrews o
Serrezles vis
Aprietelos tomillos
©
32
Page 33

#21
\
®
1/4-20Xl/2" Screw
Qty: 2
Vis&m_tal 1/4-20×1/2po
Qt_ :2
Tomillosparametalesde 1/4-20x 1/2"
Cant.2
O
Serrezles vis
Aprietelos tomillos
#8X3/8"SheetMetalScrew
Qty:2
Vis&t61eno8×3/8po
Qt_: 2
Tornilloparalaminasmet_licas
No.8 de3/8"
Cant.2
33
Page 34

#9
#24
®
©
#45
#8
@
/
|
#8
@
#8
®
#8-32X3/8"
StainlessSteelScrew
Qty:2
Vis &m6tauxno8-32×3/8po
Qt6:2
Tomilloparametales
No.8-32de3/8"
Cant.2
1#26
@
#8 WingNut
Qty.1
#crou &oreilles no8
Qt6:1
Tuercade mariposaNo.8
Cant.1
VenturiClip
Qty:l
Agrafe du braleur
Qte: 1
Presillaparaelquemador
Cant.1
©
34
\
\
Page 35

Oo
_0
#18
#1
#20
#19
#7
©
©
#7
BatteryAA
PileAA
BateriaAA
35
Page 36

X#39
®®
ll l cAuTioNJill
Cylinder valvemust faceto front of cart oncetank is
attached. Failureto install cylinder correctly may allow
gas hoseto bedamagedin operation, resulting in the
riskof fire.
#35
E .c,.
Unavez que el tanquehayaquedado instalado,la valvula
del tanquedebe quedarorientadahacia laparte
delanteradel carrito. Si no seinstalacorrectamenteel
tanque,se puededaSarlamangueradegas duranteel
suministro, Ioquepuedeocasionar elriesgo dieincendio.
(novieneincMdo)
ATTENTION
Lerobinet du reservoir dolt _tre orienteversledevant
du chariotunelois le r6servoirfi×_enposition.Une
mauvaiseinstallationdu reservoir pourraitendommager
le tuyauagaz,creant un risqued'incendie.
36
Page 37

EMERGENCIES: ifa gasleakcannot bestopped,ora fireoccursdue to gas leakage,call the firedepartment.
Gasleakingfrom
cracked/cut/burnedhose.
GasleakingfromLPcylinder.
Gasleakingfrom LP
cylindervalve.
GasleakingbetweenLP
cylinderand regulator
connection.
Firecomingthroughcontrol
panel.
Greasefireorcontinuous
excessiveflamesabove
cookingsurface.
Troubleshooting
Burner(s)willnotlight
usingignitor.
(SeeElectronicIgnition
Troubleshootingalso)
Continuedonnextpage.
, Damagedhose.
, Mechanicalfailuredue torusting or mishandling.
, Failureof cylindervalvefrom mishandlingor
mechanicalfailure.
, Improperinstallation,connectionnottight,and/or
failureofrubberseal.
, Fireinburnertubesectionof burnerdueto blockage.
, Toomuchgreasebuildupin burnerarea.
GASiSSUES:
,Tryingto lightwrongburner.
, Burnernotengagedwithcontrolvalve.
, Obstructionin burner.
, Nogas flow.
,Turnoff gasat LP cylinderorat source on naturalgassystems. Discontinueuseof
productandreplacevalve/hose/regulator.Oncevalve/hose/regulatorreplaced
conductcompleteleakcheckpermanual.
, ReplaceLPcylinder.
, Turnoff LPcylindervalve.ReturnLPcylinderto gassupplier.
, Turnoff LP cylindervalve.Removeregulatorfromcylinderandvisuallyinspectrubber
sealfor damage.SeeLPCylinderLeakTestandConnectingRegulatortothe LP
Cylinder.
, Turnoff controlknobsandLP cylindervalve. Leavelidopentoallow flamestodie
down.Afterfire is out andgrilliscold. removeburnerand inspectfor spidernestsor
rust.SeeNaturalHazardandCleaningthe BurnerAssemblypages.
, Turnoff control knobsandLPcylindervalve.Leavelidopentoallowflamesto die
down.After cooling,clean foodparticlesandexcessgreasefrom insidefireboxarea,
greasetray,andothersurfaces.
,See instructionsoncontrolpaneland in UseandCaresection.
, Makesurevalvesare positionedinsideof burnertubes.
, Ensureburnertubesarenotobstructedwithspiderwebs orothermatter.See
cleaningsectionof Useand Care.
, MakesureLP cylinderis notempty.IfLP cylinderisnot empty,referto
"Suddendropingasflow."
Burner(s)willnotmatchlight.
,Vaporlock atcouplingnutto LPcylinder.
,Couplingnut andLPcylindervalvenotfully
connected.
ELECTRICALISSUES:
, Electrodecrackedor broken;"sparksat crack."
, Electrodetip notin properposition.
(Doesnot applytoSUREFIRE.)
,Wire and/orelectrodecoveredwithcookingresidue.
,Wiresarelooseordisconnected.
, Wiresareshorting(sparking)betweenignitorand
electrode.
, Deadbattery.
ELECTRONICIGNmON:
, Nospark,noignitionnoise.
, Nospark,someignitionnoise.
, Sparks,butnot at electrodeor at full strength.
, See"GAS ISSUES:".
, Matchwillnotreach.
, Impropermethodofmatch-lighting.
,Turn offknobsanddisconnectcouplingnutfromLPcylinder.Reconnectandretry.
, Turnthe couplingnut approximatelyone-halfto three-quartersadditionalturnuntil
solidstop.Tightenby handonly-do notusetools.
, Replaceelectrode(s).
MainBurners:
, Tipof electrodeshouldbe pointingtowardgas portopeningon burner.The
distanceshouldbe 118"to 1/4".Adjustifnecessary.
Sideburner:
,Tipof electrodeshouldbepointingtowardgas portopeningonburner,the
distanceshouldbe 1/8"to 3/16".Adjust ifnecessary.
,Cleanwireand/orelectrodewith rubbingalcoholand clean swab.
, Reconnectwiresor replaceelectrode/wireassembly.
, Replaceignitorwire/electrodeassembly.
, Replacewith anew alkalinebattery.
, SeeSectionIof ElectronicIgnitionSystem.
, SeeSectionIIof ElectronicIgnitionSystem.
,See SectionIIIof ElectronicIgnitionSystem.
, Uselong-stemmatch(fireplacematch).
, See"Match-Lighting"sectionof UseandCare.
37
Page 38

Troubleshooting(continued)
%
Suddendrop ingasflowor
lowflame.
Flamesblowout.
Flare-up. ,Clean burnersandinsideof grill/firebox.
Persistentgreasefire. ,Turn knobstoOFF.Turngas offatLP cylinder.Leavelidin positionandletfire
Flashback (firein ,Turn knobstoOFF.Clean burnerand/orburnertubes.See burnercleaning
burnertube(s)), sectionofUseand Care.
Oneburnerdoesnot light , Cleancarry-overtube(s)with wirebrush.
fromotherburner(s).
, Outof gas.
, Excessflow valvetripped.
,Vaporlock atcouplingnut/LPcylinderconnection.
, Highorgustingwinds.
, Lowon LPgas.
, Excessflow valvetripped.
, Greasebuildup.
, Excessivefat in meat.
, Excessivecookingtemperature.
, Greasetrappedbyfoodbuilduparound
burnersystem.
, Burnerand/orburnertubesare blocked.
, Greasebuilduporfood particlesinend(s) of
carryovertube(s).
,Checkforgas inLPcylinder.
,Turn offknobs,wait30 secondsand lightgrill.Ifflamesarestill low,turnoff knobs
andLP cylindervalve.Disconnectregulator.Reconnectregulatorandleak-test.Turn
onLP cylindervalve,wait 30secondsandthenlightgrill.
, Turnoff knobsandLP cylindervalve.Disconnectcouplingnutfrom cylinder.
Reconnectand retry.
, Turnfrontof grill tofacewind orincreaseflameheight.
, RefillLPcylinder.
, Referto"Suddendropin gasflow"above.
,Trimfatfrommeat beforegrilling.
,Adjust(lower)temperatureaccordingly.
burnout.After grill cools,removeandcleanall parts.
Troubleshooting- Electronic ignition
SECTIONI
Nosparksappearat any
electrodeswhenElectronic
IgnitionButtonispressed;
no noisecan beheardfrom
spark module.
SECTIONII
Nosparksappearat any
electrodeswhenElectronic
IgnitionButtonispressed;
noisecan beheardfromspark
module.
SECTIONIII
Sparksarepresentbutnotat
all electrodesand/ornotat
full strength
, Batterynot installedproperly.
, Deadbattery.
, Buttonassemblynot
installedproperly.
, Faultysparkmodule.
, Outputleadconnectionsnot
connected.
, Outputleadconnectionsnot
connected.
,Arcingtogrill awayfrom
burner(s).
, Weakbattery.
, Electrodesarewet.
, Electrodescrackedor broken
"sparksatcrack".
, Checkbatteryorientation.
, Hasbatterybeenusedpreviously?
, Checktoinsurethreadsare properly
engaged.Buttonshouldtravelupand
downwithoutbinding.
, Ifnosparksaregeneratedwithnew
batteryandgoodwire connections,
moduleisfaulty.
,Are outputconnectionsonand tight?
,Are outputconnectionsonandtight?
, Ifpossible,observegrill in dark
location.Operateignitionsystemand
lookfor arcingbetweenoutputwires
andgrillframe.
,Allsparkspresentbut weakor at
slowrate.
, Hasmoistureaccumulatedonelectrode
and/orin burnerports?
, Inspectelectrodesfor cracks.
, Installbattery(makesurethat "+"and "-" connectorsare
orientedcorrectly,with "+"on capend.)
, Replacebatterywith newalkalinebattery.
, Unscrewbuttoncapassemblyand reinstall,makingsure
threadsare alignedandengagedfully.
, Replacesparkmoduleassembly.
, Removeandreconnectalloutput connectionsat moduleand
electrodes.
, Removeandreconnectall outputconnectionsat moduleand
electrodes.
, Ifsparksare observedotherthan fromburner(s),wireinsulation
may bedamaged.Replacewires.
, Replacebatterywitha newalkalinebattery.
, Usepapertoweltoremovemoisture.
, Replacecrackedor brokenelectrodes.
38
Page 39

URGENCES ; si une fuitede gaz nepeutpas_tre arr_t_e,ou siun incendiese propageenraison d'unefuite de gaz, appelezleserviced'incendie.
Fuitede gazsur untuyau o Tuyauendommage.
casse,coupeoubrale.
Fuitede gazdu reservoirde o Defaillancem@aniquedueala rouilleoua une
GPL. mauvaisemanipulation.
Fuitede gazde la valvedu
reservoirde GPL.
Fuitede gazentrele
reservoirde GPLet le
raccorddu regulateur.
Feusortantdu panneaude
commande.
Feudegraisseou grosses
flammescontinuesau
dessusdela surfacede
cuisson.
oDefaillancedelavalvedureservoirduea une
mauvaisemanipulationoua unedefaillance
m@anique,
o Installationincorrecte,connexionnonetanche,
defaillancedujointd'etanch6it6.
oFeudansletube dubraleurau niveaudu
braleurdaa un blocage.
oAccumulationexcessivede graisseautourdu
braleur.
D_pannage
Ledispositifd'allumage
n'allumepas le(s)
braleur(s).
(Voiregalementla section
D@annagepourles
dispositifsd'allumage
electroniques)
suitebla pagesuivante.
PROBLI_MESRELATIFSAUGAZ :
oVousessayezd'allumerle mauvaisbraleur.
oLebraleurn'estpas brancheausyst_mede
valve.
oLebraleurestobstrue.
oLegaznecirculepas.
° FermezI'alimentationen gazauniveaudu reservoiroua lasourceauniveaudu
syst_mededistributiondu gaznaturel.Cessezd'utiliserce produitetremplacer
la vanne/ tuyau/ regulateur.Unefoisvalve/ tuyau/ regulateurremplace
conduitev@ificationdefuite completeparmanuel.
o Remplacezlereservoirdegaz.
oFermezI'alimentationen gaz auniveaude lavalvedu reservoirdeGPL.
RapportezlereservoirdeGPLaufournisseur.
o FermezI'alimentationengazau niveaude lavalvedu reservoir.Retirezle
regulateurdureservoiret v@ifiezpar inspectionvisuellesi lejointd'etanch6it6
aet6endommageou non. Consultezlessections<<Essai d'etanch6it6d'un
reservoirdeGPL)>et<<Connexiondu regulateuraureservoirde GPL )>.
o Fermeztousles boutonsde reglage,ainsique la valvedu reservoir,Laissezle
couvercleouvertpour permettreauxflammesdes'eteindre.Unefois lefeu
eteintetI'appareilrefroidi,enlevezle braleuret inspectez-leafin d'identifierla
presencederouilleoudenidsd'araignees.Consultezlespagesconcernant
lesdangersnaturelsetcellessurle nettoyagedubraleur.
oFermeztousles boutonsde reglage,ainsique la valvedu reservoir.Laissezle
couvercleouvertpour permettreauxflammesdes'eteindre.Unefois le
refroidissementtermine,enlevezlesparticulesd'alimentsetlagraisse
accumulesa I'int@ieurdufoyer, duplateaud'ecoulementdelagraisseetdes
autressurfaces.
oVoir lesinstructionssur le panneaude commandeetdans lasection
Utilisationetentretien.
oAssurez-vousquele syst_medevalve estbien ins@edanslestubesdu
brOleur.
oAssurez-vousquelestubesdu brt31eurne sontpasobstruespardestoiles
d'araigneesou pard'autresmati@es.Voirlasectionsur lenettoyageet
I'entretien.
oWrifiez que lereservoirdeGPLn'est pasvide.Si le reservoirde GPLn'est
pasvide,consultezI'article<<Baissesubite de lacirculationdugaz )>.
Lebraleurne s'allumepas
avecdesallumettes.
oIIy a un bouchondevapeurau niveaude
I'ecrouderaccorddureservoirdeGPL.
oL'@roude raccordet le reservoirdeGPL ne
sontpascompletementbranches.
PROBLEMESI_LECTRIQUES:
o L'electrodeest fendueou cassee.Des
etincellesseproduisenta I'endroitdela
fissure.
o Lapointede I'electroden'est pasplaceeau
bonendroit,
(Nes'appliquepasSUREFIRE)
o Desfils ouI'electrodesontcouvertsde
residusde cuisson.
o Lesfils sontdebranch6sou lecontactest
mauvais.
o Court-circuit(etincelles)entrele dispositif
d'allumageet I'electrode.
o Lapileest@uisee.
ALLUIViAGE€:LECTRONIQUE:
o Pasd'etincelles,pasdebruitd'allumage.
o Pasd'etincelles,quelquesbruits d'allumage.
o Lesetincellessontpresentes,maispasau
niveaude I'electrodeoupasa pleine
puissance.
o Consultezlasection<<PROBLEMES
RELATIFSAU GAZ >>
o L'allumetteesttropcourte.
o Methodeincorrected'allumageavecune
allumette.
oFermeztousles boutonsdereglageetdebranchezI'ecrouderaccorddu
reservoirdegaz. Rebranchez-leetessayeza nouveau.
oTournezI'ecroude raccordd'environundemi-touroudetroisquartsde
toursupplementairejusqu'ace qu'ilsoitbloquea fond. Neserrezqu'a la
main- n'utilisezpasd'outils.
oRemplacezla ou leselectrodes.
BrOleursprincipaux:
oLa pointedeI'electrodedoit_treorienteeversI'orificede gazdu brOleur.
Ladistancedoit sesituerentre1/8poet 1/4po.Ajustezau besoin.
Br01eurlat@al:
oLa pointedeI'electrodedoit_treorienteeversI'orificede gazdu brOleur.
Ladistancedoit sesituerentre1/8poet 3/16po. Ajustezaubesoin.
o Nettoyezlesfils ouleselectrodesaumoyend'alcoola frictionet d'un
chiffonpropre.
o Rebranchezlesfils ouremplacezleselectrodesetlesills.
o Remplacezle@ble d'allumageou I'electrode.
o Remplacezparunenouvellepilealcaline.
oReportez-vousa la sectionI du syst_med'allumageelectronique.
oReportez-vousa la sectionII dusyst_med'allumageelectronique.
oReportez-vousa la sectionIII dusyst_med'allumageelectronique.
o Utilisezdesallumettesa tige Iongue(allumettesconcuespourI'allumagede
foyers).
o Reportez-vousa lasection_<Allumageavecuneallumette)>dansle
manueld'utilisationetd'entretien.
39
Page 40

D_pannage (suite)
Baissesubiteduflux de
gazouflammefaible.
Lesflammess'eteignent.
Flambeessoudaines. , Accumulationdegraisse. , Nettoyezlesbraleurset lapartieint@ieuredugril oudufoyer.
Incendiede graisse , GraissecoinceeparI'accumulationde , Tournezles boutonsen positiond'arr6t(OFF).FermezI'alimentationengaz
persistant, nourritureautourdusyst_medu braleur, au niveaudureservoirdeGPL.Laissezlecouvercleen positionetlaissez
Retourdeflamme... , Lebraleurou lestubesdu braleursent , Tournezlesboutonsen positiond'arr_t(OFF).Nettoyezles braleursou les
(incendiedanslestubes bloques, tubesdebraleur.Voir lasectionsurle nettoyagedu braleurdumanuel
dubraleur), d'utilisationetd'entretien.
Unbraleurne s'allume , Accumulationdegraisseoude particules , Nettoyezle(s)renfort(s)de tubeau moyend'unebrossemetallique.
pasa partird'autres d'alimentsdansle(s)extremit6(s)des
braleurs, renfortsde tube.
D_pannage - Allumage _lectronique
, Legazest @uis&
, Lasoupalpederemplissageexcessifaet6
declenchee.
, IIexisteunbouchondevapeurauniveaude
I'ecrouderaccorddureservoirdeGPL.
, Ventsforts ou rafales.
, Niveaudegaz bas.
, Laso@apederemplissageexcessifaet6
declenchee.
' Ex@sde grasdansla viande. , Enlevezle grasde la viandeavantlacuisson.
, Temp@aturede cuissonexcessive. , Ajustez(abaissez)la temp@atureselonle cas.
, V@ifiezque lereservoirde GPLcontientbiendu gaz.
, Fermezlesboutons,attendez30 secondesetallumezlegril. Si les
flammessenttoujoursfaibles,fermez lesboutonsetlavalvedureservoir.
Debranchezle regulateur.Rebranchezlerequlateuretfaitesunessai
d'etanch6it&Ouvrezla valvedureservoir,a_tendez30secondes,puis
allumezlegril.
, Fermeztousles boutonsde reglage,ainsique lavalvedu reservoir.
DebranchezI'ecroude raccorddureservoir.Rebranchez-leetessayezde
nouveau.
, Tournezle grilafin defaireface auventouaugmentezla hauteurdes
flammes.
, Remplissezlereservoirdegaz.
. Reportez-vousa la section<<Baissesubite deI'ecoulementdu gaz >>ci-
dessus.
lefeu s'@uiser.Lorsquele grila refroidi,enlevezet nettoyeztoutesles
p_eces.
1
SECTIONI
Pasd'etincellesapparaissent
toutmomentdes electrodes
d'allumageelectronique
Buttonispresses,pasde bruit
)eut_treentendua partirde
bougiesmodule.
SECTIONII
Pasd'etincellesapparaissent
toutmomentdeselectrodes
d'allumageelectronique
Buttonispress&le bruit peut
6treentendua partirde
bougiesmodule.
SECTIONIII
Des etincellessent
presentes,mais pasvis-
a-visdetoutesles
electrodesou alors,les
etincellesnesontpas
pleinepuissance.
, Lapilen'est pasinstallee
correctement.
, Lapileest @uisee.
, Leboutonn'estpas
installecorrectement.
, Lemodulede production
d'etincellesest
defectueux.
, Lesills de sortiene sent
pasbranches.
, Lesfilsdesortiene sent
pasbranches.
, Amorcaged'arc
electriqueloindes
bn_leurs.
, Pilefaible.
, Leselectrodessent
mouillees.
, Leselectrodessent ,
fenduesoucassees.Des
etincellesapparaissent
I'endroitde lafissure.
, Wrifiez I'orientationdela pile.
Cettepilea-t-elledeja et6
utilisee?
Wrifiez que lefiletageest bien
engag& Leboutondoitse
d@lacerlibrementdehaut en bas.
Si aucuneetincellen'est
produiteavecunenouvellepile
et unbenraccorddeills, le
moduleest defectueux.
, Lesills de sortiesont-il
branchesetetanches?
Lesills de sortiesont-il
branchesetetanches?
Si possible,observezle gril
dansI'obscurit& Faites
fonctionnerledispositif
d'allumageet cherchez
I'amorgagede I'arcentre lesfils
desortieetle cadredugril.
Touteslesetincellessent
presentes,maisfaiblesou
lentes.
Y-a-t-iluneaccumulation
d'humiditesur I'electrodeou
danslesouverturesdubrt_leur?
Examinezleselectrodespour
d'eventuellesfissures.
° Installezlapile(assurez-veusquelespelarit@s<<->>et<<
+ >>sontorient@escorrectement,aveclec6t@
<<+ >>surlafindelaPAC.)
° Remplacezlapileavecuneneuvellepilealcaline.
, DesserrezI'assemblageducapuchondu boutonet
installez-ledenouveau,en vous assurantquelefiletage
est aligneetengagecompletement.
, Remplacezle moduled'etincelles.
, Enlevezet rebrancheztousles filsdesortiedu moduleet
des electrodes.
, Enlevezet rebrancheztous lesfilsdesortiedu moduleet
des electrodes.
, Si vousvoyezdes etincellesautresque cellesdes
bn_leurs,lesfils d'isolationsentpeut-_treendommages.
Remplacezlesills.
, Remplacezla pile avec unenouvellepilealcaline.
. EssuyezI'humiditeavecuneserviettede papier.
, Remplacezleselectrodesfenduesoucassees.
40
Page 41

CASOS DIE IEMERGIENC|A: Si no se puede detener una fuga de gas, o si ocurre un incendio debido a una fuga de gas, Ilame a los bomberos.
Fugasde gasdemangueras
agrietadas,cortadaso
quemadas.
Fugade gasdelcilindro.
Fugadegas dela valvuladel
cilindro.
Fugadegas entreelcilindro
y la conexi6ndelregulador.
Salefuego porel tablero
de control.
Haycontinuamentefuego
producidopor lagrasa o
demasiadasllamassobre la
superficiede cocinar.
Resolucion de problemas
Elquemadorolos
quemadoresnose
enciende(n)al usarel
encendedor.(Leaademasla
secci6nResoluci6nde
problemasdel encendido
electr6nico)
, Mangueradafiada.
, Fallamecanicadebidoa la oxidaci6no al maluso.
, Fallade lavalvuladel cilindrodebidaal realuso
o afallamecanica.
, Instalaci6ninadecuada,laconexi6nnoesta bien
apretada,fallade lajuntadecaucho.
, Fuegoenla secci6ndeltubodelquemador
debidoa unbloqueo.
, Demasiadagrasaacumuladaenlazonadelquemador
PROBLEIViASDEGAS:
, Estatratandodeencenderel quemadorequivocado.
, FI quemadornoestaconectadoalavalvulade control.
, Obstrucci6nenel quemador.
, Nohayflujo degas.
- Cierreel gasen el cilindroo en lafuente de lossistemasdegasnaturaI.Dejede
utilizarelproductoy vuelvaa colocarla valvula/ lamanguera/ el regulador.Una
vezquela valvula/ lamanguera/ reguladorsustituy6conductacompletarevisi6n
defugassegOnelmanual.
, Cambieelcilindrodegas.
, Cierrelavalvula delcilindrodegas.Devuelvaelcilindroal proveedordegas.
, Cierrelavalvuladel cilindrode gas.Retireelreguladordeltanquey examine
visualmentelajuntadecaucho paradetectarcualquierdafio. Lea lassecciones
tituladasPruebaparadetectarfugasenun cilindrodegasy C6moconectarel
reguladoralcilindrodegas.
, Cierrelasperillasde controly lavalvuladel cilindrodegas.Dejeabierta latapa para
permitirquelasllamasseextingan.Unavezque se hayaextinguidoel fuegoy la
parrillaestefria, retireelquemadory examineloparaver si tienenidos de arafiaso
herrumbre.Lealas paginasrelativasaLospeligrosnaturalesyla limpiezadela
unidaddel quemador.
, Cierrelas perillasdecontrol y lavalvuladelcilindrodegas. Dejeabiertala tapa para
permitirquelasllamasseextingan.Unavezque se hayaenfriado,limpielasparticulas
decomiday laacumulaci6nde grasaen la parte interiorde lazonade lacamarade
combusti6n,la bandejaparalagrasa ytodaotra superficie.
, Lealasinstruccionesen eltablerode controlyenla secci6ntituladaUsoy
mantenimiento.
, Verifiqueque lasvalvulasestenubicadasdentrode lostubosdelosquemadores.
, Verifiqueque el tubode los quemadoresnoeste obstruidocon telarafiasuotras
materias.Lea la partereferentea lalimpiezaen lasecci6nUsoymantenimiento.
, Verifiqueque el tanqueno estevacio.Si eltanquede gasnoesta vacio,lealasecci6n
referenteala Caidarepentinadelflujo degas.
ContinOaen la pagina
siguiente.
El quemadoro losquemadores
nose enciendenconf6sforos.
, Hayvaporatrapadoenla tuercade uni6nal tanque
degas.
, Latuercade uniony lavalvuladel tanquede gas no
estan bienconectadas.
PROBLEMASDE ELECTRIClDAD:
, Electrodoagrietadooroto;salen"chispasdela grieta".
, Lapuntadel electrodonoestaenla posici6ncorrecta.
(NoseaplicaaSURFIRE)
, Elcable oelelectrodoestacubiertocon restosde
comida.
, Loscablesestanflojos odesconectados.
, Loscablesproducencortocircuitos(chispas)entre
el encendedoryel electrodo.
, Pilagastada.
ENCENDIDOELECTRONICO:
, Nohay chispa,no hay sonidode encendido.
, Nohay chispa,hay unsonidoleve de encendido.
, Haychispas,peronoenel electrodoo a plena
potencia.
, Lea"PROBLEMASDE GAS:".
, Elf6sforono Ilegaal puntodeencendido.
, Metodoinadecuadode encendidocon f6sforos.
, Cierrelas perillasydesconectela tuercadeuni6ndeltanque.Vuelvaaconectarlay
tratedenuevo.
, Girela tuercade uni6n entre mediavuelta ytrescuartosde vuelta adicionales,hasta
queno la puedagirarmas.Aprietelaa manot]nicamente,nouse herramientas.
°Cambieel (los)electrodo(s).
Quemadoresprincipales:
, Lapuntadelelectrododebe estarorientadahaciael orificiode combusti6ndel puerto
delquemador.Ladistanciadebeser de 1/8"a 1/4"(3,17mma 6,35 ram).Ajt]stelasi
esnecesario.
Quemadorlateral:
, Lapuntadel electrododebeestarorientadahaciael orificiode combusti6ndel puerto
del quemador.Ladistanciadebeserde 1/8"a 3/16".(3,17 mma 4,76ram) Ajt]stelasi
es necesario.
, Limpieel cableyel electrodoconalcoholde frotary un hisopolimpio.
, Vuelvaa conectarlos cableso cambiela unidaddeelectrodo/cable.
, Cambielaunidaddelcabledel encendedor/ el electrodo.
, Cambielaporunapilaalcalina nueva.
, Leala secci6nI deSistemade encendidoelectr6nico.
, Lealasecci6nIIde Sistemadeencendidoelectr6nico.
• Lea la secci6n IIIde Sistema de encendido electronic&
, Useun f6sforode palitolargo(f6sforoparaencenderchimeneas).
, Leala partetituladaEncendidoconf6sforosde lasecci6nUsoymantenimiento.
41
Page 42

Resoluci6ndeproblemas(continuaci6n)
H H iiiiiiii_,,=,iii_.....
Caida repentinadelflujode
gas o llamareducida.
Llamasqueseapagan.
Fogonazos.
Fuegospersistentes, oCierrelasperillas.Cierreel pasode gas desdeel tanque.Dejelatapa ensu sitioy
producidosporla grasa, dejequese apagueelfuego. Despuesde que seenfrie laparrilla,retirey limpie
Retornodelas Ilamas...(fuego oCierrelasperillas.Limpieel quemadoro lostubosdel quemador.Leala secci6nde
enlostubosdelquemador), limpiezadel quemadorde Usoymantenimiento.
Unode losquemadoresno oLimpieel (los) tubo(s)dearrastrecon uncepillode alambre.
enciendedel (delos)otro(s)
quemador(es).
oSe acab6el gas.
oSe activ6lavalvulaporsobrecargade gas.
oHayvaporatrapadoen laconexi6nde latuercade
uni6nyel tanquedegas.
oVientosfuertesoen rafagas.
oBajoflujode gas propano.
oSe activ6lavalvulaporsobrecargade gas.
oAcumulaci6ndegrasa.
oCarnesumamentegrasosa.
oTemperaturadecocci6ndemasiadoelevada.
oGrasaatrapadaporacumulaci6nderestosdecomida
alrededordel sistemadelquemador.
oElquemadoro los tubosdel quemadorestan
obstruidos.
oAcumulaci6ndegrasaode particulasdecomidaen
el (los)extremo(s)del (delos)tubo(s) de arrastre.
oVerifiquequeeltanquedegasestecargado.
oCierrelasperillas,espere30 segundosy enciendalaparrilla.Si las llamas
siguensiendo bajas,cierrela perillayla valvuladel tanquedegas.Desconecte
el regulador.Vuelvaa conectarelreguladory hagauna pruebaparadetectar
fugas.Abrala valvuladeltanquedegas,espere30 segundosy, luego,encienda
la parrilla.
oCierrelas perillasdecontrolyla valvuladelcilindrode gas. Desconectela
tuercade uni6ndel tanque.Vuelvaa conectarlaytratedenuevo.
oGireelfrente de laparrillade modoquequedede caraal viento,o aumentela
graduaci6nde las llamas.
oRecargueeltanquedegas.
oLeaIoreferentea la Caidarepentinadel flujodegasenla secci6nanterior.
oLimpielos quemadoresyel interiordela parilla/ camarade combusti6n.
oDesgrasela carneantesdecocinarlaa laparrilla.
oAjuste (baje)latemperaturasegt]ncorresponda.
todaslas piezas.
Resolucionde problemas - Encendidoelectronico
SECClONI
No aparecenencualquier
chispascuandoloselectrodos
deencendidoelectr6nico
Buttonispresionado,nose
puedeescucharel ruidode
chispasm6dulo.
SECClON II
Noaparecenencualquier
chispascuandolos electrodos
deencendidoelectr6nico
Buttonispresionado;se puede
escucharelruido de chispas
m6dulo.
SECCIONIII
Hay chispasperonoentodos
loselectrodosy/ono a plena
potencia
oLapilano estainstalada
adecuadamente.
oPilagastada.
oMontajeButtonno istalled
correctamente
oM6dulodechispasdefectuoso.
oLasconexionesdelcablede
salidanoestanbienhechas.
oLasconexionesdelcablede
salidanoestan bienhechas.
oElarcode la parrillaseforma
lejosdel(de los)quemador(es).
oPiladebil.
oLoselectrodosestanht]medos.
oLoselectrodosestanagrietados
o rotos,con"chispasen las
grietas".
oReviselaorientaci6nde lapila.
o_Esunapila usada?
oVerifiquequelatapade lapila
este bienconectada.
oSi nosegeneranchispasconlapila
nuevaylas conexionesdel cableestan
bienhechas,el m6duloesta
defectuoso.
o2Estanconectadasy bienhechas
lasconexionesdesalida?
o_,Estanconectadasy bienhechas
lasconexionesdesalida?
oSies posible,observela parrillaenun
lugaroscuro.Hagafuncionarel
sistemadeencendidoytratede
detectarlaformaci6ndelarco entre los
cablesdesalidayel marcode la
parrilla.
oSe formantodaslas chispas,peroson
debilesolentas.
o&Sehaacumuladohumedadenel
electrodoy/o enlosorificiosde
combusti6n?
oExamineloselectrodosparadetectar
grietas.
oInstalelapila(verifiqueque losconectores"+"y ""estenorientados
correctamente,conel extremo"+"dela tapa.)
oCambielaporuna pilaalcalinanueva.
oQuitela unidaddelatapade lapilay vuelvaa instalarla;
verifiqueque estebienconectada.
oCambiela unidaddel m6dulodechispas.
oRetirey vuelvaa hacertodaslas conexionesdesalidaenel
m6duloyen los electrodos.
oRetirey vuelvaa hacertodaslas conexionesdesalida
enel m6duloyen loselectrodos.
oSi seobservanchispasquenoseandel (delos)
quemador(es),esposiblequeestedaSadoelaislamientode
loscables.Cambieloscables.
oCambiela pila poruna pila alcalinanueva.
oUse unatoalladepapelparasecarla humedad.
oCambieloselectrodosagrietadosorotos.
42
Page 43

Three convenient ways to register your product:
Trois fa(;ons pratiques d'enregistrer votre produit:
Tres formas convenientes de registrar su producto:
O Online
En ligne
En Ifnea
Scan QR Code
En scannant le code QR
Escaneando el c6digo QR
By mail I Par la poste I Por correo
PLEASE FILL OUT THIS CARD AND ATTACH A COPY OF YOUR SALES RECEIPT. RETURN IT WITHIN 10 DAYS OF PURCHASE. FOR WARRANTY SERVICE PROOF OF PURCHASE
WILL BE REQUIRED. THIS WARRANTY IS NON-TRANSFERABLE,
LLENE ESTATARJETA Y DEVUELVALA DENTRO DE LOS 10 DIAS DE LA COMPRA. PARA ELSERVlCIO DE GARANTIA ES NECESARIO QUE PRESENTE SU COMPROBANTE DE
COMPRA, CONSERVE LA FACTURA. ESTA GARANTIA ES INTRANSFERIBLE.
VEUILLEZ COMPLETER CETTE CARTE ET LA RETOURNER DANS LES 10 JOURS SUIVANT L'ACHAT, POUR OBTENIR LE SERVICE SOUS GARANTIE, UNE PREUVE D'ACHAT DOlT
ETRE PRESENTEE. VEUILLEZ CONSERVER VOTRE FACTURE. LA PRESENTE GARANTIE N'EST PAS TRANSFERABLE.
*Required I Necesario I Exig6 ~ PLEASEPRINT~ IMPRIMA POR FAVOR ~S'IL VOUSPLA'fTIMPRIMER ~
* 1. First Name I Nombre I Pr_nom
Address (number & street) I Direcci6n (nt_mero V calle) I Adresse (num_ro et rue) Apt Number I N-°de apart I N°-d'appt •
* 2, E-mail Address I Direcci6n de correo electr6nico ! Adresse (}lectronique
Ini_al ! Inicial I Ini_ale Last Name I Apellido I Nora de Famillie
Zip Code I C6digo Zip I Code PostalCity I Cludad I Ville State [ Estado I Province
* 3. Phone Number I N_mero telef6nico _ Num_ro de t_l_phone
*4.
Model Number I N_mero de modelo I Num_ro de mode e I __,_ _ _,_',_f-_z._
Serial Number I N_mero de seriel Num_ro de s_rie
6. Date of Purchase I Fecha de compra I Date de I'achat
7. Store Name I Nombre de la tienda I Nora du magasin
ST_C_ERON PRODUCT
$
_, Purchase Price I Precio de compra [ Prix d'achat
10.
Which product are you registering?
?.Qu_ producto est_ registrando?
Quel produit enregistrez-vous?
1. [_Gas Grill ] Parrilla a gas ]Gril au gaz
2. [] Electric Grill ] Parrilla el_ctrica ] Gril _lectrique
3. []Smoker I Ahumador [ Fumoir
4. []Charcoal Grill ] Parrilla a carb6n [ Barbecue au charbon
5. E_ Cooker/Fryer ] Cocina/freidora ] Cuiseur/Friteuse
6. []Other I Otro I Autre
We respect your privacy. I Respetamos su privacidad. [ Nous respectons votre vie priv_e.
O If you prefer not to receive special offers and promotions from Char-Broil, please check here: [ ]
o Marque aquf si no desea recibir ofertas y promociones especiales de Char-Broih
® Si vous pr_f_rez ne pas recevoir d'informations concernant des offres sp_ciales et des
promotions de Charbroil, veuillez cocher ici:
9. Your Gender I Sexo I Sexe:
[] Male I Masculino I Masculin
[]Female ] Femenino I F_minin
Mail to: / Enviar a: / Envoyer _ :
Char-Broil Warranty Registration
P.O.Box 1240
Columbus, GA 31902-1240
* S. Attach copy o[your
sales receipt here.
Adjunte aqui la copia
de su recibo de
corn pra
Veuillezattacherune
copiede votrere_u
Thank you for completing this questionnaire. I Gracias per completer este cuestionario. I Merci d'avoir bien voulu remplir ce questionnaire.
43
Page 44

i::
i::,, Delicious
,- Exciting ever_ts and promotions
: .,And much more -
REGISTERYOUR
PRODUCTTO
RECEIVEA
:SPECIALOFFER
CHARBROIL.COM/REGISTER
REGISTREZ
VOTREPRODUIT
RECEVOIRUNE
IY
OFFRESPECIAL
CHARBROIL.COM/REGiSTER
:REGISTRESU
PRODUCTOPARA
RECl UNA
OFERTAESPECIAL
CHARBROIL.COMIRE61STER
 Loading...