

Page 1
DH5000 Straight-through to Corner Operation
Conversion Instructions
Converting Straight-through Operation to Corner Operation
! ATTENTION !
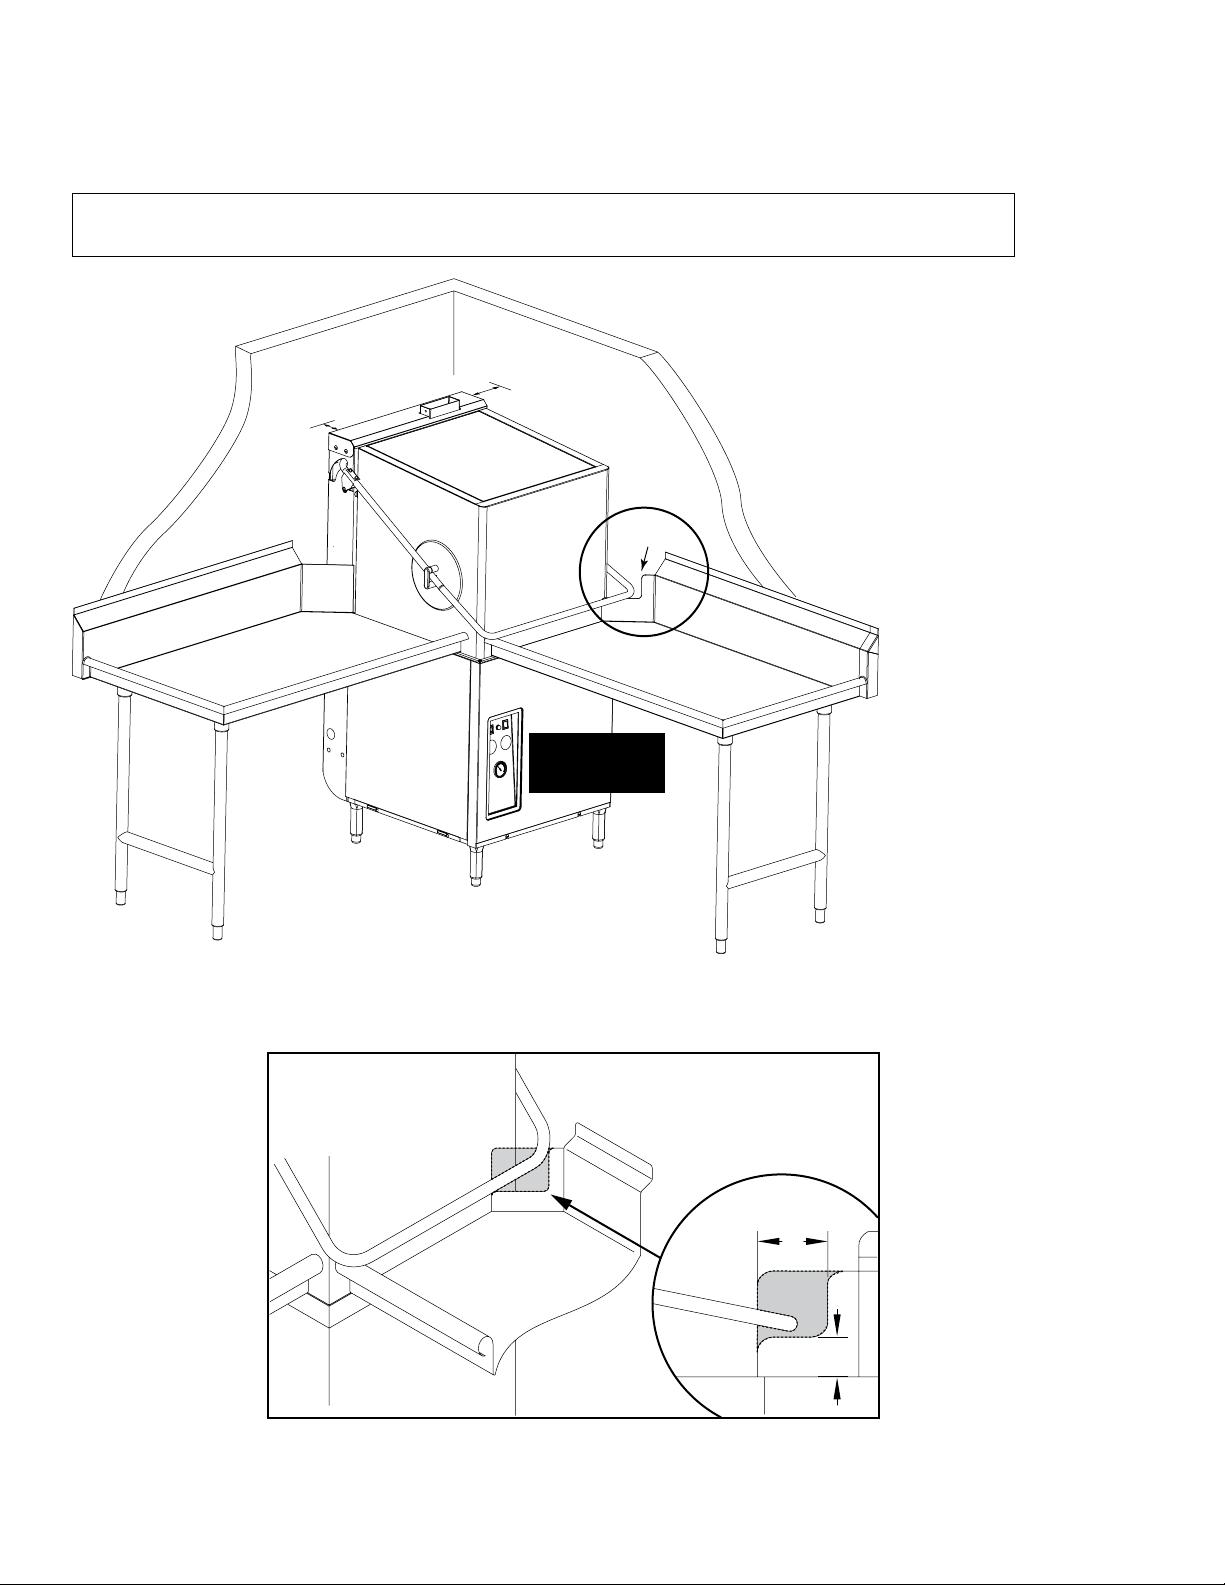
The clean-end dish table must be modified if the backsplash is more than 3” [76mm] high.
Refer to the illustration below and the next page to convert a straight-through operation machine to
a corner operation machine.
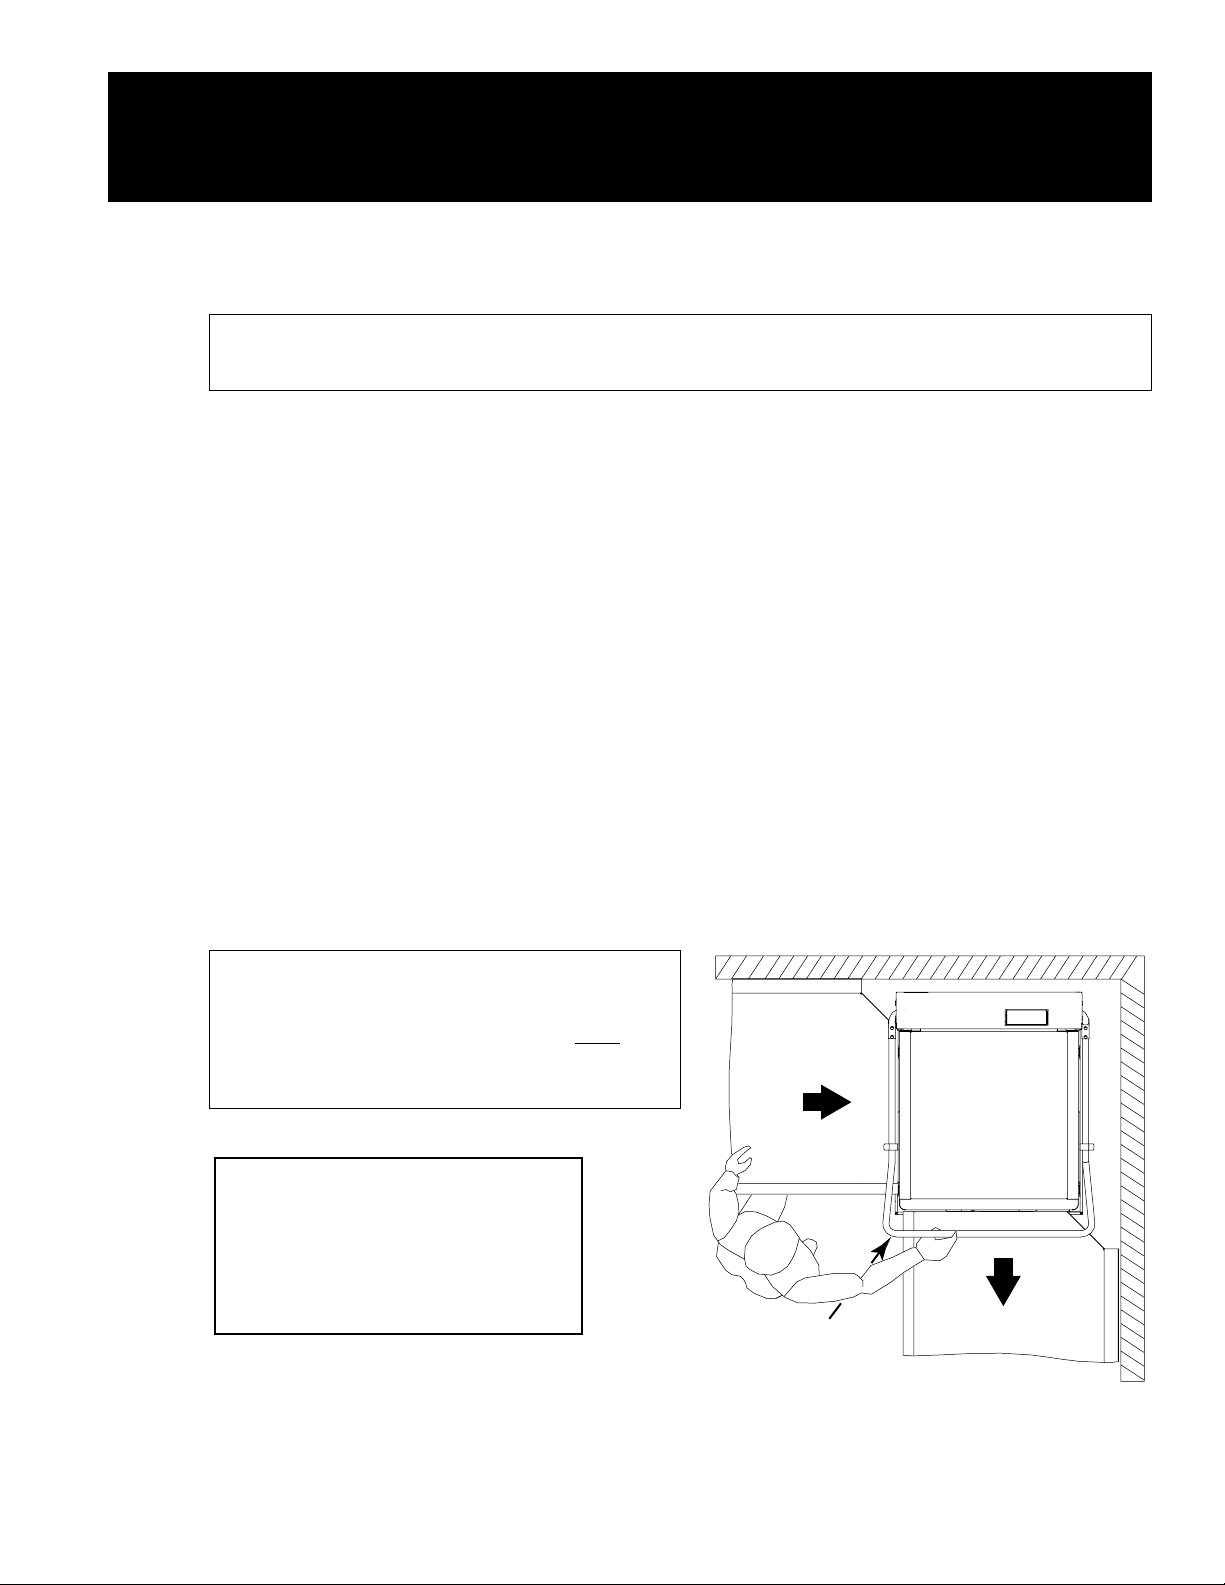
To convert the dishwasher:
1. Place the dishwasher as shown below so the control panel faces into the room
and is accessible to the operator.
2. Refer to the illustrations on the next page and cut a notch in the dish table backsplash
if it is higher than 3" [76 mm].
3. Position the rear of the machine a minimum of 1-7/8" [48mm] from the back wall and a
minimum of 5-1/8" [130 mm] from the right side wall.
4. Make the utility connections as described in this manual and in accordance with all
local codes and regulations.
5. Install the dish tables so the edge of each table fits over the inner wall of the dishwasher
tank.
6. Secure the dish tables to the dishwasher
7. Seal each dish table joint with a food-grade sealant to prevent leakage.
! IMPORTANT !
An optional Splash Shield, P/N 334630, is
available for corner operation and must be
installed before the machine is placed in its
permanent location.
NOTE:
DH5000 Splash Shield Installation
Kit P/N 901156 installation
instructions f
prior to S/N D140911960 are on
page 4.
or machines built
Control
Panel
Corner Operation Shown
1Form No. 114907 rev. C
Page 2
Converting Straight-through Operation to Corner Operation (continued)
! ATTENTION !
If the backsplash is more than 3" [76mm] high, then it must be notched for handle clearance.
1-7/8"
[48]
MIN.
5⅛"
[130]
MIN.
Controls must
be accessible.
CORNER CONFIGURATION
See Detail
HANDLE CLEARANCE CUTOUT
FOR CORNER OPERATION
Detail
2 Form No. 114907 rev. C
5"
[127]
3" [76]
Page 3

Converting Straight-through Operation to Corner Operation
Track Assembly
Guide
! IMPORTANT !
An optional Splash Shield, P/N 334630, is available for corner operation and must be installed
before the machine is placed in its permanent location.
Track Assembly Conversion:
Step 1: Open the hood and remove the
track assembly. Pull straight up and lift out
of the machine.
Step 2: Rotate the track assembly 180°
and reinstall it in the machine.
Step 3: The guide that was at the back of
the machine is now at the front. Remove
the fasteners holding the guide in place.
Save the fasteners.
Step 4: Rotate the guide counter-clockwise
to the right-side of the track assembly.
Use the fasteners to secure the guide.
Optional Splash Shield Installation for S/N D140911960 and above:
The splash shield reduces splash-out whenever the hood is raised.
IMPORTANT:
The splash shield must be installed before the machine is placed in its
permanent location.
Step 1: Remove the two 1/4-20 x 1/2" hex head bolts
located on the right-hand side of the machine as shown
in the illustration “Splash Shield (outside view)”.
Save the bolts.
Step 2: Raise the hood and fit the splash shield channel
guide over the edge of tank. Refer to illustration
“Splash Shield (inside view).
Step 3: Reinstall the bolts removed in step 1.
Step 4: Open and close the hood to ensure it
operates smoothly.
Step 5: Conversion is complete.
Bolts
1/4-20 X 1/2"
Splash
Shield
(inside view)
Channel
Guide
Splash
Shield
Right-side
of machine
Note:
See page 4 for splash shield installation instructions
for machines built prior to S/N D140911960.
Corner
Wall
Splash Shield (outside view)
3Form No. 114907 rev. C
Page 4

Kit 901056 - DH5000 Splash Shield Installation Kit
For machines built prior to S/N D140911960.
! IMPORTANT !
The splash shield must be installed before the machine is placed in its permanent
location.
Step 1: Check the contents of the kit.
Qty. (1) P/N 334630, DH5000 Splash Shield
Qty. (2) P/N 100734, 1/4-20 x 1/2” Hex Hd. Bolt
Qty. (2) P/N 106482, Washer, Lock 1/4”
Qty. (2) P/N 106026, Washer, Flat 1/4”
Step 2: Refer to the illustration at right. Raise the hood and fit the
splash shield channel guide over the right hand edge of tank.
Step 3: Refer to the the illustration below. Using the splash shield as a
template, mark the location for the mounting holes on the right-hand
side of the machine.
Step 4: Use a 5/16” drill bit and drill two mounting holes.
Step 5: Install the panel using two stainless steel 1/4-20 x 1/2” bolts
nuts, flat washers, and lock washers supplied in the kit.
Step 6: Raise and lower the hood to ensure it operates smoothly.
Step 7: The conversion is complete.
Splash
Shield
(inside view)
Channel
Guide
Splash
Shield
Bolts
1/4-20 X 1/2"
nuts, flat washers
and lock washers
4 Form No. 114907 rev. C
Right-side
of machine
Corner
Wall
Splash Shield (outside view)
 Loading...