

Page 1
1
2 3
4
56
789
*
0#
C ncel
Models WKP5LM3 & WKP250LM3
#
#
#
?
?
?
?
Wireless Keypad
®
Overview
The Wireless Keypad uses a digitally secure intercom
link that allows it to control one access point. The
Wireless Keypad is compatible with various LiftMaster
Wireless Products.
Model WKP5LM3 can hold up to 5 PIN Numbers.
Model WKP250LM3 can hold up to 250 PIN Numbers.
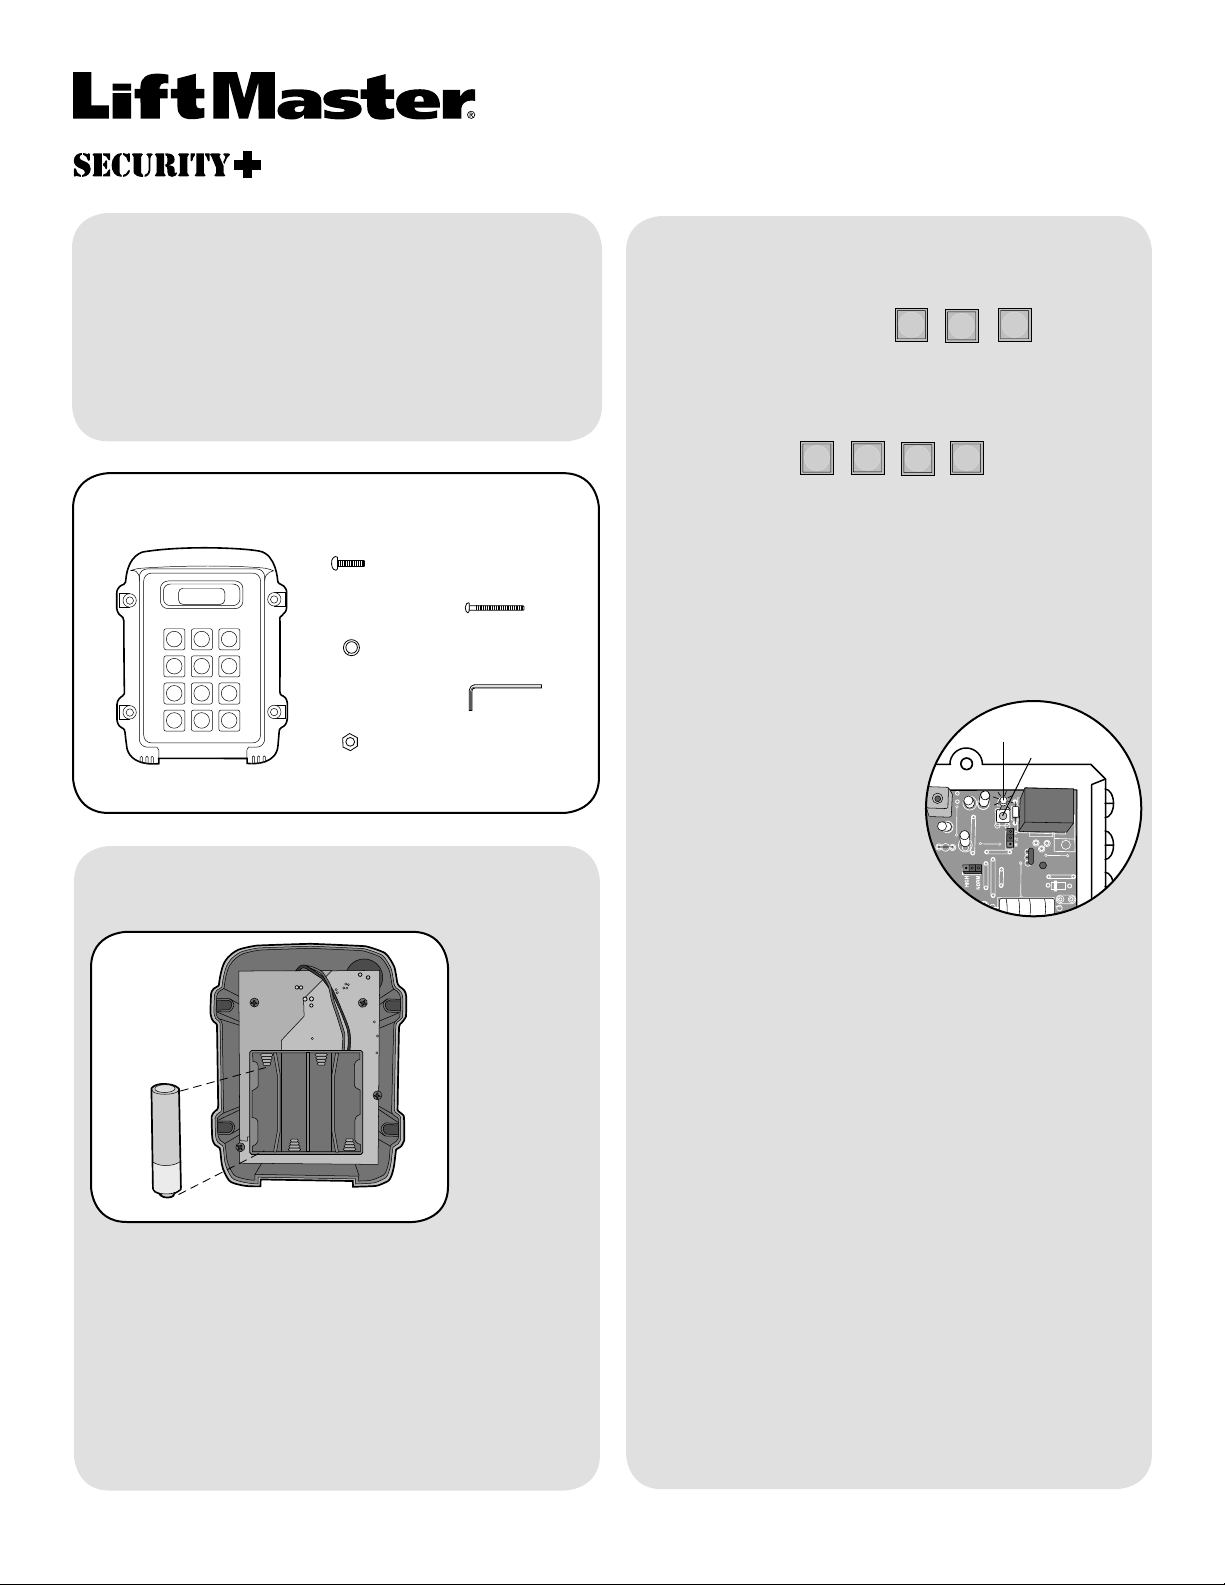
Carton Inventory
Bolt (4)
Screw (4)
Washer (4)
Allen Wrench
Keypad
Nut (4)
Assembly
Initial Setup
Step 1: On keypad press:
Step 2: Enter 4 digit Master PIN Number.
Example: 1234.
NOTE: “ * “ is the cancel button that will cancel any
call or key sequence.
Program Pre-Installed LiftMaster Receiver
Step 1: Pry open the front
panel of the receiver case
with a coin or a screwdriver.
Step 2: Press and release
the Learn button on the
receiver. The Indicator Light
will light for 30 seconds
indicating that receiver is in
Learn Mode.
Indicator Light
Learn Button
Install 4 AA Alkaline batteries (not provided). (Lithium
batteries recommended for colder environments.)
Keypad will beep.
Keypad will continuously beep indicating no Master
PIN Number has been programmed. Proceed to Initial
Setup.
Step 3: Within 30 seconds enter Master PIN Number
on Keypad.
Step 4: Press “1”.
Erase All Control Codes
Press and hold the Learn button on the receiver until
the Indicator Light turns off indicating that the receiver
memory is clear (about 6 seconds).
1
Page 2
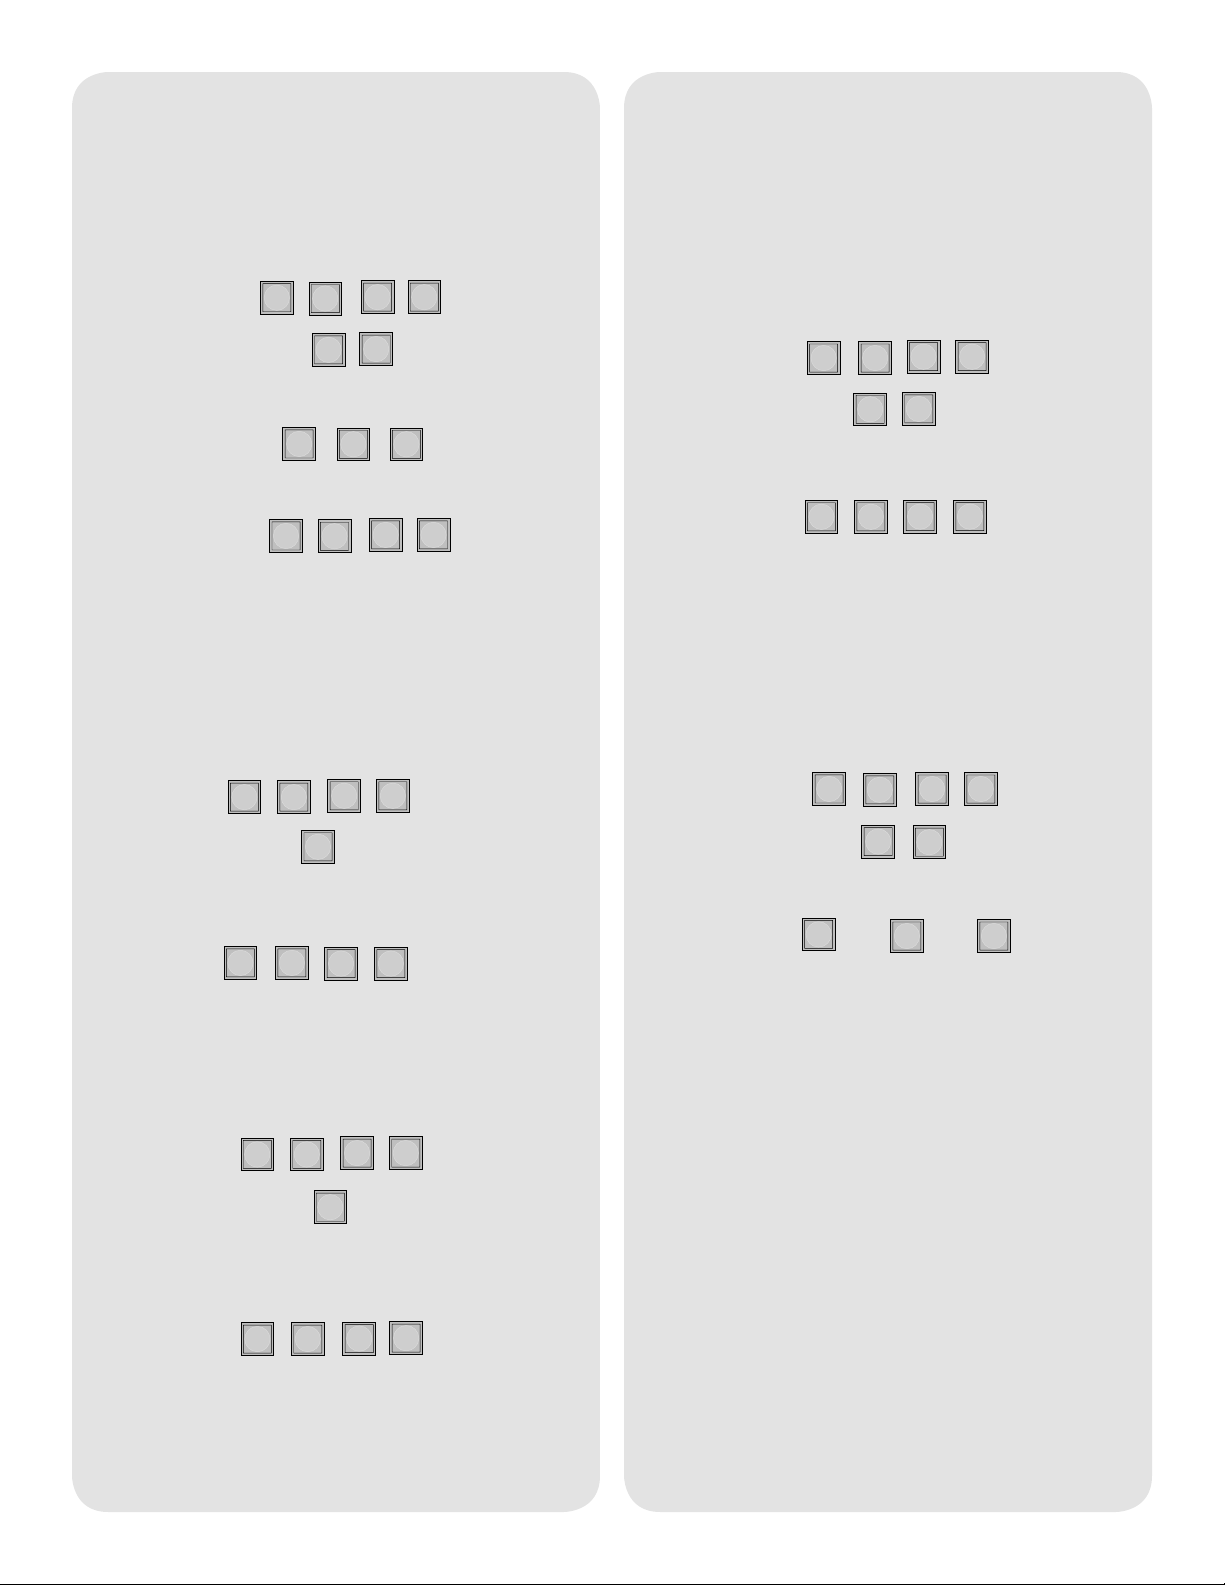
Operation
?
???
0
9
#
#
#
???
?
5
1
???
?
9
?
?
?
?
7
?
?
?
?
0
8
1
2
3
To use Keypad, enter any valid PIN Number.
Change Master PIN Number
Enter existing Master PIN Number on Keypad:
“BEEP”
Enter new Master PIN Number:
“BEEP”
Adding PIN Numbers
The WKP5LM3 can support up to 5 PIN Numbers
while the WKP250LM3 can support 250.
Temporary PIN Numbers
A temporary PIN Number can be used only once
within a 24 hour period.
NOTE: The WKP5LM3 can hold up to 5 Temporary
PIN Numbers while the WKP250LM3 can hold 15.
Enter Master PIN Number on Keypad:
“BEEP”
Enter temporary PIN Number:
“BEEP”
Keypad Brightness
When it is dark, the panel will light when it detects
movement (up to 5') or when a button is pressed.
Enter Master PIN Number on Keypad:
“BEEP”
Enter new PIN Number:
“BEEP”
Erasing PIN Numbers
Enter Master PIN Number on Keypad:
“BEEP”
Enter PIN number you want to remove:
Enter Master PIN Number on Keypad:
Enter one of the following brightness levels:
OR
OR
“BEEP”
Default setting is 2.
Battery
The AA batteries (not provided) in the Keypad will
typically last up to 3 years depending on use. (Lithium
batteries recommended for colder environments.)
“BEEP” “BEEP”
A triple beep indicates a PIN Number has been
entered that does not exist. The Master PIN Number
cannot be deleted.
Page 3

Mount Keypad
It is recommended that Keypad be mounted to a
Gooseneck post or non-metallic surface. If it is
necessary to mount Keypad to a metal surface, use a
non-metallic spacer to move the Keypad away from
the metal surface.
Step 1
Choose mounting location for Keypad. Remove the
back panel and attach it to a solid surface or post.
Step 2
Mount the Keypad onto the back panel with screws.
Tighten screws with Allen wrench.
3
Page 4

One Year Limited Warranty
The Chamberlain Group, Inc. warrants to the first retail purchaser of this product that it is free from defect in materials and/or workmanship for a period
of 1 year from the date of purchase.
FOR TECHNICAL SUPPORT DIAL OUR TOLL FREE NUMBER:
1-800-528-2806
www.liftmaster.com
NOTICE: To comply with FCC and or Industry Canada rules (IC), adjustment or modifications of this receiver and/or transmitter are prohibited,
except for changing the code setting or replacing the battery. THERE ARE NO OTHER USER SERVICEABLE PARTS.
Tested to Comply with FCC Standards FOR HOME OR OFFICE USE. Operation is subject to the following two conditions: (1) this device may not
cause harmful interference, and (2) this device must accept any interference received, including interference that may cause undesired operation.
© 2011, The Chamberlain Group Inc.
114A3531D All Rights Reserved
 Loading...