

Page 1
®
Model NTD2
Wireless Portable Indoor/Outdoor
Intercom
Overview
The Intercom has up to a 1000' range and allows
multiple simultaneous conversations, using a 900 MHz
secure digital radio link. The intercoms form an
exclusive network and respond only to other intercoms
in the network.
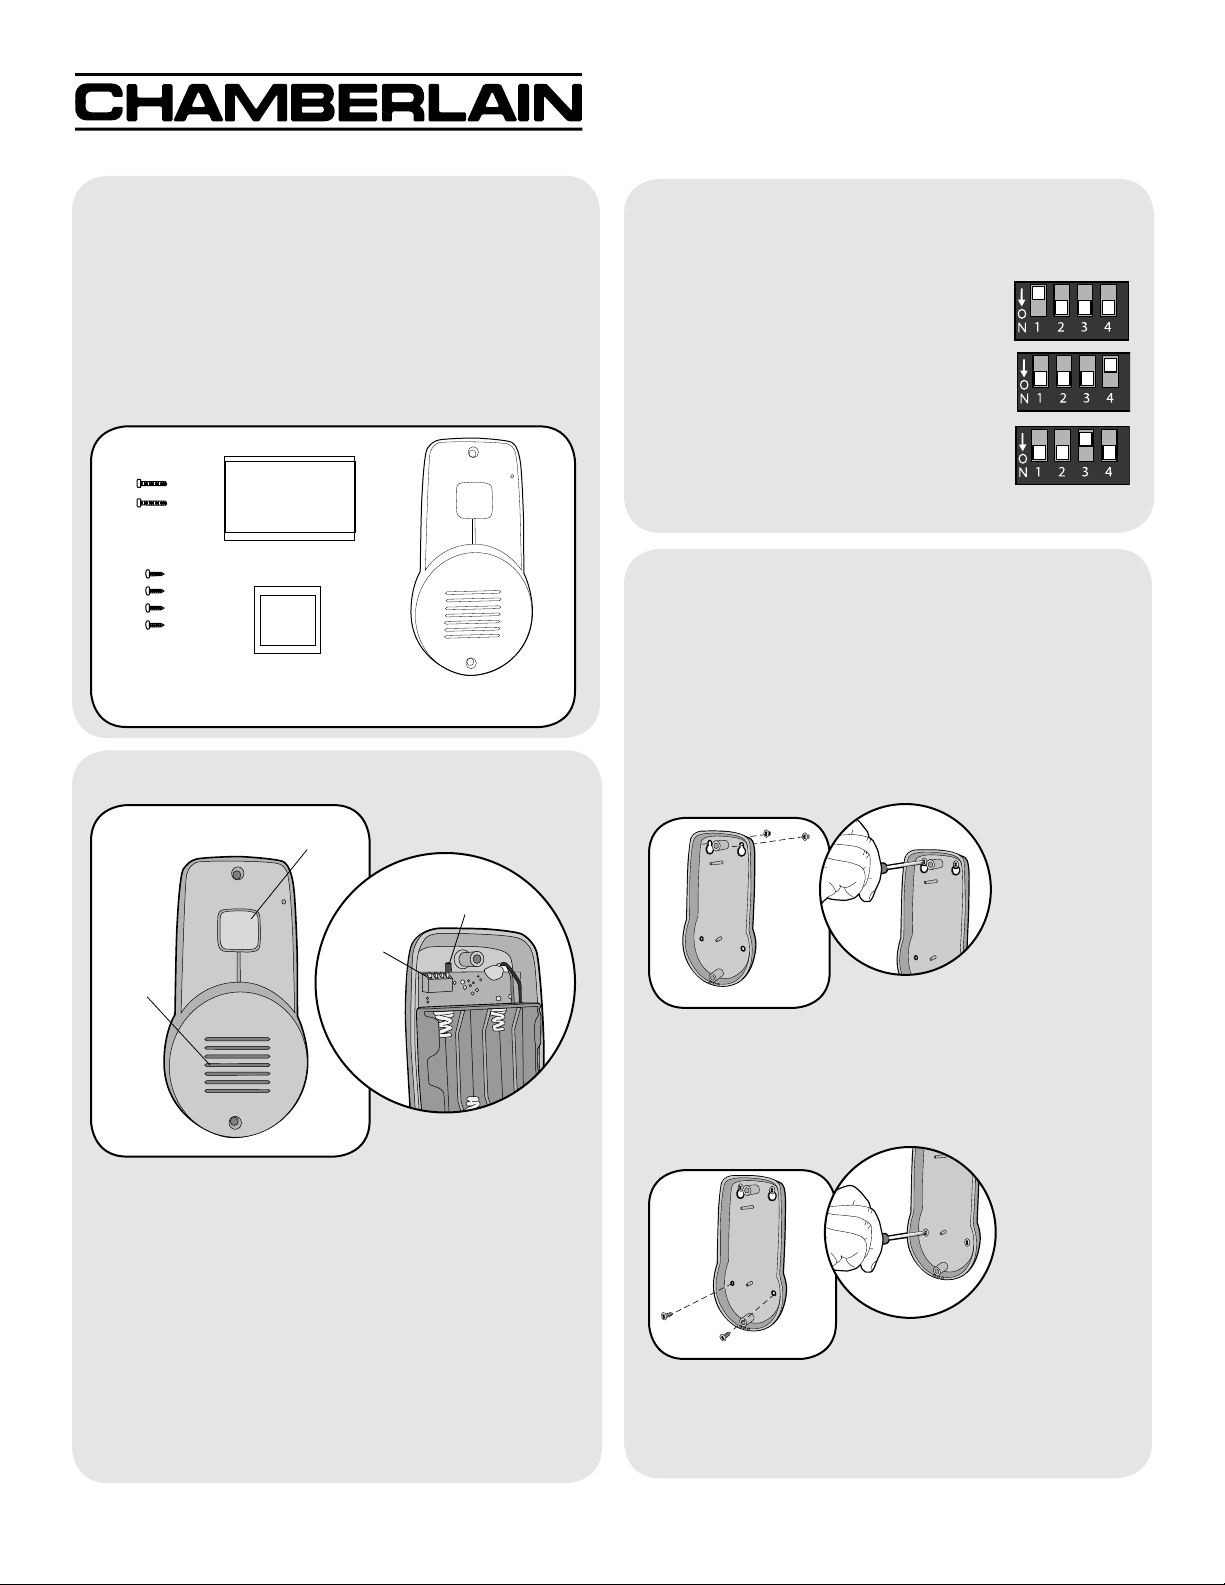
Carton Inventory
Mounting Tape
Alcohol Wipe
Intercom (2)
Operation & Features
Call Mode: In Call Mode the intercom may only be
used to call the intercom network and will not be able
to hear conversation from within the network.
To put intercom into Call Mode place
Dipswitch #1 to the UP position.
Volume: To increase the intercom
volume, place Dipswitch #4 to the UP
position.
Sensitivity: To increase sensitivity on
the intercom set Dipswitch #3 to the
UP position.
NOTE: Dipswitch #2 is not used.
Mounting Intercom
The Intercom can be mounted by using the included
screws or by using the double-sided mounting tape. It
is recommended to use the mounting tape on
surfaces such as metal or glass.
Mounting with Screws
Step 1
Talk Button
Learn Button
Dipswitch
Block
Speaker
Talk Button: To talk, hold down the Talk button and
all intercoms in the network will receive the signal.
When holding down the Talk button on a different
intercom, a secure channel is created and the other
intercoms in the network do not hear the
conversation.
Battery: The AA Alkaline batteries (not provided) will
last up to a year depending on use (Lithium batteries
recommended for colder environments). When the
batteries are low it will emit three beeps every ten
minutes.
Mount Intercom with small silver screws. See
mounting template on page 3. Screw the top two
screws halfway into the mounting surface. Place back
of intercom over screws. Tighten screws.
Step 2
Put the remaining silver screws into the bottom holes
of intercom. Tighten screws.
1
Page 2
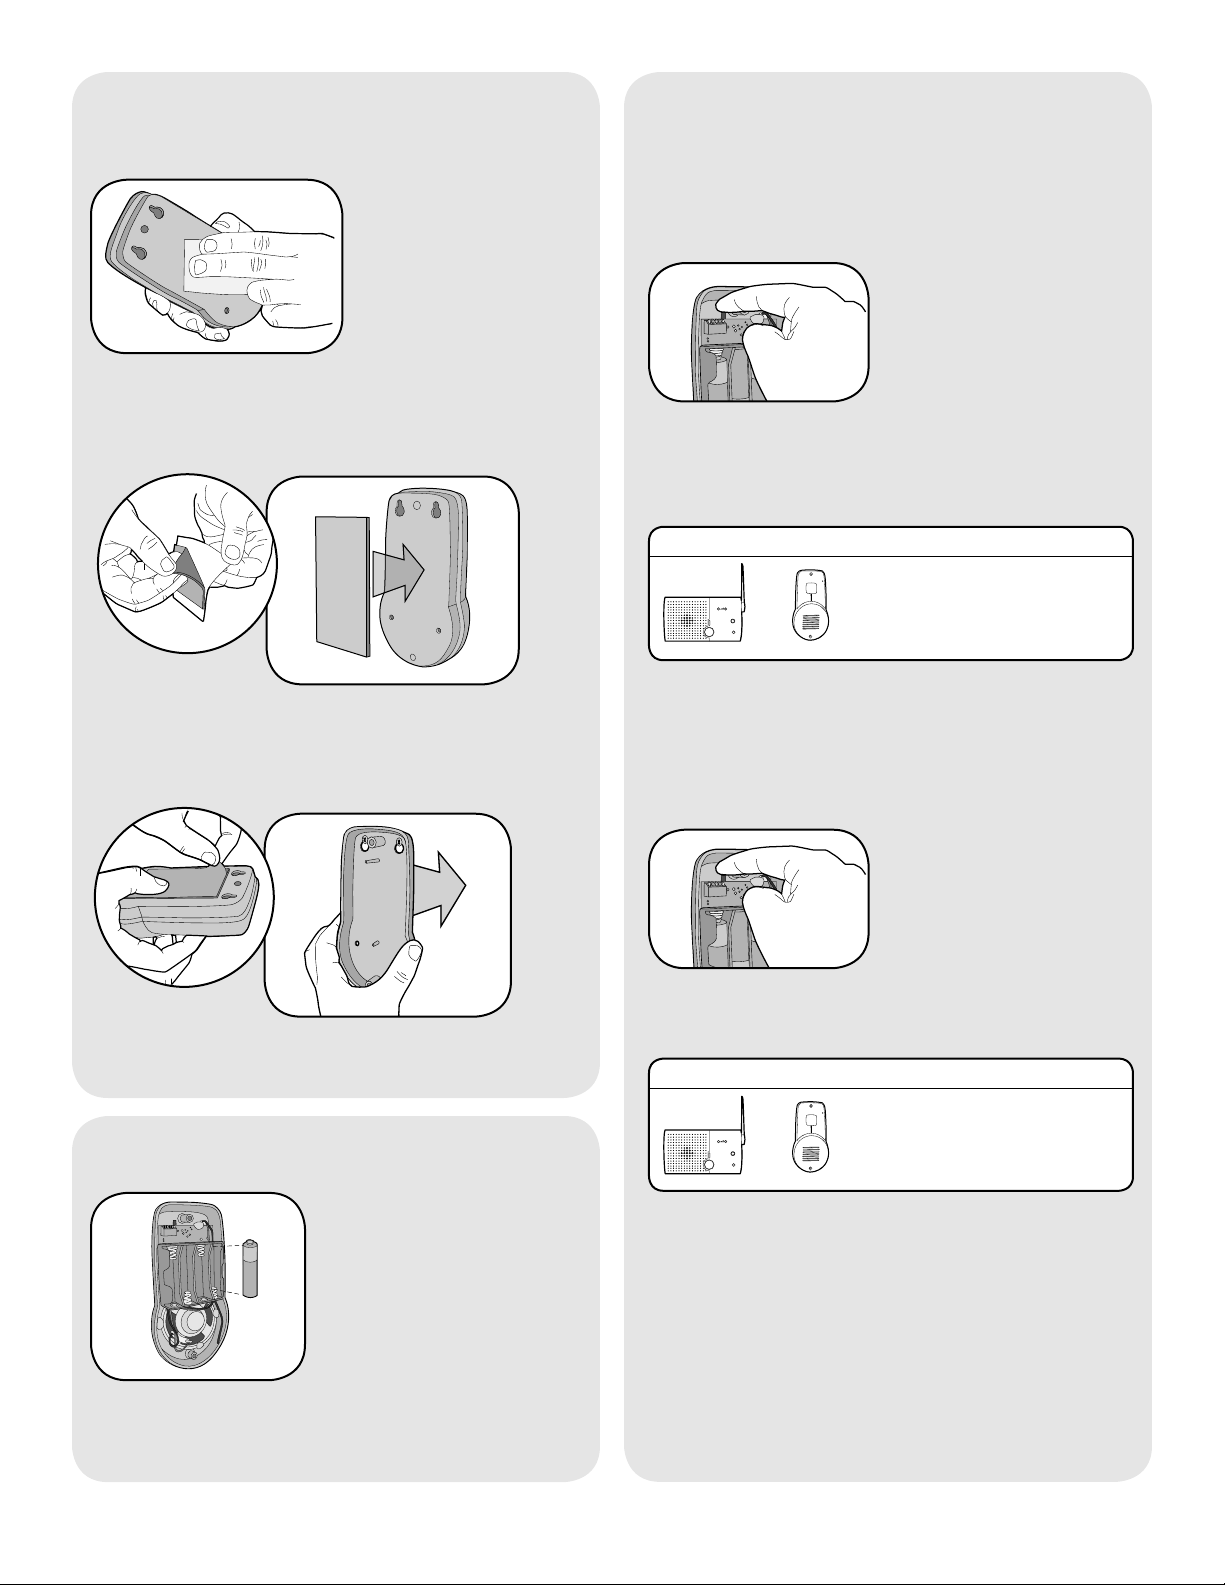
Mounting with Tape
HOLD
ACTIVE
TALK
13
24
VOLUME
MONITOR
CHANNEL
OFF
HOLD
ACTIVE
TALK
13
24
VOLUME
MONITOR
CHANNEL
OFF
Step 1
Clean back of intercom and mounting surface using
the alcohol wipe.
Step 2
Programming Intercom
The intercom must be programmed to at least one
other intercom to become a network or it can be
programmed into an existing network.
Create New Network
Before programming, clear memory on all intercoms.
Press the Learn button on the new intercom until a
beep is heard. Within 10 seconds put the second
intercom into Learn Mode (refer to table below).
INTERCOM LEARN MODE
Press the Learn button
until a beep is heard.
OR
Peel off white paper from mounting tape. Firmly
press mounting tape on back of intercom.
Step 3
Peel paper from mounting tape. Firmly press
intercom onto mounting surface.
Assemble Intercom
Each intercom will emit a tone when entering
programming mode. It may take up to 3-1/2 minutes
for a secure network to be established.
Add to an Existing Network
Press the Learn button on the new intercom until a
beep is heard. Within 10 seconds put any networked
intercom into Learn Mode (refer to table below).
INTERCOM LEARN MODE
Press the Learn button until
a beep is heard.
OR
Each intercom will emit a tone when entering
programming mode. It may take up to 3-1/2 minutes
for a secure network to be established. Repeat for
any additional intercoms.
Install 4 AA Alkaline batteries (not provided). (Lithium
batteries recommended for colder environments.)
NOTE: Do not program new intercoms to each other
before adding them to the network or they will form a
separate network and the memory will need to be
cleared.
2
Page 3

Secure Cover
Secure cover with the two large black screws.
Troubleshooting
Intercom does not function.
Check batteries in Intercom. When you press the Talk
button you should hear a tone.
Ensure Intercom is connected to a network.
See Assemble & Program.
Intercom is not getting expected transmission
range.
Keep Intercom away from trees, metal objects and
electrical wiring. Do not mount intercom on a tree,
masonry, or metal surface.
Intercom beeps every ten minutes.
The battery is low in the intercom. Replace with AA
Alkaline batteries.
Need to clear intercom’s memory.
Press and hold Learn button, an initial beep will be
heard. Continue to hold until a second beep is heard
(about 6 seconds). Ensure other intercoms are not
activated during this time. Once memory is clear the
intercom can be programmed to a new network.
Intercom can not be programmed to network.
A network may contain up to 12 intercoms. It may be
necessary to clear the network and reprogram all the
intercoms to the network. See Programming Intercom.
NOTE: Manufacturer is not responsible for any radio
or TV interference caused by unauthorized
modifications to this equipment. Changes or
modifications not expressly approved by the
manufacturer could void the authority to operate the
equipment.
3
Page 4

One Year Limited Warranty
The Chamberlain Group, Inc. warrants to the first retail purchaser of this product that it is free from defect in materials
and/or workmanship for a period of 1 year from the date of purchase.
This equipment has been tested and found to comply with the limits for a Class B digital device, pursuant to Part 15 of
the FCC Rules. These limits are designed to provide reasonable protection against harmful interference in a residential
installation. This equipment generates, uses and can radiate radio frequency energy and, if not installed and used in
accordance with the instructions, may cause harmful interference to radio communications. However, there is no
guarantee that interference will not occur in a particular installation. If this equipment does cause harmful interference to
radio or television reception, which can be determined by turning the equipment off and on, the user is encouraged to try
to correct the interference by one or more of the following measures:
• Reorient or relocate the receiving antenna.
• Increase the separation between the equipment and receiver.
• Connect the equipment into an outlet on a circuit different from that to which the receiver is connected.
• Consult the dealer or an experienced radio/TV technician for help.
FOR TECHNICAL SUPPORT DIAL OUR TOLL FREE NUMBER:
1-800-528-9131
www.chamberlain-DIY.com
NOTICE: To comply with FCC and or Industry Canada rules (IC), adjustment or modifications of this
receiver and/or transmitter are prohibited, except for changing the code setting or replacing the battery.
THERE ARE NO OTHER USER SERVICEABLE PARTS.
Tested to Comply with FCC Standards FOR HOME OR OFFICE USE. Operation is subject to the following
two conditions: (1) this device may not cause harmful interference, and (2) this device must accept any
interference received, including interference that may cause undesired operation.
© 2010, The Chamberlain Group Inc.
114A4097B All Rights Reserved
 Loading...