


2400W BLOWER & VAC
INSTRUCTION MANUAL
BVA2400

SAFETY
INSTRUCTIONS
WARNING! When using power tools,
basic safety precautions should always
be taken to reduce the risk of fire,
electric shock and personal injury. Also,
please read and heed the advice given
in the additional safety rules.
1. Keep the workplace clean and tidy.
Cluttered work areas invite accidents and
injury.
2. Consider the environment in which you
are working. Do not use power tools to
in damp or wet locations. Keep the work
area well lit. Do not expose power tools to
rain or high humidity. Do not use power
tools in the presence of flammable liquids
or gas.
3. Keep visitors away from the worksite.
All visitors and onlookers, especially
children and infirm persons should be kept
well away from where you are working. Do
not let others in the vicinity make contact
with the tool or extension cord.
4. Store tools safely. When not in use,
tools should be stored in a dry, high place
or locked up out of the reach of children.
5. Do not force the tool. The tool will do
the job better and more safely working at
the rate for which it was designed.
6. Use the correct tool for the job. Do
not force small tools or attachments to do
the job best handled by a heavy dust tool.
Never use a tool for a purpose other than
that for which it was intended.
7. Dress correctly. Do not wear loose
clothing or jewelry. They can be caught in
moving parts. Rubber gloves and non-slip
footwear are recommended when working
outdoors. If you have long hair, wear a
protective hair covering.
8. Use safety accessories. Safety
glasses and ear protectors should always
be worn. A face or dust mask is also
required.
9. Do not abuse the power cord. Never
pull the cord to disconnect the tool from
the power point. Keep the cord away from
heat, oil and sharp edges.
10. Look after your tools. Keep tools
clean for better and safe performance and
follow the instructions regarding
lubrication and accessory changes.
Inspect extension cords periodically and
replace them if damaged. Keep tool
handles dry, clean and free from oil and
grease.
11. Disable idle tools. Switch off the
power and disconnect the plug from the
power before servicing, when changing
accessories and when the tool is not in
use.
12. Avoid unintentional starting. Always
check that the switch is on the OFF
position before plugging the tool to the
power supply. Do not carry a plugged in
tool with your fingers on the switch.
13. Use outdoor rate extension cords.
When a tool is used, use only extension
cords that are intended for outdoor use
and are so marked.
14. Stay alert. Watch what you are doing.
Use common sense. Do not operate a
power tool when you are tired.
15. Check for damage parts. Before
using a tool, check that there are no
damaged parts. If a part is slightly
damaged, carefully determine if it will
operate properly and perform its intended
function. Check for alignment of moving
parts, binding of moving parts, breakage of
parts, proper mounting and any other
conditions that may affect the operation of
the tool. A guard or other part that is
damaged should be properly repaired or

replaced by an authorized service facility
unless otherwise indicated in this
instruction Manual. Defective switches
must be replaced by an authorized service
facility. Do not use a tool if the switch does
not turn the tool on and off correctly.
16. Guard against electric shock.
Prevent body contact with grounded
objects such as water pipes, radiators,
coolers and refrigerator enclosures.
17. Use only approved parts. When
servicing, use only identical replacement
parts. Use an authorized service facility to
fit replacement parts.
18. Be aware of the harmful/toxic dusts
arising from working area (e.g. fertilizers,
insecticides)
19. The use of improper accessories or
attachments. Other than recommended
can lead to personal injury.
20. This tool is constructed in
accordance with the relevant safety
requirements, only experts may repair the
tool. Otherwise, it may endanger your life
21. Voltage-make sure power supply is
correct for your machine. The voltage of
this machine is on the rating plate.
Additional safety instruction
for blower vac
1. Always wear adequate protective
clothing when operating the tool to avoid
injuries to face, eyes, hands, head or
hearing. Use safety glasses or a face
shield, high boots or sturdy shoes, long
trousers, work gloves, a hard hat and ear
defenders.
2. When starting up and when the tool is
in operation, keep the nozzles away from
all parts of the body, especially the hands
and feet.
3. Do not start the tool when it is upside
down or when it is not in the operating
position.
4. Switch the motor off and remove the
plug when the tool is not being used left
unattended, being cleaned, being moved
from one place to another, when the
blower and vacuum tubes are being
interchanged or when the extension cord
is entangled or damaged.
5. Use only outdoor rated extension
leads that are so marked. Keep the
extension cord away from heat, oil and
sharp edges.
6. Do not operate the tool near people,
especially children or pets. Turn it off if
they get too close. Maintain a safe
distance of at least 5m from other people
when using the tool.
7. Never direct the blower tube towards
bystanders or pets. Never blow debris in
the direction of bystanders or pets.
8. Do not handle the plug or the tool with
wet hands and do not use the tool in the
rain or in damp weather.
9. Ensure that the extension lead is
secured in a manner that prevents it from
disconnecting from the plug whilst in use.
10. Keep all the air intakes and the blower
tube free of dust, lint, hair and other
material that may cause a reduction in air
flow.
11. Keep a balanced and stable stance
while using the tool.
12. Do not switch on the tool to in
enclosed or poorly ventilated spaces or in
the presence of inflammable and/or
explosive substances such as liquids,
gasses and powders.
13. Do not use the tool to vacuum up any
liquids, particularly flammable or
combustible liquids such as petrol.

14. Do not use the tool to vacuum up
burning or hot material such as cigarettes,
matches or hot ashes.
15. Never operate the tool in the vacuum
mode without the vacuum bag fitted.
Always ensure that the zip on the bag is
fully closed. Frequently check the bag for
signs of wear of deterioration. If the bag
is damaged, replace it.
16. Only operate the tool during broad
daylight or with adequate artificial light.
17. When the tool is not in use, store it in
a dry place and out of reach of children.
18. After use, disconnect the tool from the
power supply and check for damage. If
you have the slightest doubts, contact an
authorized service center.
19. Only use the tool according to the
instructions given in this manual.
20. Check regularly that the screws are
tight.
21. Use only spare parts and accessories
recommended by the manufacturer.
22. Do not try to repair the tool or access
internal parts. Contact authorized service
centers only.
23. Do not get distracted and always
concentrate on what you are doing. Use
common sense. Never operate the tool
when you are tired, sick or under the
influence of alcohol or other drugs.
24. If the blower vac starts to vibrate
excessively, switch off immediately and
have it checked by a qualified service
engineer.
25. Never run while using the blower vac.
26. Do not cross roads or gravel paths
while operating blower vac.
27. On steep slopes cut across the slope,
never in an up and down direction.
28. Do not overreach, keep proper footing
and balance at all times.
For extra safety a RCD separate circuit
breaker Max.30mA should be used on all
mains powered electrical equipment
which is used outdoors.
SAVE THESE
INSTRUCTIONS
1. TRAINING
y Read the instructions carefully. Be
familiar with the controls and the proper
use of the appliance.
y Never allow children to use the
appliance.
y Never allow people unfamiliar with
these instructions to use the appliance.
Local regulations may restrict the age of
the operator.
y Never operate the appliance while
people, especially children, or pets are
nearby.
y The operator or user is responsible
for accidents or hazards occurring to other
people or their property.
2. PREPARATION
y While operating the appliance, always
wear substantial footwear and long
trousers.
y Do not wear loose clothing or
jewellary that can be drawn into the air
inlet. Keep long hair away form the air
inlets.
y Wear protective goggles while
operating.
y To prevent dust irritation the wearing
of a face mask is recommended.
y Before using, check the supply and
extension cord for signs of damage and
aging. Do not use the appliance if the cord
is damaged or worn.
y Never operate the appliance with
defective guards or shields, or without

safety devices for example debris collector
in place.
y Only use a weather proof extension
cord fitted with a coupler according to IEC
60320-2-3.
3. OPERATION
y Always direct the cord to the rear
away from the appliance.
y If a cord becomes damaged during
use, disconnect the supply cord from the
mains immediately. DO NOT TOUCH THE
CORD BEFORE DISCONNECTING THE
SUPPLY.
y Do not carry the appliance by the
cord.
y Disconnect the appliance from the
mains supply:
a) Whenever you leave the machine;
b) Before clearing a blockage;
c) Before checking, cleaning or working
on the appliance;
d) If the appliance starts to vibrate
abnormally.
y Operate the appliance only in daylight
or in good artificial light.
y Do not overreach and keep your
balance at all times.
y Always be sure of your footing on
slopes.
y Walk, never run.
y Keep all cooling air inlets clear of
debris.
y Never blow debris in the direction of
bystanders.
4. MAINTENANCE AND
STORAGE
y Keep all nuts, bolts and screws tight
to be sure the appliance is in safe working
condition.
y Check the debris collector frequently
for wear or deterioration.
y Replace worn or damaged parts.
y Use only genuine replacement parts
and accessories.
y Store the appliance only in a dry
place.
If an extension cord is used make sure it is
for outdoor use and marked as such. The
recommended size of extension cord is
not lighter than a 1.0mm and a maximum
of 10 meters in length.
This appliance is not intended for use by
persons (including children) with reduced
physical, sensory or mental capabilities, or
lack of experience and knowledge, unless
they have been given supervision or
instruction concerning use of the
appliance by a person responsible for their
safety.
If the supply cord is damaged, it must be
replaced by a special cord or assembly
available from the manufacturer or its
service agent.
SYMBOL
DESCRIPTION
In accordance with essential
applicable safety standards of European
directives.
The tool is double insulated. This
means that all the external metal parts are
electrically insulated from the mains power
supply. It unnecessary for the tool to earth.
Warning.
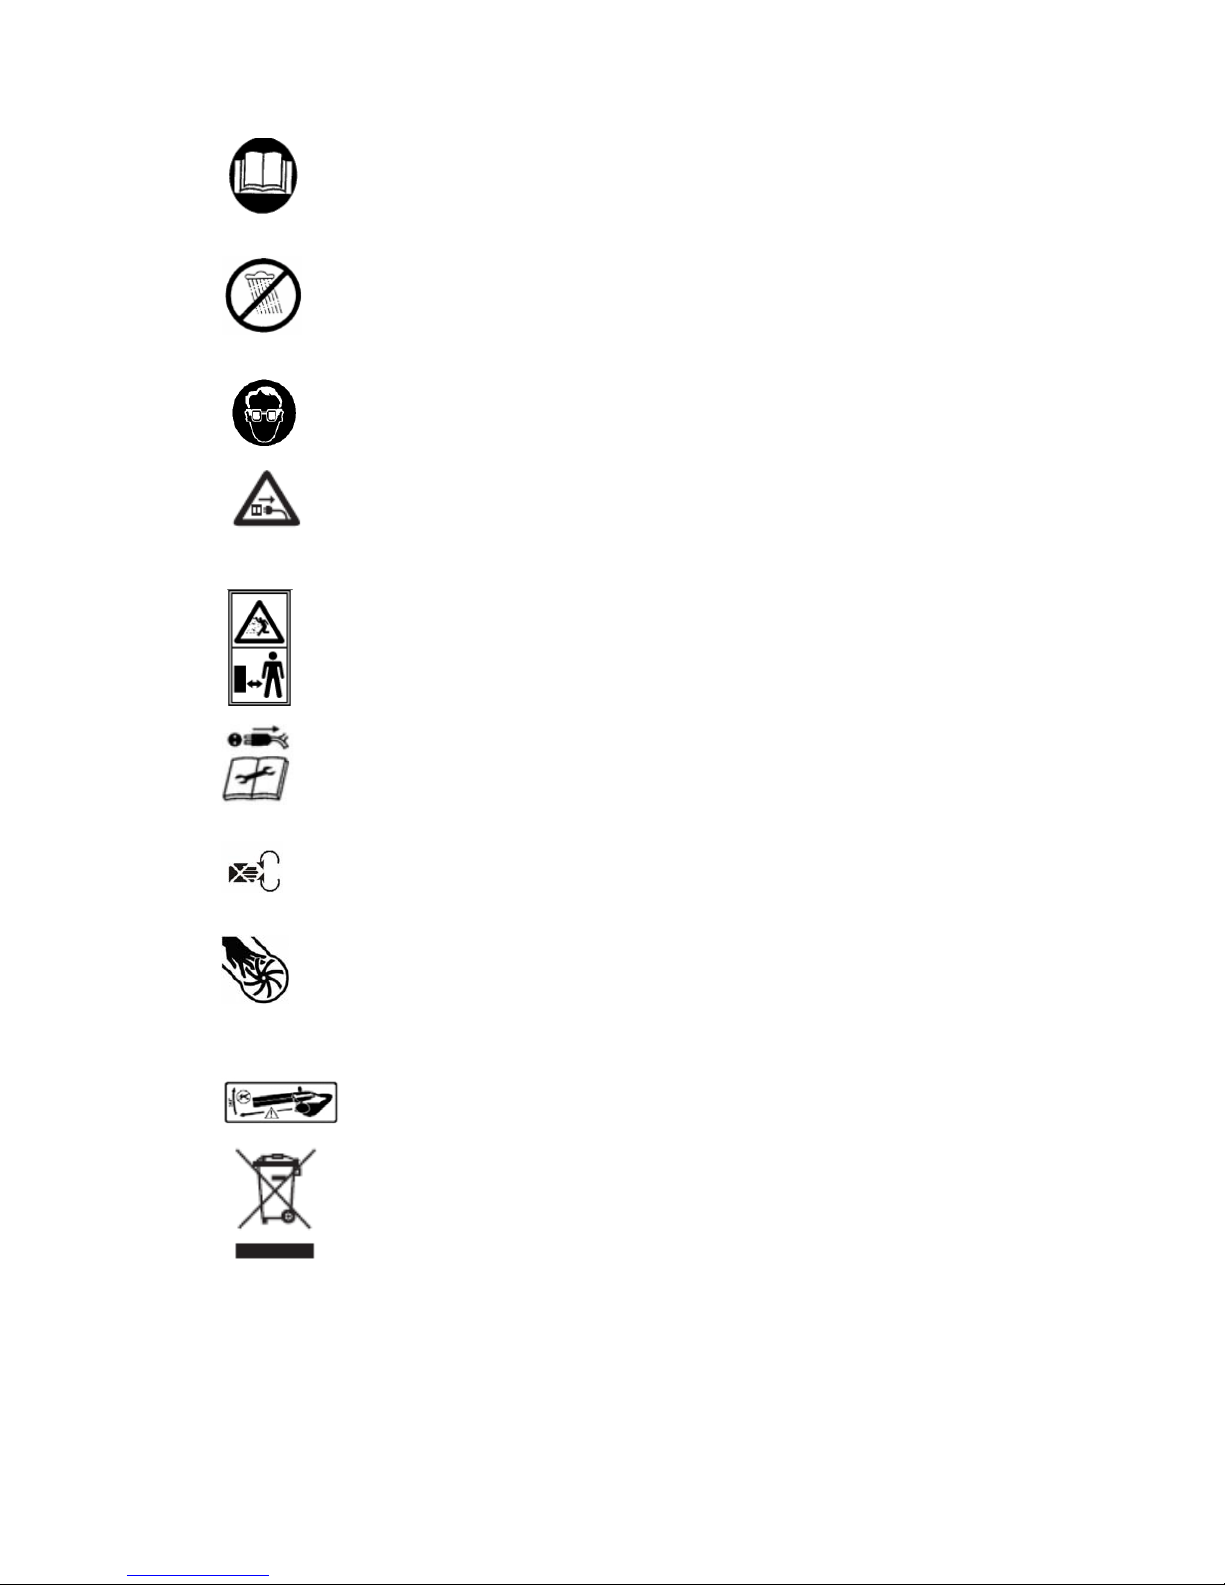
Read the instruction manual prior
to operation.
Do not use in the rain or leave
outdoors while it is raining.
Wear eye protection.
Pull out the mains plug before
checking a damaged power cable.
Keep bystanders away.
Remove the power plug before
maintenance and repair work.
Keep your hands well clear of the
openings and inlets in the garden vac.
Rotating Fans. Keep hands and
feet out of the openings while the machine
is running.
Keep bystander away.
Produced after 13th August
2005
Waste electrical products should
not be disposed of with household
waste. Please recycle where facilities exist.
Check with your Local Authority or retailer
for recycling advice.
TECHNICAL DATA
Model No: BVA2400
Voltage: 230-240V~50Hz
Wattage: 2400W
No load speed: 6000-13000/min
Max air speed: 270km/h
Max air capacity: 14m
3
/min
Leaf Mulching ratio: 10:1
Collection bag: 45L
Weight: 5.5kgs
Cable length: 10m
Measured sound pressure level: 90dB(A)
Guaranteed sound power level: 102dB(A)
Vibration does not exceed: 2.5m/s
2
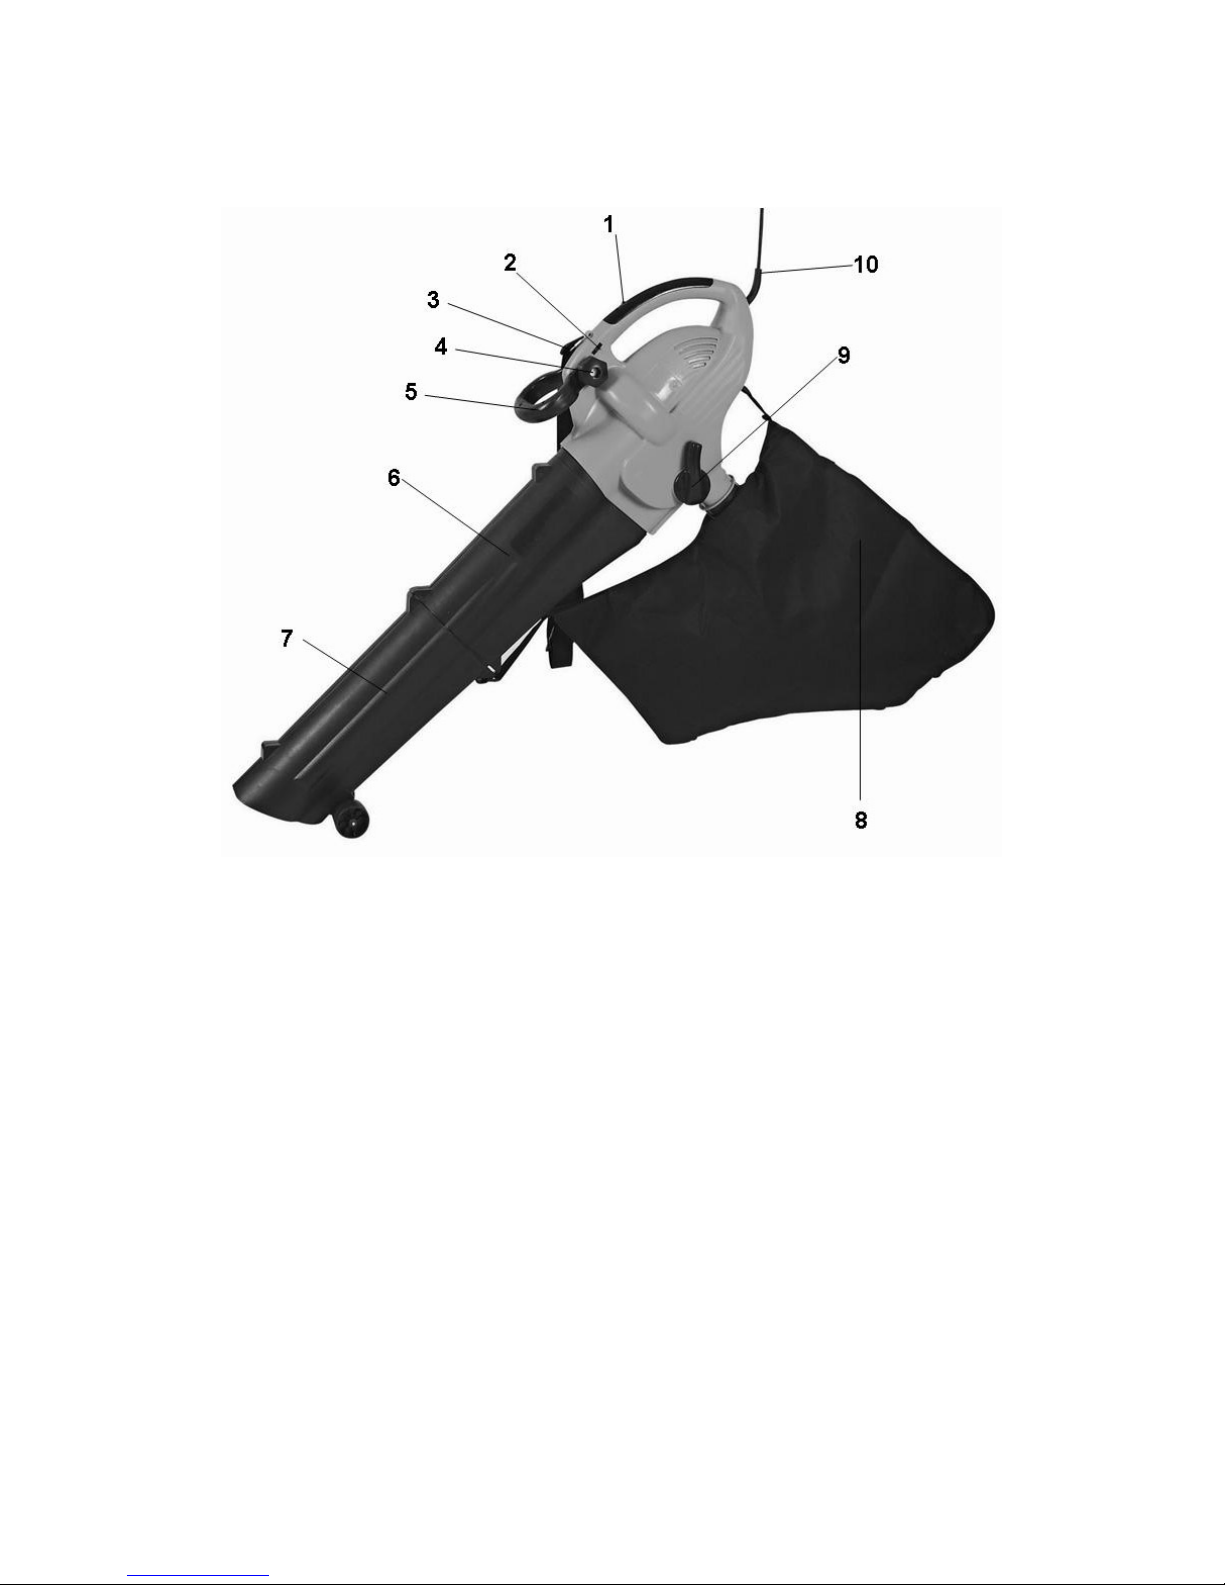
KNOW YOUR MACHINE
1. On/Off Switch
2. Speed Control Switch
3. Shoulder Strap
4. Front Grip Adjustment knob and securing Bolt
5. Front Grip
6. Chute (Middle Section)
7. Chute (Lower Section)
8. Collection Bag
9. Blow/Vac Selector
10. Power cable and Plug

ASSEMBLY
Notes: Please read the important safety
instructions before use.
Assemble Hand Grip
1. Locate hand grip (5) over top of motor
unit , push down and align grip section.
(Dia.2)
2. Pass bolt (4) through adjusting knob (4)
and motor unit, and locate threaded
section in hand grip. (Dia.2)
3. Tighten using locking knob (4).
Note: Loosen locking knob to adjust hand
grip to a comfortable working position,
retighten locking knob.
Assemble Chute
1. Align lower section (7) with middle
section (6). (Dia.3)
2. Slide middle section (6) over lower
section (7), ensure inner divider slots
correctly into groove of lower section
(7). (Dia.3)
Assemble Chute to Motor Section
1. Align complete chute section (6) with
motor unit and push into position.
(Dia.4)
Note: A motor cut-out safety switch is
located inside top section of motor. To
ensure starting, chute must be firmly
located before finally locking into position.
2. Attach the suction pipe to the motor
housing using the two included screws
(Dia.5)
Attention: The device may only be
switched on with the 2 parts of the pipe
being firmly connected to each other and
firmly screwed to the motor housing.
Assemble collection bag
1. Position collar section of collection bag
(8) up to collar of motor section.
(Dia.6)
2. Push the bag collar upwards and
locate guide lugs on the inside of the
collar in guides on motor unit, push up

and turn collar to secure into position.
(Dia.6)
3. Finally attach collection bag support
straps. (Dia.6)
Preparing the Vacuum/Blower For
Use
Note: To avoid detaching power cable
always check that it is attached firmly to
securing hook before using
vacuum/blower.
1. Make a loop with the power cable and
push it into the recess. (Dia.7)
2. Place the end of the end of the loop
round cable securing hook and ensure
it is pulled firmly enough to prevent it
coming loose while operating the
vacuum/blower. (Dia.7)
OPERATION
There are two operating functions as
follows:
BLOWER
This operation enables you to gather
leaves quickly in one location ready to be
vacuumed.
Using the garden vac in the blower
mode
Note: Ensure power On/Off switch (1) is in
the Off position before switching on the
mains power.
1. Connect to the mains supply.
2. Place the carrying strap (3) over your
shoulder and adjust it to suit the
working position.
3. Rotate the function selector to the
“blow” position, ensure selector clicks
into blower position. (Dia.9)
4. Place the vacuum tube in front of you
resting on the support wheels. Slide

the power On/Off switch (1) to turning
the vac blower on.
5. Move slowly forward to gather the
leaves, or to move the leaves from
inaccessible areas.
6. The blower mode can be used to blow
leaves etc, from corners, fences, walls,
wooded areas and beneath ears. Be
aware of the direction of the jet of air,
as it is capable of moving heavy
objects which could cause damage, or
injury.
7. Blow the leaves into a pile.
8. When the leaves have been
satisfactorily gathered, slide the
On/Off switch (1) marked “O” to turn
the blower vac OFF.
Note: This blower vac is fitted with
variable power control switch (2), slide
switch down for additional power.
Dia.10
Warning! Always switch off
before operating the function
selector, to change the mode.
9. Switch OFF and rotate the mode
selector to the vacuum position,
ensure selector clicks into location.
(Dia.11)
10. The leaves can now be collected and
shredded.
VACUUM
This operation is used for general picking
up work around the garden.
Using the garden vac in the
vacuum mode.
Note: Ensure power on/Off switch (1) is in
the OFF position before switching on the
mains power.
1. Connect to the mains supply.
2. Place the carrying strap (3) over
your shoulder and adjust it to suit the
working position.
3. Rotate the function selector to the
“vac” position, ensure selector clicks into
Vac position. (Dia.11)
4. Place the vacuum tube in front of you
resting on the support wheels. Slide the
power On/Off switch (1) to turning the
vac on.
5. When the collection bag is full, the
suction power will be reduced.
6. When this happens, slide the ON/OFF
switch (1) to “O” to turn the garden vac
OFF and disconnect from the mains
supply.
7. Wait for the motor to come to a
complete standstill, then remove the
collection bag. (Dia.6)
8. Empty the bag completely.
9. Refit the collection bag. (Dia.6).
Warning! Always switch off
before operating the function selector,
to change the mode.

MAINTENANCE AND
AGE
STOR
supply
Warning! Always switch off and
disconnect from the mains
before starting any cleaning or
maintenance procedures.
Cleaning
1. Remove the collection bag. (Dia.6)
2. Empty the collection bag.
3. With eye protection on, turn the bag
inside out and vigorously shake out
dust and debris.
4. Keep the shredder chamber, vacuum
tube and shredder fan, clean an
unblocked.
5. Keep the cooling vents clean and clear
of debris.
Clearing blockages
1. Remove the collection bag.
2. Check fan for blockages.
3. Make sure that the fan is free to rotate
and that it is not damaged in any way.
Do not use the garden vac if the fan is
damaged.
These are no user serviceable parts in the
blower vac. If a fault is suspected return
the blower vac to an authorized dealer for
repair.
4. Rotate the function selector to check
for any other blockages.
5. Clear fan and the chamber of any
blockages.
6. Check the vacuum tube is clear of
blockages before refitting the
collection bag.
Troubleshooting
If the blower vac will not operate, check
plug fuse and power at main plug.
There are no user serviceable parts in the
blower.
Note: If a fault is suspected return the
blower vac to an authorized dealer for
repair.
Maintenance
Apart from keeping the blower vac
clean and unblocked, there are no user
maintenance procedures to be carried
out. Refer to qualified service
personnel if any repairs or internal
maintenance is required.
1. Store the tool, instruction manual and
accessories in a secure, dry place. In
this way you will always have the
information ready to hard.
2. Keep the tool’s air vents unclogged
and clean at all times.
3. Remove dust and dirt regularly.
Cleaning is best done with a rag or
brush.
4. Never use caustic agents to clean
plastic parts.
Caution: Do not use cleaning agents to
clean the plastic parts of the tool. A mild
detergent on a damp cloth is
recommended. Water must never come
into contact with the tool.
5. Empty the vacuum bag after each use
to avoid deterioration, and air flow
obstruction both of which will reduce
the performance of the tool.
6. Clean the bags as required. Put on
eye protection, turn the bag inside out,
empty debris and vigorously shake out
dust and residual debris.
7. Wash the bag at least once a year:
z Remove the vacuum bag tube.
z Turn the bag inside out.
z Wash the bag by hand in soapy water .
Rinse and allow to thoroughly dry before
re-use.

PLUG REPLACEMENT
Your blower vac is fitted with a moulded
plug. However If you need to replace a
fitted plug then follow the instructions
below.
IMPORTANT
The wires in the mains lead are coloured
in accordance with the following code:
Blue - Neutral Brown – Live
As the colours of the wires in the mains
lead of this appliance may not correspond
with the coloured markings identifying the
terminals in your plug, proceed as follows.
The wire which is coloured blue must be
connected to the terminal which is marked
with N
The wire which is coloured brown must be
connected to the terminal which is marked
with the letter L
If a 13AMP (BS1363/A) plug is used, a
13A fuse must be fitted, or if any other type
of plug is used a 13AMP fuse must be
fitted, either in the plug or adapter, or on
the distribution board.
Note: If a moulded plug is fitted and has
to be removed take great care in disposing
of the plug and severed cable, it must be
destroyed to prevent engaging into a
socket.
If the supply cord is damaged it must be
replaced by a service agent or a similarly
qualified person in order to avoid hazard.


 Loading...