

Page 1

C2000W Mobile Data
Terminal User Manual
Page 2

Dear customers:
Thank you for choosing our products, we will try our best to provide you with the
comprehensive and thoughtful service and technical support. The user manual has introduced
the detailed configurations and operations of the portable terminal. Before operating, please
read the specifications carefully.
Welcome to feedback us your concerns, perspectives and suggestions, we will be glad to
answer and reply to you.
Chainway Information Technology Co., Ltd
Address: 9/F, Building 2, Phase 2, Gaoxinqi Industrial Park, Liuxian 1st Rd, District 67, Bao’an,
Shenzhen
Zip Code:518057
Telephone:400-0755-23223300
Fax: 0755-23223310
Web Site:www.chainway.net
Email: sales@chainway.cn
Page 3

CATALOGUE
Chapter 1 Product Introduction .............................................................................................. - 6 -
1.1 Technical Parameters ............................................................................................................... - 6 -
1.2 Accessories .................................................................................................................................... - 8 -
Chapter 2 Getting Started ........................................................................................................... - 8 -
2.1 Introduction ................................................................................................................................ - 9 -
2.2 TF card.........................................................................................................................................- 12 -
2.3 Stand-by and Wake-up .........................................................................................................- 13 -
2.3.1 Suspend .....................................................................................................................................- 13 -
2.3.2 Wake-up ....................................................................................................................................- 13 -
2.3.3 Power on...................................................................................................................................- 13 -
2.3.4 Power off ..................................................................................................................................- 13 -
2.4 Taskbar .......................................................................................................................................- 14 -
2.5 Desktop .......................................................................................................................................- 16 -
Chapter 3 System Settings........................................................................................................- 17 -
1.1. Internet Options ......................................................................................................................- 20 -
1.2. PC Connection ..........................................................................................................................- 21 -
1.3. Storage Manager .....................................................................................................................- 22 -
1.4. Power ...........................................................................................................................................- 22 -
1.5. Keyboard ....................................................................................................................................- 23 -
1.6. Password ....................................................................................................................................- 24 -
1.7. Regional Settings .....................................................................................................................- 25 -
1.8. Date/Time ..................................................................................................................................- 26 -
1.9. Remove Programs ..................................................................................................................- 26 -
1.10. Input Panel ......................................................................................................................- 27 -
1.11. Mouse ................................................................................................................................- 27 -
1.12. Owner (personal information of the owner) ....................................................- 28 -
1.13. Network and Dial-up Connections ........................................................................- 29 -
Page 4

1.14. System ...............................................................................................................................- 29 -
1.15. Display ...............................................................................................................................- 31 -
1.16. Volume &Sounds ...........................................................................................................- 32 -
1.17. Dialing ...............................................................................................................................- 33 -
1.18. Certificates .......................................................................................................................- 34 -
1.19. Stylus .................................................................................................................................- 34 -
1.20. USB Mode Switch ..........................................................................................................- 35 -
Chapter 4 Keyboard and Input Methods ............................................................................- 36 -
4.1. Soft keyboard: ..........................................................................................................................- 36 -
Chapter 5 Network Connection .............................................................................................- 37 -
5.1. WIFI ..............................................................................................................................................- 37 -
5.2. GPRS Dial-up Connection ....................................................................................................- 39 -
5.2.1. GPRS Configuration ...........................................................................................................- 39 -
5.2.2 GPRS Dial-up Connection ................................................................................................- 43 -
Chapter 6 Synchronization with the PC and Updating OS ..........................................- 44 -
6.1. Introductions on the ActiveSync ......................................................................................- 44 -
6.3.1 Copy System Files to SD Card ..........................................................................................- 49 -
6.3.2 Update OS for Windows CE ..............................................................................................- 49 -
Chapter 7 Functional Utilization ...........................................................................................- 51 -
Chapter 8 Malfunction and Repair ........................................................................................- 52 -
8.1. Equipment and System Problems ....................................................................................- 52 -
8.2. Scanning Problems .................................................................................................................- 53 -
8.3. RFID Problems .........................................................................................................................- 53 -
8.4. Network and Communication Problems .......................................................................- 53 -
Chapter 9 Maintenance .................................................................................................................. 55
Appendix 1 Code Types of 1D Barcode Scanner .................................................................. 56
A1.1 Supported Code Types ............................................................................................................. 56
A1.2 Transmit Code Type Character ............................................................................................. 56
Page 5

A1.3 Enable / Disable Barcodes ...................................................................................................... 57
Page 6

Chapter 1 Product Introduction
C2000W terminal handheld with its smart appearance, rugged structure, easy portability,
barcode and RFID tags reading, can satisfy different users with different application
environments.
C2000W handheld has ideal advantages of fast reading speed and high recognition rate by
using Symbol SE955/SE4500 high-performance scanning engine. It supports screen touch
operation by using Wince 6.0 OS, and increases the work and long standby time effectively by
using the 3200mAh high-capacity lithium battery.
1.1 Technical Parameters
Physical Parameters
Dimensions
148mm*67mm*31mm
Weight
<250g (including the battery)
Screen
2.8″QVGA TFT-LCD, 65K colors, backlight
Keyboard
21 silica gel numeric keys
Battery
3.7V, 3200mAh, rechargeable li-ion polymer battery
Expansion Slot
MicroSD/TF, maximum capacity of 8G
SIM Slot
one SIM card
Audio
0.5W wat
Camera
Samsung 3.2 mega pixels
Performance Parameters
CPU
Samsung ARM920T,533MHz
OS
Windows CE 6.0
Memory
128MB RAM + 512MB NAND FLASH
Page 7

Interface
USB 2.0 Client
Storage Card Type
MicroSD card
Maximum Expansion
Storage
32GB
Environmental Parameters
Operating
Temperature
-20℃ to 50℃
Storage Temperature
-20℃ to 70℃
Humidity
5%RH-95%RH(non-condensing)
Dropping Survive
Withstands 1.2m dropping to concrete (six sides)
Sealing
IP54
Wireless Communication
WAN
GSM/GPRS/EDGE(850,900,1800,1900MHz), speed
85.61/42.8bps
WLAN
WiFi IEEE 802.11 b/g
WPAN
Bluetooth 2.0
Data Collection
Barcode
1D barcode(Symbol SE955, laser, hardware decoding):
UPC/EAN, Code128, Code39, Code93, Code11,
Interleaved 2 of 5, Discrete 2 of 5, Chinese 2 of 5,
Codabar, MSI, RSS, ect
2D barcode(Symbol SE4500,COMS, software
decoding):
Data Matrix, QR Code, Aztec Code, PDF417, US Planet,
UK Postal, ect.
Page 8
RFID
HF 13.56MHz, ISO14443A/ISO15693(optional)
Developing Environment
SDK
Chainway SDK
Programming
Language
C++/C#/VB.Net
Developing Tool
Visual Studio 2005 / Visual Studio 2008
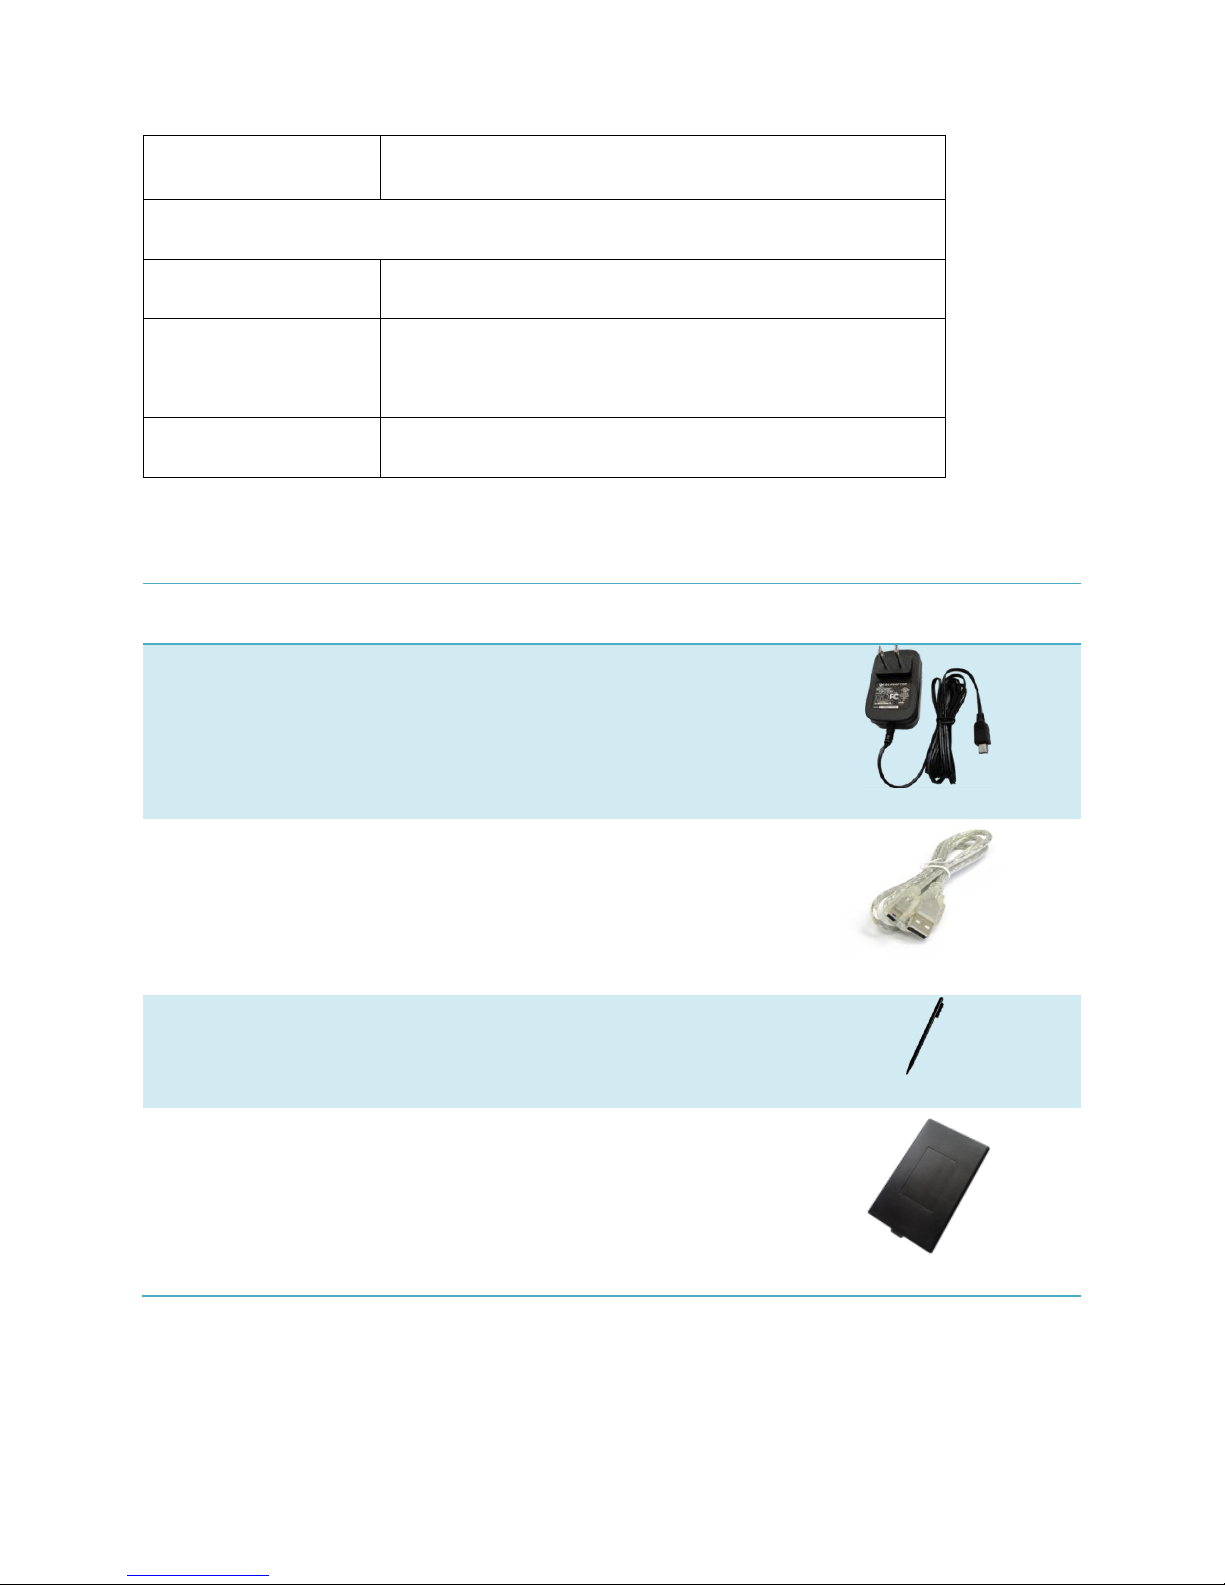
1.2 Accessories
Title
Piece
Note
Picture
Power Adapter
1
Charging the battery
USB cable
1
Synchronizing with the PC,
charging the battery
Stylus
1
Operating the screen touch
Battery
1
3200mAh high- capacity
lithium battery
Chapter 2 Getting Started
Page 9

2.1 Introduction
Please refer to <C2000W User Manual> which introduces the functional characteristic, battery
installation, SD card installation, SIM card installation, charging, barcode reading, and RFID
tags reading, ect.
2.1.1 Functional characteristic:Pic 2.1-1
2.1.2 Installation:Pic 2.1-2
Page 10

Pic 2.1-2
2.1.3 Charging: Pic 2.1-3
Page 11

Pic 2.1-4
2.1.4 Scanning: Pic 2.1-5
Page 12
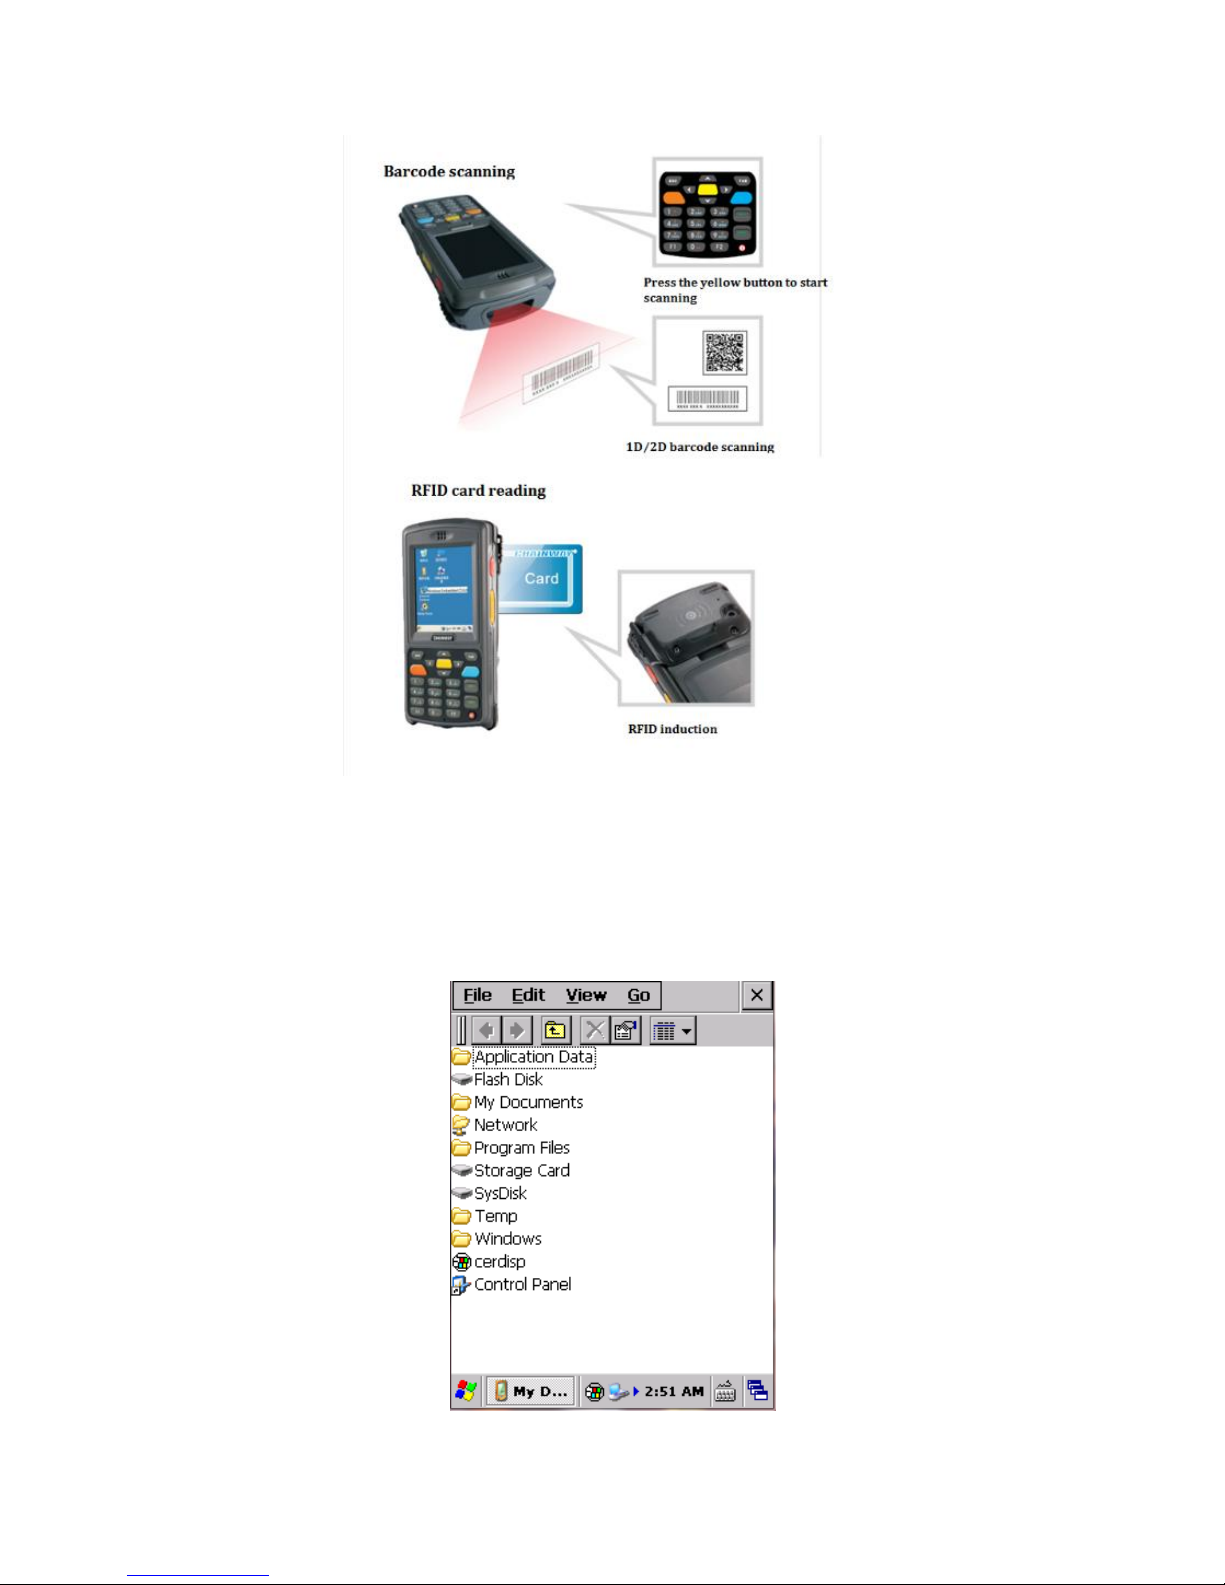
Pic 2.1-5
2.2 TF card
After installing the SD card successfully, we can see an icon named “Storage Card” when open
“My Device”. You can open it to get the files stored. Pic 2.2-1
Page 13

Pic 2.2-1
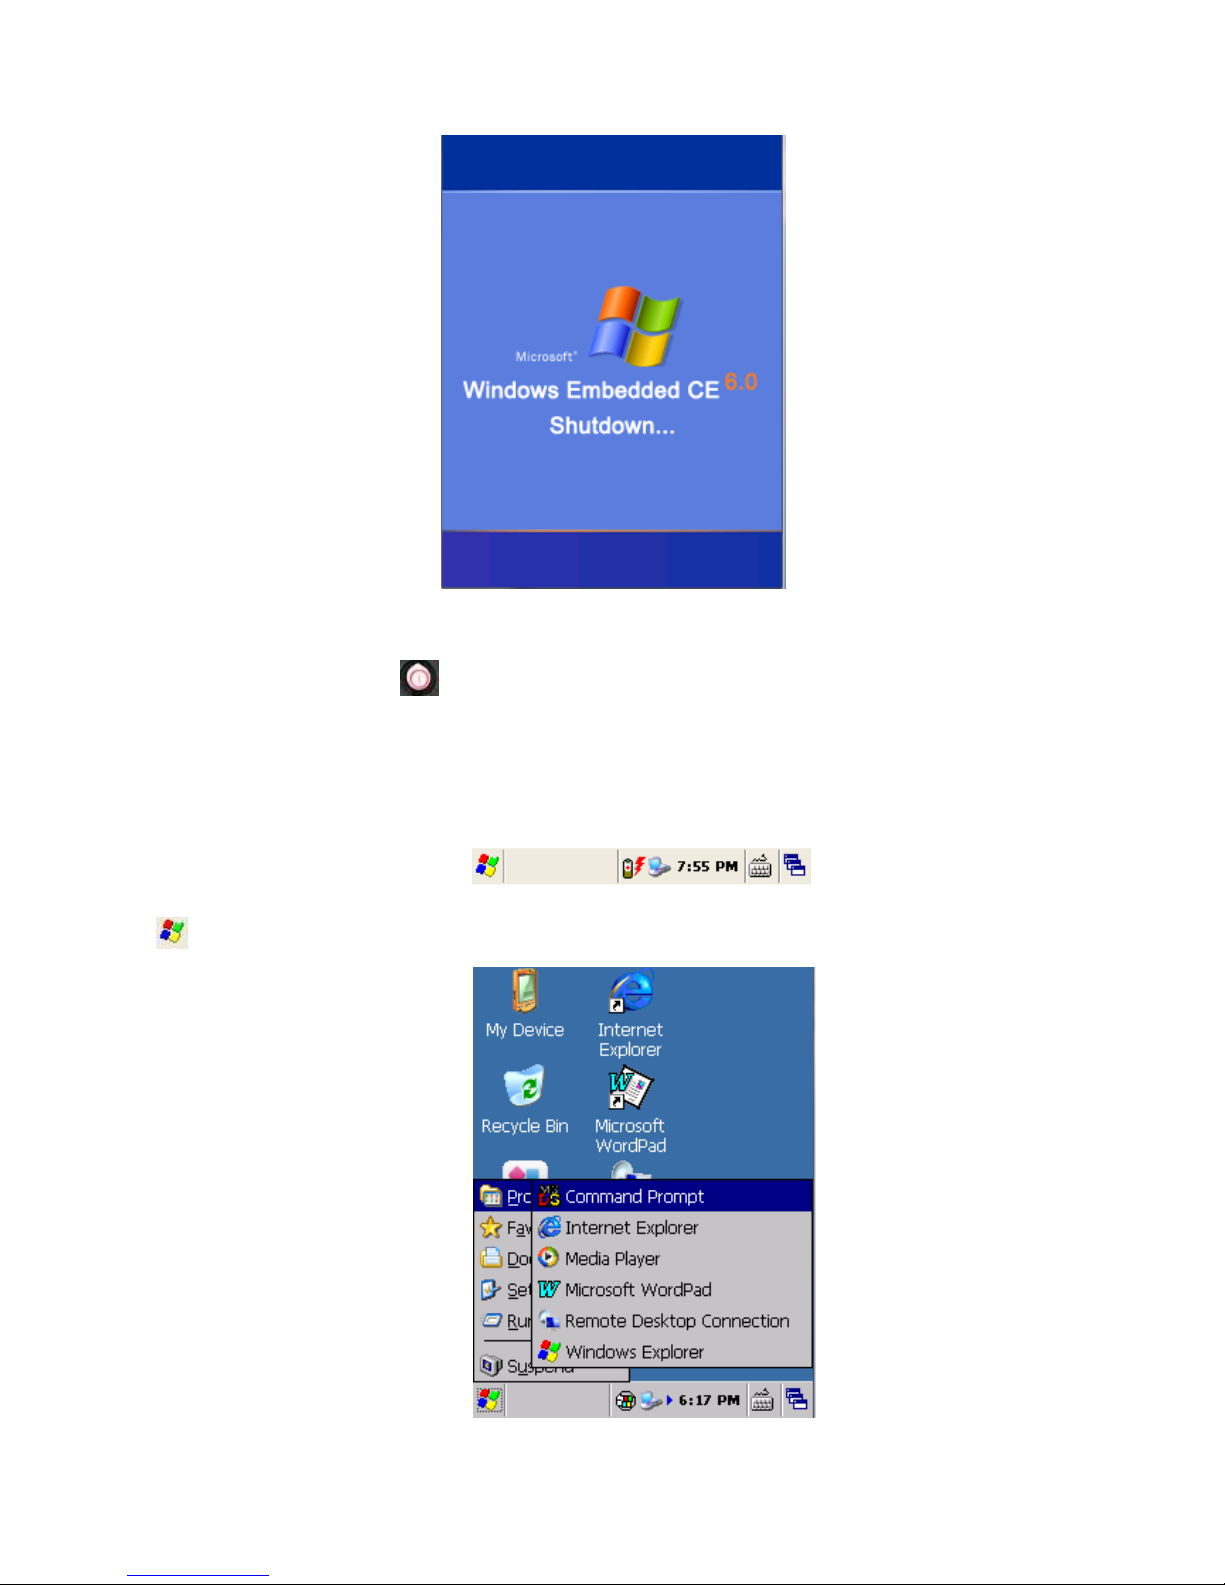
2.3 Stand-by and Wake-up
2.3.1 Suspend
We can save the power by pressing once lightly to set the device into the status of
suspend, then in the new interface, there would be three options including suspend, shutdown
and cancel, and choose ‘Suspend’.
The device will enter the status of stand-by automatically once there is no operation for a long
time when it is powered on, in order that it can save the power. Please refer to Pic 3.4 for
detailed parameters. Pic 2.3-1
Pic 2.3-1
2.3.2 Wake-up
Press once lightly to wake up the device immediately when it is in the status of stand-by
in order that we can operate it normally.
2.3.3 Power on
For device being powered off, press once lightly, then it will boot and enter the system
after a few seconds.
2.3.4 Power off
For device being powered on, press tightly, then in the new interface, there would be
three options including suspend, shutdown and cancel, and choose ‘Shutdown’. Pic 2.3-2
Page 14
Pic 2.3-2
Note: please do not press frequently for stand-by/ wake-up operation, in case that the
screen is damaged or the data is lost.
2.4 Taskbar
The taskbar is on the bottom of screen which displays on-going tasks;
Start Menu: on the left of task bar, you can see program list in it. Pic 2.4-1
Pic 2.4-1
Page 15

Input method menu: we can view the available input method options and switch them by
clicking it, it also supports soft keyboard input; Pic 2.4-2 and Pic 2.4-2
Pic 2.4-2 Pic 2.4-3
Current task menu, we can view all the current tasks and switch them by clicking it; Pic
2.4-4
Page 16

Pic 2.4-4
Time, which shows the current time, we can set the properties including time, date,
and time zone after entering the interface of ‘Data/Time Properties’ by double clicking the icon.
Meanwhile, we can enable or disable the time showing by choosing SettingsTask and
Start Menu. Pic 2.4-5 and Pic 2.4-6
Pic 2.4-5 Pic 2.4-6
2.5 Desktop
After starting the device, the default view is desktop. We can click the icons or shortcuts on
desktop by stylus. If touch the screen for a while by stylus, it will be as right click by mouse on
PC, we can see the right-click menu. Pic 2.5-1 and Pic 2.5-2
Page 17

Pic 2.5-1 Pic 2.5-2
Chapter 3 System Settings
This chapter introduces system settings and operations on Windows CE.
Click and choose ‘Settings’ and then ‘Control Panel’; Pic 3-1 and Pic 3-2
Pic 3-1 Pic 3-2
Page 18

The setting applications are listed as follows:
Application
Description
Set internet options such as homepage, privacy, etc.
Specify the method connecting with PC.
Recalibrate the stylus pen.
Storage management, including HDD and TF cards.
View battery power and manage power schemes.
Set keyboard properties.
Set password for system
Regional settings. Customize regions, user interface/input language.
Adjust current time, current date, and change time zone.
Page 19

Select and remove programs.
Switch input method.
View properties of mouse.
Change information of the owner.
Network and dial-up connections. Used for WIFI or GPRS connecting
configuration.
Adjust volume and sounds.
Display system information, adjust memory and change device name.
Adjust background, appearance and backlight.
Adjust dialing properties.
WLAN setting. Configure wireless network.
Page 20
Certificate information.
Switch the three mode of USB(storage card for u disk, flash disk for U dish
and activesync
1.1. Internet Options
Enter the interface of ‘ Internet Options’ to set ‘General’, ‘Connection’, ‘Security’, ‘Privacy’,
‘Advanced’ and ‘ Popups’ by clicking ‘Internet Options’ within ‘Control panel’. Pic 3.1-1, Pic
3.1-2, Pic 3.1-3, Pic 3.1-4, Pic 3.1-5 and Pic 3.1-6
Pic 3.1-1 Pic 3.1-2
Page 21
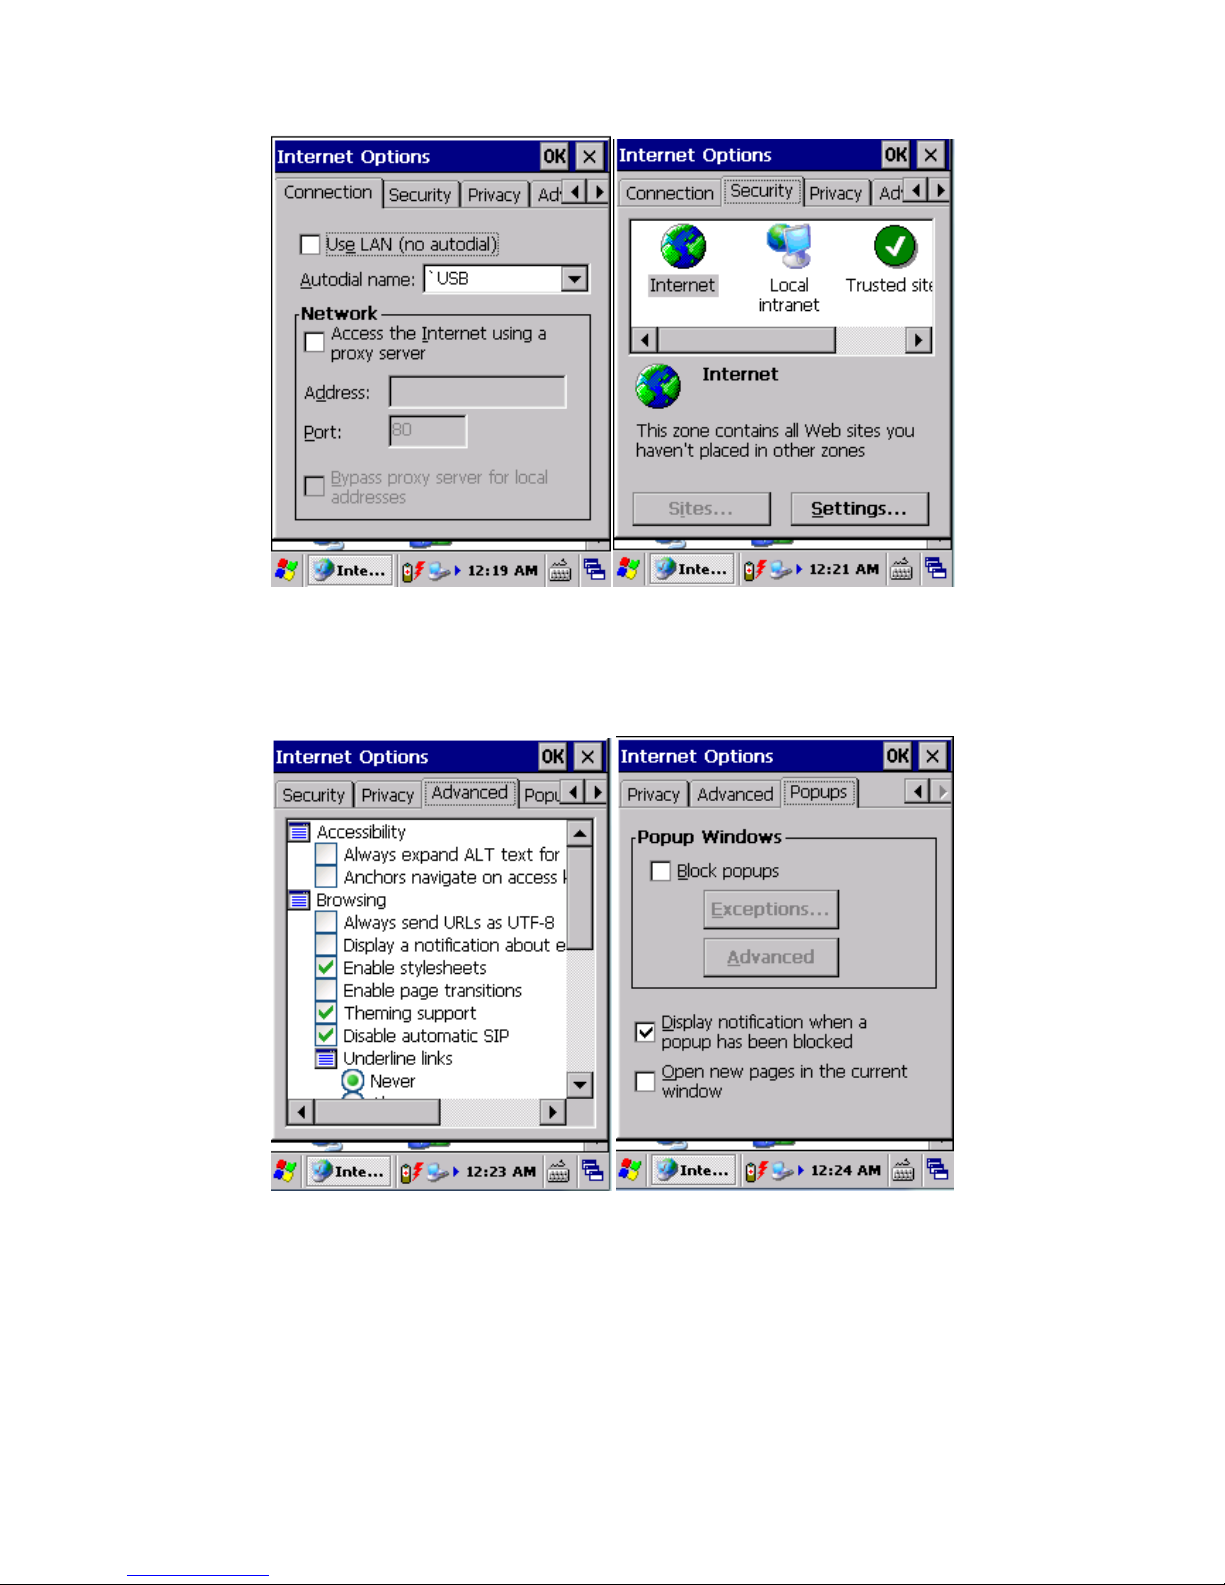
Pic 3.1-3 Pic 3.1-4
Pic 3.1-5 Pic 3.1-6
1.2. PC Connection
Choose the connection method with PC by click ‘PC Connection’ within ‘Control Panel’; Pic 3.2-1
and Pic 3.2-2
Page 22

Pic 3.2-1 Pic 3.2-2
1.3. Storage Manager
Format or dismount the storage by choosing ‘Storage Manager’ within ‘Control Panel’; Pic 3.3-1
Pic 3.3-1
1.4. Power
Choose ‘Power’ within ‘Control Panel’, the detailed interface is as follows: Pic 3.4-1, Pic 3.4-2
and Pic 3.4-3
Page 23

Pic 3.4-1 Pic 3.4-2
Pic 3.4-3
1.5. Keyboard
Set the properties of the keyboard by choosing ‘Keyboard’ within ‘Control Panel’; Pic 3.5-1
Page 24

Pic 3.5-1
1.6. Password
We can set the password to ensure the security by choosing ‘Password’ within ’Control Panel’.
For users have clicked ‘Enable password protection at power on’ will be required to input the
correct password and press ‘Enter’ for each rebooting. For incorrect password, users are not
allowed to log in. Press ‘OK’ to save the settings we made. Pic 3.6-1
Pic 3.6-1
Page 25

Note: Please ensure that the password is remembered, otherwise, we cannot log in the device
successfully.
Recommend: We recommend not users to enable the password protection function except for
some special utilizations.
1.7. Regional Settings
By ‘Regional Settings’, we can change the format information including ‘Number’, ‘Currency’,
‘Time’, ‘Date’, and also the location information; Pic 3.7-1, Pic 3.7-2, Pic 3.7-3 and Pic 3.7-4
Pic 3.7-1 Pic 3.7-2
Page 26

Pic 3.7-3 Pic 3.7-4
1.8. Date/Time
We can set the properties of date/time/time zone by choosing ‘Data/Time’ within ‘Control
Panel’; Pic 3.8-1
Pic 3.8-1
1.9. Remove Programs
Page 27

We can remove the application programs by choosing ‘Remove programs’ within ‘Control
Panel’; Pic 3.9-1
Pic 3.9-1
1.10. Input Panel
We can change the input method by choosing ‘Input Panel’ within ‘Control Panel’; Pic 3.10-1
Pic 3.10-1
1.11. Mouse
Page 28
We can test and set the sensitivities of double click and physical distance by choosing ‘Mouse’
within ‘Control Panel’; Pic 3.11-1
Pic 3.11-1
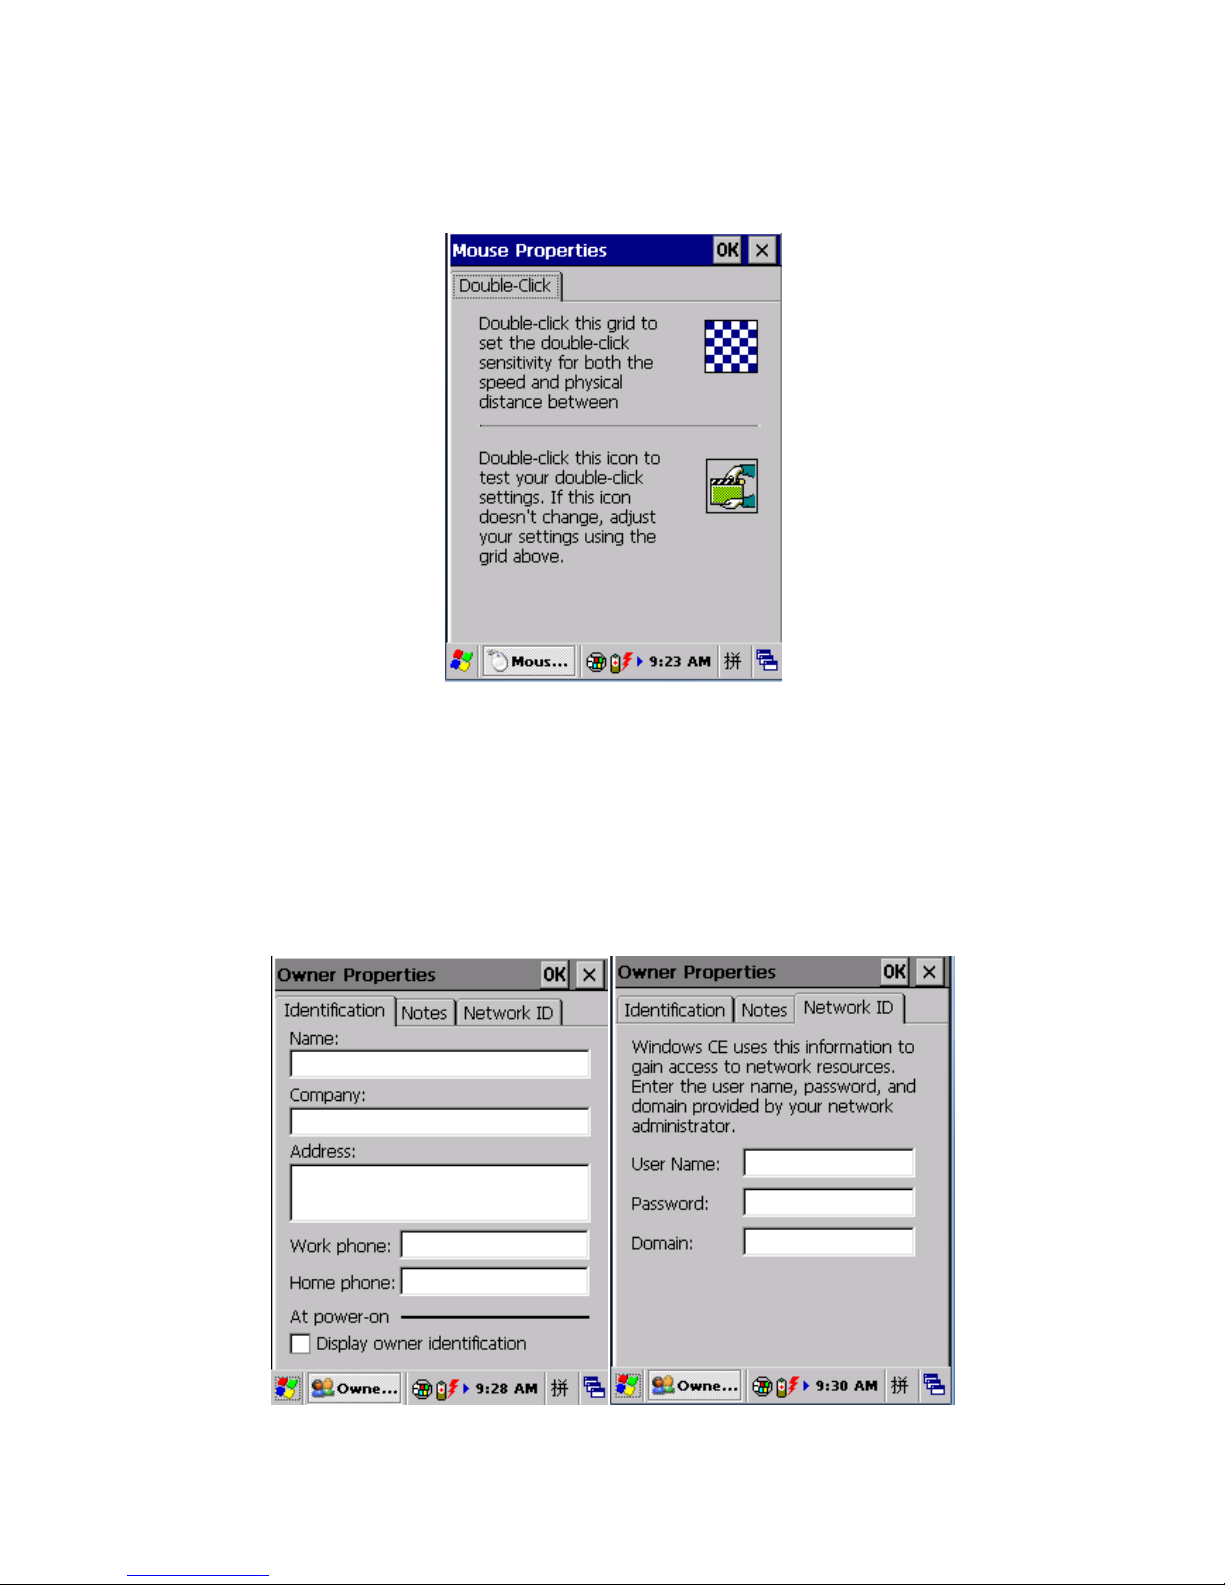
1.12. Owner (personal information of the owner)
We can set the owner properties by choosing ‘Owner’ within ‘Control Panel’, including ‘Name’,
‘Company’, ‘Address’, ‘Work phone’, ‘Home phone’ and ‘Display owner identification’. Pic 3.12-1
and Pic 3.12-2
Page 29

Pic 3.12-1 Pic 3.12-2
1.13. Network and Dial-up Connections
We can set the network properties by choosing ‘Network and Dial-up Connections’ within
‘Control Panel’; Pic 3.13-1 and Pic 3.13-2
Pic 3.13-1 Pic 3.13-2
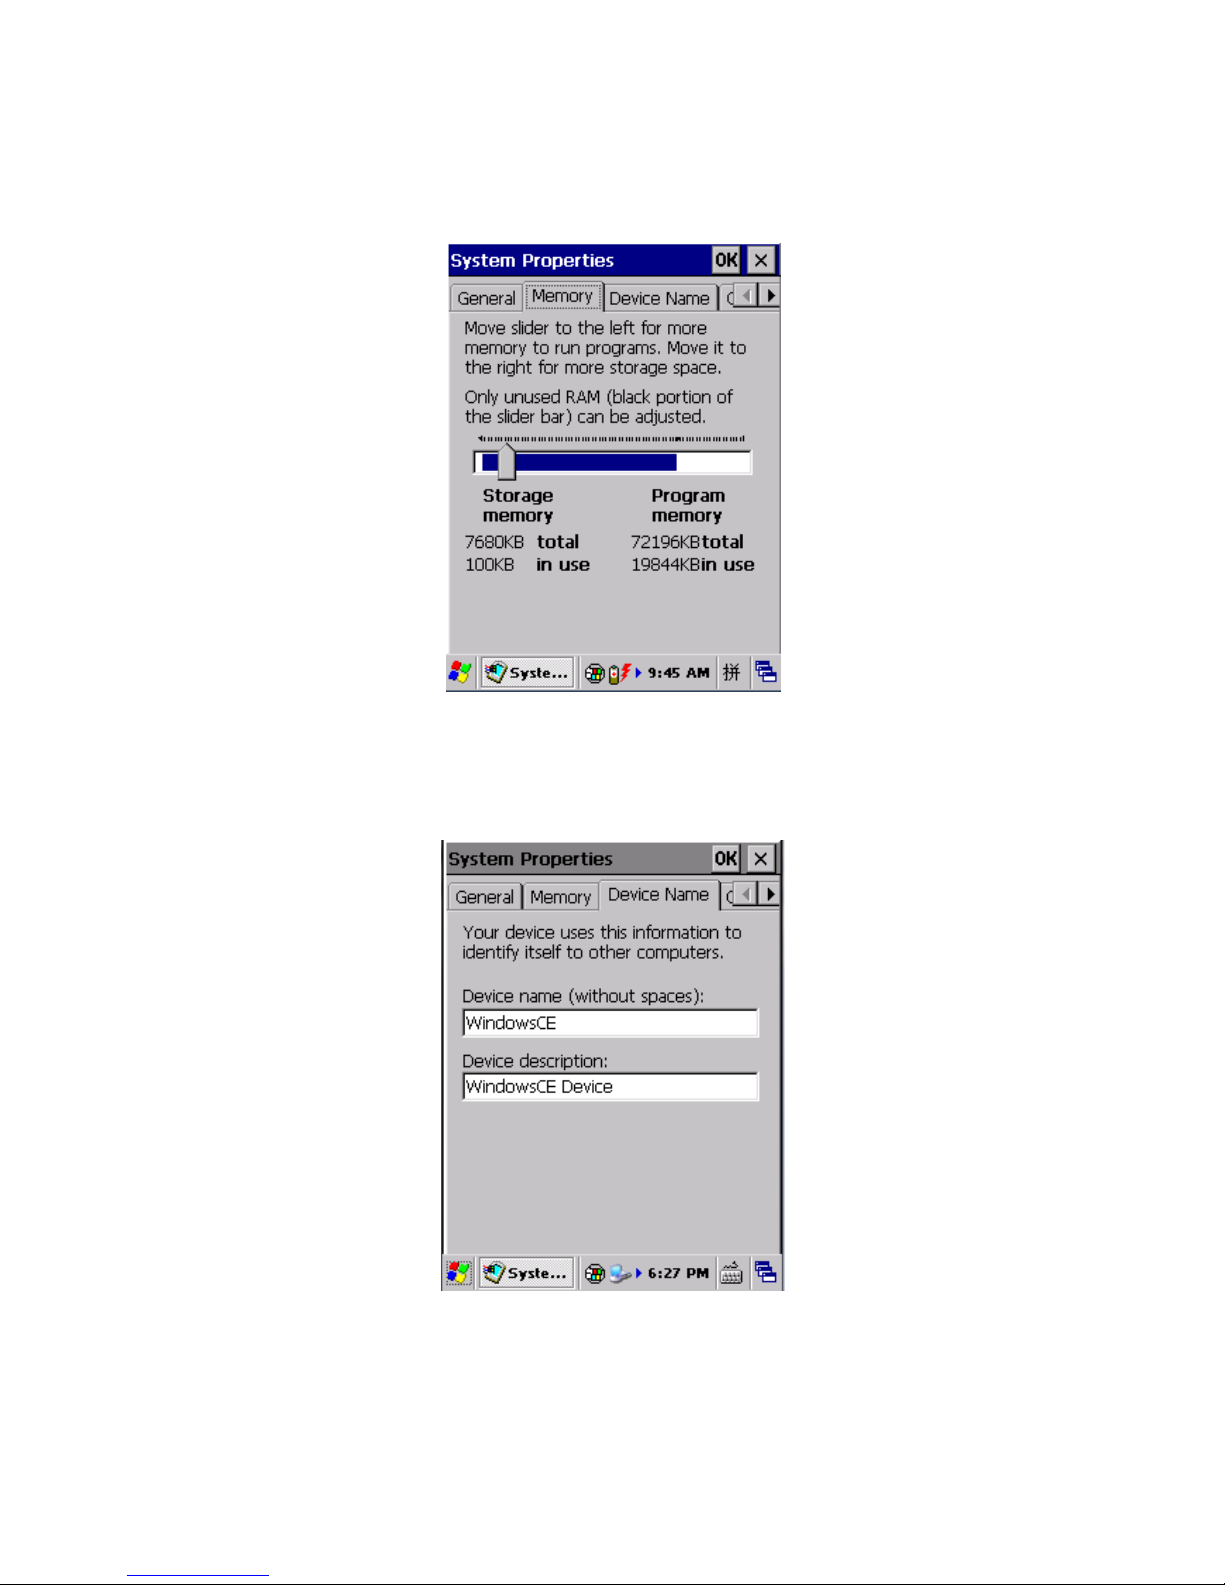
1.14. System
General: we can view the system information including system version, processor, memory and
expansion cards; Pic 3.14-1
Page 30
Pic 3.14-1
Memory: we can view the utilization status of the memory; Pic 3.14-2
Pic 3.14-2
Device name: We can view and change the device name and device description; Pic 3.14-3
Pic 3.14-3
Copyright: We can view the copyright information of the OS; Pic 3.14-4
Page 31

Pic 3.14-4
1.15. Display
Background: We can set and view the background image; Pic 3.15-1
Pic 3.15-1
Appearance: We can set the appearance scheme of the system; Pic 3.15-2
Page 32

Pic 3.15-2
Backlight: We can set the starting time of the backlight to save power and extend the battery
life. Please set it according to the requirements. Pic 3.15-3
Pic 3.15-3
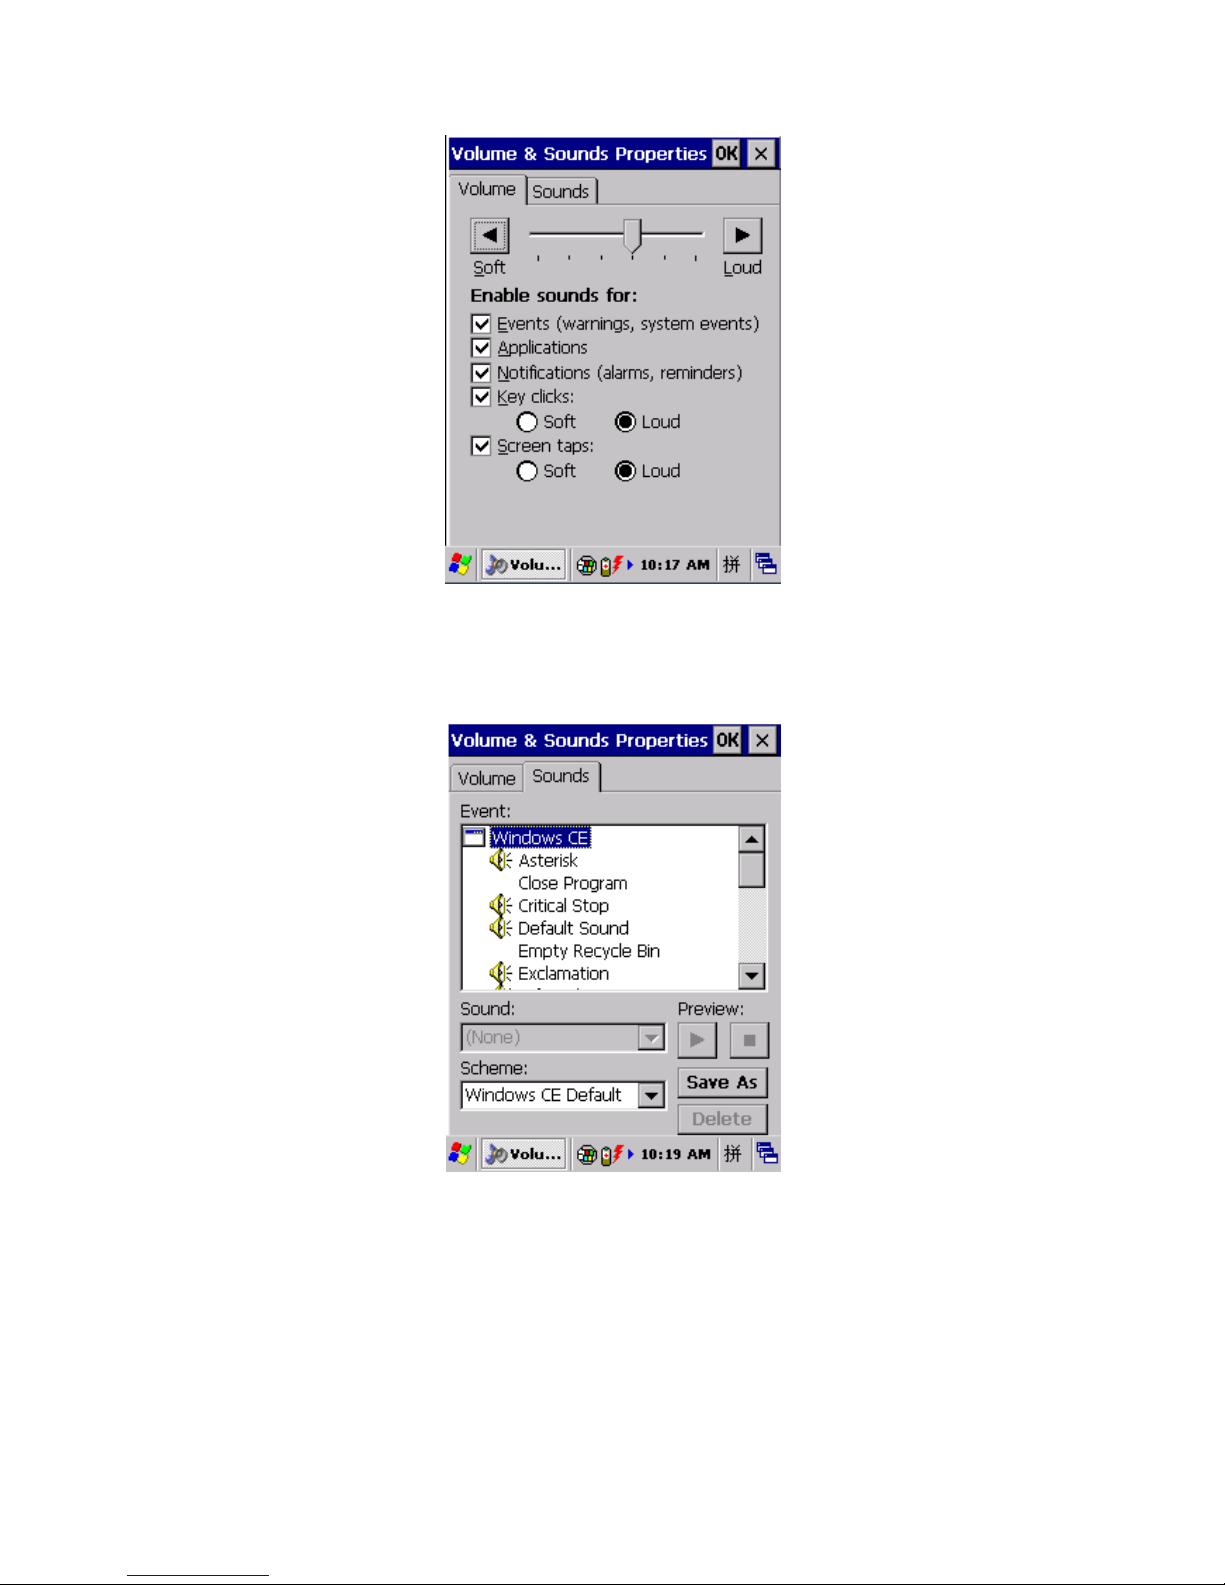
1.16. Volume &Sounds
Volume: We can set the volume; Pic 3.16-1
Page 33
Pic 3.16-1
Sounds: We can set the sound schemes: Pic 3.16-2
Pic 3.16-2
1.17. Dialing
We can set the dialing properties by choosing ‘Dialing’ within ‘Control Panel’; Pic 3.17-1
Page 34
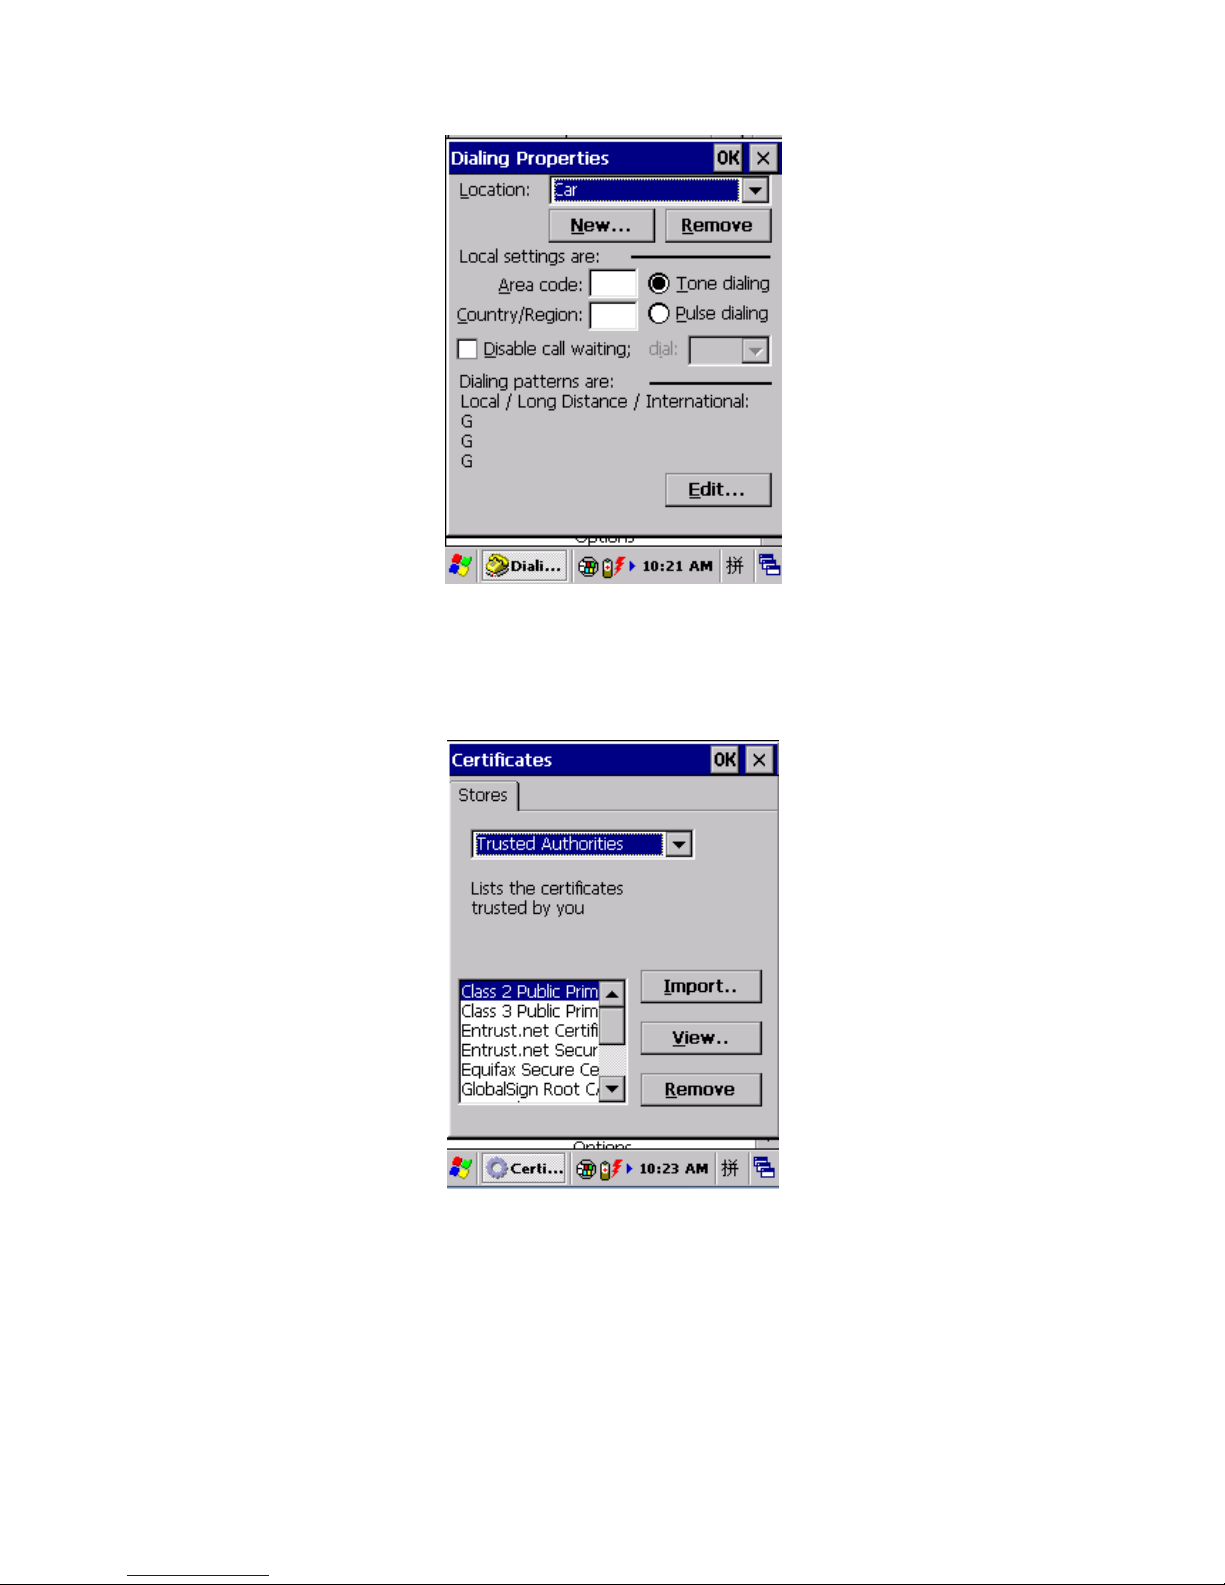
Pic 3.17-1
1.18. Certificates
We can manage the certificates by choosing ‘ Certificates’ within ‘Control Panel’; Pic 3.18-1
Pic 3.18-1
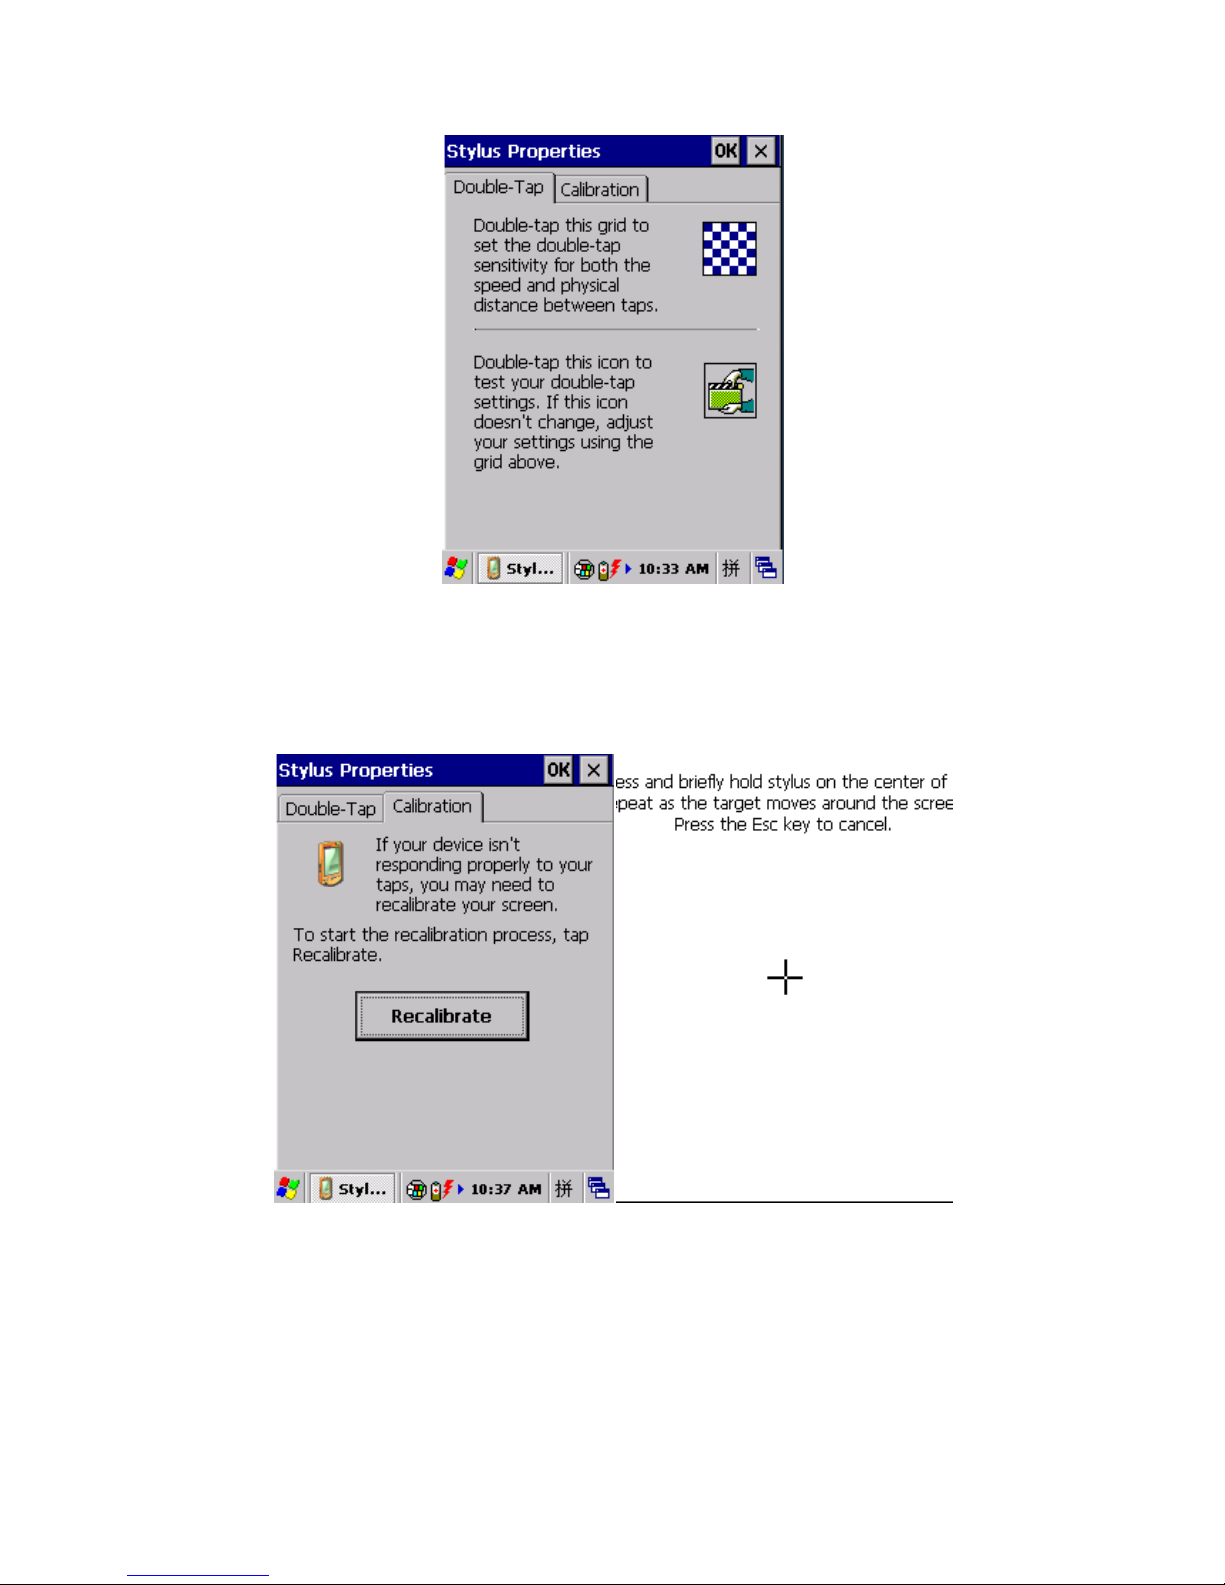
1.19. Stylus
Double Tap: We can set the sensitivities of double click and physical distance; Pic 3.19-1
Page 35
Pic 3.19-1
Calibration: We can calibrate the accuracy of the touch screen by choosing ‘Recalibrate’; Pic
3.19-2 and Pic 3.19-2
Pic 3.19-1 Pic 3.19-2
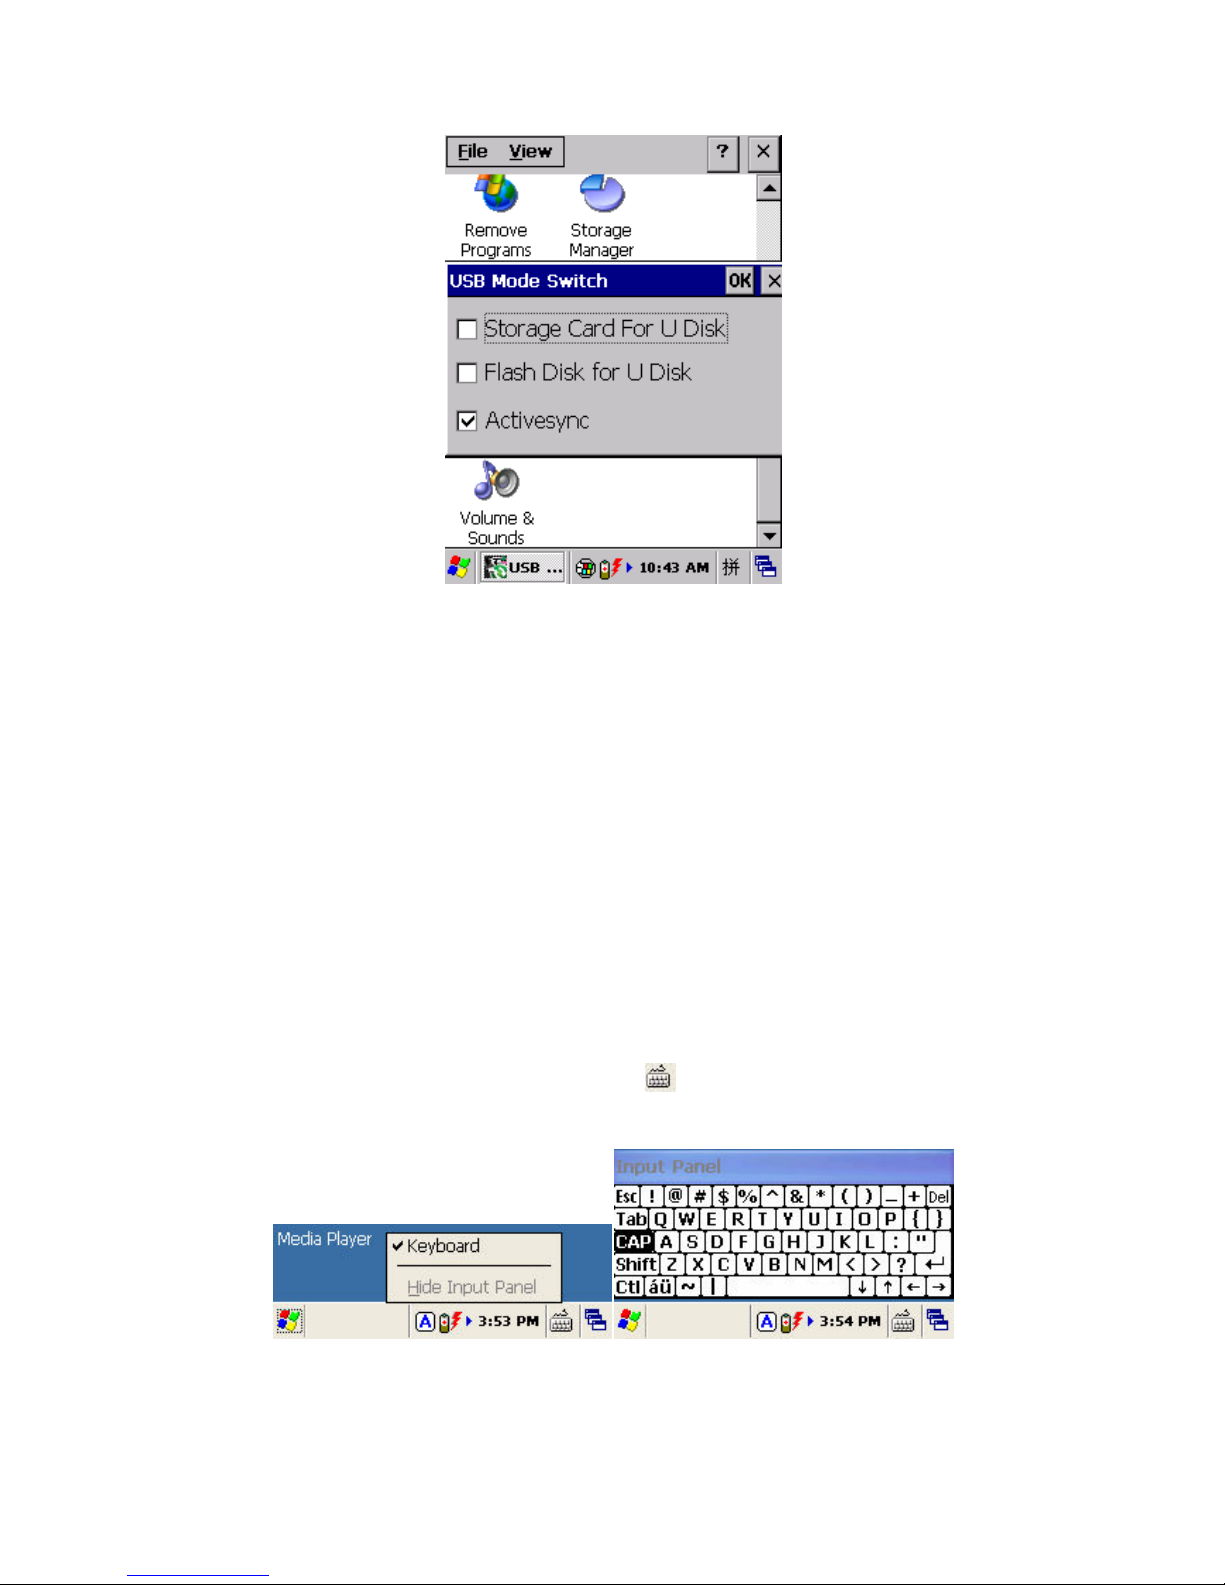
1.20. USB Mode Switch
We can switch the three modes by choosing ‘USB Mode Switch’; Pic 3.20-1
Page 36
Pic 3.20-1
1.Storage Card For U Disk: the storage card will be used as the U disk;
2.Flash Disk For U Disk: the flash disk will be used as the U disk;
3.Activesync: Synchronization with the PC
Chapter 4 Keyboard and Input Methods
4.1. Soft keyboard:
1) Input from keyboard: input numbers only by default;
2) Input by soft keyboard: click the keyboard icon on task bar, check the ‘Keyboard’, it will
pop up the soft keyboard , you can type letters from it. Pic 4.1-1 and Pic 4.1-2
Pic 4.1-1 Pic 4-1-2
There are two methods for inputting capitalized letters;
Page 37

a) Press on soft keyboard and you can input capital letters and tap again to go
back to lower case status. Pic 4.1-3
b) Click and the soft keyboard switch to capital letter input, after a capital letter is
input, the soft keyboard will restore to lower case. Pic 4.1-4
Pic 4.1-3 Pic 4.1-4
If you need to input symbols, click and select the ones you desire to input. When it’s
done, click to restore to normal.
Chapter 5 Network Connection
5.1. WIFI
WiFi is a default module of our device. It allows wireless communication and real-time data
transmission.
1) Open ‘AppCenter’ on desktop , then run the application ‘WIFI’ in ‘AppCenter’; Pic 5.1-1
2) Click ‘Load’ on ‘WLAN Loader’ , then network icon will display on toolbar; Pic 5.1-2
Page 38

Pic 5.1-1 Pic 5.1-2
3) Double click the network icon, choose the router from ‘Wireless Information’, and then click
‘Connect’; choose proper ‘Encryption’ and ‘Authentication’, and type password in ‘Network
Key’, and then click ‘OK’; Pic 5.1-3, Pic 5.1-4, Pic 5.1-5 and Pic 5.1-6
Pic 5.1-3 Pic 5.1-4
Page 39

Pic 5.1-5 Pic 5.1-6
4) If it is successful connected, the network icon will display , and you can see the ‘Status’ and
‘Signal Strength’.
5.2. GPRS Dial-up Connection
The GPRS module supports GSM/GPRS (900/1800 MHz). It can also support 850/1900MHz if
necessary. Before using GPRS, please ensure that your SIM card is available and you have
mounted it into the device card slot
5.2.1. GPRS Configuration
Dial-up settings:
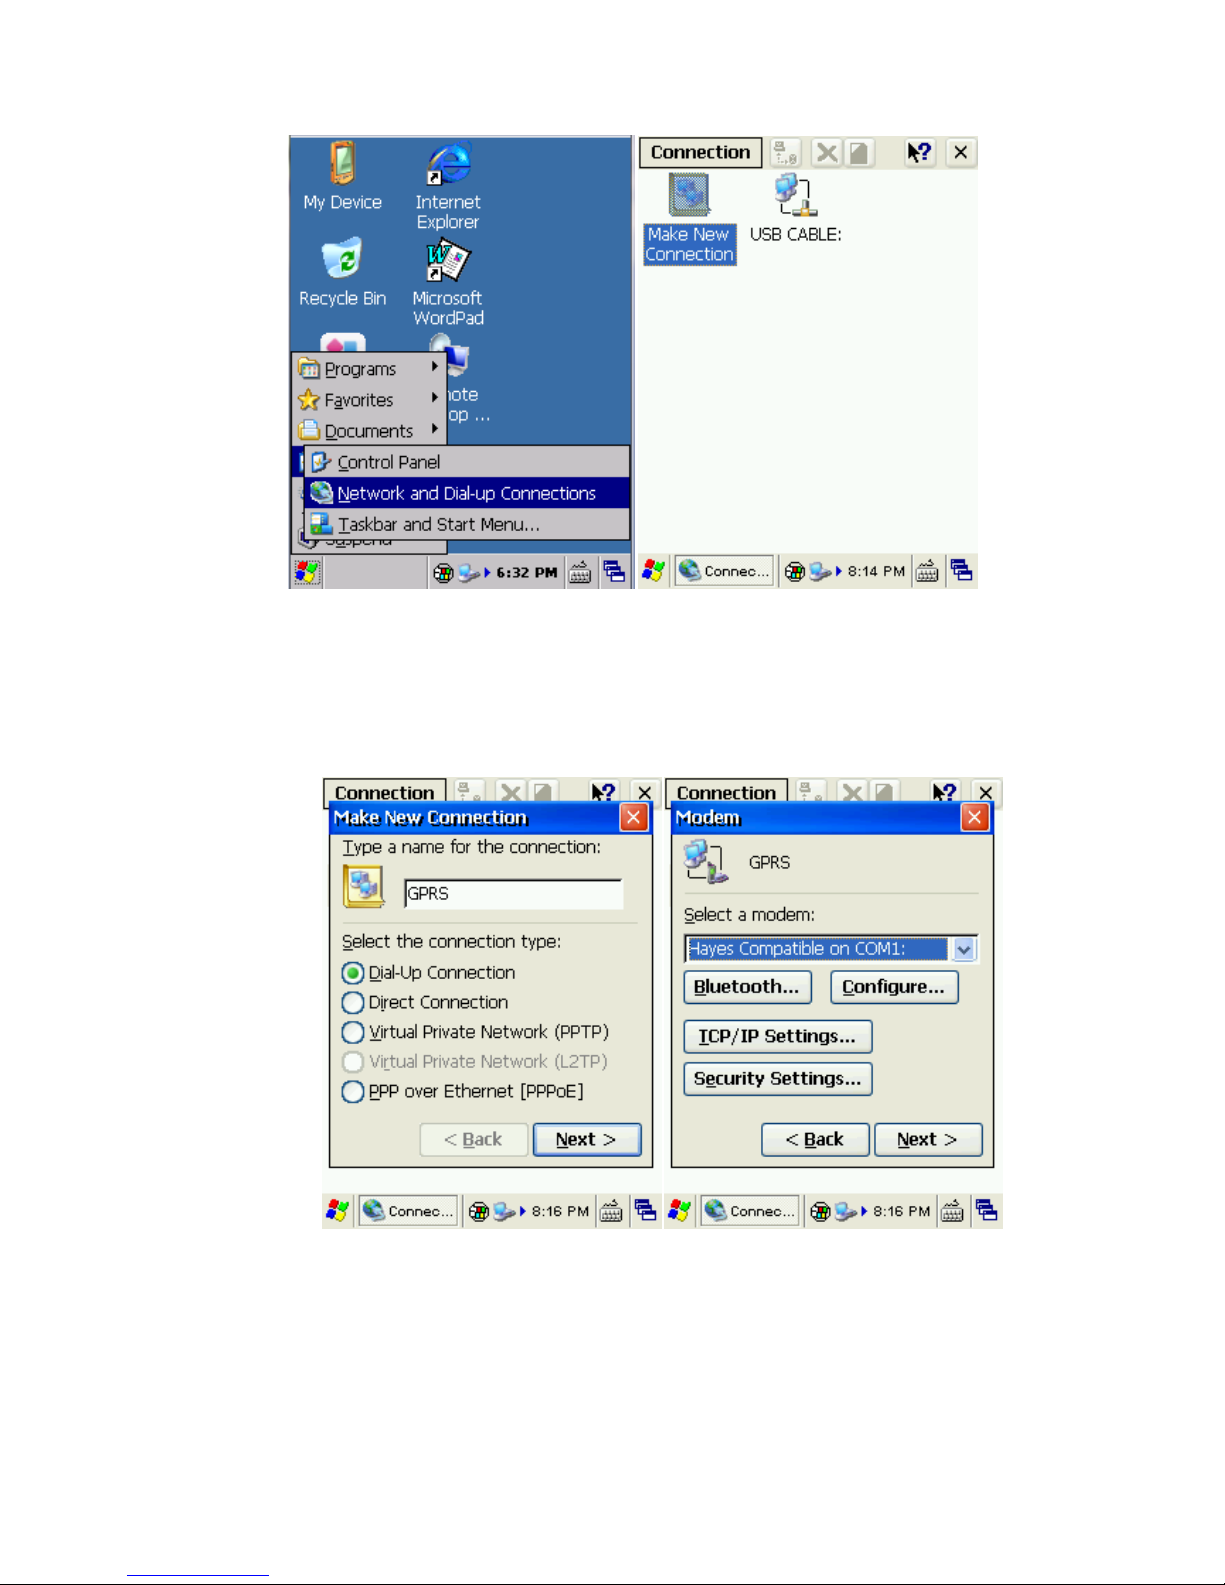
1) Click ‘Start Menu’->’ Settings’-> ‘Network and Dial-up Connections’, and then double click
‘Make New Connection’. Pic 5.2.-1 and Pic 5.2-2
Page 40
Pic 5.2-1 Pic 5.2-2
2) Input connection name ‘GPRS’ and then ‘Next’ ; click ‘Configure’ then ‘Next’; Pic 5.2-3
and Pic 5.2-4
Pic 5.2-3 Pic 5.2-4
3) In ‘Port Settings’, set ‘Connection Preferences’ as below:
‘Baud Rate’: 115200; ‘Data Bits’: 8; ‘Parity’: None; ‘Stop Bits’: 1; ‘Flow Control’: None
Then click ‘Call Options’ to turn to another tab page;
Page 41

4) Input ‘+CGDCONT=1,”IP”,”CMNET”’ (input all blue characters including the commas and
quotation marks) into ‘Extra Settings’, the ‘CMNET’ (which is short for China Mobile
Network) should be replaced by your local ‘GPRS APN’ (Access Point Name); left other
default, then click ‘OK’; Pic 5.2-5 and Pic 5.2-6
Pic 5.2-5 Pic 5.2-6
5) Click Next to Phone Number page, input the country/region code, area code and Phone
number (*99***1#), then click Finish; now you can see the GPRS connection icon; Pic 5.2-7
and Pic 5.2-8
Pic 5.2-7 Pic 5.2-8
Page 42
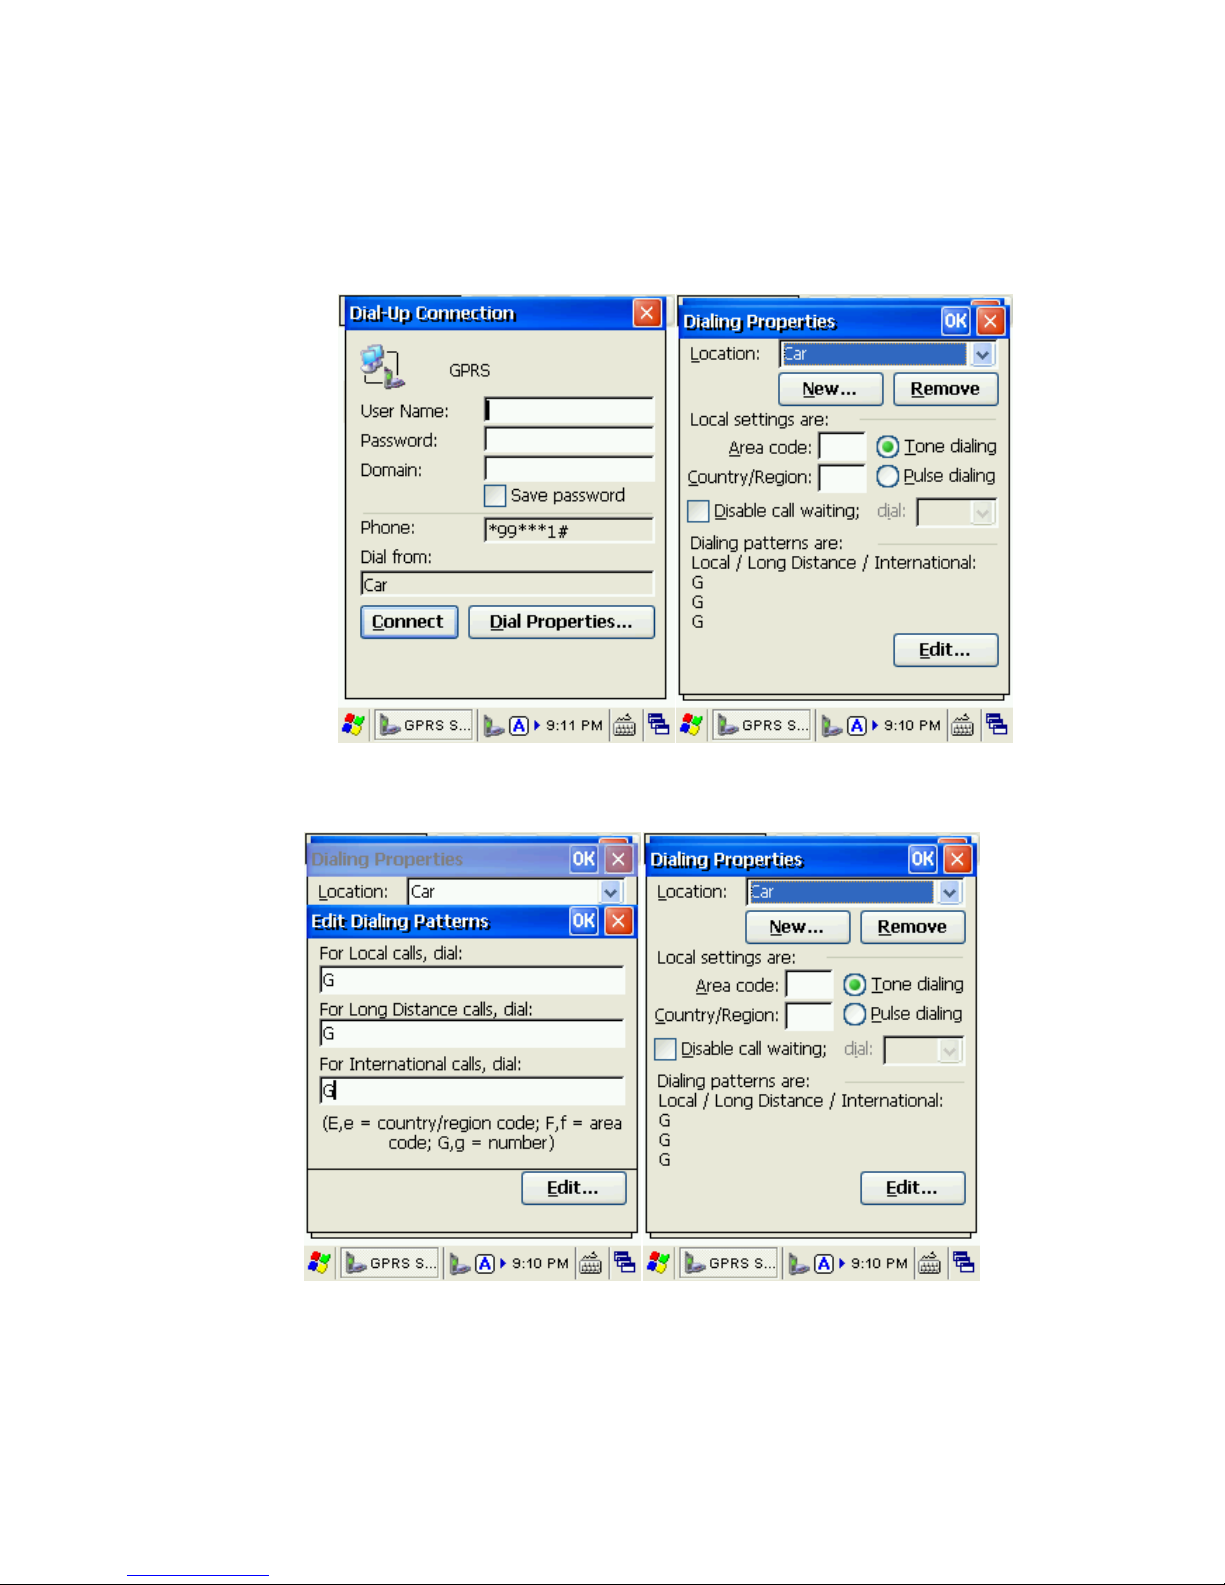
6) Double click the GPRS icon; in ‘Dial-Up Connection’ page, keep ‘User Name’, ‘Password’ and
‘Domain’ blank, and then click ‘Dial Properties’; choose ‘Location’ as ‘Car’ and then click ‘Edit’;
Fill the 3 edit boxes all with letter ‘G’ and then ‘OK’. Click ‘OK’ on ‘Dialing Properties’, and then
back to desktop. Pic 5.2-9, Pic 5.2-10, Pic 5.2-11 and Pic 5.2-12
Pic 5.2-9 Pic 5.2-10
Pic 5.2-11 Pi 5.2-12
Note: During the process of our configurations, we use ‘CMNET’ as the reference, for users please
input the local GPRS setting and dial-up information by contacting the local service provider.
Page 43

5.2.2 GPRS Dial-up Connection
Please pay attention to the following points before dial up:
The configurations are set properly;
SIM card is installed properly as the followed image;
The SIM card works at the frequency of 900Mhz and 1800Mhz;
The SIM card is available and the GPRS function is activated;
Page 44

Chapter 6 Synchronization with the PC and
Updating OS
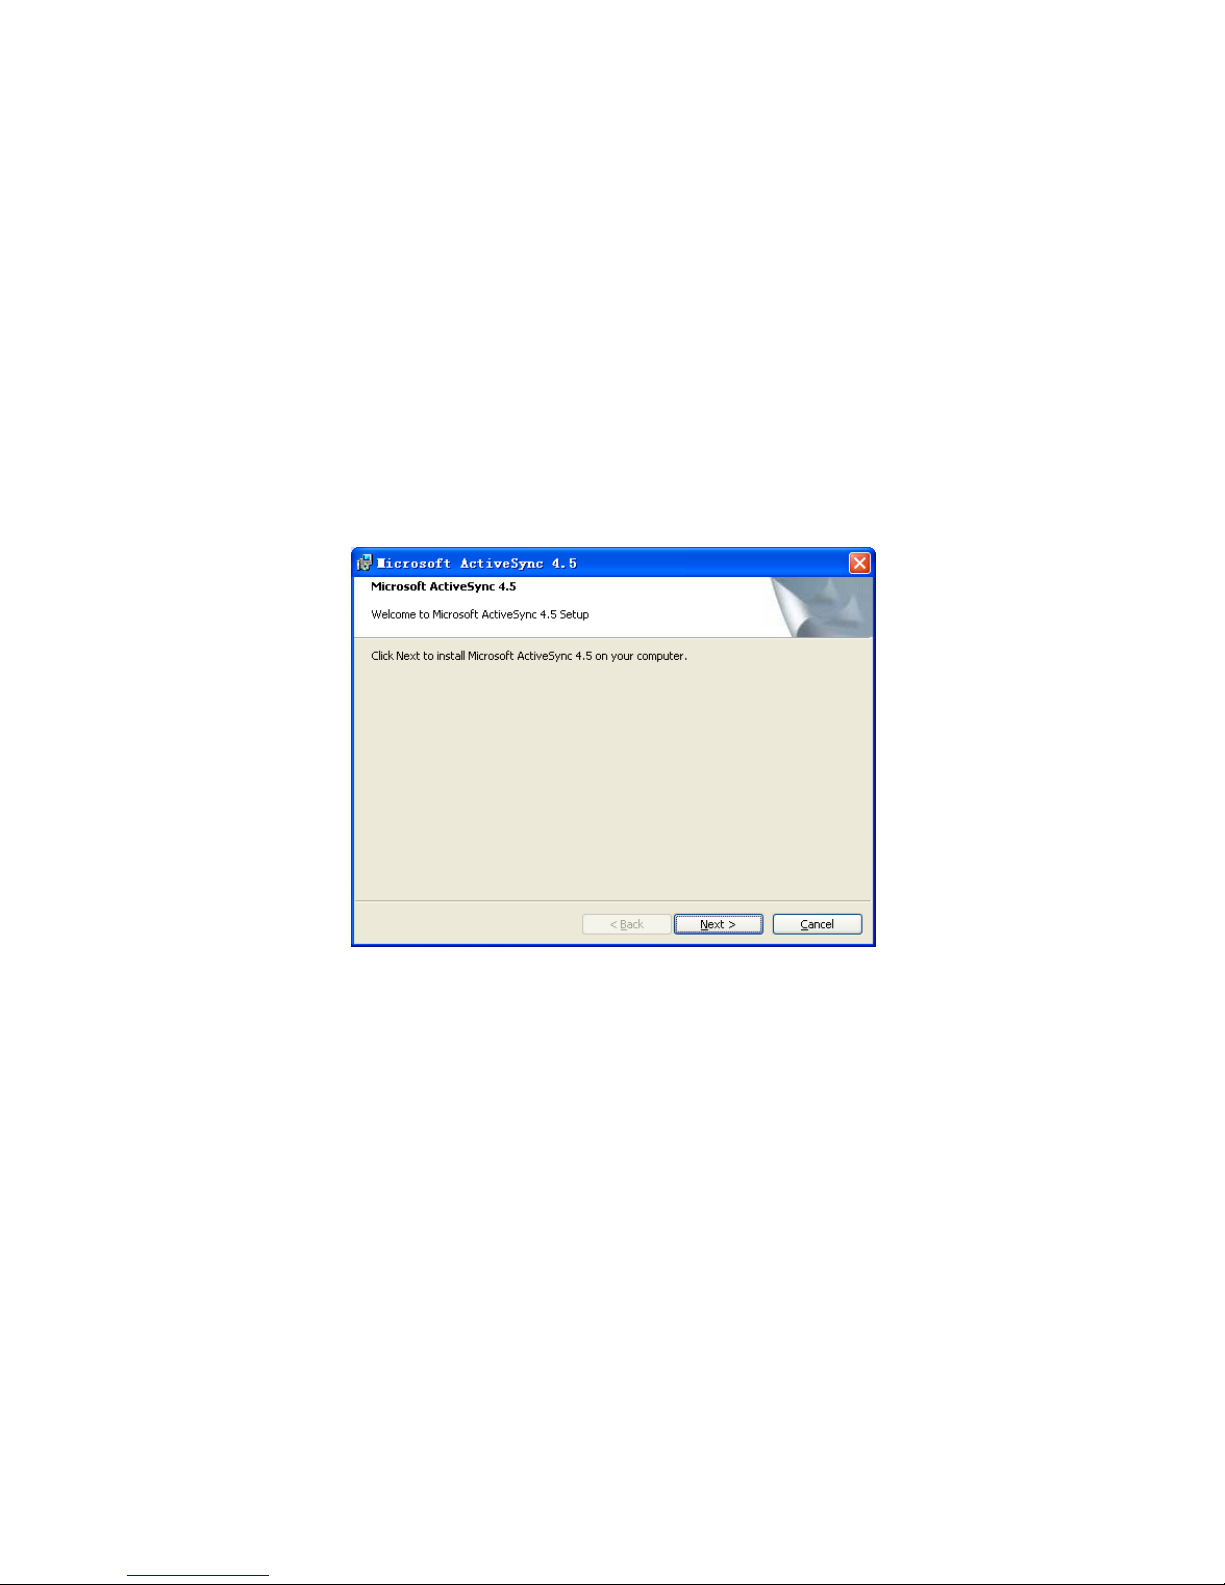
We can visit the handheld, preview, copy and cut file or synchronize the data with the PC after
installing the ActiveSync software successfully. The following introduces the detailed steps on
how to install it:
6.1. Introductions on the ActiveSync
We support 3 versions ActiveSync software for different OS (operation system):
ActiveSync4.5_OfficialRelease.msi
Supports OS:
Windows Server 2003;Windows Server 2003 Service Pack 1;Windows Server 2003 Service
Pack 2;Windows XP;Windows XP 64-bit;Windows XP Embedded;Windows XP Embedded
Service Pack 1;Windows XP Embedded Service Pack 2;Windows XP for Itanium-based
Systems Version 2003;Windows XP Home Edition;Windows XP Media Center Edition;
Windows XP Professional 64-Bit Edition (Itanium);Windows XP Professional 64-Bit Edition
(Itanium) 2003;Windows XP Professional Edition;Windows XP Professional x64 Edition;
Windows XP Service Pack 1;Windows XP Service Pack 2;Windows XP Starter Edition;
Windows XP Tablet PC Edition
ActiveSync6.1_OfficialRelease-x64.exe
Supports OS(64bit):
Windows 7 Ultimate;Windows 7 Enterprise;Windows 7 Professional;Windows 7 Home
Premium;Windows Vista Ultimate;Windows Vista Enterprise;Windows Vista Business;
Windows Vista Home Premium;Windows Vista Home Basic;Windows Vista Server
ActiveSync6.1_OfficialRelease-x86.exe
Supports OS(32bit):
Page 45
Windows 7 Ultimate;Windows 7 Enterprise;Windows 7 Professional;Windows 7 Home
Premium;Windows 7 Starter;Windows Vista Ultimate;Windows Vista Enterprise;Windows
Vista Business;Windows Vista Home Premium;Windows Vista Home Basic;Windows Vista
Server
6.2. ActiveSync Installation
Choose the ActiveSync properly according to the OS of the PC, and we use
ActiveSync4.5_OfficialRelease.msi as the reference,
1) Open the software, the following is the interface: Pic 6.2-1
Pic 6.2-1
2) Choose ‘Next’ and we will enter the following interface: Pic 6.2-2
Page 46
Pic 6.2-2
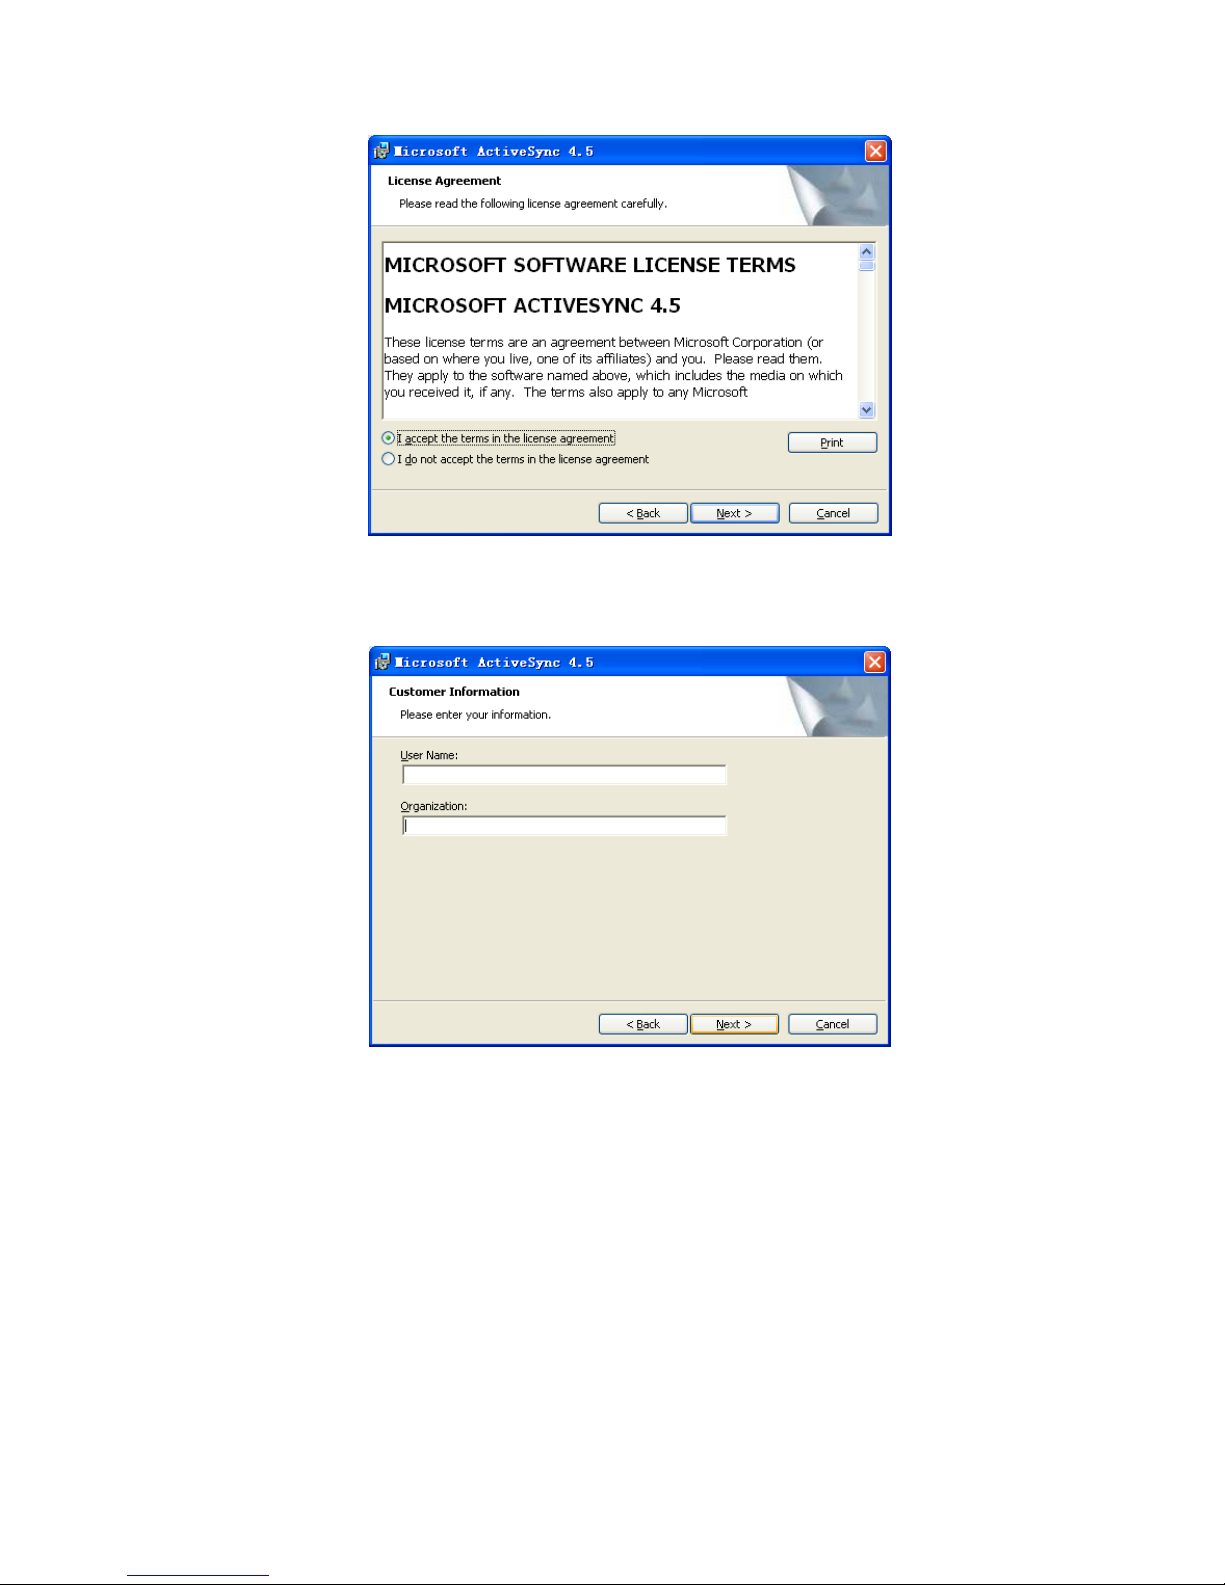
3) Then we choose ‘I accept the terms in the license agreement’, and click ‘Next’; Pic 6.2-3
Pic 6.2-3
4) Input the user name and organization information and then click ‘Next’; Pic 6.2-4
Page 47
Pic 6.2-4
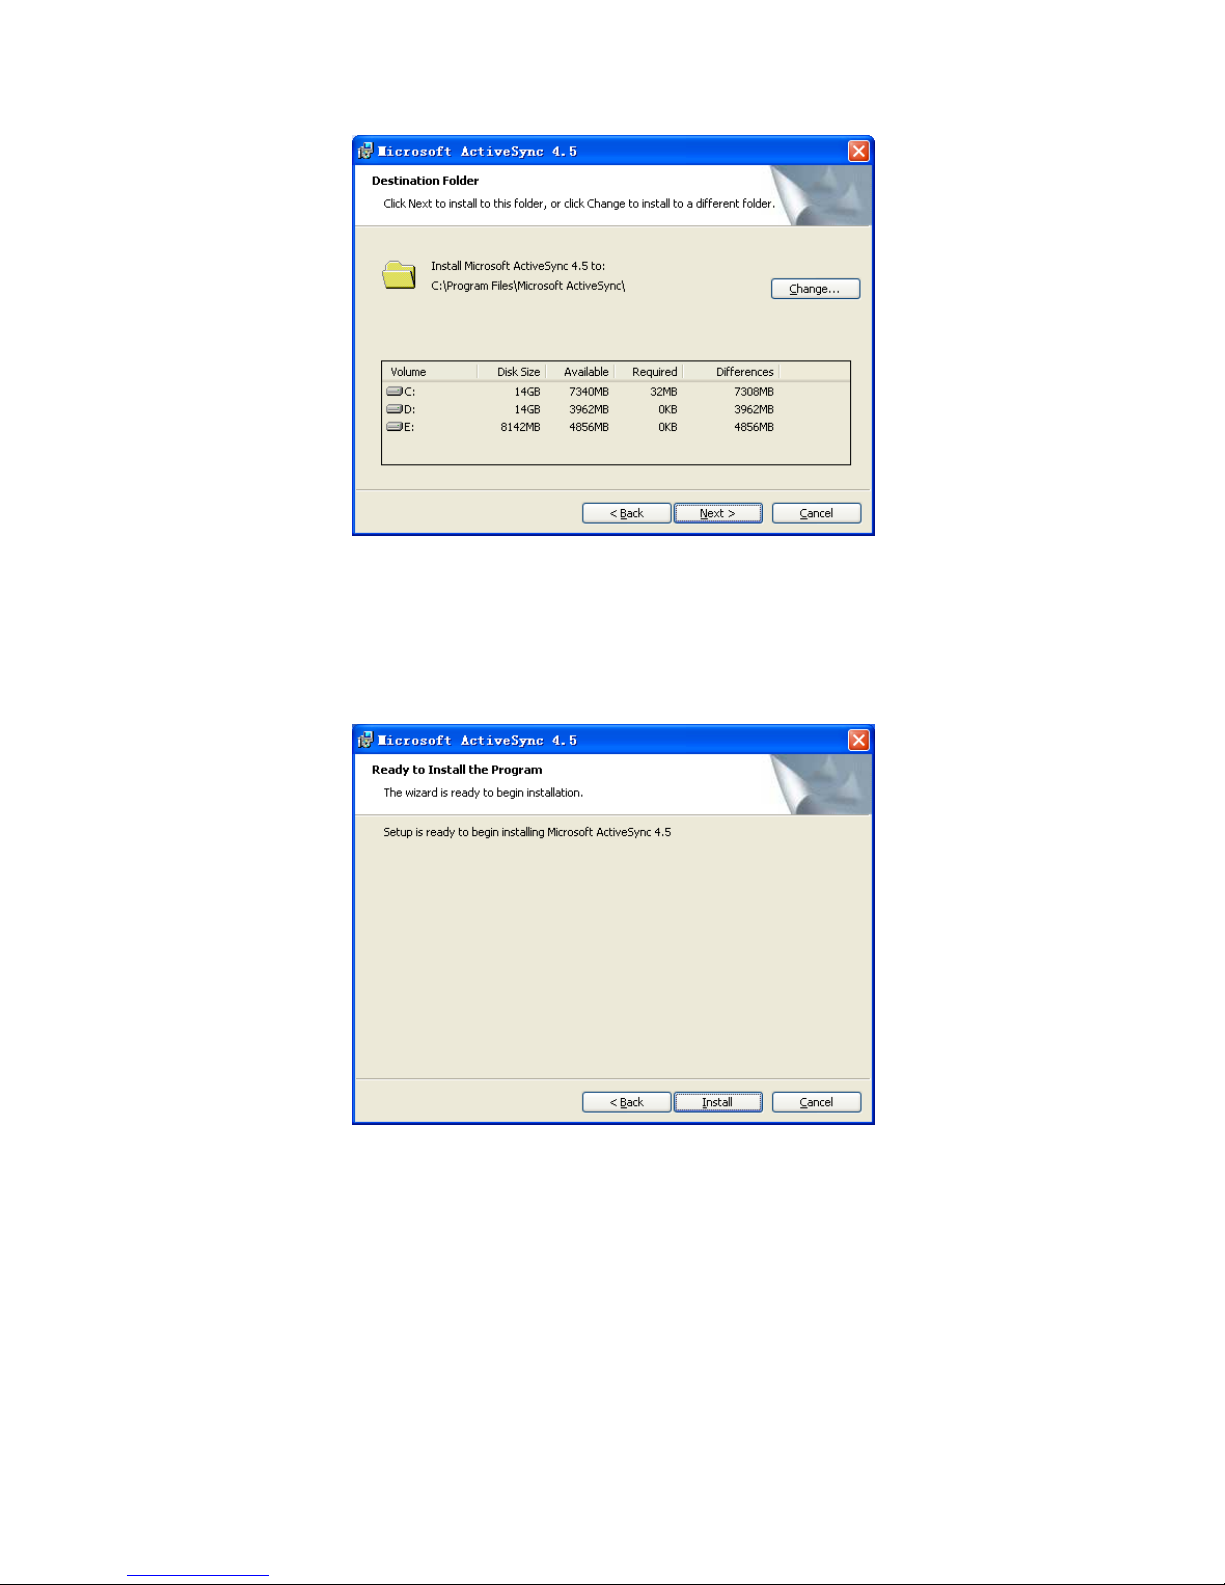
5) The default installation path is ‘C:\Program Files\ Microsoft ActiveSync’, we can click
‘Change’ to change the installation path; Pic 6.2-5
Pic 6.2-5
6) Confirm the operating is correct before click ‘Install’ to continue the process of installation;
Pic 6.2-6
Page 48

Pic 6.2-6
7) After the successful installation, we can go to the followed interface: Pic 6.2-7
Pic 6.2-7
8) Click ‘Finish’ to finish the installation, and choose ‘Yes’ to reboot the PC; Pic 6.2-8
Page 49
Pic 6.2-8
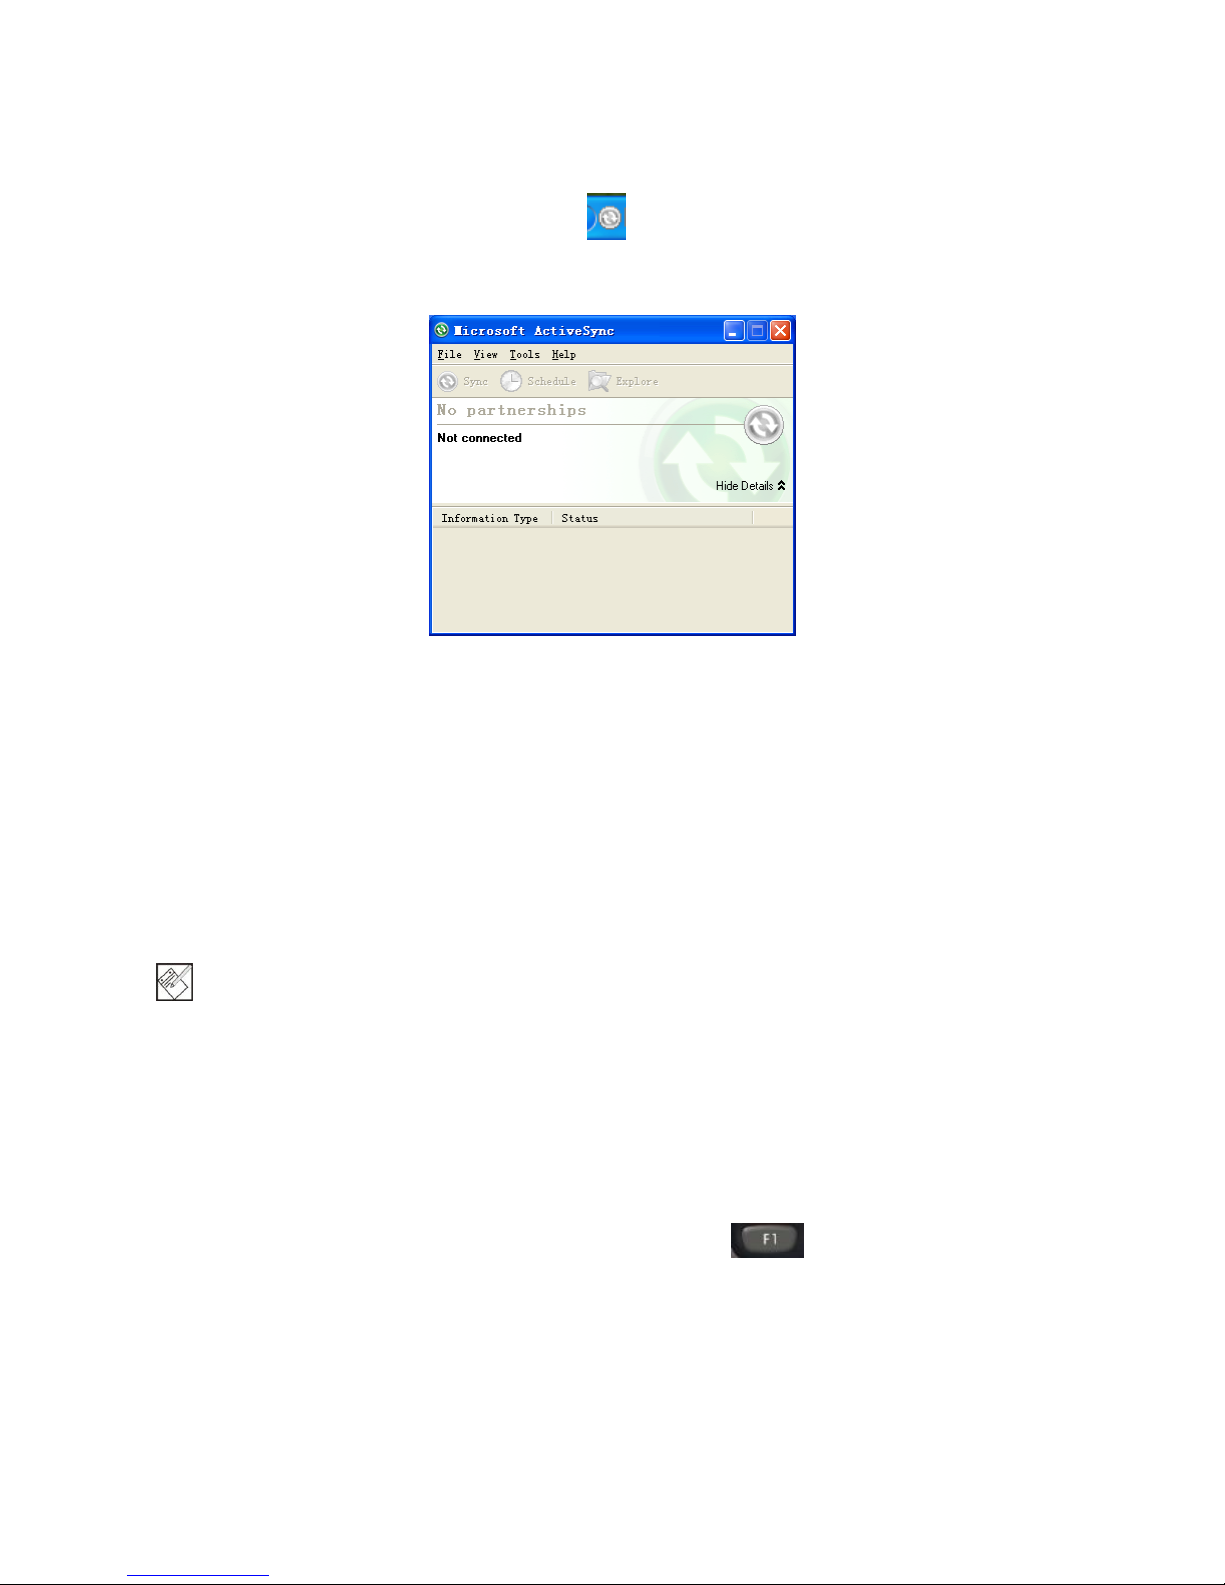
9) After the rebooting, we can find the icon on the right corner of the PC, double click it
to open the ActiveSync; Pic 6.2-9
Pic 6.2-9
6.3. Update Operating System
Before updating, please backup your data: copy the data to PC or other disk like SD card. All
data and applications will be erased after updating.
6.3.1 Copy System Files to SD Card
1) Format the SD card;
Note: Format the card. Do not choose fast format. Choose the File System as FAT32.
Tip: For the TF card installed in the device by default when being purchased from us, the step has been
done before
2) Copy the update files into the SD card;
3) Install SD card to the device.
6.3.2 Update OS for Windows CE
After finishing steps above, restart the device, and then press F1 as soon as possible; then you
will see it as Figure6-3-1; choose Update OS, then press the yellow button on keyboard; then please
wait the system update and start.
Page 50

Pic 6.3-1
6.4. Restore Factory Settings
Before updating, please backup your data: copy the data to PC or other disk like SD card. All data and
applications will be erased after updating.
After finishing steps above, restart the device, and then press F1 as soon as possible; then you
will see it as Figure6-3-1; choose Restore factory settings, then press the yellow button on keyboard;
then please wait the system restore and start.
If you choose Start OS, the system will start normally.
Page 51

Chapter 7 Functional Utilization
Helps as a test Demo which includes multiple modules containing 1D barcode, 2D barcode, LF,
HF, WIFI, GPRS, Bluetooth and camera is installed before leaving the factory. Users can adjust
them according to the functional modules. For detailed description, please refer to <Helps >.
Pic 7-1
Pic 7-1 Pic 7-2
The following is the captured image of the interface: Pic 7-3
Pic 7-3
Page 52

Chapter 8 Malfunction and Repair
8.1. Equipment and System Problems
Table8-1 Equipment and System Problems
Problems
Solutions
Device can’t start
Ensure the battery is correctly placed (see 2.1).
Change fully-charged battery.
Take off the battery and place again.
Touch-screen doesn’t
work
Clean the touch screen.
Recalibrate by the calibration procedure.
Restart the device
Screen fails to display
Check if the device is in standby status.
Restart the device.
Replace with fully-charged battery.
Keyboard doesn’t work
Check if the device is in standby status.
Restart the device.
Replace with fully-charged battery.
TF card can’t be
identified
Check if the TF card is placed wrongly.
Check if the TF card is placed firmly.
Check if the TF card is damaged.
Restart the device.
Replace with fully-charged battery.
Battery can’t be
Check if the adapter is damaged.
Page 53

recharged
Check if the USB cable is damaged.
Check if the adapter is plugged into the socket (220V).
Check if the adapter is plugged firmly.
8.2. Scanning Problems
Table8-2 Scanning Problems
Problems
Solutions
Press “scan” button but
no action
Check if the scanner head is damaged.
Check if the program is correct (please refer to DEMO for
specific codes).
Replace with fully-charged battery.
No data collected after
scanning
Check if the scanner head is damaged.
Check if the program is correct (please refer to DEMO for
specific codes).
Check if the barcode is damaged.
Make sure it’s in effective operating/scanning distance/range.
Make sure the barcode to be scanned is identifiable by the
device.
Check if the scanning window is covered with dusts.
Replace with fully-charged battery.
8.3. RFID Problems
Table 8-3 RFID Problems
Problems
Solutions
RFID tag can’t be
identified
Ensure the RFID module in the handheld terminal is compatible
with the tags.
Ensure the program is correct (please refer to DEMO)
Ensure the tag being scanned is within the RFID sensing area
(please see 3.2)
8.4. Network and Communication Problems
Table 8-4 Network and Communication Problems
Page 54

Problems
Solutions
Can’t be recognized after
USB is connected
Ensure USB cable is plugged.
Ensure USB cable is not damaged.
Restart the device.
Pull out and reconnect the USB cable.
Check if Microsoft ActiveSync has been installed properly
(please refer the Chapter 7)
Ensure connection to PC is correct
WIFI communication error
Ensure the program is correct (Please refer to DEMO).
Ensure the setting is correct (please refer to 5.1)
Ensure the accessories come with WIFI connection joint,
which is in effective transmission distance.
Page 55

55
Chapter 9 Maintenance
Do not use non-standard recharger or batteries, which may cause damage
to the device.
Do not scrap the screen. Use the attached stylus or plastic pen-shape
objects that suit touch screens. Do not use steel pen, pencil or other sharp
and hard articles on the screen.
Use soft cloth with diluted screen detergent to clean the screen.
Deal with used batteries according to environmental regulations. Do not
throw batter into fire, otherwise it may cause explosion.
Page 56

56
Appendix 1 Code Types of 1D
Barcode Scanner
The 1D barcode scanner can set parameters by scanning specific Function Barcodes.
Operation Steps: aim the scanner at a function barcode; scan it; the laser will quickly
disappear if succeed, which shows that setting is successful.
A1.1 Supported Code Types
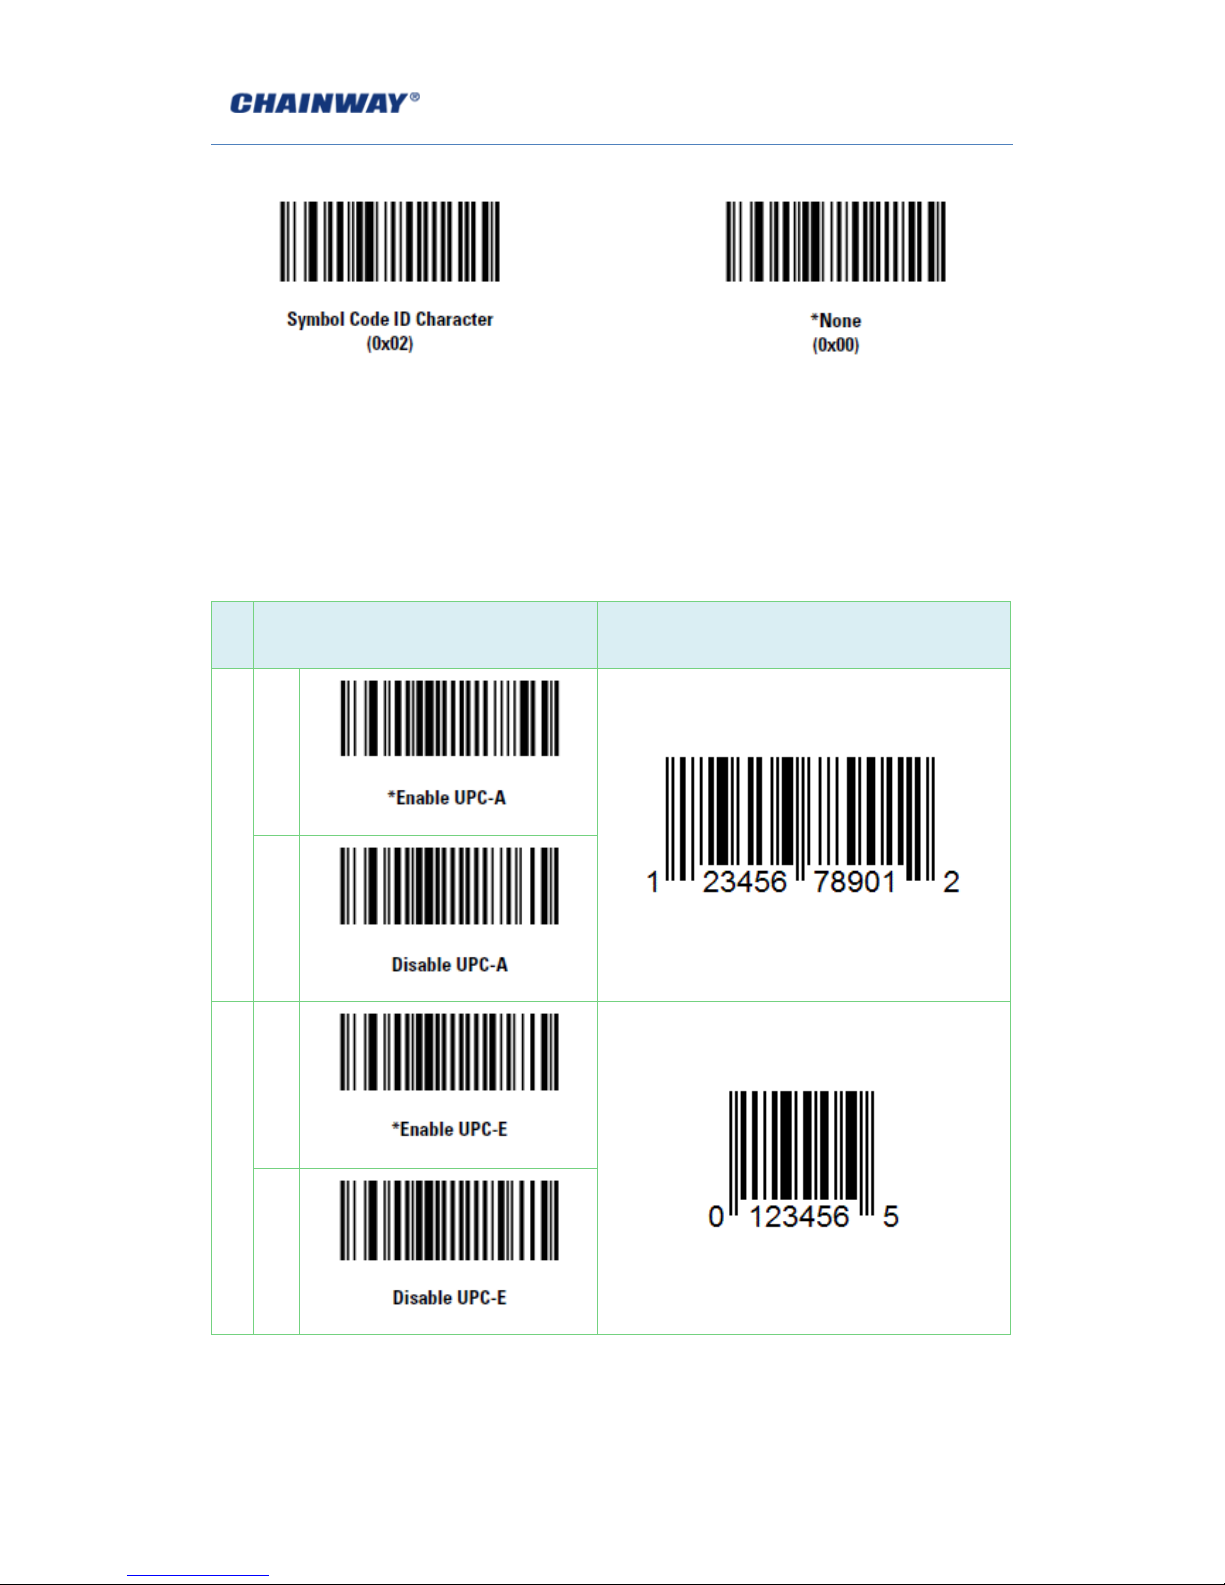
Appendix Table 1
Enable
Disable
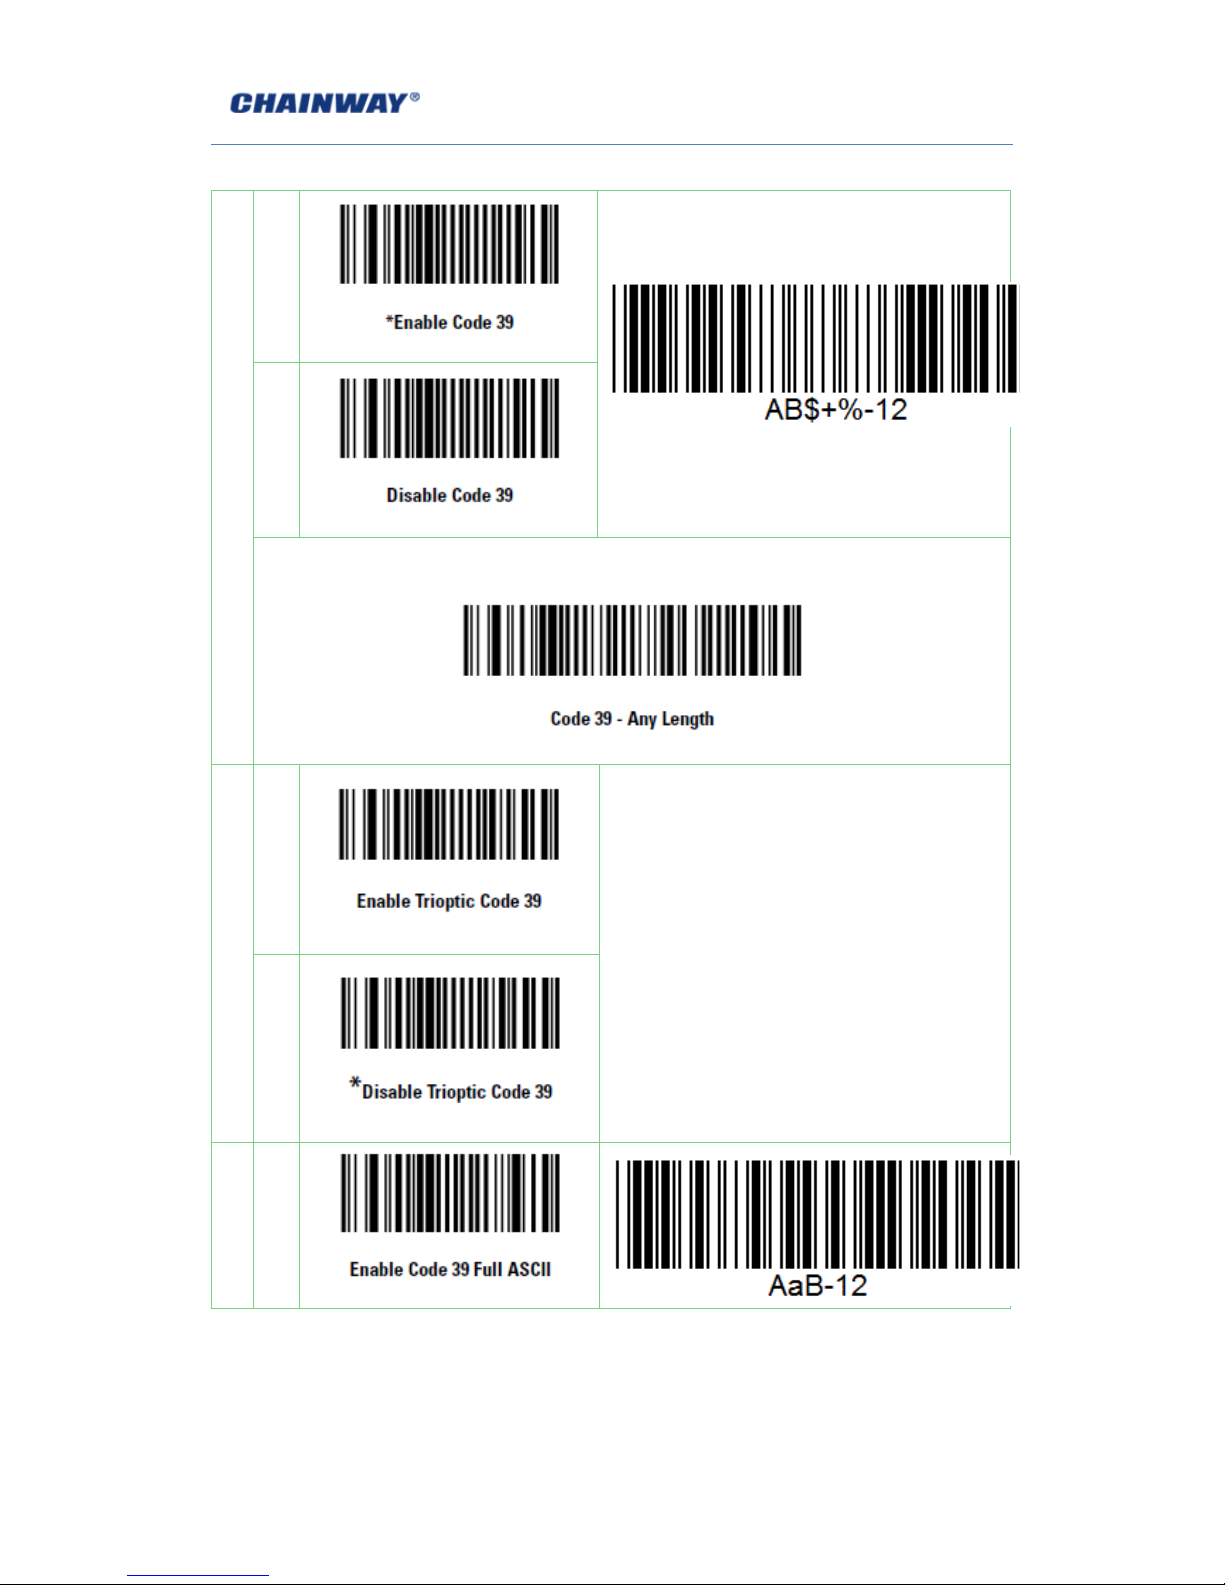
Code 39
Codabar
IATA 2 of 5
Code 128
Discrete 2 of 5
UPC A with 2 Supps.
Interleaved 2 of 5
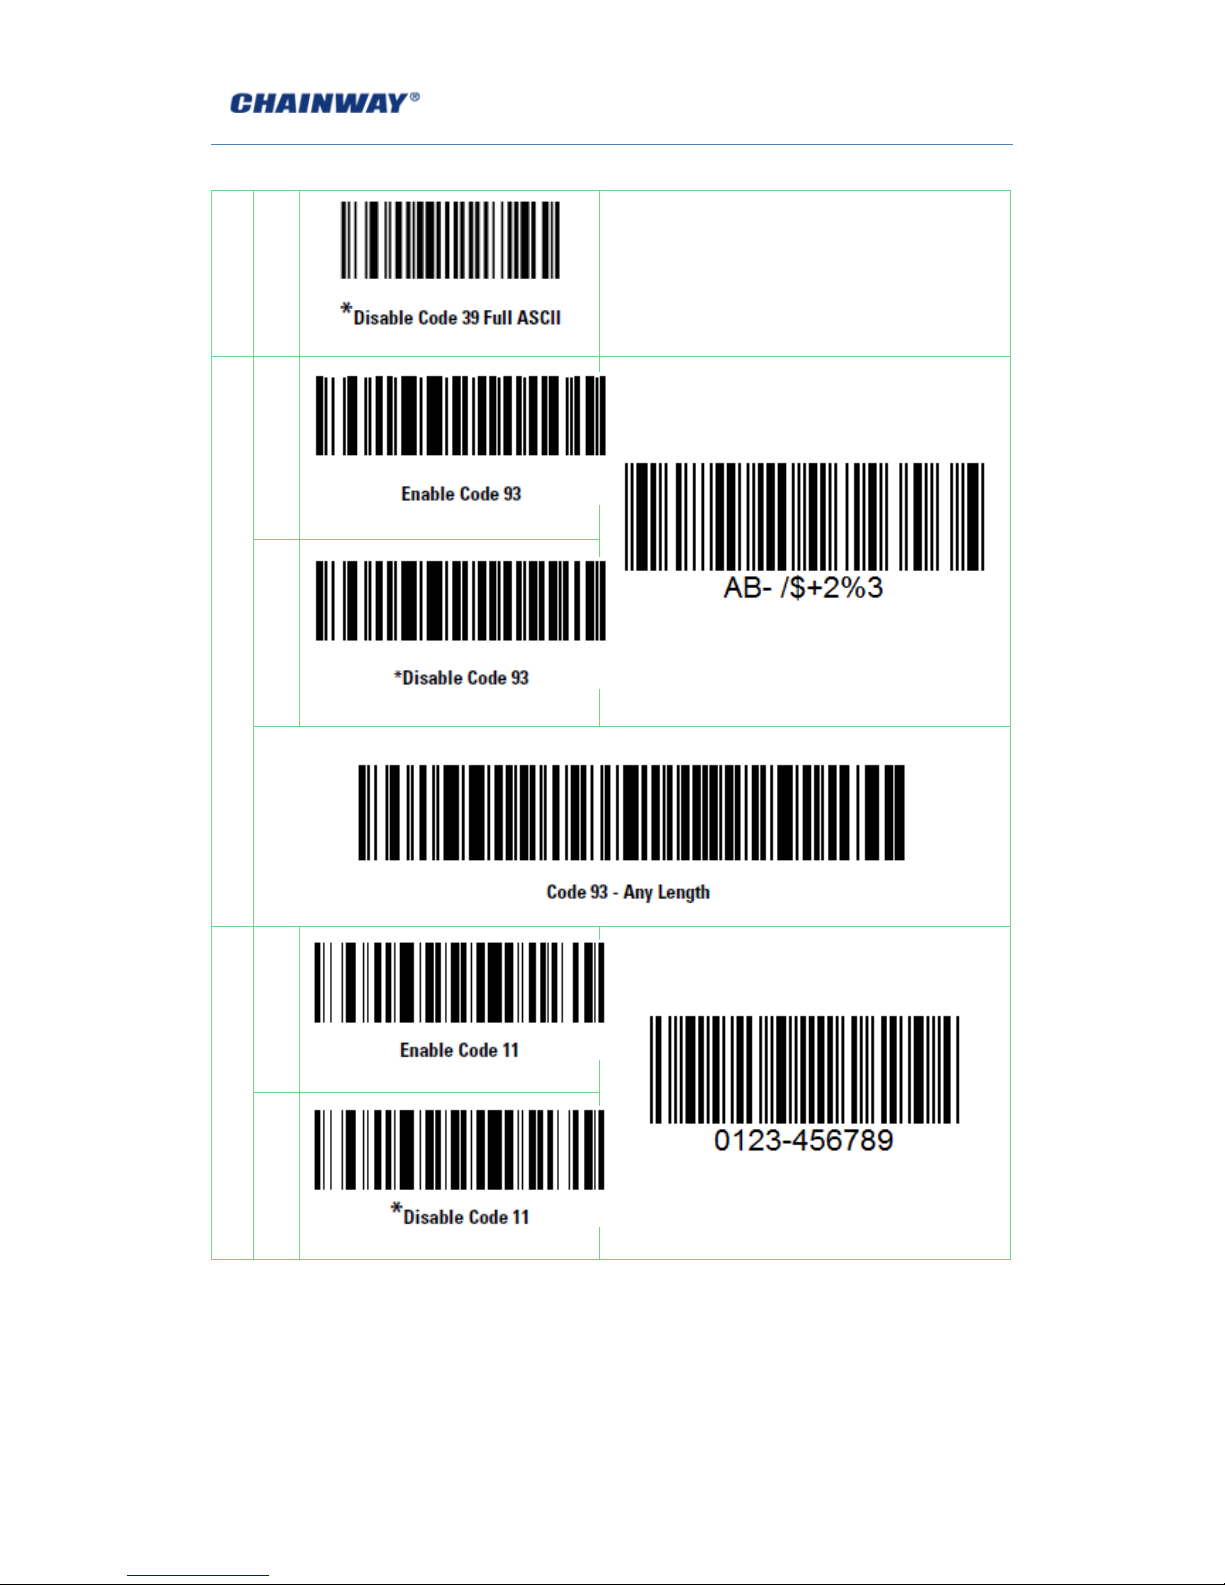
Code 93
UPC A with 5 Supps.
UPC A
MSI
UPC E0
EAN 8
Trioptic Code 39
UPC E0 with 2 Supps.
EAN 13
Bookland EAN
UPC E0 with 5 Supps.
EAN 128
Code 11
EAC 13 with 2 Supps.
UPC E
Chinese 2 of 5
EAN 13 with 5 Supps.
ISBT 128
UPC E1
UPC E1 with 2 Supps.
RSS-Limited
UPC E1 with 5 Supps.
RSS-14
Coupon Code
RSS-Expanded
Note: the types enable / disable by default can be switched by scanning
corresponding function barcodes in Appendix Table 2.
A1.2 Transmit Code Type Character
Page 57
57
Enable Disable
If this function enable, scanner will recognize code type when scanning a barcode.
A1.3 Enable / Disable Barcodes
Appendix Table 2
Typ
e
Function Barcodes
Sample Barcodes
UPC-A
Enable
Disable
UPC-E
Enable
Disable
Page 58

58
UPC-E1
Enable
Disable
EAN-8
Enable
Disable
EAN-13
Enable
Disable
Bookland EAN
Enable
Page 59

59
Disable
Code 128
Enable
Disable
UCC/EAN 128
Enable
Disable
ISBT 128
Enable
Disable
Page 60
60
Code 39
Enable
Disable
Scanning this barcode to enable for any length Code 39
Trioptic Code 39
Enable
Disable
Code 39 Full
ASCII
Enable
Page 61
61
Disable
Trioptic Code 39 and Code 39 Full ASCII cannot be
enabled simultaneously. If an error beep sounds
when enabling Trioptic Code 39, disable Code 39 Full
ASCII and try again.
Code 93
Enable
Disable
Scanning this barcode to enable for any length Code 93
Code 11
Enable
Disable
Page 62

62
Scanning this barcode to enable for any length Code 11
Interleaved 2 of 5
Enable
Disable
Scanning this barcode to enable for any length I 2 of 5
Discrete 2 of 5
Enable
Disable
Page 63

63
Scanning this barcode to enable for any length D 2 of 5
Chinese 2 of 5
Enable
Disable
Codabar
Enable
Disable
Scanning this barcode to enable for any length Codabar
Page 64

64
MSI
Enable
Disable
Scanning this barcode to enable for any length MSI
RSS-14
Enable
Disable
RSS-Limited
Enable
Page 65

65
Disable
RSS-Expanded
Enable
Disable
 Loading...