

Page 1
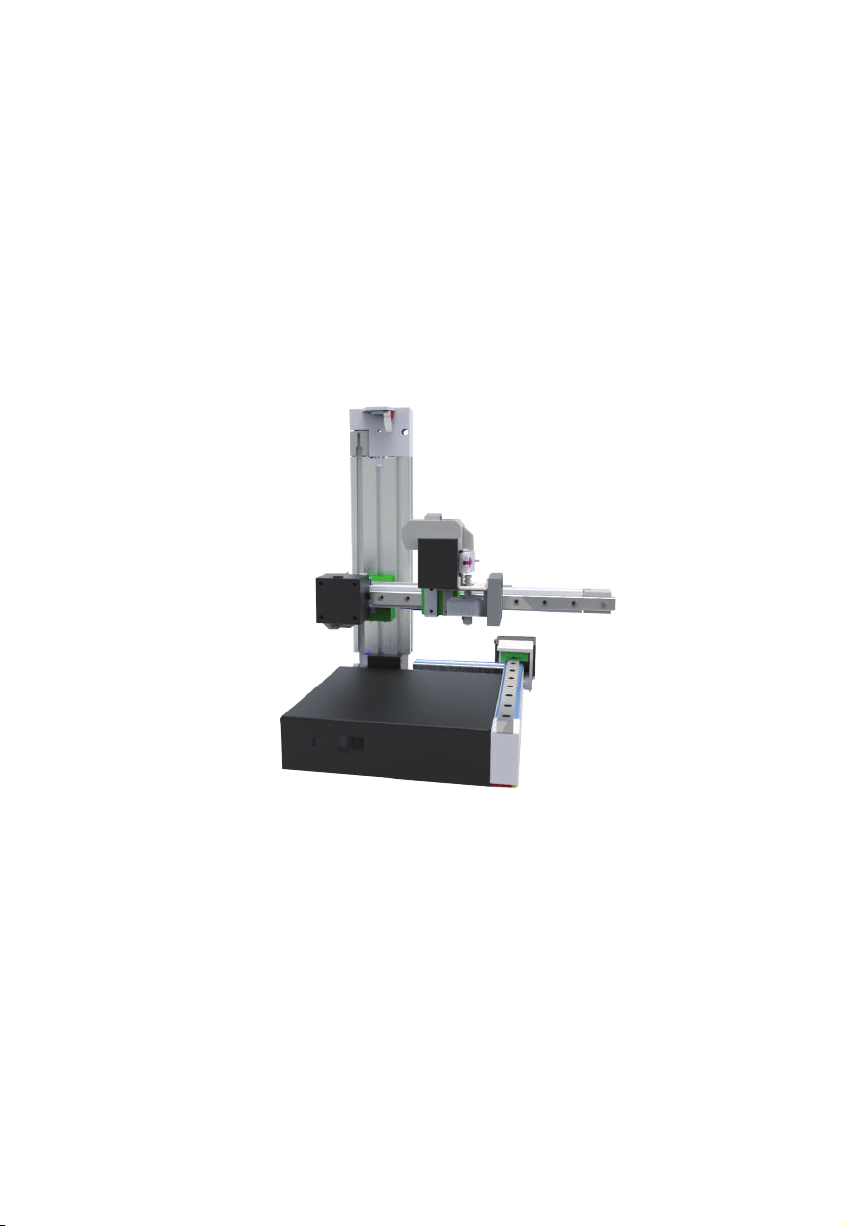
CETUS MKIII
Quick Start Guide
ENGLISH----------------------------------------- ---------------P1
TRADITIONAL CHINESE-------------------------------------P9
GERMAN------------------------------------------- -------------P17
JAPANESE------------------------------------------------------P25
Page 2
EN
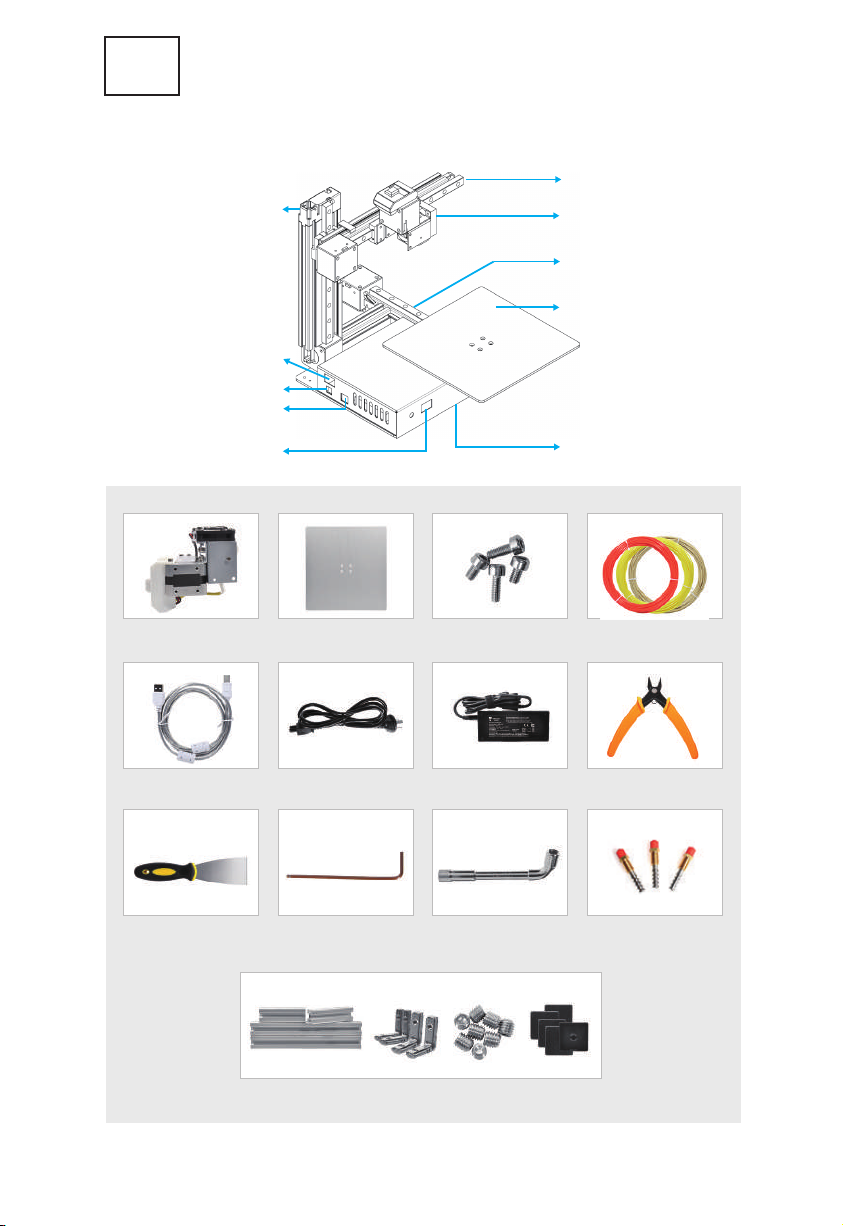
This manual provides you the quick installation for the 3D printer including
hardware and software. For more information, please refer to support.tiertime.com
Y-Axis
Z-Axis
Power Switch
USB Connector
Power Connector
Extruder Unit
X-Axis
Build Platform
Initialization Button
Extruder Unit
USB Cable Power Cable
Scraper
Build Plate Spare Screws
Hex Key
Power Adapter
Nozzle Wrench
Main Seat
PLA Filament Sample
(50g x 3)
Plier
Nozzles
(0.2/0.4/0.6mm)
Spool Holder Kits
1
Page 3
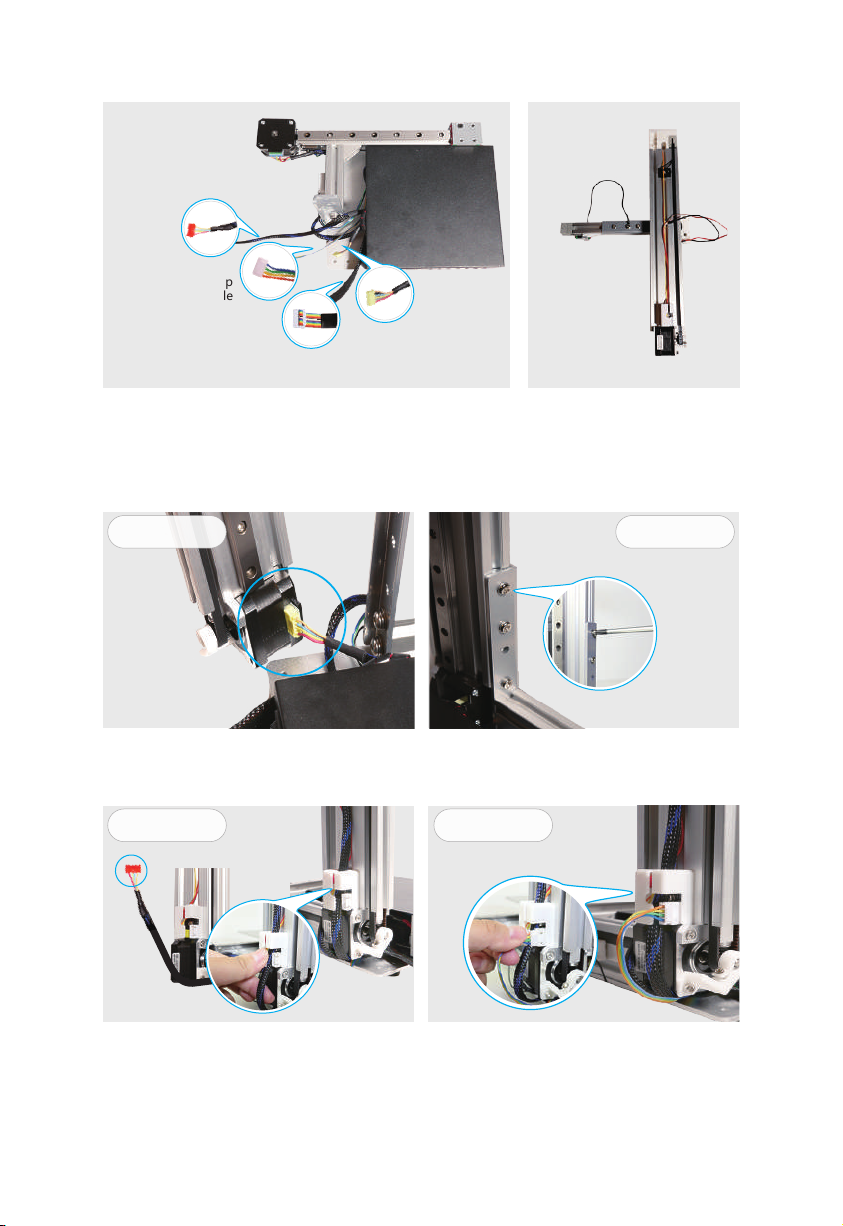
Y-motor
cable
Z-Y Endstop
cable
Extruder cable
Z-motor cable
X-axis and machine base
>> INSTALLATION GUIDE
Hold the Z-axis vertically by hand and
plug in the Z motor cable.
STEP 3. STEP 4.
Assemle the Z axis on the base by
use the 3 large screws included.
Y and Z-axes assembly
STEP 2. STEP 1.
Push the Y-motor cable(Red) into the
white cable holder.
2
Connect the Y-Z endstop cable to the
connector inside the cable holder.
Page 4
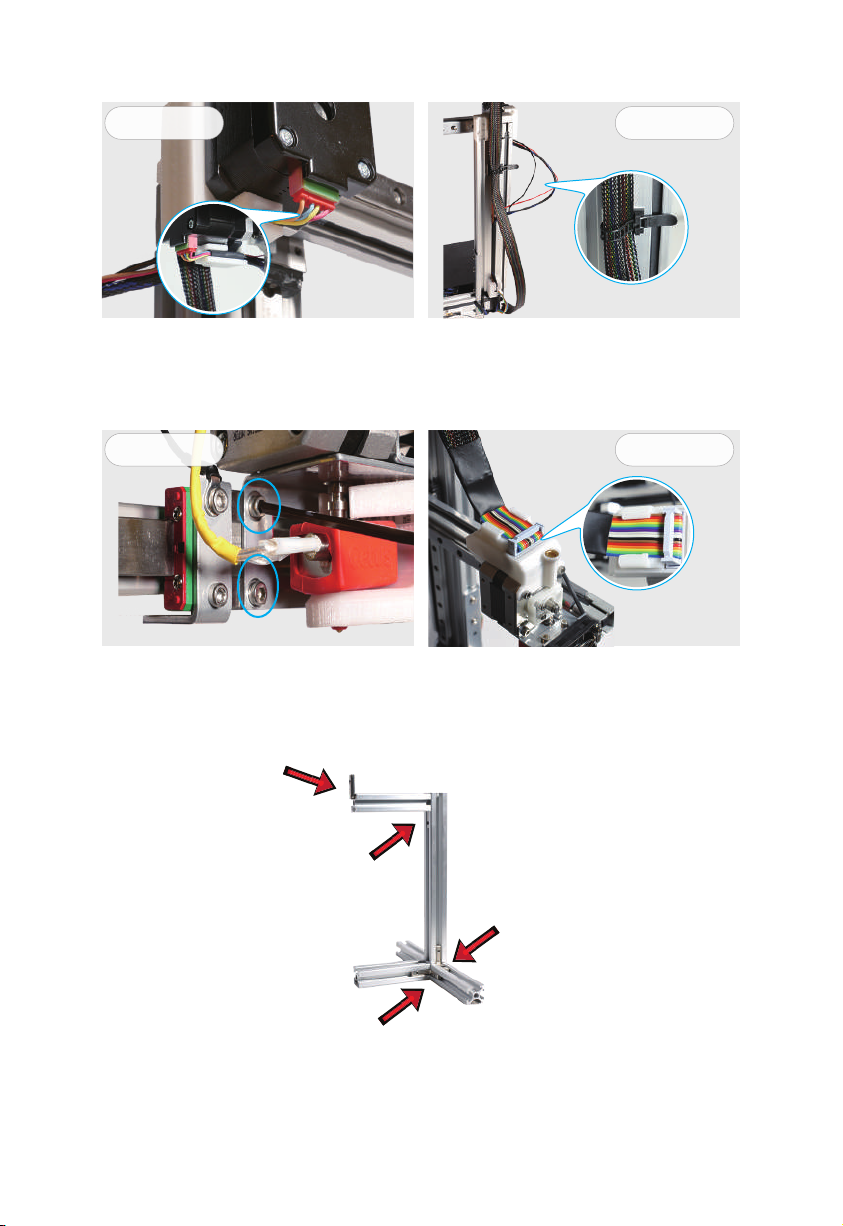
STEP 5. STEP 6.
Connect Y-motor cable to Y-motor.
Y-motor cable insert to the cable
holder.
STEP 7.
Install the extruder head by using
the 2 hex nuts on the linear rail
slider.
Put the extruder cable underneath the
Z-motor and hold to the Z-axis by the
cable belt. Y-motor cable and Y-Z
endstop cable can be hold together by
zip tie.
STEP 8.
Plug in the extruder cable securely. Fit
the cable into the protective slot.
Assemble the filament spool holder, red arrows
indicate where L bracket is used.
3
Page 5
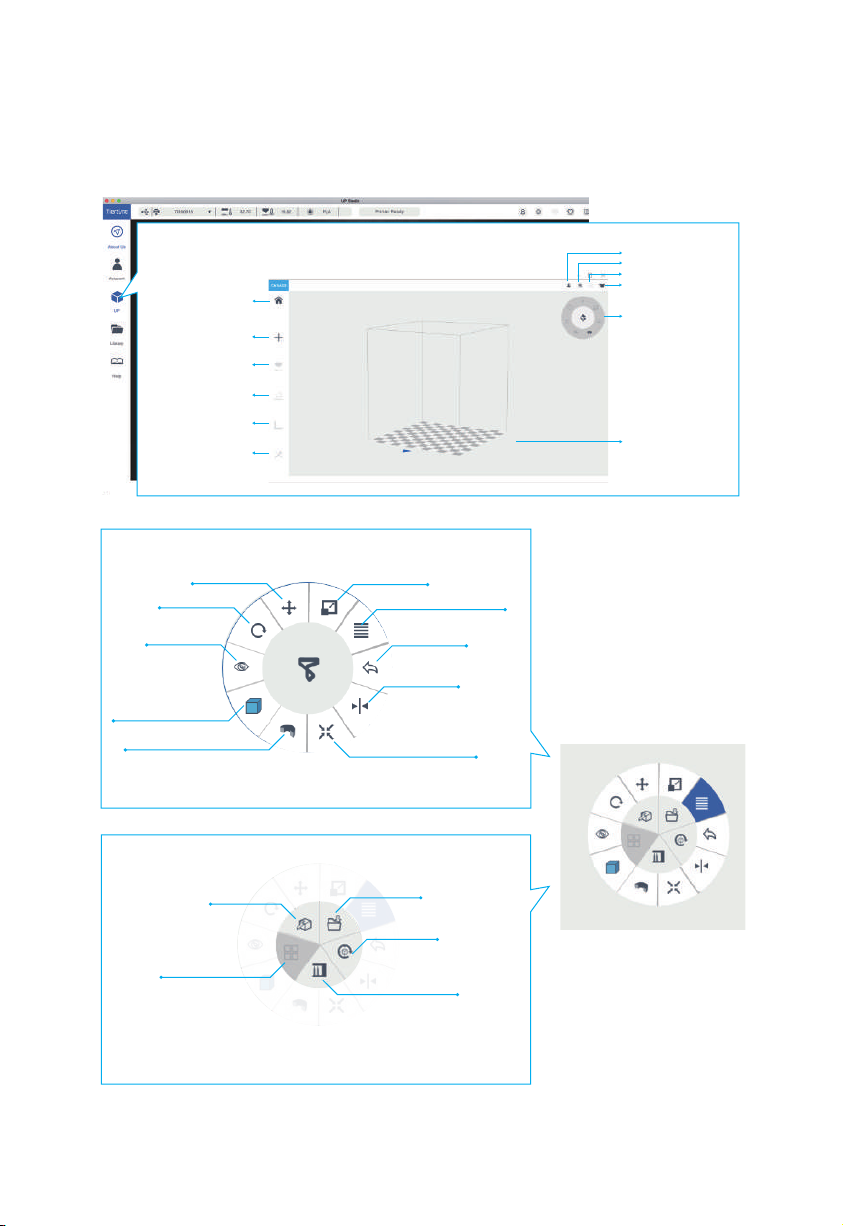
>> SETUP PRINTER
1. Download and Install Cetus3D software: www.cetus3d.com/download
2. Start to print by clicking the print icon on the software main menu.
Account
Settings
Share
Back to
Add a Model
or Picture
Print
Initialization
Calibration
Mainte
-
Skin
Model
Adjustment
Wheel
Build Space
Rotate
View
Display Mode
Disection View
Merge
Move
Fix Errors
Wheel Menu
2nd Level Menu
Scale
2nd Level Menu
Undo
Mirror
Auto Place
Save
Reset
View Support
Note: Initialization
is required every
time when the
machine is powered
on, this is in order
to determine the
correct position.
4
Page 6
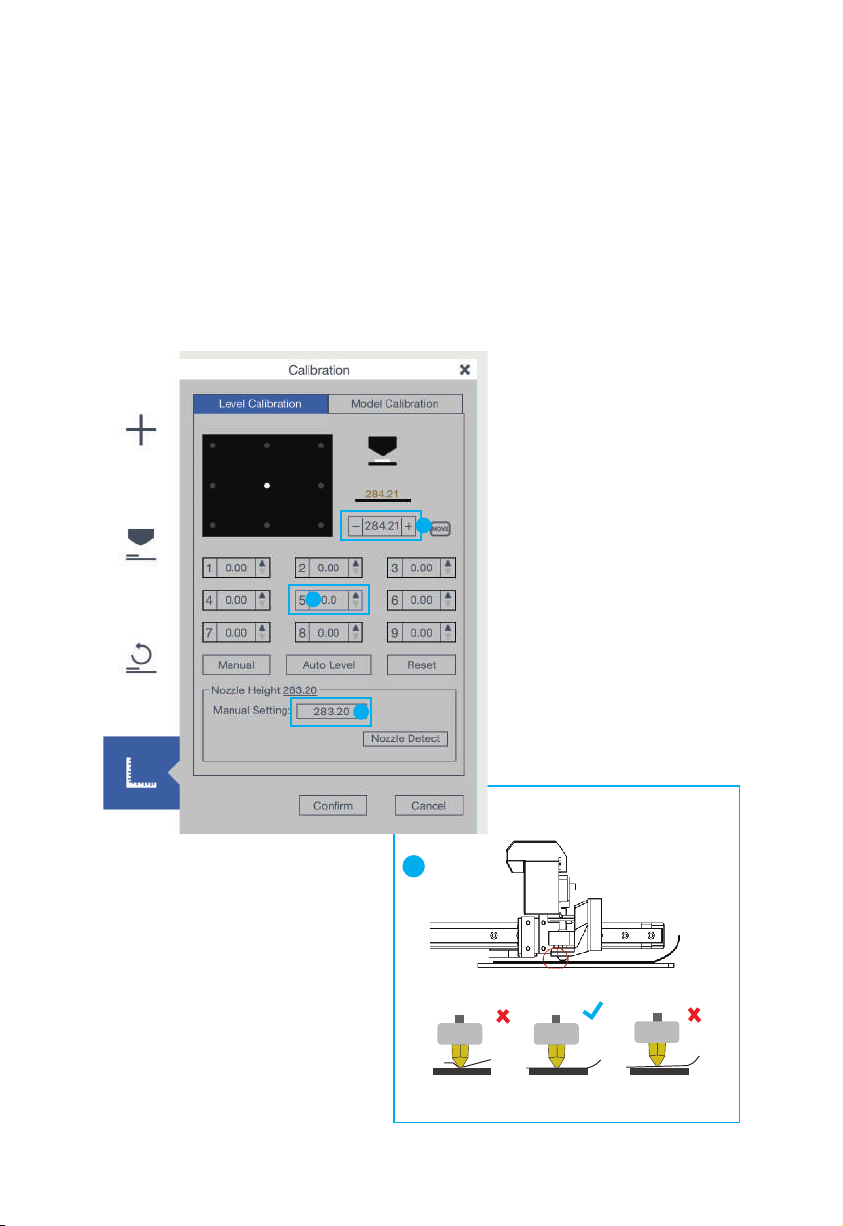
>> ADJUST THE NOZZLE HEIGHT
1. Go to “Calibration”.
2. Press button 5 to move the Nozzle to the middle of the build platform.
3. Use the + button to lower the Nozzle to close proximity of platform.
4. Put a paper in between the Nozzle and Platform, lower the nozzle and
feel the drag be tween paper and nozzle. At the correct height, the paper
should be able to move freely but user should able to feel a small drag from
the nozzle.
5. Note the current nozzle height and deduct the value of it by 0.5mm and
press “set”button to save the value as nozzle height (for printer with raft).
3
2
5
4
Paper
Too Low Just Right
Too High
5
Page 7
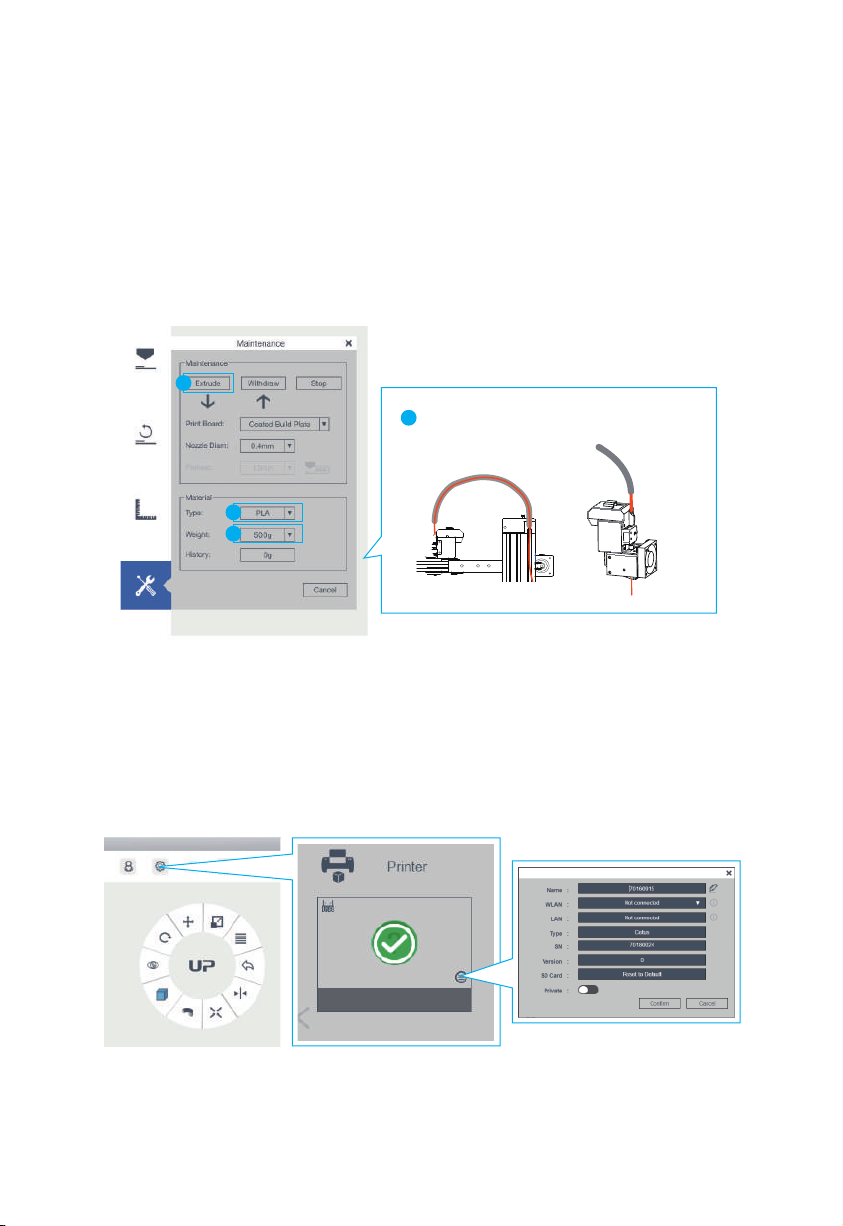
>> LOAD FILAMENT
1. Go to“Maintenance”.
2. Select the Material from the dropdown material list.
3. Input the filament weight.
4. Click“Extrude”to heat up the nozzle.when the filament melting temperature
is reached,the printer will buzz and begin to extrude.
5. Install the guiding tube,insert the filament into guiding tube.When the printer buzz,
insert the filament into the extruder unit gently.
4
5
3
2
>> SETUP WIFI
1. Click the Setting icon at the top right corner.
2. Select Printer.
3. Click the Printer Detail button.
4. Click the Network dropdown menu to select an available network.
5. Input the password for the Wi-Fi network.
Note: The computer and printer must be in the same WLAN (same SSID) before
connecting.
6
Page 8
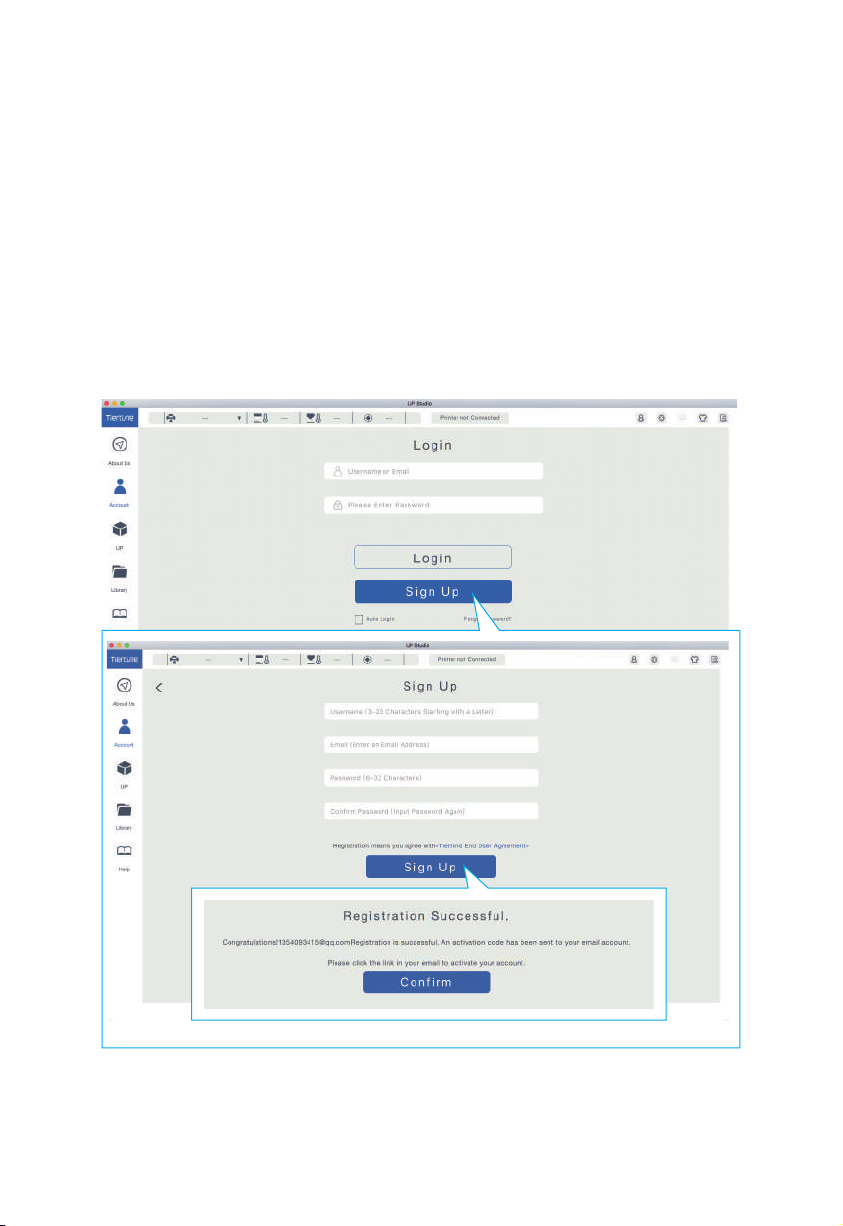
>> ACTIVATE MACHINE
1. Connect your printer to computer. In the software, go to account section and
login, click “Activate”to activate the machine.
2. We recommend you to register an account and active your printer to get fully
access to functions of 3D printer.
3. Select Account on the software main menu.
4. For a new user, click “Sign Up” to create a user account.
5. Register your account including Username,Email and Password,Go to the
registered email and click the activation link.
7
Page 9
SOCIAL MEDIA
COMPLIANCE
RoHS
SUPPORT
Email: [email protected]
Forum: www.cetus3d.com/forums
Facebook Group: Cetus3D Users
MANUFACTURER
Wuxi Tiertime Technology Co., Ltd
35-301 Changjiang South Road (by No.1 Road, Inner Ring),
Wuxi New District, Jiangsu 214142, P. R. China
Tel: +86 (01) 10 64338663
Email: [email protected]
8
 Loading...