

Page 1
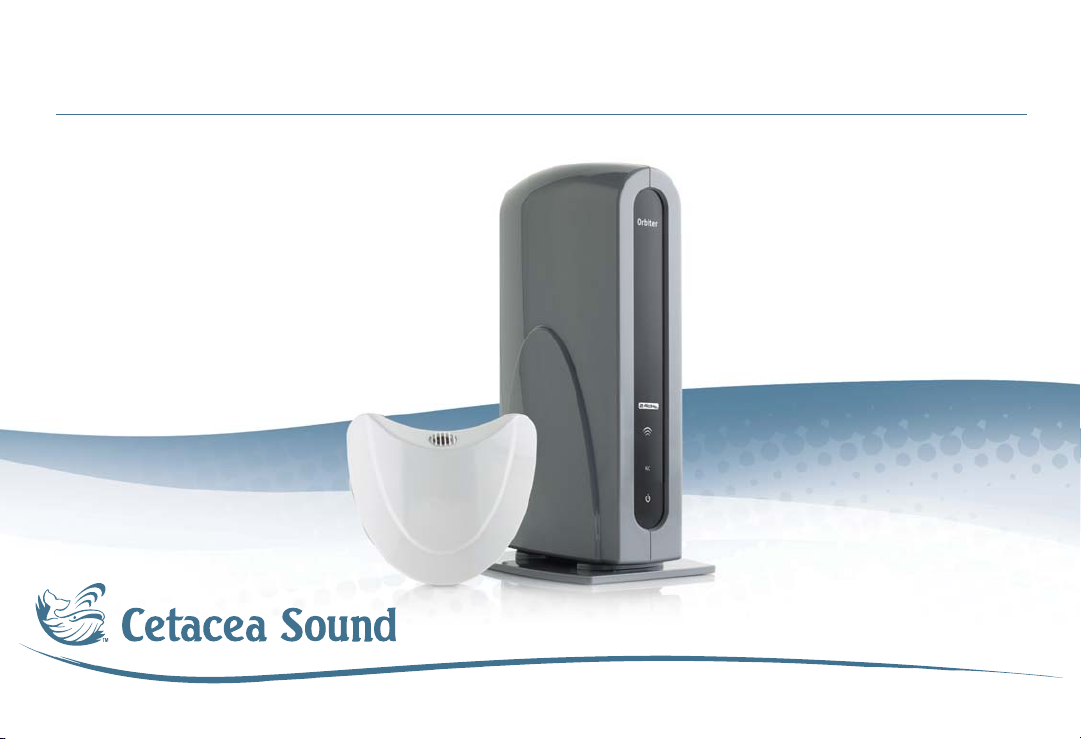
Orbiter
System No.:
ORB-CMD-001
ORB-CMD-LR001
Quick Start Guide
Technical Audio for the 21st Century Classroom
Page 2
READ BEFORE
INSTALLING
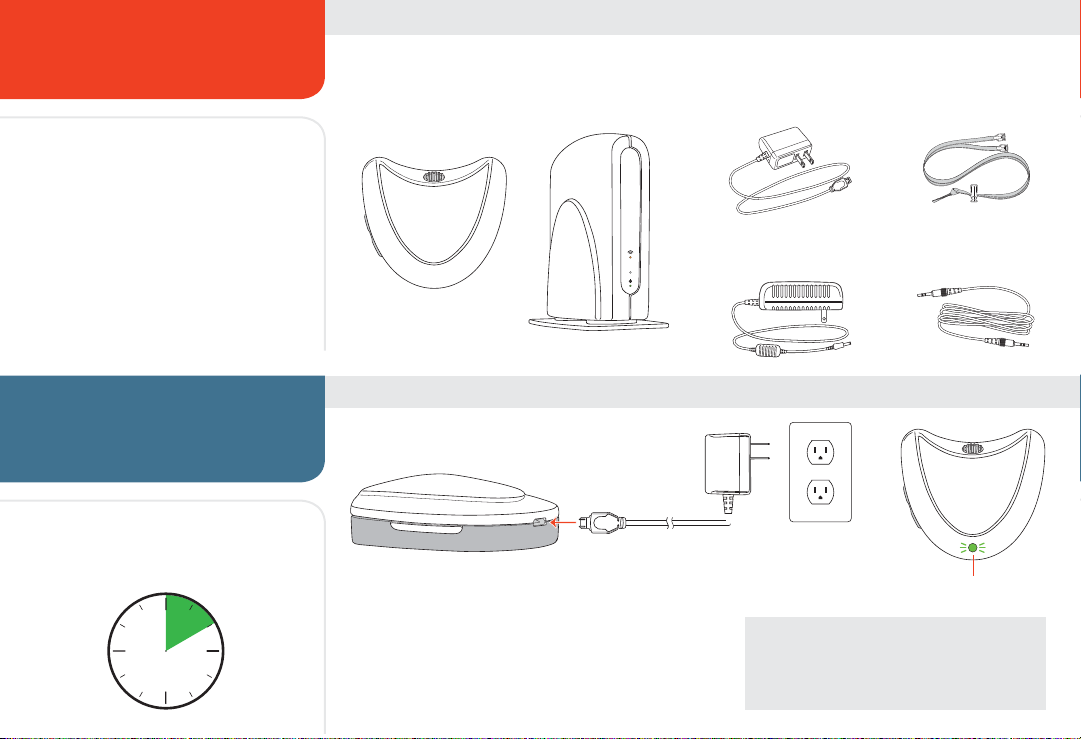
ORBITER™ SYSTEM CONTENTS
For in-depth safety, installation,
and operational procedures, read or
download the Orbiter Owner’s Manual
at www.cetaceasound.com.
CHARGE UP ORBITER
TRANSMITTER
PRIOR TO OPERATION
Please allow two hours of charge prior
to fi rst use.
2
Orbiter Transmitter Orbiter Receiver
Orbiter
R/C
➊
CONNECT ORBITER TO CHARGER
1. Connect the charger to the power connector on the Orbiter.
2. Green LED will begin fl ashing.
3. Allow for two hours of charge time prior to fi rst use or
when Green LED is glowing steady.
Transmitter Charger Lanyard Kit
Receiver Power Supply
Audio Cable (optional)
➋
NOTE
The Orbiter has built-in overcharge protection.
Once fully charged, the Green LED will cycle
between charge (steady) and discharge (blinking).
Page 3
SET UP AND CONNECT
R/C
RECEIVER
INSTALLER NOTES
No tools are required to set up the
Orbiter other than to run cable as
needed. Clips, hangers, and hooks are
recommended for long cable runs.
OPERATE THE ORBITER
TRANSMITTER
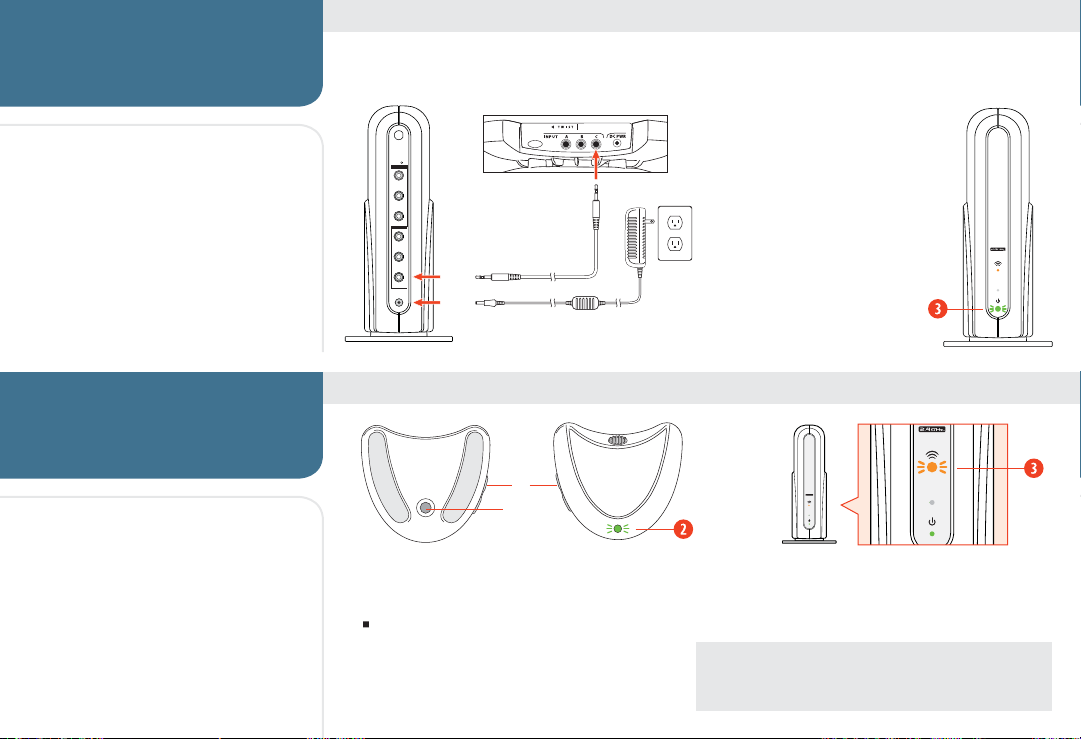
POSITION RECEIVER ON A FLAT SURFACE NEAR AN AC SOURCE
Astronaut Speaker (not included)
EXT. ANT.
INPUTS
1
2
3
OUTPUTS
LINE
VAR
➊
ORBITER
15V DC
PWR
➋
1. Connect 3.5 mm speaker
cable to ORBITER OUTPUT
connector and amplifi er/
speaker INPUT.
2. Connect the power supply
to the receiver POWER
connector and AC source.
3. Green LED will illuminate
to indicate receiver is ON.
Orbiter
Orbiter
R/C
CONTROLLING FEEDBACK
When operating the Orbiter for the fi rst
time, step away from the speaker and be
ready to adjust volume down as needed.
Have a second person help determine
appropriate loudness by listening from
the audience location.
➍
➊
REMOVE ORBITER FROM CHARGER PRIOR TO USE
1. Click MASTER CONTROL once for ON.
Click again to cycle between ON and MUTE. To
turn OFF, push and hold MASTER CONTROL for 4
seconds, then release.
2. Green LED will illuminate on the transmitter while ON.
3. Amber LED will illuminate on the receiver while connected.
4. Set appropriate volume with VOLUME CONTROL button.
NOTE
The Orbiter will not connect to the receiver while charging. Once
charged, disconnect charger and operate pendant as normal.
R/C
Page 4
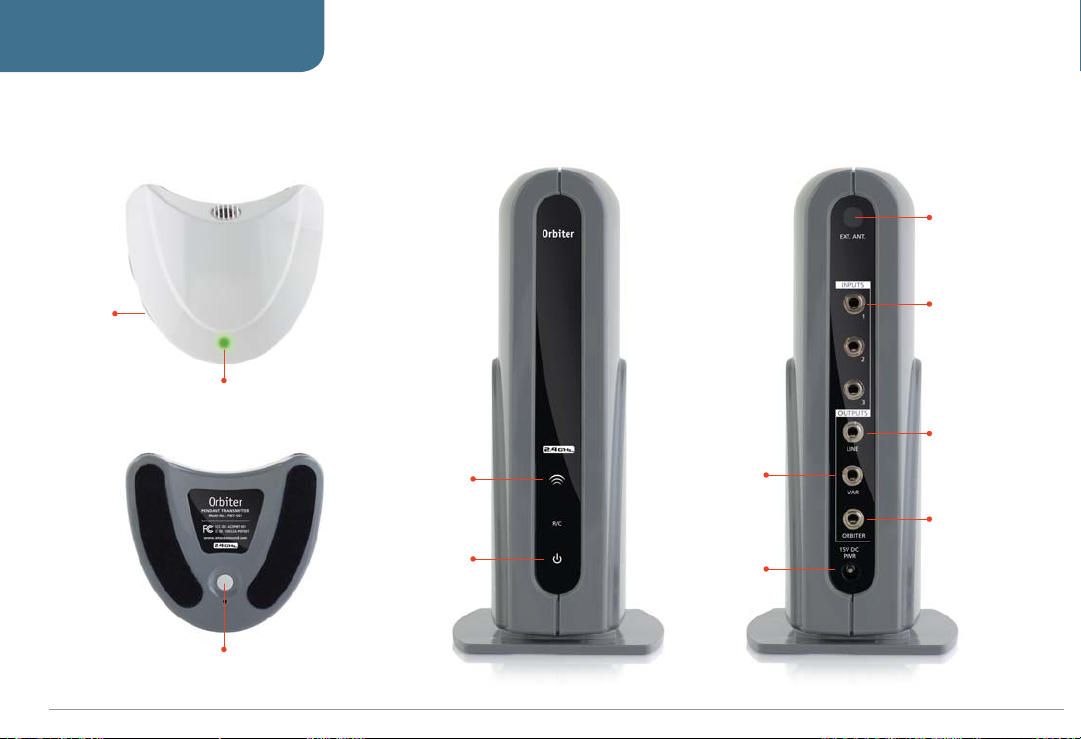
REFERENCE IMAGES
VOLUME
CONTROL
Orbiter Transmitter
FRONT
STATUS INDICATOR
Green LED
BACK
MASTER CONTROL
ON/OFF/MUTE
WIRELESS
CONNECTION
Amber LED
POWER
Green LED
Orbiter Receiver
VARIABLE OUTPUT
NOTE:
Future feature set
and is currently disabled
DC POWER
CONNECTOR
FRONT BACK
EXTERNAL
ANTENNAE
NOTE:
Optional
feature
INPUTS (1, 2, 3)
Stereo/mono source
connections
LINE OUTPUT
Signal output for
INPUTS (1, 2, 3) to
amplifi er /speaker
ORBITER OUTPUT
Signal output for Orbiter
microphone to amplifi er
/speaker
© 2014 Cetacea Sound Corp. All rights reserved. Orbiter™ is a trademark of Cetacea Sound Corp. 1(800) 556-1922 [email protected] www.cetaceasound.com All audio products are proudly made in the U.S.A. (5/14) 201207-005
 Loading...