

Page 1

easy-DISPATCH
USERS MANUAL
CES WIRELESS TECHNOLOGIES CORP.
925-122 South Semoran Blvd.,
Winter Park, FL 32792
Tel: (407) 679-9440
Fax: (407) 679-8110
e-mail: sales@cesusa.com
support@cesusa.com
Ref: MAN94
A CES PUBLICATION © 1998
Printed in USA
Page 2

Warranty
CES Wireless Technologies, (CES), warrants this product to be free from defects in material and
workmanship for two years from date of shipment. If a malfunction occurs, it will be repaired or replaced
(at our option) without charge for materials or labor if returned to the factory. This warranty does not
apply to parts damaged due to improper use- including accident, neglect, unreasonable use, and improper
installation - or to unauthorized alterations or modifications of the equipment. It does not extend to
damage incurred by natural causes such as lightening, fire, floods, or other such catastrophes, nor to
damage caused by environmental extremes, such as power surges and or transients. It does not extend to
microprocessors if is determined that the failure of a micro is due to static damage, application of
improper voltages to the unit, or other problems not related to circuit design. In such case or in the case of
a desire to update the micro to a different version of software, such request must be specified in writing,
and there will be a charge agreed upon by both parties.
This product is warranted to meet published specifications and to operate as specified only when properly
installed in radio equipment which complies with US FCC specification and the applicable radio
manufacturer’s specifications. CES is not responsible for any operational problems caused by system
design, outside interference, or improper installation. Installation and programming of this CES product
must be completed by a qualified two-way radio technician or engineer.
Equipment for repair must be returned to the factory, freight prepaid, only with prior authorization. Please
call 407-679-9440 for an RMA number. A brief letter describing the nature of the defect should be
included with the merchandise. Repair by other than CES will void this warranty. In-warranty
merchandise must be shipped, freight prepaid, to CES. CES will return the repaired or replaced
equipment prepaid to purchaser, within the United States. Outside the US freight must be paid by the
customer.
This warranty applies to the original purchaser of the equipment only. CES is not liable under this
warranty, or any implied warranty, for loss of use or for other consequential loss or damage experienced
by the purchaser. Some states do not permit the exclusion or limitation of implied warranties or
consequential damages. This warranty provides special legal rights, and the purchaser may have other
rights that vary from state to state.
Copyright
The information in this manual, and any software in this product remains the property of CES.
Duplication, or disclosure is not permitted without the prior written consent of CES. CES reserves the
right to change products, specifications, and installation data at any time, without notice.
All information contained in this document is carefully prepared and offered in good faith as a guide in
the installation, operation, use and servicing of our products. Installers must insure that the final
installation operates satisfactory, within relevant regulatory requirements. We accept no responsibility for
incorrect installations.
ARIS™ and auto-CALL™ are trademarks of CES
ARi-195e and zone-CALL ™ are trademarks of CES
LTR™ is a registered trademark of E.F. Johnson Company
Smartnet™ is a trademark of Motorola Communications
Windows and Windows ‘95 are registered trademarks of Microsoft Corporation
IBM is a trademark of International Business Machines
A CES PUBLICATION Copyright CES 1998
Page 3

1.0 Introduction
easy-DISPATCH is a base computer display center allowing a dispatcher to receive
information from a mobile radio or remote alarm transmitter. The functionality of the
center is determined by the signaling module installed in the mobile radio, normally the
CES ARi-100.
Features:
• Individual unit, vehicle ID, remote alarm ID.
• Multiple status fields that can be used for status, or other information transfer between
mobile, remote location and base.
• Time, date and message fields for each unit.
• Logging of traffic to disk.
• Entries may be edited as they appear on screen.
• Databases for Vehicles and Drivers.
1.1 System Requirements
To use easy-DISPATCH you must have the following hardware and software:
• A computer capable of running Windows95™, which must be installed.
• A minimum of 8MB of RAM, although 16MB is recommended.
• A hard disk with at least 10MB of free space.
• An available Serial Communications Port for communication with the ?
• If you are using the Gateway Mode then another Serial Communications Port will be
required.
1.2 Installation
easy-DISPATCH is distributed on 3.5” 1.44MB diskettes. The number of diskettes is
subject to change.
The installation is started by running SETUP. Since SETUP is a Windows95 program you
must start Windows95 first. Next select the Start button, then select Run and type
A:\SETUP.EXE. Replace “A:\” with “B:\” if installing from Drive B. Press the OK
button. To install easy-DISPATCH click on the Next button in each dialog box, then
Finish when SETUP is complete. If easy-DISPATCH is distributed on more than one
diskette SETUP will tell you when to insert each diskette.
Page 4
2.0 Running easy-DISPATCH
To launch easy-DISPATCH select the Start button, select Programs, then select easy-
DISPATCH.
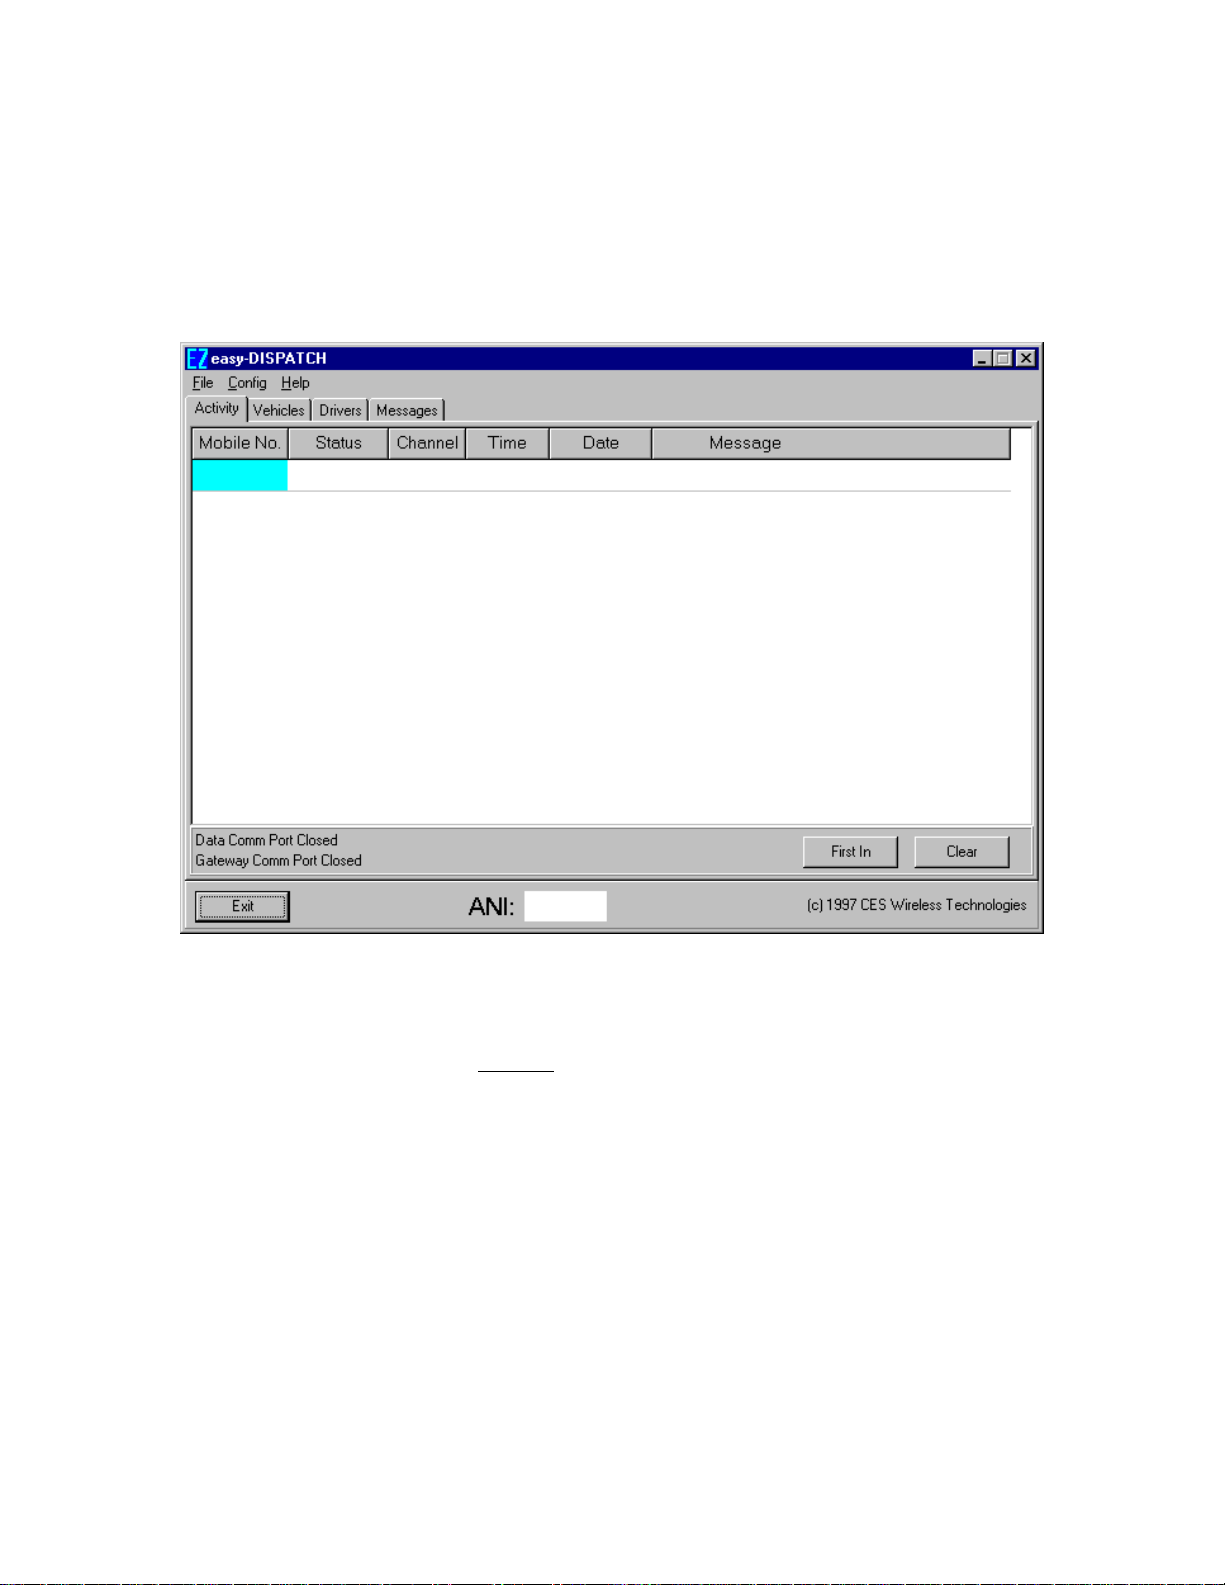
The main dispatcher window will be displayed. It will look something like this:
2.1 Activity Tab
This window is the main window for monitoring dispatch activity. Note that dispatch
activity is displayed only in the Activity tab. As statuses are received they will be displayed
in the grid. The columns in the grid are Mobile Number, Status, Channel, Time, Date and
Message.
To start or stop receiving statuses select the File pull down menu and then click on
Start/Stop. The labels in the lower left hand corner of the window, above the Exit button,
display the current status. If the labels have the word “Open” in them then easyDISPATCH has opened the serial communication port(s) as configured (see section 3.2
for information on configuring the serial communication ports) and it is awaiting valid
data. Otherwise, the serial ports are not open and no data will be received.
As each status is received it is time and date stamped for future reference. By default each
new status received is displayed at the bottom of the grid. To have each new message be
Page 5
displayed at the top of the grid click on the First In button. The caption on the button will
change to Last In and each new status received will be displayed at the top of the grid. To
change it back simply click on the Last In button.
When an ANI status is received it will be displayed at the bottom of the screen.
Optionally, it will also be displayed in the grid (see section 3.3 for more information). To
view more information regarding the ANI double click on it and a window will pop up
displaying the date and time when the ANI was received.
To clear a status from the grid select any column in the desired status row and click on the
Clear button. A window requesting confirmation will pop up. Click on the OK button to
clear the selected message or click the Cancel button to not clear the message.
To exit the program click on the Exit button or select the File pull down menu and click
on Exit.
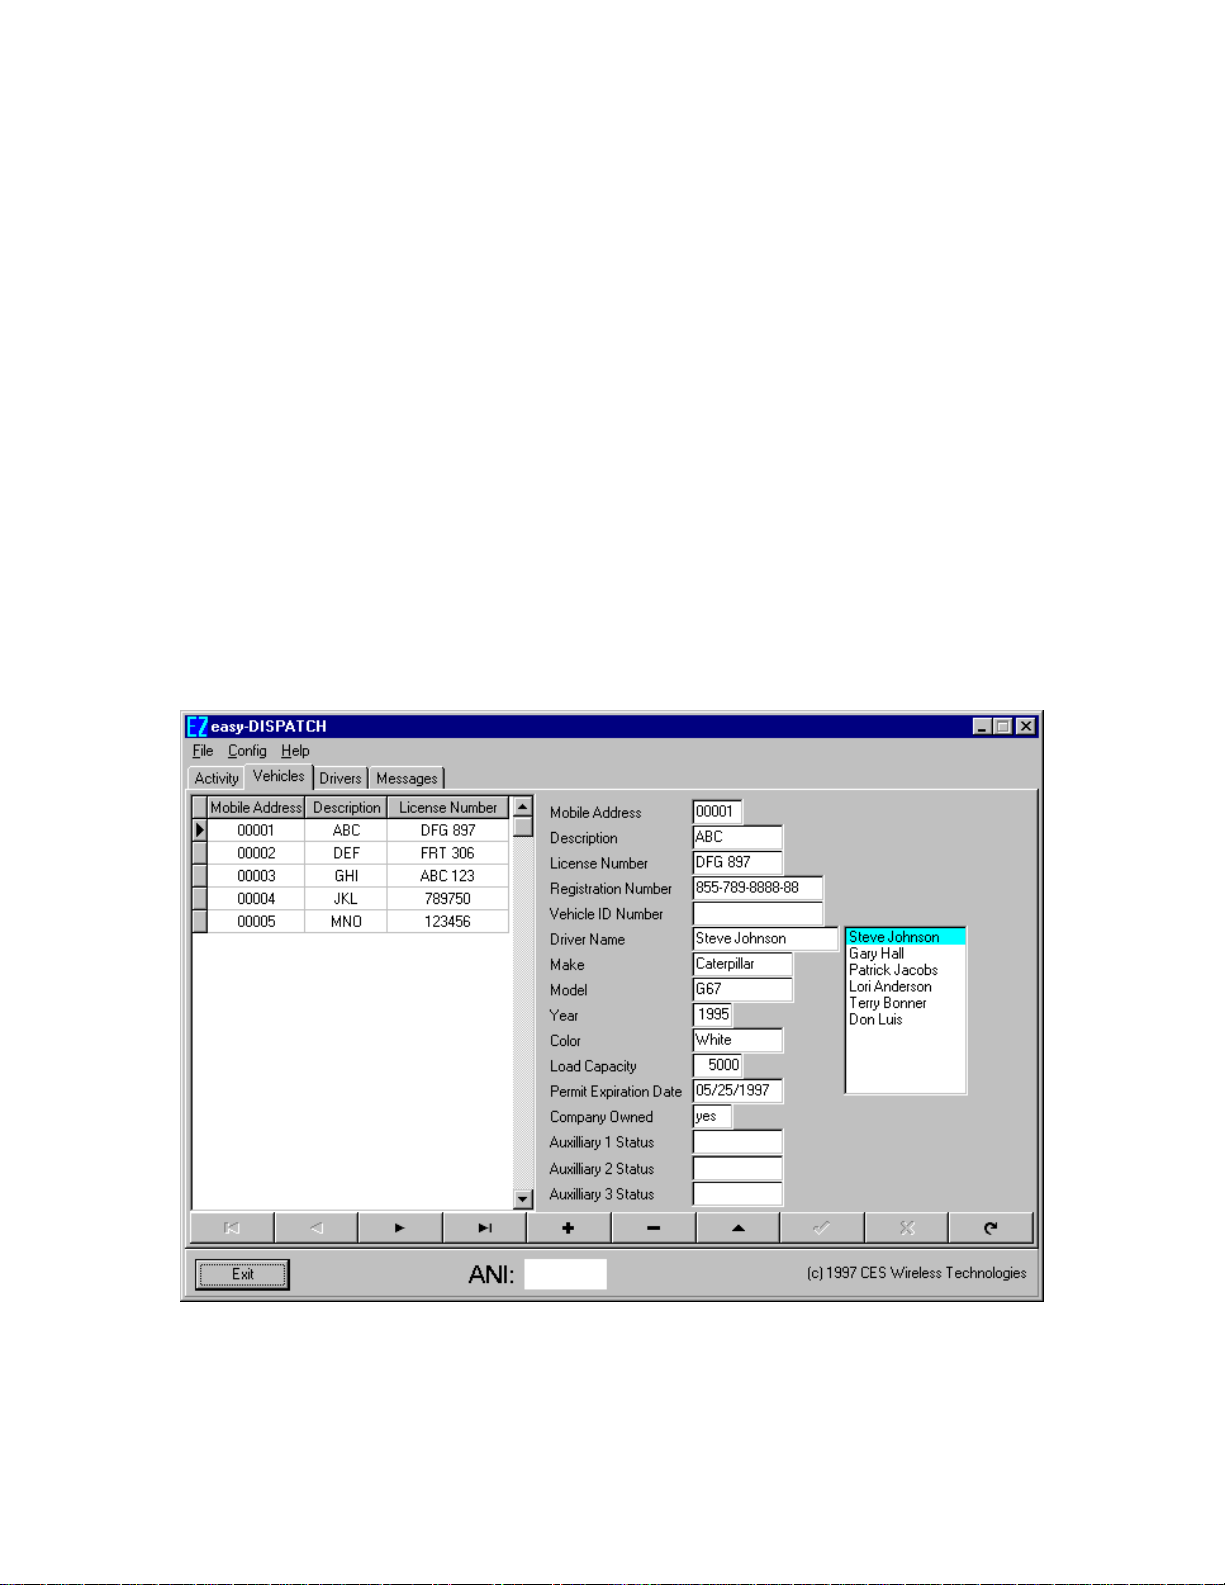
2.2 Vehicles Tab
When the Vehicles tab is selected the following window will be displayed:
This window allows maintenance to be done on the Vehicle database. To select a vehicle
locate the vehicle in the grid on the left side of the screen and click on it. That vehicles
information will be displayed. Changes to the information can be made by clicking on the
Page 6
desired field and making the necessary changes. To save the changes either change to
another record or click on the check mark button in the row of buttons near the bottom of
the window. To cancel the changes made click on the X button.
To insert a new vehicle click on the + button and enter the vehicle information. Save the
new vehicle information by selecting another record or click on the check mark button in
the row of buttons near the bottom of the window. To cancel the changes made click on
the X button.
To delete a vehicle select the vehicle to be deleted and click on the — button. A window
will pop up to confirm the deletion. Click the OK button to delete the vehicle or click on
the Cancel button to not delete the vehicle.
The purpose of the other buttons may be determined by positioning the mouse over them
for a moment. A hint will be displayed.
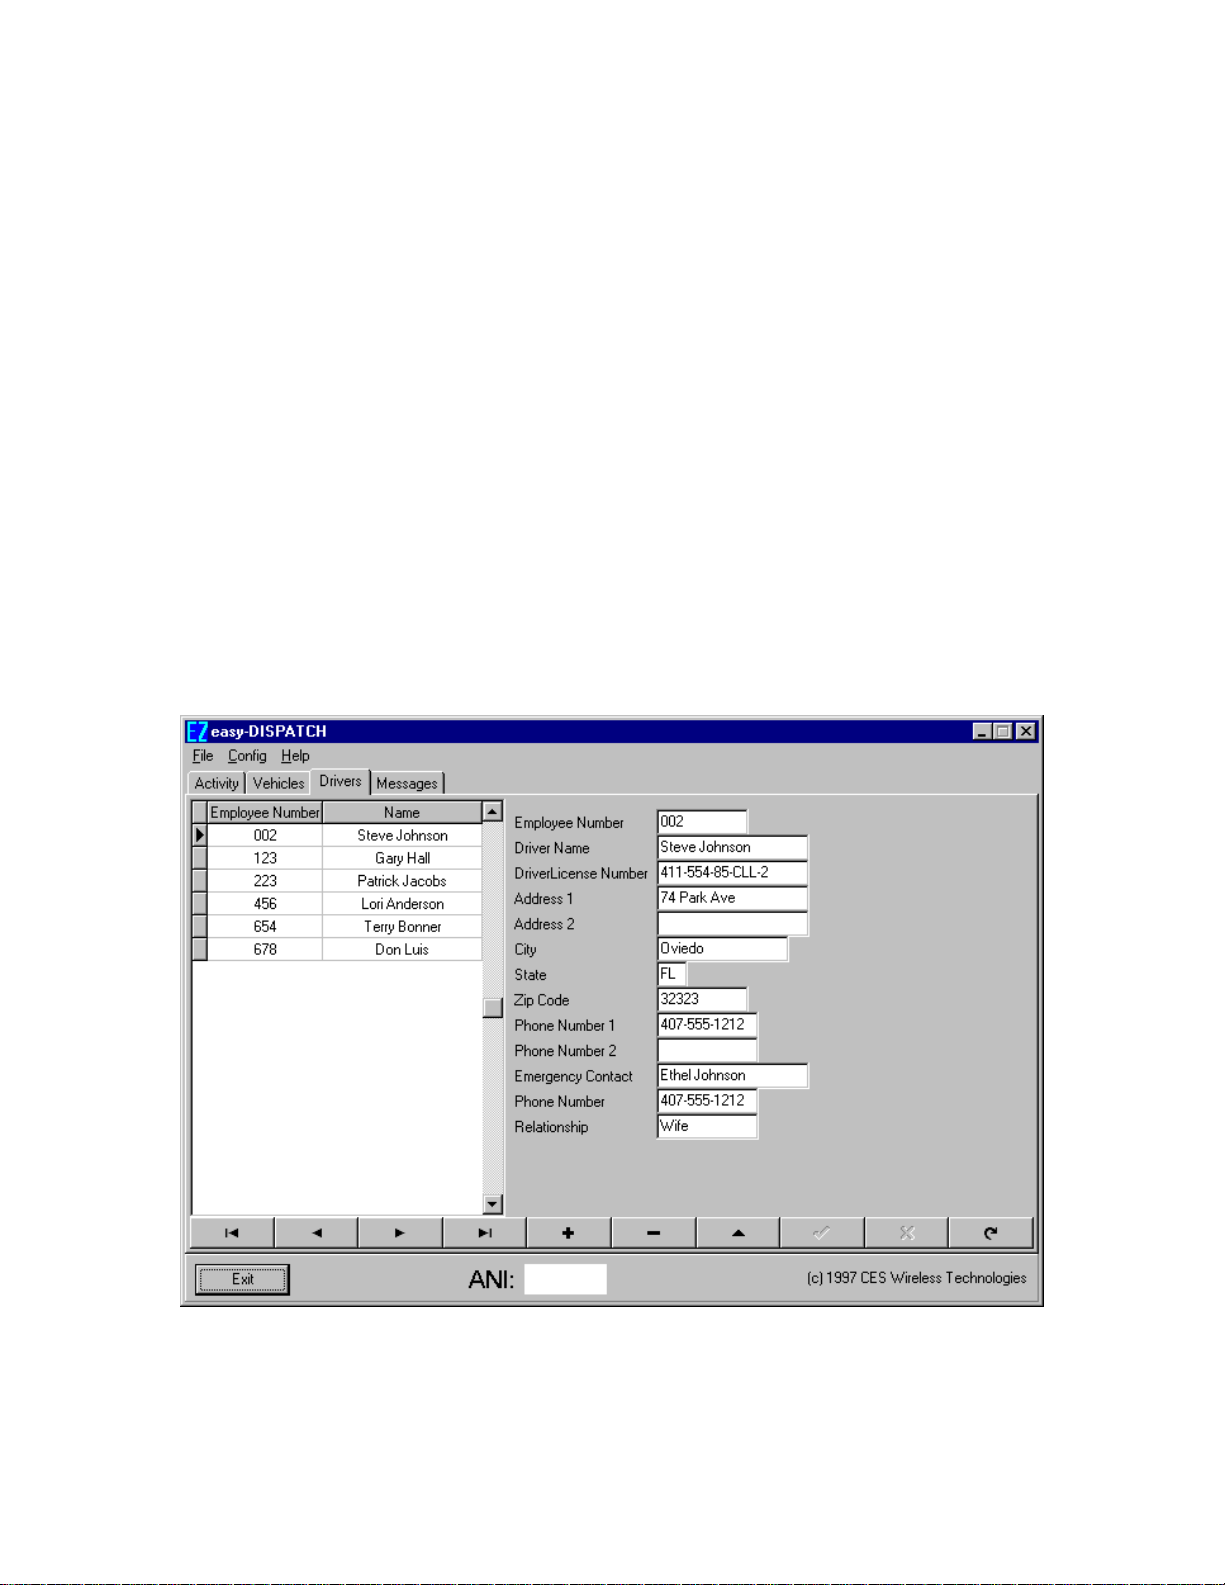
2.3 Drivers Tab
When the Drivers tab is selected the following window will be displayed:
This window allows maintenance to be done on the Driver database. To select a Driver
locate the driver in the grid on the left side of the screen and click on it. That drivers
information will be displayed. Changes to the information can be made by clicking on the
Page 7
desired field and making the necessary changes. To save the changes either change to
another record or click on the check mark button in the row of buttons near the bottom of
the window. To cancel the changes made click on the X button.
To insert a new driver click on the + button and enter the driver information. Save the
new driver information by selecting another record or click on the check mark button in
the row of buttons near the bottom of the window. To cancel the changes made click on
the X button.
To delete a driver select the driver to be deleted and click on the — button. A window
will pop up to confirm the deletion. Click the OK button to delete the driver or click on
the Cancel button to not delete the driver.
The purpose of the other buttons may be determined by positioning the mouse over them
for a moment. A hint will be displayed.
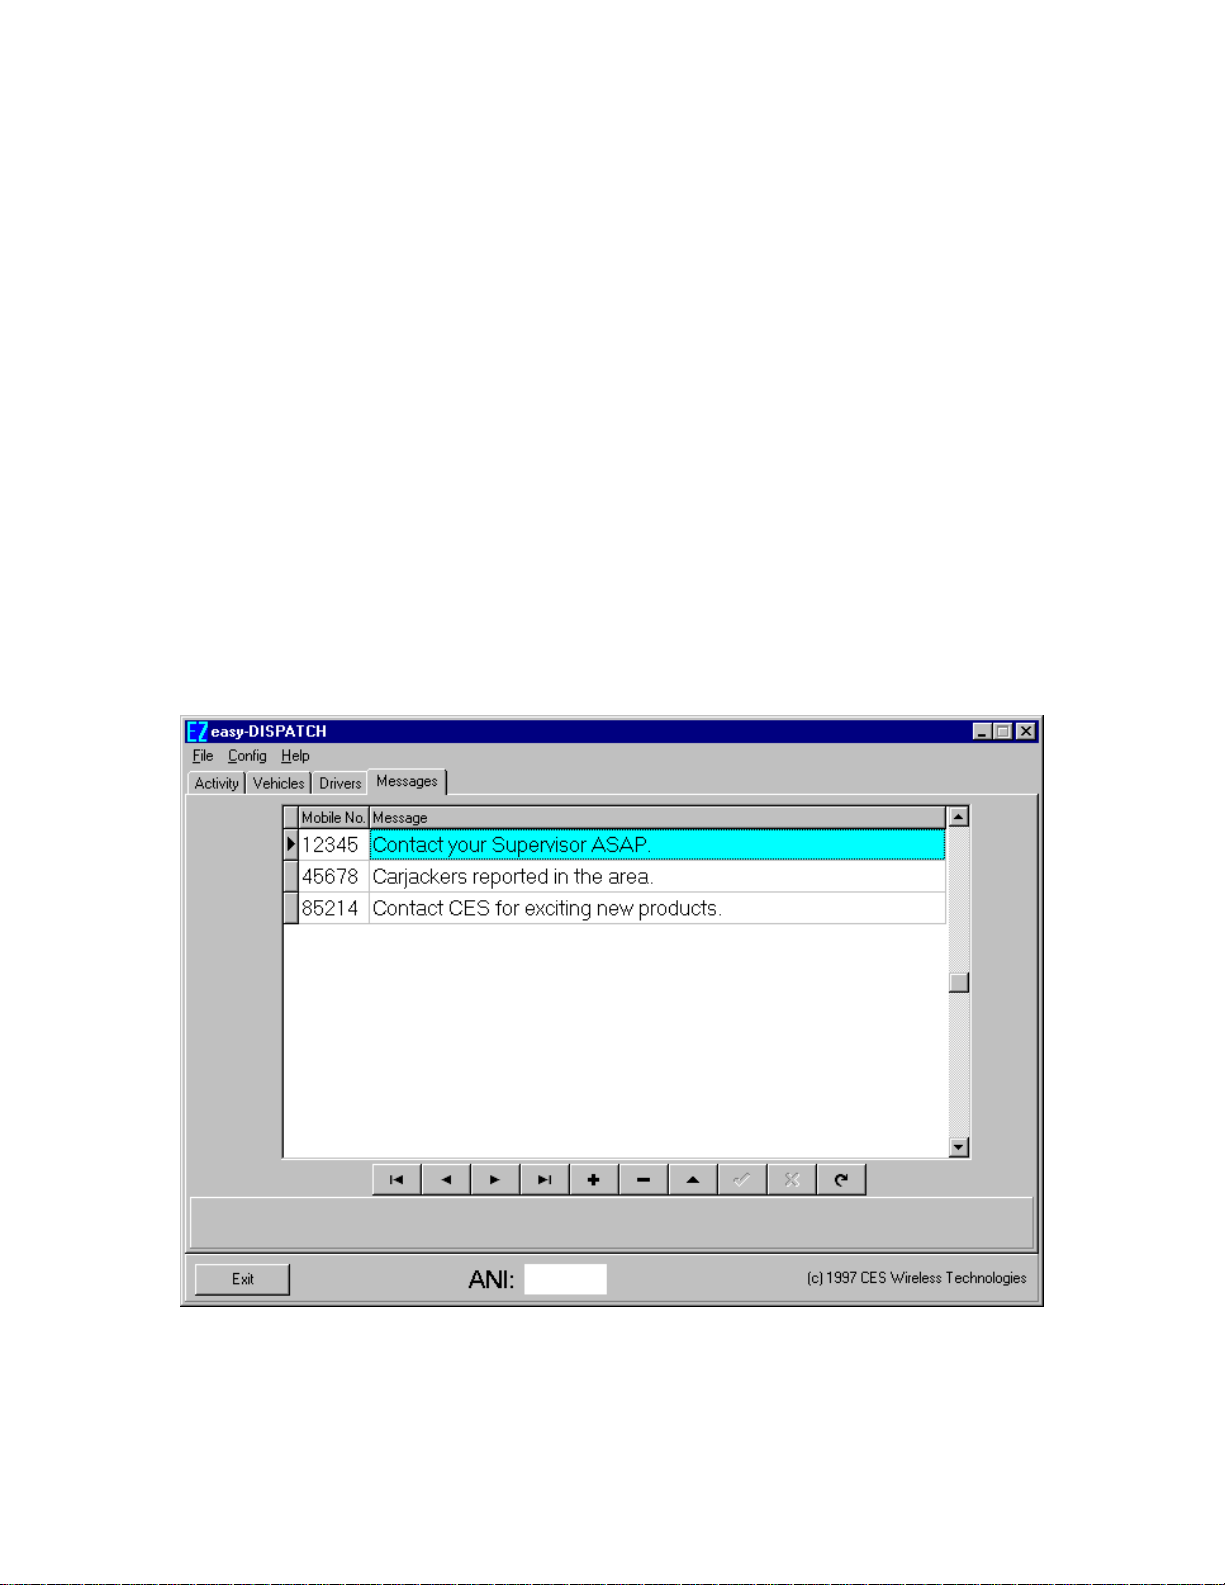
2.4 Messages Tab
When the Messages tab is selected the following window is displayed:
This window allows the entry of messages that are to be relayed to the drivers. When a
status is received the messages will be searched for a message for the mobile whose status
Page 8

was just received. If a message exists it will be displayed in the Message column of the
Activity grid and removed from the list of messages.
Messages can be added, deleted, and changed in the same methods as described above for
Vehicles and Drivers.
3.0 System Configuration
To change the system configuration select the Config pull down menu and then click on
System. The following window will be displayed.
There are 4 tabs on this window. They are Status Codes, Serial Ports, System Options and
Mobile Options.
Make the desired changes to the configuration. To save the changes click on the OK
button. The configuration will be reviewed to determine if it is valid. If so it will be saved.
Otherwise, a window will pop up displaying an error message and the configuration will
not be saved. To not save the changes that have been made click on the Cancel button.
Clicking on either the OK or the Cancel button will close the System Configuration
window.
3.1 Status Codes Tab
The Status Codes tab provides the ability to set the value of the status codes, the text that
is to be displayed when the status code is received (optional), the color in which the status
code should be displayed, whether to beep or not, and whether or not to save the status
code in the history database.
Page 9

The status code value must have the same number of characters as specified under the
Mobile Options tab (see section 3.4 for more information).
The text to be displayed is limited to a length of 12 characters.
The colors for the status codes are black (default), red, blue, green and gray.
3.2 Serial Ports Tab
The Serial Ports tab provides the ability to configure the serial communication ports in the
computer for use with easy-DISPATCH.
The Data Comm Port is the port in which status data will be received. Click on the
appropriate comm port to select it.
The Gateway Comm Port is the port in which data will be sent to another computer. If
using Gateway Mode then select the appropriate comm port by clicking on it.
3.3 System Options
The System Options tab provides the capability to set certain system options. The window
looks like this when selected.
Page 10

Enable Gateway Mode: To enable Gateway Mode, where status information is passed on
to another computer, click on the box.
Overwrite Prior Status: By clicking on this box each status received from a mobile unit
will be added to the Activity grid and any prior message for that mobile will be removed
from the grid. If the box is not selected then each status is added to the grid as it is
received.
ANI Options: There are 2 options in the ANI Options group. They are the status code of
the ANI (ANI Status Code) and whether or not the ANI status code is to be displayed in
the Activity grid.
3.4 Mobile Options Tab
The Mobile Options tab provides the capability to configure easy-DISPATCH for the way
in which your mobile fleet is configured. The window looks like this.
Page 11

The options on this window are the number of pre code digits, the value of the pre code
digits, the number of digits per mobile number (including the pre code digits), the number
of digits in the status code, and whether to display the text entered for the status code or
the status code itself.
Number of Pre Code Digits: Enter the number of pre code digits used in your mobile fleet
here. Valid values are 0 to 4. Note that this many Pre Code Digits must be entered for the
configuration to be saved.
Pre Code Digits: If you make a non-zero entry for the number of pre code digits you must
enter the digits here. Only statuses received whose mobile number begins with these digits
will be displayed in the Activity grid. Also, if pre code digits were in use and are no longer
being used (number of pre code digits equals zero) then the entry in this field must be
removed.
Number of Mobile Number Digits: Enter the number of digits that make up the mobile
numbers in your fleet here. Note that this includes the pre code digits. Valid values are 1
to 5.
Number of Status Code Digits: Enter the number of digits that comprise the status codes
here. Valid values are 1 to 3. Note that the status codes entered on the Status Code tab
must be equal in length to this number.
Display Status Code or Description: This option determines whether the description for a
status code on the Status Code tab is displayed or if the status code itself is displayed.
Click on the appropriate box.
 Loading...