

Cerwin-Vega CVHD-63, CVHD-63C, CVHD-12S User Manual
Cerwin-Vega Service & Support
Customer Service:
Monday-Friday 8am-5pm EST
Email: Service@Cerwin-Vega.com
(Emails without subject title will be ignored.)
Phone: +1 818.534.1500
Technical Support:
Monday-Thursday 8am-5pm EST
E-Mail: TechnicalSupport@Cerwin-Vega.com
(Emails without subject title will be ignored.)
Phone: +1 818.534.1500
Sales
Phone +1 954.316.1500
O PERATION
O PERACION
A UDIO V IDEO S PEAKERS
CVHD-63
SA
TELLITE
CVHD-63C
CENTER
CHANNEL
CVHD-12S
12” POWERED SUBWOOFER
MANUAL_CVHD-1
CVHDmanual9.qxd 6/12/06 7:02 PM Page 1
MONT
AJE DE LA PLATAFORMA NORMAL
:
1. Coloque la cubierta de la base sobre el peso de
la base.
2. Introduzca el tornillo M8 x 20 mm a través del
peso de la base y la cubierta de la base hasta la parte
inferior del elemento vertical de la base.Repita el
procedimiento para los dos tornillos restantes.
3. Apriete a mano los tornillos de la base y
verifique que el elemento vertical esté bien
alineado con la base.
4. Apriete los 3 tornillos de la base,una vez que
estén alineados.
5.
Conecte las tres patas roscadas o patas de goma
al f
ondo del peso de la base.
Para montar el CVHD-63 en la posición alta:
6. Atornille el accesorio de las llaves de montaje en los
dos insertos inferiores en la parte trasera del CVHD-63.
7. Haga pasar el cable de altavoz a través de la base y
hacia fuera de la parte superior del elemento vertical.
8. Fije el altavoz a la plataforma poniendo las llaves de
montaje (en la parte trasera del altavoz) en las
cor
respondientes ranuras del elemento vertical de la
base,y deslícelas hacia abajo para fijarlas en su
posición.
9. Haga pasar el cable de altavoz a través del agujero en
la tapa de la parte superior de la plataforma.
10. Conecte el cable de altavoz a los postes de
sujeción de altavoces,asegurándose de observar la
polaridad correcta (+ al poste rojo,- al poste negro).
11. Paso opcional: Para mejorar las características de amortiguación,rellene el tubo de
plástico con arena y póngalo en el elemento vertical de la plataforma (tenga
cuidado de no perforar la bolsa de plástico en las costillas internas del elemento
vertical al deslizar el tubo).
12. Coloque la tapa encima del tubo de la plataforma.
13.
Conecte la cubier
ta de ca
b
les al par de insertos roscados superiores en la parte
posterior del CVHD-63 (apenas arriba y abajo de los postes de sujeción) con los
tornillos M5 x 18 mm suministrados.
Para montar el CVHD-63 en la posición media:
6.
Ator
nille el accesor
io de montaje en los dos inser
tos medios en la par
te tr
aser
a del
CVHD-63C (apenas arriba y abajo de los postes de sujeción).
7. Haga pasar el cable de altavoz a través de la base y hacia fuera del agujero en el
frente del elemento vertical,entre los dos agujeros de llave.
8. Conecte el cable de altavoz a los postes de sujeción de altavoces,asegurándose de
observar la polaridad correcta (+ al poste rojo, - al poste negro).
9.
Fije el altavoz a la plataforma poniendo las llaves de montaje (en la parte trasera del
altavoz) en las correspondientes ranuras del elemento vertical de la base,y
deslícelas hacia abajo para fijarlas en su posición.Nota: Al conectar el altavoz,haga
pasar el exceso de cable hacia atrás,a través del correspondiente agujero.
10.
P
aso opcional:
P
ar
a mejor
ar las características de amortiguación,rellene el tubo de
plástico con arena y póngalo en el elemento vertical de la plataforma (tenga
cuidado de no perforar la bolsa de plástico en las costillas internas del elemento
v
er
tical al deslizar el tubo).
11.
Coloque la tapa encima del tubo de la plataf
orma.
12. Coloque el tapón de goma en el pequeño agujero ovalado en la parte superior de
la tapa del elemento vertical.
Para montar el CVHD-63 en la posición baja:
6.
Retir
e cuidadosamente la r
ejilla del CVHD-63,
le
vantándola de la armazón desde el
lado del logotipo (empujando hacia adentro la tela de la rejilla y agarrando desde
debajo de la armazón).No se preocupe: la rejilla está diseñada para hacer esto.Tras
liber
ar las dos clavijas inferiores de la rejilla,deslice cuidadosamente los dedos
debajo de la armazón de la rejilla,a lo largo del borde del gabinete, para aflojar las
r
estantes c
lavijas y retirar la rejilla.Coloque la rejilla en el CVDH-63 al revés de la
posición or
ig
inal y empújela hasta que esté al r
as con el bor
de delanter
o del baf
f
le.
7. Atornille el accesorio de montaje de llaves en los dos insertos inferiores en
la parte trasera del CVHD-63 (apenas arriba y abajo de los postes de
sujeción).
8. Haga pasar el cable de altavoz a través de la base y hacia fuera del agujero en
el frente del elemento vertical,entre los dos agujeros de llave.
9. Conecte el cable de altavoz a los postes de sujeción de altavoces,
asegurándose de observar la polaridad correcta (+ al poste rojo, - al poste
negro).
10. Fije el altavoz a la plataforma poniendo las llaves de montaje (en la parte
trasera del altavoz) en las correspondientes ranuras del elemento vertical de
la base,
con el gabinete colocado boca abajo,y deslícelas hacia a bajo para
fijarlas en su posición (el logotipo debe estar ahora en posición normal,no
invertido);por eso colocamos la rejilla al revés. Nota:Al conectar el altavoz,
haga pasar el exceso de cable hacia atrás,a través del correspondiente
agujero.
11.
Paso opcional:Para mejorar las características de amortiguación, rellene el
tubo de plástico con arena y póngalo en el elemento vertical de la
plataforma (tenga cuidado de no perforar la bolsa de plástico en las costillas
internas del elemento vertical al deslizar el tubo).
12. Coloque la tapa encima del tubo de la plataforma.
13. Coloque el tapón de goma en el pequeño agujero ovalado en la parte
superior de la tapa del elemento vertical.
Pedestales de piso para bocina de canal
central
Montaje de la plataforma central:
1. Coloque la cubierta de la base sobre
el peso de la base.
2. Introduzca el tornillo M8 x 20 mm a
través del peso de la base y la cubierta de
la base hasta la parte inferior del
elemento vertical de la base. Repita el
procedimiento para los dos tornillos
restantes.
3. Apriete a mano los tornillos de la base y
verifique que el elemento vertical esté
bien alineado con la base.
4. Apriete los 3 tornillos de la base,una vez
que estén alineados.
5. Conecte las tres patas roscadas o patas
de goma al fondo del peso de la base.
6. Atornille el accesorio de las llaves de montaje en los dos insertos medios en
la par
te tr
asera del CVHD-63C (apenas a izquierda y derecha de los postes de
sujeción).
7. Conecte la abrazadera universal de montaje suministrada con el CVHD-63C
al elemento v
er
tical,
en posición horizontal,utilizando los tor nillos M5 x 18
mm suministrados.Para ver la orientación correcta, consulte la Figura X.El
niv
el de der
ec
ha a izquier
da del canal central puede ajustarse aflojando el
tornillo superior que fija la abrazadera de montaje universal al elemento
vertical de la plataforma.
8.
Ha
ga pasar el ca
b
le de altavoz a través de la base y hacia fuera del agujero en
el frente del elemento vertical,a través de la abrazadera universal entre los
dos a
gujer
os de lla
v
e.
9. Conecte el cable de altavoz a los postes de sujeción de altavoces,
asegurándose de observar la polaridad correcta (+ al poste rojo, - al poste
negro).
10.
F
ije el alta
v
oz a la plataf
or
ma poniendo las llaves de montaje (en la
parte trasera del altavoz) en las correspondientes ranuras en la abrazadera
universal,y deslícelas hacia abajo y a la derecha para fijarlas en su posición.
Nota:
Al conectar el alta
voz,haga pasar el exceso de cable hacia atrás, a través
del correspondiente agujero.
11.
P
aso opcional:
P
ar
a mejor
ar las car
acterísticas de amortiguación,rellene el
tubo de plástico con arena y póngalo en el elemento vertical de la
plataforma (tenga cuidado de no perforar la bolsa de plástico en las costillas
inter
nas del elemento v
er
tical al deslizar el tubo).
12.
Coloque la tapa encima del tubo de la plataf
orma.
13. Coloque el tapón de goma en el pequeño agujero ovalado en la parte
superior de la tapa del elemento vertical.
Pedestales de piso para bocina satelites
Ensamblaje pedestal de piso opcional
WELCOME TO THE FAMILY!
First off,you have great taste in loudspeakers. At Cerwin-Vega, deep bass and
great highs are a way of life.
Nice to kno
w there are a few people out there who share our passion for
music. And we consider you to be the newest member of the family. We hope your
speakers give you years of enjoyment. Of course, in the event of a problem, make
sure you familiarize yourself with this warranty. We like to think that while you’re
sitting in front of your speakers,we’re standing behind them.And now a few
c
hoice words from our lawyer. (Hey,every family has one.)
WHO’S COVERED BY THIS WARRANTY?
Cerwin-Vega’s Limited Warranty on residential speakers extends only to the original
purchaser as evidenced by the original Bill of Sale and only to the residential speakers
purchased from authorized Cerwin-Vega dealers.
T
en words of advice: retain the original bill of sale in a safe place!
WHAT’S COVERED BY THIS WARRANTY?
Cerwin-V
ega warrants that all new residential speakers shall be free from defects in
material and workmanship,under normal and proper use. Cerwin-Vega agrees to repair or
replace (at our option) all such defective parts at no charge for labor or materials.
WHAT’S NOT COVERED BY THIS WARRANTY?
This Limited Warranty does not apply to defective equipment that: Has been altered or
repaired by other than factory approved procedures;has been subjected to negligence,
misuse or accident;has been damaged by improper line voltage; had its serial number or any
part of it altered,defaced, or removed;has been used for other than home entertainment
purposes;or has been used in a way that is contrary to Cerwin-Vega’s written instructions.
Except as provided by statute,this Limited Warranty does not cover losses,consequential or
otherwise,resulting from the improper use of, or inability to operate,any Cerwin-Vega
product.
HOW
LONG
DOES
THE WARRANTY
EXTEND?
Cerwin-Vega’s Limited Warranty extends for a period of five (5) years for all system
speaker components and two (2) years for all associated electronics components,including
amplifier and controller devices,from date of purchase as shown on the original Bill of Sale.
If a defect exists within the warranty period,the warranty will not expire until the defect
has been fixed. The warranty period will also be extended if the warranty repairs have not
been performed due to delays caused by circumstances beyond the control of the original
purchaser,or if the warranty repairs did not remedy the defect and the original purchaser
notifies Cerwin-Vega or the original dealer or an Authorized Cerwin-Vega Service Center of
the failure of the repairs within 30 days after they were completed.
HOW DO YOU GET WARRANTY SERVICE?
In order to obtain warranty service,contact your original dealer or distributor, or an
Authorized Cerwin-Vega Service Center. If,for some reason, you have trouble locating a
service representative,contact Cerwin-Vega’s Customer Service Department for assistance:
Service@cerwin-vega.com
In some cases,the Customer Service Depar tment can solve a service problem without
an
y return of equipment to Cerwin-Vega,thereby avoiding transit delays.
Phone: 818-534-1500 Fax: 818-534-1590
NOW, WHAT IF THE PRODUCT MUST BE RETURNED?
If the Customer Service Department determines that the equipment must be returned to
Cerwin-Vega for service,a Return Authorization will be issued by mail,and the defective
merchandise may be shipped to the address provided with the Return Authorization freight
pr
epaid,
along with a cop
y of both the Return Authorization and the original Bill of Sale.The
pr
oduct will be r
epair
ed or r
eplaced (at our option) and returned to the original purchaser.
Only the return postage will be paid by Cerwin-Vega.Cerwin-Vega will not be responsible
f
or dama
g
e occur
r
ing in shipment fr
om the original purchaser or due to improper packing
materials.Remember to pack all equipment carefully and in the original carton if possible.
Additional charges may be added if new packing materials are required for return shipment.
SAVE YOUR ORIGINAL PACKING MATERIALS!
OTHER REMEDIES UNDER THE LAW
The e
x
er
cise of an
y of the pr
o
visions under the Limited Warranty does not affect the
protections or remedies of the original purchaser under other laws. If you have additional
questions a
bout ser
vice,
wr
ite or call the Customer Ser
vice Depar
tment.
This Limited
Warranty applies to all residential speakers,and supersedes all previous warranty statements.
Cerwin-Vega reserves the right to make changes in product design and specifications at any
time.
EXCEPT AS PROVIDED HEREIN AND BY APPLICABLE LAW,CERWIN-VEGA MAKES NO
ADDITIONAL REPRESENTATION OR WARRANTY OF ANY NATURE WHATSOEVER,
EXPRESSED OR IMPLIED,AS TO THE EQUIPMENT,INCLUDING BUT NOT LIMITED TO,THE
MERCHANTABILITY,FITNESS FOR A PARTICULAR PURPOSE,DESIGN CONDITION OR
WORKMANSHIP OF THE EQUIPMENT,OR THE QUALITY OF THE MATERIAL INCLUDED
THEREIN
,THIS LIMITED WARRANTY CONSTITUTES THE SOLE AND ENTIRE AGREEMENT
BETWEEN CERWIN-VEGA AND THE ORIGINAL PURCHASER.
CER
WIN
-VEGA’S LIMITED WARRANTY
IMPORTANT SAFETY INSTRUCTIONS
READ INSTRUCTIONS - Read all safety and operating instructions before operating the product.
RETAIN INSTRUCTIONS - Retain all safety and operating instructions for future reference.
READ WARNINGS - Read all warnings on the product and in the operating instructions.
FOLLOW INSTRUCTIONS - Follow all operating and use instructions.
POWER SOURCES (CVHD-12S) - Connect the product only to a power receptacle of the
type described in the operating instructions or as marked on product. The mains plug is
used as the disconnect device and shall remain readily operable.
GROUNDING ORPOLARIZATION (CVHD-12S) - Do not defeat the product’s grounding or
polarization feature.
POWER CORD PROTECTION (CVHD-12S) - Route power-supply cords so that they are not
likely to be walked on or pinched by items placed on or against them. Pay particular
attention to cords at plugs,convenience receptacles, and the point where they exit from
the product.
WATER AND MOISTURE - This apparatus shall not be exposed to dripping or splashing and
that no objects filled with liquids,such as vases, shall be placed on the apparatus. Do not
use the product near water;e.g., near a bathtub,washbowl, kitchen sink,laundr y tub,in a
wet basement,or near a swimming pool, etc.
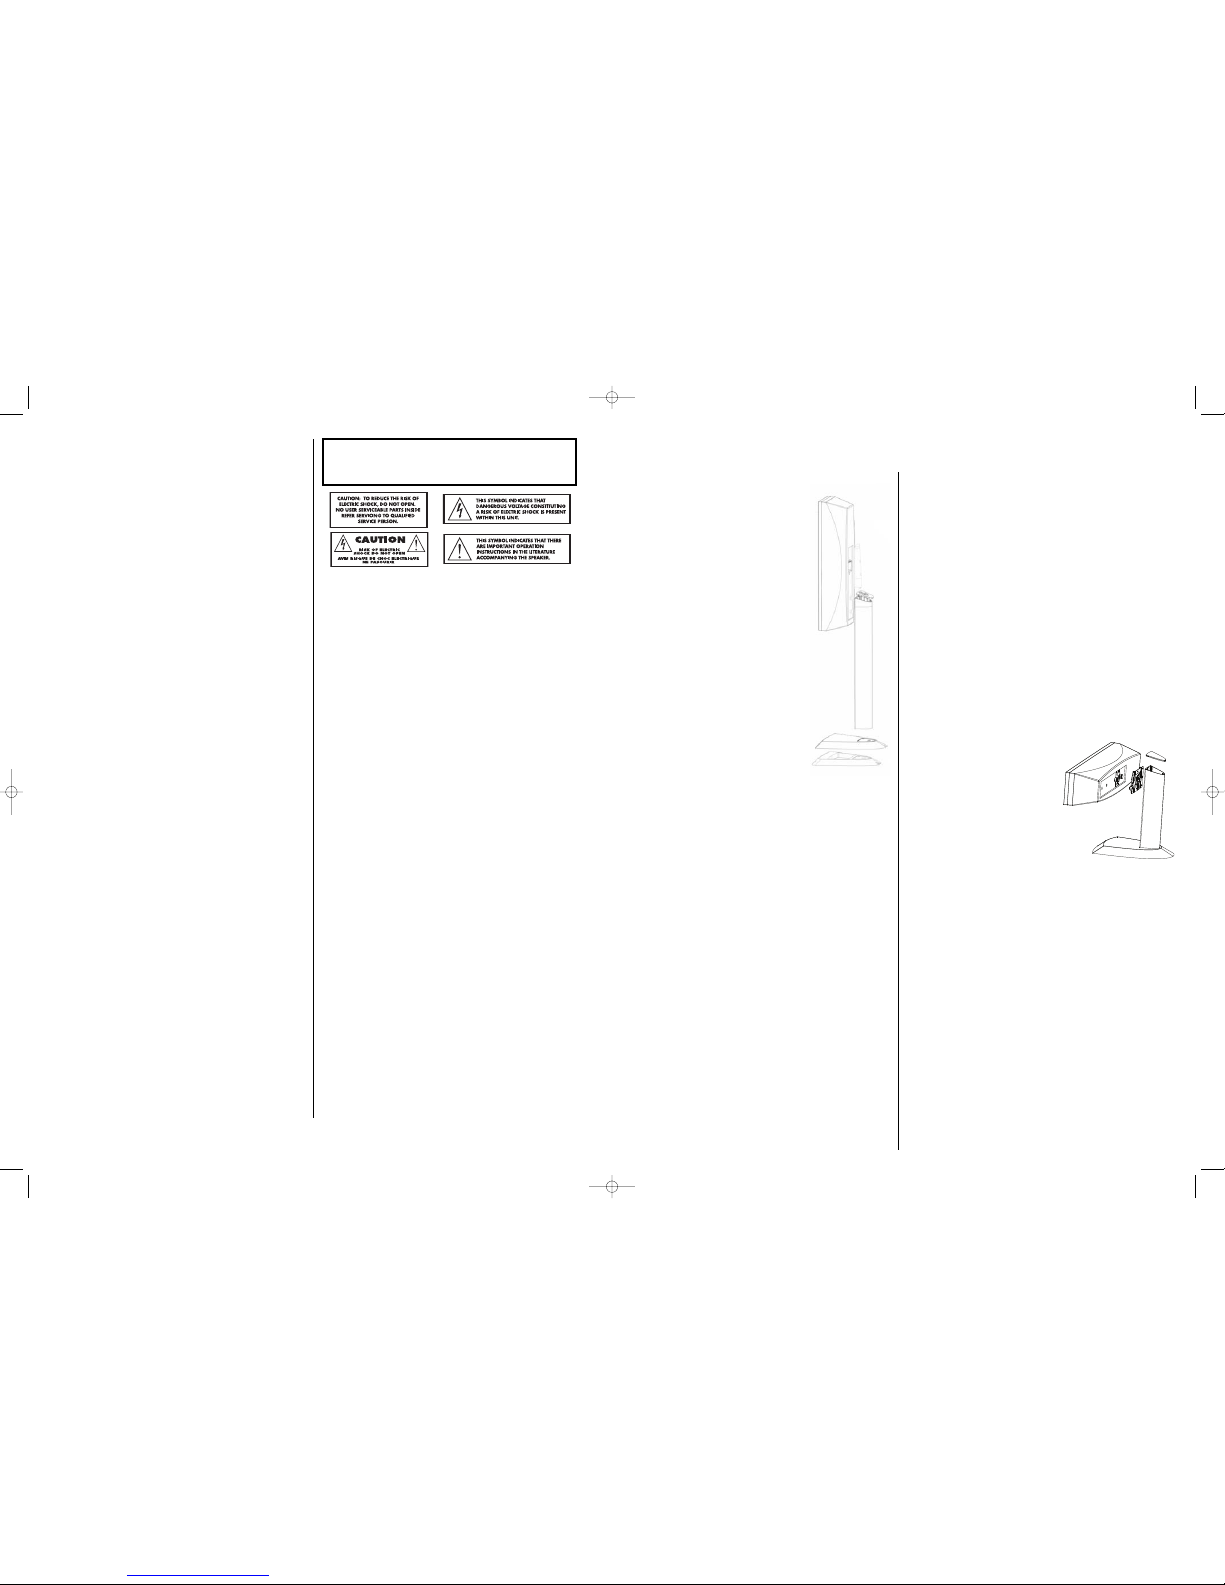
PLACEMENT - This product is designed for specific placement. The CVHD-63 and the
CVHD-63C are designed to be wall mounted using the supplied wall mount brackets,
Omnimount 7.0™ aftermarket wall mount brackets or optional stands sold separately.
Place these components only on bookshelves,appropriate stands, wall mount bracket,or
on top of a television/monitor.Optional stands for the CVHD-63C and floor stands for the
CVHD-63 are available from your authorized Cerwin-Vega dealer.
HEAT - Place the product away from heat sources such as radiators,heat registers, stoves,or
other appliances (including amplifiers) that produce heat.
CLEANING - Clean the product only with a dry cloth;do not use any liquids such as water
or solvents.
OBJECT AND LIQUID ENTRY - Use care so that objects or liquids do not enter the enclosure
thr
ough openings.
DAMAGE REQUIRING SERVICE - If the product requires service, use only qualified service
personnel when:
A. Objects have fallen, or liquid has been spilled into the product;or
B.
The pr
oduct has been e
xposed to r
ain;or
C.
The pr
oduct does not appear to operate normally,or exhibits a marked
c
hange in performance;or
D. The product has been dropped, or the enclosure damaged.
SERVICING - Do not attempt to service the product beyond what is described in the
operating instructions. All other servicing should be referred to qualified service
personnel. In the e vent your Cerwin-Vega speaker fails to operate properly,please contact
the dealer where you purchased the unit. Or,for further assistance contact us at the
addresses listed below.
HEARING DAMAGE WARNING - Contin
uous,
e
xcessiv
e exposure to sound pressure levels in
e
xcess of 85 dB ma
y cause hearing loss. Cerwin-Vega audio/video speaker systems are
capable of producing sound pressure levels greater than 85 dB.
All CVHD Series speakers are CE compliant.
Cerwin-Vega is constantly striving to maintain the highest consumer standards. As a
result of these efforts,modifications may be made from time to time to existing products
without prior notice. Specifications and appearance may differ from those listed or shown
in this manual.
USA:
Cerwin-V
ega,9340 De Soto Ave.,Chatsworth, CA 91311
Stanton Group Europe:382 Avenue de la Couronne,1050 Brussels, Belgium
WARNING: TO REDUCE THE RISK OF FIRE OR ELECTRIC
SHOCK, DO NOT EXPOSE THIS SPEAKER CABINET TO RAIN
OR MOISTURE.
CVHDmanual9.qxd 6/12/06 7:02 PM Page 3
 Loading...