

Page 1

18W 6” LED Work Light - CT18W6ILEDA
Applications
LED technology is a new type of energy-saving lighting, used primarily in car lights, truck lights,
off-road lights, headlights and other automotive machinery.
What's in the box
2 x LED work lights
2 x Mount hinges
6 x Bolts
6 x Nuts
2 x Allen Keys
Specifications
• Input voltage: 10 ~ 30V DC
• Ingress protection: IP67
• Colour temperature: 6000 ~ 6500k
• Working temperature: -40°C ~ 80°C
• Connections: Red + / Black -
Safety Instructions
Please read and keep these instructions available for future reference.
• This product is designed and intended only for use with 10-30 Volts DC such as that in a
motor vehicle or other form of machinery. Applying voltages lower or higher than this or
any other voltages in AC will result in damage to the light, and possible injury or harm to
the user.
• Before wiring up the light, ensure that the battery and any other power sources have been
isolated to prevent electric shock.
• Do not look directly into the light while it is on, as this may result in eye damage.
• The LED light bar is designed for off-road use only. Use of the light bar on public roads
may result in accidents due to blinding light from other road users.
• By law, the LED light must be installed so that it can only be operated with your car
showing high-beams. When your lights are dipped, the LED light must also be
extinguished.
• Installation of this product must be performed by a competent person who has the skills,
knowledge and training to perform the tasks described adequately.
• By installing this product, you acknowledge and agree that Kogan.com will not be liable to
you or any other person for any direct, indirect, incidental, special, consequential or
exemplary damages, including but not limited to damages for product liability, personal
injury or negligence resulting from use of goods or services supplied to you, or on behalf
of you through the installation and use of this product.
• Please ensure that you connect the black wire to the negative battery connector, and the
red wire to the positive battery connector.
• Make sure all wiring is away from hot surfaces and moving parts.
• Some vehicles create large spikes of voltage upon starting up or turning off. Do not have
the lights on when starting or turning off vehicle.
• If you have any doubt about installation, please consult with an automotive electrician or
contact the Kogan customer support team.
• For warranty issues/claims, please go to http://www.kogan.com/au/help
Page 2
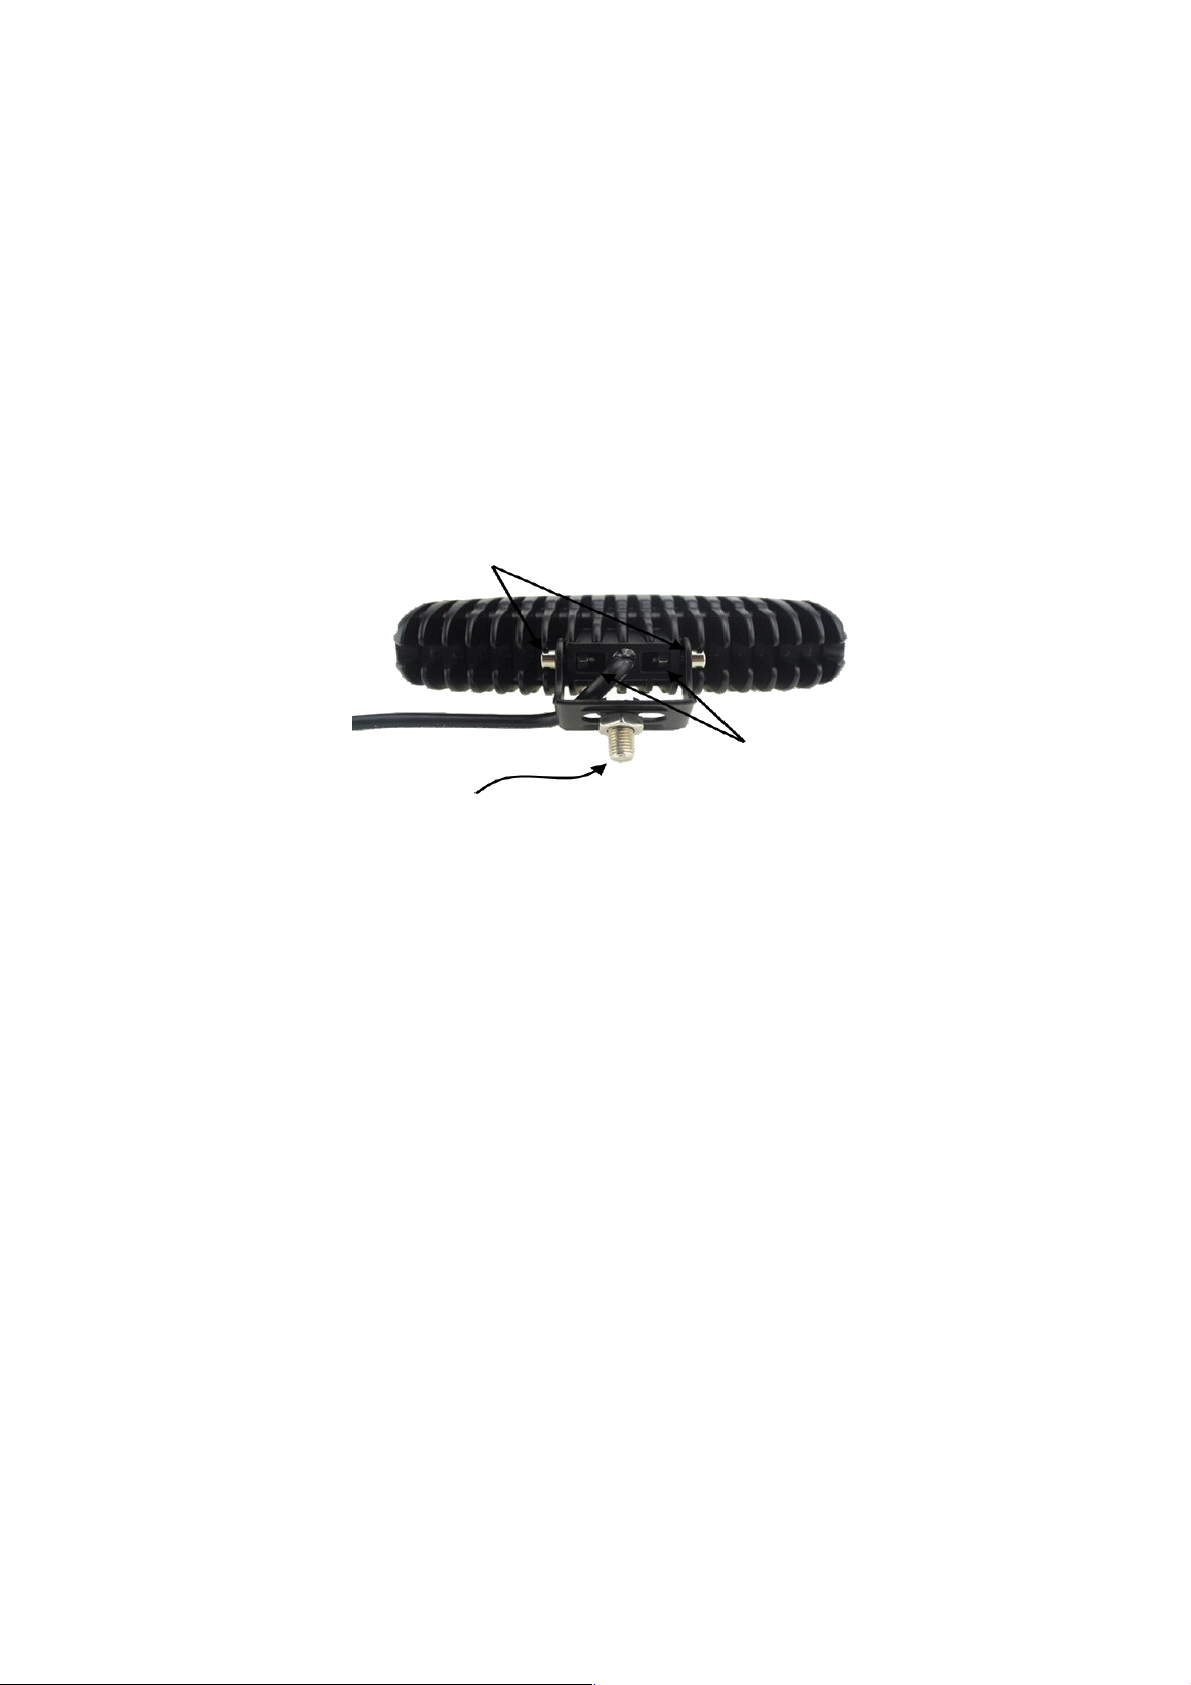
Mounting the LED light
• (Images supplied are just a guide. Slight design changes may occur, however the mounting
functionality will remain the same.)
1. Put the main mounting bolt through the main gap on the bracket, then loosely fix the
spring washer and nut to it. Do not tighten.
2. Laying the light flat on a level surface, place the two small mounting nuts into the slots in
the mount of the light.
3. Slide the mounting bracket over the mount on the light, then slide the small mounting
bolts through the holes into the small mounting nuts. You can then tighten the bolts using
the allen key. The nuts themselves will not turn in the slot due to being held in place.
4. Drill a bolt hole in the appropriate location on the mounting plate where you would like to
fix the base and attach the mounting plate.
5. Unscrew the nut and spring washer from the main mounting bolt, then insert the main
mount bolt through the hole you drilled. Retighten the spring washer and nut, holding the
unit in place.
Small mounting bolts
Small mounting nuts
Main mounting bolt, nut
and spring washer.
 Loading...