

Page 1
Mounting &
Maintenance
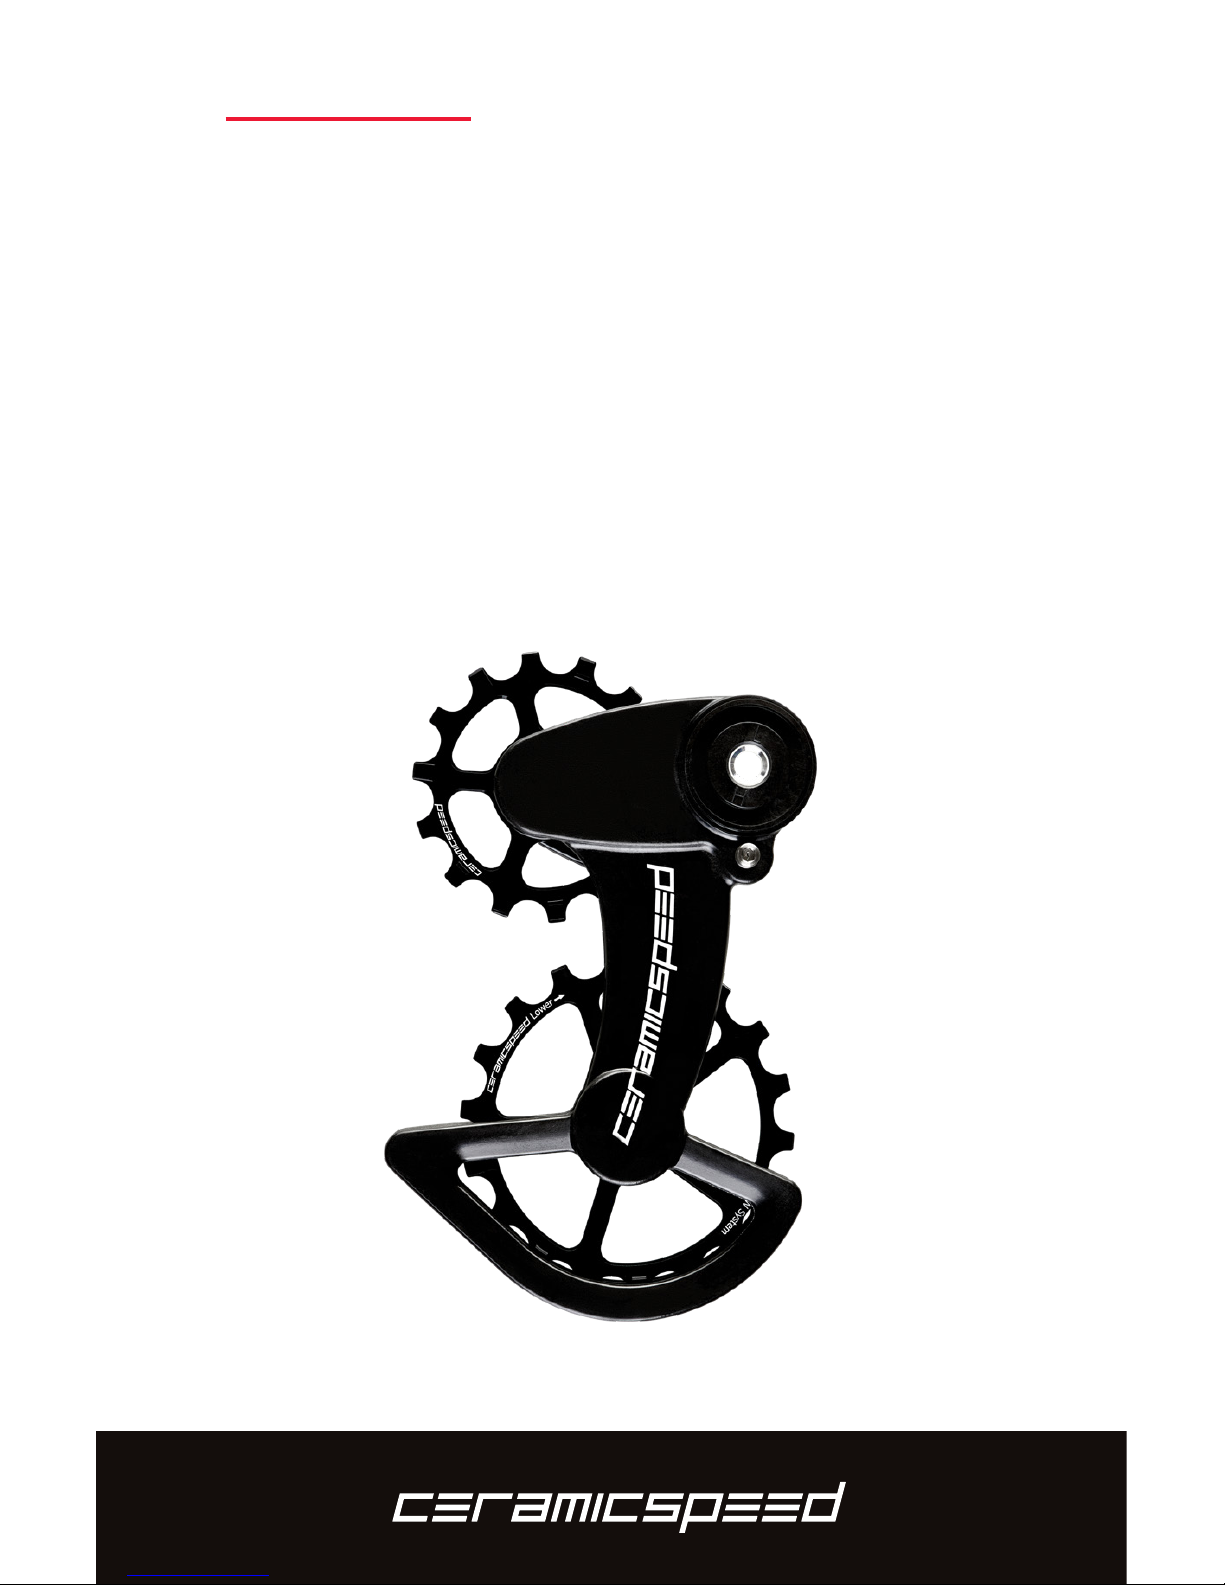
OSPW X
For SRAM Rival & Force 1 Type 3
Page 2
Derailleur compatibility
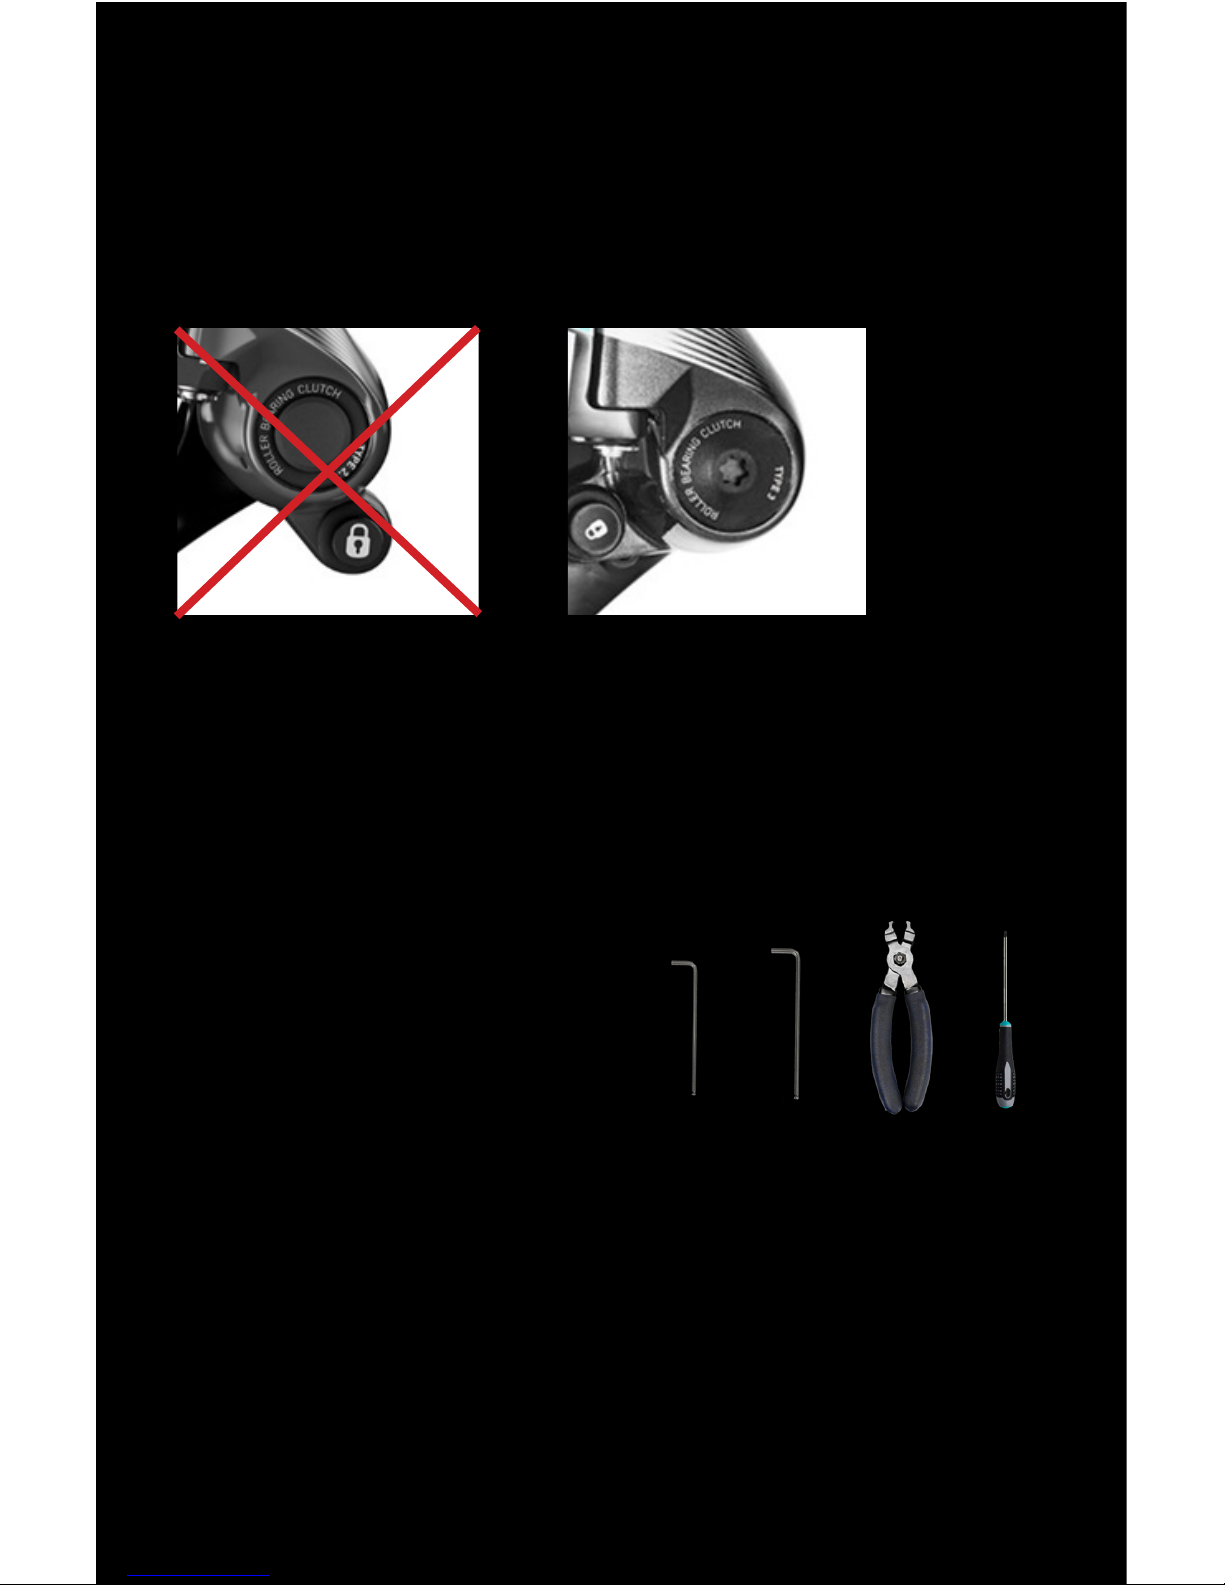
The OSPW X cage fits all Rival1 and Force1 derailleurs with Type 3 clutch
regardless of the cage length. The cage lock position needs to be in the 8 o’clock
position (not 5 o’clock) for complete functionality.
The cage is NOT compatible with Type 2.1.
Type 2.1 Type 3
Cassette sizes:
OSPW X Systems support from 10 to max. 42 teeth. It is possible to use all
combinations between these limits.
It is NOT possible to use a 50 tooth cassette.
Tools:
A: 2,5mm Allen key
B: 3mm Allen key
C: Chain tool
D: Torque wrench for 3Nm & 4Nm
ATTENTION
To guarantee the best possible shifting performance with the OSPW X you
must ensure that the cable and housing is setup correctly per the original
manufacture’s specification. Poor cable performance and/or housing routing
from the shifter to the derailleur can impede accurate derailleur actuation.
A B C D
Page 3
Maintenance
No set of rules can be made for how often your Oversized Pulley Wheels are
to be maintained. Maintenance frequency depends on the weather conditions
that you are riding in.
A worn chain will increase the wear on the pulley wheels significantly, so
make sure that you change your chain before it is completely worn out. Under
normal conditions, we recommend that you
service the Oversized Pulley Wheels when you
have ridden under wet conditions, washed your
bike or each time you lubricate the chain. For
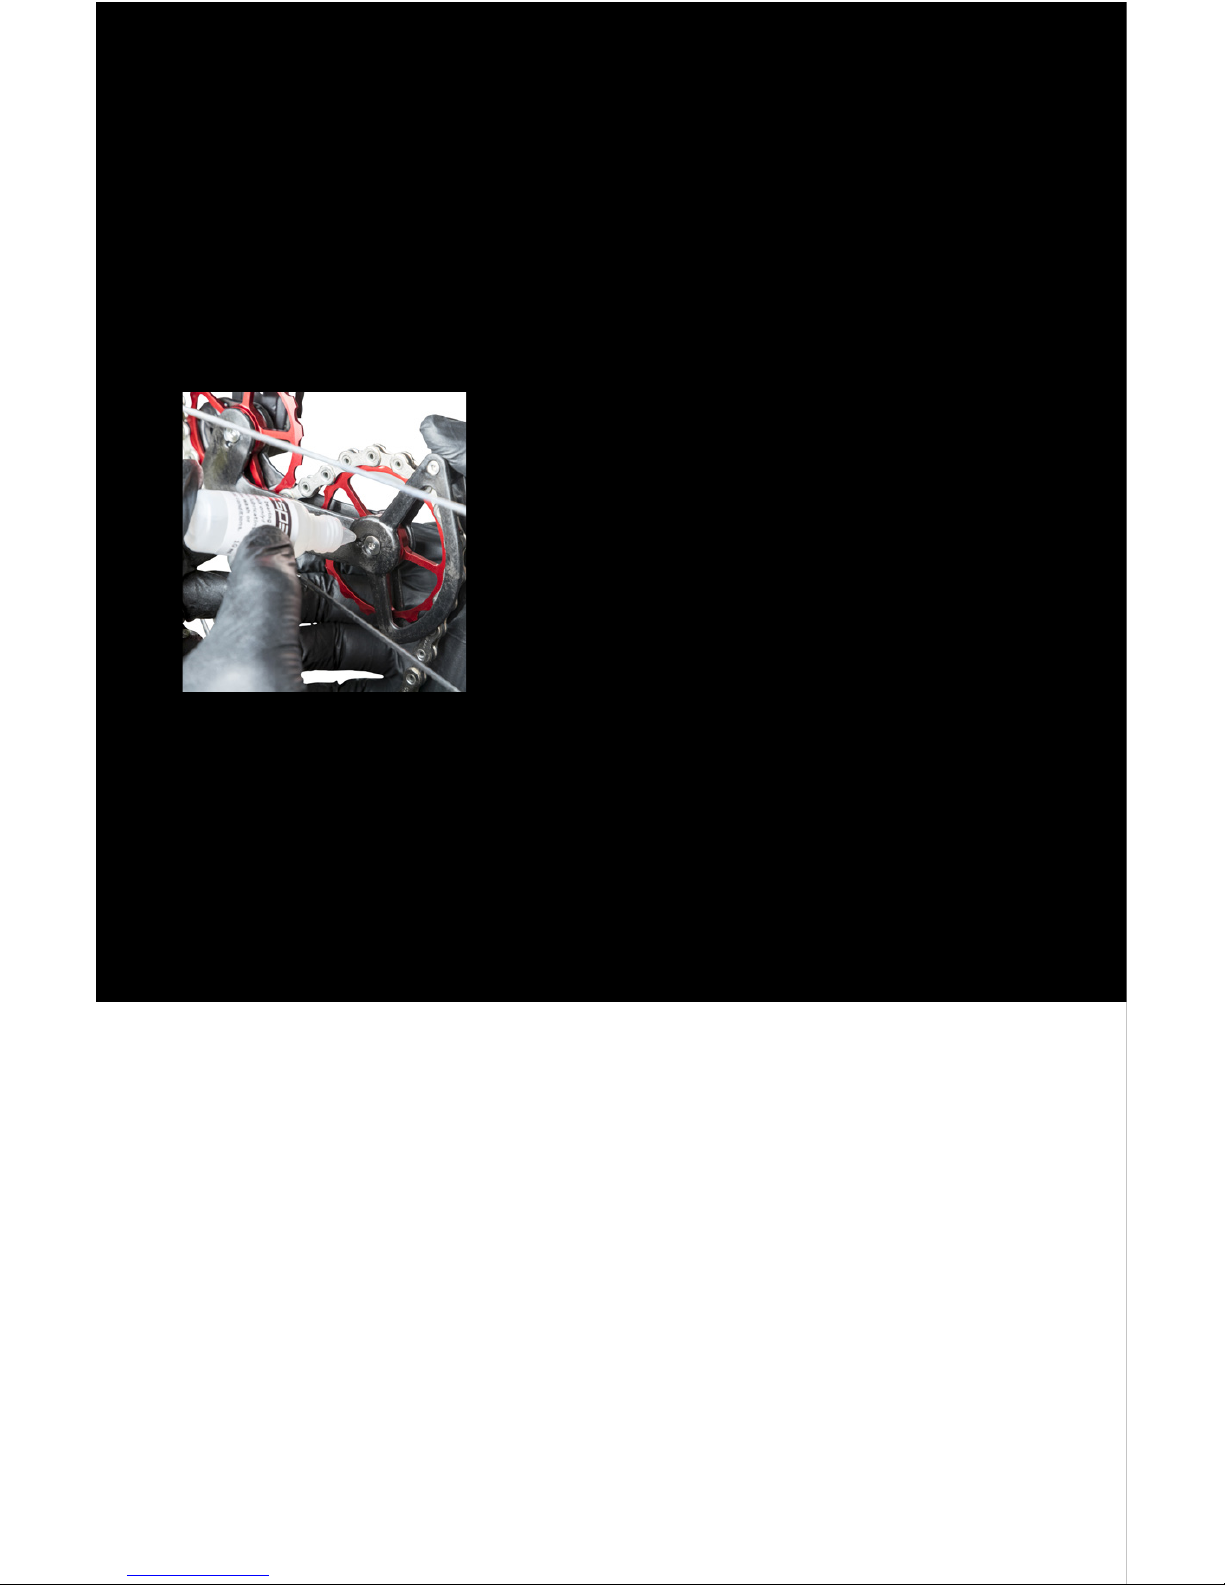
normal maintenance, add a drop of oil into the
lubrication points (see the page 3) for optimal
performance. Make sure to position the OSPW
System horizontally to ensure that the oil reaches
the Oversized Pulley Wheel bearings.
We recommend the use of CeramicSpeed Oil on the OSPW X System. This can
be purchased from the CeramicSpeed dealers worldwide or from our webshop.
Watch our maintenance video on ceramicspeed.com in the Support section.
When travelling, your OSPW X System will not fit in the bike travelling bag. We
recommend that you dismount the whole rear derailleur and pack it aside.
Extended Maintenance
Approximately once every half a year we recommend that you perform
an
extended maintenance.
In this case, you should dismount the Oversized Pulley
Wheels from the cage, remove the seals from both sides and clean all parts in
a shaker with degreaser. After cleaning, dry the components off, put two drops
of oil onto the CeramicSpeed Balls, place the seals back on and remount
the Oversized Pulley Wheels. When dismounting the cage plates, you will
need a 2.5 mm Allen Key for the pulley wheel bolts (see page 3) and a 2 mm
Allen key for the tower bolts. To remount the screws, tighten the pulley wheel
screws up to a max torque of 1 Nm and the tower bolts up to 0.3 Nm. For this,
a torque tool is recommended.
If you’re riding in wet and muddy conditions
, we
recommend you to perform an extended maintenance more frequently and
replace oil with All Round Grease for better protection.
Page 4
To ensure the very best in riding performance it is vital that your new
OSPW X System is mounted correctly. Follow these instructions to install
your OSPW X System for SRAM Rival & Force 1 Type 3.
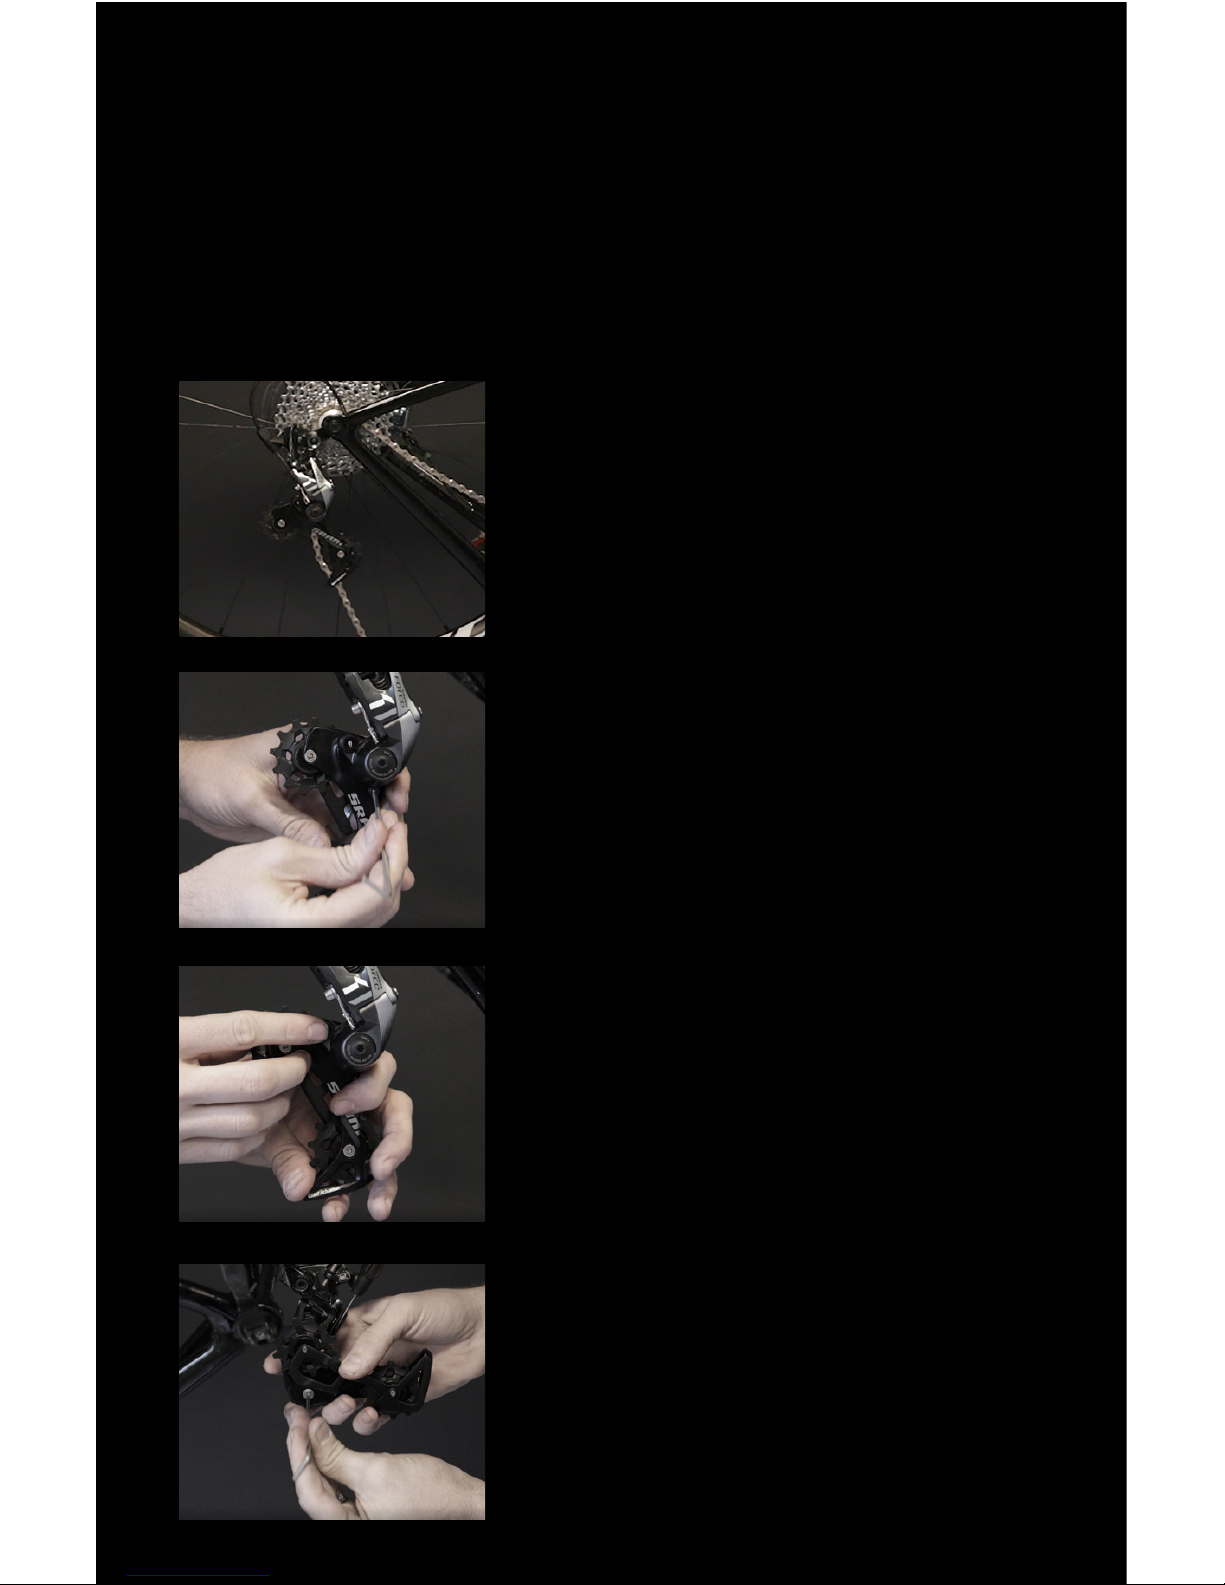
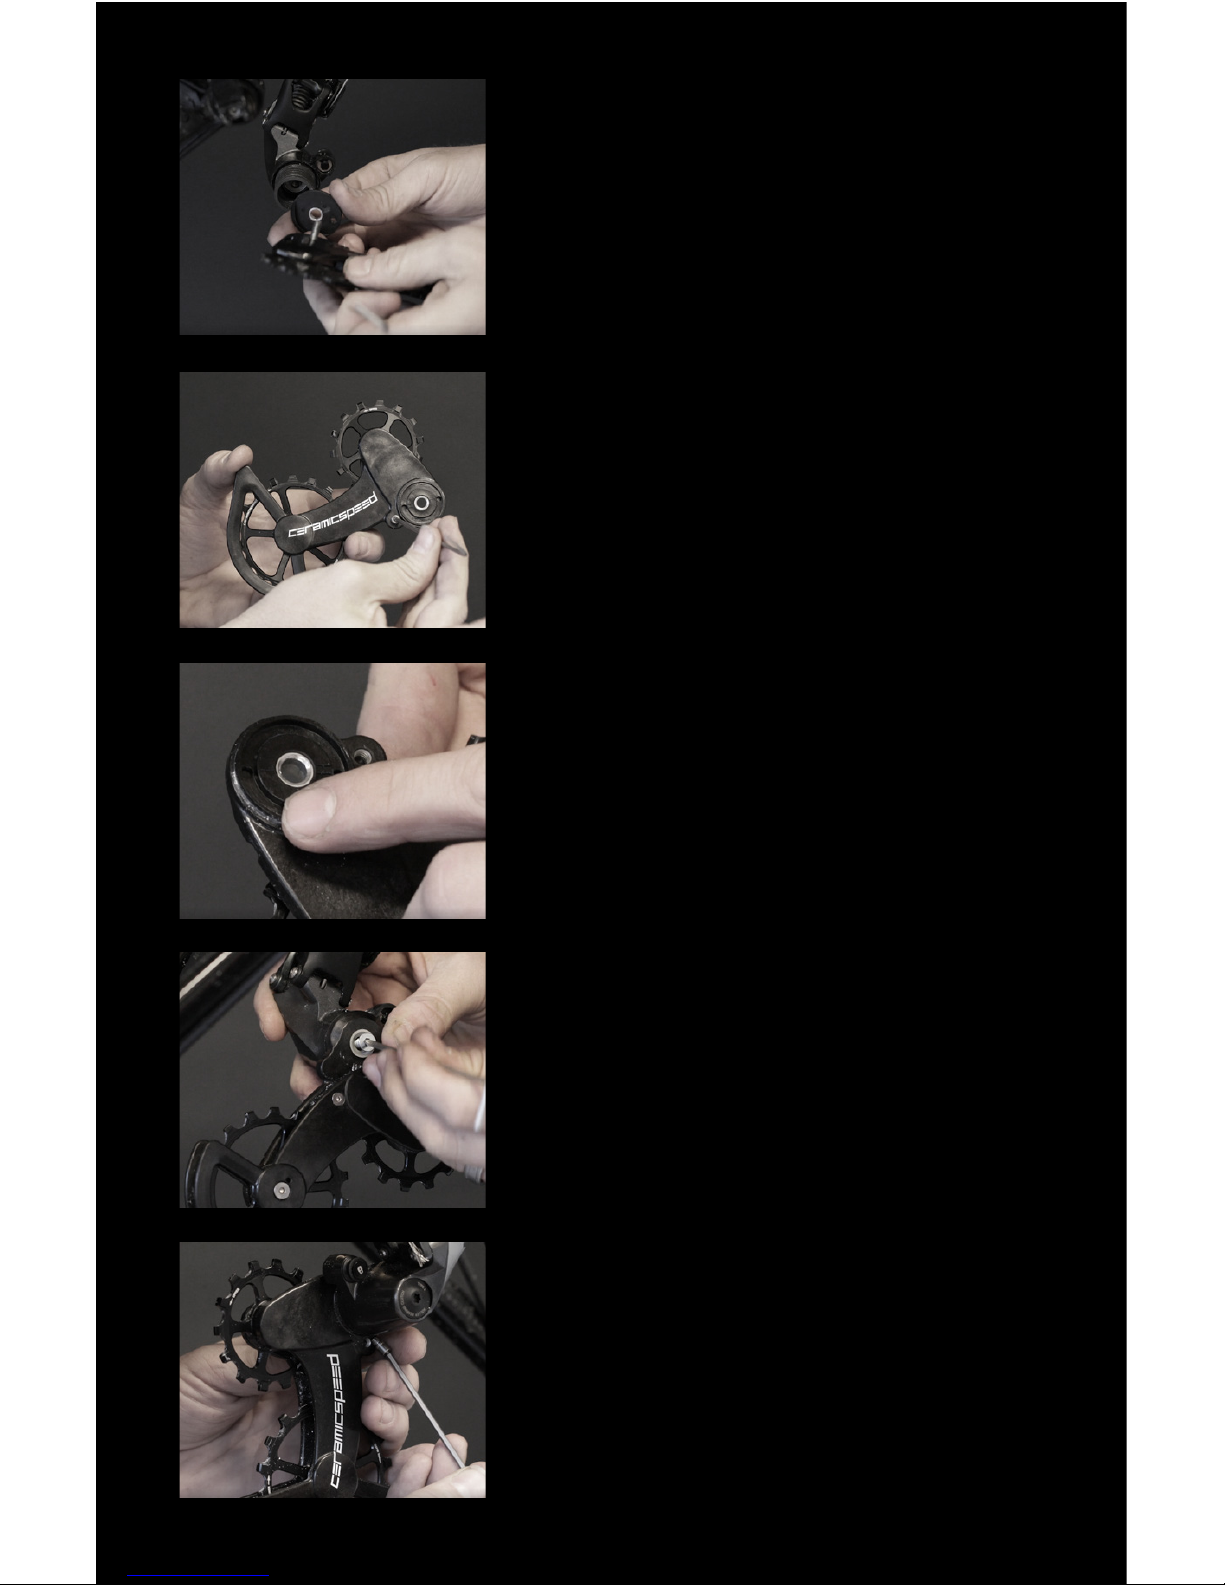
1. Rotate the stock pulley cage forward and
engage the Cage Lock. Remove the chain.
2. Remove the stop screw with a 3mm Allen
Key, this will not be reused.
Shift up 23 gears.
4. Remove the cage mounting screw with a 3mm
Allen key and set aside the original cage. You
will reuse the cage mounting screw.
3. Disengage the Cage Lock and release the
spring tension to zero. The cage will unwind
a complete revolution.
Mounting Manual
Page 5
9.
Turn the cage clockwise and secure the cage
with the Cage Lock. Mount the CeramicSpeed
stop screw with a 2,5mm Allen key (torque to
3Nm).
6. Unbox the OSPW X and remove the silver
CeramicSpeed stop screw with a 2,5mm
Allen key.
5. Remove the plastic cap if it did not come
off with the derailleur cage and set aside
(not to be used with OSPW X). You should
now see the pulley cage tension spring.
7. There are 2 holes for spring tension. We
recommend Low tension setting (marked
‘L’ at top) to minimize drive train friction.
Move the spring tension to the standard
setting (at bottom) if you experience any
issues such as slow shifting response or
drop a chain.
8. Once the spring tension setting is selected,
align the OSPW X, spring and derailleur
body together. Install the factory cage
mounting screw. and torque to 4Nm.
Page 6
If you are using a 44 tooth or larger chain ring you may not be able to overlap
the ends of the chain for measurment. You do not need to add any links to
a stock chain, a full length chain (114 links for SRAM, 116 links for KMC) is
sufficent for use.
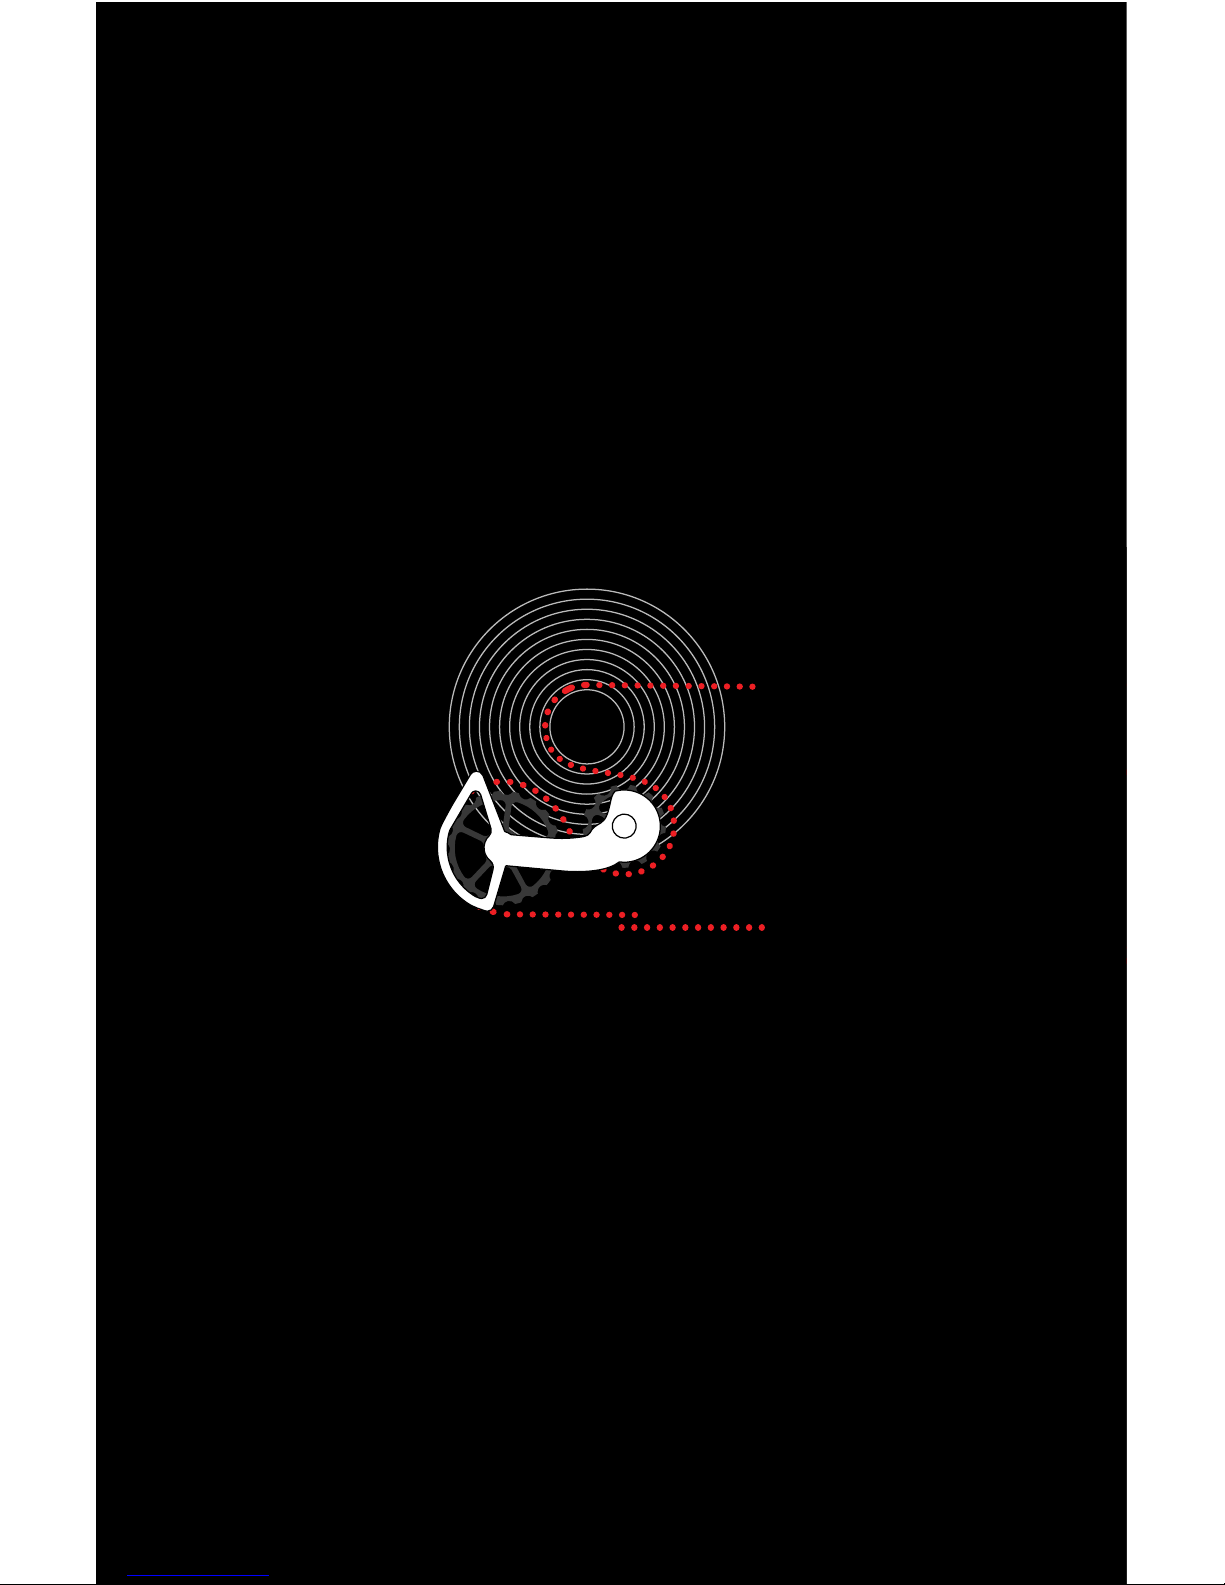
Recommendation on upper pulley clearance on the largest cog (adjusting of
B-limit) = 1015mm depending on cassette size.
Chain length
STEP 1: Place the chain on the smallest cog on the cassette. To find the correct chain
length, pull the two chain ends together, just as you would when needing to cut a chain
to length. The lower part of the cage should start to move downwards, away from the
cassette, as referenced in the second image.
Page 7
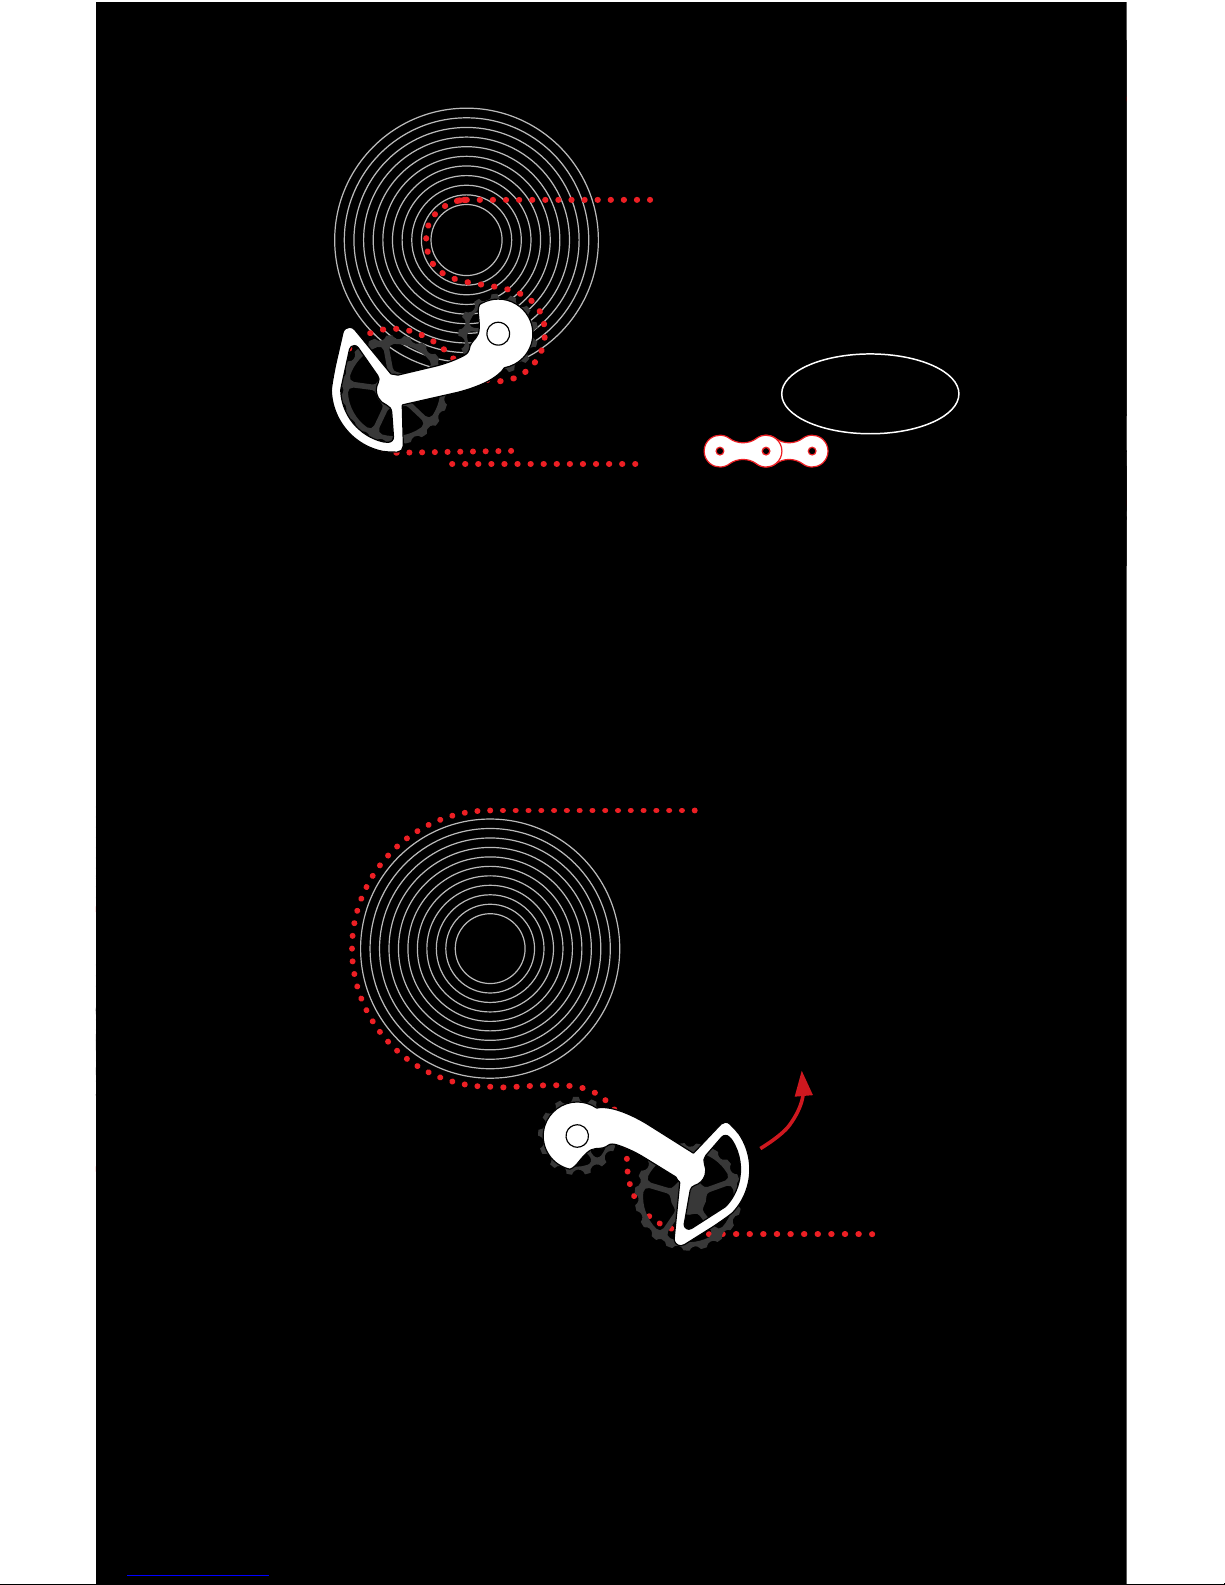
STEP 3: With the chain now cut to length it is important to test the clearance of the OSPW X
System when the rear derailleur is set in the largest cog on the cassette. Just as the arrow
indicates the cage should be able to rotate counter clockwise. It is important that there is some
clearance between the upper pulley wheel of the OSPW X System and the largest cog on the
cassette. If you find the clearance is not enough, adjust the B-tension accordingly.
STEP 2: When tension is applied on the chain and the OSPW X System appears to be
aligned as the diagram above, the chain needs to be cut (1 link shorter than step 1) and
connected by the required amount of links in order to achieve sufficient tension in this gear
combination (always the small cog on the cassette).
1 link shorter
than step 1
Page 8

Up to 6 years warranty
Thankfully, we do not have to deal with warranty issues often. Nevertheless,
we are happy to introduce you to our comprehensive warranty program.
Standard products 4 years
Bottom Brackets
Pulley Wheels
Wheel Kits
Headsets
Oversized Pulley Wheel Systems
Single Bearings
Coated products 6 years
Bottom Brackets
Pulley Wheels
Wheel Kits
Headsets
Oversized Pulley Wheel Systems
Single Bearings
We are committed to manufacturing and delivering the best ceramic bearing
products in the industry. Should your CeramicSpeed product not live up to your
expectations, and this is caused by defects in materials and/or workmanship,
we encourage you to contact us.
Register your product within the first 30 days of purchase on
ceramicspeed.com/sport under the section Support. Should you thereafter,
and within the warranty period need to file a claim, please return to the same
section on our website and fill in your claim. We will always strive to revert to
you concerning your claim within 24 hours.
ceramicspeed.com/sport/support
V1-1901
 Loading...