

Page 1
USER MANUAL
Page 2
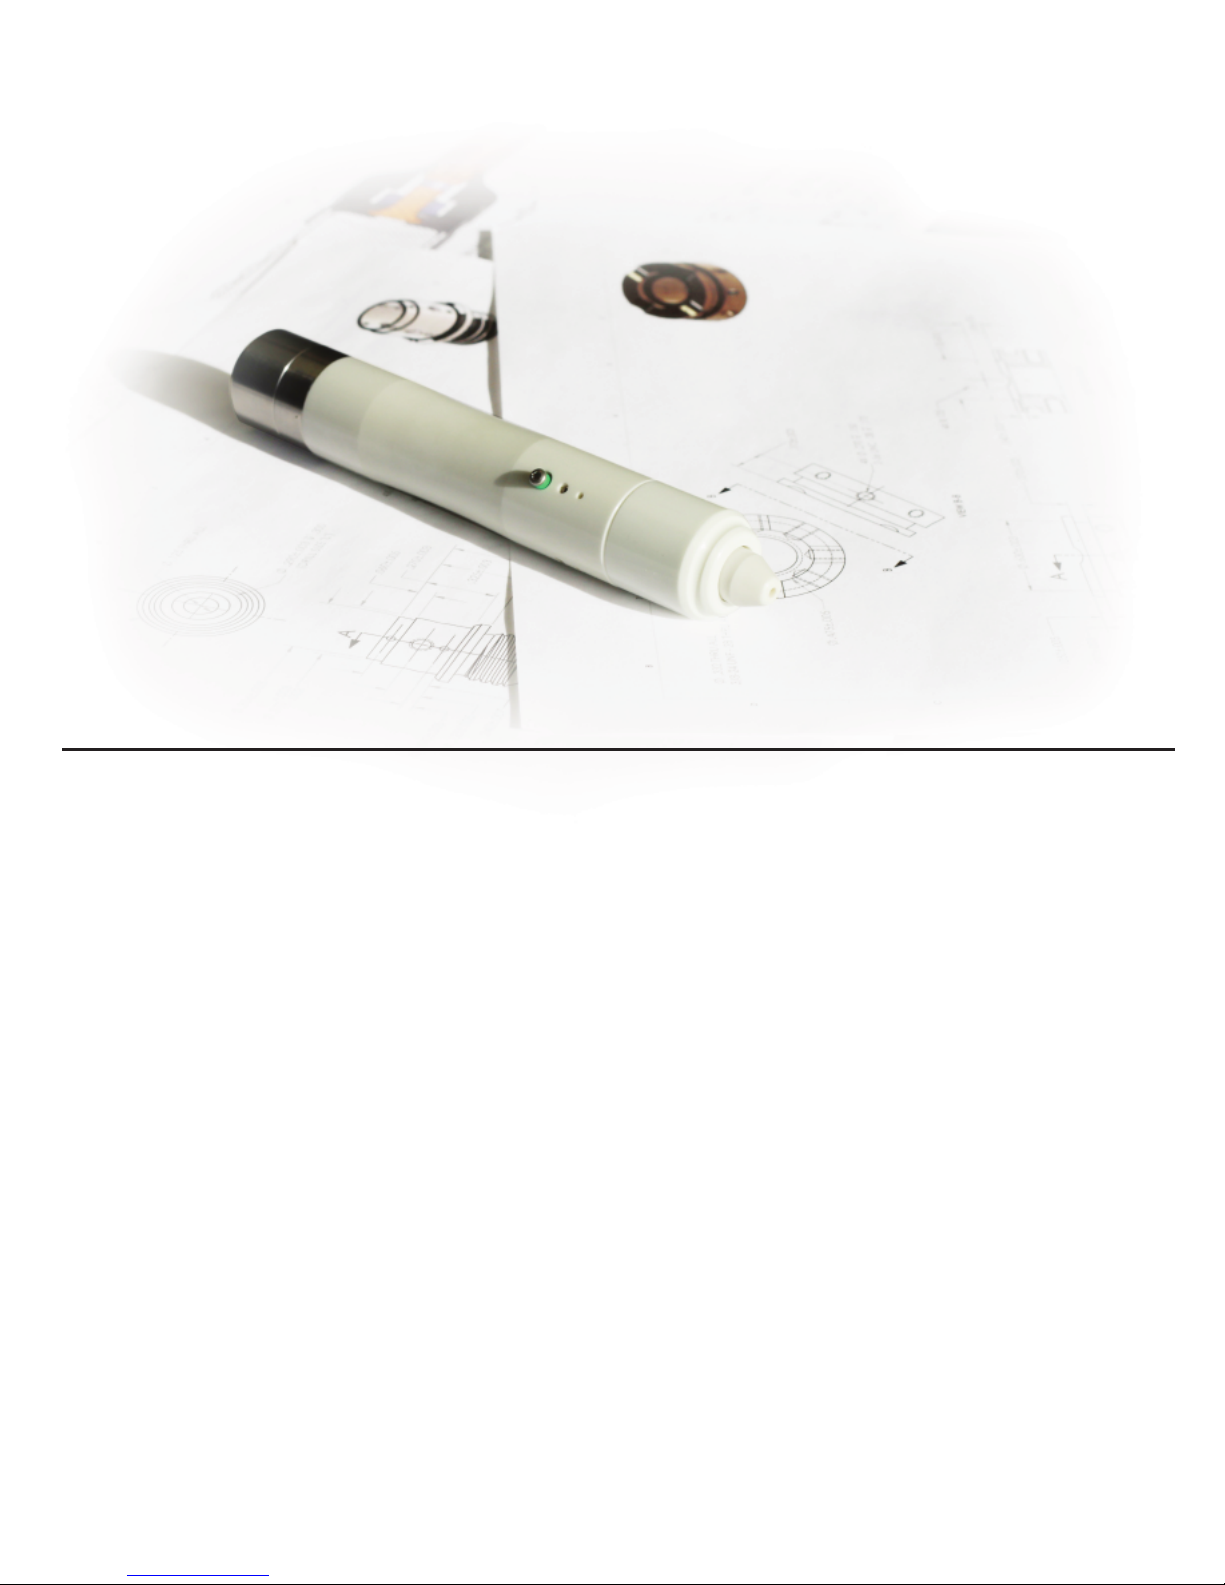
The Cera is designed for simplicity and reliability. They are all
hand assembled so warm up times can vary slightly (a couple seconds). The Cera Cartridge simply threads into the top of the body. The
body holds an 18650 Battery of 3.7V. If you did not purchase the battery from us it will need to contain the following characteristics: 18650
size, 3.7V and a minimum of 6 amperage rating. The mAh will determine how long each charge lasts. For performance and life we recommend the batteries available on our website.
The switch that powers the vaporizer on/off is momentary and will
need to be depressed while in use. Once you let go, the power is off.
This is located on the very bottom of the device. You can easily hold
the vaporizer with one hand while depressing the power button by
making a fist on the bottom and using the index, middle or opposing
finger to press the button.
Each cartridge will have a different warm up time. This will vary depending on what type of material is loaded as well.
Design
Page 3
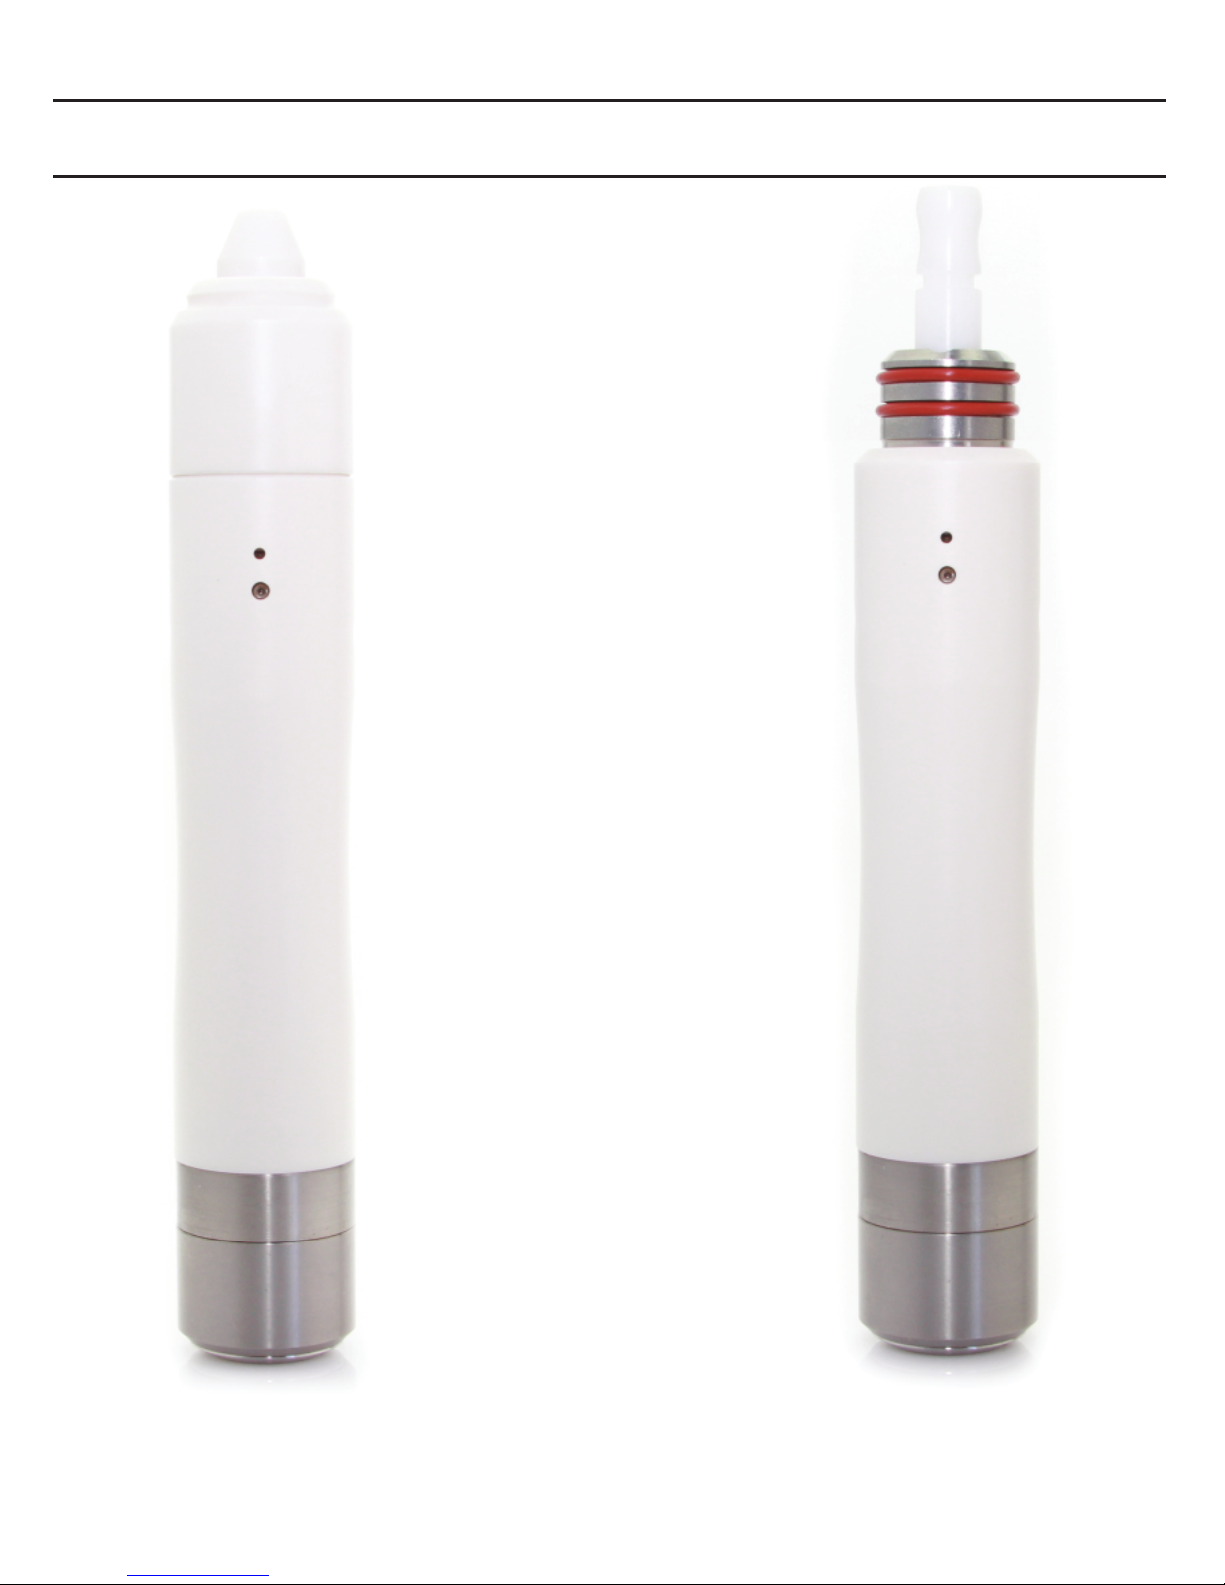
CONFIGURATION
Loose Leaf Oil
Page 4
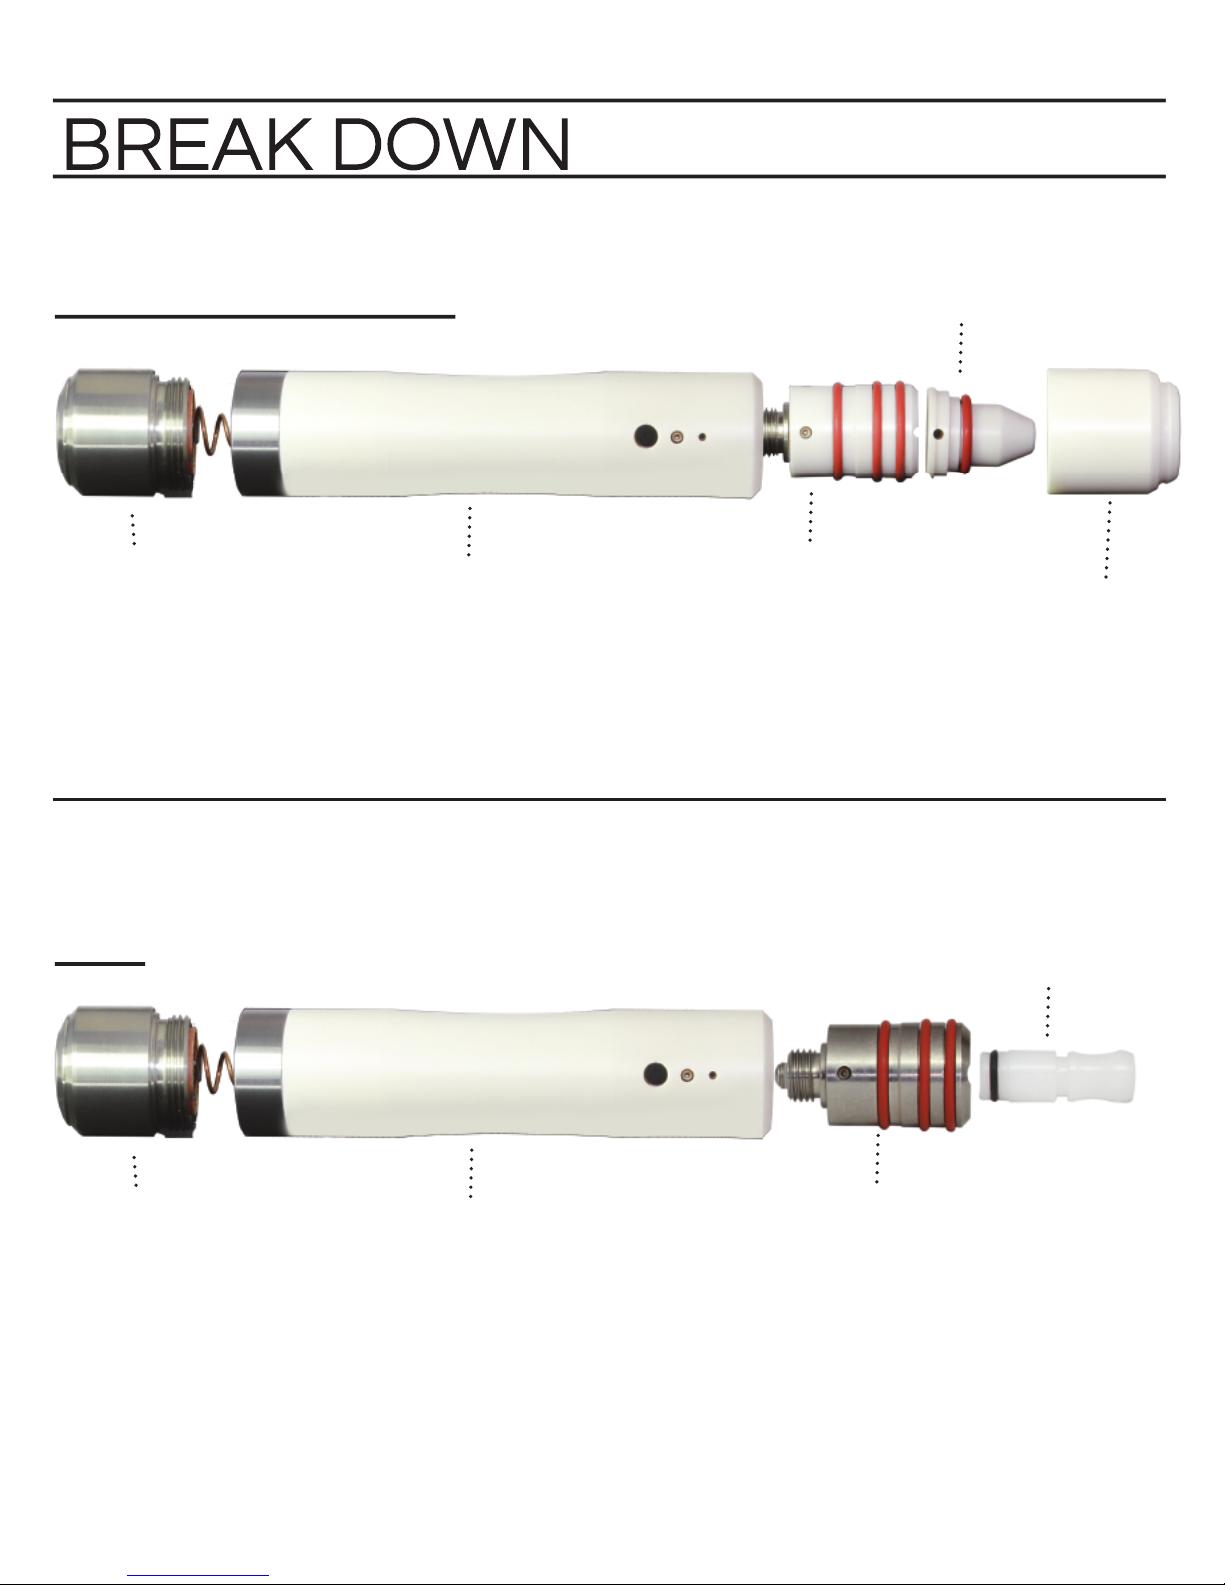
BREAK DOWN
Oil
Loose Leaf
Switch
Ceramic Body
Heating Core
Mouth Piece
Top Cap
Switch
Ceramic Body
Heating Core
Mouth Piece
Page 5
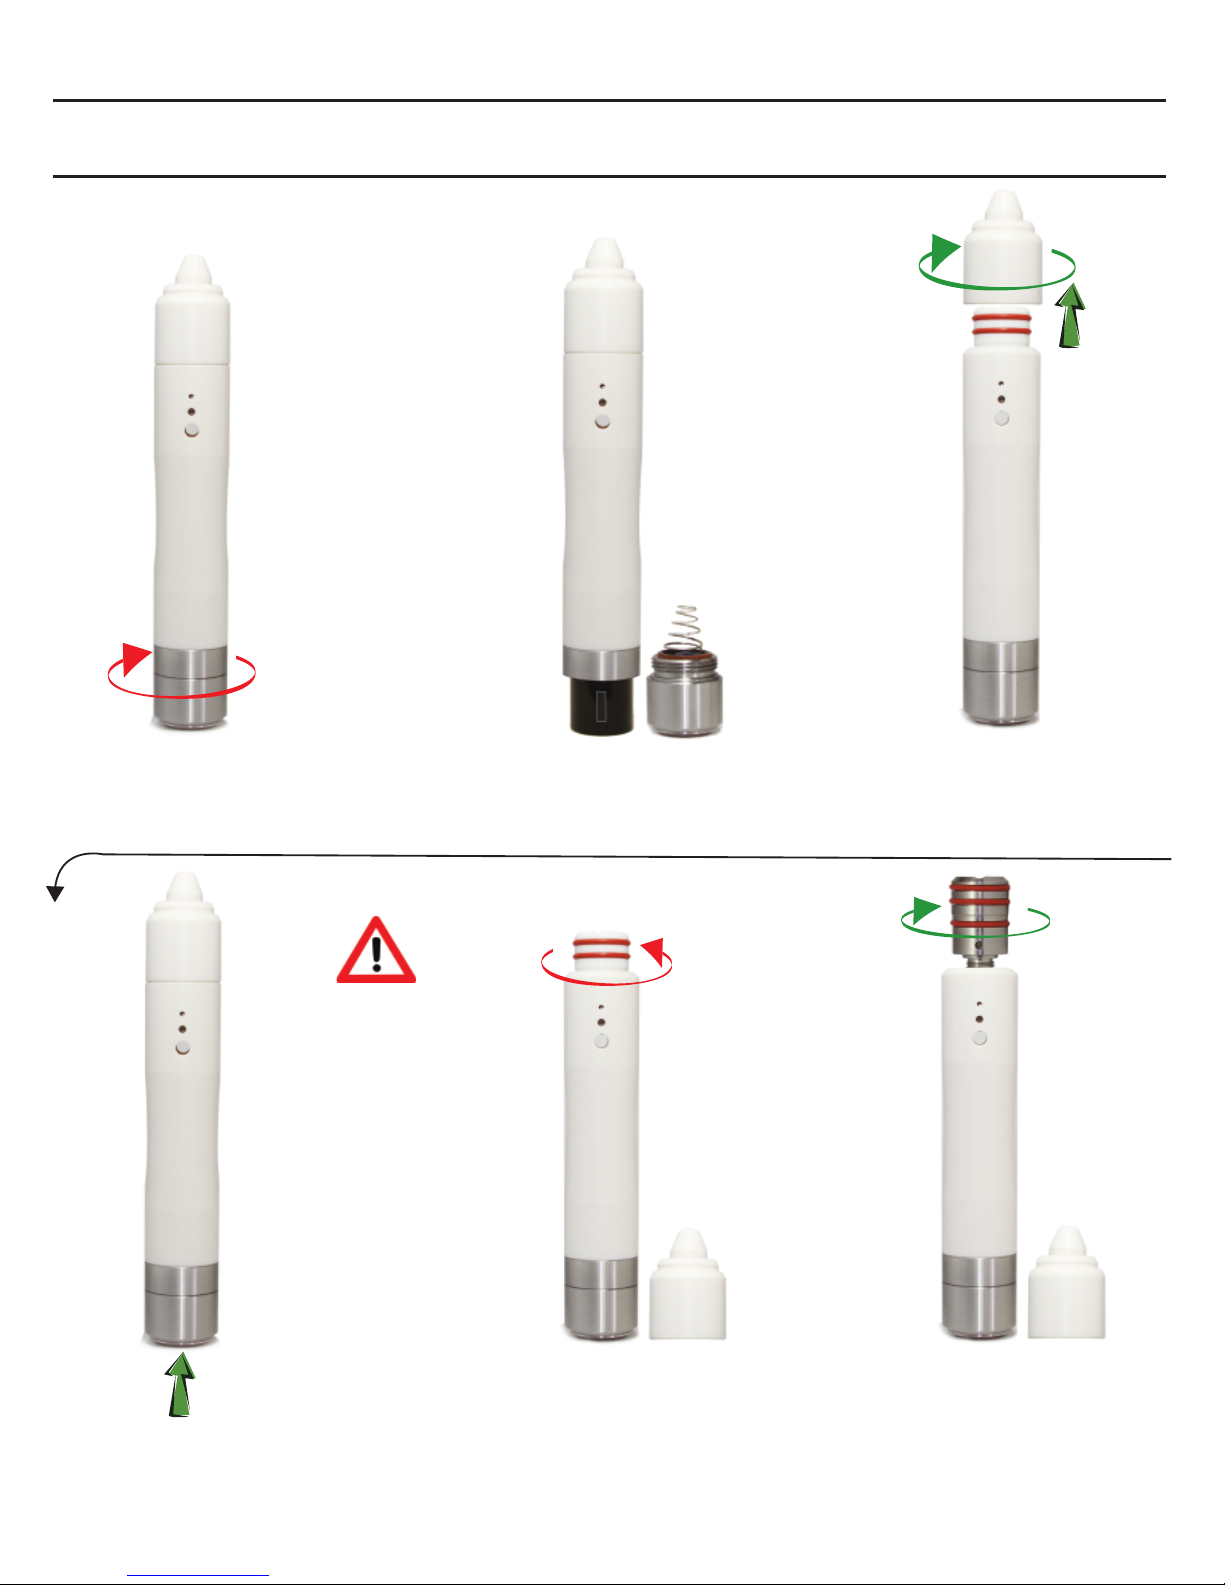
BASIC OPERATION
To insert battery turn
counter-clockwise to
remove bottom Switch
Insert charged
Battery positive side
up & re-insert Switch
To load pull Top Cap
off while applying a
clockwise twist
Depress and hold
Switch to turn on
*Caution: Heating
Core can be
extremely hot
Turn counter-clockwise
to remove heating core.
Turn clockwise
to re-insert
Heating Core
Page 6
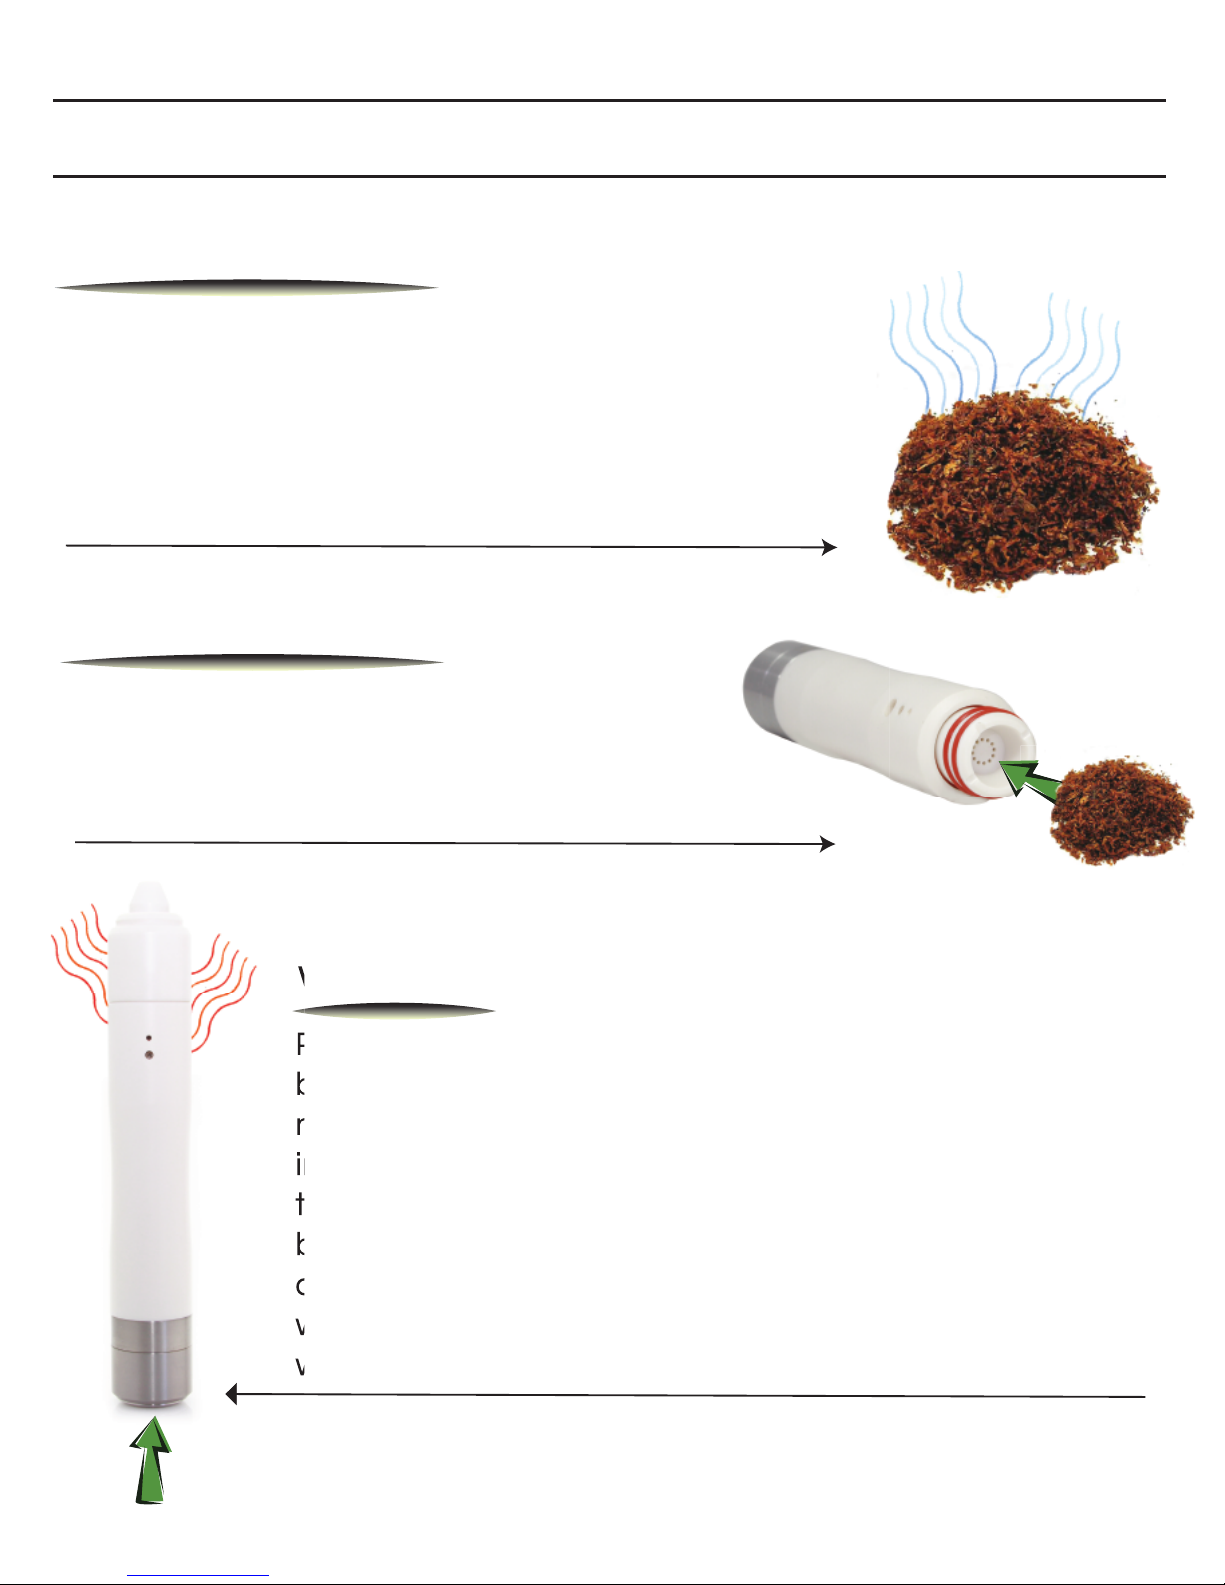
LOOSE LEAF STEPS
For the first technique, exploit the advantages of the
basic Cera system to simplify the task by drying the
material. Grind your botanicals and cure (dry) them
well. Removing the water before is important, it has
to be very dry to vape well (the water has to be evaporated off first, robbing vaping power in the process).
Peparing Material
Load the Cartridge with a medium to fine
grind of the material. Fill Cartridge to the brim
and lightly pack the material down. Place the
Top Cap and Mouthpiece over the Cartridge.
Loading Material
Warm Up
Proceed with a 20-30 second warm up time. This is done
by turning on the device by depressing and holding the
momentary Switch. Follow up with a very slow and steady
inhale, while keeping the power on. It is important to note
that the hot air needs to contact and circulate the chamber air, bringing the material up to vaping temperature. the
quicker the draw, the cooler the chamber will become,
while a slower draw will warm up the chamber; each user
will find their own preference.
Warm Up
that the hot air needs to contact and circulate the cham
quicker the draw, the cooler the chamber will become,
while a slower draw will warm up the chamber; each user
will find their own preference.
Page 7
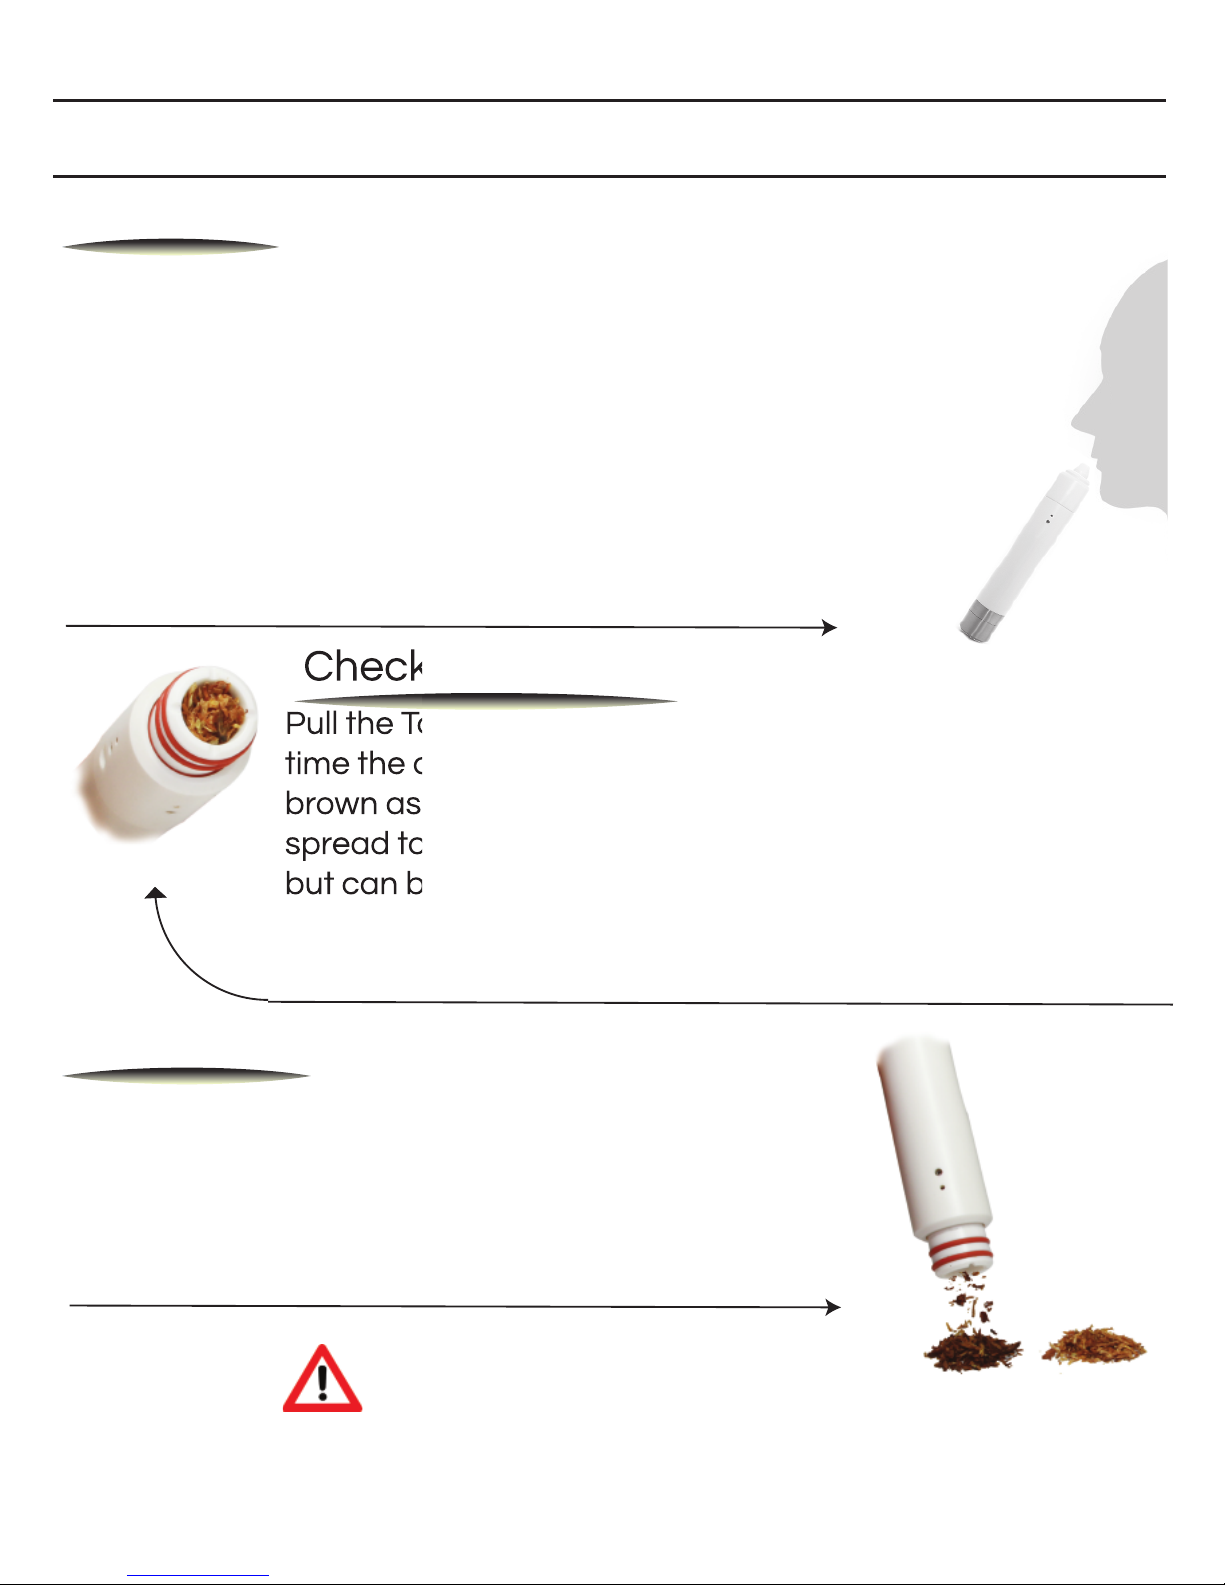
Inhalation
LOOSE LEAF STEPS cont.
The quicker the draw, the cooler the chamber will become,
while a slower draw will warm up the chamber; each user will
find their own preference. After each inhalation release the
switch to not overheat the material or the device, this will also
increase battery life. After the first initial warm up, the device
will retain the heat, back to back inhalations will not require a
warm up each time. It is recommended for the user to try different inhaling techniques, as some may work well for some
users, while other techniques will not.
Pull the Top Cap off at anytime to check the progress. Over
time the center part of the material will shift from green to
brown as vaping progresses. The darker area will naturally
spread to all of the material, no stirring is normally needed
but can be done. Most users stop vaping when production
tapers off, or a ‘burnt popcorn taste' appears. When these
symptoms occur, check material and reload if needed.
Checking Material
time the center part of the material will shift from green to
spread to all of the material, no stirring is normally needed
Reloading
When the vapor production tapers off, it will indicate
that most of the material has been vaporized.
Remove top cap to discard material (you will notice a
change in color), reload material as mentioned in
“Loading Material”
*Caution: Using the Cera
for an extended amount of
time can make the device
hot to the touch.
Page 8

Page 9
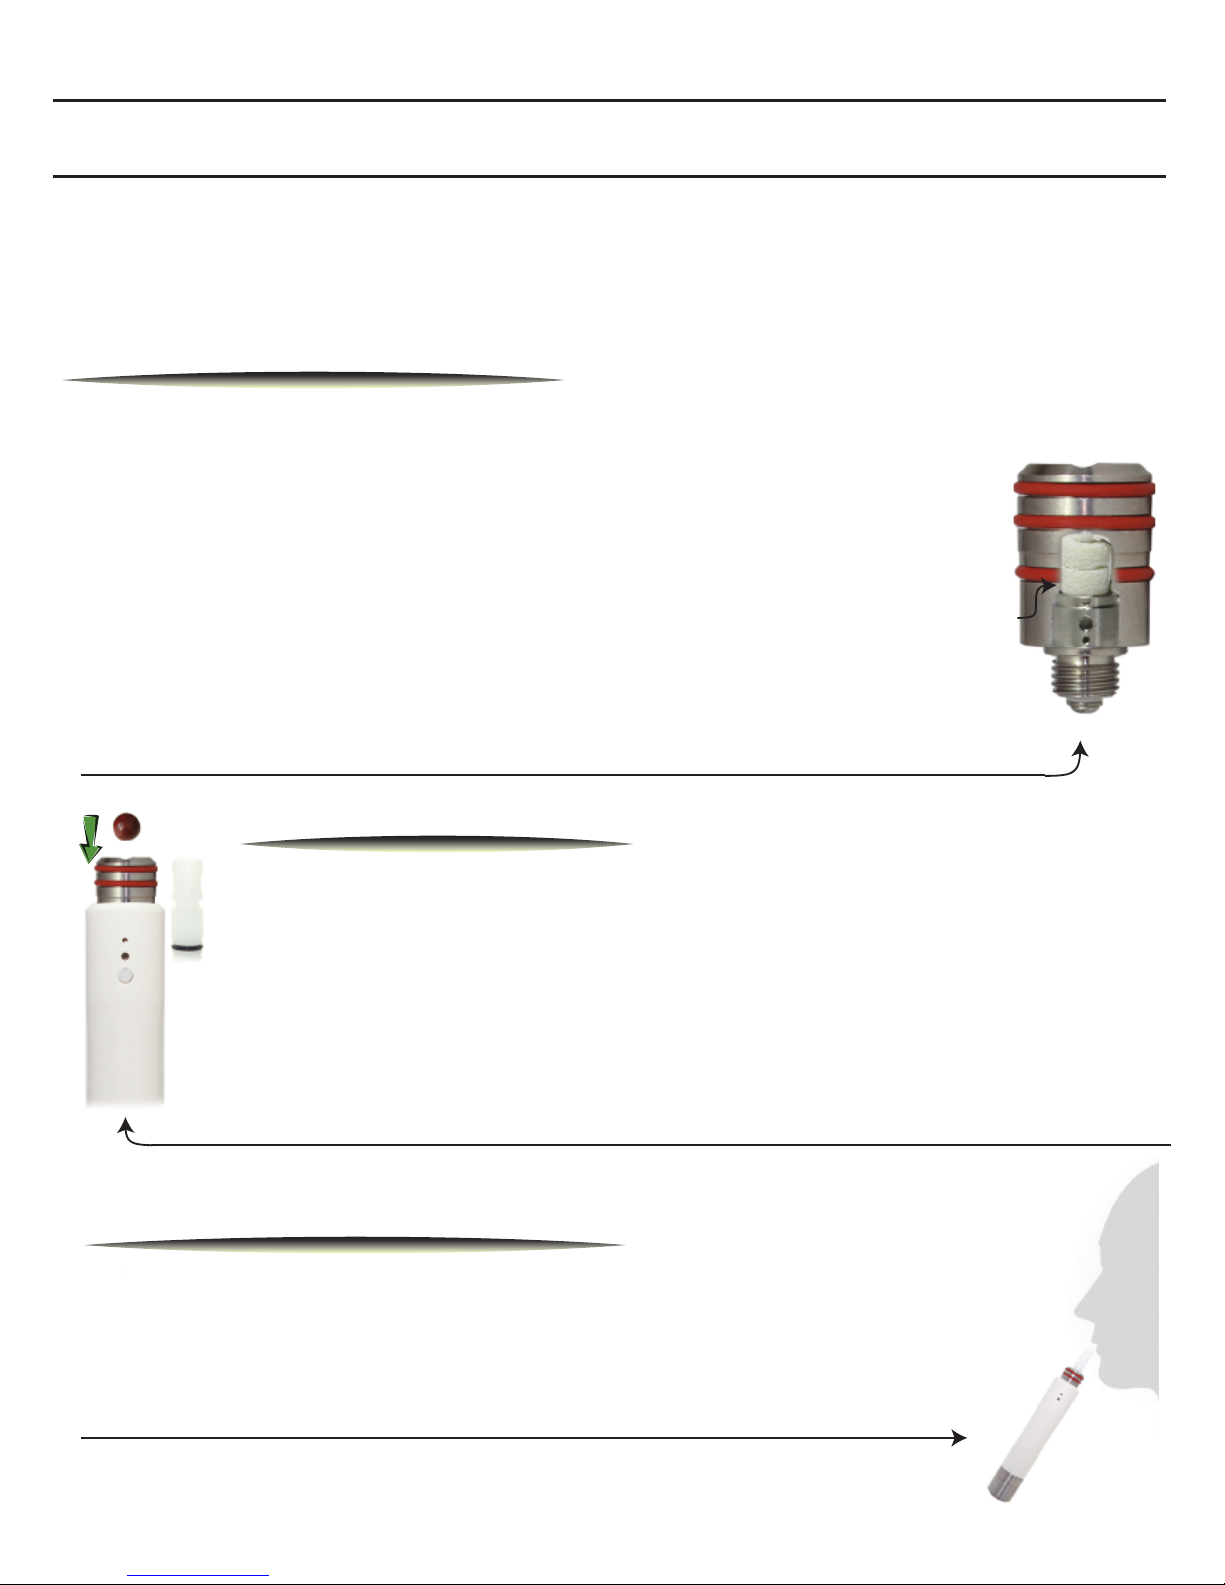
OIL STEPS
Material & Core Design
his Cartridge can hold up to .5 grams of oil, wax or butters. There are
some materials that will work but aren’t ideal for this Cartridge.
A few things to keep in mind; The Oil Cartridge is made up of 4
porous ceramic rings and 1 ceramic wafer on top. The rings
surround the heating core, suspending the material in close
proximity for efficiency and performance.
*
Material needs to be able to melt into a liquid to be absorbed into the porous
ceramic materials. Dried concentrates should be used in the Loose Leaf Cartridge
as they do not melt down and stay s
olid.
Loading Material
To load pull the Mouthpiece off and place material on top of the
porous ceramic wick, be cautious to not poke or scrape the
porous ceramic wick and cause unwanted damaged. Once the
substance is placed in the chamber, depress the Switch to warm
up the Chamber, you will notice the material liquefy and soak
into the porous ceramic. For thicker wax materials use a dull tool
to gently stir or pop any bubbles.
Warm-up & Inhalation
hen material is fully saturated into the porous ceramic the
device is now ready to be used. Depress switch to give a 5
second warm-up. Slowly inhale until vapor becomes thick,
once up to temperature inhale as you please.
(Porous Ceramic)
Cleaning: Is recommended when performance is lacking, it is part of
periodic maintained that varies with usage. We do recommend
cleaning when the device is stored for a long period of time as material
can harden and can damage the Heating Core.
Page 10
OIL STEPS CONT.
Checking & Reloading
When vapor production tapers off, this indicates that most of the
material has been vaporized. Remove the mouth piece and
check if the material walked up the walls of the chamber, if so
use a applicator to push material back down to the porous ceramic, once again be sure not to damage top ceramic. To reload
simply repeat the steps stated in “Loading Material”, it is suggested to put 0.25 gram of material for reloading.
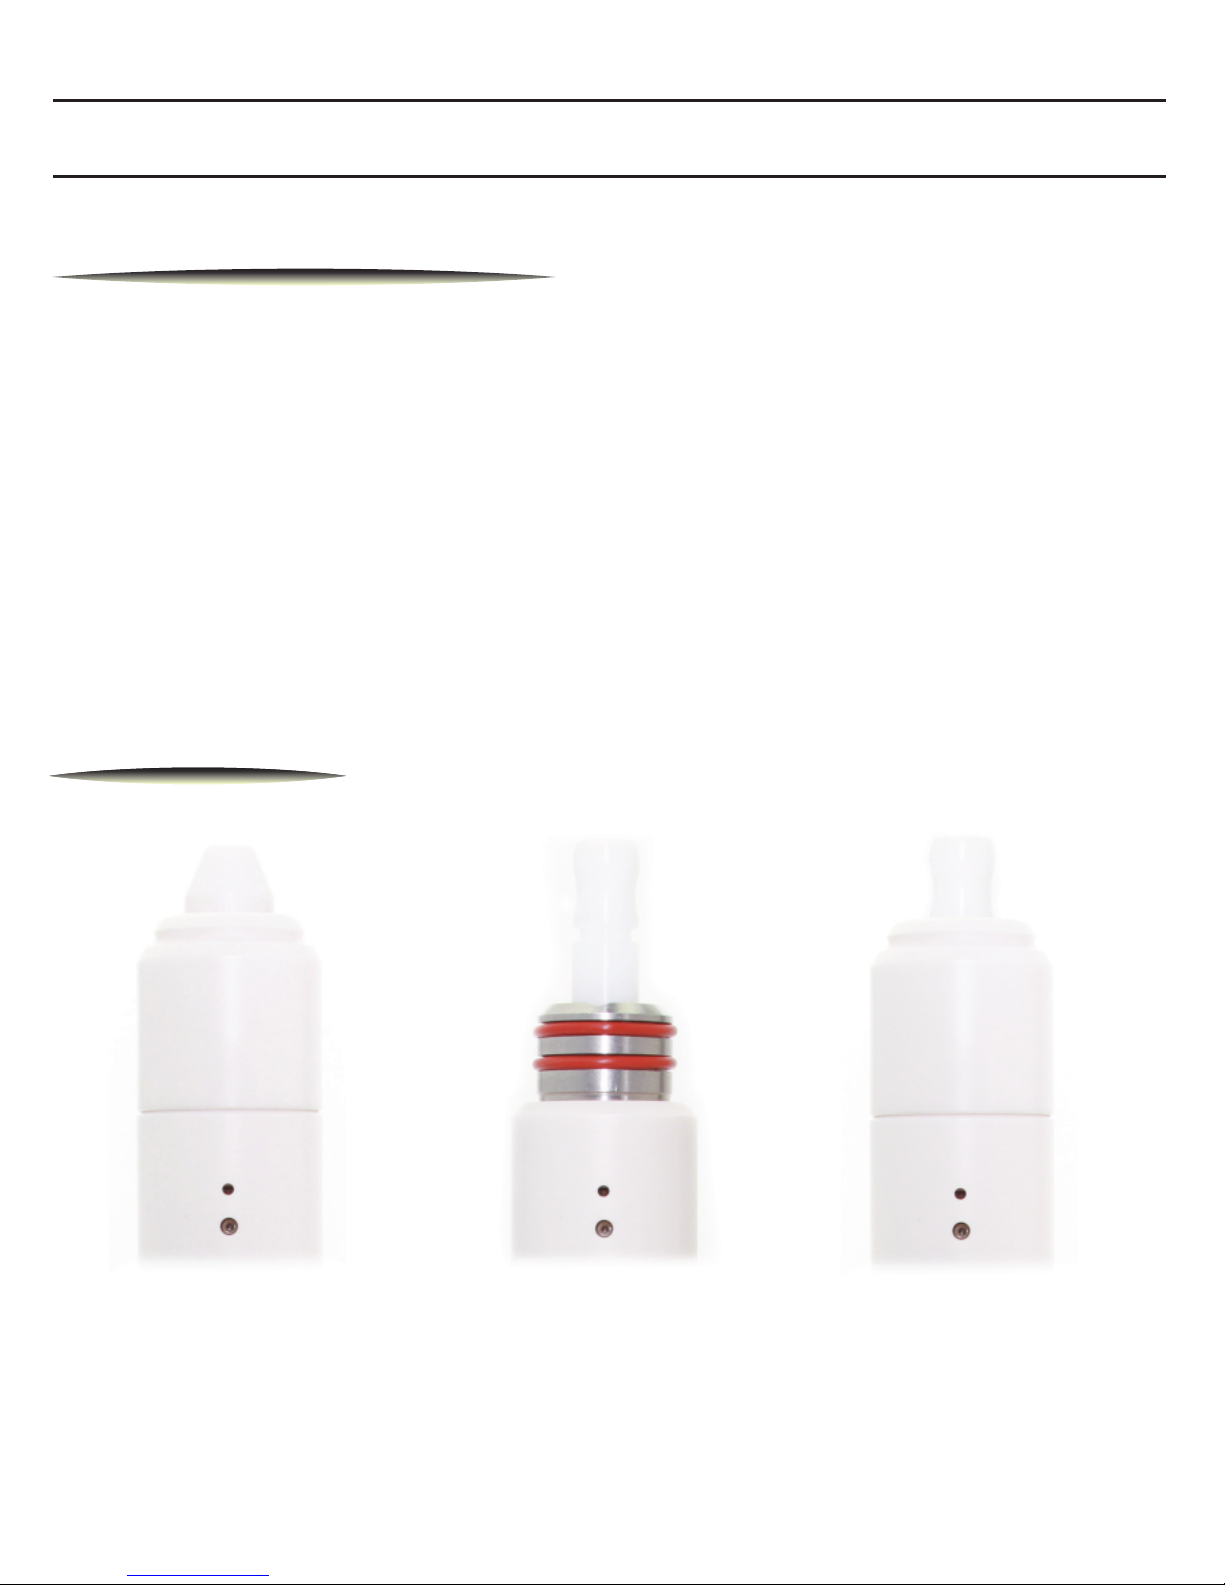
Mouthpieces
Ceramic Top Cap
with 510 mouth
piece
Ceramic Top Cap
& mouthpiece
510 Mouthpiece
Page 11
OIL CLEANING
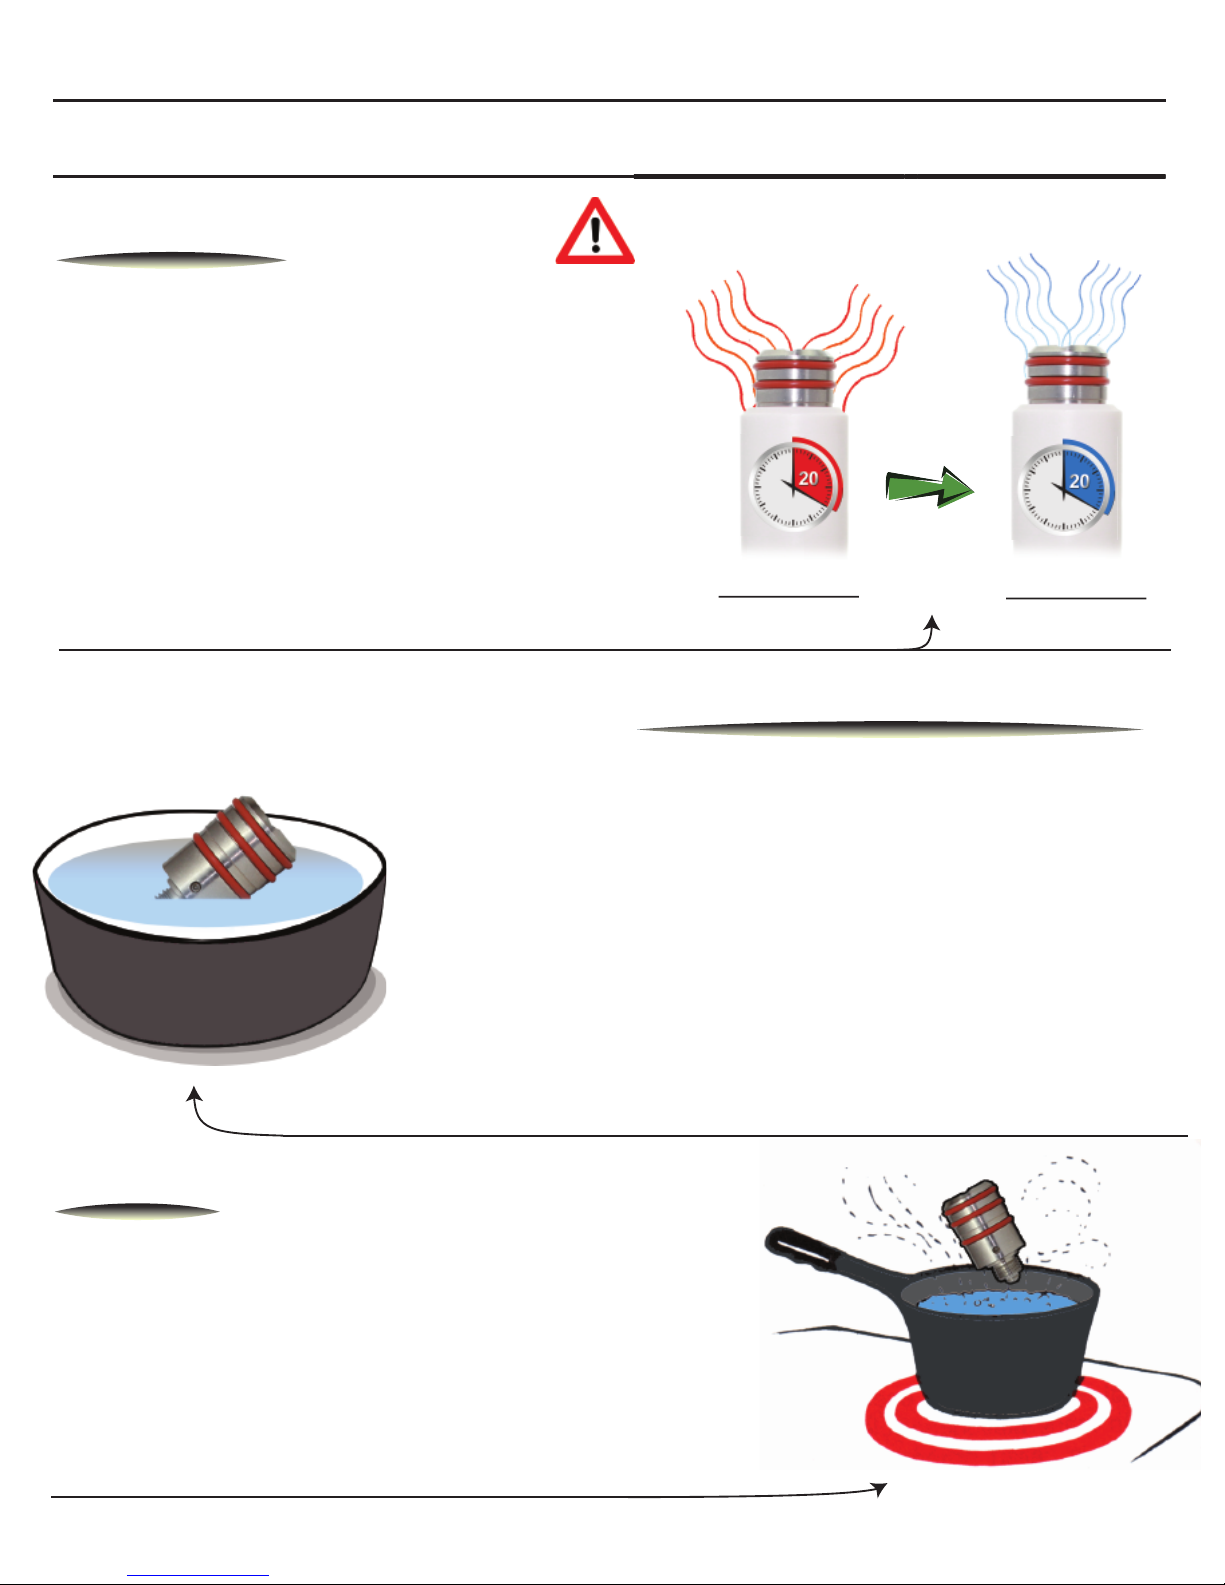
Dry Clean
Dry clean: First pull off mouthpiece
before cleaning. To dry clean simply
turn the device on for 20 seconds
and let the device cool off for another
20 seconds, repeat this cycle 3-5
times or until you see visible vapor
dissipate.
*Use caution with excessive cycles
as the heating core can become very hot, be
sure to let the core cool off between cycles.
20 Seconds on
20 Seconds off
Isopropyl Alcohol Soak
Unthread the heating chamber as described in “Basic
Operation”. Once removed get a container to hold the
Isopropyl Alcohol (91%+), place the Heating Chamber
in the container and make sure to fully submerge the
Chamber. Soak for 15-30 minutes and repeat if necessary. We also recommend to rinse or to boil Chamber
after an Isopropyl soak. Once cleaned allow adequate
time to dry, we recommend to let dry overnight.
*Do not
to force dry using ovens or internal heating element, as this may
damage the heating element.
Boiling
Unthread the Heating Chamber as described
in “Basic Operation”. Place Heating Chamber
in boiling water for 15-30 minutes; repeat if
necessary. Once cleaned it is important to fully
dry out the Heating Chamber before use. *
Do
not to force dry using ovens or internal heating element, as
this may damage the heating element.
*Caution: Heating
Chamber can be
extremely hot
Page 12
OIL CLEANING CONT.
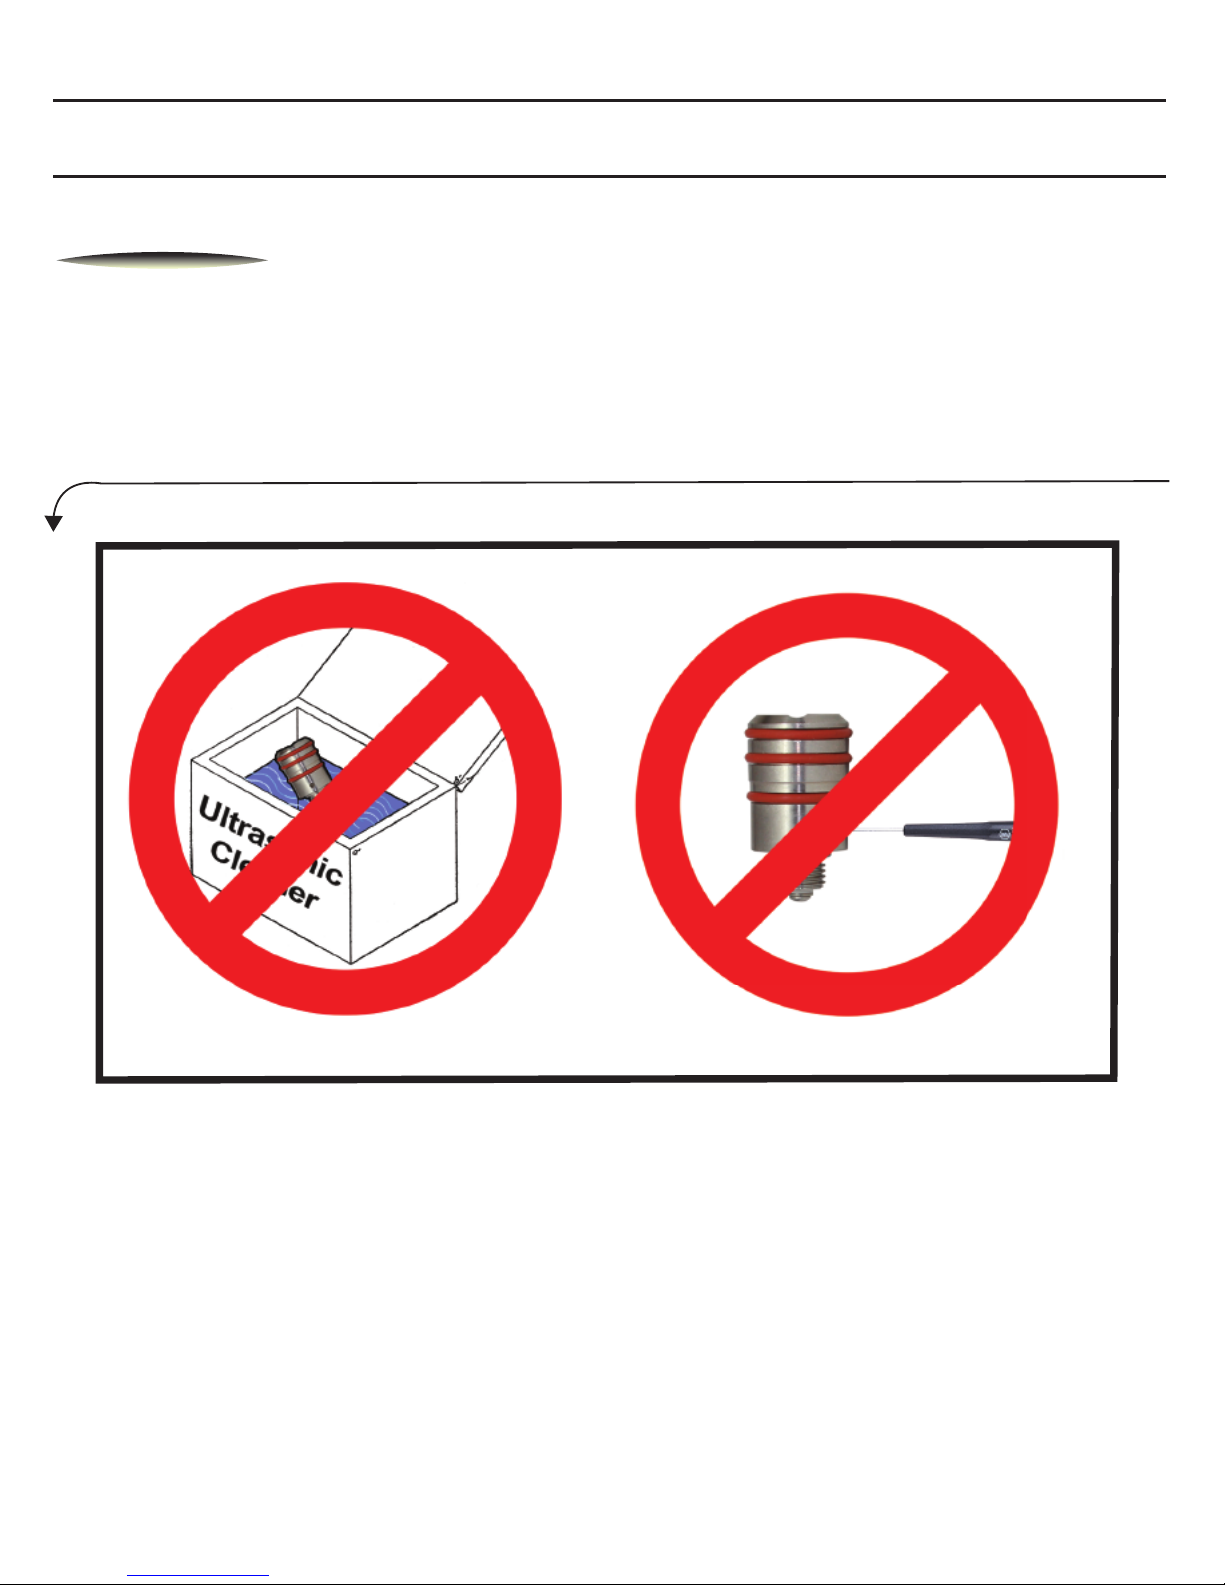
Warning
-Ultrasonic Cleaners are not recommended and will void the warranty;
the frequency of the cleaner has had a tendency to cause failure to
heading chambers.
-Do Not attempt to open Heating Chamber by removing screws and
internally clean. This will void warranty
Page 13
LOOSE LEAF CLEANING
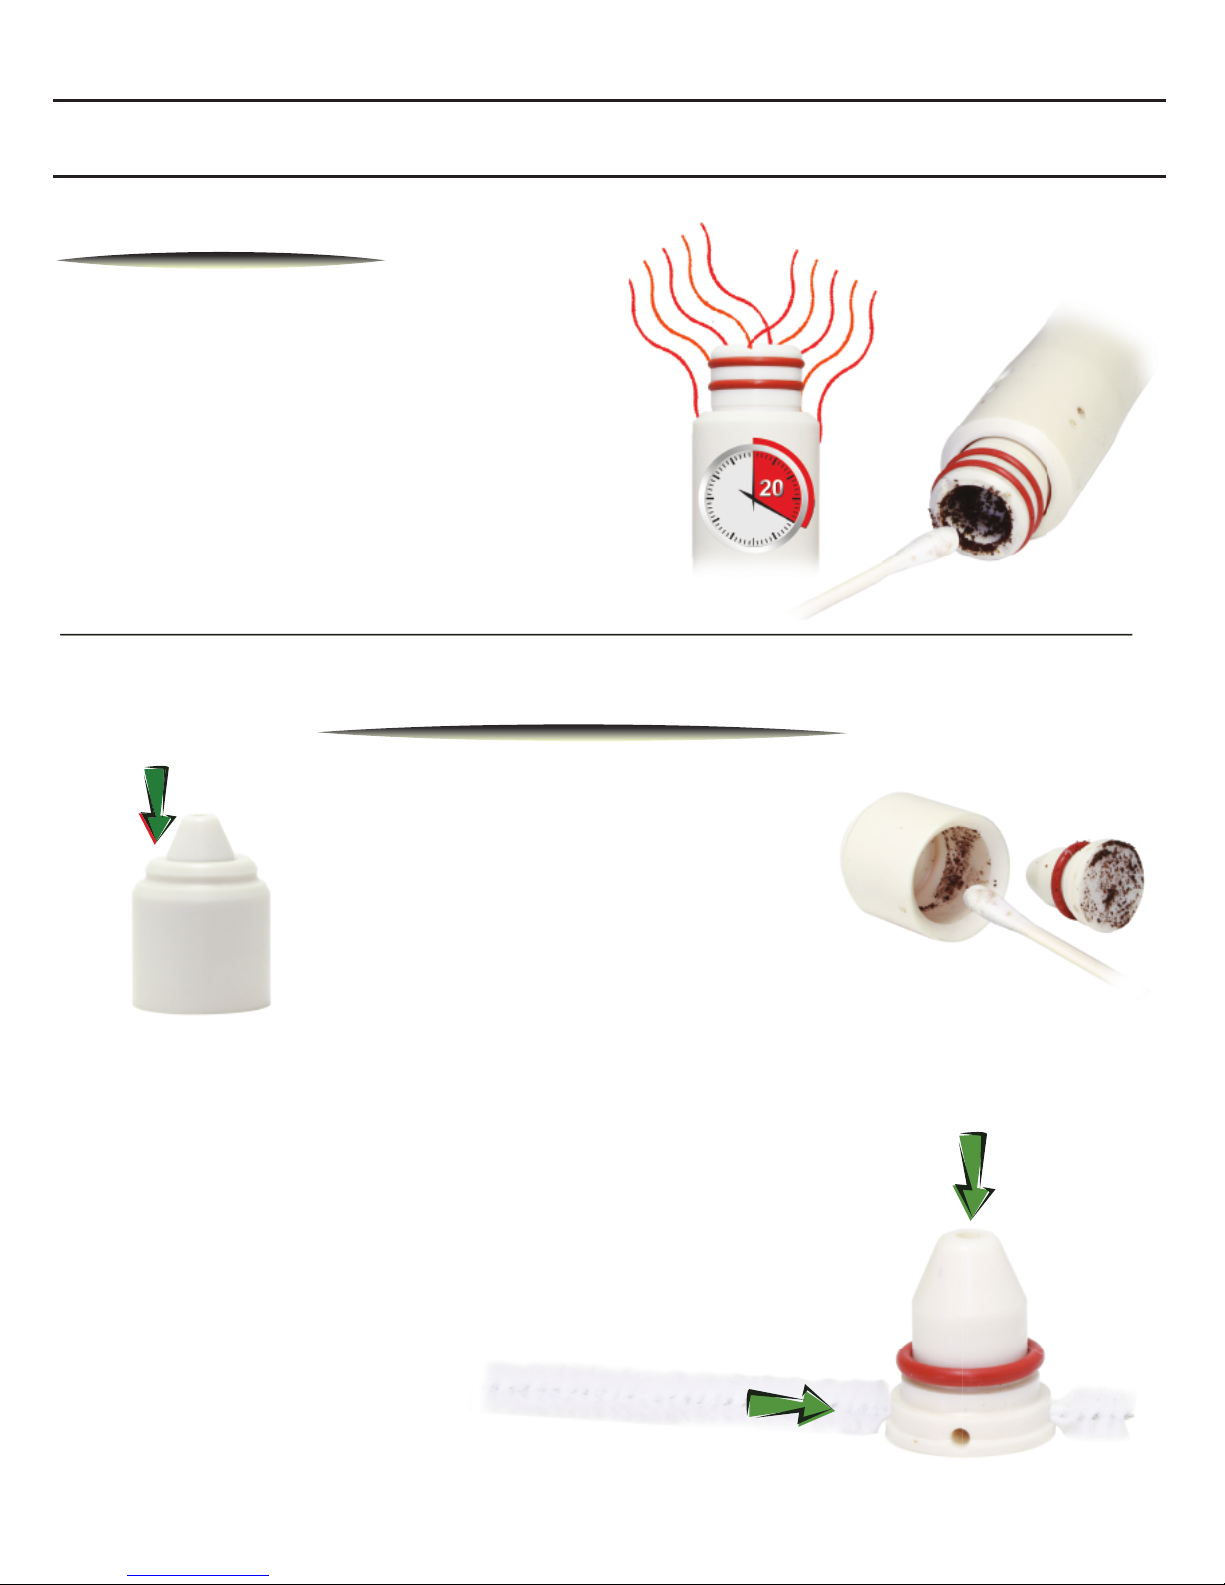
Dry/Wet Wipe
Remove Ceramic Top Cap, give a 20
second dry burn, this will warm the
residue on the Loose Leaf Cartridge.
With a Q-tip or tissue, simply wipe
the residue off the ceramic surfaces;
this works very well if the Q-tip or
tissue is lightly soaked with Isopropyl
Alcohol. Repeat if necessarily.
Mouthpiece Cleaning
Remove Top Cap, and press down on
mouthpiece; the two should sepa-
rate, be sure not to loose the O-ring
that sits around the mouthpiece.
With a Q-tip or tissue, wipe the
inside of the cap of residue, do
the same with the mouthpiece
and O-ring.
To clean the Mouthpiece, take a pipe cleaner and
run the cleaner through the air passages. Start
with the top passage, then continue to the side
passages. For the lower air passages, the pipe
cleaner should pass through and exit out of the
opposite side. Repeat as need, once or twice
should be sufficient
 Loading...