

Century 4-in-1 system Instruction Manual

CAR SEAT/
STROLLER
INSTRUCTION
MANUAL
English PM-0725AC 4/98
Do not use this 4-in-1 System
until you read and understand
these instructions!
IMPORTANT INFORMATION
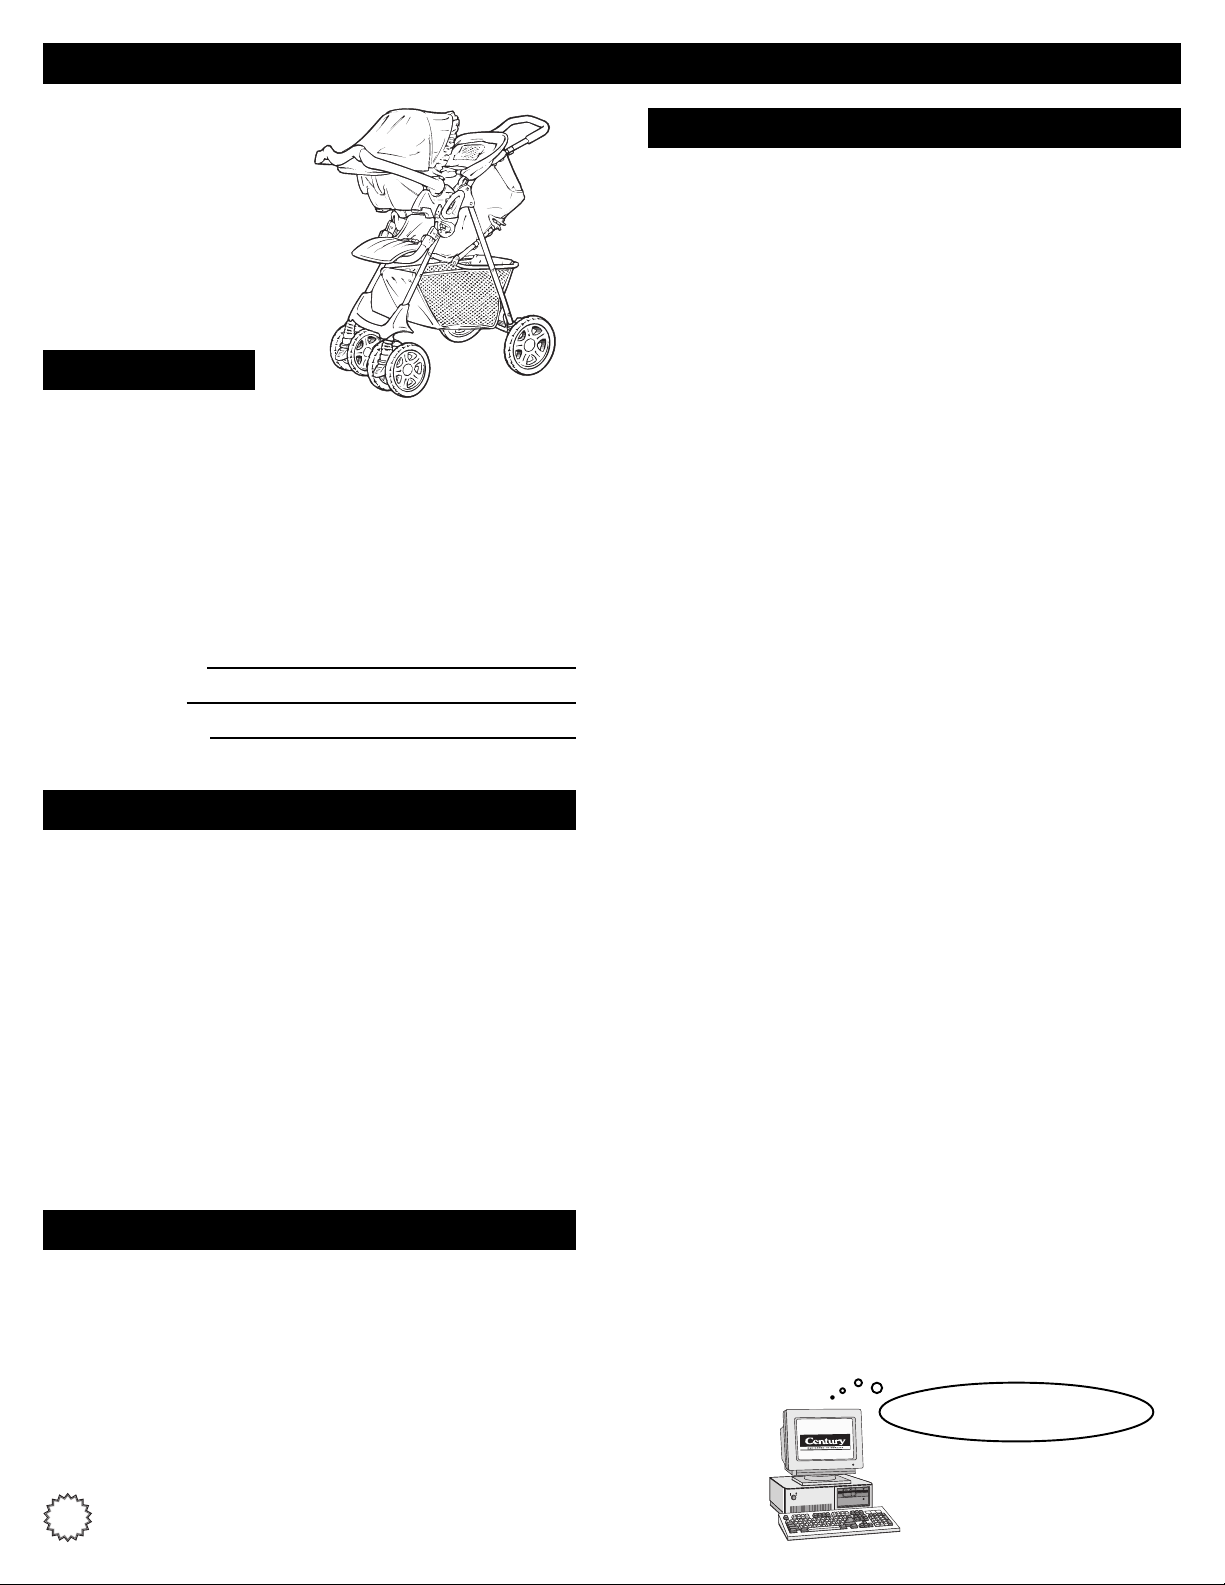
Thank you for selecting this
4-in-1 Car Seat/Stroller which
can be used as:
• Infant Car Seat
• Infant Carrier
• Car Seat/Stroller
• Stroller
Need Help?
If you need help with this product, call toll-free 1-800-837-4044
from anywhere in the U.S. or Canada. Outside these areas
please call 330-963-2800 8:00 AM until 6:00 PM E.S.T.
Monday through Friday.
Or write us at: Century Products Company
9600 Valle y View Road
Macedonia, OH 44056-2096
Attention: Consumer Relations Department
Please have available the following information. See label on leg
of stroller.
Date of Purchase:
Model Number:
Manufacture Date:
Table of Contents
Page:
1 Important Information
2 Warnings
3 Car Seat/Stroller Assembly
Opening Stroller
Front Wheel Assembly
Locking Footrest
Rear Wheel Assembly
Attaching Car Seat Adapter
5 Car Seat/Stroller Use
To Use Brakes
To Lock Or Unlock Front Wheel Swivels
To Attach Car Seat
To Remove Car Seat
7 Stroller Use
Safety First Check List
✔Read and understand instruction manual before using stroller.
✔Read and understand car seat instruction manual before using
car seat in a vehicle.
✔Use the SmartFit® Plus Base provided with this product only
with a Century Assura™, SmartFit® or SmartFit® Plus Infant
Car Seat.
✔Never leave child unattended.
✔Use with only one (1) child at a time.
✔Do not use accessories other than those provided by Century.
NOTE: All warnings and instructions apply whether stroller is
being used with or without napper bar in the use position.
Weight & Height Limits
• Car Seat/Stroller Use:
- Less than 9 kg (20 lbs.)
- Less than 69 cm (27 inches)
To Use Brakes
To Lock Or Unlock Front Wheel Swivels
To Remove Car Seat Adapter
Canopy Positions
To Use Napper Bar
Seat Back Positions
To Secure Child With Harness
9 Folding and Storing
10 Maintenance
Cleaning
To Remove Front Wheel Assembly
To Remove Rear Wheel Assembly
Dented Wheels
11 Replacement Parts
• Stroller Use:
- Up to 15.9 kg (35 lbs.)
- Up To 101 cm (40 inches)
1
Save instruction manual for future reference.
Visit us at our Web site!
www.centuryproducts.com

WARNINGS
• Never leave child unattended.
Always keep child in view, even
when sleeping.
- Children may become tangled in
harness straps and suffocate.
- Stroller may roll away, crash and
seriously injure child, even with
brakes engaged.
• Avoid serious injury from falling or
sliding out. Always use seat belt.
• Avoid serious injury or strangulation,
child in stroller seat when car seat adapter is attached.
Remove adapter assembly
BEFORE
DO NOT
using stroller seat.
place
• DO NOT
or pull down on car seat or stroller
handle.
- Stroller may tip over.
- Car seat handle may break.
• DO NOT
at a normal walking speed only.
Fast walking, jogging or running
can cause loss of control and
injure child.
allow children to play, hang
jog with stroller. Push stroller
• DO NOT
or escalators with child in it because
child could fall out and be injured.
•
DO NOT
car seat handle or car seat shell. •
Handle may break.
pull or carry stroller on stairs
lift car seat/stroller unit by
• DO NOT
Maximum basket weight is 4.5 kg
(10 lbs.). Stroller may become
unstable and tip over and injure
child.
• DO NOT
or canopy as stroller could tip over and
injure child.
overload basket.
hang anything on handlebar
• DO NOT
stroller may tip over and injure child.
allow child to climb unassisted into stroller as
• DO NOT
Century.
use accessories other than those provided by
2
Stroller Right
Side
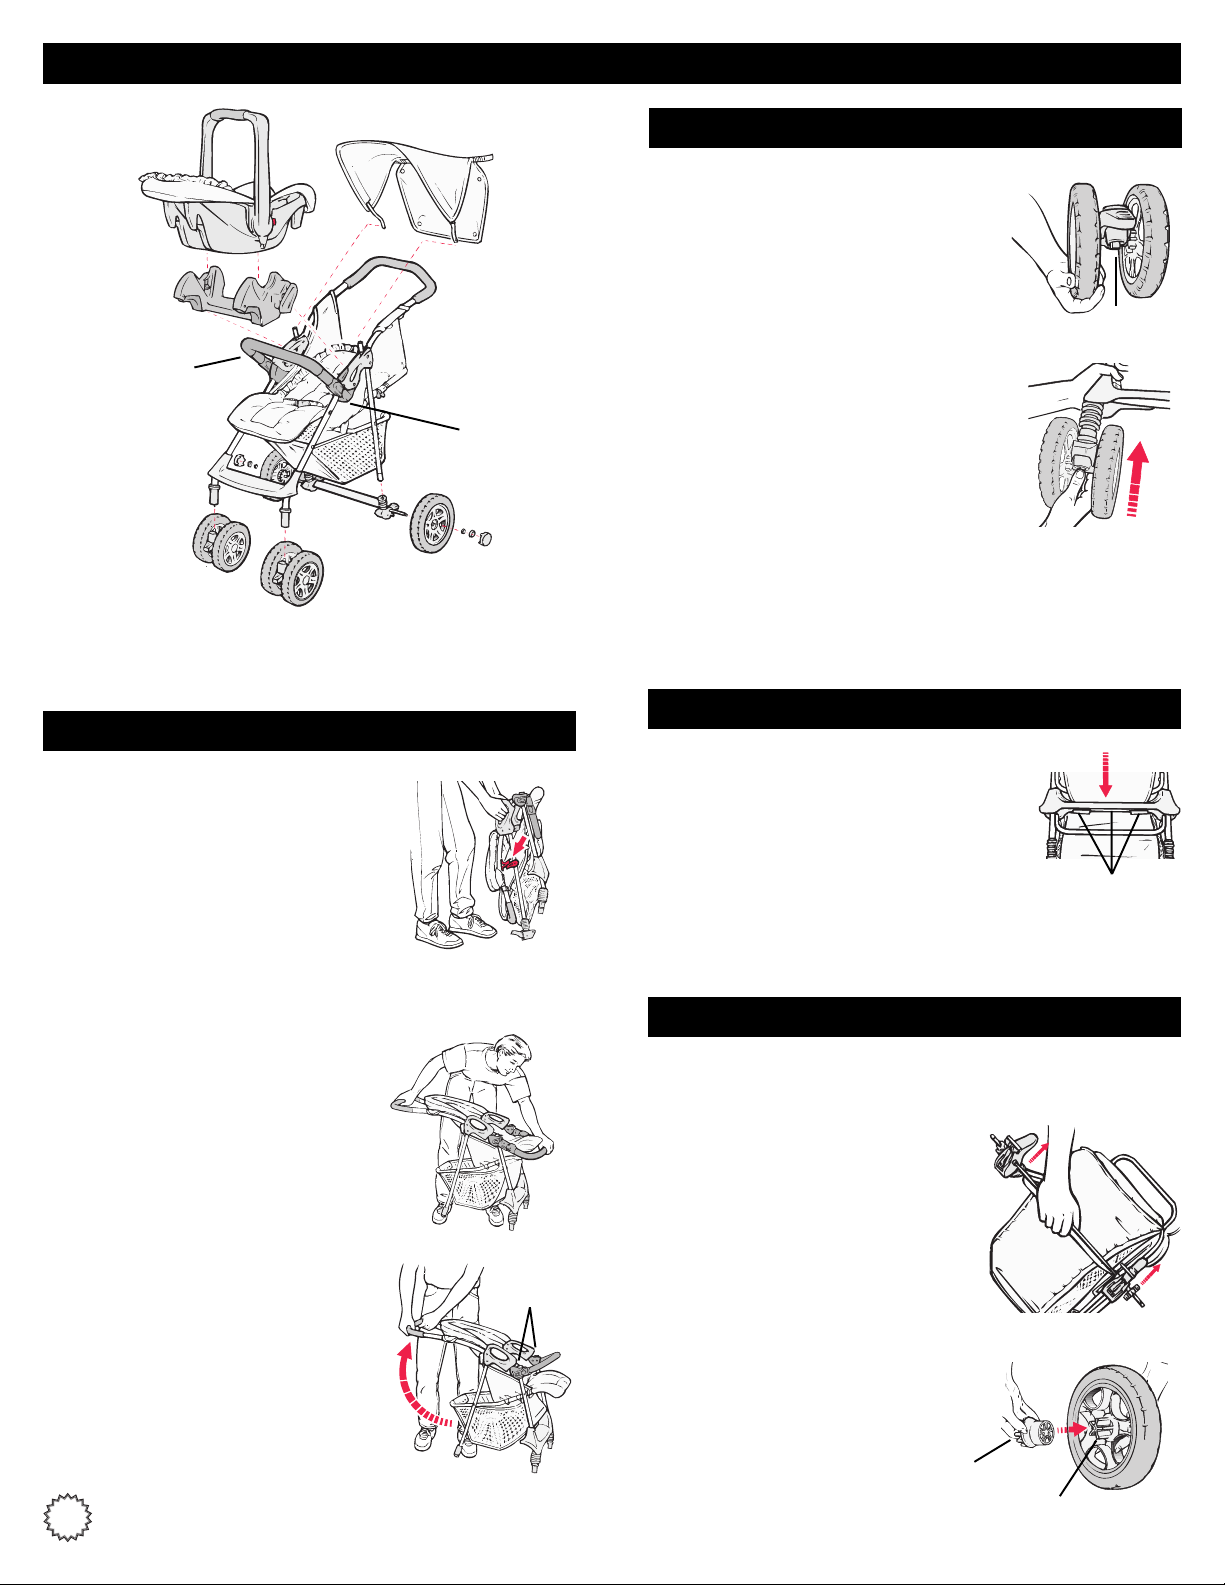
CAR SEAT/STROLLER ASSEMBLY
Front Wheel Assembly
1Hold swivel wheel assembly upright
(tab pointing down).
2Tilt stroller slightly back and push wheel
Stroller Left
Side
assembly onto leg until it
place.
Repeat steps 1 and 2 for opposite leg.
CAUTION: After wheel assembly is complete, pull on
wheels to check that they are
locks
in
locked
Tab
in place.
Opening Stroller
1Stand stroller upright and pull tab to
release latch.
2Raise napper bar over lower edge of seat
and push into slots.
NOTE: Stroller ma y be used without
napper bar raised. If using stroller
without napper bar raised, skip step 2.
3Spread handle and rear legs until both
fold locks
“click”
into position.
Fold Locks
Locking Footrest
Push footrest down so that frame cross tube
is centered between three (3) tabs on
bottom of footrest until it snaps in place.
Tabs
Rear Wheel Assembly
1Remove axle protectors from ends of axle and discard.
2With stroller laying face down on
floor, slide brake lever brackets onto
rear legs until your hear a click.
NOTE: Brak e lever
handle.
must
face stroller
3With connector ribs facing out, push
connector onto wheel ribs.
Connector
Ribs
3
Wheel
Ribs
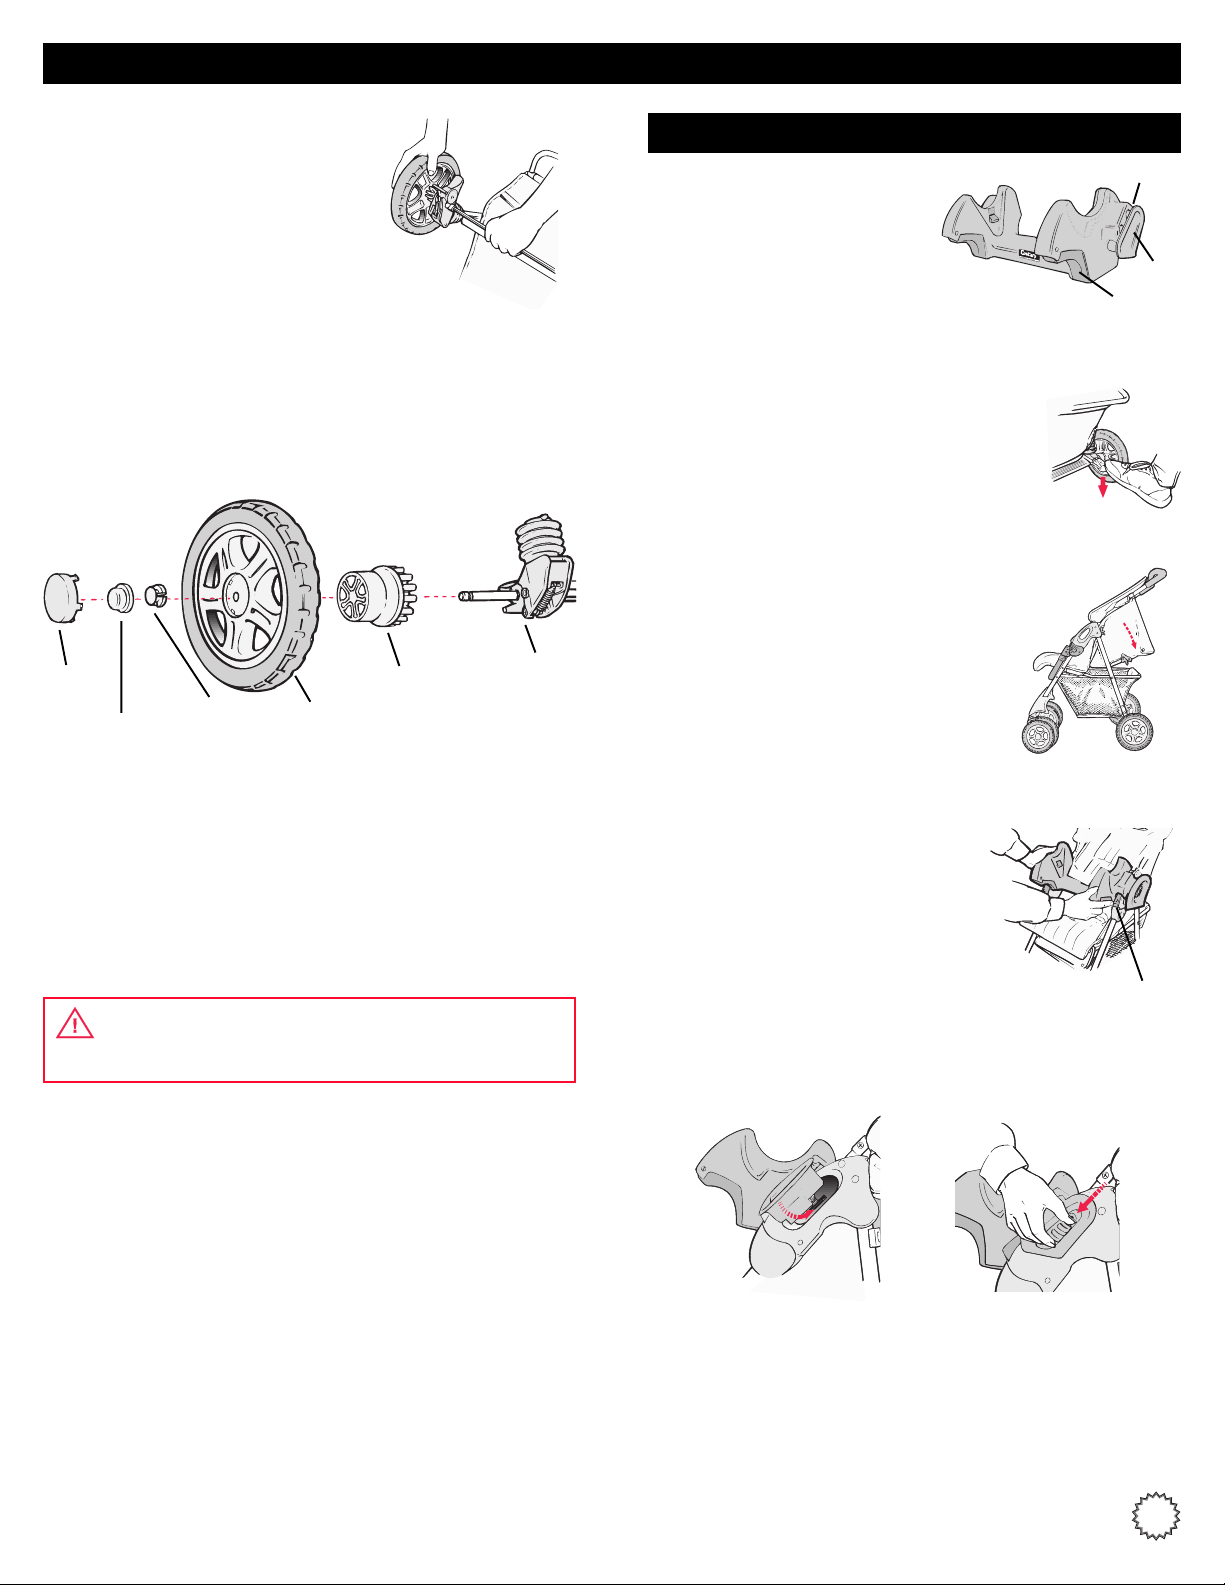
CAR SEAT/STROLLER ASSEMBLY continued
4Slide wheel connector onto end of axle
rod with ribs and connector facing in.
Attaching Car Seat Adapter
5Secure wheel to axle:
• Snap wheel retainer onto grooved end of axle. Make sure
large end of wheel retainer is towards wheel.
• Snap wheel retainer cap over wheel retainer.
• Line up hub cap tabs with slots in wheel and snap hub cap
in place.
Hub
Cap
Retainer
Cap
Wheel
Retainer
Wheel
Connector
Brake
Lever
Bracket
Before using car seat/stroller, you
MUST
attach car seat adapter to
stroller.
1Set footbrakes to prevent stroller from
moving.
NOTE: It is only necessary to push
down on one brake lever. Both brakes
are locked from either side.
2Stroller seat back
position to use car seat adapter.
MUST
be in the reclined
Bracket
Catch
Release
Trigger
CAUTION:
- Failure to install retainer cap may cause wheels to
come off of stroller.
- After wheel assembly is complete, pull on wheels to
check that they are locked into place.
WARNING
Prevent a possible choking hazard, discard axle protectors
and polybag which contained rear wheel parts.
3Align sides of adapter brackets so
that stroller handle grip buttons are
below adapter brackets.
NOTE: Adapter release triggers
MUST
face away from stroller.
Button
4Rotate adapter brackets into handle grip openings while
sliding catch down.
5Release catch when in place.
Pull on adapter to be sure it is securely attached.
4
 Loading...