

Page 1
www.centro-rc.com
CENTRO
C0030 CENTRO C4.1 CARBON BATTERY X BRACE
C0031 CENTRO C4.1 CARBON BATTERY HOLDERS
C0032 CENTRO C4.1 30G BRASS BULKHEAD (USE WITH C0034)
C0033 CENTRO C4.1 BRASS FRONT BRACE (USE WITH C0032)
C0034 CENTRO C4.1 DELRIN FRONT BRACE (USE WITH C0032)
C0035 CENTRO C4.1 15G BRASS BULKHEAD WEIGHT (USE WITH C0034)
C0036 CENTRO C4.1 10G BRASS BULKHEAD WEIGHT (USE WITH C0034)
C0037 CENTRO C4.1 5 BRASS BULKHEAD WEIGHT (USE WITH C0034)
C0038 CENTRO C4.1 15G ACKERMAN PLATE
C0039 CENTRO C4.1 BRASS 10G UNDER BELL CRANK WEIGHT
C0001 CENTRO C4.1 CONVERSION KIT
C0005 CENTRO C4.1 BODYSHELL & WING CLEAR
C0006 CENTRO C4.1 ALUMINIUM 5251-H22 CHASSIS
C0007 CENTRO C4.1 ALUMINIUM BATTERY X-BRACE
C0008 CENTRO C4.1 ALUMINIUM LIPO BATTERY HOLDER
C0009 CENTRO C4.1 MACHINED DELRIN GEARBOX CASINGS (L/R)
C0010 CENTRO C4.1 FRONT BRACE POSTS
C0011 CENTRO C4.1 ALUMINIUM FRONT SUSPENSION BRACE
C0012 CENTRO C4.1 ALUMINIUM REAR SUSPENSION BRACE
C0013 CENTRO C4.1 REAR INNER HINGE PINS
C0014 CENTRO C4.1 REAR CARBON FIBRE SHOCK TOWER
C0015 CENTRO C4.1 REAR WING MOUNTS
C0016 CENTRO C4.1 LOGO DECAL SHEET
AS9706 B44 LIPO POSTS
AS9360 IDLER GEAR
AS9361 IDLER GEAR SHAFT
AS89072 TURNBUCKLE
AS6278 REAR TOWER BALL STUD .400 SILVER
AS9751 LAYSHAFT SPACER CRUSHTUBE
AS25568 BALL JOINTS/BALLS FOR BRACE
AS4449 4-40 LOCK NUTS (LIPO HOLDER, STUDS)
AS6913 4-40 1 1/4 (LONG GEARBOX SCREW) 4-40 X 3/8 FHCS CSK
FAST140 FASTRAX M3 BLUE COUNTERSUNK WASHER (STRAP)
FAST142-2 FASTRAX M3 1.0MM WASHER (RIGHT GEARBOX)
FAST142-4 FASTRAX M3 2.0MM WASHER (LEFT GEARBOX, WING, BALL STUD
FTBB01 IDLER BEARINGS
OPTION PARTS & ACCESSORIES
INSTRUCTIONS
Page 2
www.centro-rc.com
CHASSIS>>>
Welcome to the Centro C4.1conversion kit for the B4.1. Convert
your rear-motor car to a mid-motor in a few easy steps. Designed
and tested to suit high bite astroturf, carpet and multi-surface
tracks where the rear-motor car falls short.
Please follow the instructions carefully as we know most men
don’t give them a second glance. For most hardened racers the
majority of the conversion is self explanatory but the car does
require 2 areas where clearances need to be checked and
adjusted accordingly.
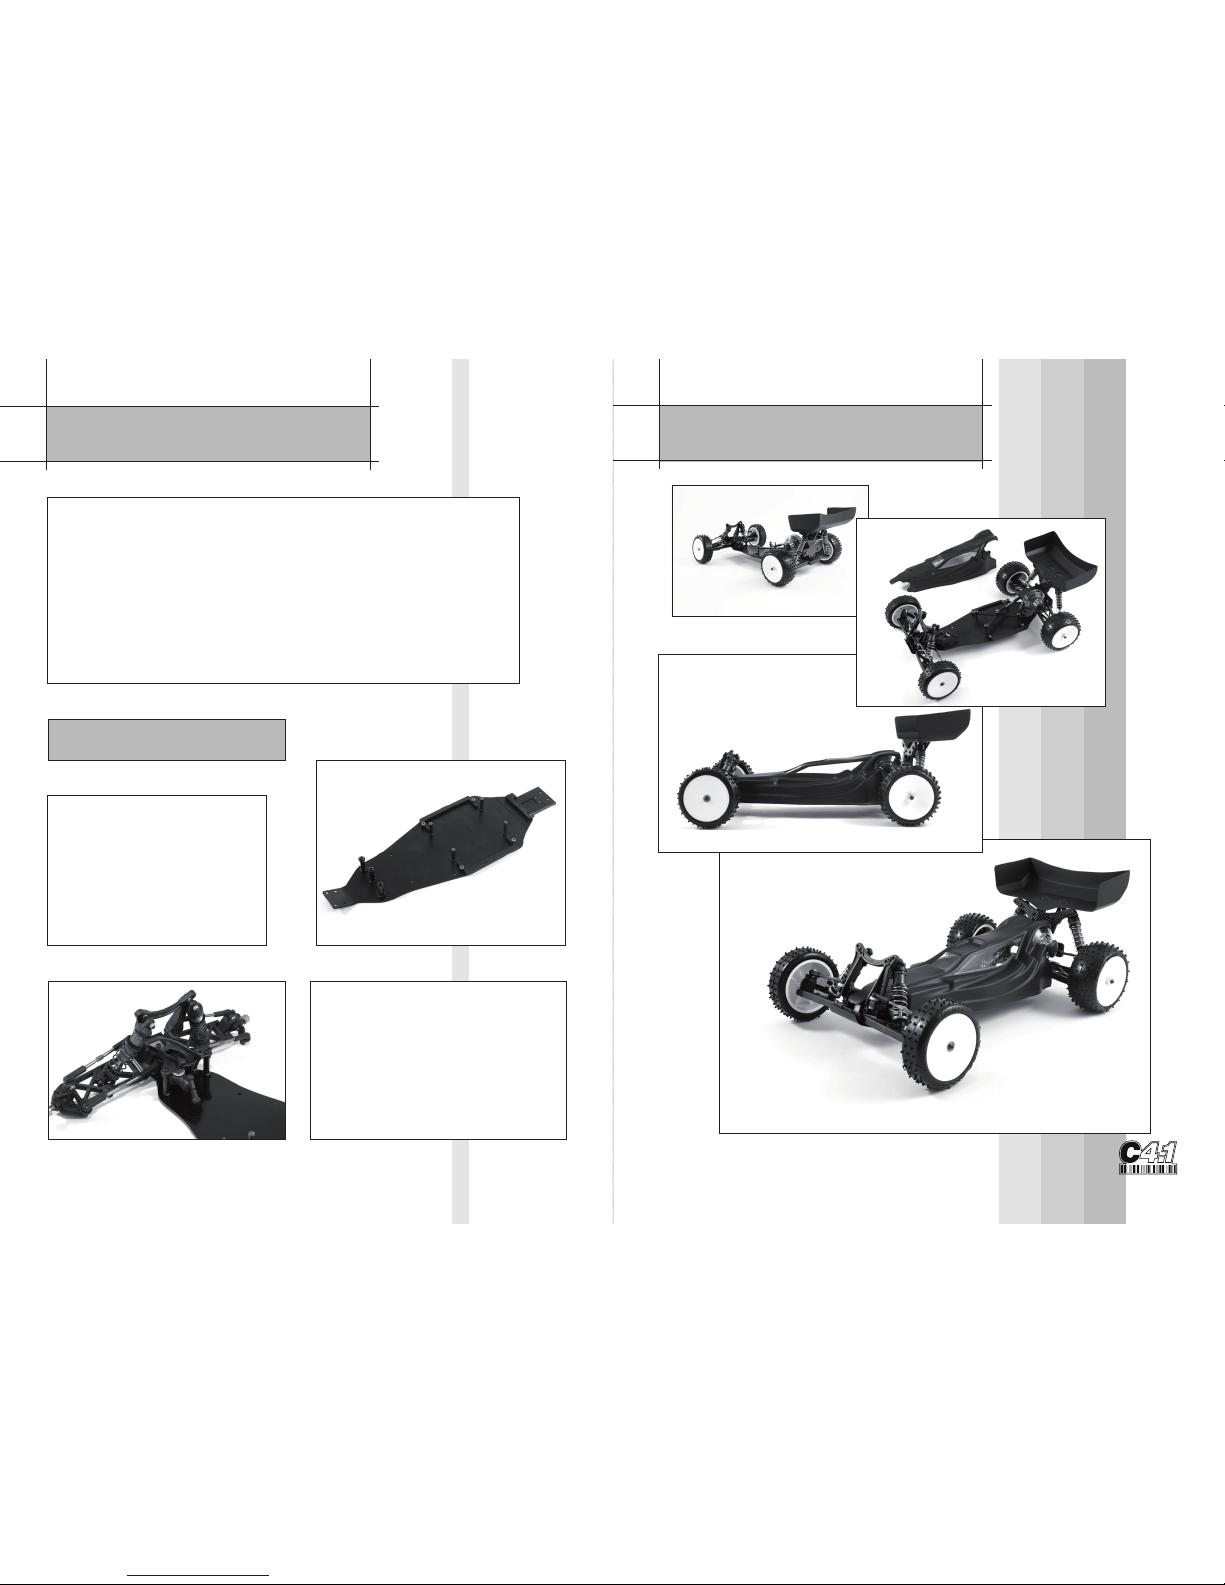
Using the 4-40 x 3/8 length
screws and relevant 4-40
gold lock nuts provided.
Screw and fix into place the
front posts, lipo holders,
battery posts and rear front
block. See picture.
Attach your pre-assembled B4.1
front end onto the centro chassis
and 3 posts as a complete unit
and screw into place. Refer to your
B4.1 instructions for a detailed front
end assembly. All parts should fit
perfectly into place.
INTRODUCTION>>>
FINISHING TOUCHES >>>
>
>
Page 3
www.centro-rc.com
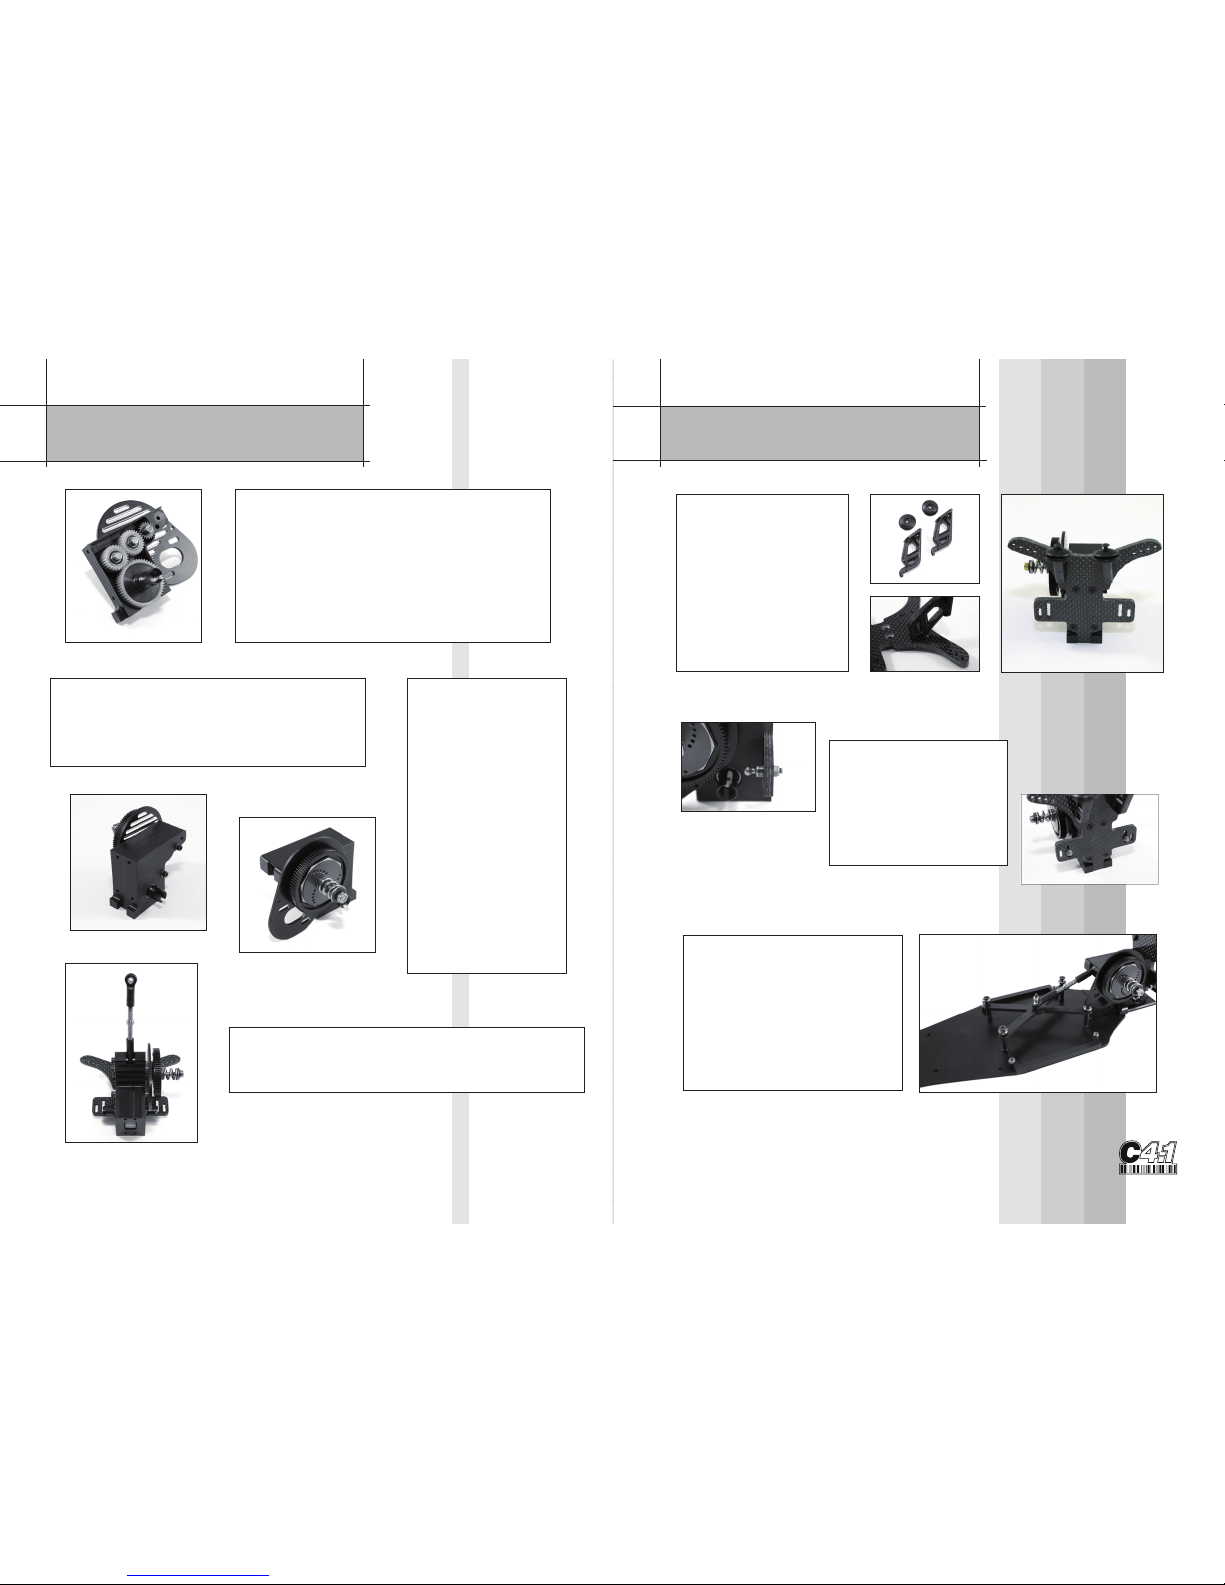
Slide the remaining 2x 2 mm spacers into
place on the motor plate side. It’s a tricky
job so take your time. Make sure all 4
spacers are in place.
Using the 2 long
screws and 2x 1mm
washers screw
the gearbox case
together ensuring
you take your time
and dont cross
thread the
motor plate.
Use a small amount
of thread lock and
don’t overtighten.
The gearbox should
spin freely.
Fix the gearbox to the chassis
using 4x 4-40 3/8 screws.
Take care not to over tighten.
Adjust the chassis brace to
the correct length and place
the X brace over the posts
into position.
Add the long ball studs
into position using the
2mm washers provided.
See CML website for
set-up location
and information.
Assemble the slipper clutch as per the B4.1
instruction manual. Assemble the chassis brace
and slide it into place and tighten.
Once you have the layshaft spacing tuned
correctly. Place all the gears into place. The
gears will all sit at the same height.
Clip the two sides together and check that
everything spins freely. The case should clip
together with no visable gap between the
two halves.
Attach the wing
mounts to the tower
using the M3 screws
and 2MM washers
provided and attach
the tower to the
backside of
the gearbox.
GEARBOX CONT>>>
TOWER AND BRACE >>>
>
>
>>
>
>
>
>
>
Page 4
www.centro-rc.com
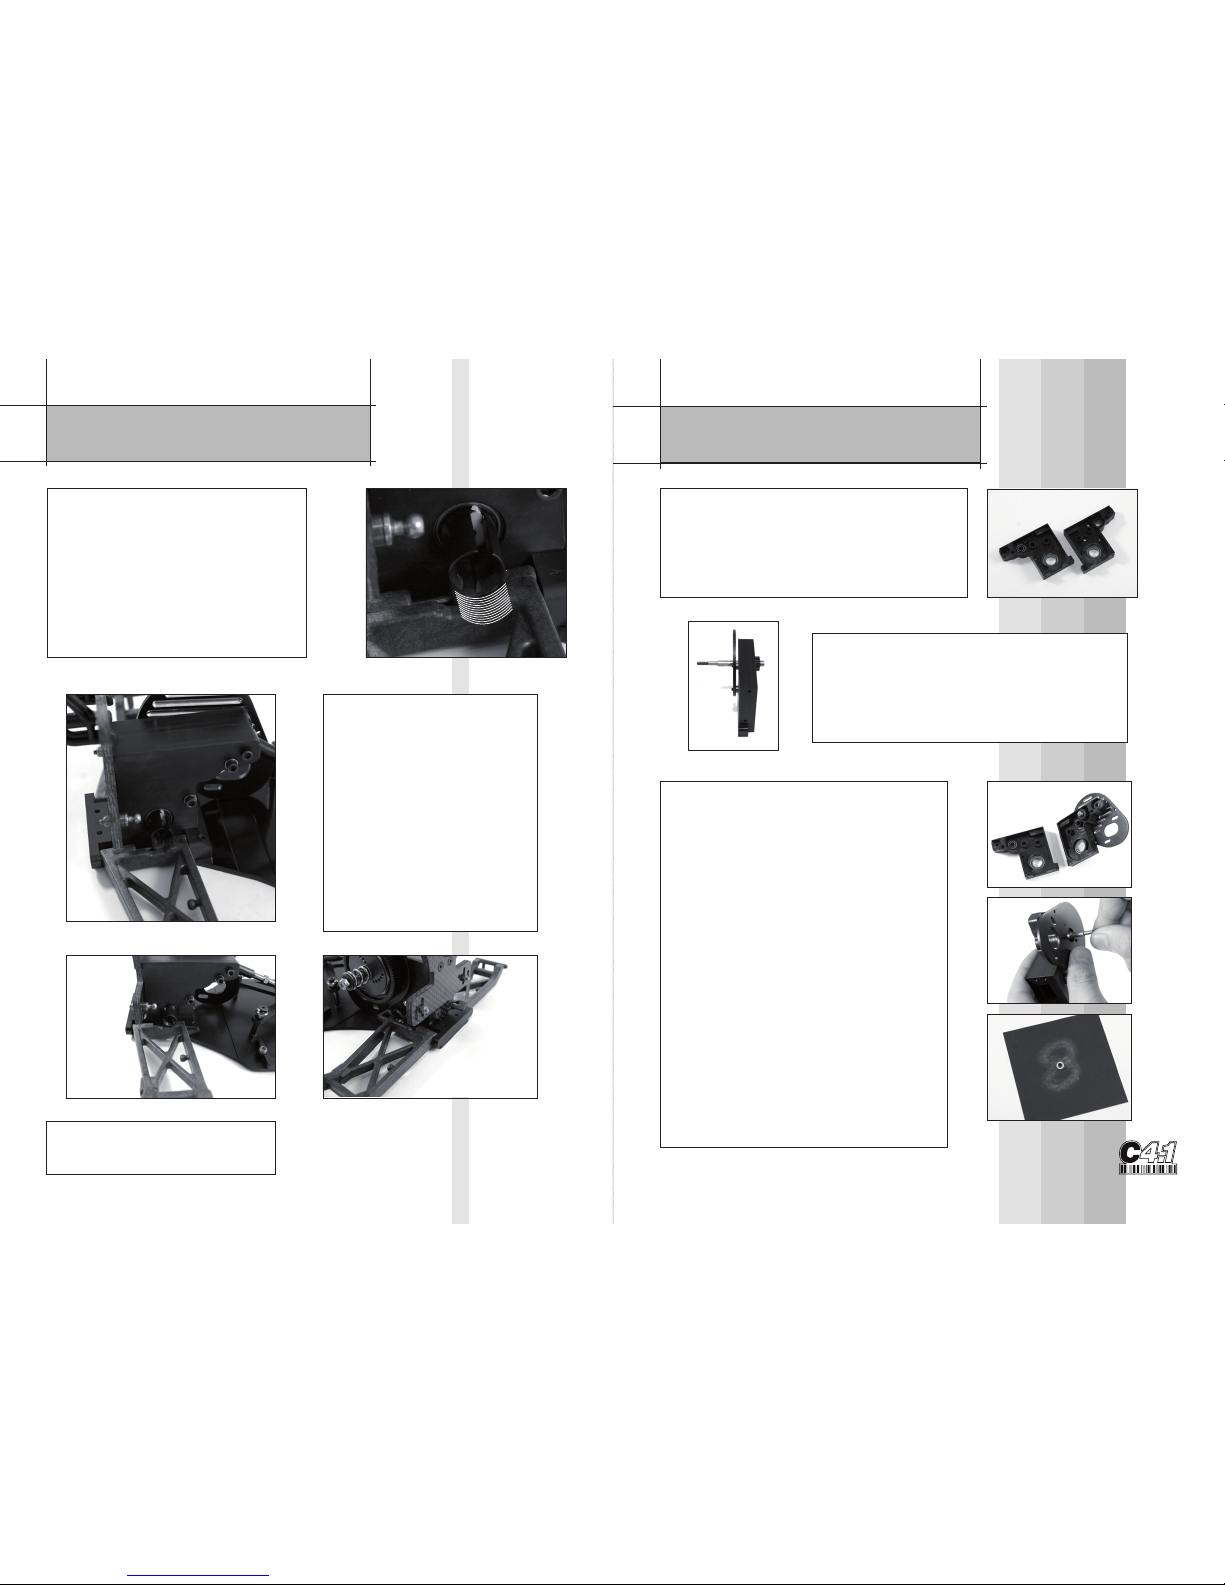
Attach the modified arms
to the rear front block
using the shortened hinge
pins provided. Fix the rear
suspension block in place
and screw to the chassis.
See CML web-site for
set-up advice on anti-squat
positions. 1 & 2 degree
options are available. Flip the
rear block to adjust.
Please note: these pictures do
not show the arm modification.
Make a clearance modification to
the rear arm as shown here. This
will allow for increased up travel. A
standard dremel sanding drum is
best. Just a few mm will need to be
taken off. This is required because
the Centro C4.1 gearbox sits lower
than the standard B4.1
GEARBOX>>>
ARM MOD & FIXING>>>
Place all 4 bearings into position. Make
sure they are firmly pressed into and
seated correctly.
Pease Note: The bearings are a snug fit.
This is normal
Screw the motor plate to the LHS gearbox
case using the 2 CKS screws & 2x 2mm
washers provided. Use a small amount of
threadlock and nip the 2 screws tight.
Don’t overtighten.
Your kit may come with 1 large layshaft
spacer or 2-3 thinner spacers. Shim
accordingly so a small amount of end
float is achieved.
Put the layshaft spacer on the layshaft
and slide the shaft into place. Now clip
the two halves together.
Apply a small amount of pressure to
test that the layshaft spins freely. If it
doesn’t then remove 1 of the smaller
spacers or:
With fine sand paper layed out flat on
the table. Sand the large spacer in a
figure of 8 for around 10 second on
each side.
Repeat until a small amount of end float
is achieved.
>
>
>
> >
>
>
>
 Loading...