

Page 1
© 2004 ORBYX ELECTRONICS. All Rights Reserved
CD Stereo System
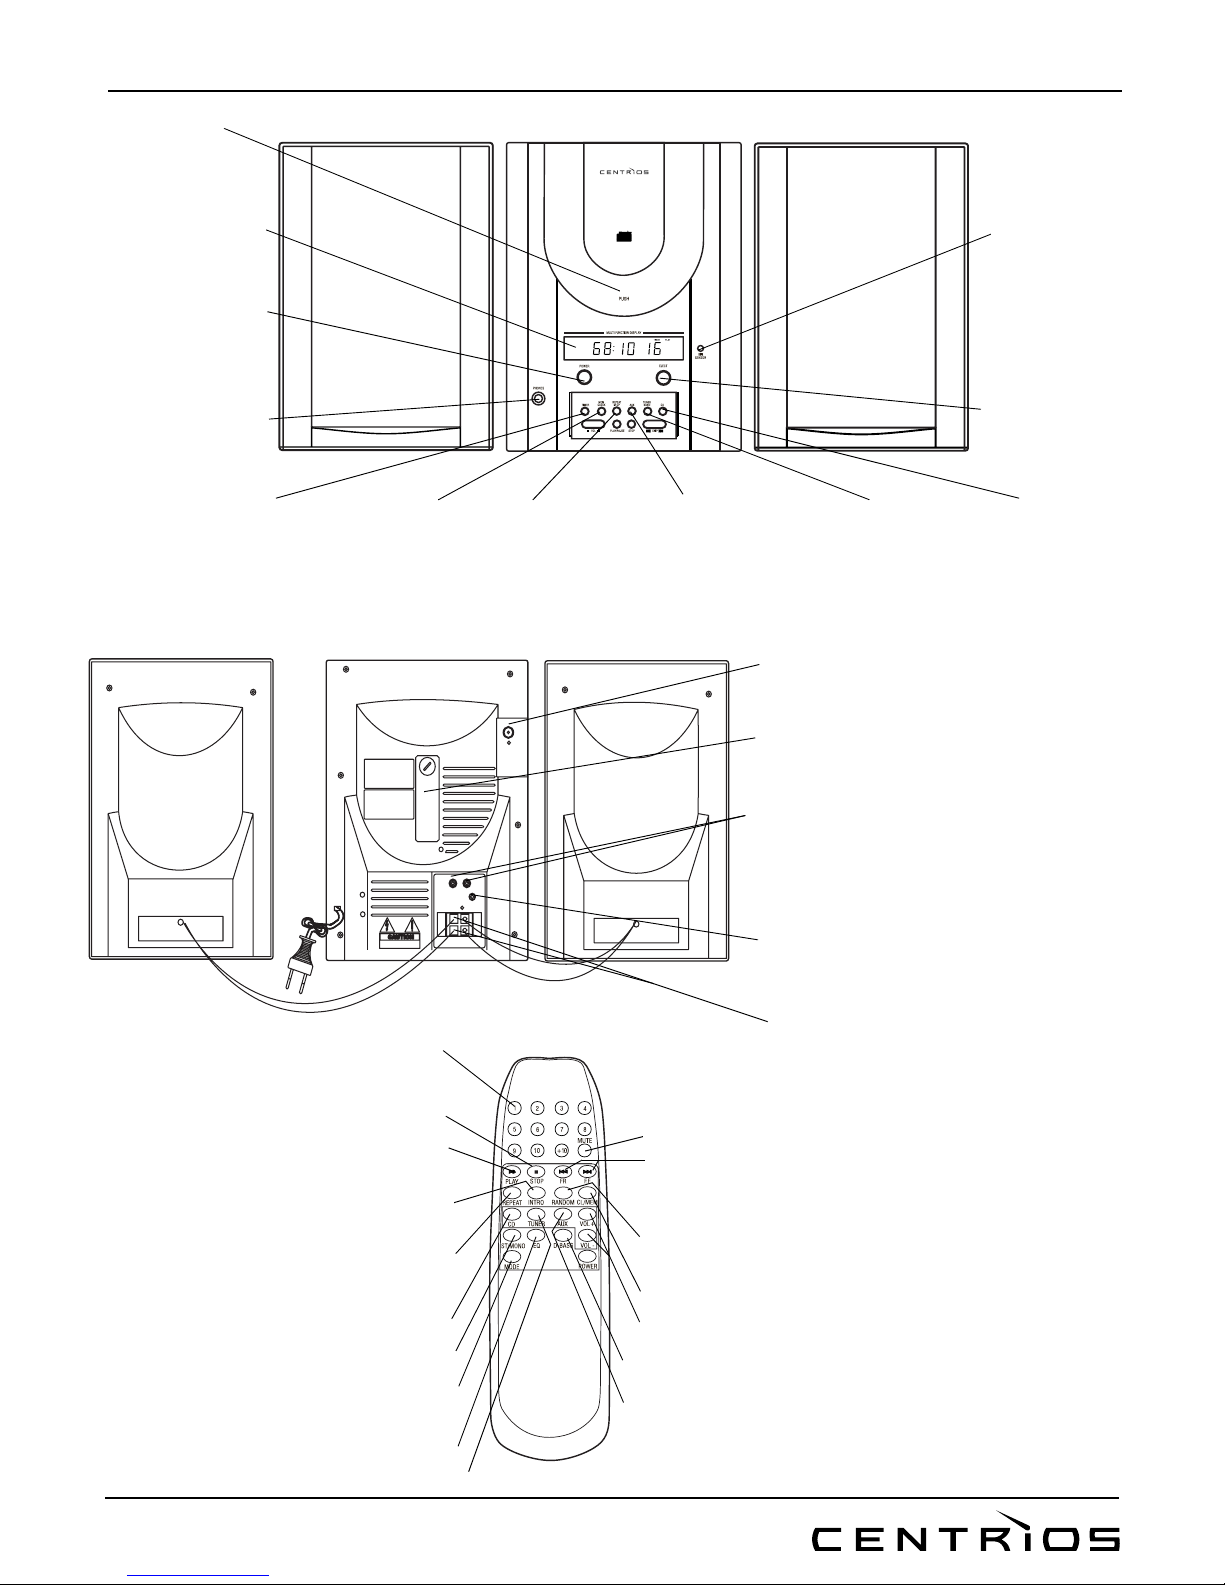
Push Area —
Press here to
open the CD
door.
LCD— Displays
various functions.
POWER — To turn on
or off the power.
PHONE JACK — To
connect with a pair of
stereo headphones
for private listening.
TIMER — To set time
of timer-on and timeroff.
MEM/CLOCK— To
set CD programming, radio
channel or clock.
REPEAT/M-UP — To set
repeatedly play for one or
all CD tracks. Or search
through preset radio
channels.
AUX—To play
with other audio
equipment.
TUNER/BAND—
To switch to tuner
mode or select radio
band (FM, AM).
CD — To switch
the unit to CD
mode.
EJECT— Press
to open the
operation panel.
IR SENSOR
—
Point the
remote
control here for
operation
by remote
control.
FM 75 Ohm JACK — To
connect with FM pig-tail
antenna or built-in home
BATTERY COMPARTMENT
—To hold one 9V back-up
battery.
AUX IN JACK —To connect
with other equipment (not
included).
SUB WOOFER LINE OUT
—To connect with subwoofer (not included).
NUMBERS-Press to select CD
track or to select preset
channel directly.
STOP- Press to stop CD playing.
PLAY/PAUSE- Press to play CD
or to pause.
INTRO-Press to initiate intro
scan, or to cancel intro scan.
REPEAT- In CD mode, press to set repeat
playing for one or all tracks or to cancel
repeat playing. In tuner mode, press to
search for preset station.
CD-Press to switch to CD mode.
ST/MONO- Press to turn FM broadcasting
from stereo to mono or vice versa.
MODE-Press to select display mode of CD
remain, clock, Timer-on or Timer-off.
EQ-Press to select desired EQ.
TUNER- Press to switch to tune mode or to
select band.
MUTE- To cut off sound or to resume.
FR and FF- In CD mode, press to skip backward or
forward for a certain track. In tuner mode, press to
tune for a radio program. In time mode, press to set
the clock.
CL/MEM-Press to set CD/Radio memory, or to set clock, timer.
VOL+/- Press to adjust the volume.
RANDOM- Press to set random play, or to cancel
random play.
AUX- Press to switch to Aux mode.
POWER- Press to turn power on or off.
SPEAKER TERMINAL —
To connect main unit to
speakers.
1318118
OWNER’S MANUAL
Page 2
2
IMPORTANT SAFETY INSTRUCTIONS
1. All the safety and operating instructions should be read before
the product is operated.
2.
The safety and operating instructions should be retained for
future reference.
3.
All warnings on the appliance and in the operating instructions
should be adhered to.
4.
All operating and use of instructions should be followed.
5. Do not use this appliance near water.
6.
Clean only with a dry cloth.
7. Do not block any ventilation opening. Install in accordance with
the
manufacturer’s instructions.
8. Do not install near any heat sources such as radiators, heat registers,
stoves, or other appliances (including amplifiers) that pro-
duce heat.
9. Do not defeat the safety purpose of the polarized or groundingtype
plug. A polarized type plug has two blades with one wider
tha
n the other. A grounding type plug has two blades and a third
gr
ounding prong. The wide blade or the third prong are provided
for your safety. If the provided plug does not fit into your outlet,
co
nsult an electrician for replacement of the obsolete outlet.
10. Protect the power cord from being walked on or pinched
particularly at plugs, convenience receptacles, and the point
where they exit from the apparatus.
11.Only use attachment/accessories specified by the
manufacturer.
12. Unplug this apparatus during lighting storms or when unused
for long periods of time.
13. Refer all servicing to qualified service personal. Servicing is
re
quired when the apparatus has been damaged in any way, such
as
power-supply cord or plug is damaged, liquid has been
sp
illed or objects have fallen into the apparatus, the apparatus has
been exposed to rain or moisture, does not operate normally, or as
been dropped.
14. This appliance shall not be exposed to dripping or splashing
water and that no object filled with liquids such as vases shall be
placed on the apparatus.
PREPARATION
CONNECTING THE SPEAKERS
1. Pull out the tabs of the speaker terminals on the back of the
mai
n unit.
2. Insert the speaker lead wires into the speaker terminal.
Note: Match the end of the speaker wire to the color-coded
connector.
3. Push back the tabs to clip the lead wires.
INSTALLING THE BATTERIES IN THE REMOTE
C
ONTROL
The remote control requires two AA batteries (not supplied) for
pow
er.
Ca
utions:
• Use only fresh batteries of the required size.
• Do not mix old and new batteries, different types of batteries,
(s
tandard, alkaline, or rechargeable), or rechargeable
batteries
of different capacities.
1. Press and pull out the battery compartment.
2. Place the batteries in the compartment as indicated by the
pola
rity (+ and-) marked inside.
3. Replace the cover.
The maximum operational distance between the remote control
an
d the sensor should be 8 metres. If the remote control only
op
erates at a much shorter distance, replace the batteries.
INSTALLING THE BACK-UP BATTERY
When you install the backup battery, the player can keep the
memory of clock setting and radio channel even after you power
off the player. You will need to replace the battery about every
6 months. Note: To save the battery, always connect to AC power
whe
n available.
1. Rotate the lock on battery compartment to OPEN and pull out
the
battery compartment cover.
2. Attached 9V battery (sold separately) to the terminal and
place the battery in the battery compartment.
3. Replace the battery cover and rotate the lock to CLOSE.
CONNECTING THE SYSTEM TO AC POWER
Insert the AC power plug into a standard AC outlet. The time on
the
display flashes.
Press POWER to turn on the player. The blue LCD backlight turns
on
.
USING HEADPHONES
You can connect a pair of headphones with a 3.5mm plug to
PHONE
jack for private listening.
Note: Reduce the volume to prevent injury to your ears, before
you
use the headphones.
CD PLAYER OPERATION
After you turn on the player, the tuner mode appears on the
display
for the first time, otherwise, the player shows the mode last
used before you powered off the last time.
OPENING OR CLOSING THE
OPERATION PANEL
Press EJECT to open the operation panel or rotate the panel
upw
ard and press it until it locks to close the panel.
USING THE MUTE FUNCTION
You can press MUTE on the remote control to silence the CD
player. Press MUTE again or press - VOL+ to resume.
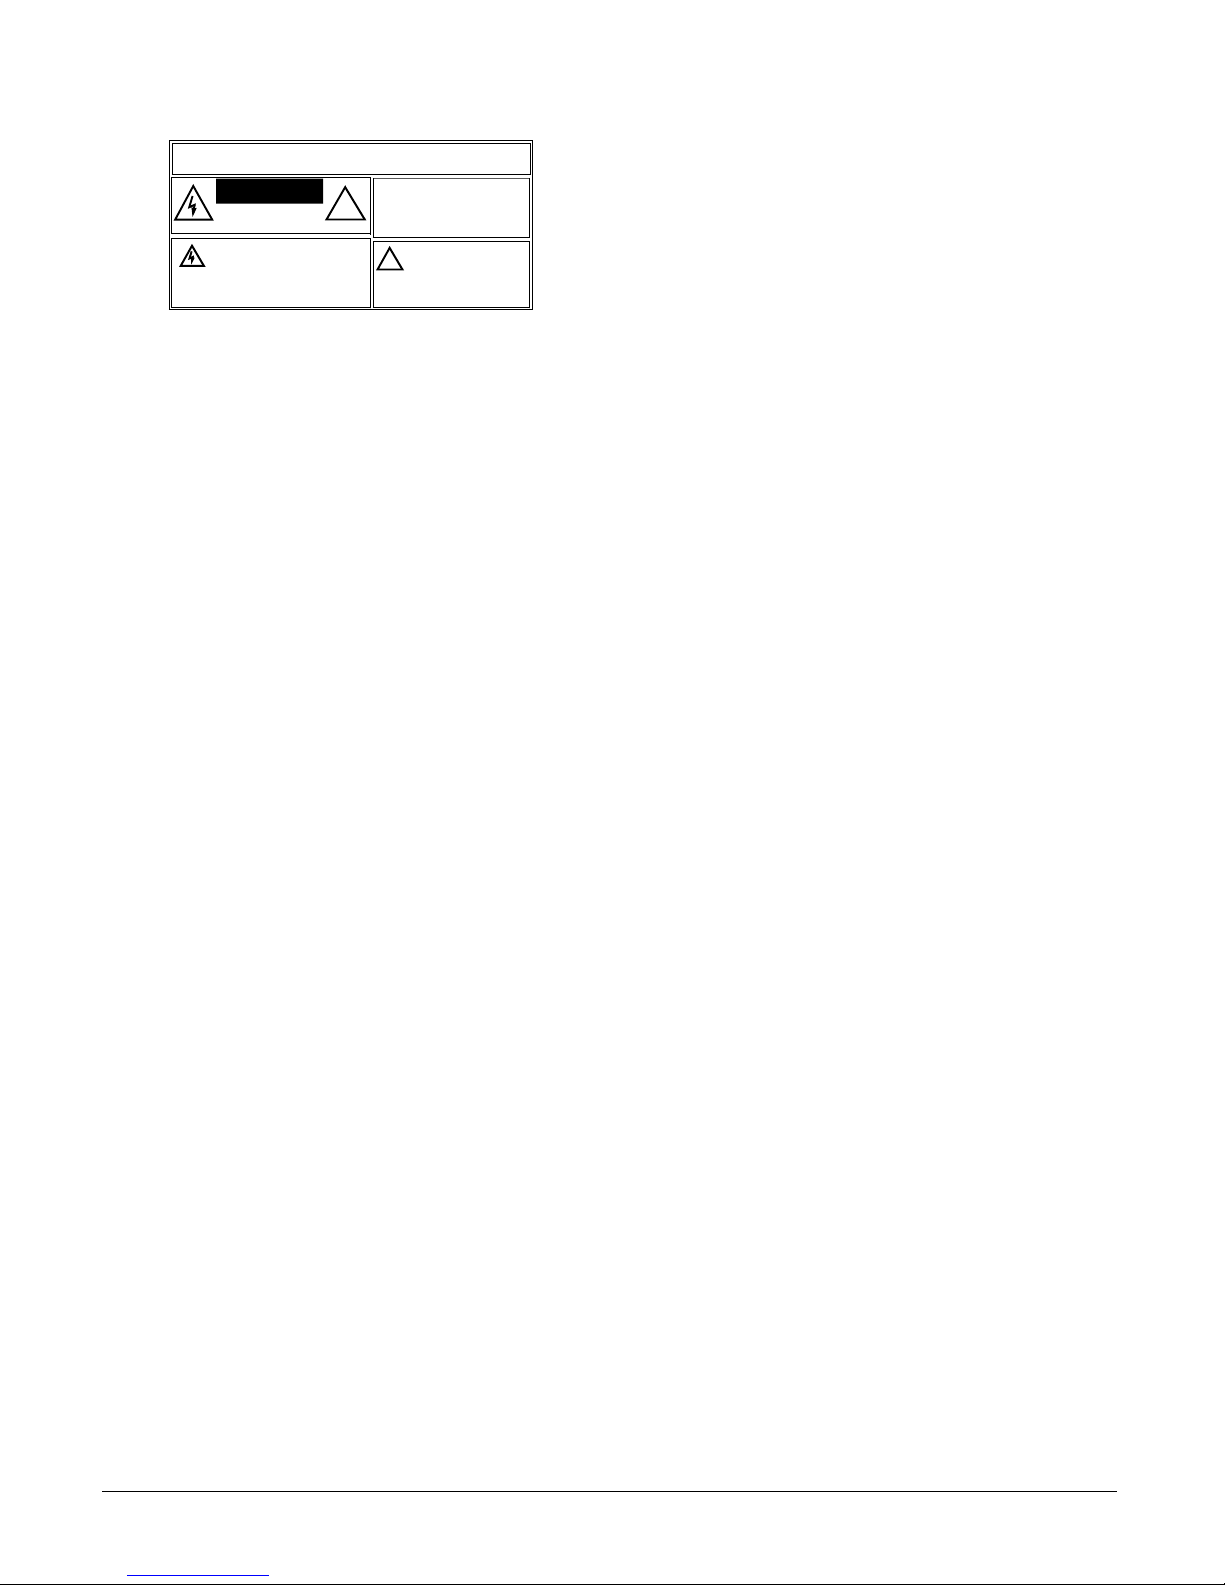
The lightning symbol is intended to alert you to
the presence of uninsulated dangerous voltage
wi
thin this product’s enclosure that might be of
sufficient magnitude to constitute a risk of electric
shock. Do not open the product’s case.
The exclamation symbol is intended
to inform you that important operating
and maintenance instructions are
included in the literature
accompanying this product.
!
WARNING: To red uce the risk of fire or shock hazard, do not expose this pro duct to rain or
moisture.
..CAUTION..
CAUTION:
TO REDUCE THE RISK O F
ELECTRIC SHOCK, DO NOT REMOV E
CO
VER OR BACK. NO USERSERVICEABLE PARTS INSIDE. REFE R
SERVICING TO QUALIFIED PERSONN EL.
RI
SK OF ELECTRIC SHOCK
DO NOT OPEN
!
Page 3

3
CD TIME REMAINING FUNCTION
When playing CD, press MODE until REMAIN appears on the
display to see the remaining time of the playing CD. Repeatedly
pr
ess MODE until the original display appears.
PLAYING A CD
Note: The CD player can play CD-Rs, CD-RWs as well as CDs.
1. Press CD to enter the CD mode. In CD mode DISC appears
and -- -- -- flashes about 3 seconds later. Press PUSH to
open the CD door, OPEN appears on the display.
2. Hold the CD by its edges and carefully place it into the CD
compartment and gently press it on the centre hub.
3. Close the compartment cover. The CD player will read the
disc, and-- -- -- -- flashes.
Note: After the CD player is finished reading, the total play time
and the total track number will appear on the display.
4. Press
on the remote control or PLAY/PAUSE on CD
pl
ayer to play CD from the 1st track.
Or, you can press one of the buttons on the remote control to
select a track to play.
Note: To play tracks 11 to 19 press +10 then the second digit. For
ex
ample, to play 13, press +10 first, then press 3. To stop playing,
pr
ess STOP.
The CD stops at the end of the last track. When CD playing stops,
the display shows the total number of the tracks and total playing
time.
USING SEARCH
You can skip search or audible search forward or backward as you
desire.
SKIP SEARCH
Note: You can use the skip search to quickly locate any track.
Repeatedly press or hold down or until your desired track
appears on the display.
During playing, repeatedly press or to search for your
desired track.
AUDIBLE SEARCH
During play you can press and hold or . The CD player plays
the
CD forward or backward at a high speed and low volume.
When you hear the section you want, release or to resume
normal play.
Note: If you hold down while the last track is playing, audible
forward search stops at the end of that last track. If you hold down
while the first track is playing, audible backward search stops at
the beginning of the track one, and then plays the first track at
normal speed.
USING D-BASS
To enhance the bass sound, repeatedly press D-BASS on the
remote control. D-BASS appears on the display, the D-BASS turns
on. When it disappears, it turns off.
USING EQ
When playing, repeatedly press EQ on the remote control to
select equalizer from FLAT, ROCK, JAZZ, POP, CLASSIC.
USING REPEAT PLAY
You can set the CD player to continuously play a single track, all
tr
acks, or all of the programmed tracks on the loaded CD
contin
uously. During play, repeatedly press REPEAT M-UP on CD
player or REPEAT on the remote control until REPEAT flashes on
the display to repeat the current track continuously.
To repeat all the tracks, repeatedly press REPEAT M-UP on CD
player or REPEAT until REPEAT appears on the display steadily.
To end the repeat play, repeatedly press REPEAT M-UP on CD
player or REPEAT until REPEAT disappears from the display.
USING INTRO SCAN
You can set the CD player to play the first 10 seconds of each
tr
ack on a loaded CD, so you can find the track you want to hear.
When playing, press INTRO on the remote control, the player will
scan from the current track.
To scan from the first track, stop the playing then press INTRO on
the remote control, and press PLAY on the remote control.
To end the scanning, repeatedly press INTRO on the remote
control until the INTRO disappears from display.
Random Play
You can set the CD player to randomly select and play tracks from
a loaded CD.
While the CD player is stopped, press RANDOM on the remote
control then press PLAY on the remote control, the CD player
starts random play at once, and RANDOM appears on the display.
While playing, press RANDOM on the remote control and
RANDOM
appears on the display. The player starts play randomly
after the current track finishes.
To end the random play, repeatedly press RANDOM on the
remote until RANDOM disappears from the display.
PROGRAMMING CD TRACK SEQUENCE
You can program up to 16 tracks from the loaded CD to play in any
order
you choose and you can also program the same track to
pl
ay more than once.
1. Press CL/MEM on the remote control or MEM/CLOCK on the
CD player after you stop the play. PR:01 -- appears on the
display
.
2. Repeatedly press or to select your desired track as
programmed track.
3. Press CL/MEM on the remote control or MEM/CLOCK on the
CD player to start next program.
4. Repeat step 2 to program the track as you desired.
5. To end the programming, press PLAY/PAUSE on CD player
or on the remote control. The player will play the CD as
you programmed the order.
To exit the CD programmed mode, press STOP until the
MEMORY disappears from the display.
Notes:
• While playing, you can press and hold
or
to audible
search backward or forward.
• The player stop automatically, after the last programmed track
plays.
• Before you clear the memory, you can repeat playing the
programmed track by pressing PLAY/PAUSE on CD player
or on the remote control after the last programmed track
is played.
• Opening CD door will exit the programmed mode.
/
/
/
Page 4

4
Clearing CD Memory
After the playing of programmed track stops, press STOP again to
clear the memory. MEMORY on the display disappears.
TUNER OPERATION
To switch to the tuner mode from the CD mode, press TUNER
BAND until AM or FM appears on the display.
At FM band, repeatedly press ST/MONO to select the stereo or
mono sound as you desire. STEREO or MONO appears on the
display.
Tuning
Manual searching—Repeatedly press F or J to search the
frequency.
Automatic searching — Hold the F or J for over half a second
then release to search the frequency. The frequency on the
display will run to search and will stop when it receives a strong
signal.
Memory search — Press the number buttons on the remote
control to select the preset channel directly.
Or, you can repeatedly press REPEAT M-UP to search the preset
channel.
PRESET THE RADIO CHANNEL
You can store up to 20 FM stations and 12 AM station in memory.
1. Repeatedly press TUNER BAND to select the desired band.
Note: Select one method to search the channel as you like.
2. Press CL/MEM on the remote control or MEM/CLOCK on the
CD player. When the desired channel is received, CH
appears and -- beside the frequency flashes.
3. Within 5 seconds press the digit button on the remote control
or press REPEAT M-UP on CD player or CL/MEM on the
remote control to confirm your presetting.
4. Repeat step 2 and step 3 to preset the other channels.
5. You can press the number buttons on the remote control to
select the programmed channels. Or repeatedly press
REPEAT or REPEAT M-UP to search for the channel
programmed.
SETTING THE CLOCK
1. Press POWER button to turn the unit off.
2. Press MEM/CLCOK on the main unit or CL/MEM on the
remote control, the hour digit flashes on the display.
3. Repeatedly press or hold J or F to change the hour digit to
your desired setting.
4. Press MEM/CLOCK or CL/MEM with the minute digit
flashing.
5. Repeatedly press or hold J or F to change the minute digit
to your desired setting.
6. Press MEM/CLOCK or CL/MEM to confirm you setting.
To see the clock when CD player is playing, press MODE until the
time appears.
USING THE TIMER
Note: You need to set the time before setting the timer.
You can set a time as TIMER ON or TIMER OFF to turn on or off
the CD player automatically as desired.
The timer turns on automatically after you set it. To turn off the
timer, repeatedly press MODE on the remote control until TIMER
OFF appears on the display.
Note: In any mode you can turn the timer on/off. When you turn
both of them on, TIMER ON OFF appears on the display. When
you turn one of them on TIMER ON or TIMER OFF appears.
When you turn them off, TIMER ON OFF disappears.
SETTING TIMER ON
1. Repeatedly press MODE on the remote control until TIMER
ON flashes on the display.
2. Press MEM/CLOCK on the main unit or CL/MEM on the
remote control, the hour digit flashes on the display.
3. Repeatedly press or hold J or F to change the hour digit to
your desired setting.
4. Press MEM/CLOCK or CL/MEM with the minute digit
flashing.
5. Repeatedly press or hold J or F to change the minute digit
to your desired setting.
6. Press MEM/CLOCK or CL/MEM to confirm your
setting. ON steadily appears on the display.
Note: The CD player will play the last program you listened to
when it turns on at your set time.
SETTING TIMER OFF
1. Repeatedly press MODE on the remote control until TIMER
OFF flashes on the display.
2. Press MEM/CLOCK on the main unit or CL/MEM on the
remote control, the hour digit flashes on the display.
3. Repeatedly press or hold J or F to change the hour digit to
your desired setting.
4. Press MEM/CLOCK or CL/MEM with the minute digit
flashing.
5. Repeatedly press or hold J or F to change the minute digit
to your desired setting.
6. Press MEM/CLOCK or CL/MEM to confirm your
setting. OFF steadily appears on the display.
CD CARE TIPS
Even though a compact disc is durable, treat the CD surface with
care.
• Do not write on either side of the CD, particularly the nonlabel side (signals are read from the non-label side).
• Do not store CDs in high temperature of high humidity areas.
They might warp.
• Keep CDs dry. A water drop can act as a lens and affect the
laser beam’s focus.
Always handle a CD by the edges to avoid fingerprints and always
keep in it in its protective case or sleeve when it is not in use.
Fingerprints and scratches on the CD’s surface can prevent the
laser beam from correctly reading the digital information.
CONNECTING WITH AUXILIARY
EQUIPMENT
You can connect other audio equipment to use the CD player as a
speaker system.
1. Using a stereo connection cable (not supplied),connect AUX
IN Jack on rear of the CD player to AUX OUT Jack on
another audio device.
2. Press AUX button to enter AUX mode.
3. Play the connected audio device according to its instruction
manual.
Page 5
07A03
1318118
Pr
inted in China
CARE
Keep the system dry; if it gets wet, wipe it dry immediately. Use
and store the system only in normal temperature environments.
Handle the system carefully; do not drop it. Keep the system away
from dust and dirt, and wipe it with a damp cloth occasionally to
ke
ep it looking new.
TROUBLESHOOTING
If your CD player is not working properly, these suggestions might
help you to eliminate the problem.
SPECIFICATIONS
Radio Frequency range.................................... AM: 520-1710KHz
..
...................................................................... FM: 87.9-107.9MHz
Radio channel memory ........................................ AM: 12 channels
..
........................................................................... FM: 20 channels
CD Player
Power
supply (Main unit) .............................................120V 60 Hz
Remote
control .................................................... 2 X AA batteries
Back-up
battery ....................................................... 1 x 9V battery
General
Max output power ..................................................................... 10w
Operation Temperature..................................................1˚C – 40˚C
Dimension
of Main unit (WHD)...................... 8 1/2 x 11 x 4 3/4 inch
Speaker .............................................................7 x 11 x 4 3/4 inch
Weight (not include package material) ..................................14 lbs
Specifications are typical; individual units may vary. Specifications
are
subject to change and improvement without notice.
Problem Solution
No Playing
• Re-plug the AC plug or
reinstall the batteries
properly. Or, change the
battery.
• Press related button to select
mode.
• Insert the disc correctly and
close the door securely.
• Clean the lens.
No Display
Re-plug the AC plug
No Sound
Check the speaker wire
co
nnection.
Noise or weak in radio
receiving
Change the position for receiving
(180 x 290 x 120mm)
(218
x 290 x 120mm)
(6
.2 kg)
LIMITED WARRANTY
Who is Providing This Warranty?
• Orbyx Electronics, LLC (“Orbyx), as the distributor of this
Centrios product (your “Product”).
What Does This Warranty Cover?
• This warranty covers defects in materials or
workmanship in your Product under normal use and
conditions.
What is the Period of Coverage?
• This warranty covers your Product for 12 months from
the original purchase date.
Who Is Covered?
• This warranty covers the original consumer purchaser.
Coverage terminates if you sell or otherwise transfer
your Product.
What Will We Do To Correct Problems?
• We will repair your Product or replace your Product with
a new or reconditioned equivalent product, at our option.
How Do You Get Service?
• Call Orbyx TOLL FREE at 1-866-363-3059 for
instructions for obtaining warranty service from Orbyx’s
authorized service providers.
• Or, return your Product directly to the retail store from
which you purchased the Product.
• When you obtain service for your Product, you must
provide a purchase receipt (or other proof of the original
purchase date) and a description of the defect(s).
What Does This Warranty Not Cover?
• This warranty DOES NOT COVER:
• damage due to misuse, abuse, alteration, unauthorized
repair, or accident (such as improper electrical current);
• damage due to “acts of God” (such as lightning) or other
contingencies beyond our control;
• cosmetic damage;
• externally generated static, signal reception or antenna
problems not caused by your Product; or batteries.
• This warranty also DOES NOT COVER, and in no case
will we be liable for, any incidental damages (such as
transportation costs to and from an authorized service
provider, or loss of time) or consequential damages
(such as costs of repairing or replacing other property
which is damaged, including tapes, discs, speakers not
included with your Product or other accessories, or
external electrical systems) resulting from the use of
your Product. Some states do not allow the exclusion or
limitation of incidental or consequential damages, so the
above limitation or exclusion may not apply to you.
• Defacing the serial number, or using your Product for
commercial or institutional purposes, voids this
warranty.
Are There Other Warranties?
• There are no express warranties other than those
expressed herein. Neither the sales personnel nor any
other person is authorized to make any other warranties
or to extend the duration of any warranties.
• ANY IMPLIED WARRANTIES, INCLUDING ANY
IMPLIED WARRANTY OF MERCHANTABILITY (AN
UNWRITTEN WARRANTY THAT A PRODUCT IS FIT
FOR ORDINARY USE), ARE LIMITED TO 90 DAYS.
Some states do not allow limitations on how long an
implied warranty lasts, so the above limitation may not
apply to you.
How Does State Law Apply?
• This warranty gives you specific legal rights, and you
may also have other rights which vary from state to
state.
ORBYX ELECTRONICS WARRANTY
ORBYX Electronics warrants that this product will be free
from defects in materials and workmanship for a period of
one (1) year from the date of purchase. Within this period,
simply take the product and your proof of purchase to any
ORBYX Electronics store or dealer and the product will be
repaired without charge for parts and labour. ORBY X
Electronics reserves the right to charge for transportation.
Any product which has been subject to misuse or
accidental damage is excluded from this warranty.
This warranty is only applicable to a product purchased
through ORBYX Electronics' company owned stores and
dealers and to a product that is presented for repair in a
country where ORBYX Electronics offers the product for
sale. While this warranty does not confer any legal rights
other than those set out above, you may have additional
statutory rights which will vary under the laws of the
various countries, states, province and other governmental
entities in which ORBYX Electronics operates. This
warranty is subject to all statutory rights you may have in
the country of purchase.
LIMITED WARRANTY
Limited Warranty/Garantie Limitée
U.S.A & Canada
© 2004 ORBYX Electronics. All Rights Reserved .
Distributed exclusively in the U.S. by
Orbyx Electronics, LLC
501 South Cheryl Lane,
Walnut, CA 91789
Imported in Canada for/Importé au Canada pour
Orbyx Electronics,
Concord, Canada, L4K 4M3
Manufactured in China
For parts, service, and general inquiries please call 1-866-363-3059
or visit us on the web at www.orbyxelectronics.com
 Loading...