

Page 1
N1224 Alternator
Regulator Changeout Instructions
This symbol is used to indicate
CAUTION
presence of hazards that can cause
minor property damage.
Removing regulator from N1224 alternator
1. Remove battery cables from batteries and/or
turn off master switch to disconnect vehicle
batteries from vehicle.
If vehicle has dual voltage electrical
CAUTION
system, be sure both 14 V and
28 V batteries are disconnected.
2. Gain access to regulator.
3. Mark cables and harness for ID and reassemble reference.
4. Remove cables and harness from regulator.
5. Remove and discard regulator mounting
hardware.
6. Remove regulator.
Re-installing regulator on N1224 alternator
1. Remove battery cables from batteries and/or
turn off master switch to disconnect vehicle
batteries from vehicle.
If vehicle has dual voltage electrical
CAUTION
system, be sure both 14 V and 28 V
batteries are disconnected.
2. Set new regulator on alternator. Install and
tighten new mounting hardware (in bag supplied with alternator) as shown in Figure 1.
3. Plug harness(es) into alternator as shown in
Figure 1.
4. Attach and tighten cables to terminals as
shown in Figure 1.
5. Reconnect batteries and/or turn on master
switch, start engine, and verify alternator
output/operation.
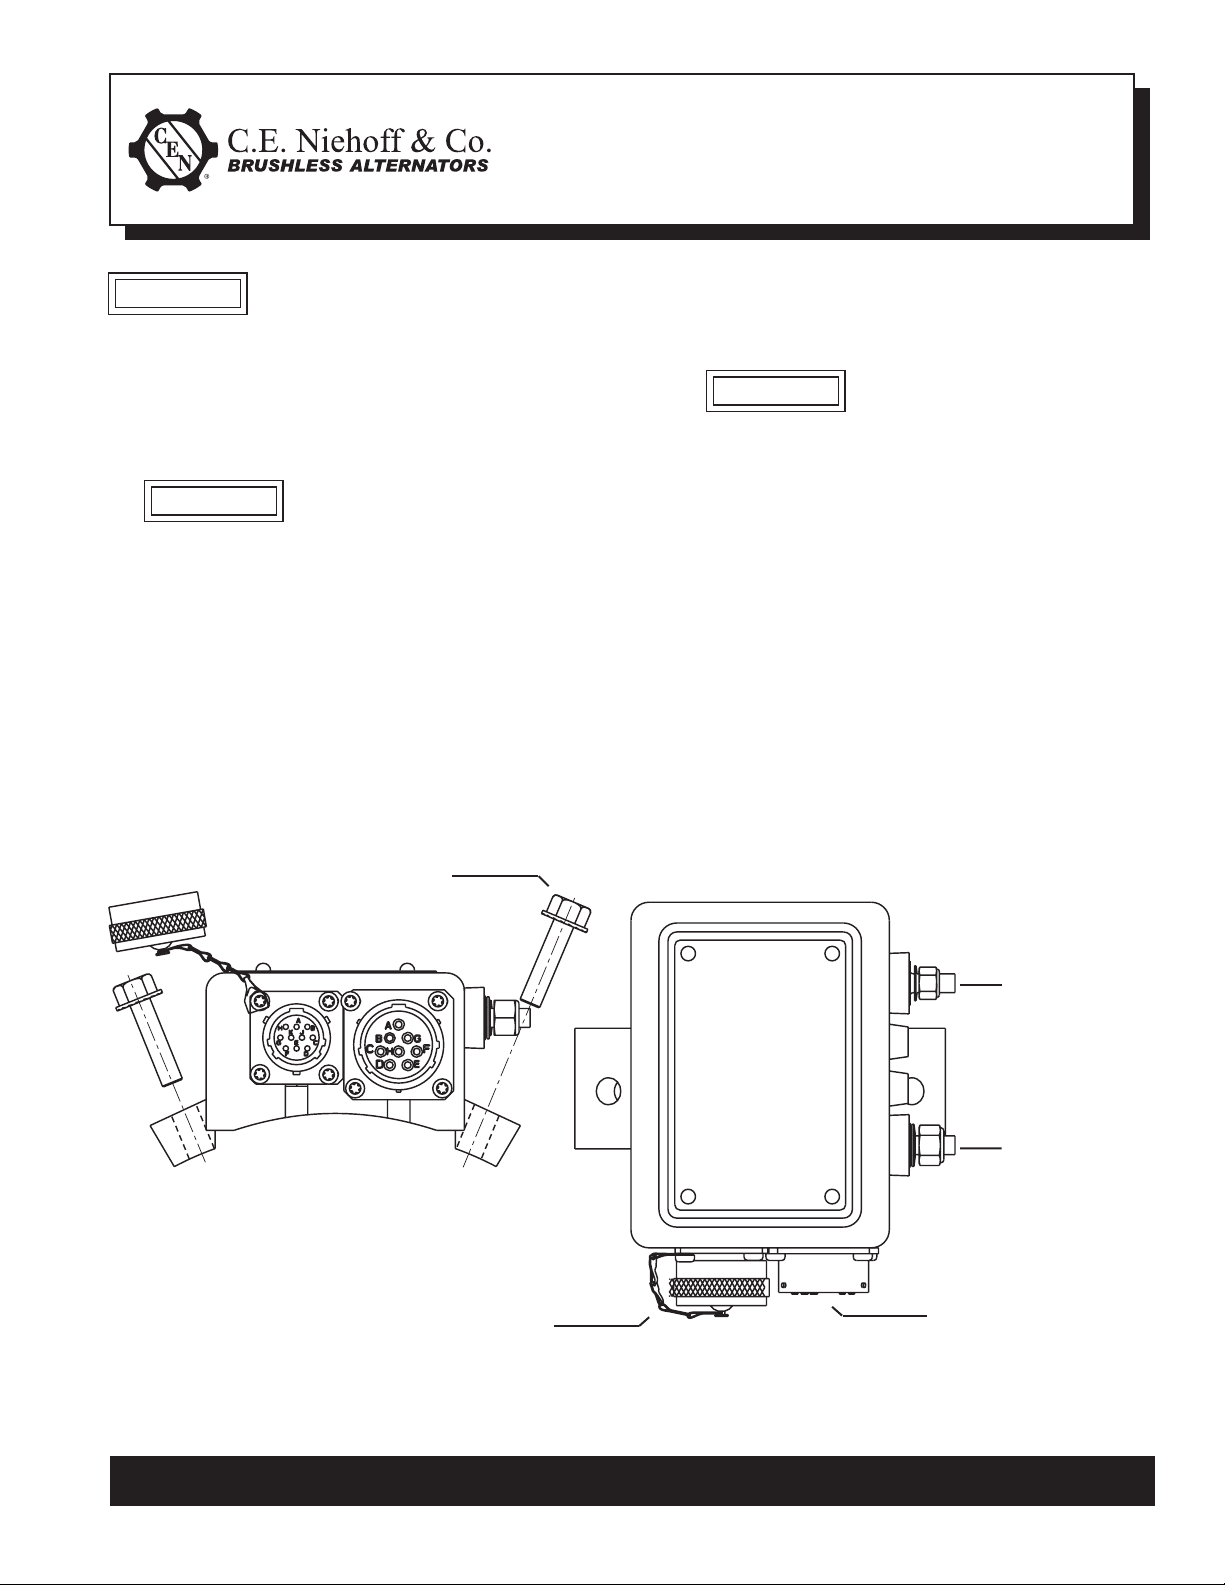
Hex Washer Screw M6x1 (2 places) –
Torque to 8.5 Nm/75 lb.in.
J1939 harness may or may not be
connected at this location—if so, tighten securely
Figure 1 - Regulator/Harness Attachment
T
T
T
E Terminal:
Torque locknut to
T
3.4 Nm/30 lb.in.
AC Terminal:
Torque locknut to
T
3.4 Nm/30 lb.in.
Alternator-to-regulator
harness—tighten securely
C. E. Niehoff & Co. • 2021 Lee Street • Evanston, IL 60202 Tech Services Hotline 800-643-4633
Page 1 of 1
II0138A
 Loading...