

Page 1
600141
Rev.3
Page 2

CEM
P.O. Box 200
Matthews, North Carolina 28106-0200
(704) 821-7015 FAX: 704-821-7894
e-mail: info@cemx.com
Copyright 2000 by CEM Corporation
All Rights Reserved
This manual contains proprietary information which shall not
be reproduced or transferred to other documents or disclosed
to others without prior written permission
of CEM Corporation
SMART System5™ is a trademark of CEM Corporation
CEM is a registered trademark of CEM Corporation
U.S. patent 4,291,775; 4,438,500; 4,457,632;
4,554,132; and 4,753,889
Other U.S. and foreign patents pending
MANUFACTURED IN THE
UNITED STATES OF AMERICA
This instrument complies with United States Code of Federal Regulations (CFR) Title
21, Part 1030 for microwave leakage. A verification report is on file.
This instrument complies with United States Code of Federal Regulations (CFR) Title
47, Federal Communications Commission (FCC) Part 18 – Industrial, Scientific and
Medical (ISM) Equipment – emissions requirements. A verification report is on file.
i
Page 3

NOTICE
The following precautions should be observed to avoid possible exposure to excessive
microwave energy:
• Do not tamper with the safety interlocks. The SMART System5 is equipped
with three safety interlocks which prevent the instrument from producing
microwave power if the cover is open.
• Do not place any object between the microwave cavity and the cover or allow
soil or cleaner residue to accumulate on sealing surfaces.
• Do not operate the instrument if it is damaged. It is particularly important that
the instrument cover close properly and that there is no damage to the cover
(bent), hinges and latch (broken or loosened), or sealing surfaces.
• The instrument should be adjusted or repaired only by qualified service
personnel.
The following precautions should be observed to avoid instrument-induced electromagnetic
interference:
• The possibility of instrument-induced electromagnetic interference (EMI) is
minimal if precautions outlined above are followed.
• The instrument should not be placed close to any electrical device susceptible
to EMI. It is suggested that the user post a sign warning pacemaker wearers
that a microwave device is in operation.
• If the instrument is suspected of inducing EMI, the cover should be carefully
inspected. A microwave leakage measurement should be performed as
outlined in the Troubleshooting, Maintenance and Service section of this
manual. Leakage measured above the legal limit of 5 mW/cm2 should be
reported to the CEM Service Department.
This instrument utilizes high voltages and microwave radiation.
Instrument service and
repair should be performed only by those trained in repair and maintenance of high
voltage and microwave power systems.
ii
Page 4

To the best of our knowledge, the information contained herein is accurate. However,
CEM cannot accept liability of any kind for the accuracy or completeness of the
information contained in this manual. The final determination of the suitability and
proper use of the instrument described herein, the accuracy of the information and data
obtained from such use, and whether such use infringes any patents or the legal
safeguards of others are the sole responsibility of the user.
Warnings, Cautions and Notes
Warnings, cautions and notes are included throughout this manual and should be read
thoroughly and strictly followed.
WARNING: A warning is inserted for essential information used to emphasize
dangerous or hazardous conditions to the operation, cleaning and maintenance of the
instrument which may result in personal injury.
CAUTION: A caution is inserted for essential information used to emphasize
procedures which, if not strictly followed, may result in damage or destruction to the
instrument or improper instrument operation.
NOTE: A note is inserted for emphasis of procedures or conditions which may
otherwise be misinterpreted or overlooked and to clarify possible confusing situations.
iii
Page 5

iv
Page 6

Table of Contents
Introduction......................................................................................................1
System Installation...........................................................................................3
External Printer ..........................................................................................7
External Balance ........................................................................................7
Personal Computer or Serial Printer Setup ................................................8
Instrument Description ...............................................................................9
Sample Analysis ............................................................................................13
Sampling ..................................................................................................13
Preparation ...............................................................................................14
Weight ......................................................................................................16
Holders .....................................................................................................16
Application ...............................................................................................18
Method Information .................................................................................22
Bias Identification ....................................................................................23
Determining Ash/COH for Processed Meats ...........................................25
Ash Contents of Meats .............................................................................26
Methods Development .............................................................................29
System Operation
Quick Test ................................................................................................31
Constant Weight..................................................................................31
Set Time ..............................................................................................37
Edit/Create Method ..................................................................................43
Edit Method ........................................................................................45
Create Method.....................................................................................47
Moisture/Solids - Standard Test ....................................................47
Moisture/Solids - Wastewater - TSS .............................................53
Moisture/Solids - Wastewater - TSS/TVSS ..................................59
Moisture/Solids - Dilution .............................................................65
Moisture/Solids - Syringe Weigh - Internal Balance ...................73
Moisture/Solids - Syringe Weigh - External Balance ..................79
Moisture/Solids - Ash....................................................................87
Moisture/Fat or Moisture/Fat/Protein - Standard ..........................93
Moisture/Fat or Moisture/Fat/Protein - Dilutions .......................101
Moisture/Fat or Moisture/Fat/Protein - Modified .......................111
Load Method ..........................................................................................121
Setup.......................................................................................................123
System Options .................................................................................123
System Information...........................................................................125
Printer................................................................................................125
Communication Port .........................................................................126
Contrast .............................................................................................126
Clock .................................................................................................127
Calibration.........................................................................................128
Security .............................................................................................129
Company Name ................................................................................133
Delete Method...................................................................................134
Serial Options....................................................................................135
Unit Serial Number ...........................................................................136
v
Page 7

vi
Table of Contents (Continued)
Print..............................................................................................................137
Statistics .......................................................................................................139
External Components...................................................................................141
Maintenance, Troubleshooting and Service.................................................143
Cleaning Recommendations...................................................................143
Routine Maintenance .............................................................................143
Special Tools and Kits ...........................................................................143
Troubleshooting .....................................................................................144
Error Messages .......................................................................................146
Standard Solution Test ...........................................................................147
Microwave Leakage Measurement ........................................................148
Intelli-Temp Calibration.........................................................................149
Intelli-Temp Verification .......................................................................151
Service and Repair .................................................................................153
Specifications .........................................................................................155
Warranty.................................................................................................156
Page 8

1
Introduction
The CEM SMART System5™ Moisture/Solids Analyzer is designed to provide a
rapid moisture/solids analysis on a broad range of products. The patented weighing
technology provides continuous weighing of the sample during the drying process.
The system determines the precise time the sample is dry, and the moisture or
solids content of the sample is then automatically calculated based on weight loss.
Microwave energy is used to dry the samples. Polar compounds such as water,
polar organic solvents such as alcohols or ketones, and ions in the solution will
absorb microwave energy and volatilize. Once water and/or other solvents have
volatilized, the remaining solid material does not usually absorb microwave energy
and will remain relatively cool. Thus, the weight loss is due only to the volatile
solvents present in the sample. “Moisture” is used throughout this manual to refer
to any volatile substance for which the system can measure weight loss after
drying the sample.
The SMART System5 delivers 150 - 300 watts of microwave energy when
programmed for 100 percent power. Voltage of the incoming electrical service is
measured and the microwave power is adjusted by the power control system in
order to normalize the power and provide repeatable power conditions. Magnetron
power automatically adjusted to deliver appropriate wattage to the instrument cavity.
The magnetron fan remains on for 15 minutes after the end of the specified drying
time to cool the instrument.
System components consist of a microwave drying chamber, an electronic balance,
a 1/4” VGA black and white screen, an infrared temperature controller, a
microprocessor and an internal impact printer. The Octawave™ cavity is designed
to effectively deliver the microwave energy directly to the sample to achieve rapid
test times. The 50 gram four-place analytical balance has a ±0.1 mg sensitivity.
Infrared temperature measurement permits automatic adjustment of microwave
power based on user defined temperature setpoint. The microprocessor controls
and monitors system operations, automatically calculates sample results and
enables interface with external printers, external balances and/or computers.
The system is equipped with three safety interlock switches to monitor the mating
of the cavity cover and floor and one safety interlock switch to monitor the cavity
cover latch. A flame detector with an infrared feedback automatically turns off the
microwave power if excessive burning is detected.
The SMART System5 software is user friendly and easy to operate. It is capable of
storing up to 100 methods and 300 test results, and is multilingual (English,
German, Spanish, and French).
Page 9

2
Page 10

3
System Installation
1. Following the instructions provided in the packing carton, carefully remove
the SMART System5 from its shipping carton and place it on a vibration-free
workbench or laboratory table in a location that:
a. provides at least 8 in (20 cm) open space on each side and 6 in. (15 cm)
open space in the rear of the instrument for ventilation.
b. is free from vibration of large equipment and/or excessive walk-through
traffic.
c provides a temperature range of 41 °F (5 °C) to 104 °F (40 °C) and a
humidity range of 10-85 percent relative humidity.
d. provides adequate bench space for sample handling.
e. allows the instrument to be connected to a dedicated, grounded 120 or
240 VAC outlet. The SMART System5™ should be operated on a
stabilized, constant voltage AC power supply. To operate properly, the
voltage must be within ±10% of the specified level.
2. Retain all packing materials.
3. Inspect the instrument for cracks, dents or warping.
4. Remove the tape from the instrument cover. Inspect the top cover for proper
alignment. The cover must open and close freely with no binding or
restriction of movement.
WARNING
If damage is noted, do not attempt instrument operation.
AVERTISSEMENT
Ne pas mettre en marche si l’instrument est endommagé.
5. If the instrument has been damaged in shipping, contact the freight
carrier to report the damage and to file a damage report. Contact the
CEM Service Department or the nearest subsidiary or distributor (page 4)
to request service information.
6. Verify that all accessories illustrated and listed in figure 1 are included.
7. Lift the instrument cover. Install the balance stem into the balance stem
retainer in the opening of the cavity floor, ensuring that the balance stem is
firmly seated. Install the balance pan onto the stem.
Note: If the balance stem requires removal, lift the stem straight up from its
installed position. Moving the balance stem from side to side can cause damage to
the balance assembly.
Page 11

4
CEM Corporation
Service Department
P.O. Box 200
3100 Smith Farm Road
Matthews, NC 28104 -5044 USA
Within the continental United States
Telephone: (800) 726-5551
Fax: (704) 821-4368
Outside the United States
Telephone: (704) 821-7015
Fax: (704) 821-4368
Subsidiary Offices
CEM Ltd.
2 Middle Slade
Buckingham Ind. Part
Buckingham MK18 1WA
United Kingdom
Tel: (44) 1-280-822873
Fax: (44) 1-280-822342
CEM GmbH
Carl-Friedrich-Gauss-Str. 9
47454 Kamp-Lintfort
Germany
Tel: (49) 2842-96440
Fax: (49) 2842-964411
CEM S.r.l.
Via Dell’Artigianato, 6/8
24055 Cologno al Serio
Italy
Tel: (39) 35-896224
Fax: (39) 35-891661
Page 12
5
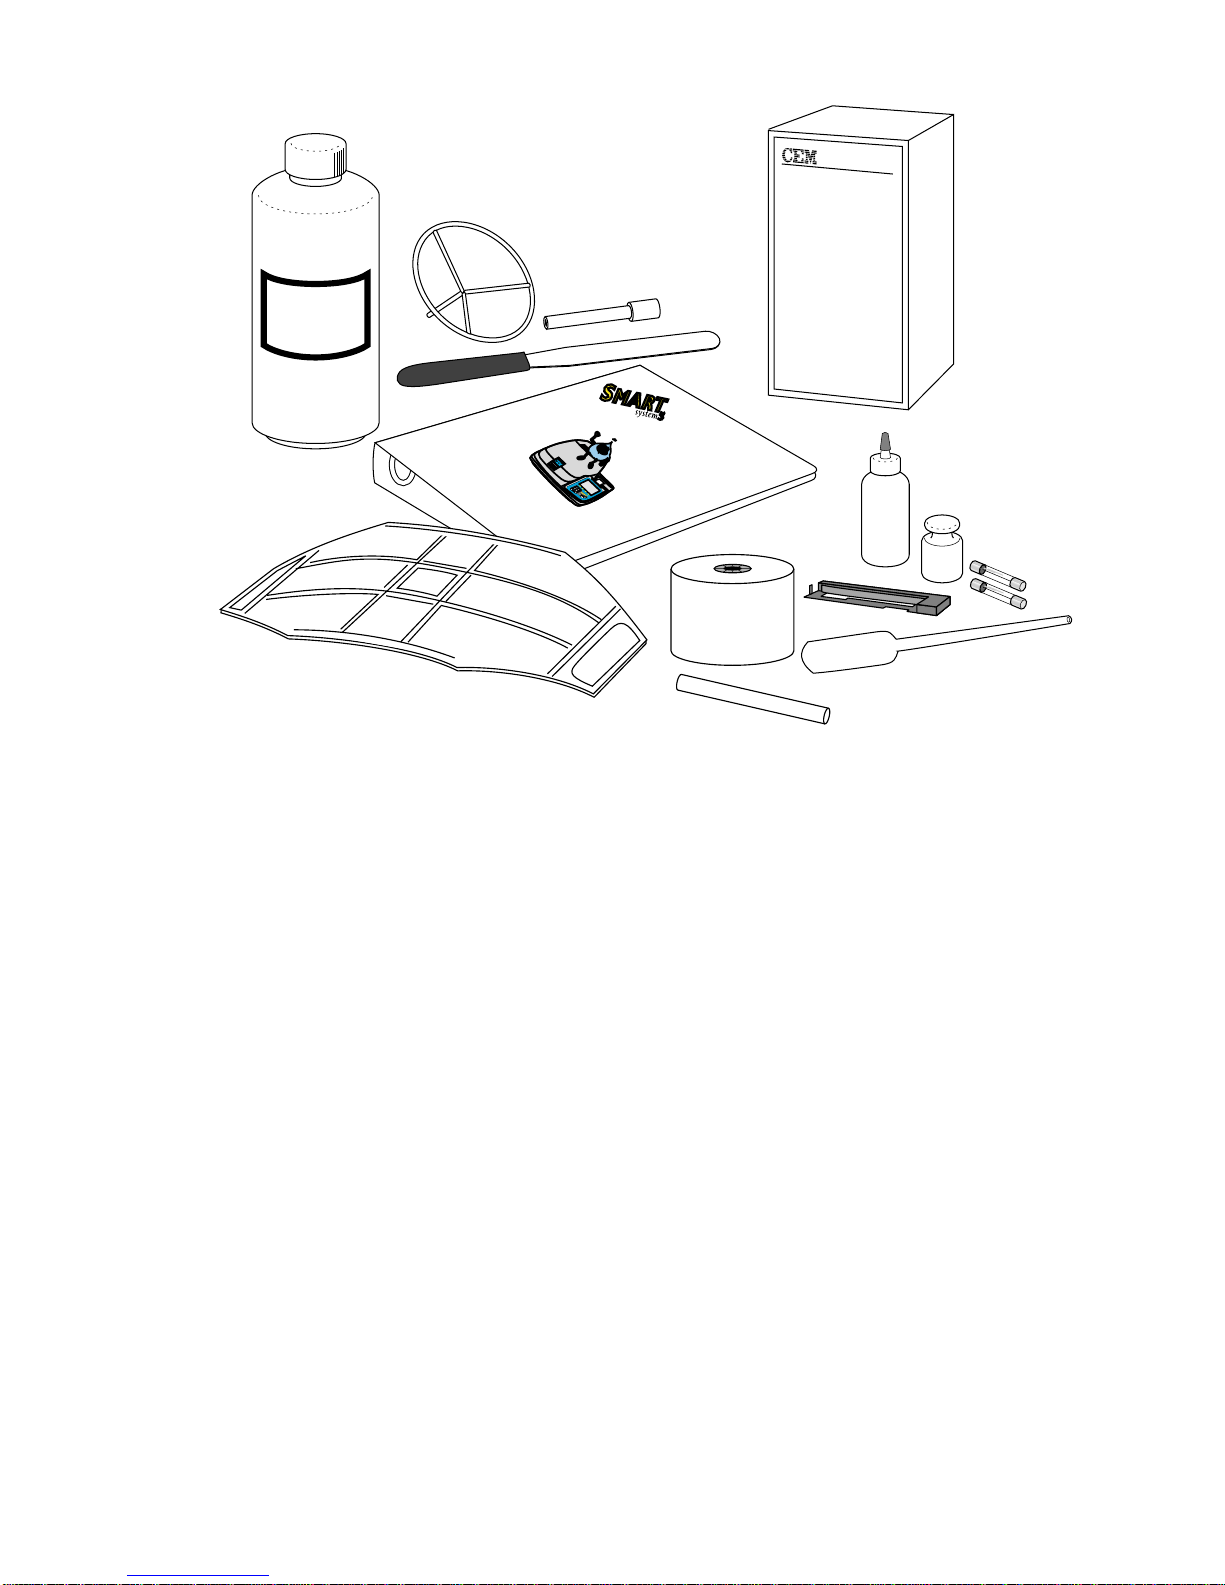
Figure 1. Accessories
• Starter Accessory Kit containing:
• Balance Stem (159600) (2)
• Balance Pan (004120) (2)
• Air Shield (568055M) (Installed in Instrument)
• Standard Solution (302600)
• Dispensing Bottle (230230)
• Spatula (302001)
• Disposable Pipette (302150)
• Glass Fiber Sample Pads (200150)
• 10 g Weight (260111)
• Fuses, 10AMP (2) (188340) and 5AMP (2) (188331)
• Operation Manual (600140)
• Printer Paper Holder (159065)
• Printer Ribbon (315122) (Installed in Instrument)
• Printer Paper (1 Roll) (315120)
Glass Fiber
Sample Pads
Reorder part # 200150
C
E
M
C
o
r
p
o
r
a
t
io
n
P
.
O
.
B
o
x
2
0
0
M
a
t
t
h
e
w
s
,
N
C
2
8
1
0
6
1
-
8
0
0
-
3
3
4
-
6
3
1
7
(
in
N
C
:
1
-
7
0
4
-
8
2
1
-
7
0
1
5
)
T
e
le
x
:
8
0
2
1
1
8
F
A
X
:
7
0
4
-
8
2
1
-
7
0
1
5
Moisture/Solids Analyzer
Operation Manual
Page 13

6
8. Using a voltage meter, measure the voltage of the dedicated power outlet to
verify voltage (120 VAC, 60 Hz or 220/240 VAC, 50 Hz).
9. Facing the back of the instrument, use a small screwdriver to pry the dual
voltage supply from the power module.
10. Install the voltage slide switch in the proper direction for the measured
voltage (120V, 60Hz or 220/240V, 50Hz).
11. Based on the voltage selected in step 9, install the proper fuses in the dual
voltage supply – 10 AMP (60 Hz) or 5 AMP (50 Hz).
12. Install the dual voltage supply with the appropriate fuses and the properly
installed voltage slide switch in the power module.
13. If applicable, install the exhaust hose.
14. Plug the power cord into the power cord receptacle in the rear of the
instrument and into a grounded, dedicated electrical outlet. Note: If using
external components such as a printer, computer or balance, install these
components as outlined in this manual.
15. Position the power switch located in the rear of the instrument above the
power cord receptacle in the “on” position.
CAUTION
Permit the SMART System5™ to warm up (power switch on,
microwaves not being produced) for at least 45 minutes prior to
operation. If the instrument is switched off for an extended
period of time (weekend, holidays, etc.), ensure that warmup
time is permitted prior to use.
Mise en garde
Permettre une période de 45 minutes de réchauffement du
SMART System5 avant l’utilisation (interrupteur de courant en
marche, aucune micro-onde n’est émise). Lorsque l’instrument
est en mode fermé pour un temps prolongé (fin de semaine,
vacances, etc. . .) il est important que la période de
réchauffement de 45 minutes soit observée.
16. Refer to the “Maintenance, Troubleshooting And Service” section of this
manual and perform the Standard Solution Test at least five times.
Note: CEM Corporation recommends that the power cord be connected to an AC
power outlet and the power switch remain in the “on” position at all times. After
15 minutes of idle time, the SMART System5 assumes a “sleep” mode.
Page 14
7
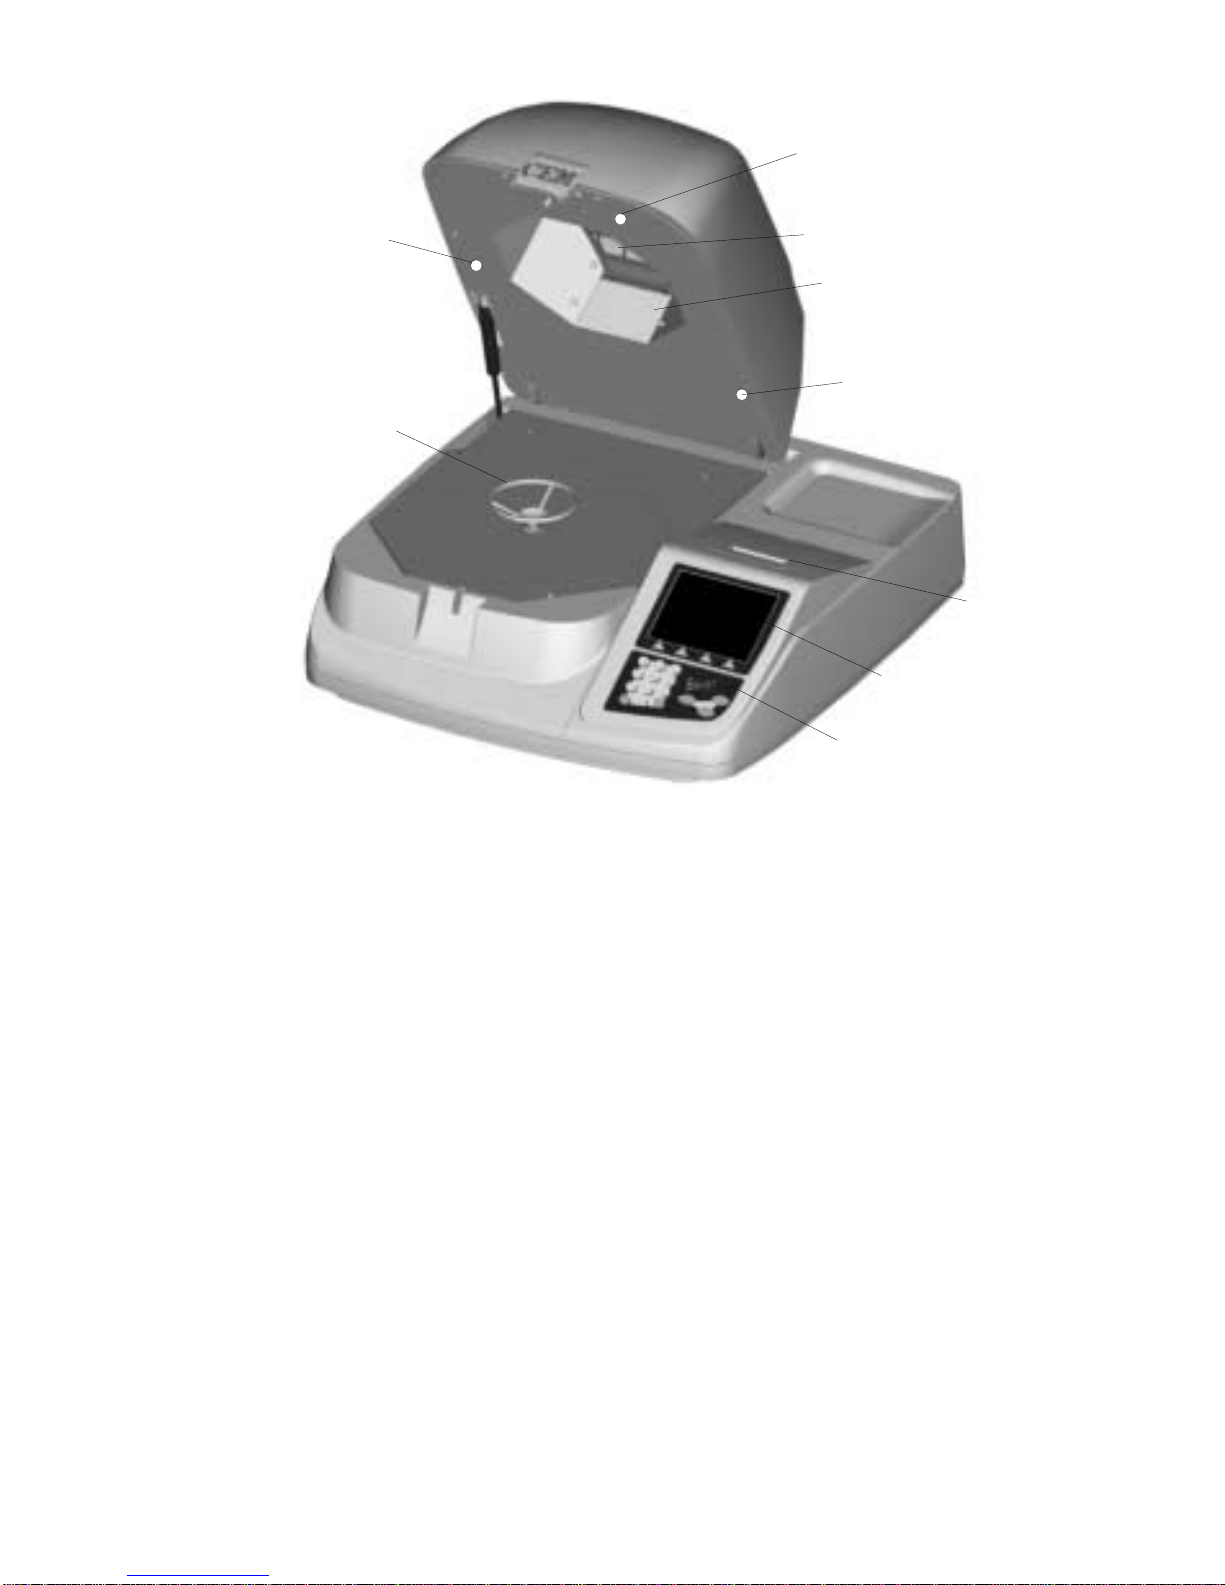
Instrument Description
Display – displays menu choices, instructional messages and analysis results on a
1/4 VGA black and white screen
Keyboard – controls operation of the SMART System5. Temperature, time, or
other numeric data may be entered with the numeric keys as requested on the
display.
Internal Printer – provides printout of methods, data and results.
Cavity – decreases test times due to its patented compact Octawave™ design.
Air Shield – prevents air flow within the microwave cavity from affecting weight
measurements.
Balance Pan – holds sample and sample pads during analysis.
Interlock Assembly – monitors mating of cavity cover and instrument skirt.
Display
Keyboard
Internal
Printer
Cavity
Air Shield
Balance
Pan
Figure 2. Smart System5 Front View
Interlock
Assembly
Interlock
Assembly
Interlock
Assembly
Page 15

8
Enter – Press to store entered parameters and data in the computer memory.
Exit – Press to exit screen.
Ready – Press to initiate current method for a test or to reset method for next test.
Start/Pause – Press to begin or pause sample analysis. Microwave heating begins
when the Start/Pause button is pressed unless the cavity cover is open. Operation
will continue through the analysis unless the Start/Pause button is pressed to
interrupt the analysis or the operation key indicating “Stop Test” is pressed.
Tare – Press to tare or zero the weight of the sample pads prior to sample analysis.
0 - 9 – Press to select items from menus such as the Main Menu, setup screens, etc.
and to select values for parameters such as time and power.
▲ Operation Keys – Press to select specific operation options such as “Stop
Test,” “Print,” “Main Menu,” Prev. Page,” etc.
Figure 3. Smart System5 Keyboard
Page 16
9
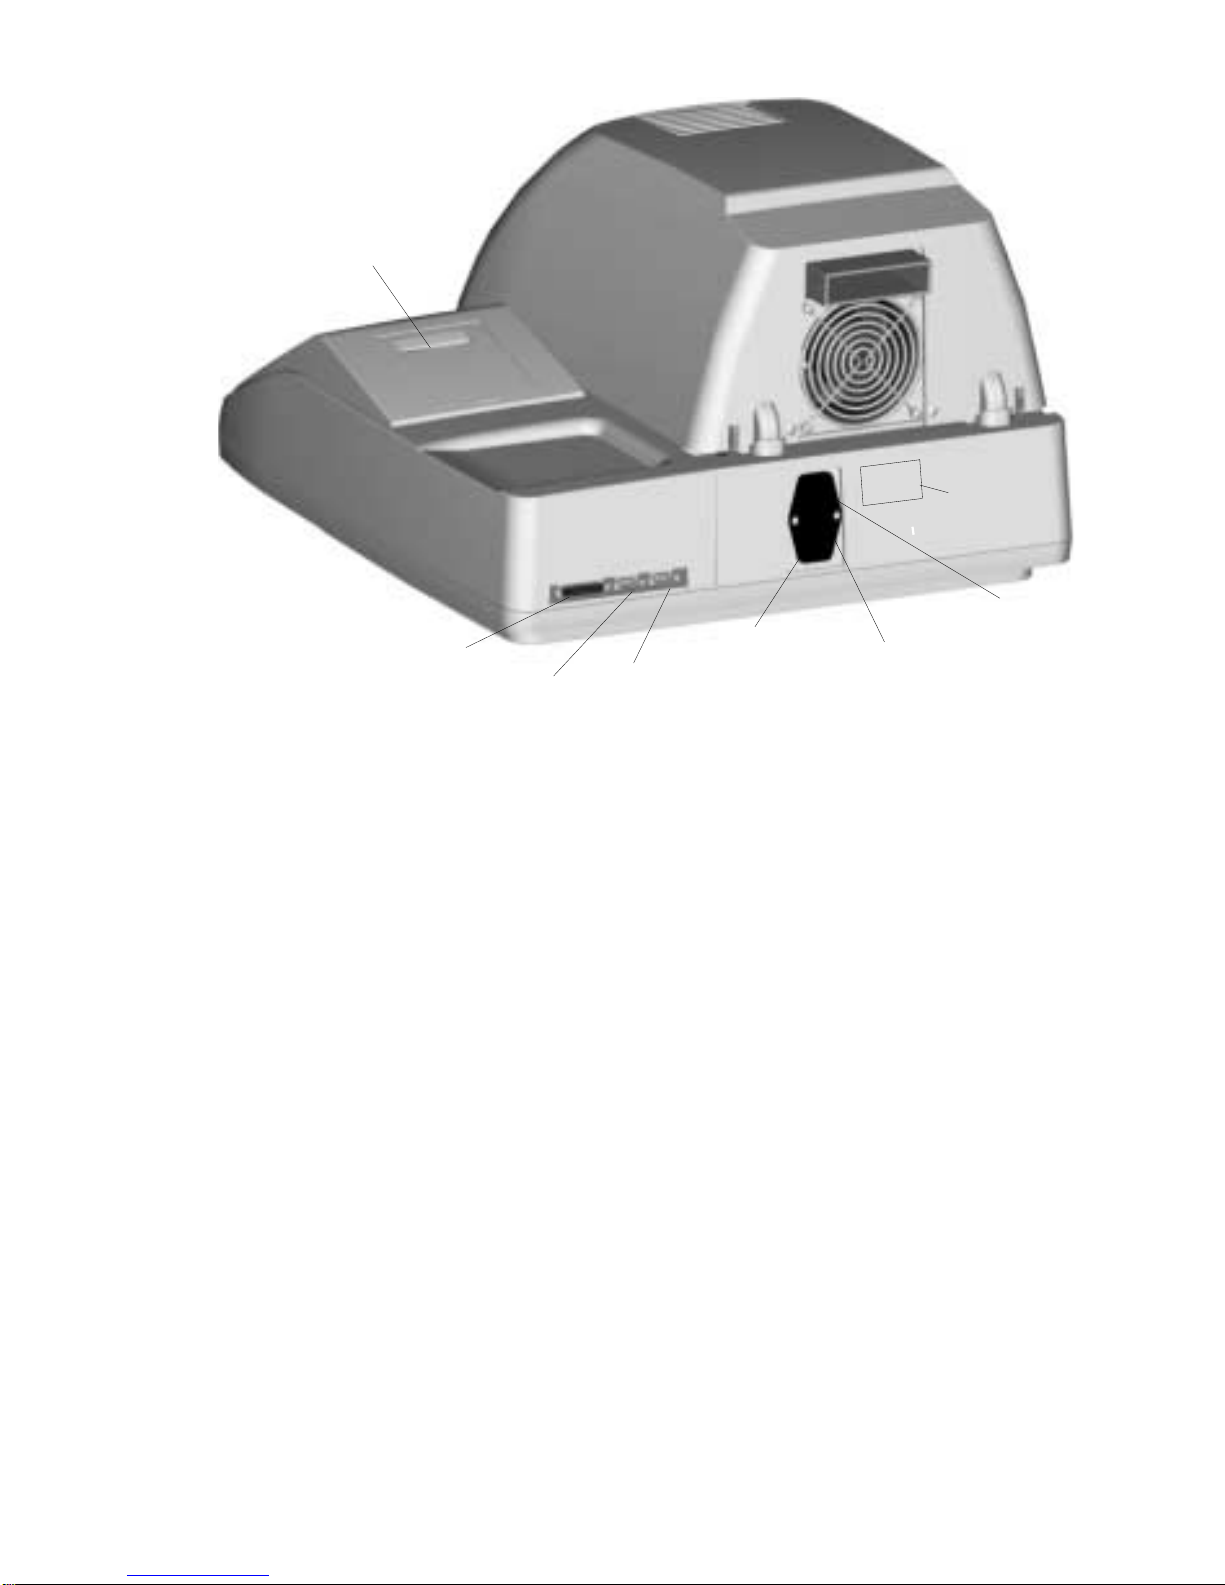
Fuses – prevent electrical power overload.
Power Cord Receptacle – receives the female end of the power cord.
Power Switch – turns electrical power to the instrument on and off.
Nameplate – lists model and serial number.
Dual Voltage Selector Switch - permits electrical voltage for the instrument to be
switched from 110 VAC to 220 VAC.
PC Port – permits connection and communication with a personal computer for
data storage, etc.
Printer Port – permits connection and communication with an external printer.
External Balance Port – permits connection and communication with an external
balance for specific applications.
Internal
Printer
Power
Switch
Power
Cord
Receptacle
Dual Voltage
Selector
Switch &
Fuses
Printer
Port
External
Balance
Port
PC
Port
Figure 4. Smart System5 Rear View
CE
CEM
Nameplate
Page 17

10
Page 18

11
Sample Analysis
Proper sample preparation and testing are critical to obtaining accuracy and
precision. Each sample has a specific characteristic composition; therefore, each
sample may require an individual method of analysis. However, guidelines can be
established for analysis of general sample types.
• Sampling – A representative sample is critical to obtain proper analysis.
• Preparation – As with any chemical analysis, a homogeneous sample is
critical to obtaining precision and accuracy.
• Weight – A consistent sample size helps ensure precision and accuracy.
Most CEM applications specify a sample size of 2-5 grams, emphasizing
the importance of a homogeneous sample.
• Holders – Absorbent pads to which a sample can be applied are used for
most analyses. Glass fiber pads are recommended because glass fibers do
not absorb microwaves. Other holders include Teflon coated glass fiber
mesh, a drying basket and a thermapad.
• Application – Most samples should be spread smoothly, avoiding lumps,
peaks or any uneven areas. Sample spread must be consistent.
• Drying Time – The drying time is determined by the type of sample and its
microwave absorbency. Constant weight drying permits drying of a sample
until a constant weight is achieved. Set time drying permits the control of
the sample analysis by entering a specified time and power level.
• Infrared Temperature – The infrared temperature measurement may be
used to operate at temperatures used in standard or vacuum oven
procedures.
• Microwave Power – The power necessary to dry a sample is determined by
sample composition. A sample should be tested at the highest possible
power without burning or degradation of the sample.
Sampling
Proper sampling of a product or process is critical in achieving proper moisture/
solids analysis. A representative sample is required to ensure that the test results
are representative of the entire batch or lot of material.
Many standard procedures such as AOAC, USDA and ASTM methods reference
sampling techniques. It is extremely important to follow techniques outlined in
these procedures for a particular sample type.
Proper handling and storage of the sample prior to analysis is also critical in
achieving accurate and representative results. Samples should not be exposed to
the air for long intervals prior to analysis. Proper storage also ensures that no
moisture is lost.
Page 19

12
Preparation
Sample preparation is critical to achieving precise and accurate test results. The
sample should be properly prepared to achieve repeatable moisture results between
duplicate analyses of the same sample. Sample preparation is either a physical or
chemical modification of the sample. Physical modification may be as simple as
stirring or shaking the sample to ensure homogeneity or more complex such as
particle size reduction, dilution or deaeration.
Chemical modification is the addition of an enzyme to hydrolyze chemically
bound fat. The objective is to create a homogeneous sample and to improve the
correlation of the test method to standard methods. Some products, such as a beef
emulsion or comminuted poultry, may require no additional preparation. Other
materials will require particle size reduction, dilution or dearation prior to testing.
Samples should be kept cool and in sealed containers to prevent loss of moisture.
If repeatable results cannot be obtained on the same sample, re-blend the sample to
improve the homogeneity and repeat tests. Sample preparation methods include:
1. Mixing of Sample – Thoroughly stir or shake sample to ensure
homogeneity.
2. Particle Size Reduction – Many products require particle size reduction
prior to being applied to the glass fiber pad. Reduction, based on product
sample, can be accomplished with a meat grinder, either an industrial or
consumer grade food processor, a coffee mill or a cheese grater. The
meat grinder is the best choice for all meat products. USDA procedure
specifies three to four passes through a 1/8” or 5/64” blade with mixing
between grinds. A USDA inspector or outside laboratory can make
recommendations. An industrial grade food processor is a good
alternative for grinding meat products. A consumer grade food processor
is ideal for grinding frozen potatoes, breaded products, or “dry” snack
foods such as cookies, crackers, and chips. A coffee mill can be used to
grind or mix “dry” snack foods. A cheese grater can be used to grate
small quantities of hard cheese samples or soap.
3. Dilution – Products with a high carbohydrate content are strong
microwave absorbers and have a tendency to burn. These samples may
require either a water or salt dilution.
A. Water Dilution – A specified amount of sample is diluted with a
specified amount of water and mixed in a blender. Typical samples
include doughs, cheese powders, corn syrups, dried meat bases and
sauces. An external balance and a blender are required for this
procedure.
(1) Interface an external balance with the SMART System5.
(2) Tare the blender cup on the external balance.
(3) Add product sample to the blender cup.
Page 20

13
(4) Add water to the product sample in the blender cup.
(5) Blend until a homogeneous mixture is obtained.
(6) Use the diluted sample to perform analysis.
B. Salt Dilution – A specified amount of salt is added to the product
sample prior to analysis. Typical samples include
frozen potatoes and frozen breaded products. This procedure
requires a teflon basket and dry table salt (sodium chloride).
(1) Line a teflon basket (CEM p.n. 200090) with two square glass
fiber pads.
(2) Place the lined basket on the balance of the Moisture/Solids
Analyzer. Press “Tare.”
(3) Place approximately 8g of salt in the lined basket. Press
“Tare.”
(4) Place the product sample on top of the salt. Press “Start” to
record the initial weight.
(5) Press “Stop.”
(6) Thoroughly mix the salt and sample in the basket.
(7) Return the basket to the balance of the Moisture/Solids
Analyzer. Press “Start” to continue the sample analysis.
4. Deaeration – Frozen dairy and imitation dairy products must be
deaerated to remove the excess air in order to provide reproducible test
results. This procedure requires a 125 mL Erlenmeyer flask, a 1 liter
beaker, a magnetic stirrer, a 11/2” x 3/8 magnetic stirring bar, and a #5
rubber stopper.
(A) Place 100 mL of sample in a 125 mL Erlenmeyer flask.
(B) Place a 11/2” x 3/8” magnetic stirring bar in the flask. Using a #5
rubber stopper, loosely cap the flask.
(C) Place flask in a 1 liter beaker containing 250 mL of water which has
been heated to 70°C.
(D) Place beaker with flask on a magnetic stirrer. Mix for 5 - 7 minutes.
(E) Cool sample to ambient temperature and thoroughly mix sample
prior to testing.
Page 21

14
5. Enzymatic Hydrolysis – The fat in processed cheese and dairy products
is often tightly bound to the protein. In order to achieve accurate test
results, the fat must be released from the protein prior to the fat extraction
process. This can be accomplished by a protease enzymatic hydrolysis of
the sample. Note: The sample must be in a liquid or “pourable” state for
the enzymatic hydrolysis to be effective.
(A) Thoroughly mix approximately 100g of sample. Heat sample in a
water bath at 60°C (± 5°C) for five minutes.
(B) Add eight (8) drops of CEM Enzyme (p.n. 302630) and mix well.
(C) Return sample to water bath for five minutes.
Weight
Sample weight can be very critical to the final test result. As with most analytical
procedures, a consistent sample size helps ensure precision and accuracy. Sample
sizes can vary, based on type of sample, from 1 gram on the low end (high percent
solids level) to 10-15 grams on the high end (very low percent solids level). Test
procedures documented by CEM and included in this manual, are for specific
sample types and suggested sample size. Sample size should remain within the
weight guidelines. CEM has determined that the suggested sample size results in
the most consistent drying and test results. Heavier sample weights may cause
sample degradation or burning, resulting in high moisture results. Lower sample
weights may result in under-drying of the sample.
Holders
Sample holders should be transparent to microwave energy.
CEM Square Sample Pad – The square pad is the most commonly used sample
holder. Typically, two (2) pads are used with the sample “sandwiched” between
the pads. For heat sensitive samples, only one pad is recommended to minimize
heat buildup. For low solids samples, three or four pads are used for absorption.
CEM Round Sample Pad – The round pad is used as a collection pad for fat
extraction and is recommended, but not required, for thermapad applications.
Sample Pads – CEM glass fiber pads are designed to provide optimum
conditions for rapid, thorough and repeatable drying. CEM Corporation
follows strict specifications in the manufacture of sample pads. Specifications
include low moisture content and optimum absorbency, density, porosity, and
strength for microwave drying.
• Moisture Content – Excessive moisture in sample pads will cause
moisture or solids values to be incorrect. Controlling the moisture
ensures that residual moisture is maintained to very close
tolerances.
Page 22

15
• Absorbency – The pad material must be absorbent enough to form a
wick for a liquid sample and to be a sample holder for more viscous
type samples.
• Density – The sample medium must have uniform density to guarantee
that the moisture will volatilize rapidly and evenly, without causing
residual heating.
• Porosity – Correct porosity of the pad material ensures maximum
surface area for liquid samples in order to increase
volatilization of moisture. Correct porosity helps prevent
sample degradation or burning.
• Strength – The tensile strength of the medium has a direct effect on the
ability of the sample pad to withstand the stress imposed during sample
application.
Teflon Coated Glass Fiber Mesh – The mesh is used as a holder for fiber
samples or as a “spacer” between multiple sheets of paper samples.
Drying Basket – The basket is made of Teflon coated glass fiber mesh. It is
typically lined with two square pads. It is used to hold large samples and for salt
dilutions.
Page 23

16
Application
The viscosity of the sample plays an important role in determining how the sample
is spread onto the pad for analysis. If a sample is thin, it can be pipetted onto the
pad and can be tested at high power levels. A thin sample spread over a large area
permits moisture to evaporate rapidly with little residual heat buildup. Glass fiber
pads may be stacked for increased absorbency.
High viscosity samples (samples that do not flow well) require a different
technique. If the sample can be easily spread across the glass fiber pad, no dilution
is required. A thick sample will tend to puddle and form a crust, sometimes trapping volatiles within the bubble. Overheating or burning can also occur on thick
samples. If repeatable results cannot be obtained by spreading the sample, a
dilution may be necessary. The sample must be soluble in the diluting agent, and
the diluting agent must be a microwave absorber.
To generate the appropriate amount of heat and achieve optimum moisture results,
different types of samples must be spread to different thicknesses over different
areas of the glass fiber sample pad. As a general guideline, the sample will
generate heat in direct proportion to the thickness of the sample layer on the pad.
A sample spread too thickly can cause sample burning; a sample spread too thinly
can cause insufficient drying. The prepared sample should be applied to a glass
fiber sample pad. Once the sample is properly applied to the sample pad, it should
be covered with a second glass fiber pad to ensure heat retention and to eliminate
splattering.
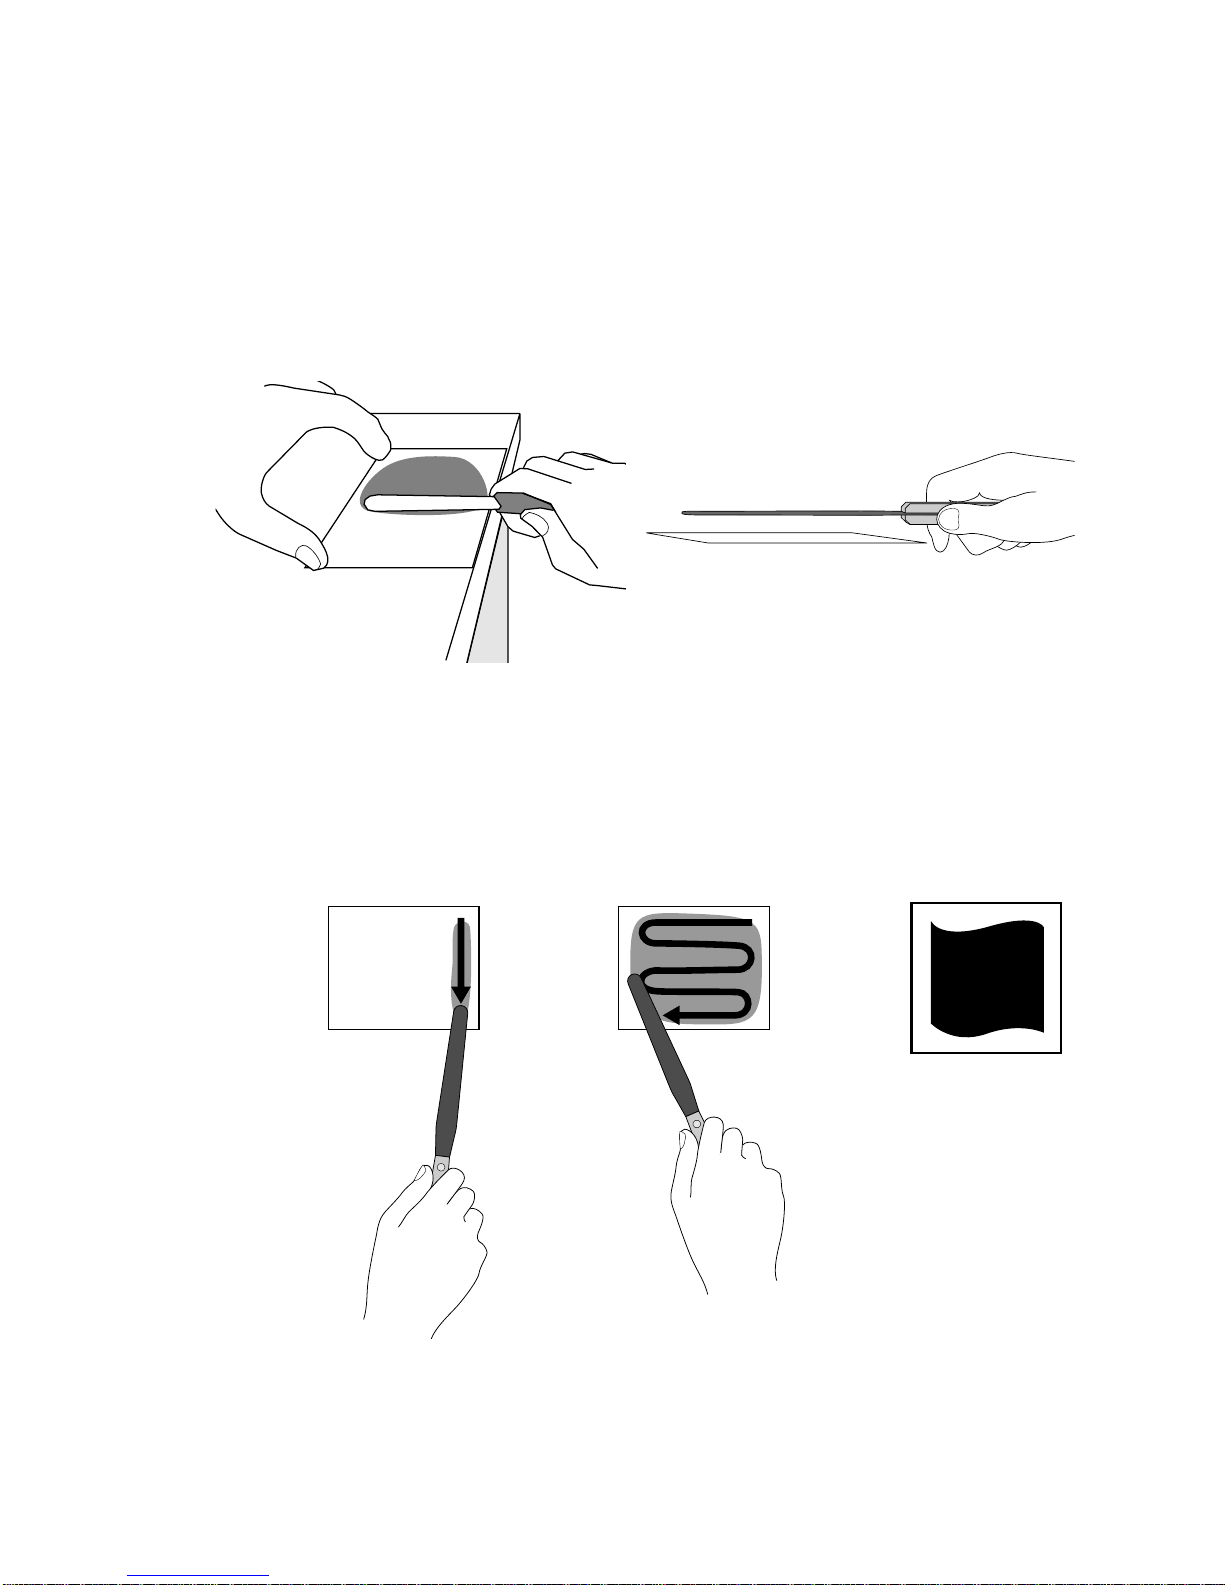
Liquid samples should be pipetted onto the pad. Solids samples should be spread
onto a pad placed on the edge of a clean, flat surface, such as a countertop. The
spatula should be held level with the pad when spreading the sample to ensure a
smooth, uniform application of sample to the pad surface.
If the sample is an organic solvent-based liquid, special handling is required.
Equipment and method modification may be required. CEM recommends using
the SMART System5 Exhaust Kit when analyzing solvent based samples.
Non-polar organic solvents do not absorb microwave energy; therefore, samples
containing this type of solvent will not dry unless they are mixed with a diluent
which absorbs microwave energy and has a higher boiling point than the non-polar
solvent.
If the sample is a polar organic solvent-based liquid, samples will absorb
microwave energy and dry as readily as a water-based liquid. If the organic solvent
is an alcohol, a ketone, or an ester, samples should be tested with water-based
techniques.
Page 24
17
Some base resins are microwave absorbers. Polyester is a known base resin that is
an absorber of microwaves. Titanium dioxide and calcium carbonate have also
been found to be microwave absorbent. If these materials are present in a sample,
usually enough heat is generated to remove most high boiling non-polar solvents
and any other volatiles. Oils become very hot when placed in the microwave field.
Some metal based samples can be tested. If carbon black is present in a sample, it
will heat very quickly and possibly burn even at low power levels.
It is recommended that CEM Corporation or a local distributor be consulted prior
to testing any solvent based sample.
General Sample Application Technique
If the sample is in a paste, semi-solid, or crumb form or a raw or skeletal meat
product such as fresh pork, ground beef, or chicken, place the sample on the end
of a spatula and spread it across one end of the pad. Then spread the sample to a
uniform thickness covering approximately 90% of the pad surface area.
1 Spread Thin Layer Across 90% of Pad
Page 25
18
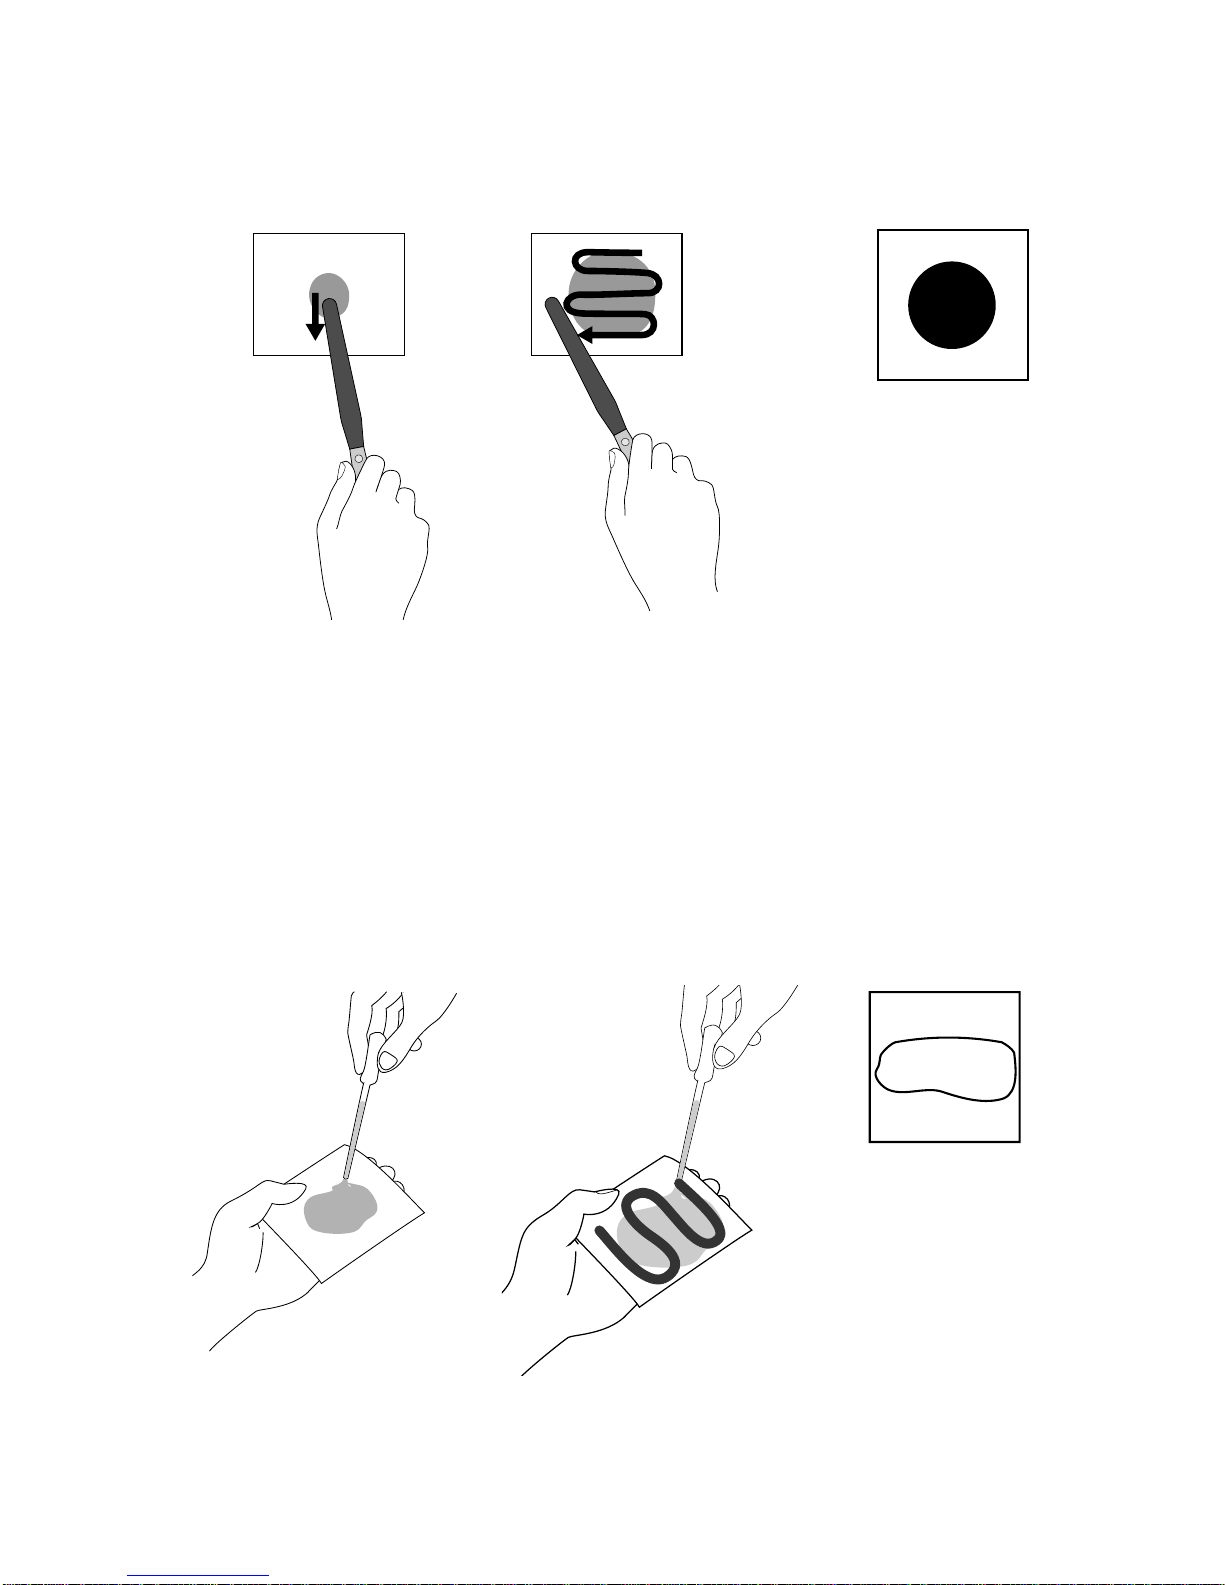
If the sample contains bound water such as an all-meat emulsion, cooked all-meat
sausage, sausage with extenders, semi-dry sausage, or ham, place the sample on
the end of the spatula and apply the sample to the middle of the pad. Then spread
the sample around the pad in a circle to generate thermal heat.
2 Spread Layer on Pad
If the sample is a heat sensitive sample such as a water-based or solvent-based
liquid, use a pipette to dispense the sample onto the pad(s). Sample size should be
2-5 grams, based on solid content of the sample – 2-3 grams for high solids
samples, 4-5 grams for samples containing less than 15 percent solids. Samples
containing less than two percent solids may require as much as 10 grams for
analysis. Large quantity samples should be pipetted onto the pads in a thin even
layer. Additional glass fiber pads may be used for increased absorbency. A
sufficient number of pads should be used to ensure that liquid samples do not drip
onto the floor of the instrument cavity.
3 Puddle, Spread with Pipette and Cover
Page 26
19
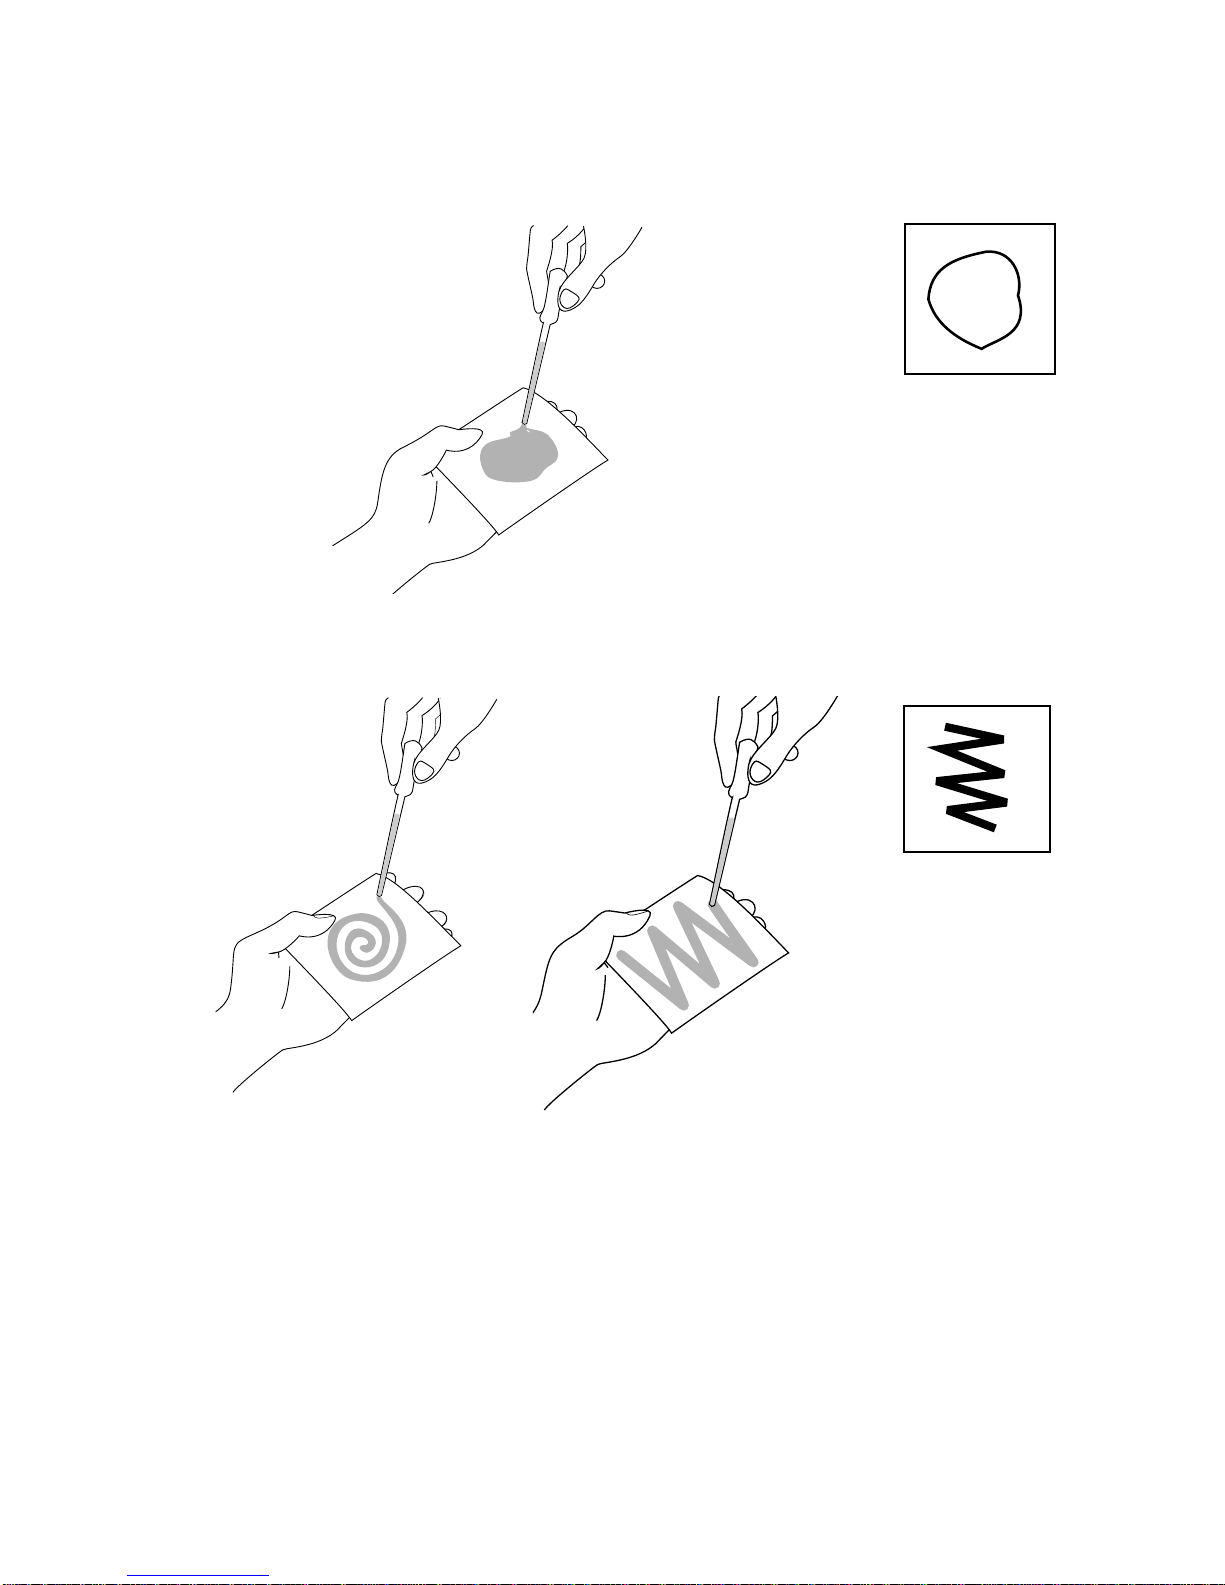
4 Puddle and Cover
5 Swirl or Zig-Zag Pattern, No Cover
Standard application used for heat sensitive samples if sample burns when using
the puddle and spread technique.
If the sample is a water-based liquid or solvent-based chemical, use a pipette to
puddle the sample onto the pad(s). Cover the sample with an additional pad. A
sufficient number of pads should be used to ensure that liquid samples do not drip
onto the floor of the instrument cavity.
Page 27

20
Method Information
Most water based samples should achieve constant weight settings in 1 - 3
minutes.
The microwave power and temperature settings should be appropriate to the
sample. The standard oven or vacuum oven temperature recommended in a
reference method for the sample should be followed. If no reference method is
available, a starting temperature of 100 °C should be programmed. Because the
power level in the instrument is adjusted based on temperature feedback, most
samples can be dried using a 100% power level setting. If a sample contains a
strong microwave absorber such as carbohydrates, the power level will likely need
to be adjusted. In most instances, a 10% power change will be sufficient to prevent
overheating.
During the initial testing of a new sample, the weight display should be monitored
to ensure that the sample does not ignite and that a stable weight reading is
displayed. Sharp declines in weight indicate excessive sample heating. If ignition
occurs, the flame detection sensor will abort the analysis.
Samples that are strong absorbers of microwave energy should be diluted or tested
at reduced power levels. These products usually contain simple carbohydrates or
tightly held moisture that will not readily escape, causing overheating and/or
burning and non-reproducible results. These samples should be tested at a low
power. Examples of heat sensitive samples include powders, paper fibers, candy
and black liquor.
Page 28

21
Bias Identification
Most samples can be analyzed for percent moisture content with a CEM drying
method, and results will compare precisely with the standard test method.
Occasionally, however, all volatiles in a particular sample cannot be removed with
microwave power. Different spread techniques can be used to eliminate the need
for a moisture bias in most samples. Sometimes browning of the sample in the
same manner as in the air oven will also produce test results comparable to the
standard test.
If microwave moisture test results are repeatable, but not comparable to the
standard test results, a bias can be identified. With most samples, the bias will
amount to only a few tenths of a percent. To determine a moisture bias, prepare a
sample for testing, ensuring that the sample is homogeneous. Test this sample by
both a standard method and the CEM microwave method. Perform at least ten tests
by each method to check repeatability, then figure an average of the ten results.
Subtract the average of the microwave test results from the average of the standard
test results. Enter the resulting number (moisture bias) into the CEM moisture/
solids instrument. Corrected moisture test results will be displayed and printed. If
the difference in the average test results is a negative number, the power level
should be reduced and the tests should be repeated.
Some meat and poultry products, whether raw or cooked, show a fat bias when
analyzed with the CEM instruments. Less fat is extracted by a short solvent
extraction than by the longer ether extraction of the traditional Soxhlet technique.
The bias will be a constant for a given product and should be considered when
generating data.
Cooked sausage (i.e. wieners, bolognas, etc. with extenders) and other cooked
products tend to bind fat in the carbohydrate/protein structure of the cooked
product and will generally yield a lower fat value when extracted in the CEM
instrument than when extracted with the Soxhlet.
For proper determination and use of biases, results from the CEM instrument
should be compared with the results from traditional “long” or standard methods
used by USDA laboratories for compliance testing. Standard methods consist of an
air oven (four hours, 125°C) for moisture and Soxhlet (four hour ether extraction)
for fat. USDA recommends correlation of rapid fat and moisture methods with
these long methods.
USDA Processed Products Inspection Division encourages the use of rapid
methods for fat and moisture analysis to assist in better process control and
compliance. USDA recommends periodic back-up analysis (one in every 10 - 20
analyses) by standard long methods when rapid methods are used in approved
Total and Partial QC (TQC/PQC) Programs. Backup checks can be performed less
frequently as laboratories gain confidence in the established biases. CEM
Corporation also recommends a Quality Assurance Program for establishing and
maintaining biases and to ensure USDA compliance.
Prior to establishing a fat bias for the Fat Analysis System, a laboratory should be
confident of obtaining the best possible results for moisture, since precision of the
fat results will depend on the moisture results. Moisture results should have
repeatability between duplicate analyses of the same sample and a mean or
Page 29

22
”average” moisture values that are close to the values being generated on the same
samples by standard oven. To obtain the best possible results for moisture, and
thus for fat, there are three factors to consider: 1) sample preparation, 2) sample
application technique and 3) power and time parameters.
After establishing moisture repeatability and achieving moisture results as close to
standard ”long” methods as possible, use the following procedure to identify fat
biases for different product categories.
1. Select three or more samples (approximately two pounds each) from
different lots of the same product.
2. Prepare each sample according to standard procedures (3 - 4 passes
through a 5/64” blade, with mixing between grinds, or equivalent).
3. Divide each ground sample in half and package and label sub-samples in
two separate, air-tight containers.
4. Analyze one set of the sub-samples (from step 3) in duplicate by standard
”long” methods – oven for moisture, Soxhlet for fat. If facilities and/or
personnel are not available for these tests, use an independent laboratory.
Request raw data (individual tests) from the laboratory, not the mean or
”average” value.
5. After obtaining the results from the standard ”long” methods, analyze the
other set of subsamples in the CEM Moisture/Solids Analyzer for
moisture only. Adjust power and spread technique until acceptable
moisture repeatability is achieved.
6. After obtaining acceptable moisture repeatability, use the Fat Analysis
System and perform 3 - 5 moisture and fat analyses for each sample. As
with moisture, fat results should be repeatable. To obtain optimum fat
results, use a sufficient redry time. Two minutes is typical, although some
samples may require more time. The sample weight should be stable
(<0.2 mg weight change in the last five seconds). An insufficient redry
time will yield artificially low fat results since the true dry, extracted
weight will not be reached.
7. Subtract values obtained from the SMART System 5 from Soxhlet values.
Average the differences to identify the average bias for a specific product
or product group.
Sample A B C
Average Soxhlet fat xx xx xx
- Average CEM fat xx xx xx
= Bias xx xx xx
(A + B + C)/3 = Average Fat Bias
8. The bias should be relatively less than 2.0% and must be added to the fat
results from the SMART System 5 to produce results that correlate closely
with official methods. Repeat this process on a regular basis to confirm
that the bias is consistent. Raw meats and blends will produce smaller
biases than cooked products with extenders.
Page 30
23
Determining Ash/COH for Processed Meats
For samples that contain salt, sugar, spice, cure or other added components, ash/
carbohydrate (COH) values must be determined by analysis. For purposes of
calculating the protein by difference, the specific amount of each component (salt,
spice, bone, etc.) is not important, only the total amount.
To determine ash/COH values for finished products or blends with sugar, salt,
spice, etc., use the following procedure:
1. Collect and prepare three (3) samples from different lots of the same
product. Store the samples in airtight containers until tested.
2. Analyze the 3 samples in duplicate for fat and moisture in the
SMART System 5 and Fat Analysis System and for protein using “long”
methods (Kjeldahl). If necessary, an independent laboratory can provide
this analysis.
3. Average the results of the duplicate analyses for each sample, then total
the % Protein + % Fat + % Moisture for each sample.
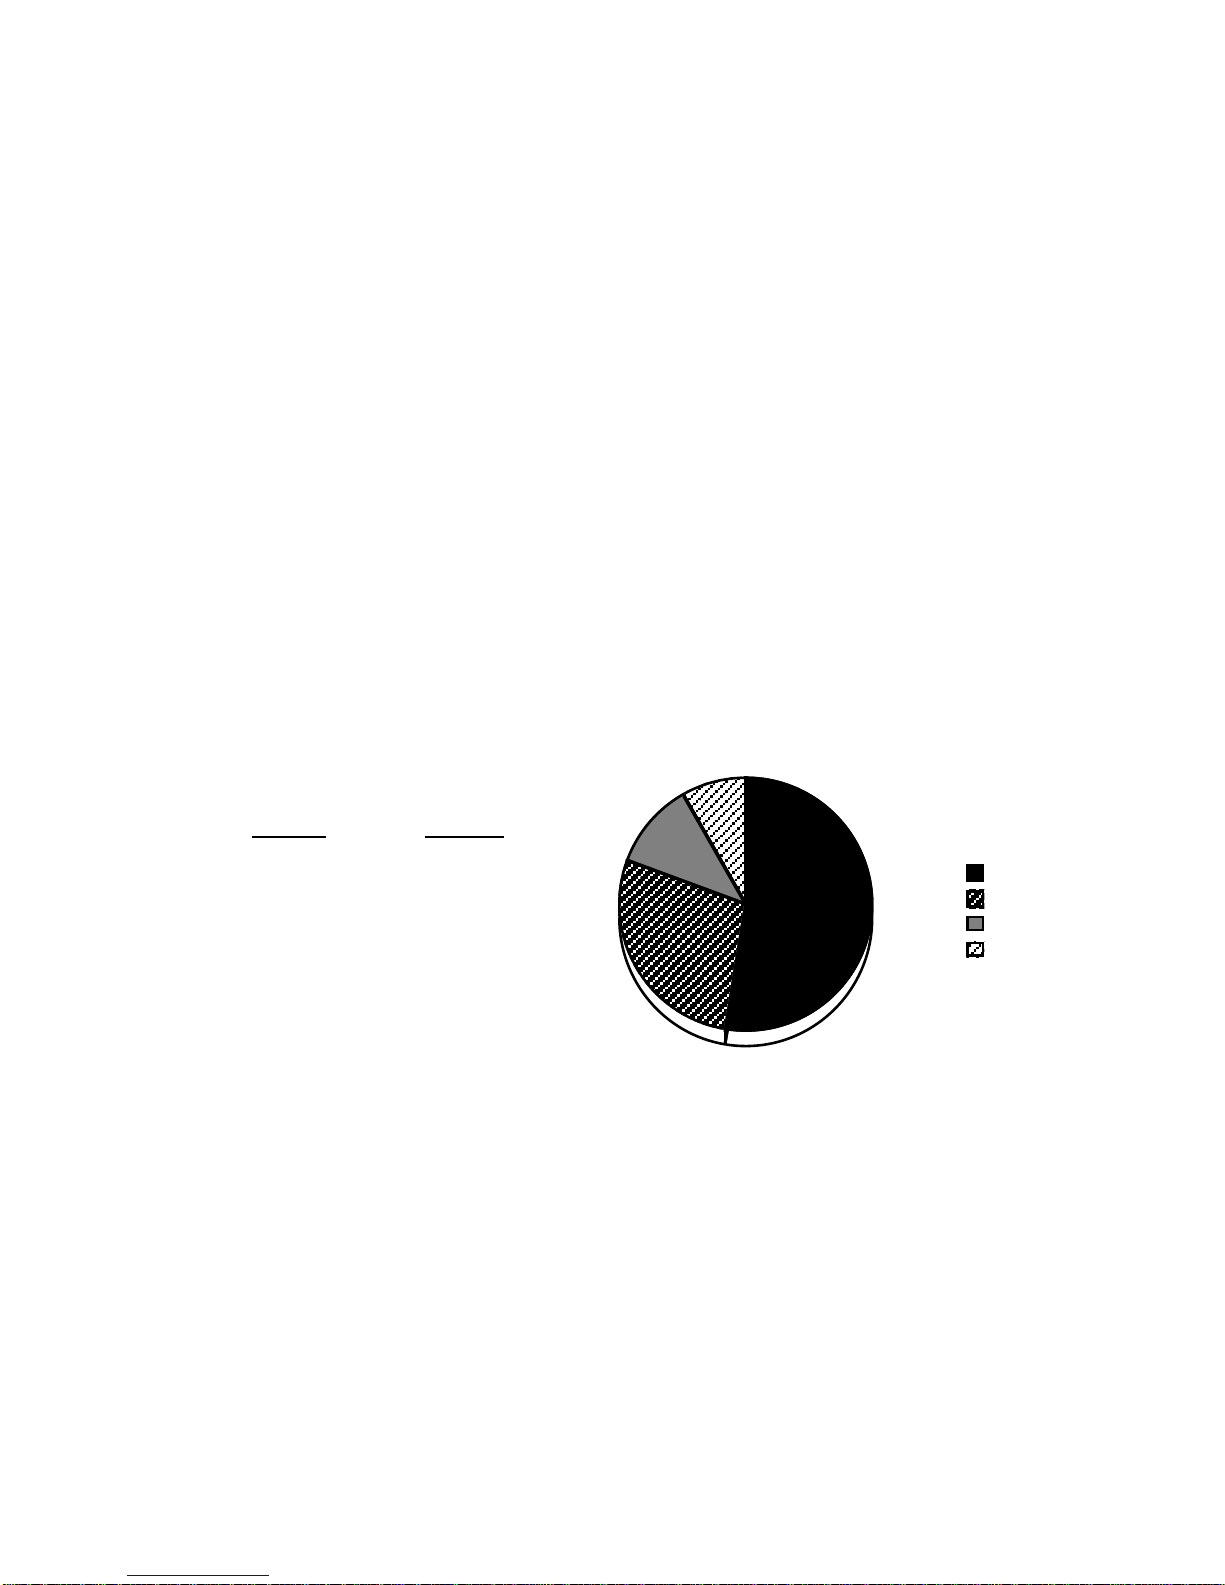
4. Subtract the sum from 100% to get an Ash/Carbohydrate factor. For
example, if the composition of a sample is:
Moisture 52.54%
Fat 28.36%
Protein 11.25%
Total 92.15%
Ash/COH = 100% - 92.15%
Ash/COH = 7.85%
5. Calculate an average of the the ash/COH values for each of the 3
samples and program that factor into the SMART System 5.
Check samples periodically to verify the ash/COH values. Variations in the
amount of added constituents (salt, sugar, spice, extenders, etc.) can cause the ash/
COH factor to vary.
7.85%
11.25%
8.36%
52.54%
Moisture
Fat
Protein
Ash/COH
Page 31

24
Ash Content Of Meats
The following values should be helpful in establishing ash/carbohydrate factors for
raw meats. Since the carbohydrate values for these meats are so low, the ash alone
is usually adequate. Obviously, for meats with added salt, spice, cure, sugars, soy,
etc., the ash/COH values will vary.
The following values are estimates since composition may vary due to individual
differences in the the meat sources, seasonal variations, processing, etc.
Moisture Protein Fat Ash
Green Beef Material
Bull Meat 67.90 19.40 11.70 1.00
Ship Boneless Beef 64.00 16.20 19.00 .80
Regular Boneless Beef 70.00 20.00 9.00 1.00
Boneless Beef Pad. for Ck. 65.70 18.30 15.00 1.00
Boneless Bull Chux 72.50 19.80 7.20 .50
Boneless Chux C. & C. 70.00 19.30 9.70 1.00
Boneless Ship Chux 62.10 17.55 19.35 1.00
Shank Meat 72.60 19.80 6.60 1.00
Clods 72.30 20.18 6.90 .62
Sirloin Butts 66.60 19.40 13.00 1.00
Star Beef (Dry Saus.) 70.00 20.00 9.00 1.00
Spcl. Beef 69.00 19.00 11.00 1.00
Spcl. Bf. Trmgs. 52.50 14.60 31.90 1.00
Reg. Bf. Trmgs. 64.60 19.40 15.00 1.00
Bnls. Plates 43.60 13.40 42.00 1.00
Bnls. Flanks 41.90 13.10 44.00 1.00
Bnls. Plate Trmgs. 40.30 12.70 46.00 1.00
Beef Fat 11.80 5.10 82.90 .20
Beef Fat from Old Cow 22.20 5.60 71.80 .40
Brains 77.40 11.40 9.80 1.40
Cheeks 70.00 19.30 9.70 1.00
Diaphragm Meat 65.79 18.21 15.60 .50
Gullet Meat 73.20 16.80 9.00 1.00
Head Meat 68.45 18.96 11.59 1.00
Hearts 72.40 16.55 9.80 1.25
Lips 59.40 17.07 22.53 1.00
Lungs 78.00 18.80 2.20 1.00
Tongues 64.25 17.75 17.00 1.00
Tongue Trmgs. 69.40 19.17 10.43 1.00
Tripe, Cooked 81.90 15.50 2.10 .50
Page 32

25
Ash Content Of Meats (Continued)
Moisture Protein Fat Ash
Green Pork Material
Spiced Ham Trmgs. 61.10 16.90 21.00 1.00
Lean Ham Trmgs. 63.80 17.70 17.50 1.00
Hamette 66.40 18.40 14.20 1.00
Corned Pk. Shldr. Mt. 61.80 15.00 20.00 3.20
A Shoulder Trmgs. 61.80 17.10 20.10 1.00
B Shoulder Trmgs. 45.40 12.70 40.90 1.00
B & F Shldrs. 1/2” Fat 49.20 13.80 36.00 1.00
B & F Shldrs. 1” Fat 45.30 12.70 41.00 1.00
Lean Picnic Trmgs. 59.90 16.60 22.50 1.00
C.T. Butts 57.90 16.10 25.00 1.00
Boneless Boston Butts 47.30 13.20 38.50 1.00
Bnls. Packer Side Mt. 124-55 41.10 11.30 46.60 1.00
Skd. Belly Mt. 24.80 7.00 67.50 .70
Reg. Pk. Trmgs. 34.30 9.70 55.00 1.00
Neck Bone Trmgs. 51.50 14.40 33.10 1.00
Spec. Lean Trim. 58.10 15.90 25.00 1.00
A Pk. Trmgs. 68.80 22.50 8.00 .60
Blade Meat 73.10 18.00 7.80 1.10
Picnic Shank Meat 65.30 18.90 15.00 .80
Ham Shank Meat 62.60 17.60 19.00 .80
Pk. Trmgs. Pad for Ck. 64.00 15.00 20.00 1.00
Neck Fat Skin Off 13.00 2.60 84.00 .40
Skd. Jowls 22.10 5.70 71.70 .50
Belly Fat Skin Off 6.40 1.30 92.20 .10
Ham Fat Skin Off 11.80 3.10 84.90 .20
Back Fat Skin Off 5.70 1.30 92.90 .10
Gelatin Skins 10% Fat 47.50 22.80 28.50 1.20
Brains 77.40 11.80 9.80 1.00
Cheeks 67.25 15.75 16.00 1.00
Cheeks Pad. for Ck. 67.25 15.75 16.00 1.00
Diaphragm Meat 68.20 17.00 13.65 1.15
Gullet Mt. 74.60 16.20 8.00 1.20
Head Mt. 58.00 15.25 25.00 1.75
Head Skins 32.40 9.25 57.37 .98
Hearts 74.40 17.50 7.00 1.10
Jaw Mt 69.00 18.73 11.27 1.00
Livers 69.80 23.50 3.85 2.85
Melts 79.30 17.70 1.80 1.20
Snouts 52.25 14.61 32.14 1.00
Snout Mt. 59.00 16.43 23.57 1.00
Stomachs 70.25 13.85 13.50 1.90
Tongues 58.35 16.25 24.50 1.00
Tongue Trmgs. 26.50 8.65 64.85 .10
Page 33

26
Ash Content Of Meats (Continued)
Moisture Protein Fat Ash
Cured Pork Material
Clear Fat 18.10 2.30 78.10 1.50
DS Fat Backs 9.20 1.80 85.00 4.00
Smoked Pk. Skins 12.80 38.00 46.50 2.70
Bacon Ends and Pcs. 14.50 7.70 76.00 2.50
High Fat Cracklings 6.00 19.00 74.00 0.00
Med. Fat Cracklings 5.00 43.00 51.00 0.00
Low Fat Cracklings 8.00 84.50 6.50 0.00
Green Calf Material
Reg. Bnls. Veal 72.25 19.80 6.95 1.00
Cheeks 74.50 17.21 7.21 1.00
Gullet Mt. 76.50 15.20 7.30 1.25
Hearts 71.70 19.67 7.63 1.00
Tripe 87.30 9.00 3.20 .50
Green Sheep Material
Reg. Boneless Mutton 69.40 19.17 10.43 1.00
Cheeks 67.90 18.84 12.26 1.00
Gullett Mt. 75.00 15.40 9.10 .50
Hearts 67.20 14.90 14.40 3.50
Tripe 90.05 8.07 1.40 .48
Page 34

27
Methods Development
The CEM Applications Laboratory has developed procedures for various types of
samples. These procedures include parameters (program, power, time, sample
preparation, etc.) needed to program the SMART System5™ and analyze samples
in the SMART System5 and Fat Analysis System. CEM sample analysis
procedures can be requested from the CEM Applications Laboratory.
If a procedure for a particular sample is not included in the applications list, review
all information in this chapter relating to sample preparation, sample spread
technique, time and power parameters, redry time, and bias identification to
develop an application method. If necessary, call the CEM Applications
Laboratory for additional information and assistance (800) 726-3331.
1. Begin testing at 100% power and 100 °C.
2. If the sample has high solids content (approximately 75% solids), begin
testing with a low sample weight (1 - 2 grams).
3. Use Quick Test, Constant Weight for testing.
4. Observe weight change closely. The weight should steadily decline. If
weight is erratic (±1 mg), the test should be stopped because the sample is
probably burning. Reduce the power to 50% and perform the test again. If
the sample continues to burn, adjust the power in 5 degree increments.
5. Record final weight result and time.
6. Perform multiple sample tests with determined power and time. Results
should be within ±0.2%.
7. For fat content results, the re-dry power setting should be no higher than the
power setting used to remove moisture.
Page 35

28
Page 36

29
Quick Test
1. POWER: 0%
2. DELTA WEIGHT: 0.0 mg
3. DELTA TIME: 0 secs
4. MAX TIME: 10 mins
5. MAX TEMP: 110 C
6. MIN WT RANGE: 2.00 g
7. MAX WT RANGE: 4.00 g
8. WT COMPENSATION: OFF
Input power, press ENTER.
Entry: 000
SET
TIME
CEM Main Menu
1. QUICK TEST
2. EDIT/CREATE METHOD
3. LOAD METHOD
4. SETUP
5. PRINT
6. STATISTICS
Press item number to select.
METHOD - QUICK TEST
Quick Test
Quick Test permits entry of parameters for a onetime analysis or method development. The Quick
Test method permits two sample analysis
procedures – Constant Weight and Set Time.
Constant Weight
Constant weight permits the operator to dry a
sample until a constant weight is achieved.
Dryness is specified by defining a maximum
acceptable weight loss over a specified time
interval. During the specified time, when the
weight loss is equal to or less than that which
was specified, the analysis stops and results are
calculated.
1. With the CEM Main Menu displayed, press
“1” to activate Quick Test.
2. Press “1” to select and enter power.
3. Using the numeric keys, enter the power
level (1 - 100%).
4. Press ENTER.
5. Press “2” to select and enter delta weight.
Note: To edit any of the parameters, press the
numeric key of the parameter to be edited and
use the numeric keys to enter the new parameter.
Then, press ENTER.
6. Using the numeric keys, enter the delta
weight (.1 - .9). Normally a weight loss
differential of 0.2 - 0.5 mg is used.
7. Press ENTER.
Quick Test
1. POWER: 0%
2. DELTA WEIGHT: 0.0 mg
3. DELTA TIME: 0 secs
4. MAX TIME: 10 mins
5. MAX TEMP: 110 C
6. MIN WT RANGE: 2.00 g
7. MAX WT RANGE: 4.00 g
8. WT COMPENSATION: OFF
Press item number to select.
SET
TIME
Quick Test
1. POWER: XXX%
2. DELTA WEIGHT: 0.0 mg
3. DELTA TIME: 0 secs
4. MAX TIME: 10 mins
5. MAX TEMP: 110 C
6. MIN WT RANGE: 2.00 g
7. MAX WT RANGE: 4.00 g
8. WT COMPENSATION: OFF
Input delta weight, press ENTER.
Entry: 0. 0
SET
TIME
➞
➞
Page 37

30
Quick Test
1. POWER: XXX%
2. DELTA WEIGHT: X.X G
3. DELTA TIME: XX secs
4. MAX TIME: XX mins
5. MAX TEMP: XXX C
6. MIN WT RANGE: 2.00 g
7. MAX WT RANGE: 4.00 g
8. WT COMPENSATION: OFF
Input min wt range, press ENTER.
Entry: 02.00
SET
TIME
Quick Test
1. POWER: XXX%
2. DELTA WEIGHT: 0.0 mg
3. DELTA TIME: 0 secs
4. MAX TIME: 10 mins
5. MAX TEMP: 110 C
6. MIN WT RANGE: 2.00 g
7. MAX WT RANGE: 4.00 g
8. WT COMPENSATION: OFF
Input delta time, press ENTER.
Entry: 00
SET
TIME
8. Press “3” to select and enter delta time.
9. Using the numeric keys, enter the delta
time
(1 - 60 seconds). Normally a differential
time interval of 10 - 15 seconds is used.
10. Press ENTER.
Note: Maximum run time is the amount of time
the instrument will operate prior to shutdown if a
constant weight has not been reached. A
maximum run time must be entered or the
program will be invalid. If the instrument shuts
down due to maximum run time, parameters
should be adjusted prior to repeating the
analysis.
11. Press “4” to select and enter maximum run
time. If using the default value of 10
minutes, omit step 12.
12. Using the numeric keys, enter the
maximum run time (1 - 60 minutes).
13. Press ENTER.
14. Press “5” to select and enter maximum
temperature. If using the default value of
110°C, omit step 15.
15. Using the numeric keys, enter the
maximum temperature (0 - 300 °C) of the
instrument during the analysis.
16. Press ENTER.
17. Press “6” to enter a minimum weight
range. If using the default minimum
weight range of 2.00 g, omit step 18.
18. Using the numeric keys, enter the
minimum weight range of the sample (0 50 g).
19. Press ENTER.
Quick Test
1. POWER: XXX%
2. DELTA WEIGHT: X.X mg
3. DELTA TIME: XX secs
4. MAX TIME: 10 mins
5. MAX TEMP: 110 C
6. MIN WT RANGE: 2.00 g
7. MAX WT RANGE: 4.00 g
8. WT COMPENSATION: OFF
Input max time, press ENTER.
Entry: 10
SET
TIME
Quick Test
1. POWER: XXX%
2. DELTA WEIGHT: X.X mg
3. DELTA TIME: XX secs
4. MAX TIME: XX mins
5. MAX TEMP: 110 C
6. MIN WT RANGE: 2.00 g
7. MAX WT RANGE: 4.00 g
8. WT COMPENSATION: OFF
Input max temp, press ENTER.
Entry: 110
SET
TIME
➞
➞
➞
➞
Page 38

31
20. Press “7” to enter a maximum weight
range. If using the default maximum
weight range of 4.00 g, omit step 21.
21. Using the numeric keys, enter the
maximum weight range of the sample (0 50 g).
22. Press ENTER.
Note: Weight compensation is designed for use
with samples having a buoyancy effect created
by heat. It should be used (turned on) for
samples, such as milk, margarine, condiments,
etc., which have a higher temperature when the
final weight is calculated than at the beginning of
the test.
23. Press “8” to toggle weight compensation
“on” or “off.”
Note: To edit any of the parameters, press the
numeric key of the parameter to be edited and
use the numeric keys to enter the new parameter.
Then, press ENTER.
24. Press READY to begin the analysis.
Note: The Quick Test screen appears indicating
the power, temperature and time.
Note: Press the operation key below EDIT to
return to the Quick Test parameter screen to edit
method parameters.
25. If Autotrack is turned off, a sample identification is required. Press the operation key
below ID.
Quick Test
1. POWER: XXX%
2. DELTA WEIGHT: X.X mg
3. DELTA TIME: XX secs
4. MAX TIME: XX mins
5. MAX TEMP: XXX C
6. MIN WT RANGE: X.XX g
7. MAX WT RANGE: X.XX g
8. WT COMPENSATION: OFF
Press READY to run test.
SET
TIME
Quick Test
1. POWER: XXX%
2. DELTA WEIGHT: X.X mg
3. DELTA TIME: XX secs
4. MAX TIME: XX mins
5. MAX TEMP: XXX C
6. MIN WT RANGE: X.XX g
7. MAX WT RANGE: 4.00 g
8. WT COMPENSATION: OFF
Input max wt range, press ENTER.
Entry: 04.00
SET
TIME
QUICK TEST
Power: xxx%
Temp (xxx): xx.x
Time: xx:xx
Wt: x.xxxxg
Place pads on balance and
press TARE.
ID EDIT
1 2 3 4 5
➞
Quick Test
1. POWER: 0%
2. DELTA WEIGHT: 0.0 mg
3. DELTA TIME: 0 secs
4. MAX TIME: 10 mins
5. MAX TEMP: 110 C
6. MIN WT RANGE: 2.00 g
7. MAX WT RANGE: 4.00 g
8. WT COMPENSATION: OFF
Press item number to select.
SET
TIME
➞
Page 39

32
26. Using the operation keys below the arrows,
position the cursor on (select) the first
number or letter of the sample identification. Press ENTER. Continue to position
the cursor on each letter or number and
press ENTER until the identification is
complete.
Note: If using an identification number only, use
the numeric keys to enter the number.
27. Press READY to return to the Quick Test
screen.
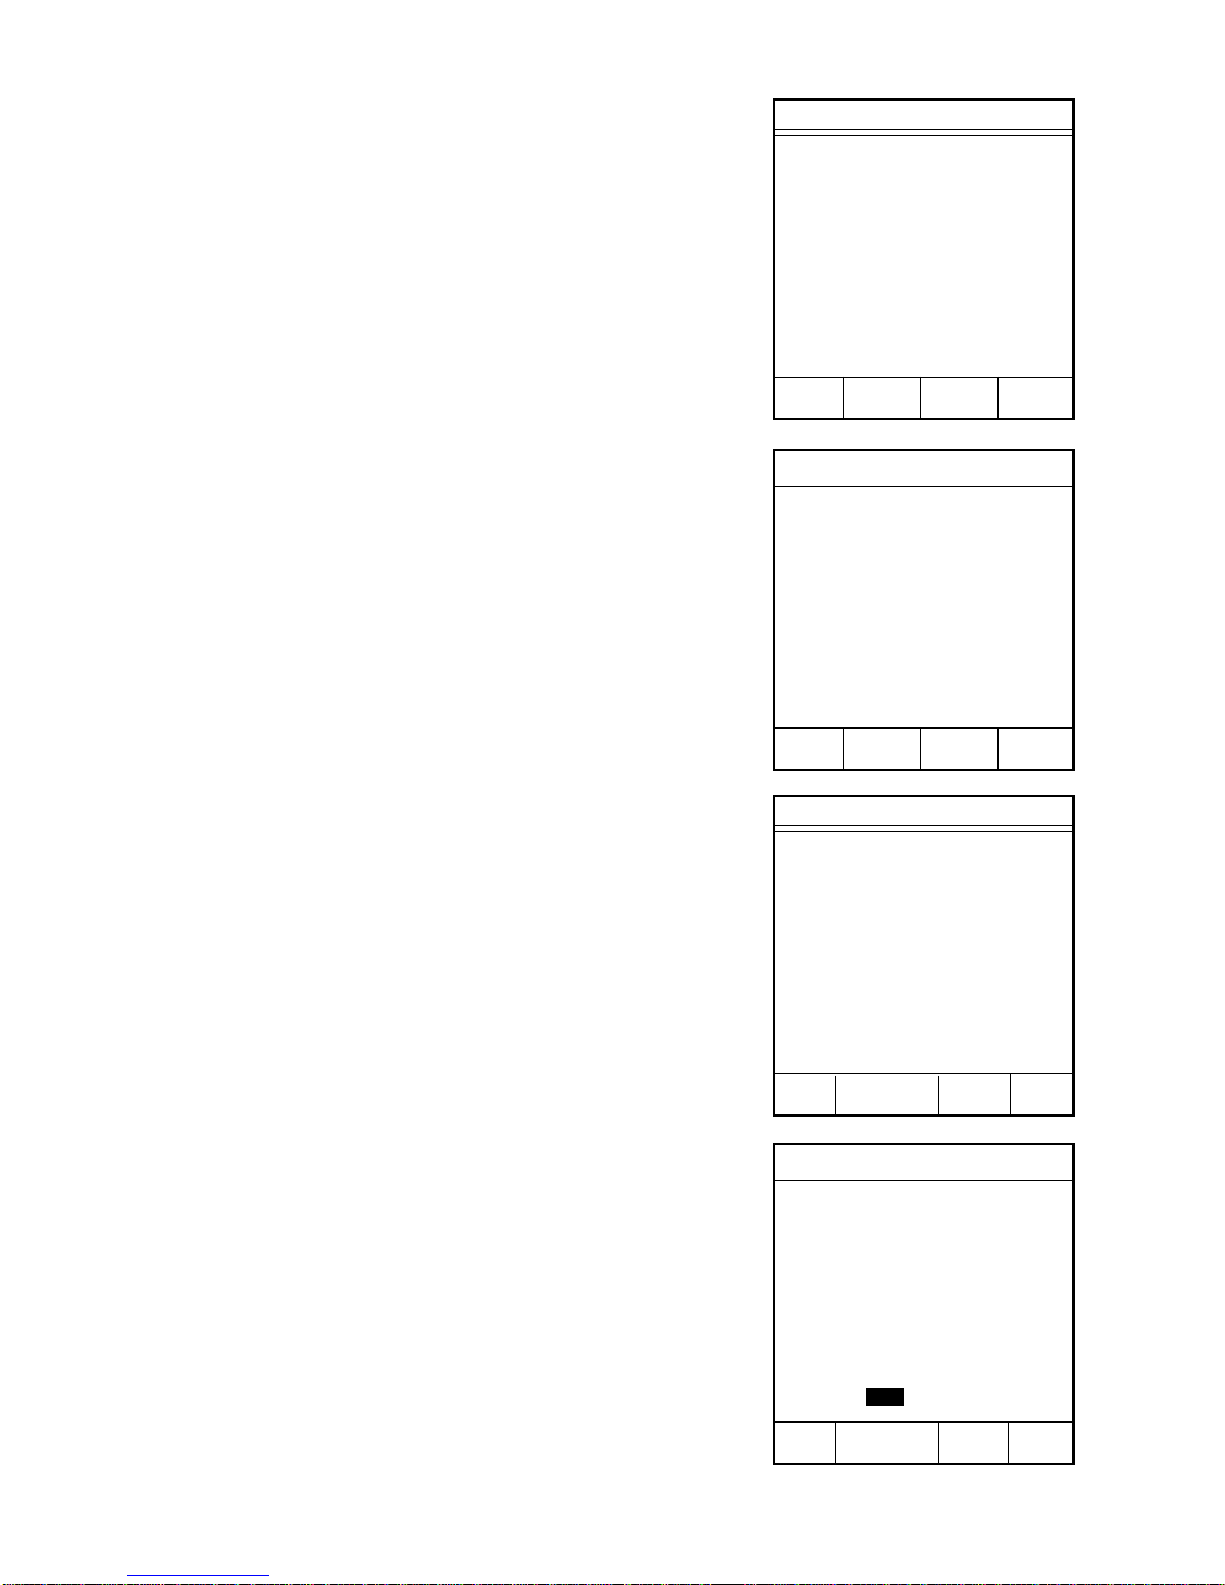
28. Lift the top cover of the SMART System
5™. Place two glass fiber sample pads on
the balance pan. Close the top cover.
29. Press TARE.
30. Wait for the instrument to tare the weight
of the sample pads. The Quick Test screen
will reappear when the tare function is
complete.
Note: The “T” in the lower left corner of the
balance icon indicates that the weight of the
sample pads has been tared.
31. Lift the instrument cover. Apply the
sample in a thin, even layer to one of the
sample pads. Quickly and gently place the
sample pads back on the balance pan.
Close the top cover.
32. Press START.
QUICK TEST
Sample ID: xxxxxx
Power: xxx%
Temp (xxx): xx.x
Time: xx:xx
Wt: x.xxxxg
Place pads on balance and
press TARE.
ID EDIT
QUICK TEST
Sample ID: xxxxxx
Power: xxx%
Temp (xxx): xx.x
Time: xx:xx
Wt: x.xxxxg
Place sample and pads on
balance and press START.
ID EDIT
1 2 3 4 5
TARING BALANCE . . .
T
1 2 3 4 5
SAMPLE ID:
0 1 2 3 4 5 6 7 8 9 A B
C D E F G H I J K L M N
O P Q R S T U V W X Y Z
Space Delete
Highlight choice, press ENTER.
Press READY to continue.
➞
➞
➞
➞
Page 40

33
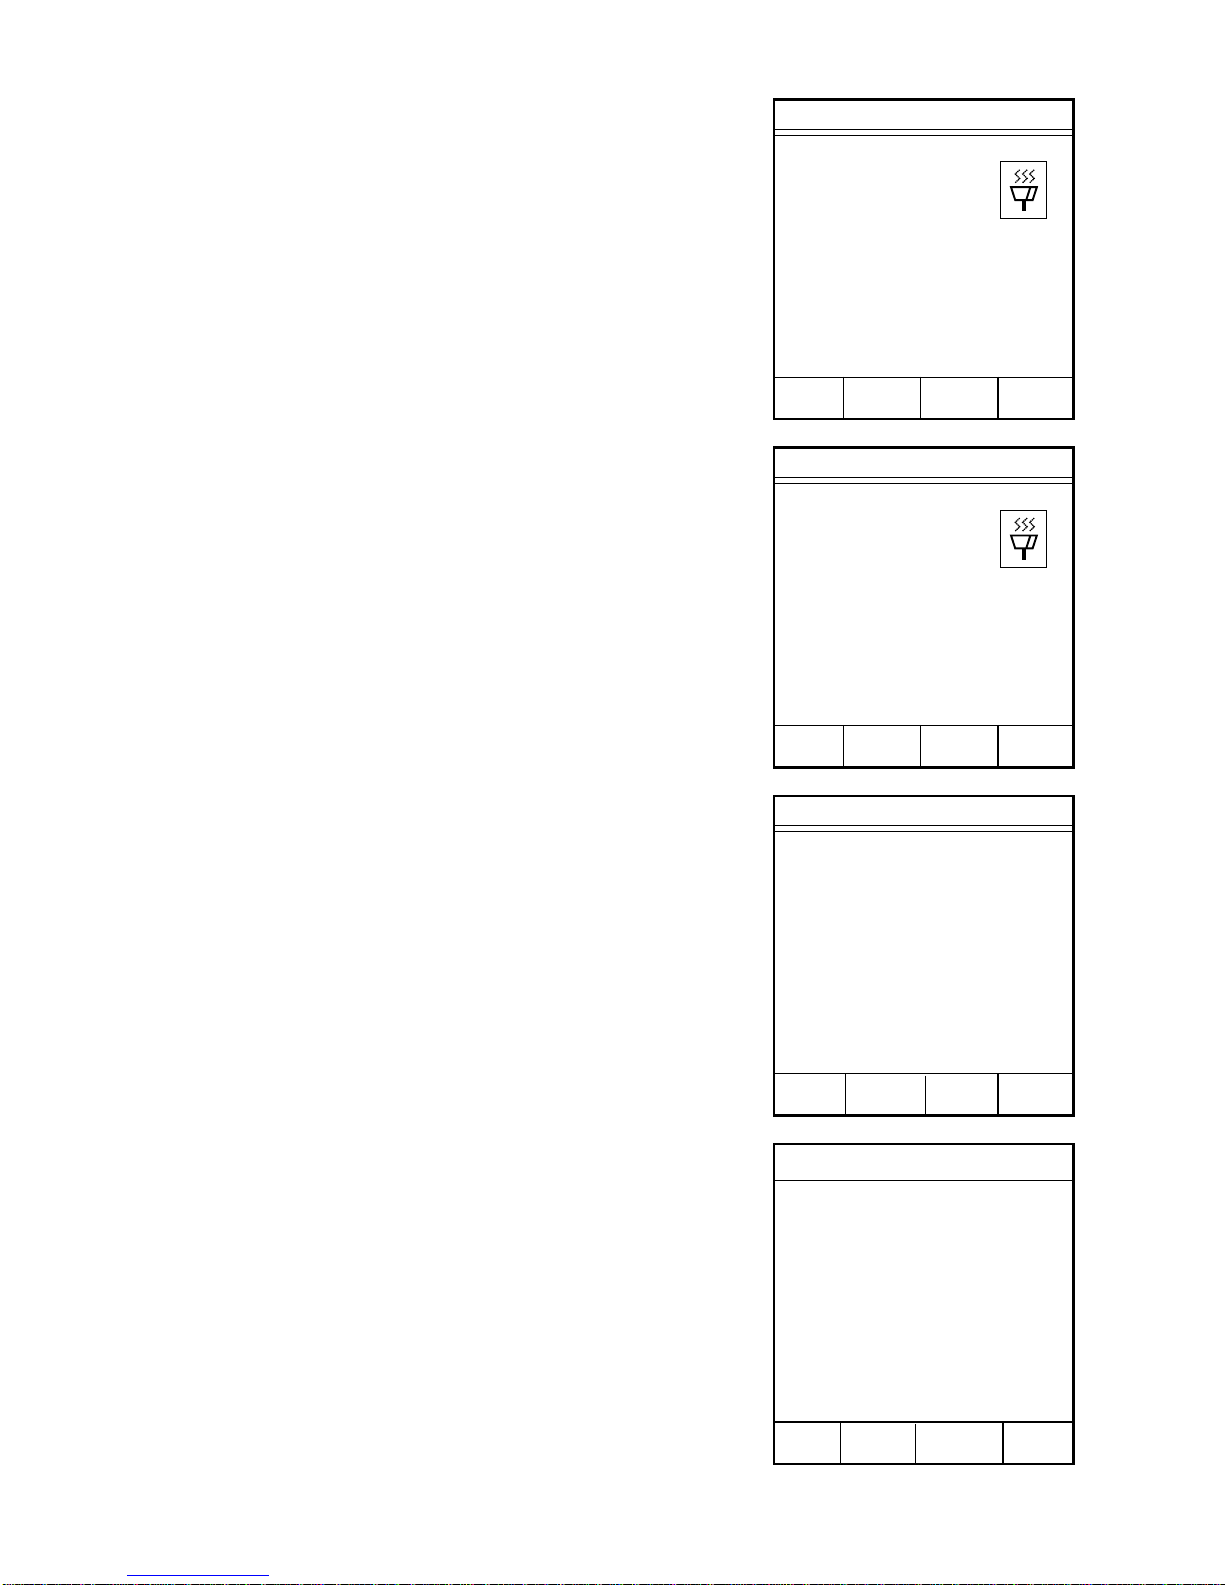
The instrument reads and records the initial
weight of the sample prior to beginning the
analysis.
As the analysis begins, the flashing microwave
indicators in the balance icon appear and the
time begins counting upward. The sample weight
decreases as the moisture is removed.
During the drying time, the operation key below
SOLIDS or MOISTURE may be pressed to
display % solids or % moisture.
When the weight loss is equal to or less than the
selected parameter, five short beeps will be
heard, and the Data Results screen will appear,
displaying either the % moisture or % solids as
selected.
Note: Press READY to analyze additional
samples using the same method.
Note: Press the operation key below FORM
FEED to advance paper from the internal printer.
33. Press the operation key below DATA to
display the analysis data.
QUICK TEST
Sample ID: xxxxxx
Power: xxx%
Temp (xxx): xx.x
Time: xx:xx
Moisture: xx.xx%
Wt: x.xxxxg
STOP
SOLIDS TEST
QUICK TEST
Sample ID: xxxxxx
Power: xxx%
Temp (xxx): xx.x
Time: xx:xx
Solids: xx.xx%
Wt: x.xxxxg
STOP
MOISTURE TEST
Data Results
XX.XX%M
Press READY to continue.
MAIN FORM
MENU FEED DATA PRINT
READING BALANCE . . .
Page 41

34
Sample Weight Data
Initial Wt: xx.xxxxg
Final Wt: xx.xxxxg
Diff Wt: xx.xxxxg
Press READY to continue.
MAIN PREV
MENU PAGE
34. Press the operation key below SAMPLE
WEIGHTS to view sample weight
information.
The Sample Weight Data screen displays the
initial weight, the final weight and the
differential weight.
35. Press the operation key below PREV
PAGE to return to the Data Results screen.
36. Press the operation key below PRINT to
print the analysis results either on the
internal printer or an external printer, if
installed.
Note: Press READY to analyze additional
samples using the same method.
37. Press the operation key below MAIN
MENU to return to the CEM Main Menu
screen.
Data Results
Sample ID: xxxxxxxxx
Dry Time: xx:xx
Moisture: xx.xx%
Solids: xx.xx%
Press READY to continue.
MAIN FORM SAMPLE
MENU FEED WEIGHTS PRINT
CEM Main Menu
1. QUICK TEST
2. EDIT/CREATE METHOD
3. LOAD METHOD
4. SETUP
5. PRINT
6. STATISTICS
Press item number to select.
METHOD - QUICK TEST
Data Results
Sample ID: xxxxxxxxx
Dry Time: xx:xx
Moisture: xx.xx%
Solids: xx.xx%
Press READY to continue.
MAIN FORM SAMPLE
MENU FEED WEIGHTS PRINT
Page 42
35
Quick Test
1. POWER: 0%
2. RUN TIME: 00:00 min:sec
3. MAX TEMP: 110 C
4. MIN WT RANGE: 2.00 g
5. MAX WT RANGE: 4.00 g
6. WT COMPENSATION: OFF
Press item number to select.
CONSTANT
WEIGHT
Quick Test
1. POWER: 0%
2. RUN TIME: 00:00 min:sec
3. MAX TEMP: 110 C
4. MIN WT RANGE: 2.00 g
5. MAX WT RANGE: 4.00 g
6. WT COMPENSATION: OFF
Input power, press ENTER.
Entry: 000
CONSTANT
WEIGHT
CEM Main Menu
1. QUICK TEST
2. EDIT/CREATE METHOD
3. LOAD METHOD
4. SETUP
5. PRINT
6. STATISTICS
Press item number to select.
METHOD - QUICK TEST
Set Time
Set time permits the operator to control the
sample analysis by entering a specified analysis
time and power level. At the end of the specified
time, the percent solids and/or moisture of the
sample is calculated and displayed.
1. With the CEM Main Menu displayed, press
“1” to activate Quick Test.
2. Press the operation key below SET TIME.
3. Press “1” to enter power.
4. Using the numeric keys, enter the power
level (1 - 100%).
5. Press ENTER.
Quick Test
1. POWER: 0%
2. DELTA WEIGHT: 0.0 mg
3. DELTA TIME: 0 secs
4. MAX TIME: 10 mins
5. MAX TEMP: 110 C
6. MIN WT RANGE: 2.00 g
7. MAX WT RANGE: 4.00 g
8. WT COMPENSATION: OFF
Press item number to select.
SET
TIME
➞
Page 43

36
Quick Test
1. POWER: XXX%
2. RUN TIME: XX:XX min:sec
3. MAX TEMP: XXX C
4. MIN WT RANGE: X.XX g
5. MAX WT RANGE: 4.00 g
6. WT COMPENSATION: OFF
Input max wt range, press ENTER.
Entry: 04.00
CONSTANT
WEIGHT
Quick Test
1. POWER: XXX%
2. RUN TIME: XX:XX min:sec
3. MAX TEMP: XXX C
4. MIN WT RANGE: 2.00 g
5. MAX WT RANGE: 4.00 g
6. WT COMPENSATION: OFF
Input min wt range, press ENTER.
Entry: 02.00
CONSTANT
WEIGHT
Quick Test
1. POWER: XXX%
2. RUN TIME: 00:00 min:sec
3. MAX TEMP: 110 C
4. MIN WT RANGE: 2.00 g
5. MAX WT RANGE: 4.00 g
6. WT COMPENSATION: OFF
Input run time, press ENTER.
Entry: 00:00
CONSTANT
WEIGHT
6. Press “2” to select and enter the sample
drying time.
7. Using the numeric keys, enter the run time
(1 sec. - 99 min. 59 sec.).
8. Press ENTER.
9. Press “3” to select and enter maximum
temperature. If using the default value of
110°C, omit step 10.
10. Using the numeric keys, enter the
maximum temperature (0 - 300 °C) of the
instrument during the analysis.
11. Press ENTER.
12. Press “4” to enter a minimum weight
range. If using the default minimum weight
range of 2.00 g, omit step 13.
13. Using the numeric keys, enter the
minimum weight range of the sample (0 50 g).
14. Press ENTER.
15. Press “5” to enter a maximum weight
range. If using the default maximum
weight range of 4.00 g, omit step 16.
16. Using the numeric keys, enter the
maximum weight range of the sample (0 50 g).
17. Press ENTER.
Quick Test
1. POWER: XXX%
2. RUN TIME: XX:XX min:sec
3. MAX TEMP: 110 C
4. MIN WT RANGE: 2.00 g
5. MAX WT RANGE: 4.00 g
6. WT COMPENSATION: OFF
Input max temp, press ENTER.
Entry: 110
CONSTANT
WEIGHT
➞
➞
➞
➞
Page 44

37
Quick Test
1. POWER: XXX%
2. RUN TIME: XX:XX min:sec
3. MAX TEMP: XXX C
4. MIN WT RANGE: X.XX g
5. MAX WT RANGE: 4.00 g
6. WT COMPENSATION: OFF
Press item number to select.
CONSTANT
WEIGHT
Note: Weight compensation is designed for use
with samples having a buoyancy effect created
by heat. It should be used (turned on) for
samples, such as milk, margarine, condiments,
etc., which have a higher temperature when the
final weight is calculated than at the beginning of
the test.
18. Press “6” to toggle Weight Compenstaion
“on” or “off.”
Note: To edit any of the parameters, press the
numeric key of the parameter to be edited and
use the numeric keys to enter the new parameter.
Then, press ENTER.
19. Press READY to begin the analysis.
Note: The Quick Test screen appears indicating
the power, temperature and time.
Note: Press the operation key below EDIT to
return to the Quick Test parameter screen to edit
method parameters.
20. If Autotrack is turned off, a sample identification name or number is required. Press
the operation key below ID.
21. Using the operation keys below the arrows,
position the cursor on (select) the first
number or letter of the sample identification. Press ENTER. Continue to position
the cursor on each letter or number and
press ENTER until the identification is
complete.
Note: If using an identification number only, use
the numeric keys to enter the number.
22. Press READY to return to the Quick Test
screen.
Quick Test
1. POWER: XXX%
2. RUN TIME: XX:XX min:sec
3. MAX TEMP: XXX C
4. MIN WT RANGE: X.XX g
5. MAX WT RANGE: 4.00 g
6. WT COMPENSATION: OFF
Press READY to run test.
CONSTANT
WEIGHT
QUICK TEST
Power: xxx%
Temp (xxx): xx.x
Time: xx:xx
Wt: x.xxxxg
Place pads on balance and
press TARE.
ID EDIT
SAMPLE ID:
0 1 2 3 4 5 6 7 8 9 A B
C D E F G H I J K L M N
O P Q R S T U V W X Y Z
Space Delete
Highlight choice, press ENTER.
Press READY to continue.
➞
➞
➞
➞
1 2 3 4 5
➞
Page 45
38
TARING BALANCE . . .
23. Lift the top cover of the SMART System
5™. Place two glass fiber sample pads on
the balance pan. Close the top cover.
24. Press TARE.
25. Wait for the instrument to zero the weight
of the sample pads. The Quick Test screen
will reappear when the tare function is
complete.
Note: The “T” in the lower left corner of the
balance icon indicates that the weight of the
sample pads has been tared.
26. Lift the top cover. Remove the sample pads
from the balance pan. Apply the sample in
a thin, even layer to one of the sample
pads. Quickly and gently place the sample
pads back on the balance pan. Close the top
cover.
27. Press START.
The instrument reads and records the initial
weight of the sample prior to beginning the
analysis.
1 2 3 4 5
QUICK TEST
Sample ID: xxxxxx
Power: xxx%
Temp (xxx): xx.x
Time: xx:xx
Wt: x.xxxxg
Place sample and pads on
balance and press START.
ID SOLIDS EDIT
T
READING BALANCE . . .
QUICK TEST
Sample ID: xxxxxx
Power: xxx%
Temp (xxx): xx.x
Time: xx:xx
Wt: x.xxxxg
Place pads on balance and
press TARE.
ID EDIT
1 2 3 4 5
Page 46
39
As the analysis begins, the flashing microwave
indicators in the balance icon appear and the
time begins counting down. The sample weight
decreases as the moisture is removed.
During the drying time, the operation key below
SOLIDS or MOISTURE may be pressed to
display % solids or % moisture.
Note: Press the operation key below STOP
TEST to stop the method test.
When the drying time is complete, five short
beeps will be heard, and the Data Results screen
will appear, displaying either the % moisture or
% solids as selected.
Note: Press READY to analyze additional
samples using the same method.
Note: Press the operation key below FORM
FEED to advance blank paper from the internal
printer.
28. Press the operation key below DATA to
display the analysis data.
29. Press the operation key below SAMPLE
WEIGHTS to view sample weight
information.
Data Results
Sample ID: xxxxxx
Dry Time: xx:xx
Moisture: xx.xx%
Solids: xx.xx%
Press READY to continue.
MAIN FORM SAMPLE
MENU FEED WEIGHTS PRINT
QUICK TEST
Sample ID: xxxxxx
Power: xxx%
Temp (xxx): xx.x
Time: xx:xx
Solids: xx.xx%
Wt: x.xxxxg
STOP
SOLIDS TEST
Data Results
XX.XX%M
Press READY to continue.
MAIN FORM
MENU FEED DATA PRINT
QUICK TEST
Sample ID: xxxxxx
Power: xxx%
Temp (xxx): xx.x
Time: xx:xx
Moisture: xx.xx%
Wt: x.xxxxg
STOP
SOLIDS TEST
Page 47
40
Data Results
Sample ID: xxxxxx
Dry Time: xx:xx
Moisture: xx.xx%
Solids: xx.xx%
Press READY to continue.
MAIN FORM SAMPLE
MENU FEED WEIGHTS PRINT
The Sample Weight Data screen displays the
initial weight, the final weight and the
differential weight.
30. Press the operation key below PREV
PAGE to return to the Data Results screen.
31. Press the operation key below PRINT to
print the analysis results either on the
internal printer or an external printer, if
installed.
Note: Press READY to analyze additional
samples using the same method.
32. Press the operation key below MAIN
MENU to return to the CEM Main Menu
screen.
CEM Main Menu
1. QUICK TEST
2. EDIT/CREATE METHOD
3. LOAD METHOD
4. SETUP
5. PRINT
6. STATISTICS
Press item number to select.
METHOD - QUICK TEST
Sample Weight Data
Initial Wt: xx.xxxxg
Final Wt: xx.xxxxg
Diff Wt: xx.xxxxg
MAIN PREV
MENU PAGE
Page 48

41
Edit/Create Method
The SMART System 5™ permits a variety of analysis programs, based on sample
type.
Moisture/Solids – The instrument performs a moisture/solids determination.
Moisture/Fat – The instrument performs a moisture/fat determination.
Dilution – The sample is diluted, and a dilution factor is used for the diluted
sample result; therefore, an accurate moisture/solids value for the undiluted sample
is obtained. An interfaced external balance is required. The dilution program
should be used with samples that burn easily, viscous samples or samples which
dry unevenly.
Syringe Weigh – Syringe Weigh is utilized when the moisture/solids instrument
cannot accurately record the initial sample weight due to rapid evaporation. The
rapid evaporation can be caused by the sample being warmer than room
temperature or containing a solvent that evaporates quickly. The instrument
internal balance or an interfaced external balance can be used to calculate the
weight of the syringe.
Ash – The moisture/solids instrument performs a standard analysis on the sample.
The sample is then transferred into an ashing furnace. The ashed sample is
returned to the moisture/solids instrument for calculation of the ash content.
Wastewater Total Suspended Solids (TSS) – A filter is utilized for samples with
low solids concentration. The instrument dries and weighs the solids obtained on a
tared filter from the filtration of a known volume of sample which is manually
entered into the system.
Wastewater Total Volatile Suspended Solids (TSS/TVSS) – The moisture/solids
instrument performs a standard analysis on the sample. The dried sample is then
transferred to an ashing furnace. The ashed sample is returned to the moisture/
solids instrument for weighing of the ashed sample. Total Suspended Solids and
Total Volatile Suspended Solids are calculated.
Moisture/Fat Modified – The fat is extracted from one sample while another
sample is dried for moisture analysis, permitting analysis of fat content of samples
in which initial drying may bind the fat molecules.
Page 49

42
Methods can be created in the following modes in either constant weight or set
time:
• Moisture/Solids
• Standard
• Wastewater
• Dilution
• Syringe Weigh
• Ash
• Moisture/Fat
• Standard
• Dilution
• Modified Fat
• Moisture/Fat/Protein
• Standard
• Dilution
• Modified Fat
CEM Corporation has preprogrammed several methods into the SMART System
5
which can be used as programmed or edited for a specific sample. Preprogrammed
methods include:
• Latex
• Water Based Chemical
• Meat (Raw)
• Cheese
• Milk
• Tomato Paste
• Butter
• Mayonnaise
• Eggs
• Salad Dressing
• Pet Food
• Yogurt
• Meat (Processed)
To use a CEM preprogrammed method, refer to the Load Method section of this
manual. To Edit a preprogrammed method, refer to the Edit Method section of this
manual.
Page 50
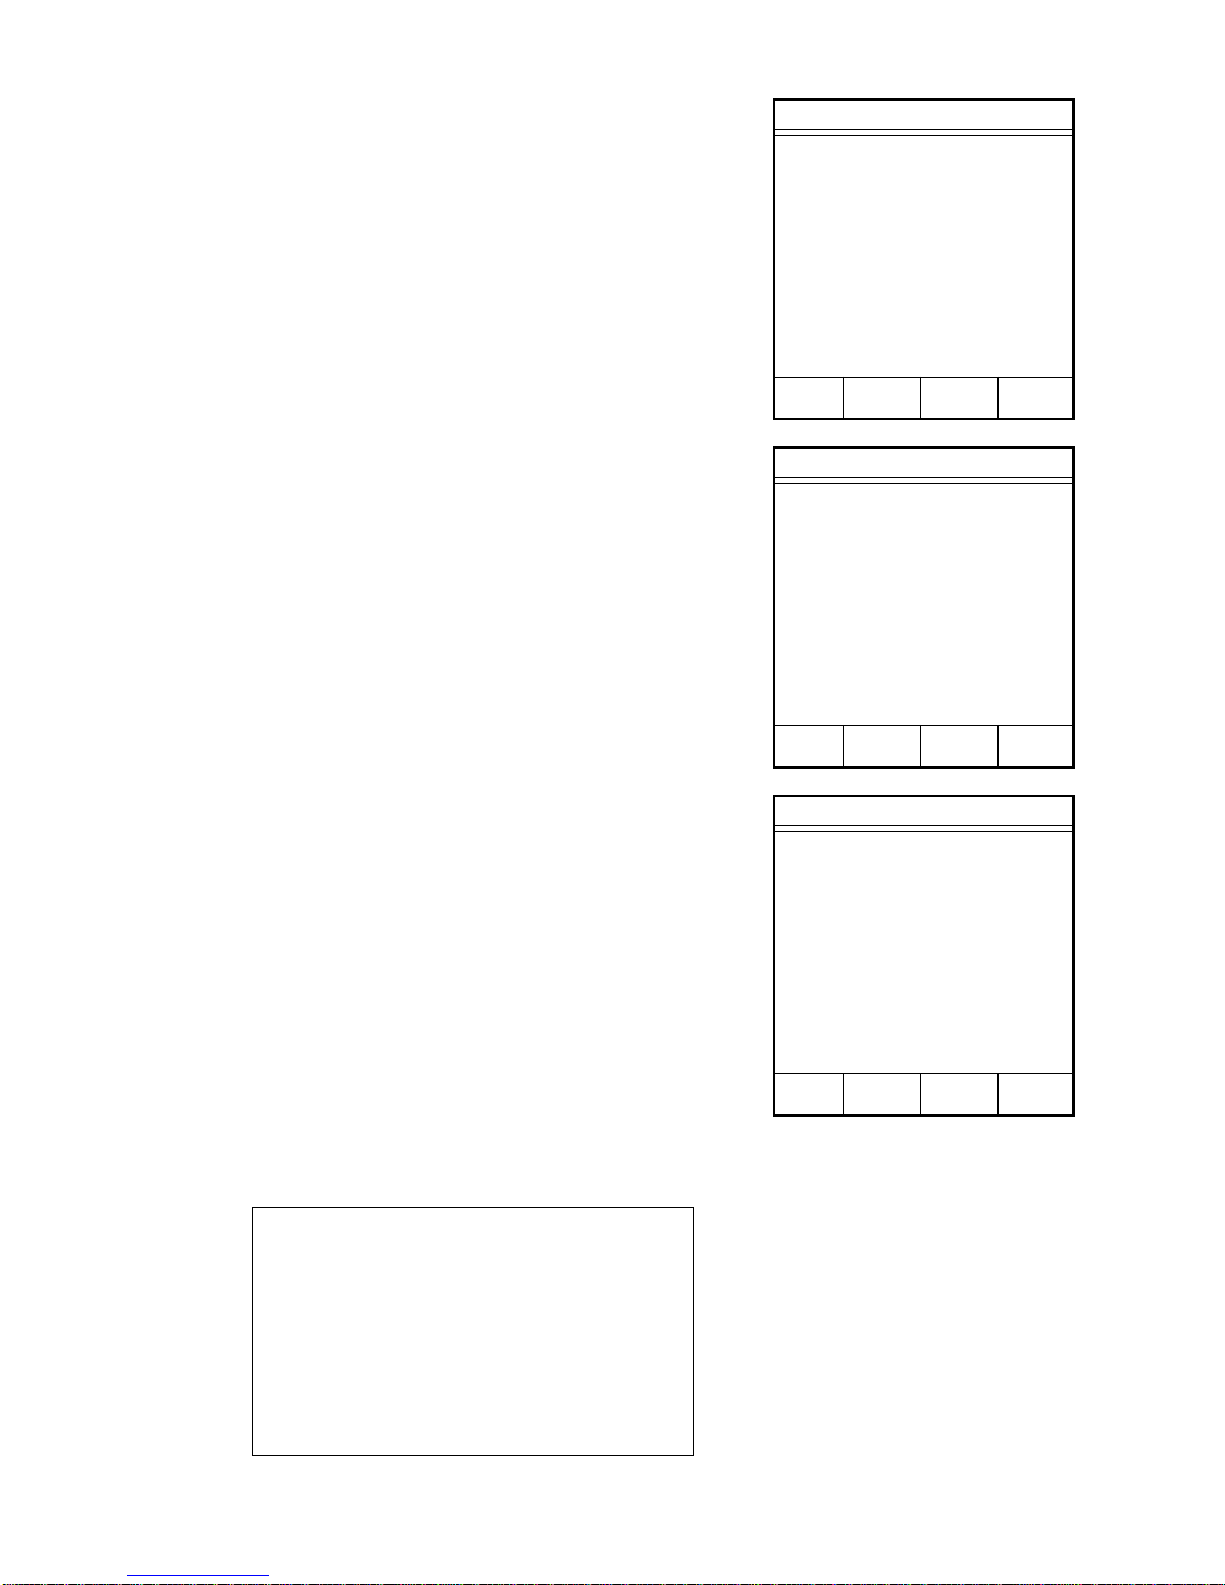
43
Edit Method
1. With the CEM Main Menu displayed, press
“2” to activate the Edit/Create Method
screen.
2. Press the item number of the method to be
edited.
Note: If the method to be edited is not displayed
on the screen, press the operation key below
NEXT PAGE to access additional methods.
Continue to press the operation key below NEXT
PAGE until the desired method is displayed.
CEM preprogrammed methods include:
• Temp Verify (cannot be edited)
• Power Test (cannot be edited)
• Standard Solution (cannot be edited)
• Latex
• Water Based Chemical
• Meat Raw
• Cheese
• Milk
• Tomato Paste
• Butter
• Mayonnaise
• Eggs
• Pet Food
• Yogurt
• Meat Processed
3. Refer to the CREATE METHOD section
of this manual for specific instructions for
entering method information to edit desired
modes and/or parameters.
CAUTION
If a CEM preprogrammed method is
edited, new parameters will be saved.
To prevent elimination of the
preprogrammed method, refer to the
preprogrammed method and create a
new method with the desired
parameters.
CEM Main Menu
1. QUICK TEST
2. EDIT/CREATE METHOD
3. LOAD METHOD
4. SETUP
5. PRINT
6. STATISTICS
Press item number to select.
METHOD - XXXXXXXX
Edit/Create Method
1. NEW METHOD
2. TEMP VERIFY
3. POWER TEST
4. STD SOLUTION
5. LATEX
6. WATER BASED CHEM
7. MEAT RAW
8. CHEESE
Press item number to select.
NEXT
PAGE
Edit/Create Method
1. MILK
2. TOMATO PASTE
3. BUTTER
4. MAYONNAISE
5. EGGS
6. SALAD DRESSING
7. PET FOOD
8. YOGURT
Press item number to select.
PREV NEXT
PAGE PAGE
Page 51

44
Page 52

45
Moisture/Solids - Standard
1. With the CEM Main Menu displayed, press
“2” to activate the Edit/Create Method
screen.
2. Press “1” to create a new method.
3. Using the operation keys below the arrows,
select the first letter or number of the
method name.
4. Press ENTER.
Note: If the method name utilizes numbers only,
use the numeric keypad to enter the numbers for
the name.
5. Continue using the operation keys to select
each letter or number of the method name.
Press ENTER after each selection until the
entire method name is selected.
6. Press READY.
7. Press “1” to toggle and select “Moisture/
Solids.”
8. Press “2” to toggle and select “Constant
Weight” or “Set Time.”
9. Press READY.
CEM Main Menu
1. QUICK TEST
2. EDIT/CREATE METHOD
3. LOAD METHOD
4. SETUP
5. PRINT
6. STATISTICS
Press item number to select.
METHOD - XXXXXXXX
Edit/Create Method
1. NEW METHOD
2. TEMP VERIFY
3. POWER TEST
4. STD SOLUTION
5. LATEX
6. WATER BASED CHEM
7. MEAT RAW
8. CHEESE
Press item number to select.
NEXT
PAGE
METHOD NAME:
0 1 2 3 4 5 6 7 8 9 A B
C D E F G H I J K L M N
O P Q R S T U V W X Y Z
Space Delete
Highlight choice, press ENTER.
Press READY to continue.
Edit Method
1. CALCULATION MODE:
MOISTURE/SOLIDS
2. TIME PARAMETER:
CONSTANT WEIGHT
Press item number to select.
Press READY to continue.
MAIN PREV
MENU PAGE
➞
➞
➞
➞
Page 53

46
10. Press “1” to select “Standard Test.”
11. Press the numbers (1 - 5 Constant Weight
or 1 - 3 Set Time) and enter the appropriate
method parameters.
Note: Refer to the QUICK TEST section of this
manual for instructions for entering method
parameters for Constant Weight and Set Time.
12. Press the operation key below NEXT
PAGE to access additional method
parameters.
13. Press the numbers (1 - 6) and enter the
appropriate method parameters.
Note: Weight compensation is designed for use
with samples having a buoyancy effect created
by heat. It should be used (turned on) for
samples, such as milk, margarine, condiments,
etc., which have a higher temperature when the
final weight is calculated than at the beginning of
the test.
14. After the final method parameter is
entered, press READY to begin the
analysis.
Moisture/Solids Analysis
1. STANDARD TEST
2. WASTEWATER
3. DILUTION
4. SYRINGE WEIGH
5. ASH
Press item number to select.
MAIN PREV
MENU PAGE
Standard Test
1. POWER: 0 %
2. DELTA WEIGHT: 0.0 mg
3. DELTA TIME: 0 secs
4. MAX TIME: 10 mins
5. BIAS: ±0.00 %
6. MAX TEMP: 110 C
Press item number to select or
next page for more menu items.
MAIN PREV NEXT
MENU PAGE PAGE
Standard Test
1. POWER: 0 %
2. RUN TIME: 00:00 min:sec
3. BIAS: ±0.00 %
4. MAX TEMP: 110 C
Press item number to select or
next page for more menu items.
MAIN PREV NEXT
MENU PAGE PAGE
Standard Test
1. RESULT RANGE: MOISTURE
2. MIN RESULT: X.XX%
3. MAX RESULT: XX.XX%
4. MIN WT RANGE: X.XX g
5. MAX WT RANGE: X.XX g
6. WT COMPENSATION: OFF
Press READY to run test.
MAIN PREV
MENU PAGE
C
O
N
S
T
A
N
T
W
E
I
G
H
T
S
E
T
T
I
M
E
Page 54

47
Note: The method test screen appears indicating
the power, temperature and time.
15. If Autotrack is turned off, a method
identification name or number is required.
Press the operation key below ID.
16. Using the operation keys below the arrows,
position the cursor on (select) the first
number or letter of the sample identification. Press ENTER. Continue to position
the cursor on each letter or number and
press ENTER until the identification is
complete.
Note: If using an identification number only, use
the numeric keys to enter the number.
17. Press READY to return to the method
screen.
18. Lift the top cover of the SMART System
5™. Place two glass fiber sample pads on
the balance pan. Close the top cover.
19. Press TARE.
20. Wait for the instrument to tare the weight
of the sample pads. The method test screen
will reappear when the tare function is
complete.
XXXXXX
Power: xxx %
Temp (xxx): xx.x
Time: xx:xx
Wt: x.xxxxg
Place pads on balance and
press TARE.
ID
1 2 3 4 5
SAMPLE ID:
0 1 2 3 4 5 6 7 8 9 A B
C D E F G H I J K L M N
O P Q R S T U V W X Y Z
Space Delete
Highlight choice, press ENTER.
Press READY to continue.
➞
➞
➞
➞
TARING BALANCE . . .
XXXXXX
Power: xxx %
Temp (xxx): xx.x
Time: xx:xx
Wt: x.xxxxg
Place pads on balance and
press TARE.
ID SOLIDS
1 2 3 4 5
Page 55
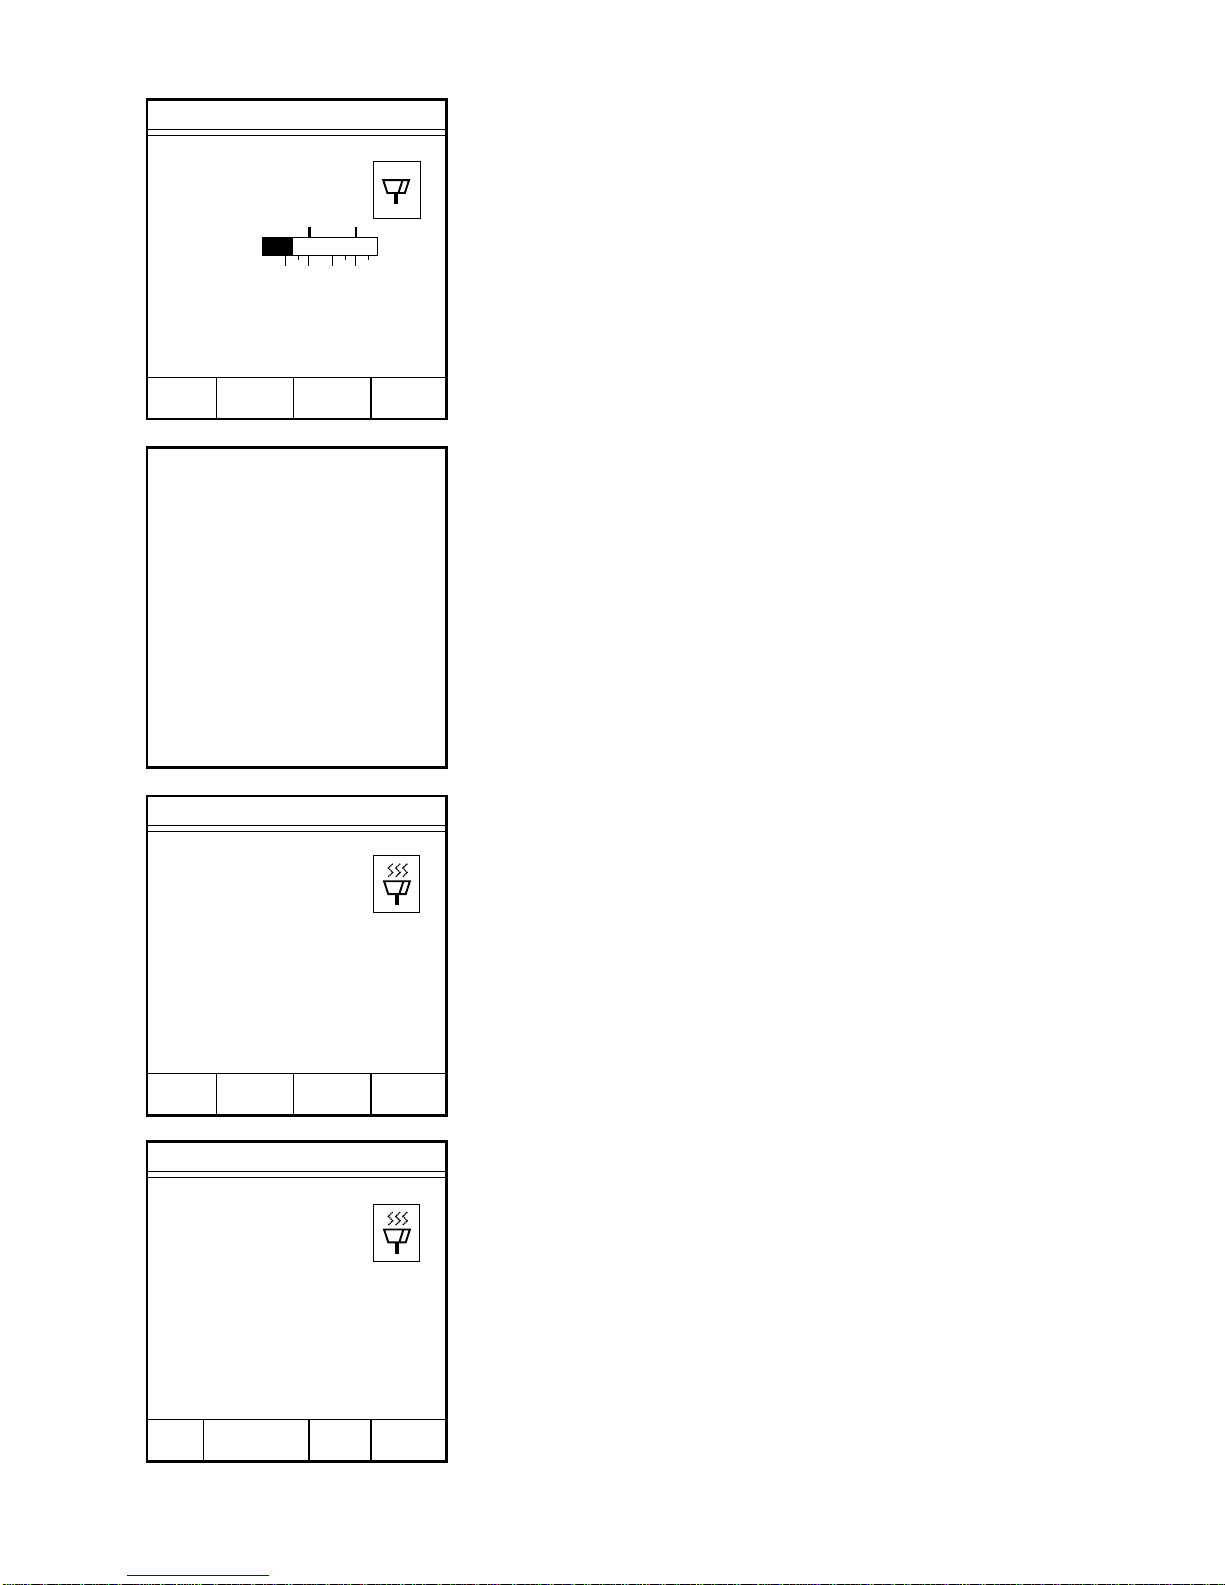
48
Note: The “T” in the lower left corner of the
balance icon indicates that the weight of the
sample pads has been tared.
21. Lift the instrument cover. Apply the
sample in a thin, even layer to one of the
sample pads. Quickly and gently place the
sample pads back on the balance pan.
Close the top cover.
22. Press START.
The instrument reads and records the initial
weight of the sample prior to beginning the
analysis.
As the analysis begins, the flashing microwave
indicators in the balance icon appear and the
time begins counting (up for Constant Weight or
down for Set Time). The sample weight
decreases as the moisture is removed.
During the drying time, the operation key below
SOLIDS or MOISTURE may be pressed to
display % solids or % moisture.
XXXXXX
Power: xxx %
Temp (xxx) : xx.x
Time: xx:xx
Wt: x.xxxxg
Place sample and pads on
balance and press START.
ID
T
1 2 3 4 5
READING BALANCE . . .
XXXXX
Sample ID: xxxxxxxx
Power: xxx%
Temp (xxx): xx.x
Time: xx:xx
Moisture: xx.xx%
Wt: x.xxxxg
STOP
SOLIDS TEST
XXXXX
Sample ID: xxxxxx
Power: xxx%
Temp (xxx): xx.x
Time: xx:xx
Solids: xx.xx%
Wt: x.xxxxg
STOP
MOISTURE TEST
Page 56

49
When the weight loss is equal to or less than the
selected parameter, five short beeps will be
heard, and the Data Results screen will appear,
displaying either the % moisture or % solids as
selected.
Note: Press READY to analyze additional
samples using the same method.
Note: Press the operation key below FORM
FEED to advance paper from the internal printer.
23. Press the operation key below DATA to
display the analysis data.
24. Press the operation key below SAMPLE
WEIGHTS to view sample weight
information.
The Sample Weight Data screen displays the
initial weight, the final weight and the
differential weight.
25. Press the operation key below PREV
PAGE to return to the Data Results screen.
26. Press the operation key below PRINT to
print the analysis results either on the
internal printer or an external printer, if
installed.
Note: Press READY to analyze additional
samples using the same method.
27. Press the operation key below MAIN
MENU to end the analysis and return to the
CEM Main Menu screen.
Data Results
XX.XX%M
Press READY to continue.
MAIN FORM
MENU FEED DATA PRINT
Data Results
Sample ID: xxxxxxxxx
Dry Time: xx:xx
Moisture: xx.xx%
Solids: xx.xx%
Press READY to continue.
MAIN FORM SAMPLE
MENU FEED WEIGHTS PRINT
Sample Weight Data
Initial Wt: xx.xxxx g
Final Wt: xx.xxxx g
Diff Wt: xx.xxxx g
Press READY to continue.
MAIN PREV
MENU PAGE
Data Results
Sample ID: xxxxxxxxx
Moisture: xx.xx%
Solids: xx.xx%
Dry Time: xx:xx
Press READY to continue.
MAIN FORM SAMPLE
MENU FEED WEIGHTS PRINT
Page 57

50
Page 58

51
Moisture/Solids - Wastewater - TSS
1. With the CEM Main Menu displayed, press
“2” to activate the Edit/Create Method
screen.
2. Press “1” to create a new method.
3. Using the operation keys below the arrows,
select the first letter or number of the
method name.
4. Press ENTER.
Note: If the method name utilizes numbers only,
use the numeric keypad to enter the numbers for
the name.
5. Continue using the operation keys below
the arrows to select each letter or number of
the method name. Press ENTER after each
selection until the entire method name is
selected.
6. Press READY.
7. Press “1” to toggle and select “Moisture/
Solids.”
8. Press “2” to toggle and select “Constant
Weight” or “Set Time.”
9. Press READY.
CEM Main Menu
1. QUICK TEST
2. EDIT/CREATE METHOD
3. LOAD METHOD
4. SETUP
5. PRINT
6. STATISTICS
Press item number to select.
METHOD - XXXXXXXX
METHOD NAME:
0 1 2 3 4 5 6 7 8 9 A B
C D E F G H I J K L M N
O P Q R S T U V W X Y Z
Space Delete
Highlight choice, press ENTER.
Press READY to continue.
Edit Method
1. CALCULATION MODE:
MOISTURE/SOLIDS
2. TIME PARAMETER:
CONSTANT WEIGHT
Press item number to select.
Press READY to continue.
MAIN PREV
MENU PAGE
➞
➞
➞
➞
Edit/Create Method
1. NEW METHOD
2. TEMP VERIFY
3. POWER TEST
4. STD SOLUTION
5. LATEX
6. WATER BASED CHEM
7. MEAT RAW
8. CHEESE
Press item number to select.
NEXT
PAGE
Page 59

52
Moisture/Solids Analysis
1. STANDARD TEST
2. WASTEWATER
3. DILUTION
4. SYRINGE WEIGH
5. ASH
Press item number to select.
.
MAIN PREV
MENU PAGE
WasteWater
1. POWER: 0 %
2. DELTA WEIGHT: 0.0 mg
3. DELTA TIME: 0 secs
4. MAX TIME: 10 mins
5. BIAS: ±0.00 %
6. MAX TEMP: 110 C
Press item number to select
or NEXT PAGE for more menu items.
MAIN PREV NEXT
MENU PAGE PAGE
10. Press “2” to select “Wastewater.”
11. Press the numbers (1 - 6 Constant Weight
or 1 - 4 Set Time) and enter the appropriate
method parameters.
Note: Refer to the QUICK TEST section of this
manual for instructions for entering method
parameters for Constant Weight and Set Time.
12. Press the operation key below NEXT
PAGE to access additional method
parameters.
13. Press “1” to toggle and select “TSS.”
14. Press the numbers (2 - 8) and enter the
appropriate method parameters.
15. Press READY to begin the method
analysis.
WasteWater
1. POWER: 0 %
2. RUN TIME: 00:00 min:sec
3. BIAS: ±0.00 %
4. MAX TEMP: 110 C
Press item number to select
or NEXT PAGE for more menu items.
MAIN PREV NEXT
MENU PAGE PAGE
C
O
N
S
T
A
N
T
W
E
I
G
H
T
S
E
T
T
I
M
E
WasteWater
1. OPTION: TSS
2. VOLUME: XXX ml
3. RESULT RANGE: MOISTURE
4. MIN RESULT: X.XX%
5. MAX RESULT: XX.XX%
6. MIN WT RANGE: X.XX g
7. MAX WT RANGE: X.XX g
8. WT COMPENSATION: OFF
Press READY to run test.
MAIN PREV
MENU PAGE
Page 60
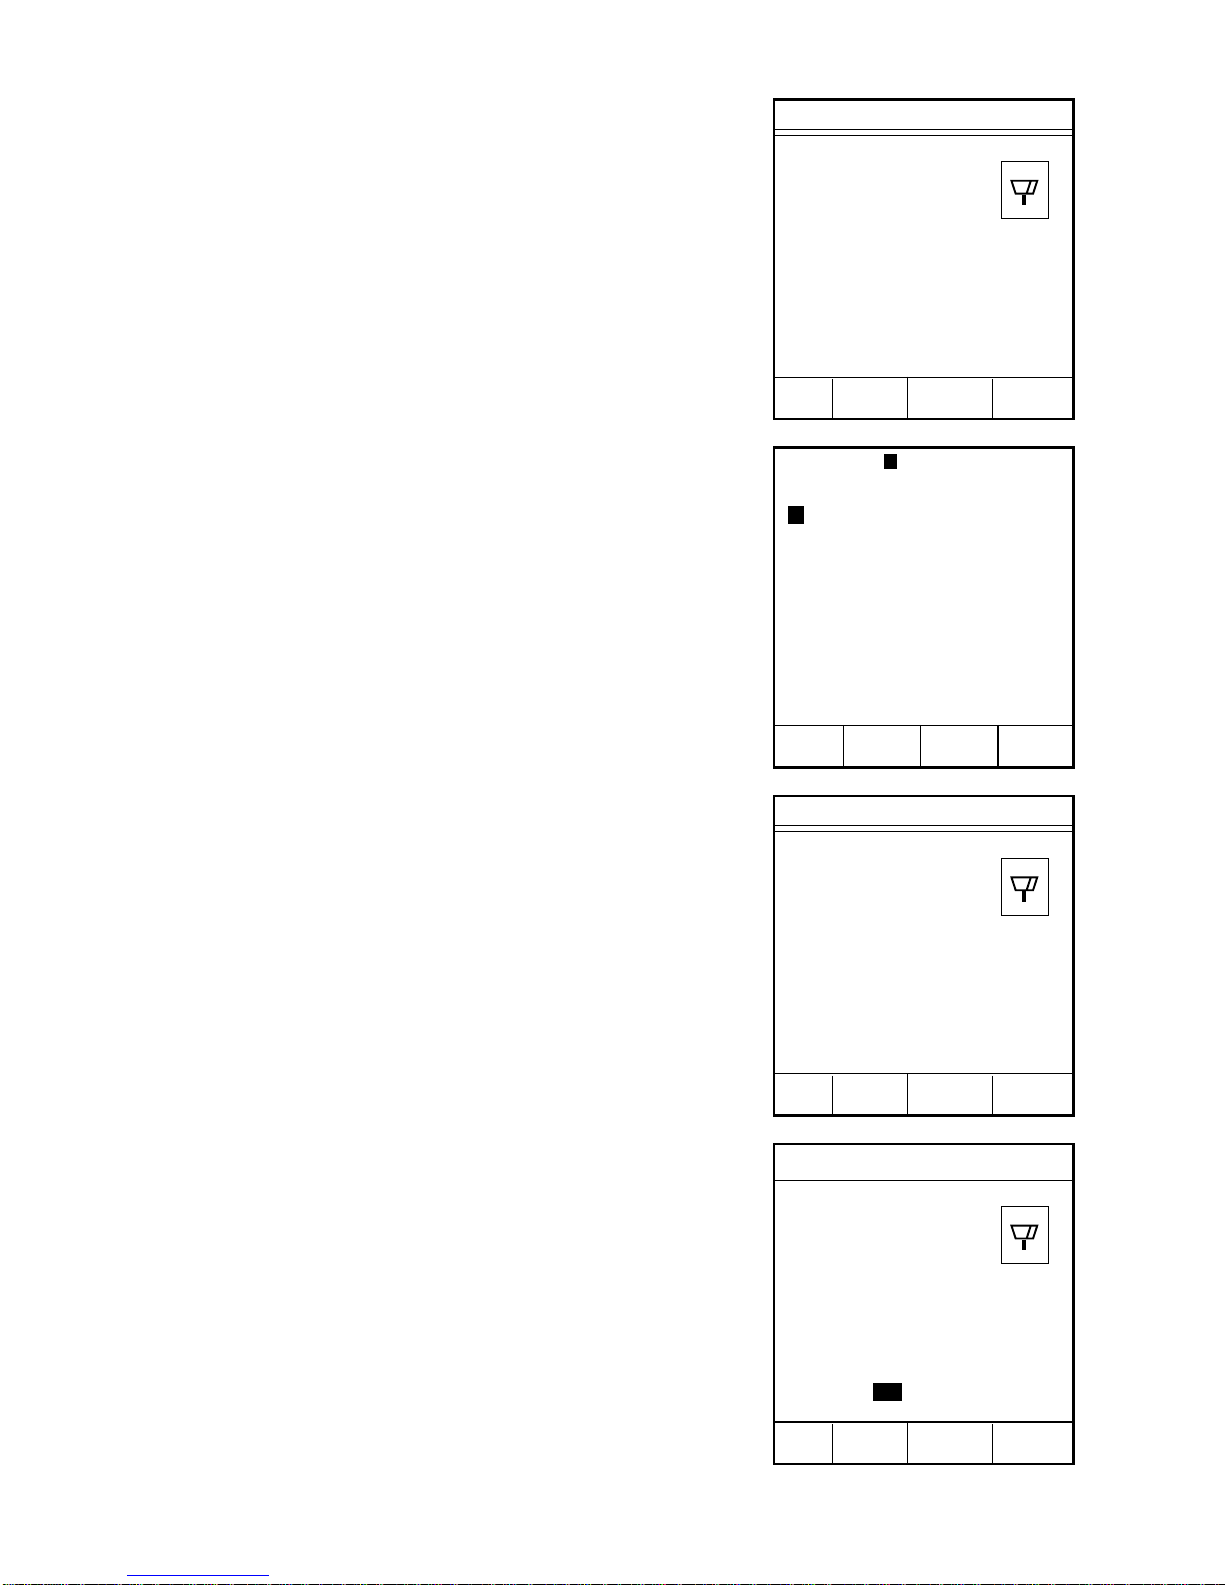
53
Note: The method test screen appears indicating
the power, temperature and time.
16. If Autotrack is turned off, a sample identification name or number is required. Press
the operation key below ID.
17. Using the operation keys below the arrows,
position the cursor on (select) the first
number or letter of the sample identification. Press ENTER. Continue to position
the cursor on each letter or number and
press ENTER until the identification is
complete.
Note: If using an identification number only, use
the numeric keys to enter the number.
18. Press READY to return to the method
screen.
Note: If analyzing only one sample, proceed to
step 29.
19. For multiple samples, press the operation
key below SAMPLE.
Note: Press the operation key below VOLUME
to edit the sample volume.
20. Using the numeric keys, enter the number
of samples to be analyzed.
21. Press ENTER.
XXXXXX
Power: xxx %
Temp (xxx): xx.x
Time: xx:xx
Volume: xxx
Sample: x
Wt: x.xxxxg
Place filter on balance and
press TARE.
ID VOLUME SAMPLE
SAMPLE ID:
0 1 2 3 4 5 6 7 8 9 A B
C D E F G H I J K L M N
O P Q R S T U V W X Y Z
Space Delete
Highlight choice, press ENTER.
Press READY to continue.
➞
➞
➞
➞
XXXXXX
Sample ID: SAMPLE xx
Power: xxx %
Temp (xxx): xx.x
Time: xx:xx
Volume: xxx
Sample: x
Wt: x.xxxxg
Place filter on balance and
press TARE.
ID VOLUME SAMPLE
XXXXXX
Sample ID: SAMPLE xx
Power: xxx %
Temp (xxx): xx.x
Time: xx:xx
Volume: xxx
Sample: x
Wt: x.xxxxg
Input samples, press ENTER.
Entry: 01
ID VOLUME SAMPLE
Page 61
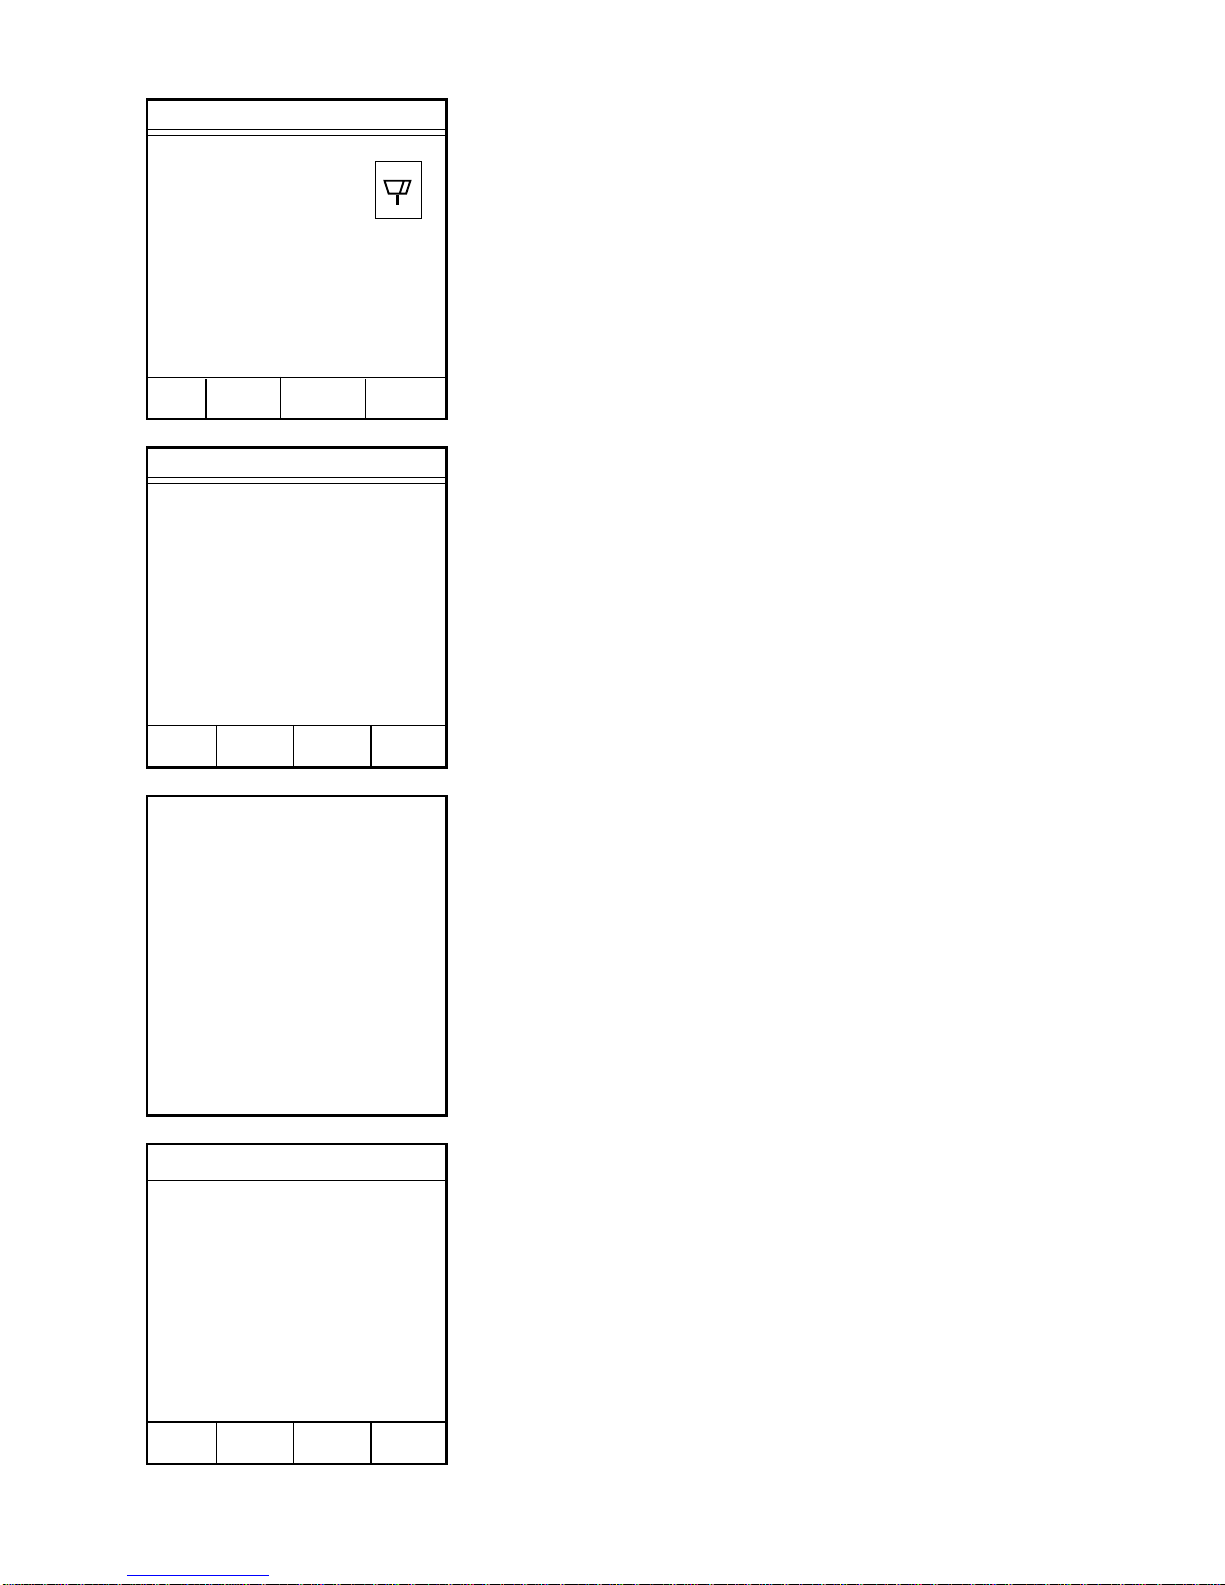
54
22. Press TARE.
23. Lift the instrument cover. Place filter #1 on the
balance pan. Close the instrument cover.
24. Press TARE.
Note: Press the operation key below ABORT to abort
the analysis.
25. Wait for the instrument to tare the weight of
filter #1.
26. Lift the instrument cover. Remove filter #1
from the balance pan. Place filter #2 on the
balance pan. Close the instrument cover.
XXXXXX
Sample ID: SAMPLE xx
Power: xxx %
Temp (xxx): xx.x
Time: xx:xx
Volume: xxx
Sample: x
Wt: x.xxxxg
Place filter on balance and
press TARE.
ID VOLUME SAMPLE
TSS Multiple Tare
Place filter 1 on
balance and press TARE.
ABORT
TARING BALANCE . . .
TSS Multiple Tare
Place filter 2 on
balance and press TARE.
ABORT
Page 62

55
27. Wait for the instrument to tare the weight
of filter #2.
28. Continue the tare process until the filters
for the total number of samples to be
analyzed have been tared.
Note: Filters must be kept in the order in which
they are tared for proper sample analysis.
Note: The “T” in the lower left corner of the
balance icon indicates that the weight of the
sample pads has been tared.
29. Place the first tared filter in the funnel.
With the vacuum source operating, pour
the sample into the funnel. When all the
sample has been filtered, remove the filter
from the funnel.
30. Lift the instrument cover. Place the wet
filter on the balance pan. Close the cover.
31. Press START.
The instrument reads and records the initial
weight of the sample prior to beginning the
analysis.
As the analysis begins, the flashing microwave
indicators in the balance icon appear and the
time begins counting (up for Constant Weight or
down for Set Time).
During the drying time, the operation key below
SOLIDS or MOISTURE may be pressed to
display % solids or % moisture.
Note: Press the operation key below STOP
TEST to abort the analysis.
TARING BALANCE . . .
XXXXXX
Sample ID: SAMPLE xx
Power: xxx %
Temp (xxx): xx.x
Time: xx:xx
Volume: xxx
Sample: x Processing: x
Wt: x.xxxxg
Place sample 1 on balance and
press START.
ID VOLUME SAMPLE
T
READING BALANCE . . .
XXXXX
Sample ID: xxxxxxxx
Power: xxx%
Temp (xxx): xx.x
Time: xx:xx
Moisture: xx.xx%
Wt: x.xxxxg
STOP
SOLIDS TEST
Page 63

56
When the drying time is complete, five short
beeps will be heard, and the Data Results screen
will appear, displaying either the % moisture or
% solids as selected.
Note: Press READY to analyze additional
samples using the same method.
Note: Press the operation key below FORM
FEED to advance paper from the internal printer.
32. Press the operation key below DATA to
display the analysis data.
33. Press the operation key below SAMPLE
WEIGHTS to view sample weight
information.
The Sample Weight Data screen displays the
initial weight, the final weight and the
differential weight.
34. Press the operation key below PREV
PAGE to return to the Data Results screen.
35. Press the operation key below “Print” to
print the analysis results either on the
internal printer or an external printer, if
installed.
Note: Press READY to analyze additional
samples using the same method.
36. Press the operation key below MAIN
MENU to end the analysis and return to the
CEM Main Menu screen.
Data Results
XX.XX
MG/Liter TSS
Press READY to continue.
MAIN FORM
MENU FEED DATA PRINT
Data Results
Sample ID: xxxxxxxxx
Dry Time: xx:xx
Moisture: xx.xx%
Solids: xx.xx%
MG/Liter TSS: x
Sample: x
Volume: xxx
Press READY to continue.
MAIN FORM SAMPLE
MENU FEED WEIGHTS PRINT
Sample Weight Data
Initial Wt: xx.xxxx g
Final Wt: xx.xxxx g
Diff Wt: xx.xxxx g
Press READY to continue.
MAIN PREV
MENU PAGE
Data Results
Sample ID: xxxxxxxxx
Dry Time: xx:xx
Moisture: xx.xx%
Solids: xx.xx%
MG/Liter TSS: x
Sample: x
Volume: xxx
Press READY to continue.
MAIN FORM SAMPLE
MENU FEED WEIGHTS PRINT
Page 64
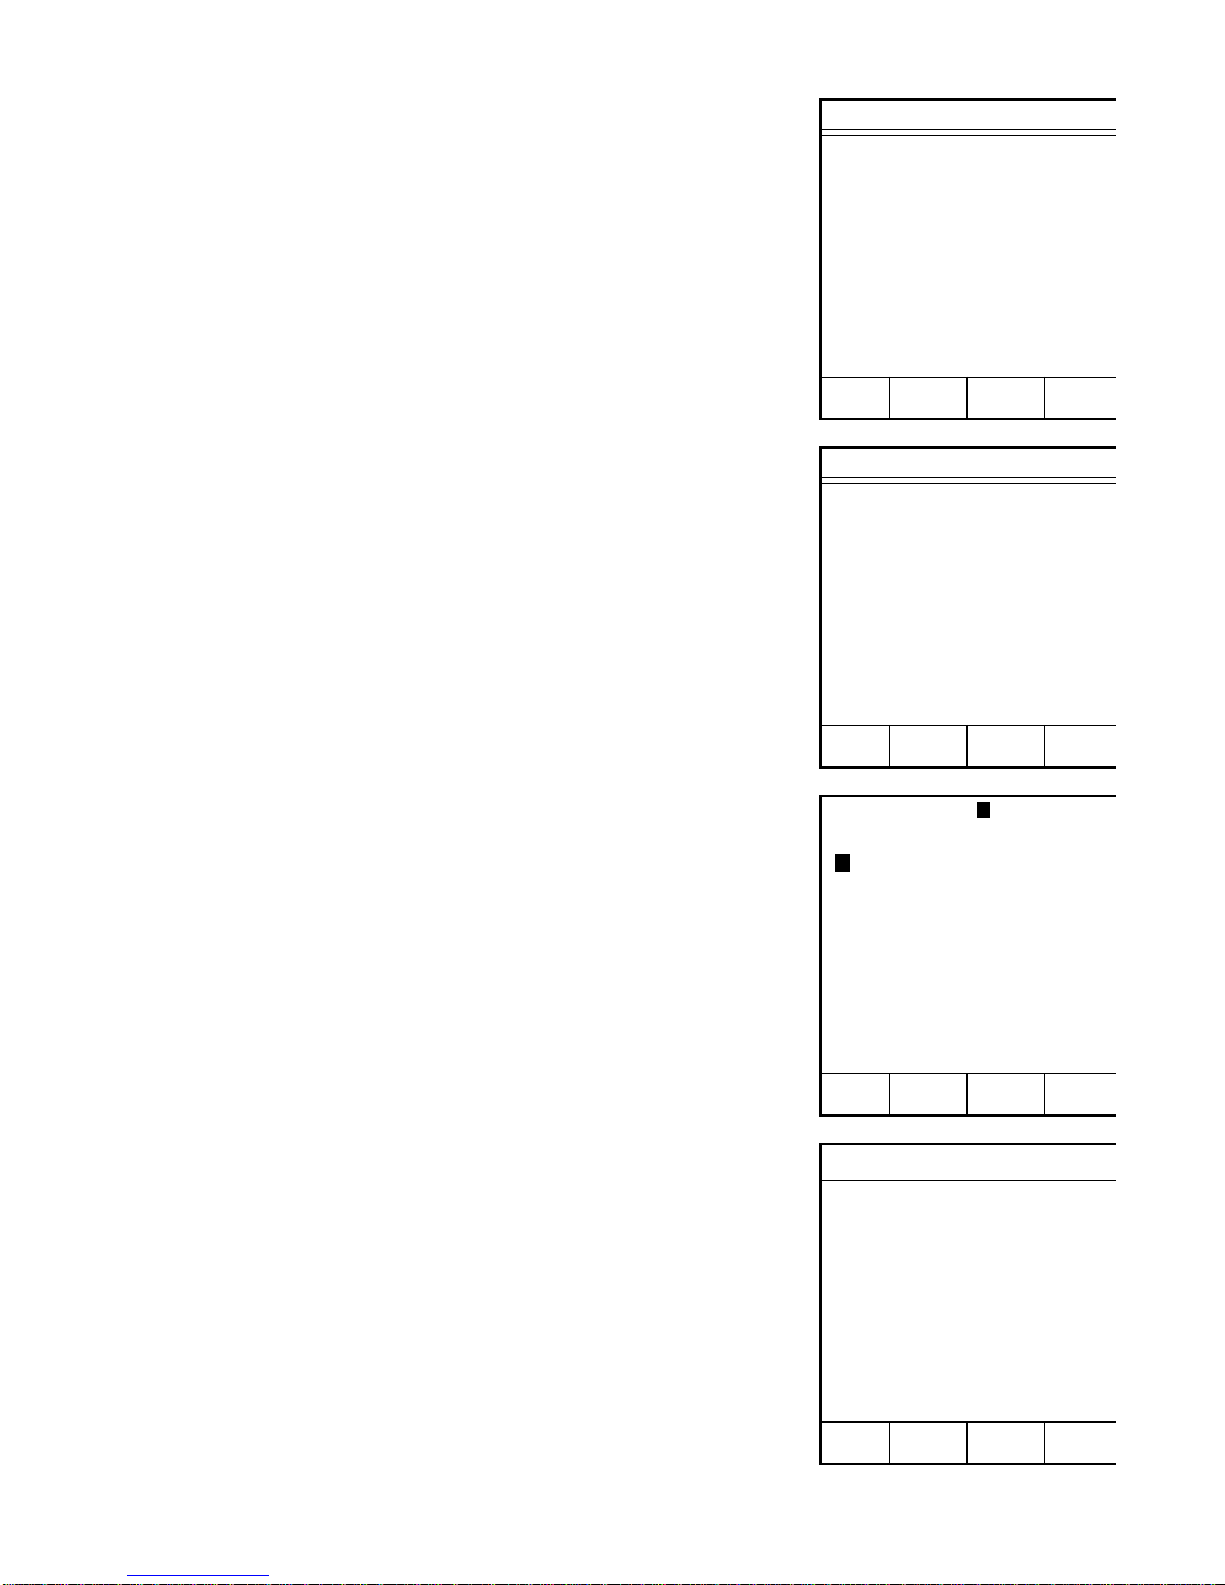
57
Moisture/Solids - Wastewater TSS/TVSS
1. With the CEM Main Menu displayed, press “2”
to activate the Edit/Create Method screen.
2. Press “1” to create a new method.
3. Using the operation keys below the arrows,
select the first letter or number of the method
name.
4. Press ENTER.
Note: If the method name utilizes numbers only, use
the numeric keypad to enter the numbers for the
name.
5. Continue using the operation keys below the
arrows to select each letter or number of the
method name. Press ENTER after each selection
until the entire method name is selected.
6. Press READY.
7. Press “1” to toggle and select “Moisture/Solids.”
8. Press “2” to toggle and select “Constant
Weight” or “Set Time.”
CEM Main Menu
1. QUICK TEST
2. EDIT/CREATE METHOD
3. LOAD METHOD
4. SETUP
5. PRINT
6. STATISTICS
Press item number to select.
METHOD - XXXXXXXX
METHOD NAME:
0 1 2 3 4 5 6 7 8 9 A B
C D E F G H I J K L M N
O P Q R S T U V W X Y Z
Space Delete
Highlight choice, press ENTER.
Press READY to continue.
Edit Method
1. CALCULATION MODE:
MOISTURE/SOLIDS
2. TIME PARAMETER:
CONSTANT WEIGHT
Press item number to select.
Press READY to continue.
MAIN PREV
MENU PAGE
➞
➞
➞
➞
Edit/Create Method
1. NEW METHOD
2. TEMP VERIFY
3. POWER TEST
4. STD SOLUTION
5. LATEX
6. WATER BASED CHEM
7. MEAT RAW
8. CHEESE
Press item number to select.
NEXT
PAGE
Page 65

58
Moisture/Solids Analysis
1. STANDARD TEST
2. WASTEWATER
3. DILUTION
4. SYRINGE WEIGH
5. ASH
Press item number to select
or NEXT PAGE for more menu items.
MAIN PREV
MENU PAGE
WasteWater
1. POWER: 0 %
2. DELTA WEIGHT: 0.0 mg
3. DELTA TIME: 0 secs
4. MAX TIME: 10 mins
5. BIAS: ±0.00 %
6. MAX TEMP: 110 C
Press item number to select
or NEXT PAGE for more menu items.
MAIN PREV NEXT
MENU PAGE PAGE
9. Press “2” to select “Wastewater.”
10. Press the numbers (1 - 6 Constant Weight
or 1 - 4 Set Time) and enter the
appropriate method parameters.
Note: Refer to the QUICK TEST section of this
manual for instructions for entering method
parameters for Constant Weight and Set Time.
11. Press the operation key below NEXT
PAGE to access additional method
parameters.
12. Press “1” to toggle and select “TSS/
TVSS.”
13. Press the numbers (2 - 8) and enter the
appropriate method parameters.
14. Press “READY” to begin the analysis.
WasteWater
1. OPTION: TSS/TVSS
2. VOLUME: XXX ml
3. RESULT RANGE: MOISTURE
4. MIN RESULT: X.XX%
5. MAX RESULT: XX.XX%
6. MIN WT RANGE: X.XX g
7. MAX WT RANGE: X.XX g
8. WT COMPENSATION: OFF
Press READY to run test.
MAIN PREV
MENU PAGE
WasteWater
1. POWER: 0 %
2. RUN TIME: 00:00 min:sec
3. BIAS: ±0.00 %
4. MAX TEMP: 110 C
Press item number to select
or NEXT PAGE for more menu items.
MAIN PREV NEXT
MENU PAGE PAGE
C
O
N
S
T
A
N
T
W
E
I
G
H
T
S
E
T
T
I
M
E
Page 66

59
Note: The method test screen appears indicating
the power, temperature, volume and time.
Note: Press the operation key below VOLUME
to edit or enter a sample volume.
15. If Autotrack is turned off, a sample identification name or number is required. Press
the operation key below ID.
16. Using the operation keys below the arrows,
position the cursor on (select) the first
number or letter of the sample identification. Press ENTER. Continue to position
the cursor on each letter or number and
press ENTER until the identification is
complete.
Note: If using an identification number only, use
the numeric keys to enter the number
17. Press READY to return to the test screen.
18. Lift the instrument cover. Place the filter
on the balance pan. Close the instrument
cover.
19. Press TARE.
20. Wait for the instrument to tare the weight
of the filter.
XXXXXX
Power: xxx %
Temp (xxx): xx.x
Time: xx:xx
Volume: xxx
Wt: x.xxxxg
Place filter on balance and
press TARE.
ID VOLUME REWEIGH
SAMPLE ID:
0 1 2 3 4 5 6 7 8 9 A B
C D E F G H I J K L M N
O P Q R S T U V W X Y Z
Space Delete
Highlight choice, press ENTER.
Press READY to continue.
➞
➞
➞
➞
XXXXXX
Sample ID: SAMPLE xx
Power: xxx %
Temp (xxx): xx.x
Time: xx:xx
Volume: xxx
Wt: x.xxxxg
Place filter on balance and press
TARE.
ID VOLUME REWEIGH
TARING BALANCE . . .
Page 67
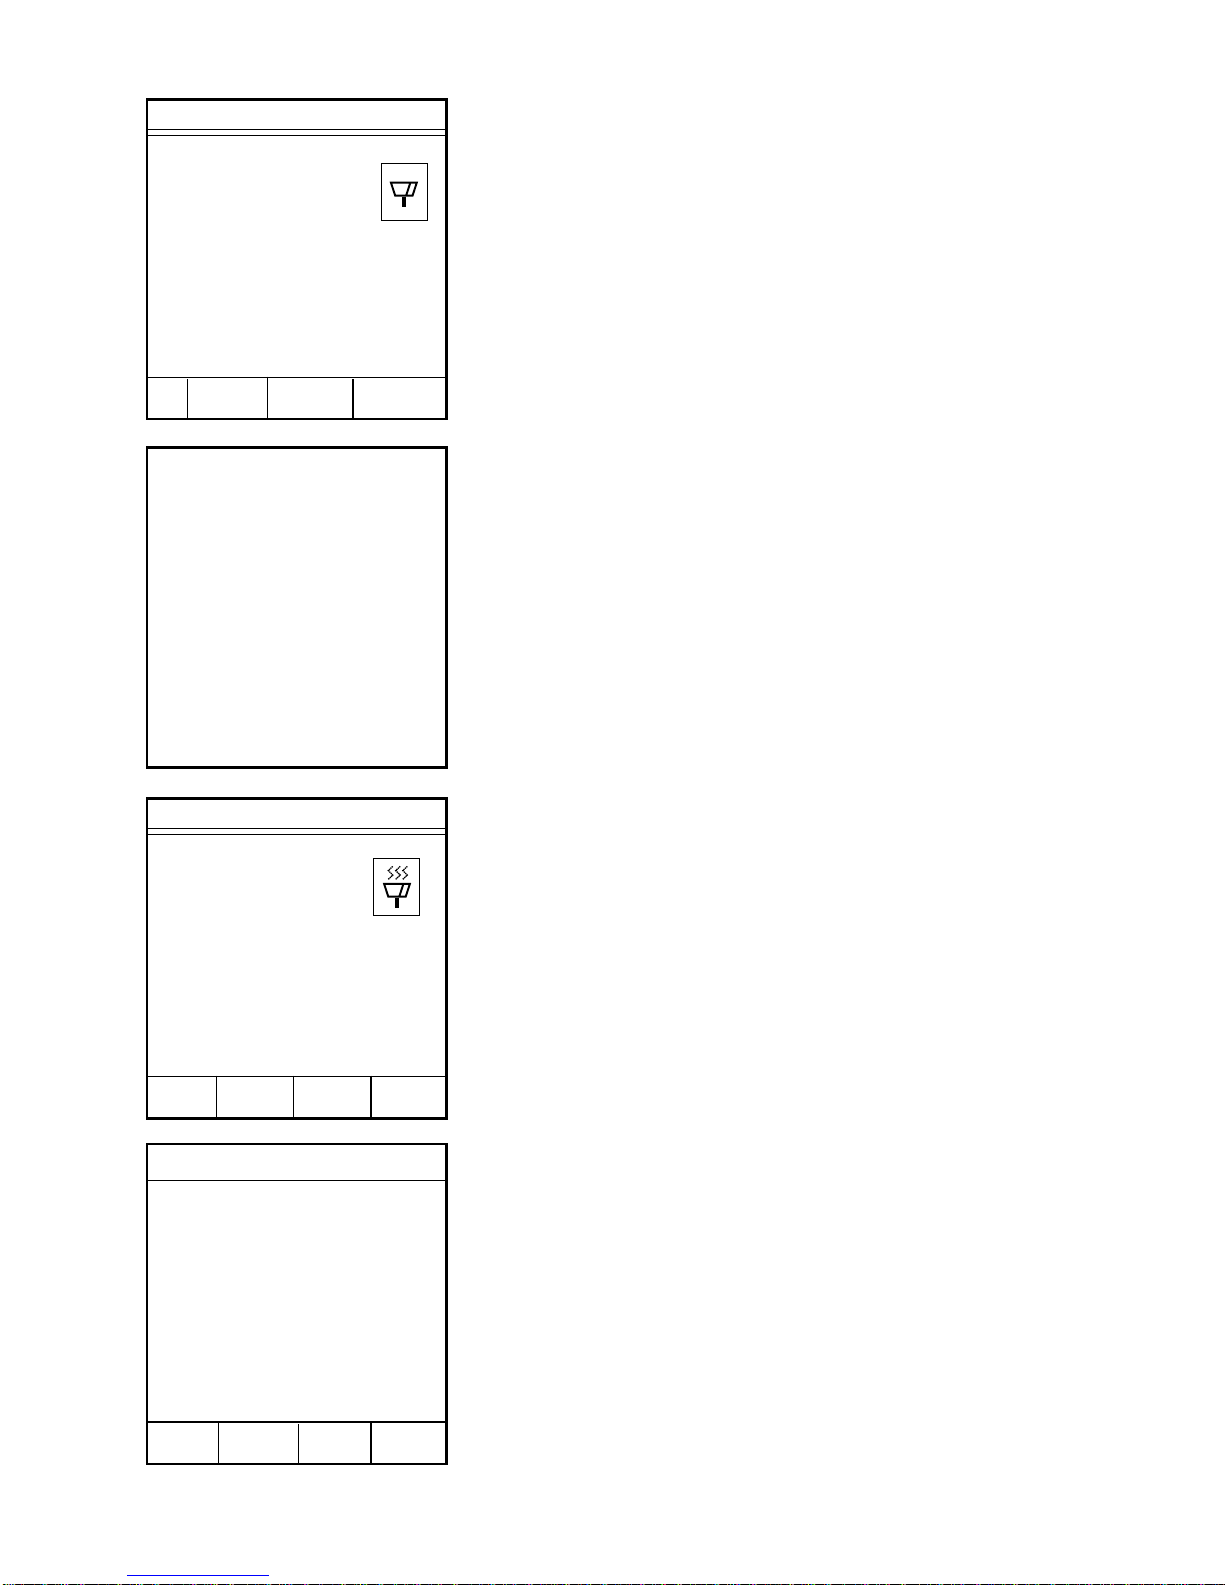
60
Note: The “T” in the lower left corner of the
balance icon indicates that the weight of the
sample pads has been tared.
21. Place filter in the funnel. With the vacuum
source operating, pour the sample into the
funnel. When all the sample has been
filtered, remove the filter from the funnel.
22. Lift the instrument cover. Place the wet
filter on the balance pan. Close the cover.
23. Press START.
The instrument reads and records the initial
weight of the sample prior to beginning the
analysis.
As the analysis begins, the flashing microwave
indicators in the balance icon appear and the
time begins counting (up for Constant Weight or
down for Set Time).
During the drying time, the operation key below
SOLIDS or MOISTURE may be pressed to
display % solids or % moisture.
Note: Press the operation key below STOP
TEST to abort the analysis.
When the drying time is complete, five short
beeps will be heard, and the Data Results screen
will appear, displaying either the % moisture or
% solids as selected.
24. To ash the dried sample, fold the filter;
place it in an ashing crucible; and place the
crucible in the ashing furnace. Ash the
sample by the defined method.
25. Press READY to reweigh the sample.
XXXXXX
Sample ID xxxxxxxx
Power: xxx %
Temp (xxx): xx.x
Time: xx:xx
Volume: xxx
Wt: x.xxxxg
Place sample and filter on
balance and press START.
ID VOLUME REWEIGH
T
READING BALANCE . . .
XXXXX
Sample ID: xxxxxxxx
Power: xxx%
Temp (xxx): xx.x
Time: xx:xx
Moisture: xx.xx%
Wt: x.xxxxg
STOP
SOLIDS TEST
Data Results
XXXX
MG/Liter
Press READY to continue.
MAIN FORM
MENU FEED DATA
Page 68

61
XXXXXX
Power: xxx %
Temp (xxx): xx.x
Time: xx:xx
Volume: xxx
Wt: x.xxxxg
Place filter on balance and
press TARE.
ID VOLUME REWEIGH
Select Sample ID
1. XXXX XXXX
2. XXXXXX XX
3. XXXXXX
4. XXX
Press item number to select.
XXXXXX
Sample ID: xxxxxxx
Power: xxx %
Temp (xxx): xx.x
Time: xx:xx
Volume: xxx
Wt: x.xxxxg
Press START to reweigh.
ID VOLUME REWEIGH
T
26. Press the operation key below REWEIGH.
Note: Press the operation key below VOLUME
to edit the sample volume.
27. Press the numerical key to select the proper
sample to be reweighed.
28. Lift the instrument cover. Place the ashed
sample on the balance pan. Close the
instrument cover.
29. Press START.
Note: To reweigh additional samples, press
READY and follow the steps outlined above.
The instrument reweighs the ashed sample and
calculates the data results.
REWEIGHING SAMPLE . . .
Page 69

62
Data Results
XXXX
MG/Liter TVSS
Press READY to continue.
MAIN FORM
MENU FEED DATA PRINT
30. Press the operation key below DATA to
display the analysis data.
31. Press the operation key below SAMPLE
WEIGHTS to view sample weight
information.
The Sample Weight Data screen displays the
initial weight, the final weight, the differential
weight and the end weight.
32. Press the operation key below PREV
PAGE to return to the Data Results screen.
33. Press the operation key below PRINT to
print the analysis results either on the
internal printer or an external printer, if
installed.
Note: Press READY to continue analysis using
the same method.
34. Press the operation key below MAIN
MENU to end the analysis and return to the
CEM Main Menu screen.
Data Results
Sample ID: xxxxxxxxx
Dry Time: xx:xx
Moisture: xx.xx%
Solids: xx.xx%
MG/Liter TSS: x
MG/Liter TVSS: x
Volume: xxx
Press READY to continue.
MAIN FORM SAMPLE
MENU FEED WEIGHTS PRINT
Sample Weight Data
Initial Wt: x.xxxx g
Final Wt: x.xxxx g
Diff Wt: x.xxxx g
End Wt: x.xxxx g
Press READY to continue.
PREV
PAGE
Data Results
Sample ID: xxxxxxxxx
Dry Time: xx:xx
Moisture: xx.xx%
Solids: xx.xx%
MG/Liter TSS: x
MG/Liter TVSS: x
Volume: xxx
Press READY to continue.
MAIN FORM SAMPLE
MENU FEED WEIGHTS PRINT
Page 70

63
METHOD NAME:
0 1 2 3 4 5 6 7 8 9 A B
C D E F G H I J K L M N
O P Q R S T U V W X Y Z
Space Delete
Highlight choice, press ENTER.
Press READY to continue.
CEM Main Menu
1. QUICK TEST
2. EDIT/CREATE METHOD
3. LOAD METHOD
4. SETUP
5. PRINT
6. STATISTICS
Press item number to select.
METHOD - XXXXXXXX
Edit/Create Method
1. NEW METHOD
2. TEMP VERIFY
3. POWER TEST
4. STD SOLUTION
5. LATEX
6. WATER BASED CHEM
7. MEAT RAW
8. CHEESE
Press item number to select.
NEXT
PAGE
Edit Method
1. CALCULATION MODE:
MOISTURE/SOLIDS
2. TIME PARAMETER:
CONSTANT WEIGHT
Press item number to select.
Press READY to continue.
MAIN PREV
MENU PAGE
➞
➞
➞
➞
Moisture/Solids – Dilution
1. Refer to the SETUP section of this manual
to ensure that the applicable external
balance is selected.
2. With the CEM Main Menu displayed, press
“2” to activate the Edit/Create Method
screen.
3. Press “1” to create a new method.
4. Using the operation keys below the arrows
select the first letter or number of the
method name.
5. Press ENTER.
6. Continue using the operation keys to select
each letter or number of the method name.
Press ENTER after each selection until the
entire method name is selected (16
characters maximum).
Note: If the method name utilizes numbers only,
use the numeric keypad to enter the numbers for
the name.
7. Press READY.
8. Press “1” to toggle and select “Moisture/
Solids.”
9. Press “2” to toggle and select “Constant
Weight” or “Set Time.”
10. Press READY.
Page 71

64
Moisture/Solids Analysis
1. STANDARD TEST
2. WASTEWATER
3. DILUTION
4. SYRINGE WEIGH
5. ASH
Press item number to select.
MAIN PREV
MENU PAGE
Dilution
1. POWER: 0 %
2. DELTA WEIGHT: 0.0 mg
3. DELTA TIME: 0 secs
4. MAX TIME: 10 mins
5. BIAS: ±0.00 %
6. MAX TEMP: 110 C
Press item number to select or
NEXT PAGE for more menu items.
MAIN PREV NEXT
MENU PAGE PAGE
11. Press “3” to select “Dilution.”
12. Press the numbers (1 - 6 Constant Weight
or 1 - 4 Set Time) and enter the appropriate
method parameters.
Note: Refer to the QUICK TEST section of this
manual for instructions for entering method
parameters for Constant Weight and Set Time.
13. Press the operation key below NEXT
PAGE to access additional method
parameters.
14. Press the numbers (1 - 6) and enter the
appropriate method parameters.
15. Press READY to begin the method
analysis.
Dilution
1. POWER: 0 %
2. RUN TIME: 00:00 min:sec
3. BIAS: ±0.00 %
4. MAX TEMP: 110 C
Press item number to select or
NEXT PAGE for more menu items.
MAIN PREV NEXT
MENU PAGE PAGE
C
O
N
S
T
A
N
T
W
E
I
G
H
T
S
E
T
T
I
M
E
Dilution
1. RESULT RANGE: MOISTURE
2. MIN RESULT: X.XX%
3. MAX RESULT: XX.XX%
4. MIN WT RANGE: X.XX g
5. MAX WT RANGE: X.XX g
6. WT COMPENSATION: OFF
Press READY to run test.
MAIN PREV
MENU PAGE
Page 72
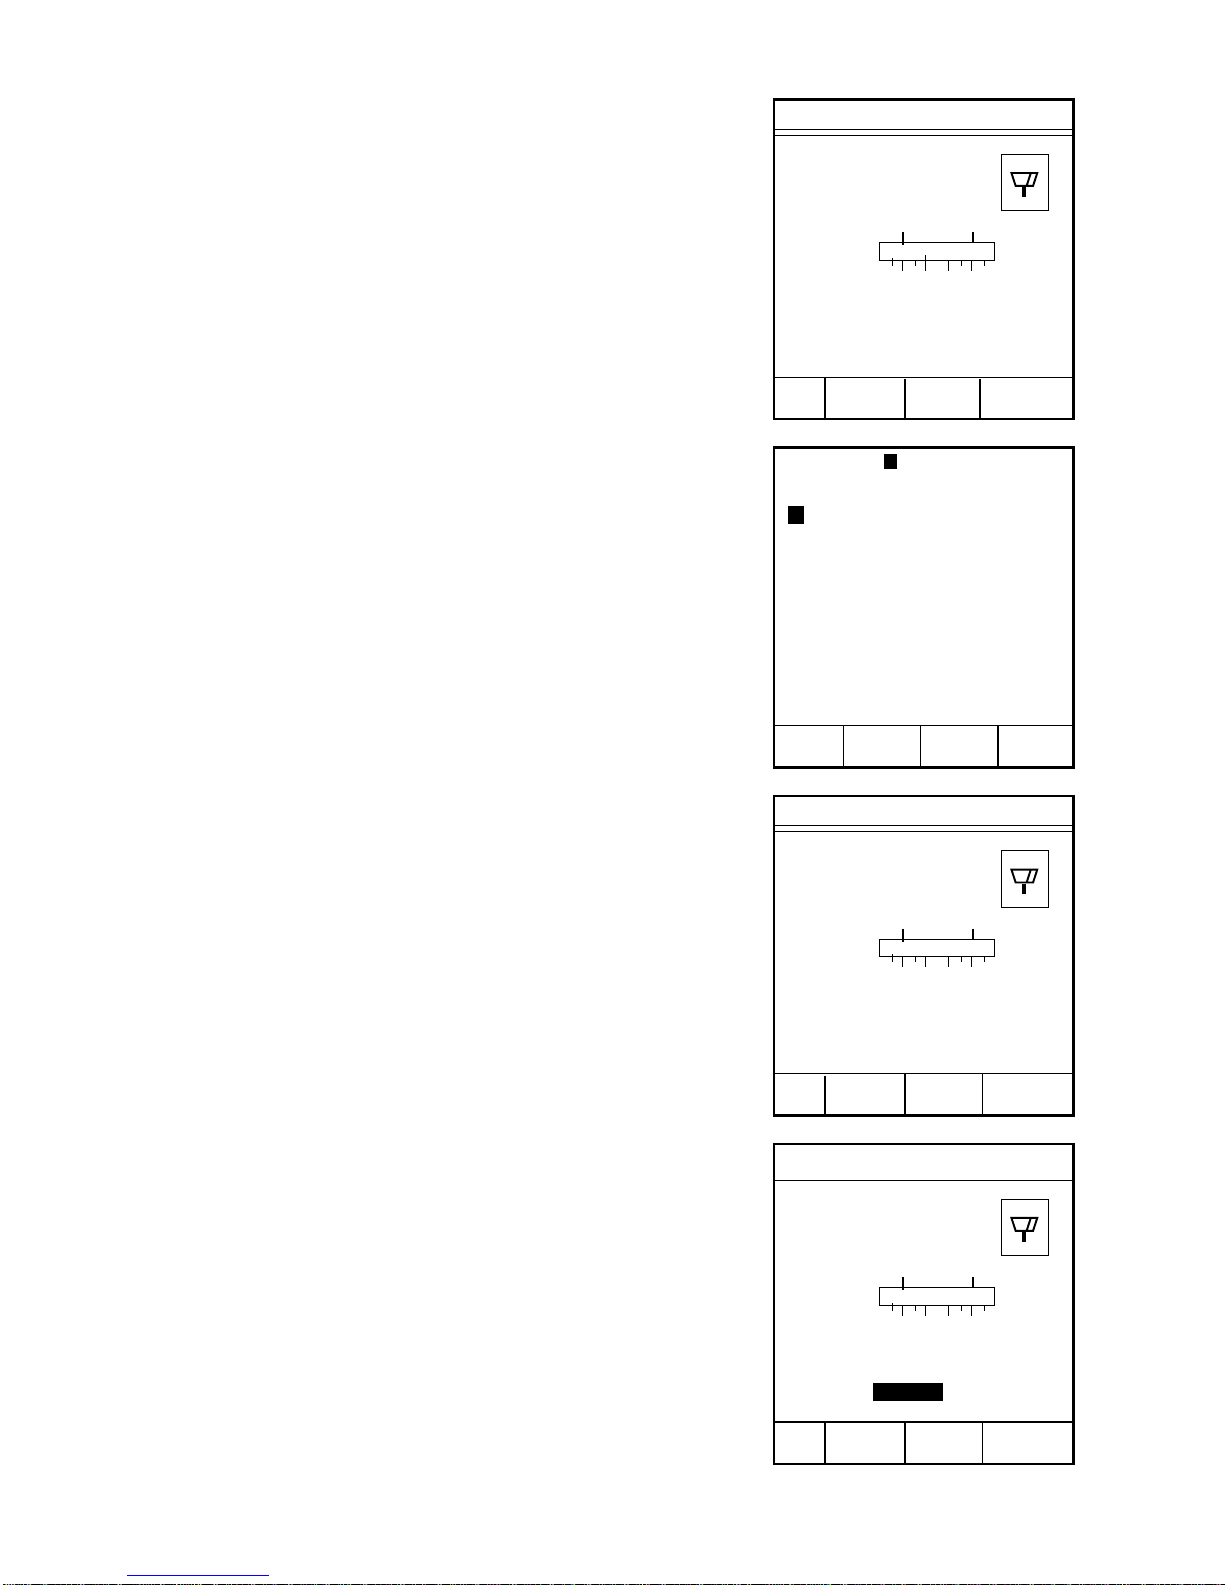
65
Note: The method test screen appears indicating
the power, temperature, time and ratio.
Note: Press the operation key below SOLIDS to
display the solids data rather than the moisture
data on the screen.
16. If Autotrack is turned off and a method
identification name or number is required,
press the operation key below ID.
17. Using the operation keys below the arrows,
position the cursor on (select) the first
number or letter of the sample identification. Press ENTER. Continue to position
the cursor on each letter or number and
press ENTER until the identification is
complete.
Note: If using an identification number only, use
the numeric keys to enter the number.
18. Press READY to return to the method test
screen.
Note: If sample and diluent are weighed on a
balance not connected to the SMART System5,
press the operation key below RATIO to enter
the dilution ratio.
19. Using the numeric keys, enter the dilution
ratio.
Note: The dilution ratio is the ratio between the
amount of sample and the amount of diluent. The
internal dilution ratio is calculated as the sample
weight after the diluent is added divided by the
initial sample weight.
20. Press ENTER.
21. Press the operation key below DILUTION
to engage the external balance and activate
the dilution menu.
XXXXXX
Power: xxx %
Temp (xxx): xx.x
Time: xx:xx
Ratio: xx.xxxx
Wt: x.xxxxg
Place pads on balance and
press TARE.
ID RATIO DILUTION
1 2 3 4 5
SAMPLE ID:
0 1 2 3 4 5 6 7 8 9 A B
C D E F G H I J K L M N
O P Q R S T U V W X Y Z
Space Delete
Highlight choice, press ENTER.
Press READY to continue.
➞
➞
➞
➞
XXXXXX
Power: xxx %
Temp (xxx): xx.x
Time: xx:xx
Ratio: xx.xxxx
Wt: x.xxxxg
Place pads on balance and
press TARE.
ID RATIO DILUTION
1 2 3 4 5
XXXXXX
Power: xxx %
Temp (xxx): xx.x
Time: xx:xx
Ratio: xx.xxxx
Wt: x.xxxxg
Input ratio, press ENTER.
Entry: 00.0000
ID RATIO DILUTION
1 2 3 4 5
Page 73

66
22. Place an empty container suitable for the
sample and diluent on the external balance.
Wait for the weight to stabilize.
23. Press TARE.
24. Wait for the SMART System5 to tare the
weight of the container.
25. Place the sample in the container on the
external balance pan.
26. Wait for the weight to stabilize.
27. Press READY.
Note: Press the operation key below ABORT to
end the dilution analysis.
The instrument reads and records the weight of
the sample.
Dilution (Ext)
Place empty container on
external balance and press TARE.
ABORT
TARING BALANCE . . .
Dilution (Ext)
Add sample to container
and press READY.
ABORT
READING BALANCE . . .
Page 74

67
28. Add the diluent to the sample in the
container on the external balance pan.
29. Wait for the weight to stabilize.
30. Press READY.
The instrument reads and records the weight of
the sample and diluent.
The instrument displays the weight of the
sample, the weight of the sample and diluent,
and the dilution ratio.
31. Press READY to continue the analysis.
32. Lift the cover of the SMART System5.
Place two glass fiber sample pads on the
balance pan. Close the instrument cover.
33. Press TARE.
Dilution (Ext)
Wt: 0.000g
Add diluent to container
and press READY.
ABORT
READING BALANCE . . .
Dilution (Ext)
Sample Wt: xx.xxxg
Sample + Dil Wt: xx.xxxg
Dilution Ratio: x.xxxx
Press READY to continue.
XXXXXX
Power: xxx %
Temp (xxx): xx.x
Time: xx:xx
Ratio: xx.xxxx
Wt: x.xxxxg
Place pads on balance and
press TARE.
ID RATIO DILUTION
1 2 3 4 5
Page 75

68
34. Wait for the instrument to tare the weight
of the sample pads.
Note: The “T” in the lower left corner of the
balance icon indicates that the weight of the
sample pads has been tared.
35. Lift the instrument cover. Apply the
sample in a thin, even layer to one of the
sample pads. Quickly and gently place the
sample pads back on the balance pan.
Close the top cover.
36. Press START.
The instrument reads and records the initial
weight of the sample prior to beginning the
analysis.
As the analysis begins, the flashing microwave
indicators in the balance icon appear and the
time begins counting (up for Constant Weight or
down for Set Time). The sample weight
decreases as the moisture is removed.
During the drying time, the operation key below
SOLIDS or MOISTURE may be pressed to
display % solids or % moisture.
TARING BALANCE . . .
READING BALANCE . . .
XXXXXX
Power: xxx %
Temp (xxx): xx.x
Time: xx:xx
Ratio: xx.xxxx
Wt: x.xxxxg
Place sample and pads on
balance and press START.
ID SOLIDS RATIO DILUTION
1 2 3 4 5
T
XXXXXX
Power: xxx%
Temp (xxx): xx.x
Time: xx:xx
Ratio: xx.xxxx
Moisture: xx.xx%
Wt: x.xxxxg
STOP
SOLIDS TEST
Page 76
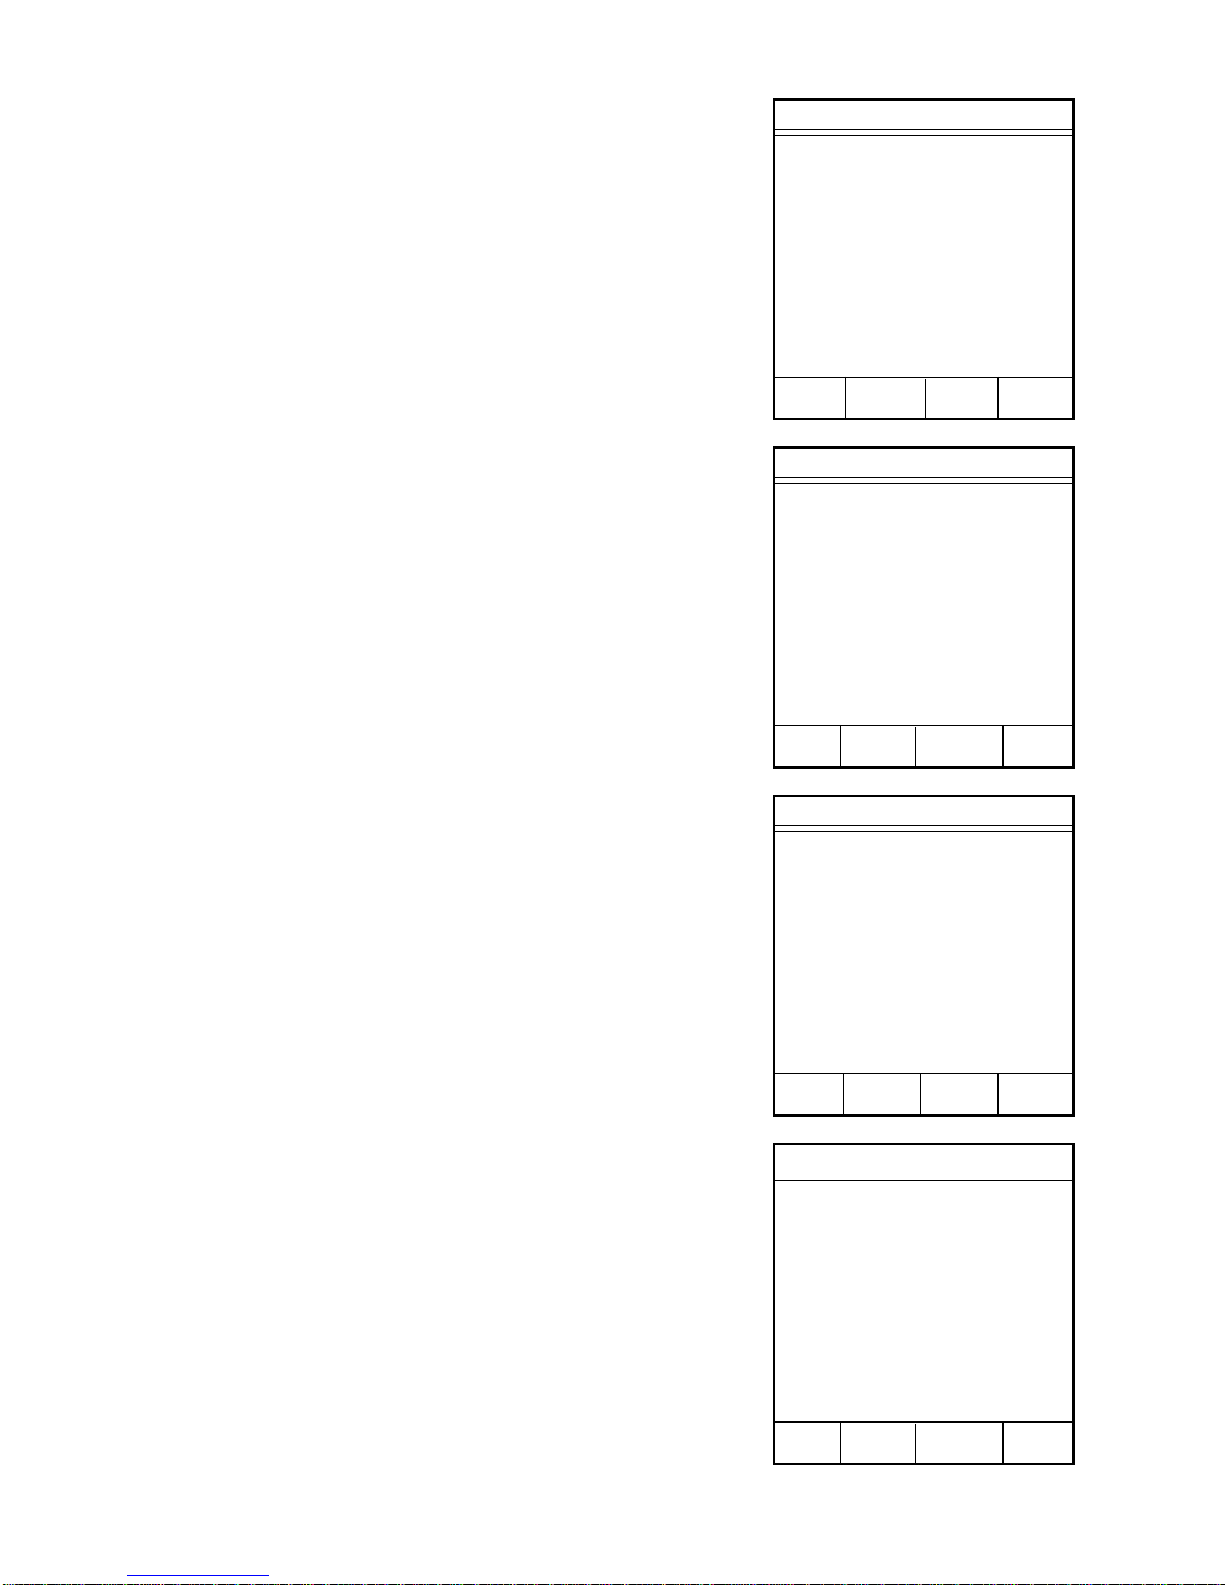
69
When the weight loss is equal to or less than the
selected parameter, five short beeps will be
heard, and the Data Results screen will appear,
displaying either the % moisture or % solids as
selected.
Note: Press READY to analyze additional
samples using the same method.
Note: Press the operation key below FORM
FEED to advance paper from the internal printer.
37. Press the operation key below DATA to
display the analysis data.
38. Press the operation key below SAMPLE
WEIGHTS to view sample weight
information.
The Sample Weight Data screen displays the
initial weight, the final weight and the
differential weight.
39. Press the operation key below PREV
PAGE to return to the Data Results screen.
40. Press the operation key below PRINT to
print the analysis results either on the
internal printer or an external printer, if
installed.
Note: Press READY to analyze additional
samples using the same method.
41. Press the operation key below MAIN
MENU to end the analysis and return to the
CEM Main Menu screen.
Data Results
XX.XX%M
Press READY to continue.
MAIN FORM
MENU FEED DATA PRINT
Data Results
Sample ID: xxxxxx
Dry Time: xx:xx
Moisture: xx.xx%
Solids: xx.xx%
Press READY to continue.
MAIN FORM SAMPLE
MENU FEED WEIGHTS PRINT
Sample Weight Data
Initial Wt: xx.xxxx g
Final Wt: xx.xxxx g
Diff Wt: xx.xxxx g
Press READY to continue.
PREV
PAGE
Data Results
Sample ID: xxxxxxxxx
Dry Time: xx:xx
Moisture: xx.xx%
Solids: xx.xx%
Press READY to continue.
MAIN FORM SAMPLE
MENU FEED WEIGHTS PRINT
Page 77

70
Page 78

71
METHOD NAME:
0 1 2 3 4 5 6 7 8 9 A B
C D E F G H I J K L M N
O P Q R S T U V W X Y Z
Highlight choice, press ENTER.
Press READY to continue.
CEM Main Menu
1. QUICK TEST
2. EDIT/CREATE METHOD
3. LOAD METHOD
4. SETUP
5. PRINT
6. STATISTICS
Press item number to select.
METHOD - XXXXXXXX
Edit/Create Method
1. NEW METHOD
2. TEMP VERIFY
3. POWER TEST
4. STD SOLUTION
5. LATEX
6. WATER BASED CHEM
7. MEAT RAW
8. CHEESE
Press item number to select.
NEXT
PAGE
Edit Method
1. CALCULATION MODE:
MOISTURE/SOLIDS
2. TIME PARAMETER:
CONSTANT WEIGHT
Press item number to select.
Press READY to continue.
MAIN PREV
MENU PAGE
Moisture/Solids - Syringe Weigh Internal Balance
1. With the CEM Main Menu displayed, press
“2” to activate the Edit/Create Method
screen.
2. Press “1” to create a new method.
3. Using the operation keys below the arrows
select the first letter or number of the
method name.
4. Press ENTER.
5. Continue using the operation keys to select
each letter or number of the method name.
Press ENTER after each selection until the
entire method name is selected (16
characters maximum).
Note: If the method name utilizes numbers only,
use the numeric keypad to enter the numbers for
the name.
6. Press READY.
7. Press “1” to toggle and select “Moisture/
Solids.”
8. Press “2” to toggle and select “Constant
Weight” or “Set Time.”
9. Press READY.
➞
➞
➞
➞
Page 79

72
Moisture/Solids Analysis
1. STANDARD TEST
2. WASTEWATER
3. DILUTION
4. SYRINGE WEIGH
5. ASH
Press item number to select or
NEXT PAGE for more menu items.
MAIN PREV
MENU PAGE
Syringe Weigh
1. POWER: 0 %
2. DELTA WEIGHT: 0.0 mg
3. DELTA TIME: 0 secs
4. MAX TIME: 10 mins
5. BIAS: ±0.00 %
6. MAX TEMP: 110 C
Press item number to select.
MAIN PREV NEXT
MENU PAGE PAGE
10. Press “4” to select “Syringe Weigh.”
11. Press the numbers (1 - 6 Constant Weight
or 1 - x Set Time) and enter the appropriate
method parameters.
Note: Refer to the QUICK TEST section of this
manual for instructions for entering method
parameters for Constant Weight and Set Time.
12. Press the operation key below NEST
PAGE to access additional method
parameters.
13. Press the numbers (1 - 6) and enter the
appropriate method parameters.
14. Press READY to begin the method
analysis.
Syringe Weigh
1. POWER: 0 %
2. RUN TIME: 00:00 min:sec
3. BIAS: ±0.00 %
4. MAX TEMP: 110 C
Press item number to select.
MAIN PREV NEXT
MENU PAGE PAGE
C
O
N
S
T
A
N
T
W
E
I
G
H
T
S
E
T
T
I
M
E
Syringe Weigh
1. RESULT RANGE: MOISTURE
2. MIN RESULT: X.XX%
3. MAX RESULT: XX.XX%
4. MIN WT RANGE: X.XX g
5. MAX WT RANGE: X.XX g
6. WT COMPENSATION: OFF
Press READY to run test.
MAIN PREV
MENU PAGE
Page 80

73
Note: The test screen appears indicating the
power, temperature, and time.
15. If Autotrack is off and a method identification name or number is required, press
the operation key below “ID.”
16. Using the operation keys below the arrows,
position the cursor on (select) the first
number or letter of the sample identification. Press “ENTER.” Continue to
position the cursor on each letter or number
and press “ENTER” until the identification
is complete.
Note: If using an identification number only, use
the numeric keys to enter the number.
17. Press “READY” to return to the test
screen.
18. Lift the cover of the SMART System5.
Place two glass fiber sample pads on the
balance pan. Close the instrument cover.
19. Press “TARE.”
20. Wait for the instrument to tare the weight
of the sample pads.
XXXXXX
Power: xxx %
Temp (xxx): xx.x
Dry Time: xx:xx
Wt: x.xxxxg
Place pads on balance and
press TARE.
EXTERNAL
ID SYRINGE
1 2 3 4 5
SAMPLE ID:
0 1 2 3 4 5 6 7 8 9 A B
C D E F G H I J K L M N
O P Q R S T U V W X Y Z
Space Delete
Highlight choice, press ENTER.
Press READY to continue.
➞
➞
➞
➞
XXXXXX
Power: xxx %
Temp(xxx): xx.x
Dry Time: xx:xx
Wt: x.xxxxg
Place pads on balance and
press TARE.
ID
1 2 3 4 5
TARING BALANCE . . .
Page 81
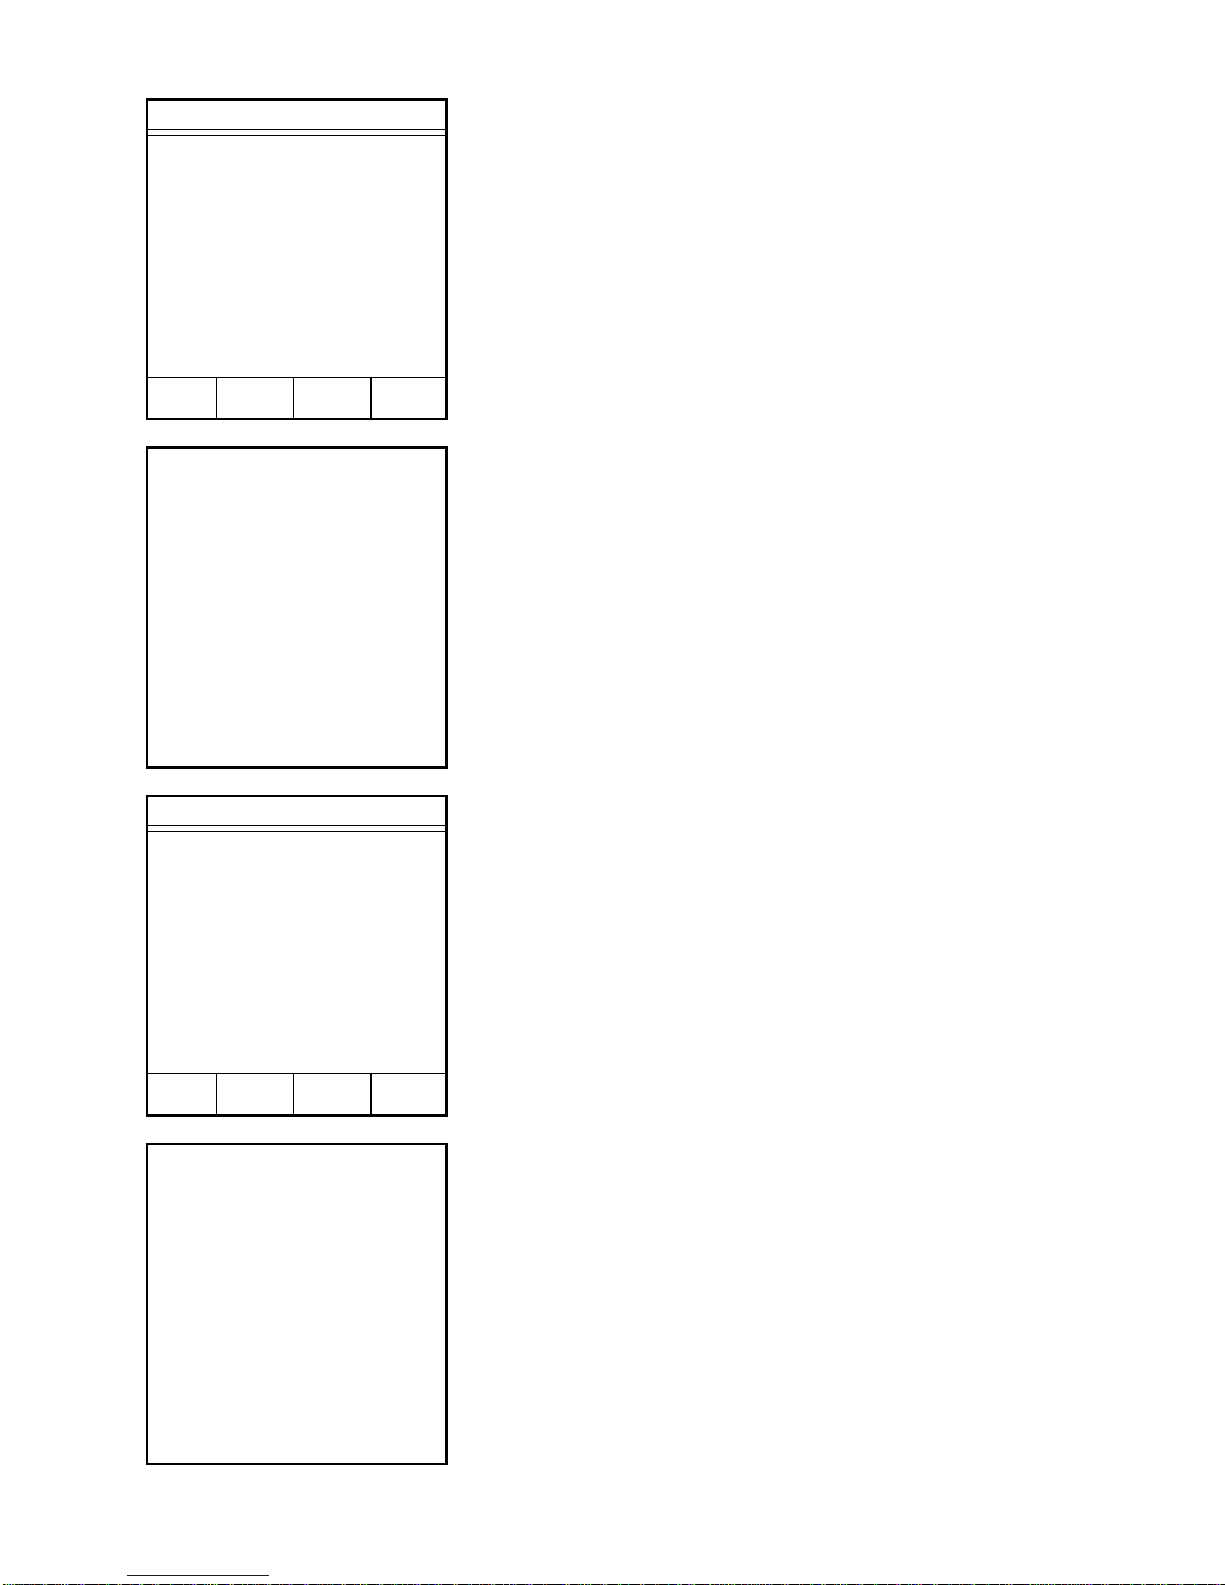
74
21. Lift the instrument cover. Remove the
sample pads from the balance pan. Place
the syringe containing the sample on the
balance pan. Close the instrument cover.
22. Press “READY.”
Note: Press the operation key below “Abort” to
end the analysis.
The instrument weighs the syringe containing the
sample.
Note: Press the operation key below “Abort” to
end the analysis.
23. Lift the instrument cover. Remove the
syringe from the balance pan.
24. Dispense the sample from the syringe on
the tared sample pads.
25. Place the empty syringe back on the
balance pan. Close the instrument cover.
26. Press “READY.”
The instrument reweighs the syringe.
Syringe Weigh (Int)
Remove sample pads. Place
filled syringe on balance
and press READY.
ABORT
WEIGHING SYRINGE . . .
Syringe Weigh (Int)
Dispense sample on pads.
Place syringe back on
balance and press READY.
ABORT
REWEIGHING SYRINGE . . .
Page 82

75
27. Lift the instrument cover. Remove the
syringe from the balance pan.
28. Press READY.
29. Place the sample pads with the sample on
the balance pan. Close the instrument
cover.
30. Press START.
The instrument reads and records the initial
weight of the sample prior to beginning the
analysis.
As the analysis begins, the flashing microwave
indicators in the balance icon appear and the
time begins counting (up for Constant Weight or
down for Set Time). The sample weight
decreases as the moisture is removed.
During the drying time, the operation key below
SOLIDS or MOISTURE may be pressed to
display % solids or % moisture.
Note: Press the operation key below STOP
TEST to end the analysis.
Syringe Weigh (Int)
Remove syringe and press READY.
ABORT
XXXXXX
Power: xxx %
Temp (xxx): xx.x
Time: xx:xx
Wt: x.xxxxg
Place sample and pads on
balance and press START.
EXTERNAL
ID SYRINGE
1 2 3 4 5
XXXXX
Sample ID: xxxxxxxx
Power: xxx%
Temp (xxx): xx.x
Time: xx:xx
Moisture: xx.xx%
Wt: x.xxxxg
STOP
SOLIDS TEST
READING BALANCE . . .
T
Page 83

76
When the weight loss is equal to or less than the
selected parameter, five short beeps will be
heard, and the Data Results screen will appear,
displaying either the % moisture or % solids as
selected.
Note: Press READY to analyze additional
samples using the same method.
Note: Press the operation key below FORM
FEED to advance paper from the internal printer.
31. Press the operation key below DATA to
display the analysis data.
32. Press the operation key below SAMPLE
WEIGHTS to view sample weight
information.
The Sample Weight Data screen displays the
initial weight, the final weight and the
differential weight.
33. Press the operation key below PREV
PAGE to return to the Data Results screen.
34. Press the operation key below PRINT to
print the analysis results either on the
internal printer or an external printer, if
installed.
Note: Press READY to analyze additional
samples using the same method.
35. Press the operation key below MAIN
MENU to end the analysis and return to the
CEM Main Menu screen.
XXXXX
XX.XX%M
Press READY to continue.
MAIN FORM
MENU FEED DATA PRINT
Data Results
Sample ID: xxxxxx
Dry Time: xx:xx
Moisture: xx.xx%
Solids: xx.xx%
Press READY to continue.
MAIN FORM SAMPLE
MENU FEED WEIGHTS PRINT
Sample Weight Data
Initial Wt: xx.xxxx g
Final Wt: xx.xxxx g
Diff Wt: xx.xxxx g
Press READY to continue.
MAIN PREV
MENU PAGE
Data Results
Sample ID: xxxxxxxxx
Dry Time: xx:xx
Moisture: xx.xx%
Solids: xx.xx%
Press READY to continue.
MAIN FORM SAMPLE
MENU FEED WEIGHTS PRINT
Page 84

77
CEM Main Menu
1. QUICK TEST
2. EDIT/CREATE METHOD
3. LOAD METHOD
4. SETUP
5. PRINT
6. STATISTICS
Press item number to select.
METHOD - XXXXXXXX
Edit/Create Method
1. NEW METHOD
2. TEMP VERIFY
3. POWER TEST
4. STD SOLUTION
5. LATEX
6. WATER BASED CHEM
7. MEAT RAW
8. CHEESE
Press item number to select.
NEXT
PAGE
Edit Method
1. CALCULATION MODE:
MOISTURE/SOLIDS
2. TIME PARAMETER:
CONSTANT WEIGHT
Press item number to select.
Press READY to continue.
MAIN PREV
MENU PAGE
Moisture/Solids - Syringe Weigh External Balance
1. Refer to the Setup section of this manual to
ensure that the applicable external balance
is selected.
2. With the CEM Main Menu displayed, press
“2” to activate the Edit/Create Method
screen.
3. Press “1” to create a new method.
4. Using the operation keys below the arrows
select the first letter or number of the
method name.
5. Press ENTER.
6. Continue using the operation keys to select
each letter or number of the method name.
Press ENTER after each selection until the
entire method name is selected (16
characters maximum).
Note: If the method name utilizes numbers only,
use the numeric keypad to enter the numbers for
the name.
7. Press READY.
8. Press “1” to toggle and select “Moisture/
Solids.”
9. Press “2” to toggle and select “Constant
Weight” or “Set Time.”
10. Press READY.
METHOD NAME:
0 1 2 3 4 5 6 7 8 9 A B
C D E F G H I J K L M N
O P Q R S T U V W X Y Z
Space Delete
Highlight choice, press ENTER.
Press READY to continue.
➞
➞
➞
➞
Page 85

78
Moisture/Solids Analysis
1. STANDARD TEST
2. WASTEWATER
3. DILUTION
4. SYRINGE WEIGH
5. ASH
Press item number to select.
MAIN PREV
MENU PAGE
Syringe Weigh
1. POWER: 0 %
2. DELTA WEIGHT: 0.0 mg
3. DELTA TIME: 0 secs
4. MAX TIME: 10 mins
5. BIAS: ±0.00 %
6. MAX TEMP: 110 C
Press item number to select or
NEXT PAGE for more menu items.
MAIN PREV NEXT
MENU PAGE PAGE
11. Press “4” to select “Syringe Weigh.”
12. Press the numbers (1 - 6 Constant Weight
or 1 - 4 Set Time) and enter the appropriate
method parameters.
Note: Refer to the QUICK TEST section of this
manual for instructions for entering method
parameters for Constant Weight and Set Time.
13. Press the operation key below NEXT
PAGE to access additional method
parameters.
14. Press the numbers (1 - 6) and enter the
appropriate method parameters.
15. Press READY to begin the method
analysis.
C
O
N
S
T
A
N
T
W
E
I
G
H
T
S
E
T
T
I
M
E
Syringe Weigh
1. POWER: 0 %
2. RUN TIME: 00:00 min:sec
3. BIAS: ±0.00 %
4. MAX TEMP: 110 C
Press item number to select or
NEXT PAGE for more menu items.
MAIN PREV NEXT
MENU PAGE PAGE
Syringe Weigh
1. RESULT RANGE: MOISTURE
2. MIN RESULT: X.XX%
3. MAX RESULT: XX.XX%
4. MIN WT RANGE: X.XX g
5. MAX WT RANGE: X.XX g
6. WT COMPENSATION: OFF
Press READY to run test.
MAIN PREV
MENU PAGE
Page 86

79
Note: The method test screen appears indicating
the power, temperature, and time.
16. If Autotrack is turned off and a method
identification name or number is required,
press the operation key below ID.
17. Using the operation keys below the arrows,
position the cursor on (select) the first
number or letter of the sample identification. Press ENTER. Continue to position
the cursor on each letter or number and
press ENTER until the identification is
complete.
Note: If using an identification number only, use
the numeric keys to enter the number.
18. Press READY to return to the test screen.
19. Press the operation key below
EXTERNAL SYRINGE to engage the
external balance and activate the external
balance syringe weigh menu.
Note: If “External Balance” does not appear on
the screen as an option, return to the Main Menu
screen; press “4 - Setup”; press “1 - System
Options”;press “4 - External Balance”; then
press the applicable number to select an external
balance.
20. Lift the cover of the SMART System5.
Place two glass fiber sample pads on the
balance pan. Close the instrument cover.
Press TARE.
XXXXXX
Power: xxx %
Temp (xxx): xx.x
Time: xx:xx
Wt: x.xxxxg
Place pads on balance and
press TARE.
ID
1 2 3 4 5
SAMPLE ID:
0 1 2 3 4 5 6 7 8 9 A B
C D E F G H I J K L M N
O P Q R S T U V W X Y Z
Space Delete
Highlight choice, press ENTER.
Press READY to continue.
➞
➞
➞
➞
XXXXXX
Power: xxx %
Temp (xxx): xx.x
Time: xx:xx
Wt: x.xxxxg
Place pads on balance and
press TARE.
EXTERNAL
ID SYRINGE
1 2 3 4 5
Syringe Weigh (Ext)
Place pads on internal
balance and press TARE.
ABORT
Page 87

80
21. Wait for the instrument to tare the weight
of the sample pads.
22. Ensure that the balance pan of the external
balance is free of any weight. Press TARE
on the SMART System5.
23. Wait for the system to tare the external
balance.
24. Place the syringe filled with sample on the
external balance pan.
25. Press READY.
Note: Press the operation key below ABORT to
end the analysis.
TARING BALANCE . . .
Syringe Weigh (Ext)
Clear external balance
pan and press TARE.
ABORT
TARING BALANCE . . .
Syringe Weigh (Ext)
Place filled syringe on external
balance and press READY.
ABORT
Page 88

81
The instrument weighs the syringe and sample.
26. Lift the SMART System5 cover. Remove
the pads from the balance pan.
27. Remove the syringe from the external
balance pan.
28. Dispense the sample from the syringe on
the tared sample pads.
29. Place the empty syringe back on the
external balance pan.
30. Press READY.
The instrument weighs the empty syringe.
31. Press READY.
READING BALANCE . . .
Syringe Weigh (Ext)
Dispense sample on pads. Place
empty syringe on external
balance and press READY.
ABORT
READING BALANCE . . .
Syringe Weigh (Ext)
Sample Wt: x.xxxxg
Press READY to continue.
Page 89
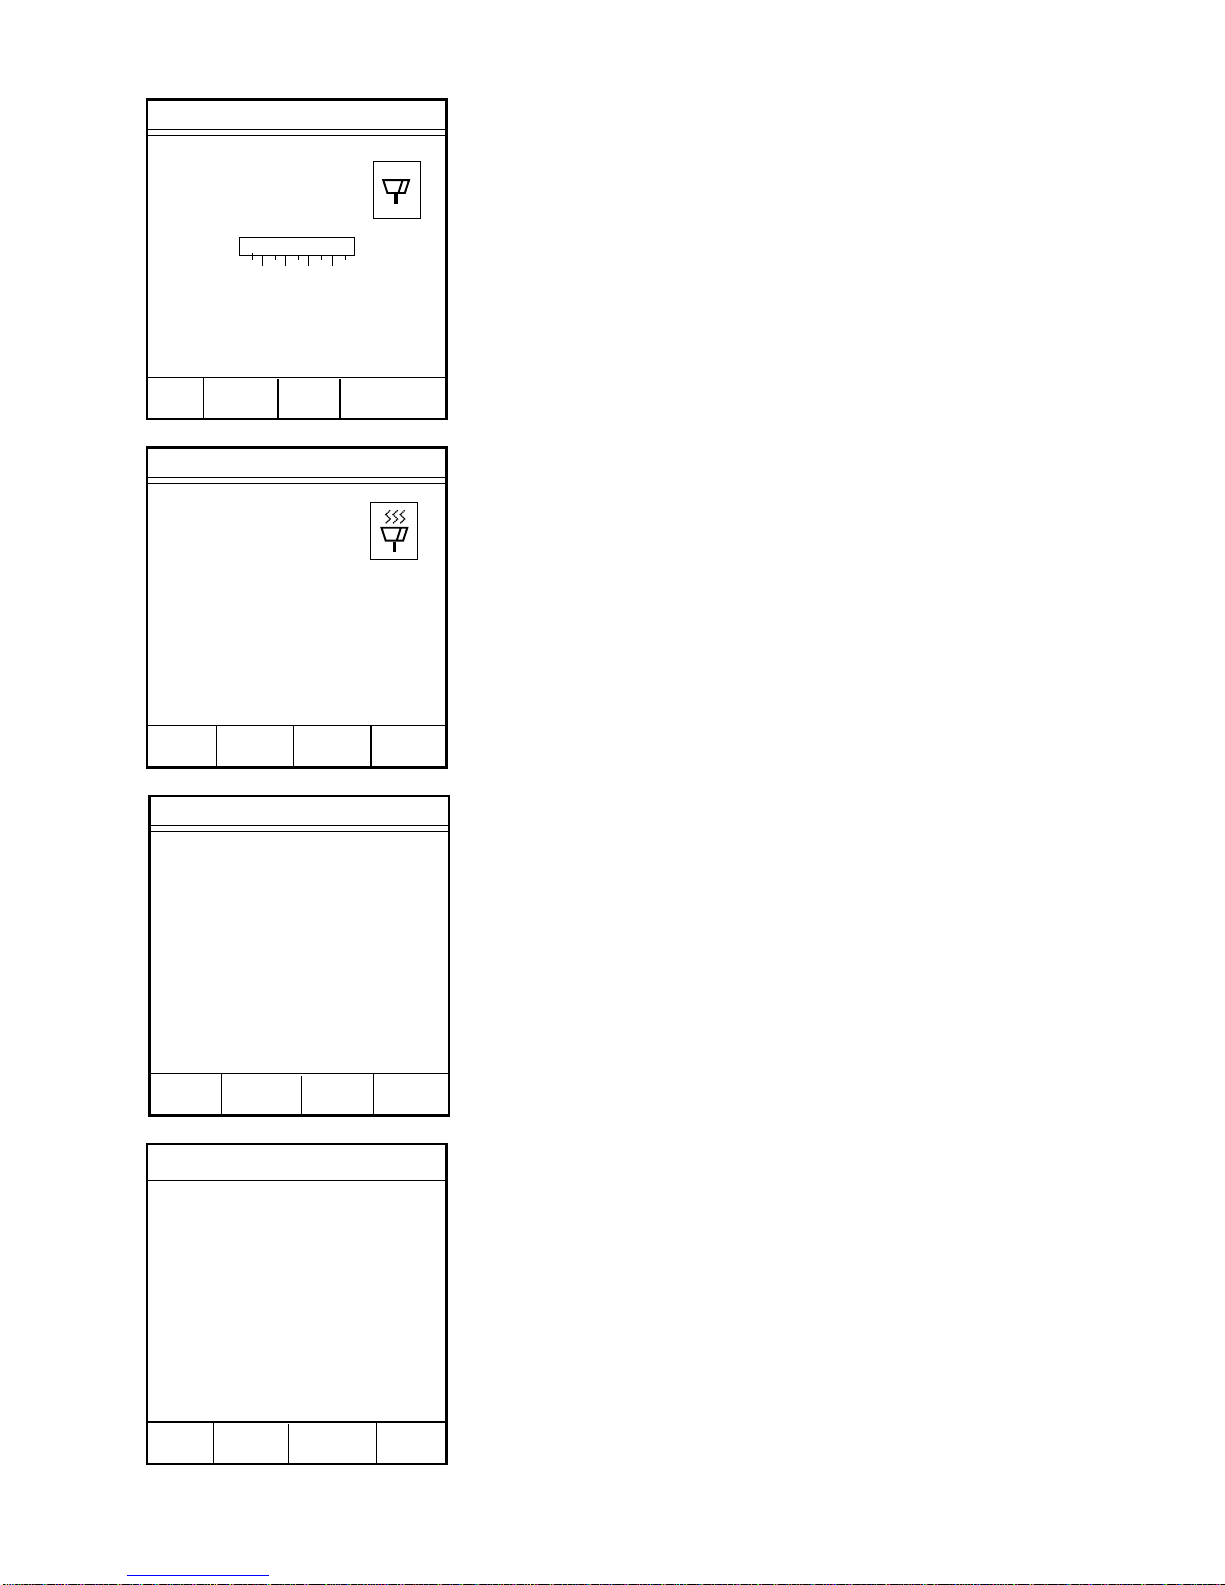
82
32. Place the sample pads with the sample on
the balance pan. Close the instrument
cover.
33. Press START.
As the analysis begins, the flashing microwave
indicators in the balance icon appear and the
time begins counting (up for Constant Weight or
down for Set Time). The sample weight
decreases as the moisture is removed.
During the drying time, the operation key below
SOLIDS or MOISTURE may be pressed to
display % solids or % moisture.
Note: Press the operation key below STOP
TEST to end the analysis.
When the weight loss is equal to or less than the
selected parameter, five short beeps will be
heard, and the Data Results screen will appear,
displaying either the % moisture or % solids as
selected.
Note: Press READY to analyze additional
samples using the same method.
Note: Press the operation key below FORM
FEED to advance paper from the internal printer.
34. Press the operation key below DATA to
display the analysis data.
35. Press the operation key below SAMPLE
WEIGHTS to view sample weight
information.
XXXXXX
Power: xxx %
Temp (xxx): xx.x
Time: xx:xx
Wt: x.xxxxg
Press sample and pads on balance
and press START.
EXTERNAL
ID SYRINGE
1 2 3 4 5
T
XXXXX
Sample ID: xxxxxxxx
Power: xxx%
Temp (xxx): xx.x
Time: xx:xx
Moisture: xx.xx%
Wt: x.xxxxg
STOP
SOLIDS TEST
XXXXX
XX.XX%M
Press READY to continue.
MAIN FORM
MENU FEED DATA
Data Results
Sample ID: xxxxxx
Dry Time: xx:xx
Moisture: xx.xx%
Solids: xx.xx%
Press READY to continue.
MAIN FORM SAMPLE
MENU FEED WEIGHTS PRINT
Page 90

83
The Sample Weight Data screen displays the
initial weight, the final weight and the
differential weight.
36. Press the operation key below PREV
PAGE to return to the Data Results screen.
37. Press the operation key below PRINT to
print the analysis results either on the
internal printer or an external printer, if
installed.
Note: Press READY to analyze additional
samples using the same method.
38. Press the operation key below MAIN
MENU to end the analysis and return to the
CEM Main Menu screen.
Sample Weight Data
Initial Wt: xx.xxxx g
Final Wt: xx.xxxx g
Diff Wt: xx.xxxx g
Press READY to continue.
MAIN PREV
MENU PAGE
Data Results
Sample ID: xxxxxxxxx
Dry Time: xx:xx
Moisture: xx.xx%
Solids: xx.xx%
Press READY to continue.
MAIN FORM SAMPLE
MENU FEED WEIGHTS PRINT
CEM Main Menu
1. QUICK TEST
2. EDIT/CREATE METHOD
3. LOAD METHOD
4. SETUP
5. PRINT
6. STATISTICS
Press item number to select.
METHOD - XXXXXXXX
Page 91

84
Page 92
85
CEM Main Menu
1. QUICK TEST
2. EDIT/CREATE METHOD
3. LOAD METHOD
4. SETUP
5. PRINT
6. STATISTICS
Press item number to select.
METHOD - XXXXXXXX
Edit/Create Method
1. NEW METHOD
2. TEMP VERIFY
3. POWER TEST
4. STD SOLUTION
5. LATEX
6. WATER BASED CHEM
7. MEAT RAW
8. CHEESE
Press item number to select.
NEXT
PAGE
Edit Method
1. CALCULATION MODE:
MOISTURE/SOLIDS
2. TIME PARAMETER:
CONSTANT WEIGHT
Press item number to select.
Press READY to continue.
MAIN PREV
MENU PAGE
Moisture/Solids - Ash
1. With the CEM Main Menu displayed, press
“2” to activate the Edit/Create Method
screen.
2. Press “1” to create a new method.
3. Using the operation keys below the arrows
select the first letter or number of the
method name.
4. Press ENTER.
5. Continue using the operation keys to select
each letter or number of the method name.
Press ENTER after each selection until the
entire method name is selected (16
characters maximum).
Note: If the method name utilizes numbers only,
use the numeric keypad to enter the numbers for
the name.
6. Press READY.
7. Press “1” to toggle and select “Moisture/
Solids.”
8. Press “2” to toggle and select “Constant
Weight” or “Set Time.”
9. Press READY.
METHOD NAME:
0 1 2 3 4 5 6 7 8 9 A B
C D E F G H I J K L M N
O P Q R S T U V W X Y Z
Space Delete
Highlight choice, press ENTER.
Press READY to continue.
➞
➞
➞
➞
Page 93

86
Moisture/Solids Analysis
1. STANDARD TEST
2. WASTEWATER
3. DILUTION
4. SYRINGE WEIGH
5. ASH
Press item number to select.
MAIN PREV
MENU PAGE
Moisture/Ash
1. POWER: 0 %
2. DELTA WEIGHT: 0.0 mg
3. DELTA TIME: 0 secs
4. MAX TIME: 10 mins
5. BIAS: ±0.00 %
6. MAX TEMP: 110 C
Press item number to select or
NEXT PAGE for more menu items.
MAIN PREV NEXT
MENU PAGE PAGE
10. Press “5” to select “Ash.”
11. Press the numbers (1 - 6 Constant Weight
or 1 - 4 Set Time) and enter the appropriate
method parameters.
Note: Refer to the QUICK TEST section of this
manual for instructions for entering method
parameters for Constant Weight and Set Time.
12. Press the operation key below NEXT
PAGE to access additional method
parameters.
13. Press the numbers (1 - 6) and enter the
appropriate method parameters.
14. Press READY to begin the method
analysis.
C
O
N
S
T
A
N
T
W
E
I
G
H
T
S
E
T
T
I
M
E
Moisture/Ash
1. POWER: 0 %
2. RUN TIME: 00:00 min:sec
3. BIAS: ±0.00 %
4. MAX TEMP: 110 C
Press item number to select or
NEXT PAGE for more menu items.
MAIN PREV NEXT
MENU PAGE PAGE
Moisture/Ash
1. RESULT RANGE: MOISTURE
2. MIN RESULT: X.XX%
3. MAX RESULT: XX.XX%
4. MIN WT RANGE: X.XX g
5. MAX WT RANGE: X.XX g
6. WT COMPENSATION: OFF
Press READY to run test.
MAIN PREV
MENU PAGE
Page 94

87
Note: The method test screen appears indicating
the power, temperature, and time.
15. If Autotrack is turned off and a method
identification name or number is required,
press the operation key below ID.
16. Using the operation keys below the arrows,
position the cursor on (select) the first
number or letter of the sample identification. Press ENTER. Continue to position
the cursor on each letter or number and
press ENTER until the identification is
complete.
Note: If using an identification number only, use
the numeric keys to enter the number.
17. Press READY to return to the test screen.
18. Lift the cover of the SMART System5.
Place two glass fiber sample pads on the
balance pan. Close the instrument cover.
19. Press TARE.
20. Wait for the instrument to tare the weight
of the sample pads.
XXXXXX
Power: xxx %
Temp (xxx): xx.x
Time: xx:xx
Wt: x.xxxxg
Place pads on balance and
press TARE.
ID REWEIGH
1 2 3 4 5
SAMPLE ID:
0 1 2 3 4 5 6 7 8 9 A B
C D E F G H I J K L M N
O P Q R S T U V W X Y Z
Space Delete
Highlight choice, press ENTER.
Press READY to continue.
➞
➞
➞
➞
XXXXXX
Sample ID: xxx
Power: xxx %
Temp (xxx): xx.x
Time: xx:xx
Wt: x.xxxxg
Place pads on balance and
press TARE.
ID REWEIGH
1 2 3 4 5
TARING BALANCE . . .
Page 95

88
Note: The “T” in the lower left corner of the
balance icon indicates that the weight of the
sample pads has been tared.
21. Lift the instrument cover. Apply the
sample in a thin, even layer to one of the
sample pads. Quickly and gently place the
sample pads back on the balance pan.
Close the instrument cover.
22. Press START.
The instrument reads and records the initial
weight of the sample prior to beginning the
analysis.
As the analysis begins, the flashing microwave
indicators in the balance icon appear and the
time begins counting (up for Constant Weight or
down for Set Time).
During the drying time, the operation key below
SOLIDS or MOISTURE may be pressed to
display % solids or % moisture.
Note: Press the operation key below STOP
TEST to abort the analysis.
When the drying time is complete, five short
beeps will be heard, and the Data Results screen
will appear, displaying either the % moisture or
% solids as selected.
24. To ash the dried sample, fold the pads;
place them in an ashing crucible; and place
the crucible in the ashing furnace. Ash the
sample by the defined method.
25. Press READY.
XXXXXX
Sample ID xxxxxxxx
Power: xxx %
Temp (xxx): xx.x
Time: xx:xx
Volume: xxx
Wt: x.xxxxg
Place sample and pads on
balance and press START.
ID REWEIGH
T
READING BALANCE . . .
XXXXX
Sample ID: xxxxxxxx
Power: xxx%
Temp (xxx): xx.x
Time: xx:xx
Moisture: xx.xx%
Wt: x.xxxxg
STOP
SOLIDS TEST
Data Results
XXXX%M
Press READY to continue.
MAIN FORM
MENU FEED DATA
Page 96

89
XXXXXX
Power: xxx %
Temp (xxx): xx.x
Time: xx:xx
Wt: x.xxxxg
Place pads on balance and
press TARE.
ID REWEIGH
Select Sample ID
1. XXXX XXXX
2. XXXXXX XX
3. XXXXXX
4. XXX
Press item number to select.
XXXXXX
Sample ID: xxxxxxx
Power: xxx %
Temp (xxx): xx.x
Time: xx:xx
Wt: x.xxxxg
Press START to reweigh.
ID REWEIGH
T
26. Press the operation key below REWEIGH.
27. Press the numerical key to select the proper
sample to be reweighed.
28. Lift the instrument cover. Place the ashed
sample on the balance pan. Close the
instrument cover.
29. Press START.
Note: To reweigh additional samples, press
READY and follow the steps outlined above.
The instrument reweighs the ashed sample and
calculates the data results.
REWEIGHING SAMPLE . . .
1 2 3 4 5
1 2 3 4 5
Page 97

90
Data Results
XX.XX
% ASH
Press READY to continue.
MAIN FORM
MENU FEED DATA PRINT
30. Press the operation key below DATA to
display the analysis data.
31. Press the operation key below SAMPLE
WEIGHTS to view sample weight
information.
The Sample Weight Data screen displays the
initial weight, the final weight, the differential
weight and the end weight.
32. Press the operation key below PREV
PAGE to return to the Data Results screen.
33. Press the operation key below PRINT to
print the analysis results either on the
internal printer or an external printer, if
installed.
Note: Press READY to continue analysis using
the same method.
34. Press the operation key below MAIN
MENU to end the analysis and return to the
CEM Main Menu screen.
Data Results
Sample ID: xxxxxxxxx
Dry Time: xx:xx
Moisture: xx.xx%
Solids: xx.xx%
Ash: xx.xx%
Press READY to continue.
MAIN FORM SAMPLE
MENU FEED WEIGHTS PRINT
Sample Weight Data
Initial Wt: x.xxxx g
Final Wt: x.xxxx g
Diff Wt: x.xxxx g
End Wt: x.xxxx g
Press READY to continue.
MAIN PREV
MENU PAGE
Data Results
Sample ID: xxxxxxxxx
Dry Time: xx:xx
Moisture: xx.xx%
Solids: xx.xx%
Ash: xx.xx%
Press READY to continue.
MAIN FORM SAMPLE
MENU FEED WEIGHTS PRINT
Page 98

91
Moisture/Fat or Moisture/Fat/Protein
-Standard
1. With the CEM Main Menu displayed, press
“2” to activate the Edit/Create Method
screen.
2. Press “1” to create a new method.
3. Using the operation keys below the arrows
select the first letter or number of the
method name.
4. Press ENTER.
5. Continue using the operation keys to select
each letter or number of the method name.
Press ENTER after each selection until the
entire method name is selected (16
characters maximum).
Note: If the method name utilizes numbers only,
use the numeric keypad to enter the numbers for
the name.
6. Press READY.
7. Press “1” to toggle and select “Moisture/
Fat” or “Moisture/Fat/Protein.”
8. Press “2” to toggle and select “Constant
Weight” or “Set Time.”
9. Press READY.
CEM Main Menu
1. QUICK TEST
2. EDIT/CREATE METHOD
3. LOAD METHOD
4. SETUP
5. PRINT
6. STATISTICS
Press item number to select.
METHOD - XXXXXXXX
Edit/Create Method
1. NEW METHOD
2. TEMP VERIFY
3. POWER TEST
4. STD SOLUTION
5. LATEX
6. WATER BASED CHEM
7. MEAT RAW
8. CHEESE
Press item number to select.
NEXT
PAGE
Edit Method
1. CALCULATION MODE:
MOISTURE/FAT
2. TIME PARAMETER:
CONSTANT WEIGHT
Press item number to select.
Press READY to continue.
MAIN PREV
MENU PAGE
METHOD NAME:
0 1 2 3 4 5 6 7 8 9 A B
C D E F G H I J K L M N
O P Q R S T U V W X Y Z
Space Delete
Highlight choice, press ENTER.
Press READY to continue.
➞
➞
➞
➞
Page 99

92
Moisture/Fat
1. STANDARD
2. DILUTIONS
3. MODIFIED FAT
Press item number to select.
MAIN PREV
MENU PAGE
Standard Moisture/Fat
Moisture Parameters
1. POWER: 0%
2. DELTA WEIGHT: 0.0 mg
3. DELTA TIME: 0 secs
4. MAX TIME: 10 mins
5. BIAS: ±0.00%
6. MIN RESULT: 0.00%
7. MAX RESULT: 100.00%
Press item number to select or
NEXT PAGE for more menu items.
MAIN PREV NEXT
MENU PAGE PAGE
10. Press “1” to select “Standard.”
11. Press the numbers (1 - 7 Constant Weight
or 1 - 5 Set Time) and enter the appropriate
method parameters.
Note: Refer to the QUICK TEST section of this
manual for instructions for entering method
parameters for Constant Weight and Set Time.
12. Press the operation key below NEXT
PAGE to access the fat parameters screen.
13. Press the numbers (1 - 7) and enter the
appropriate method parameters.
Note: Press the operation key below PREV
PAGE to return to the moisture parameters
screen.
14. Press the operation key below NEXT
PAGE to access additional method
parameters.
C
O
N
S
T
A
N
T
W
E
I
G
H
T
S
E
T
T
I
M
E
Standard Moisture/Fat
Moisture Parameters
1. POWER: 0%
2. DRY TIME: 00:00 min:sec
3. BIAS: ±0.00%
4. MIN RESULT: 0.00%
5. MAX RESULT: 100.00%
Press item number to select or
NEXT PAGE for more menu items.
MAIN PREV NEXT
MENU PAGE PAGE
Standard Moisture/Fat
Fat Parameters
1. POWER: XXX%
2. DELTA WEIGHT: X.X mg
3. DELTA TIME: XX secs
4. MAX TIME: XX mins
5. BIAS: ±X.XX%
6. MIN RESULT: X.XX%
7. MAX RESULT: XX.XX%
Press READY to begin test.
MAIN PREV NEXT
MENU PAGE PAGE
C
O
N
S
T
A
N
T
W
E
I
G
H
T
Page 100

93
Note: Press the operation key below “Prev Page”
to return to the fat parameters screen.
15. Press the numbers (1 - 3) and enter the
appropriate method parameters.
16. Press READY to begin the analysis.
17. If Autotrack is turned off and a sample
identification name or number is required,
press the operation key below ID.
18. Using the operation keys below the arrows,
position the cursor on (select) the first
number or letter of the sample identification. Press ENTER. Continue to position
the cursor on each letter or number and
press ENTER until the identification is
complete.
Note: If using an identification number only, use
the numeric keys to enter the number and press
ENTER.
19. Lift the cover of the SMART System5.
Place one round and two square glass fiber
sample pads on the balance pan (round pad
on bottom). Close the instrument cover.
20. Press TARE.
Moisture/Fat
1. MAX TEMP: XXX C
2. MIN WT RANGE: X.XXg
3. MAX WT RANGE: X.XXg
4. WT COMPENSATION: OFF
Press READY to run test.
MAIN PREV
MENU PAGE
XXXXXX
Power: xxx %
Temp (xxx): xx.x
Time: xx:xx
Wt: x.xxxxg
Place pads on balance and
press TARE.
ID REDRY
1 2 3 4 5
SAMPLE ID:
0 1 2 3 4 5 6 7 8 9 A B
C D E F G H I J K L M N
O P Q R S T U V W X Y Z
Space Delete
Highlight choice, press ENTER.
Press READY to continue.
➞
➞
➞
➞
XXXXXX
Power: xxx %
Temp (xxx): xx.x
Time: xx:xx
Wt: x.xxxxg
Place pads on balance and
press TARE.
ID REDRY
1 2 3 4 5
S
E
T
T
I
M
E
 Loading...