

Page 1
I
M
nnovators in
icrowave Chemistry
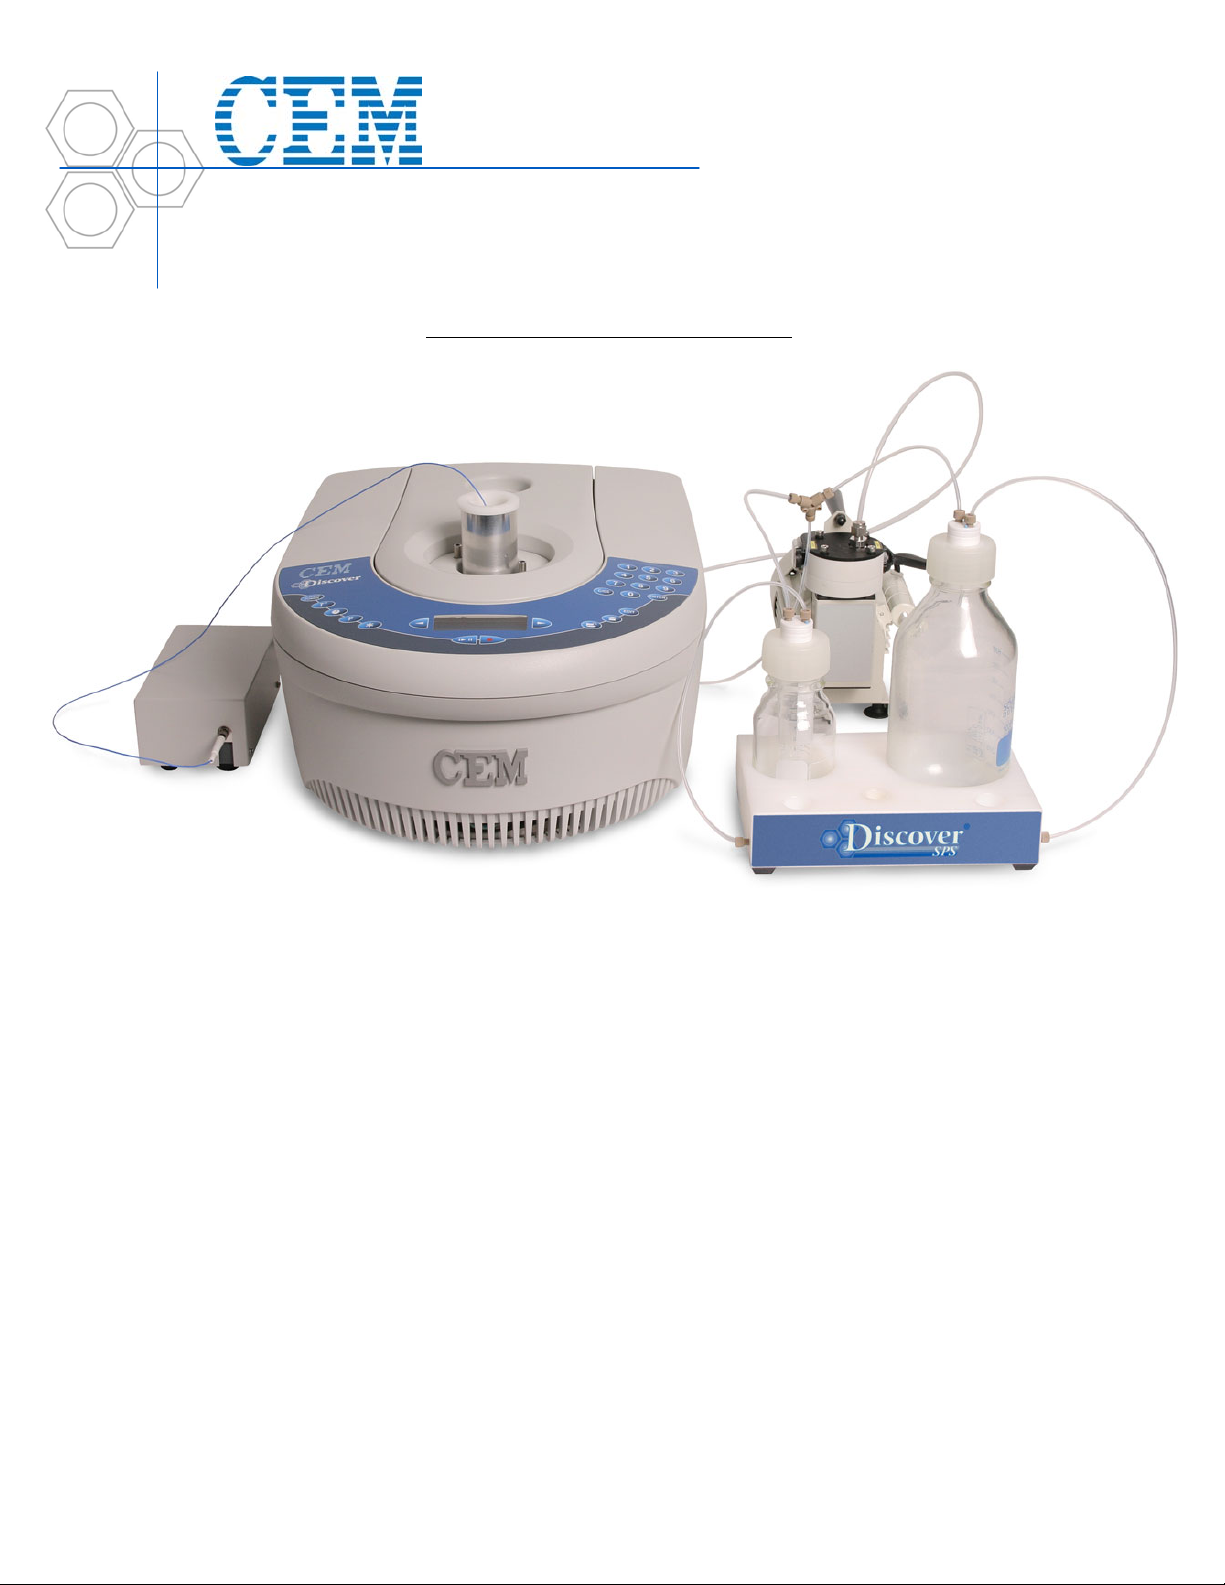
Discover SPS Installation Instructions
A. Vacuum Manifold Assembly
1. Using a wrench connect the 3/16” tubing line with TEE onto the top of the vacuum pump. Install the power
cord for the pump.
2. Assemble the vacuum pump TEE to connect directly into 1 of 2 positions on the Teflon bottle caps. Connect the
other port to the adjacent sides of the vacuum manifold line.
3. Place a 50mL centrifuge tube into the 250mL glass bottle so that it hangs in place
4. Screw each cap onto the 250mL and 1L glass bottles.
5. Place each bottle into its appropriate well in the vacuum manifold. The 1L waste is the system waste reservoir
and the 250mL serves to collect the TFA cleaved peptide product into the 50mL centrifuge tube.
B. Temperature Probe Assembly
1. Connect the fiso temperature control box into COM2 in the rear of the Discover
2. Connect the blue temperature probe into the fiso control box, taking care not to bend the probe
3. Slide the temperature probe directly into the sapphire thermowell. This is used to protect the probe from
chemical damage.
CEM Corporation z PO Box 200 z Matthews, NC 28106 z (800) 726-3331 z (704) 821-7015 z www.cempeptides.com
Page 2

I
M
nnovators in
icrowave Chemistry
C. Discover Software
1. Install the power cord for the Discover and turn the power ON with the switch located on the units left side.
2. First the fiber-optic temperature probe must be calibrated:
a. Press EDIT
b. The screen should say “TEMPERATURE”. If so press ENTER
c. Use the right arrow key and scroll to “Select Alternate”
d. Ensure that “DEVICE = FIBER-OPTIC”. If yes, then press ENTER. If no, then use the right arrow key
to change “DEVICE = FIBER-OPTIC”. Then press ENTER.
e. Press EDIT
f. The screen should say “TEMPERATURE”. If so press ENTER
g. Highlight “Enter Calibration” and press ENTER
h. Press EDIT and then enter the 7 digit GF# located on the white band at the base of the fiber-optic probe.
i. Press ENTER
j. The calibration is now saved in the software
3. To create a microwave method
a. Press the Open Folder Button
b. Select “New Method”
c. Press the right arrow key until “Mode = Discover SPS”. Then press ENTER
d. Set power then press ENTER
e. Set maximum temperature then press ENTER
f. Set method run time then press ENTER
g. Set delta temperature then press ENTER. (Delta temperature is the minimum value the temperature must
drop below the maximum temperature before the power will be re-applied. Default=5˚C).
h. Set stirring then press ENTER. (Magnetic stirring is not recommended with solid phase resins)
i. Set cooling to OFF press ENTER
j. Set “Next Stage = (N)” then press ENTER
k. Set “Save Method = (Y)” then press ENTER
l. Create method name using the arrow keys and highlight “Exit” and press ENTER when done
m. The method is now saved in the software. To load different methods, press the Open Folder Button and
use the arrow keys to scroll through available methods
CEM Corporation z PO Box 200 z Matthews, NC 28106 z (800) 726-3331 z (704) 821-7015 z www.cempeptides.com
Page 3

I
M
4. Operating Unit
a. Place the luer plug on the bottom of the reaction vessel and load with desired reactants
b. Place the reaction vessel into the holder and drop into the microwave cavity
c. Place the fiber-optic probe with thermowell cover directly into the reaction vessel
d. Press the Start button on the Discover and the loaded method will run.
e. To drain and wash the reaction vessel, remove it from the microwave and place in the well located in
front of the waste bottle immediately after removing the luer plug. Turn the vacuum pump power on and
the liquid reagents should drain into the 1L bottle.
f. Wash the resin in the reaction vessel with desired solvent.
g. Remove the reaction vessel from the vacuum manifold and re-attach the luer plug. The vessel is now
ready for reagents to be added.
nnovators in
icrowave Chemistry
Reaction Vessel Assembly Reaction Vessel Filtration and Washing
CEM Corporation z PO Box 200 z Matthews, NC 28106 z (800) 726-3331 z (704) 821-7015 z www.cempeptides.com
Page 4

I
M
nnovators in
icrowave Chemistry
5. Recommended Parameters for Fmoc Solid Phase Synthesis
a. Fmoc Deprotection
Power = 20W* (Depends on sample size. Want to reach maximum temperature in 75 seconds. Adjust as
necessary).
Temperature = 75˚C*
Time = 3:00
Delta Temp. = 5˚C
b. Coupling
Power = 20W* (Depends on sample size. Want to reach maximum temperature in 75 seconds. Adjust as
necessary).
Temperature = 75˚C*
Time = 5:00
Delta Temp. = 5˚C
Activation = HBTU or PyBOP w/ DIEA
c. TFA Cleavage**
Power = 20W(Depends on sample size. Want to reach maximum temperature in 120 seconds. Adjust as
necessary).
Temperature = 38˚C***
Time = 18:00
Delta Temp. = 5˚C
*An overshoot in temperature of 5C will be observed because of a delay in the fiber-optic probe signal
due to the thermowell.
**Caution certain scavengers (EDT, Thioanisole) can be very odorous. Ensure proper ventilation at all
times.
***Ensure that the cleavage temperature does not exceed 43˚C at any time
CEM Corporation z PO Box 200 z Matthews, NC 28106 z (800) 726-3331 z (704) 821-7015 z www.cempeptides.com
 Loading...