

Page 1

1
User manual
Model name: T131
Brand name: Cellacom
Page 2

2
Introduction
Thanks for selecting T131 color screen GSM digital
mobile phone. Through reading the manual, you can fully
know how to use T131 mobile phone, appreciate its
complete function and simple operating method.
Page 3
3
1. Before Use
1.1. Name and Explanation of Each Part
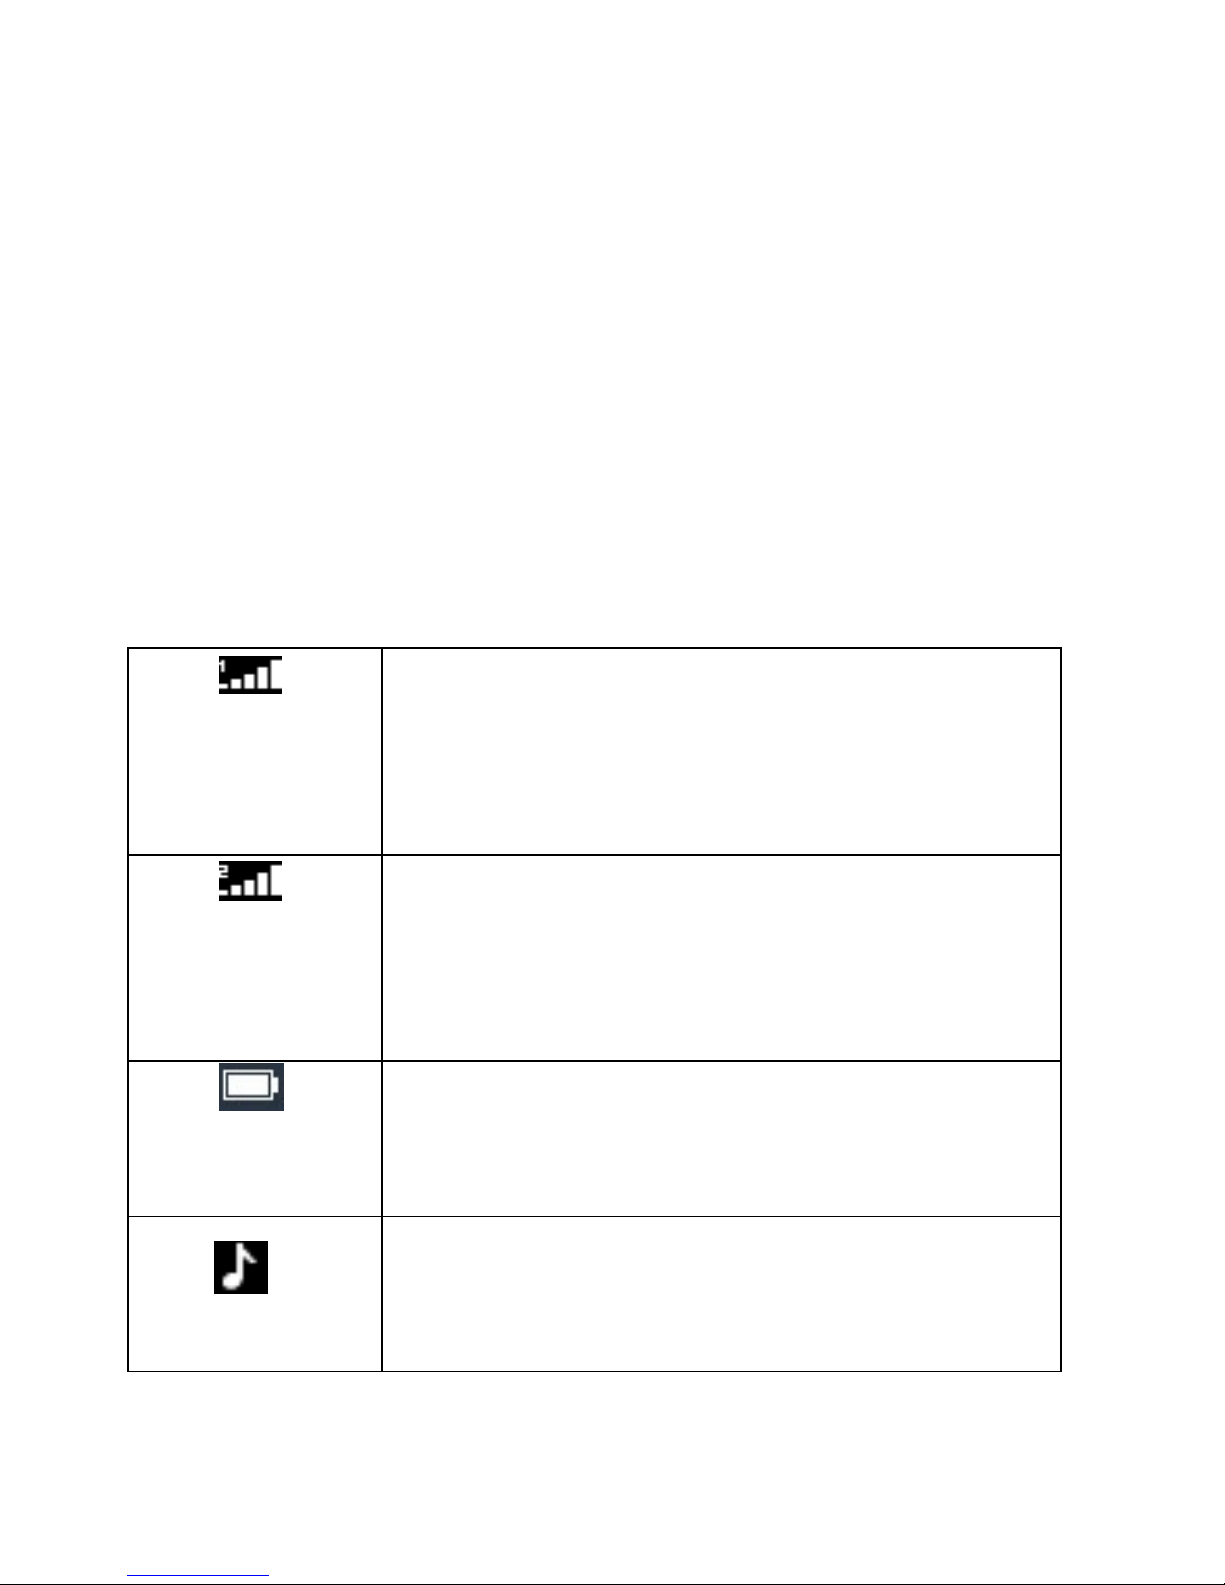
1.1.1. Description of the Standby Pictures
Network signal strength
The more the stripe is, the stronger the signal is.
When SIM card 1s inserted in card slot 1, standby
screen will show the icon.
Network signal strength
The more the stripe is, the stronger the signal is.
When SIM card 1s inserted in card slot 2, standby
screen will show the icon.
Battery strength
The full the fill is, the more electric quantity is.
Standby screen will show the icon.
General mode
When scene mode is set as general mode, standby
screen will show the icon.
Page 4
4
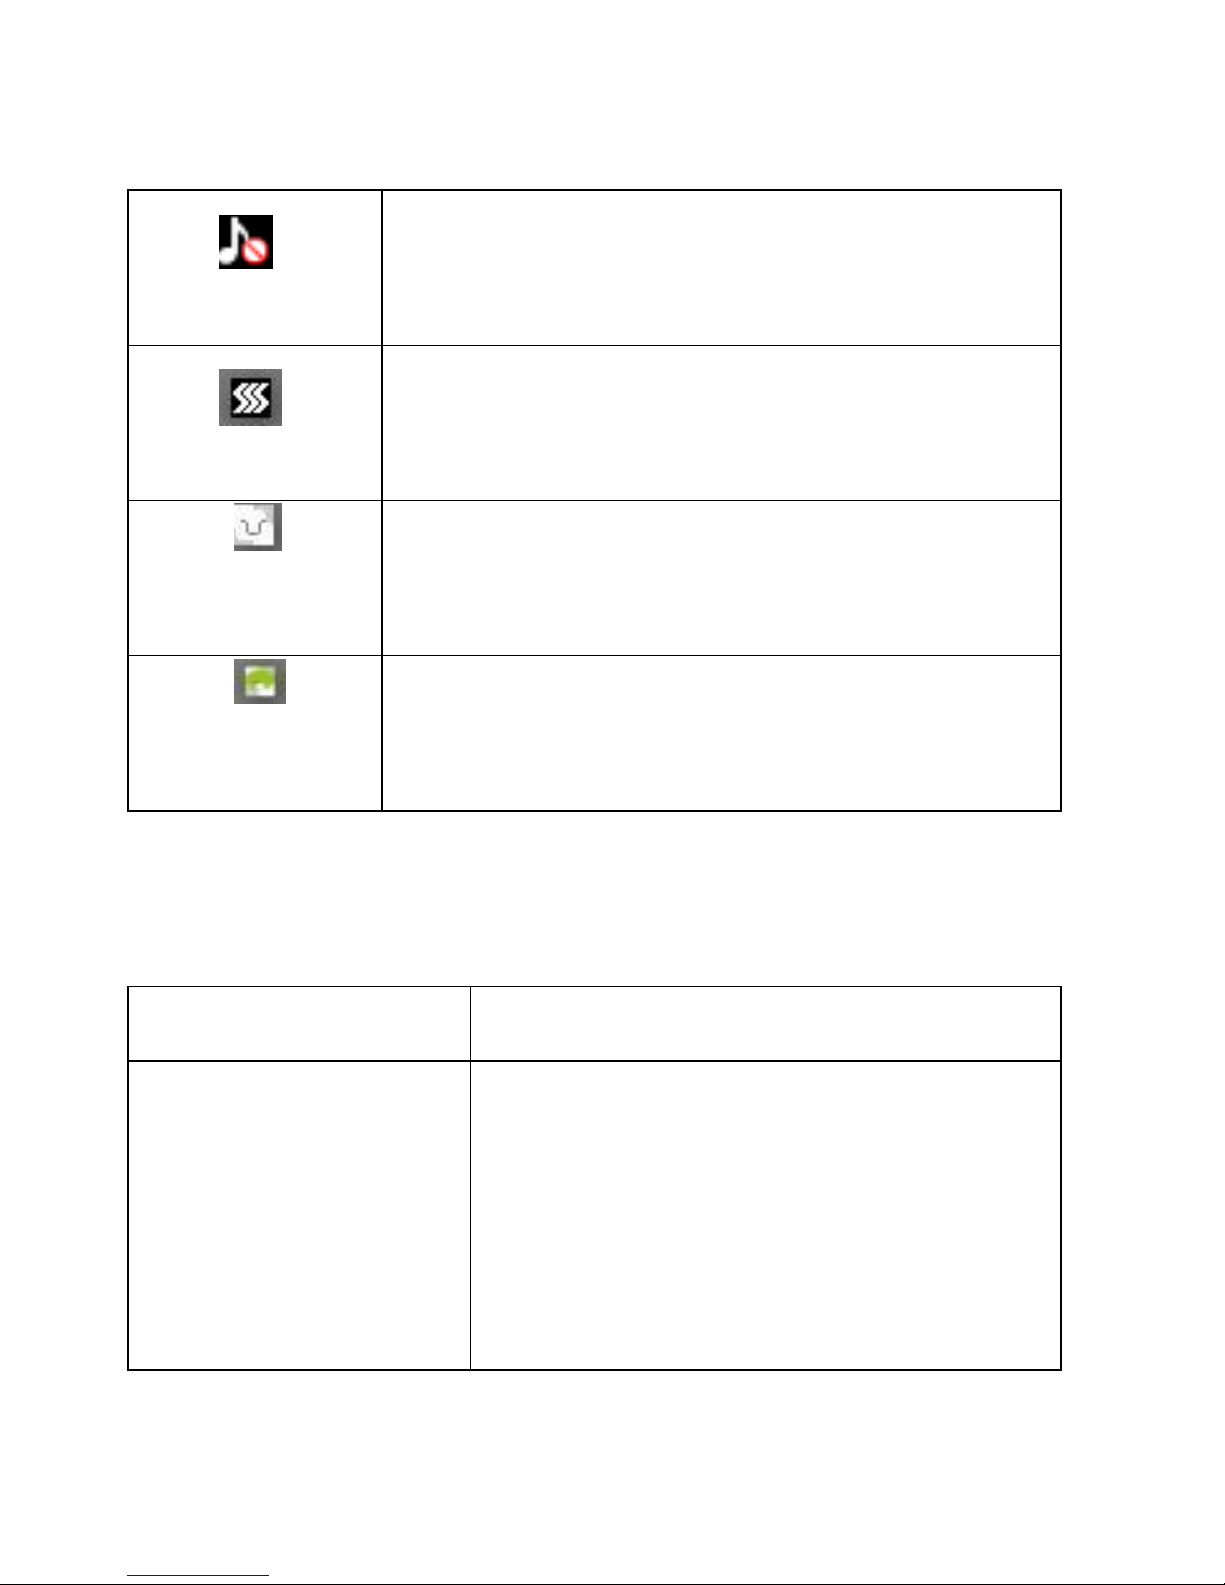
Silent mode
When scene mode is set as mute mode, standby
screen will show the icon.
Meeting mode
When scene mode is set as meeting mode
, standby screen will show the icon.
Indoor mode
When scene mode is set as Indoor mode, standby
screen will show the icon.
Outdoor mode
When scene mode is set Outdoor mode, standby
screen will show the icon.
1.1.2. Description of Keys
Keys
Function
Left soft key/
Right soft key
1. Execute functions that the
left-down/right-down corner indicator
shows. 2. In the standby mode, press
Left Soft key to access Menu, Right
Soft key to access Contacts.
Page 5
5
Navigation key
On other interfaces, it equals to
navigation key and direction key except
for special functions.
Dial key
1. Press this key to dial or receive an
incoming call.
2. When in the standby mode, press this
key to access Dialed Calls.
OK key
In the dial panel mode, press this key to
show or hide dial panel.
End key
1. Mainly used as power on/off.
2. Press to return to standby screen in
any interface.
3. End calls or reject incoming calls.
Number key
It is used to dial and input numbers or
characters. Press and hold Number
key 1 or 2 to get through the preset
voice inbox.
* Key
On the standby interface, input *; after
inputting telephone number, if you want
to input extension number, please press
twice asterisk key, after the display
screen shows “+”, please input your
Page 6
6
extension number.
# Key
1. In text editing interface, press "#"
key to switch text the input method.
2. On the standby interface Press and
hold "#" key to transfer the profile of
General /Meeting.
1.2. Install SIM Card and Memory Card
1.2.1. SIM Card
Before using the phone, you must insert valid SIM
(Subscriber Identity Module) card in the phone. SIM
card 1s provided by network supplier.
1.2.2. Memory Card
Aim at the T card slot and push the T card gently, and
the card will be inserted correctly.
Prompt: If the memory card is failed, please check
whether it is correctly placed and good contact of metal
point.
Page 7

7
1.3. Battery
1.3.1. Install the Battery
Take off the rear cover, of the mobile.
Make one end of battery with metal surface aim at the
battery connector.
Then gently press the battery downward using the
finger, and then press the other end to install the
battery.
Prompt: Please operate correctly to avoid damaging the
battery connector.
1.3.2. Charging
Insert the charger on the charging interface at the side
end of the phone.
Connect the charger to a standard wall outlet and the
battery power icon in the up-right corner of the screen will
start scrolling. When the battery bar stops scrolling, it means
the battery charge is complete. Press the two sides of the
charger plug and disconnect the charger from the phone.
Page 8

8
Prompt: In order to ensure normal operation of the
phone, please make sure to use the designated charger.
Page 9

9
2. Function Menu
2.1. Call History
Call logs
Display your recent call log.
Missed calls
Display the list of your recent missed numbers. The
operation is the same as the Dialed.
Dialed calls
Display the list of your recent dialed numbers.
Received calls
Display the list of your recent answered numbers. The
operation is the same as the Dialed.
Rejected calls
Display the incoming call records in the blacklist.
Page 10

10
Delete all
You could delete all the records of the Dialed, Received,
Missed and Rejected.
Call timers
Display information details of SIM1/SIM2: Last Call,
Received Calls, Dialed Calls, and All Calls. Press left soft
key to "Reset".
GPRS counter
Display information details of SIM1/SIM2: Last sent,
Last received, Total sent, and Total received. Press left soft
key to "Reset".
2.2. Names
This function could help you browse the name card
holder, store, edit and delete the names and phone numbers
in the phone and SIM card. To facilitate the management of
the records, this phone sets the group function, collecting
the similar items into a group. The storage capacity of the
SIM card varies and the maximum storage capacity of this
phone is 300.
Page 11

11
2.3. Games
This mobile phone provides small games, specific
operation see game shows.
Settings
You can customize the settings, such as time and date,
language, call settings etc.
Call settings
Including:
Dual-SIM: Including Standby mode, Reply by original SIM,
Set SIM name.
Call Divert: When “call divert” function is started up, you
can transfer the incoming call to voice inbox or other phone
number according to the tasked “call divert” conditions.
Call Waiting: You can start up or shut down the function.
When it is started up, even when you are making a call, you
can also receive another income call.
Call Barring: All outgoing calls, incoming calls, roaming
incoming calls, international outgoing calls, roaming
international outgoing calls are available.
Hide ID: Set the display mode of the phone number.
Others: The setting options include Call time minute
Page 12

12
reminder, Auto redial, Vibration when connected, Reply
SMS after reject, Auto call record.
Phone settings
Date & time: You can set up the date and time on the phone
as well as their display mode.
Language settings: You can select phone language.
Shortcut settings: You can set the menu when you press
navigation button to enter in standby interface.
Auto Power on/off: You can set the time and repeat mode
of power-on and power-off.
Power management: When setting pattern set to save
electricity mode. And can view your battery power.
Restore factory settings: You can restore part of the phone
settings as factory settings. The default code of restoring
factory settings is: 1234.
Display settings
Animation effect: Including Power on display, Power off
display.
Wallpaper Settings: Supported: Static wallpaper and more
pictures.
Idle display settings:
Contrast: Adjust the screen backlight.
Backlight: Adjust the backlight time.
Page 13

13
Keypad backlight time: Adjust the keypad backlight time.
Security settings
PIN: Start and close of PIN code and the modification of
PIN.
Modify PIN2: Modification of PIN2 code.
Phone locked:Open or close the phone lock. The default
password is “1234”.
Modify the cellphone password: Change the phone and
privacy password.
Privacy: Set the privacy protection. The default password is
“1234”.
Auto keypad lock: Set the time of mobile phone
automatically locked.
Lock screen by end-key: Choose open or closed by red key
locking function.
Mobile tracker: You can start up or shut down anti-theft
function or revise anti-theft function password (the
password shall be 6-digit). The default anti-theft password is
123456.
Fixed dialing: Start and close of the fixed dialing, and
management of the fixed dialing list
Blacklist: Set the Settings of the blacklist and management
of the list.
Page 14

14
User profiles
The preset modes are General mode, Silent mode,
Meeting mode, Indoor mode, Outdoor mode, Earphone
mode and Bluetooth mode. It support custom profiles,
define at most 7 profiles, and users can set the parameters
of the profiles.
Connections
Network account: Manage internet account, and support
editor and delete.
GPRS Service: Choose turn on or off GPRS service.
Data connection settings: Select to connect when needed
or Always connect.
Network selection: Select to Auto select or Manual select.
2.4. Messages
Write Message
――New SMS
You could write new message by using this function.
When you input the message to be sent, click left soft key to
send, to insert the templates, to add contact person
Page 15

15
information and symbol, and to save, etc.
――New MMS
Inbox
Save the received SMS and MMS.
Outbox
Save the SMS and MMS not sent out successfully.
Drafts
Save the unsent SMS and MMS.
Sentbox
Save the SMS and MMS you sent successfully.
Security inbox
Will store information to safety after the inbox, into view
must enter the password to check is 1234
Templates
You could edit or delete the templates.
Broadcast message
The area info services send different kinds of messages.
Change the settings of this service and inquire the area info
by using this function.
Page 16

16
2.5. Multimedia
Camera
The device is equipped with a webcam with high
pixels. You can take photo at any time and save the photo
in the device or SIM card. Press OK key to get the picture.
Image viewer
Check the pictures and shoot photos in the memory card
through the photo album.
Edit the opened pictures, press options, can do Set as
wallpaper, Set as contact icon, Delete, Share, Rename, Slide
play, Details.
Video recorder
The device is equipped with a video capture so that you
can chat with your friends through it. A driver is needed to
be installed when the video capture function is used. The
details can be found in driver installation guide.
Video player
This phone supports the video format of 3GP,and
MP4.Enter the video play list interface, press left soft key,
you could go on the following operations.
Page 17

17
Audio player
This phone could play the MP3 stored in the phone
memory and support the background play. Press the left soft
key or "OK" key to enter and use the Navigation keys to
operate the MP3 player. Press up key and down key to
adjust volume. Press left soft key to access Options:
FM radio
You can listen to Fm radio freely. Enter the radio interface.
Press the left and right navigation key to switch on a
channel. Press the ok keys to stop/play broadcasting FM
radio. Press up key and down key to adjust volume.
Sound recorder
Use this function you can record or listen to your own
record. The record file format: wav.
Press left soft key and ok key select “record”.
My files
My files manager can manage the files in the memory
Card (make sure the card has been inserted).
2.6. Tools
Bluetooth
This mobile phone support Bluetooth wireless
connection. You can establish wireless connection
Page 18

18
between mobile phone and device to realize voice
communication, data exchange and synchronization.
Calculator
The function will make your device a calculator with
which you can carry out simple math calculation.
Calendar
You can use this feature to view the year, date and solar
term easily. Use up/down/left/right direction key to
navigator other date.
Alarm
You can edit alarm, time, ring and repeated ring mode.
In “ alarm edit” mode, you can scroll up or down
direction key, when the cursor goes to the desired option,
press “OK”, then you can select desired settings.
Torch
You can turn on/off torch light or long press ok key in
standby interface.
STK
Enter STK submenu, you can use the additional
services that the network service operator provided.
The device has STK function. The service is provided
by network operator. If SIM card or network operator fails
to provide the service, the function can`t be available.
Page 19

19
Contact network service operator, if you want to have more
information.
2.7. Elite
In the function, you could check the service
information and the product simple specification.
2.8. Internet
The device is compatible with WAP service. You can
visit various WAP services, for instance, news, weather
forecast and airlines etc. The services are specially
designed for the device and are maintained by WAP service
supplier.
Page 20

20
FCC
FCC RF Exposure Information and Statement
The SAR limit of USA (FCC) is 1.6 W/kg averaged over on
one gram of tissue.
Device types: T131 (FCCID: 2AC343396993T131) has also
been tested against this SAR limit. The highest SAR value
reported under this standard during product certification for
use at the ear is 0.833 W/kg and when properly worn on the
body is 1.141 W/kg. This device was tested for typical
body-worn operations with the back of the handset kept 1.0
cm from the body. To maintain compliance with FCC RF
exposure requirements, use accessories that maintain a 1.0
cm separation distance between the user's body and the back
of the handset.
The use of belt clips, holsters and similar accessories should
not contain metallic components in its assembly. The use of
accessories that do not satisfy these requirements may not
comply with FCC RF exposure requirements, and should be
avoided.
This device complies with part 15 of the FCC rules.
Operation is subject to the following two conditions: (1) this
device may not cause harmful interference, and (2) this
device must accept any interference received, including
Page 21

21
interference that may cause undesired operation.
NOTE: The manufacturer is not responsible for any radio or
TV interference caused by unauthorized modifications to
this equipment. Such modifications could void the user’s
authority to operate the equipment .This equipment has been
tested and found to comply with the limits for a Class B
digital device, pursuant to part 15 of the FCC Rules. These
limits are designed to provide reasonable protection against
harmful interference in a residential installation. This
equipment generates uses and can radiate radio frequency
energy and, if not installed and used in accordance with the
instructions, may cause harmful interference to radio
communications. However, there is no guarantee that
interference will not occur in a particular installation. If this
equipment does cause harmful interference to radio or
television reception, which can be determined by turning the
equipment off and on, the user is encouraged to try to
correct the interference by one or more of the following
measures:
- Reorient or relocate the receiving antenna.
- Increase the separation between the equipment and
receiver.
- Connect the equipment into an outlet on a circuit different
Page 22

22
from that to which the receiver is connected.
- Consult the dealer or an experienced radio/TV technician
for help.
The user’s manual or instruction manual for an intentional
or unintentional radiator shall caution the user that changes
or modifications not expressly approved by the party
responsible for compliance could void the user's authority to
operate the equipment. In cases where the manual is
provided only in a form other than paper, such as on a
computer disk or over the Internet, the information required
by this section may be included in the manual in that
alternative form, provided the user can reasonably be
expected to have the capability to access information in that
form.
 Loading...