

Page 1
celexon.
TM
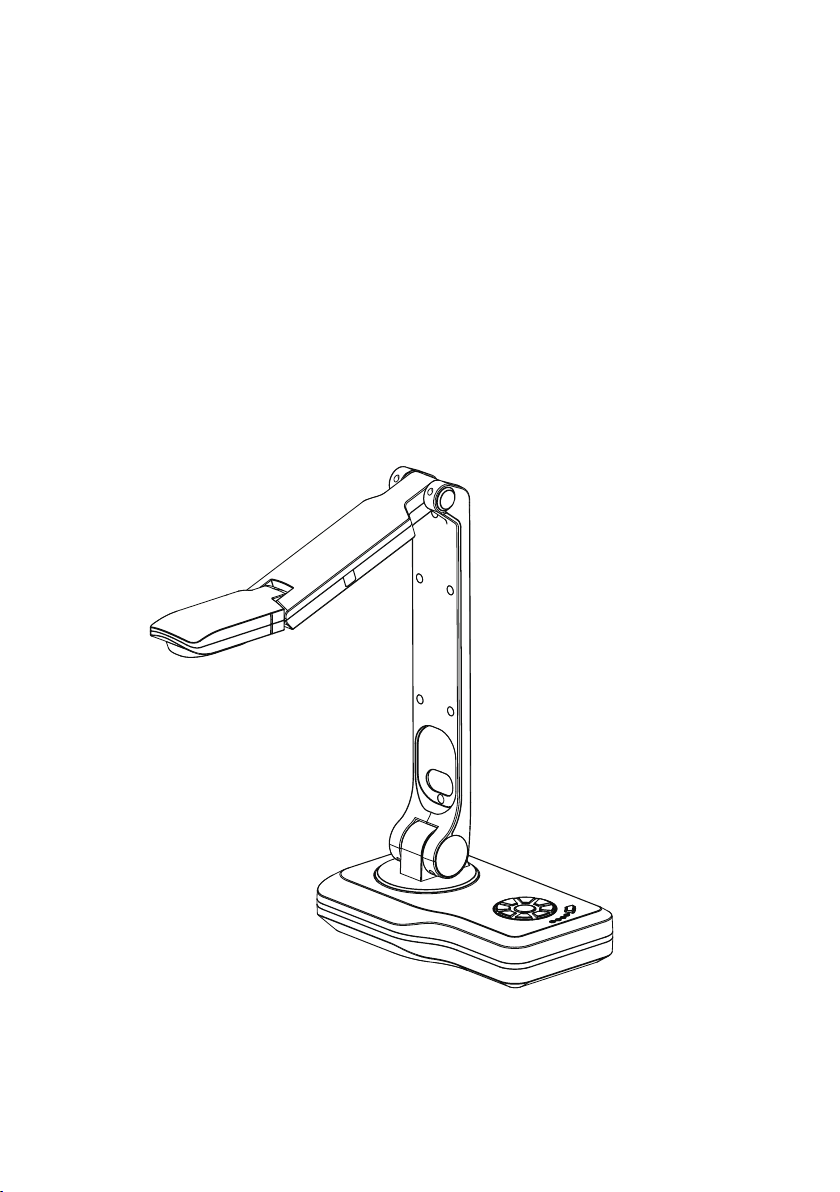
User’s guide
celexon document camera DK500
Thank you for choosing a quality product from celexon.
Read the instrucons carefully before using the product and
retain them for future reference.
Page 2

DE:
Auf http://de.celexon.com finden Sie durch Eingabe der Identifikationsnummer „CX1006“
im Suchfeld die aktuelle Version dieser Bedienungsanleitung in Ihrer jeweiligen
Landessprache zum Download. Die Konformitätserklärung und die zu diesem Produkt
gültigen Zertifizierungen sind auf unserer Webseite http://de.celexon.com einsehbar.
EN:
At http://uk.celexon.com you can find the latest version of the manual and download
it simply by searching the identification number “CX1006” in the search field. The
declaration of conformity and the relevant certificates for this product are available
on our website http://uk.celexon.com.
FR:
En vous rendant sur http://fr.celexon.com et en entrant le numéro d‘identification
„CX1006“ dans la barre de recherche, vous pourrez télécharger la version française la
plus actuelle de cette notice d‘utilisation. La déclaration de conformité ainsi que les
certificats en cours de validité de ce produit sont disponibles sur notre site internet
http://fr.celexon.com.
NL:
Op http://nl.celexon.com vind u door ingave van het identificatienummer „CX1006“ in
het zoekveld de actuele versie van deze gebruikershandleiding in uw taal als download.
De conformiteitsverklaring en de voor dit product geldige certificaten kunnen op onze
website http://nl.celexon.com worden ingezien.
SE:
På http://uk.celexon.com hittar du den aktuella versionen av din bruksanvisning på ditt
spårk för nedladdning genom att skriva in identifikationsnumret „CX1006“ i sökrutan.
Försäkran om överensstämmelse och de gilitiga certifikaten för denna produkt kan
hittas på hemsidan http://uk.celexon.com.
PL:
Na stronie http://pl.celexon.com znajdą Państwo aktualną wersję instrukcji obsługi.
W polu szukaj należy podać następujący numer: „CX1006“. Deklaracja zgodności oraz
certyfikaty dotyczące produktu są dostępne na stronie http://pl.celexon.com.
ES:
Puede descargar la versión actual de este manual de uso, en el idioma correspondiente
en http://es.celexon.com introduciendo el código de identificación “CX1006” en la barra
de búsqueda. Puede encontrar la declaración de conformidad y los certificados
correspondientes para este producto en nuestra página web http://es.celexon.com.
IT:
Visitando il sito http://celexon.com e inserendo nel campo di ricerca il codice
identificativo „CX1006“ si potrà scaricare la versione più recente di queste istruzioni.
La dichiarazione di conformità e le certificazioni relative a questo prodotto sono visibili
sul nostro portale http://celexon.com.
1
Page 3
Safety instructions
• Do not use the product until you have read and understood the complete
user guide.
• This product is intended for indoor use. Outdoor use could damage
the product.
• Use this product only on a stable surface to prevent overturning and
consequential damage to the product or injury.
• Take care when connecting and removing the cables to and from the
connectors
• Make sure that the connected cables are protected against sudden
movements.
• Repairs to this product may only be carried out by qualified personnel.
• Be sure to avoid contact with liquids or chemical agents.
• Avoid touching the camera lens.
Disclaimer
The information in this document is subject to change by the manufacturer
without notice. Changes are added in each of the following versions of this book.
The manufacturer does not warrant or guarantee the accuracy of the information
in this document.
Care instructions
Clean the product with a soft, dry, clean cloth.
In the box
• celexon document camera V500
• Infrared remote control
• 1.5m USB cable
• 1.5m HDMI cable
• 1.5m VGA cable
• Power Supply
• Owner‘s manual
2
Page 4
Remote Control Functions
Switch Switch between VGA and HDMI output
Resolution Change the screen resolution
NAV Show / Hide Menu (Auto Hide only)
Online Switch from USB to video mode
Zoom In Zoom in
Zoom Out Zoom out
Auto Autofocus
Far Manual focus out (for 3D objects)
Near Manual focus in (for 3D objects)
Photo Take a screenshot (only with SD card)
Record Create video (only with SD card)
Light Turn light on / off
Browse Browse SD card
Freeze Freeze frame
Split Share screen
Text/Img Switch between image and text mode
Del Delete picture or video
Rotate Rotate image by 90 °, 180 ° or 270 °
Mirror Mirror current image
Neg Reverse colour (negative)
Exit Back
3
Page 5
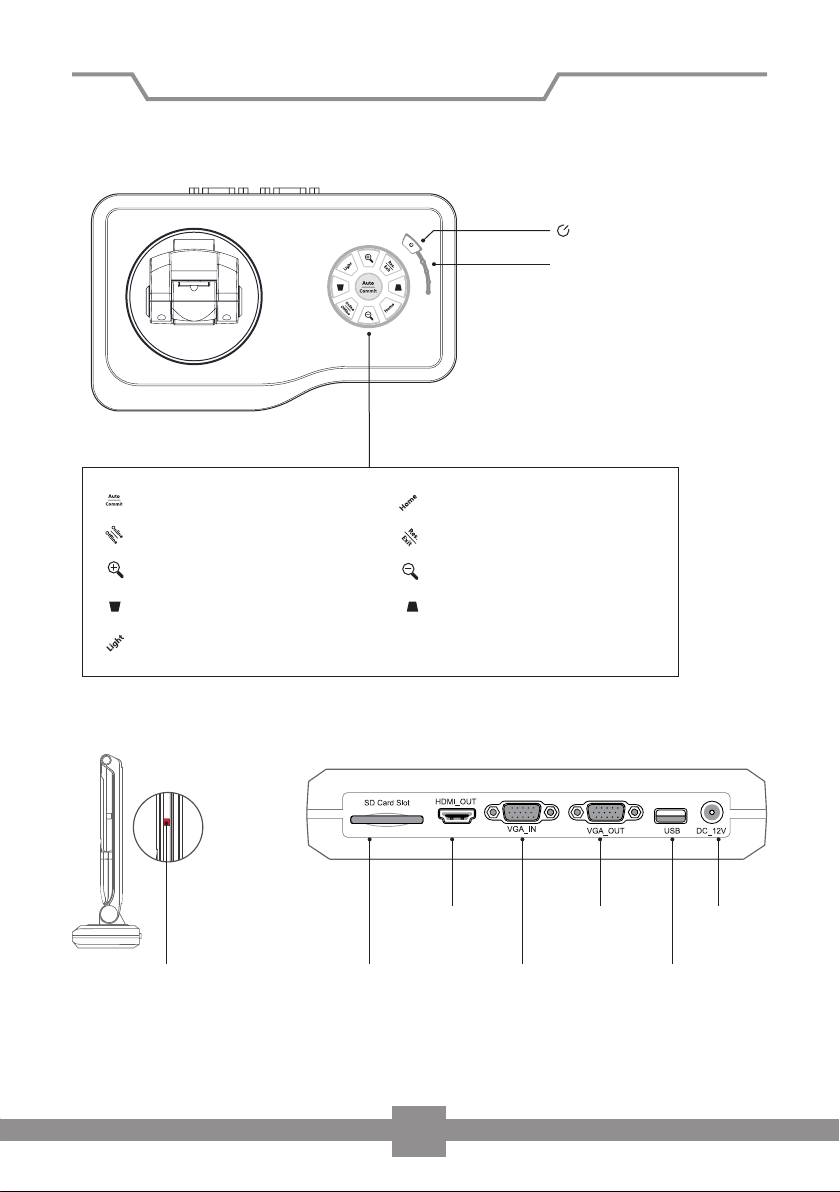
Key assignments and inputs / outputs
Power switch
Power indicator lamp
Auto Focus / Commit
Online / Offline
Zoom in
Closer Further
LED brightness
Infrared receiver SD slot VGA IN
Browse
Resolution
Zoom out
HDMI OUT
(to projector/IWB)
(to projector/IWB)
(to PC)
VGA OUT
DC Power
Port
USB Interface
( to PC)
4
Page 6
Explanations of the inputs and outputs
SD card slot:
Here you can connect an SD card to the device to save or display pictures or videos.
The SD card must be formatted in FAT32 format.
HDMI output:
Through the HDMI output, you can display the image produced by the document
camera with a HDMI cable on a display device.
VGA input:
You can use the VGA VGA IN port of the visualiser to pass through a signal from
another device (e.g. Laptop) to the display device (e.g. Projector).
VGA output:
Via the VGA output, you can display the image of the document camera or the
VGA-IN port to the display device.
USB output:
Using the USB output, you can use suitable computer software to display the image
of the document camera on a PC.
Connecting and using the device without a computer
1. Connect the device with the supplied VGA or HDMI cable to your desired
display device.
2. Connect the power adapter to the mains.
3. Now press the on / off switch on the visualizer.
4. If your display does not have automatic source selection, select the signal
input on your display according to your connection method.
5. The device is ready for use and can be operated with the buttons on the device.
5
Page 7

Connecting and using the device with computer
Option 1:
1. Connect the device to a computer with the included USB cable.
2. Connect the power cable to the mains.
3. Now press the on / off switch on the visualiser.
4. Image transfer can now begin with use of a supporting software on your
computer.
5. The selection keys on the visualizer can not be used under these settings.
Control is carried out on the software.
6. With the built-in microphone, the document camera can also be used for video
teleconferencing or alike.
Option 2:
1. Connect a computer via VGA cable to the document camera using the
VGA input.
2. Then connect the display device to the document camera via VGA cable using
the VGA output.
3. Connect the power adapter to the mains.
4. If the document camera is off, the image of the computer will be displayed by
the display device. As soon as you turn on the document camera, the image
from the camera is displayed on the display. Switching between sources is only
possible by switching the document camera on and off.
Note:
The celexon document camera V500 can be used with any TWAIN enabled PC
software.
Mouse function
You can operate the document camera with a computer mouse connected to
the USB port. In addition, comments can be made on the image by selecting the
„Comment“ field.
6
Page 8
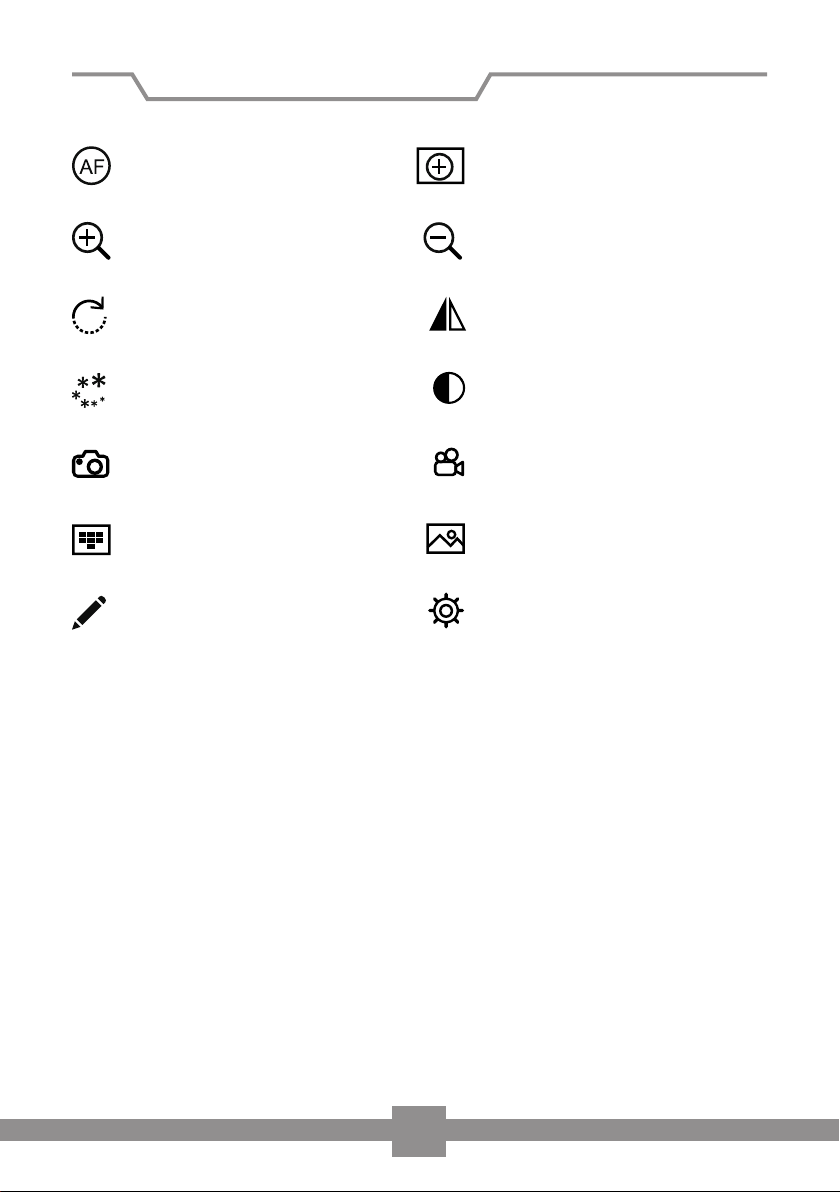
Description of built-in software
Auto-focus
Zoom in
Rotate
Freeze
Shooting (SD card required)
Thumbnail preview
Annotation
Magnify selection
Zoom out
Mirror
Split screen
Recording (SD card required)
Picture In Picture
Setting
7
Page 9
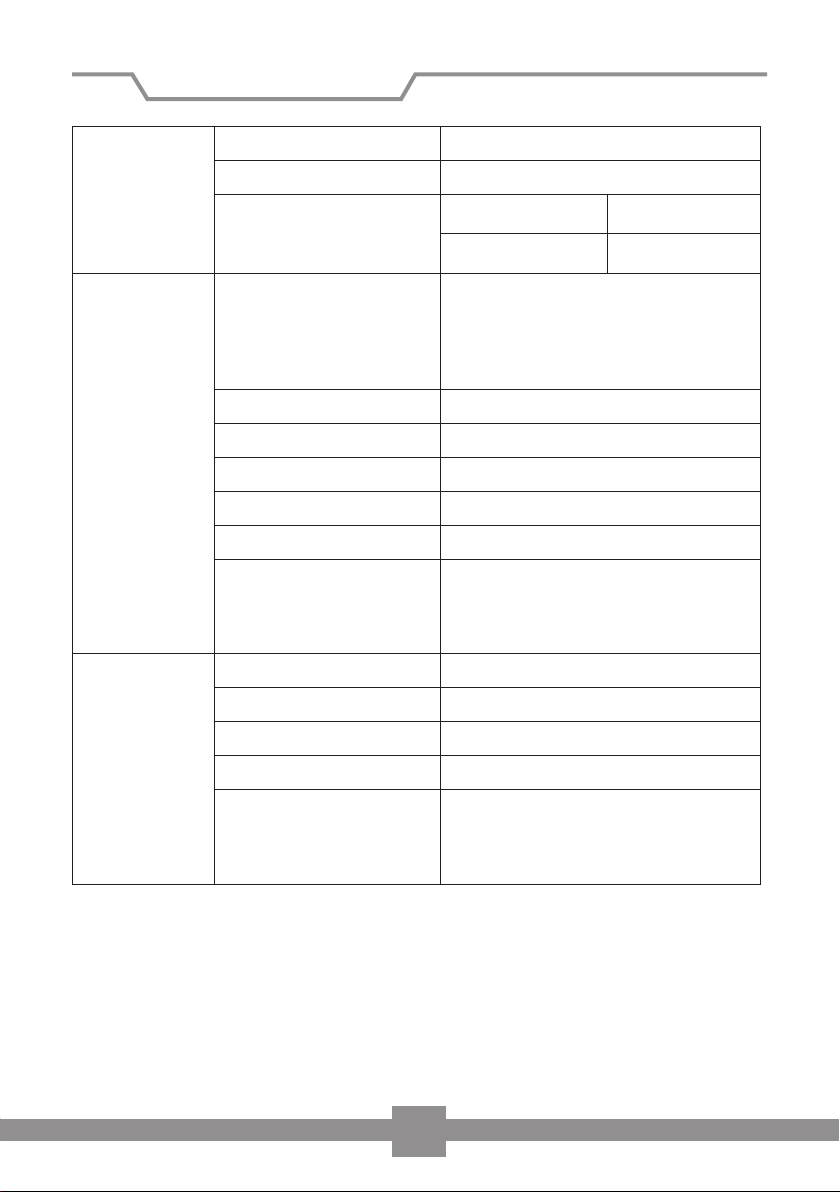
Hardware
Features
Technical specifications
Model DK500
Image sensor 1/4“ CMOS
Resolution
Picture adjustments
Digital Zoom x10
Colour Colour / Black and white / Negative
Screenshot (analog) 1080p, 5M [JPEG]
Video (analog) 720p(25fps) / 1080p(5fps) [AVI]
Screenshot (USB) 1080p, 5M
Refresh rate
Power supply 12V DC / 1A
5MP 2592x1994 SXGA 1280x960
HD1080 1920x1080 HD720 1280x720
Automatic White Balance / Contrast
ratio / Brightness / Focus / Digital noise
reduction / Still picture / Split screen /
Image-in-image mode / Mirrors / Rotate
/ Comment
2592x1944px: YUV 2fps / MJPG 15fps
1920x1080px: YUV 5fps / MJPG 15fps
1280x720px: YUV 12,5fps / MJPG 15fps
800x600px: YUV 15fps / MJPG 15fps
Interfaces
USB Connection to PC or mouse port
Slot SD card FAT32 up to 32GB
Video Interface VGA-In / VGA-Out / HDMI-out
1920x1080@60hz
Output image resolution
1280x1024@60Hz
1280x720@60Hz
1024x768@60Hz
8
Page 10
celexon.
Information on EU conformity
celexon declares that this product complies with the EU directive on electromagnetic compatibility (EMC) and EU Low Voltage Directive (LVD).
A copy of the declaration of conformity can be found at www.celexon.co.uk -->
Service --> Certificates.
celexon Germany GmbH & Co. KG
The symbol indicates separate collection of electrical and electronic
equipment in the EU countries.
Please do not throw the device into the trash.
Find out about the disposal process in your local area.
TM
 Loading...