

Page 1
102
ITEM: #22090
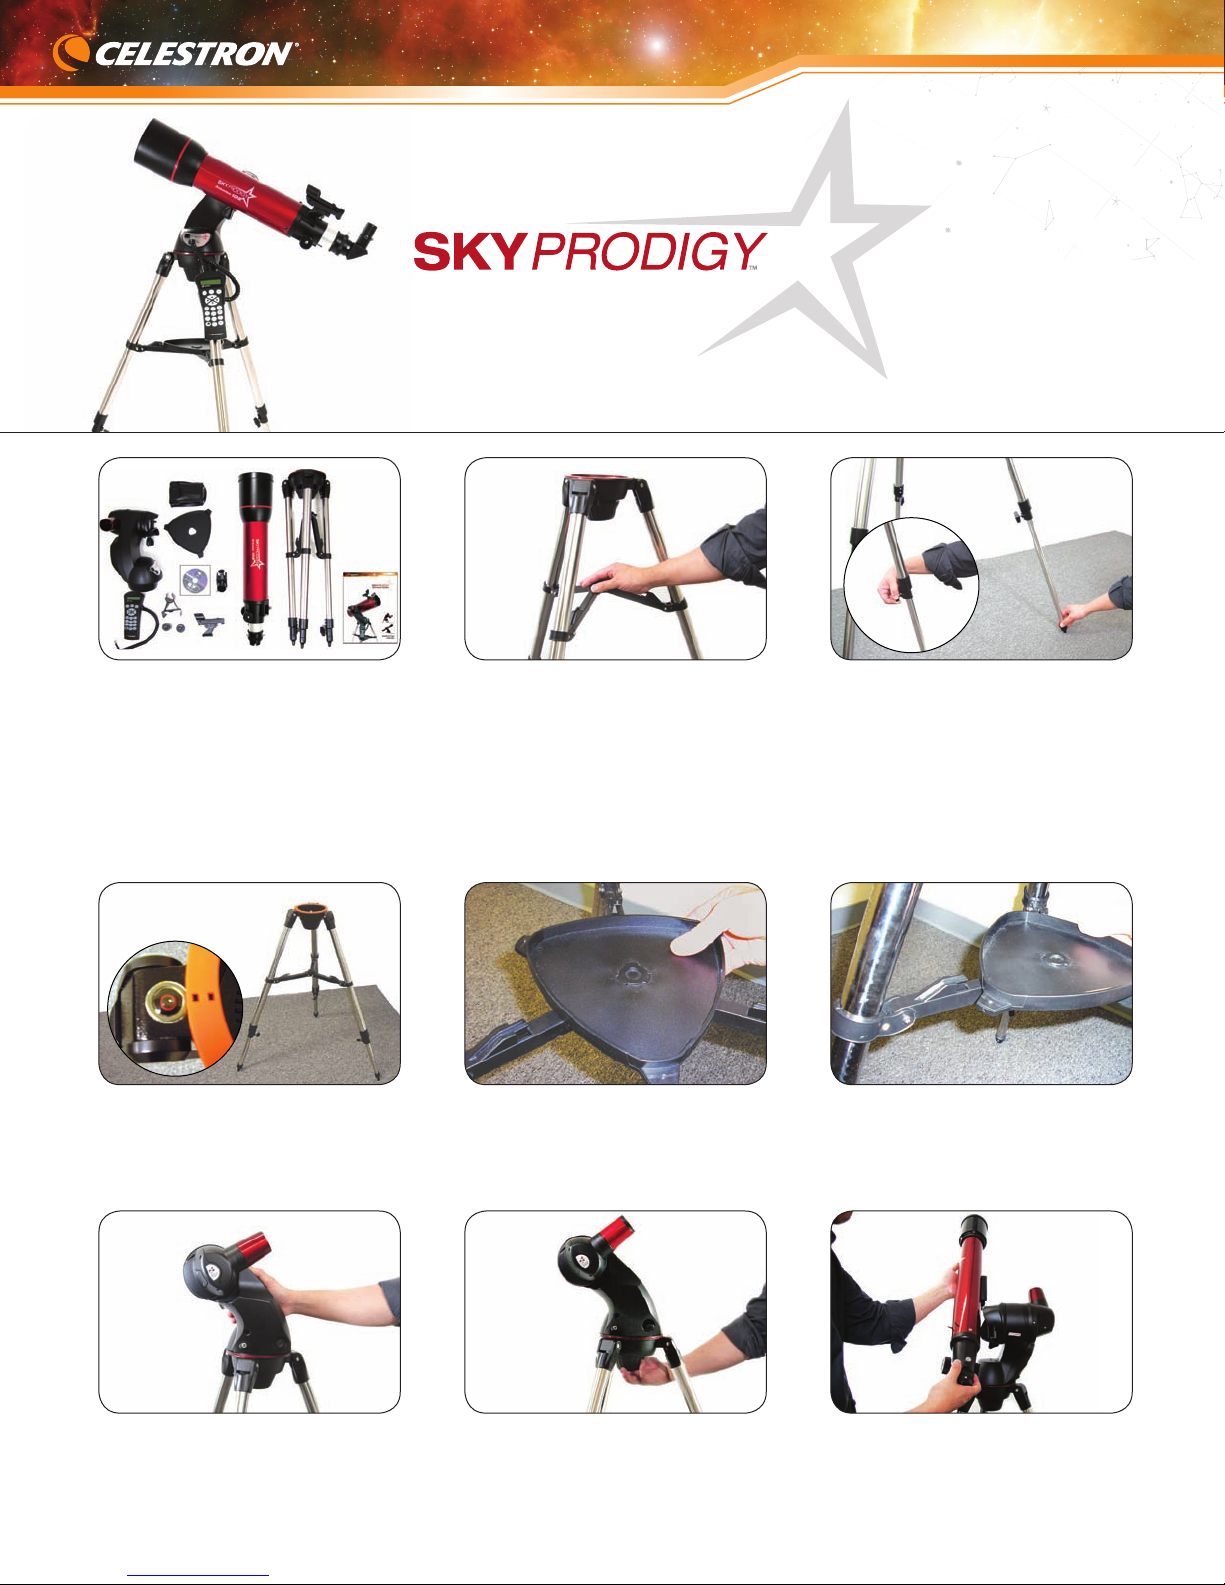
1 Your SkyProdigy includes:
optical tube, fork arm, pre-assembled
tripod, Computerized Hand Control,
hand control holder, star diagonal,
two eyepieces, StarPointer nderscope,
accessory tray, battery holder,
documentation, including an owner’s
manual, and The SkyX First Light Edition
astronomy software.
QUICK SET-UP GUIDE
2 Assemble tripod by spreading the
legs out until the center leg brace is
fully extended.
3 Extend tripod legs 6 to 8 inches by
loosening the tripod leg locking knob,
pulling the leg to desired length and
retightening knob.
4 All three legs should be the same
length to provide a level platform for
the telescope. A bubble level is included (inset) to assist in leveling.
7 Hold the telescope fork arm and
place the bottom of the base inside
the tripod mounting platform as
shown.
5 Place accessory tray on top of
center leg brace by lining up the
grooves on the tray to the post on the
brace.
8 Thread the coupling screw into
the hole at the bottom of the fork arm
base. Tighten screw to secure the
fork arm.
6 Once grooves are aligned, turn
accessory tray until it snaps into clips
on each leg brace.
9 Rotate the tube clamp so that the
camera is pointed straight up.
Page 2
Quick Set-up Guide [Continued]
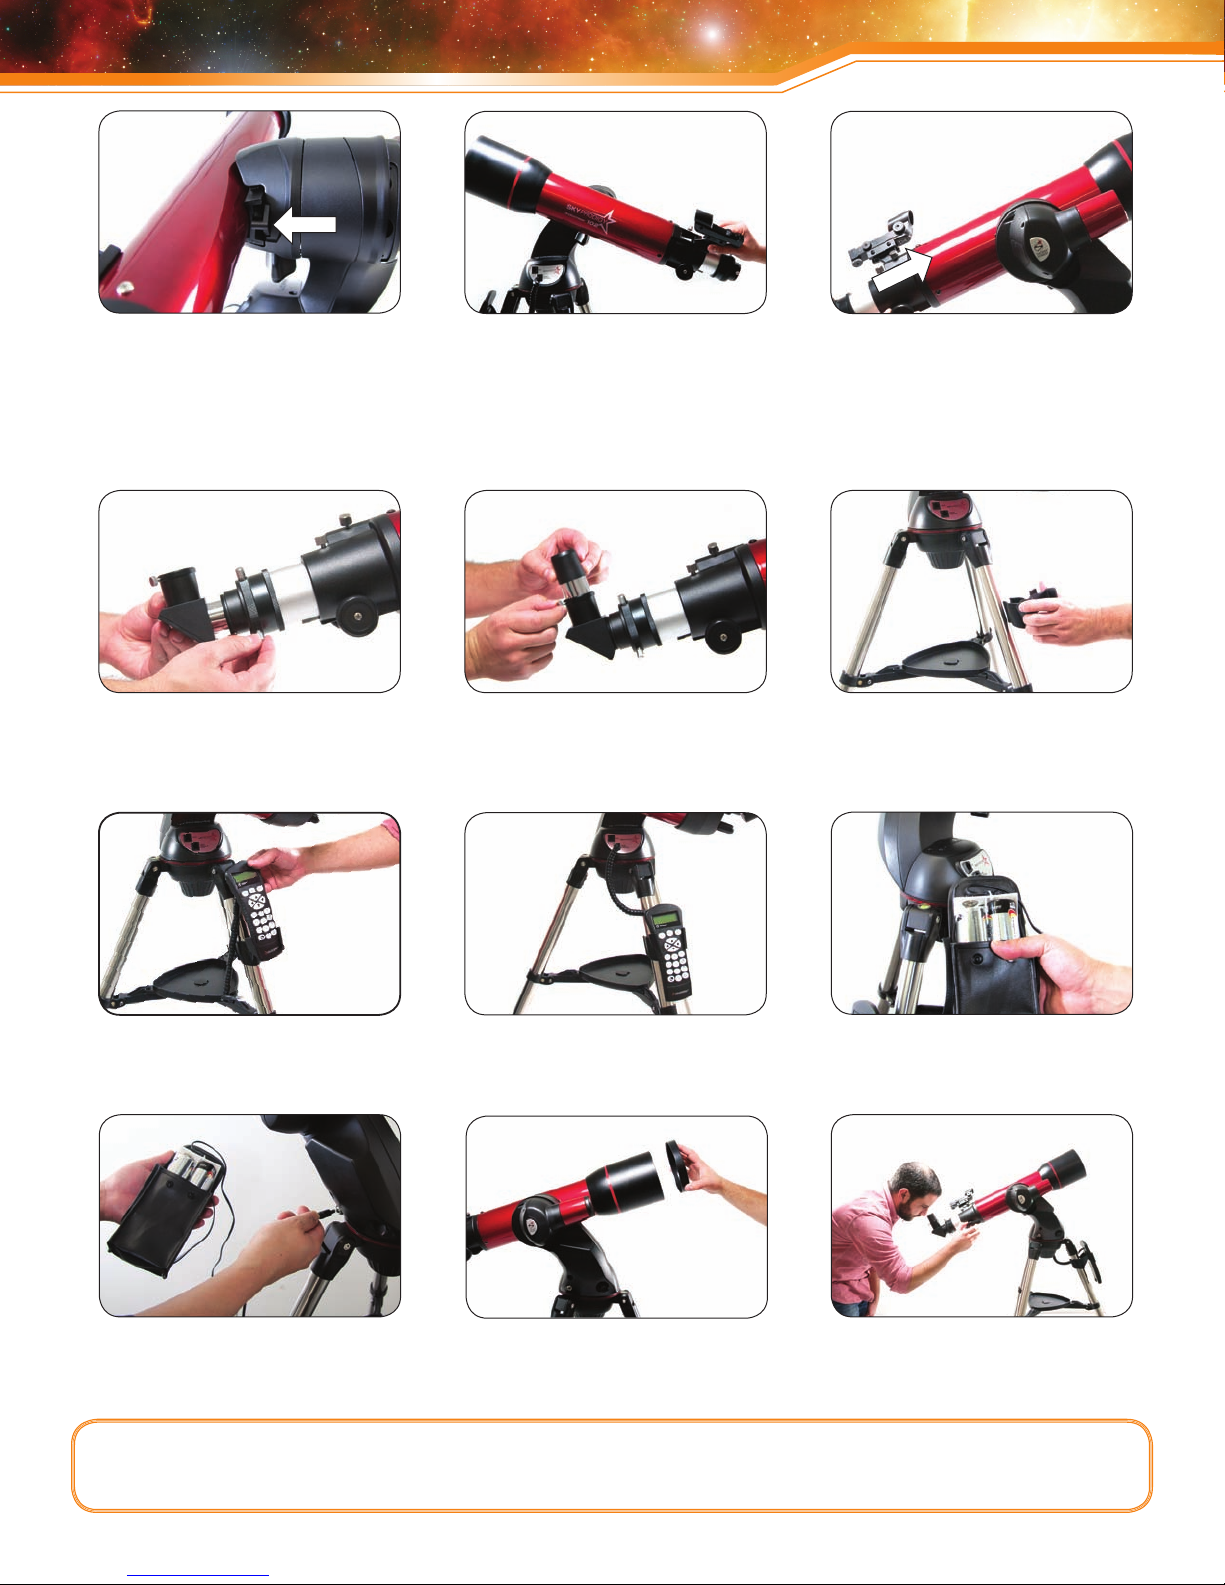
10 Slide the mounting bracket into
the tube clamp until it touches the
positioning stop at the end. Tighten
the locking screw to secure the tube in
place, making sure that the bottom of
the mounting bracket is ush against
the inside of the clamp.
13 Insert the barrel of the star
diagonal into the focuser and tighten
the two silver screws to secure in
place.
11To attach the StarPointer nder-
scope, loosen the silver screw and slide
nderscope into mounting platform .
14 Select the low power (25 mm)
eyepiece and insert as shown above.
Tighten silver screw to secure.
12 Secure nderscope to mounting
platform by tightening the silver screw.
The glass window of the StarPointer
nderscope should be facing towards
the front of the telescope.
15 Attach plastic hand control
holder to the tripod leg.
16 Slide Computerized Hand Con-
trol into the hand control holder as
shown above.
19 Plug the barrel connector of the
battery compartment into the power
outlet on the fork arm.
Before you can begin observing, you must set-up your Computerized Hand Control and align your telescope. Step by
step instructions are included in the following Hand Control Setup section.
17 Plug Computerized Hand Con-
trol into the “Hand Control” port on
the fork arm base.
20 Before you begin viewing,
please remember to remove tube
lens cap.
18 Before you can use your
telescope, you must insert eight
D-size batteries into the battery holder.
21 While observing, tube should be
positioned as shown above.
Page 3
Computerized
Hand Control
In order for the SkyProdigy to accurately point to objects in the sky, it must rst align itself with known
positions (stars) in the sky. With this information the telescope can create a model of the sky, which it uses
to locate any object in its database.
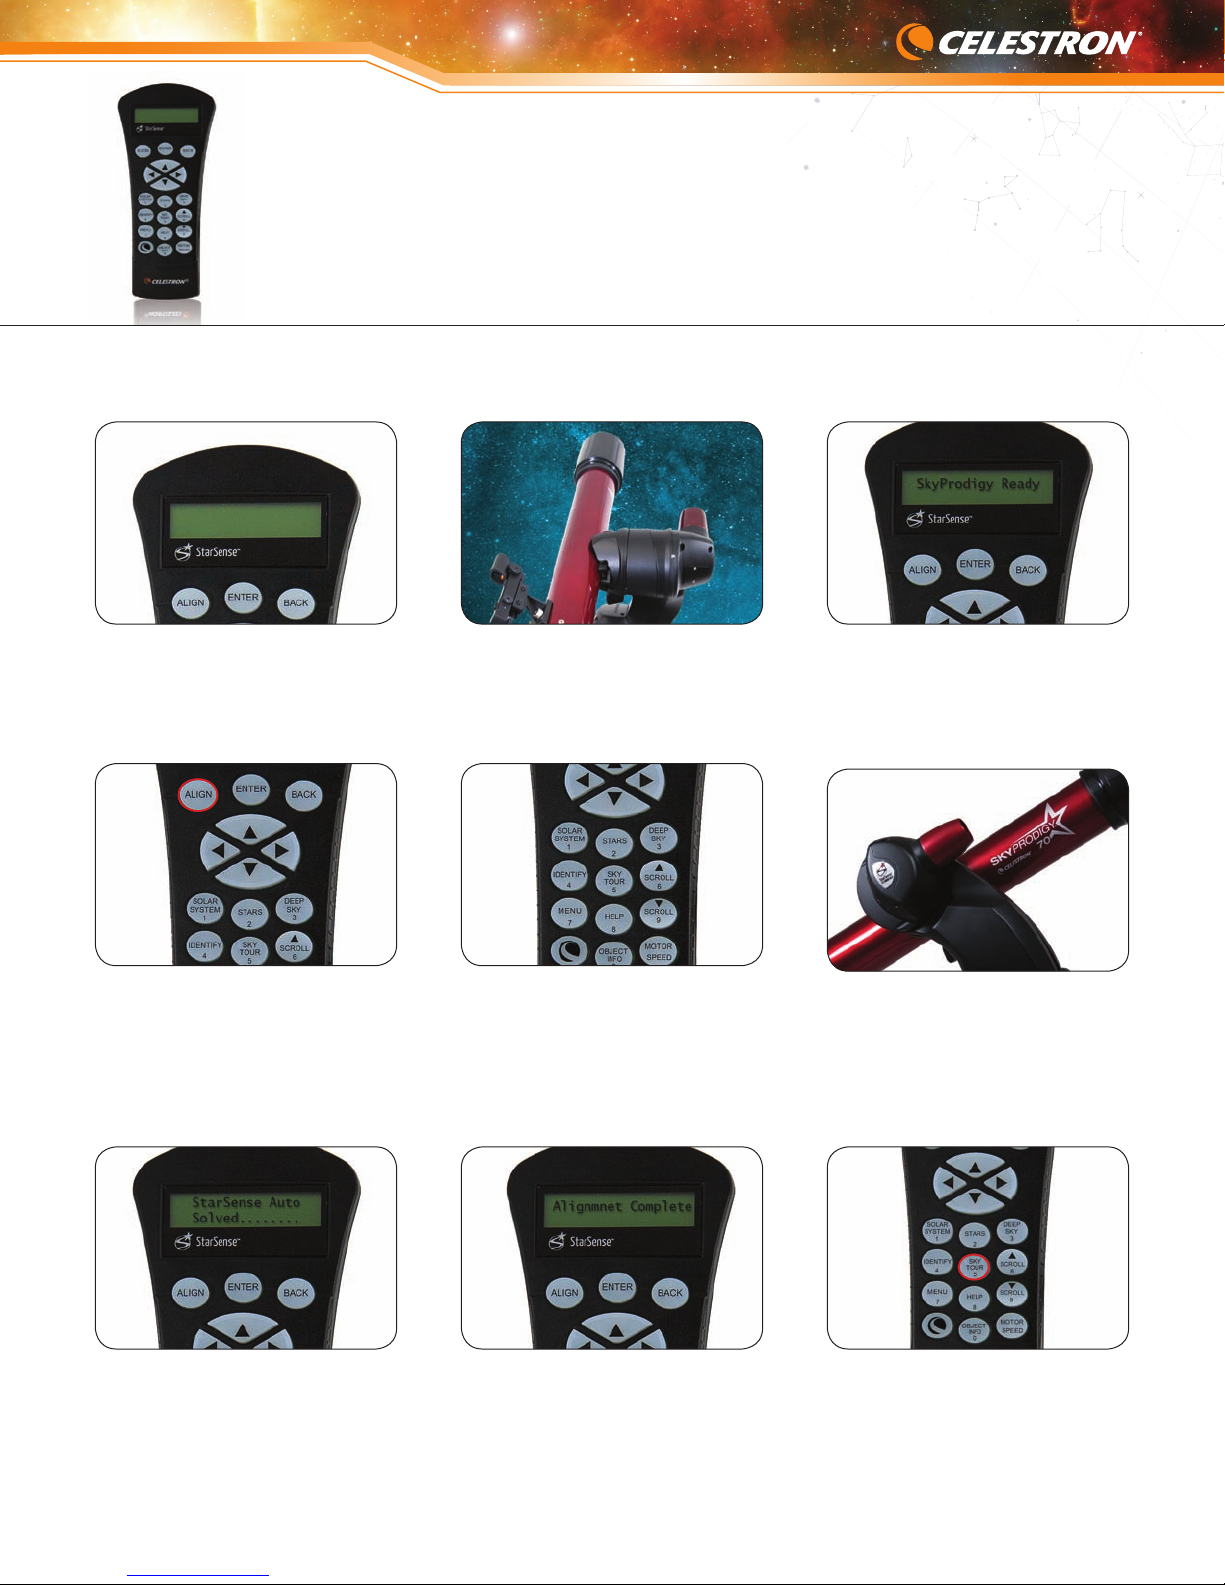
1 Set up your telescope in an
outdoor location away from large
trees and buildings that may obstruct
SkyProdigy’s view of the sky.
4 Press the ALIGN button on the
Computerized Hand Control to begin
the alignment process.
2 Face the front of the telescope
towards an open area of the sky that
has a clear horizon to the right
(clockwise) of its starting position.
Remove lens cap from camera.
5 SkyProdigy will automatically
move to its “home position” and
begin image modeling* the sky.
3 Turn power switch (located on the
side of the telescope fork arm) to the
“on” position. The LCD display will
display “SkyProdigy Ready.“
6 Once SkyProdigy has begun its
alignment process, it is important not
to touch or move the telescope in any
way. Also, while image modeling*, do
not obstruct, cover or shine light into
the camera lens located on the fork
arm of the mount.
7 Once it has identified a
positive match, the Computerized
Hand Control will display “Solved.”
8 SkyProdigy will then move to
a different position in the sky and
repeat the process until three images
are successfully acquired. The
Computerized Hand Control will
display “Alignment Complete” when
nished.
9 Now that your telescope is
properly aligned, you are ready to nd
your rst object. Press the SKY TOUR
button on the Computerized Hand
Control. The hand control will display a
list of objects that are visible from your
current location.
Page 4
Hand Control Guide [Continued]
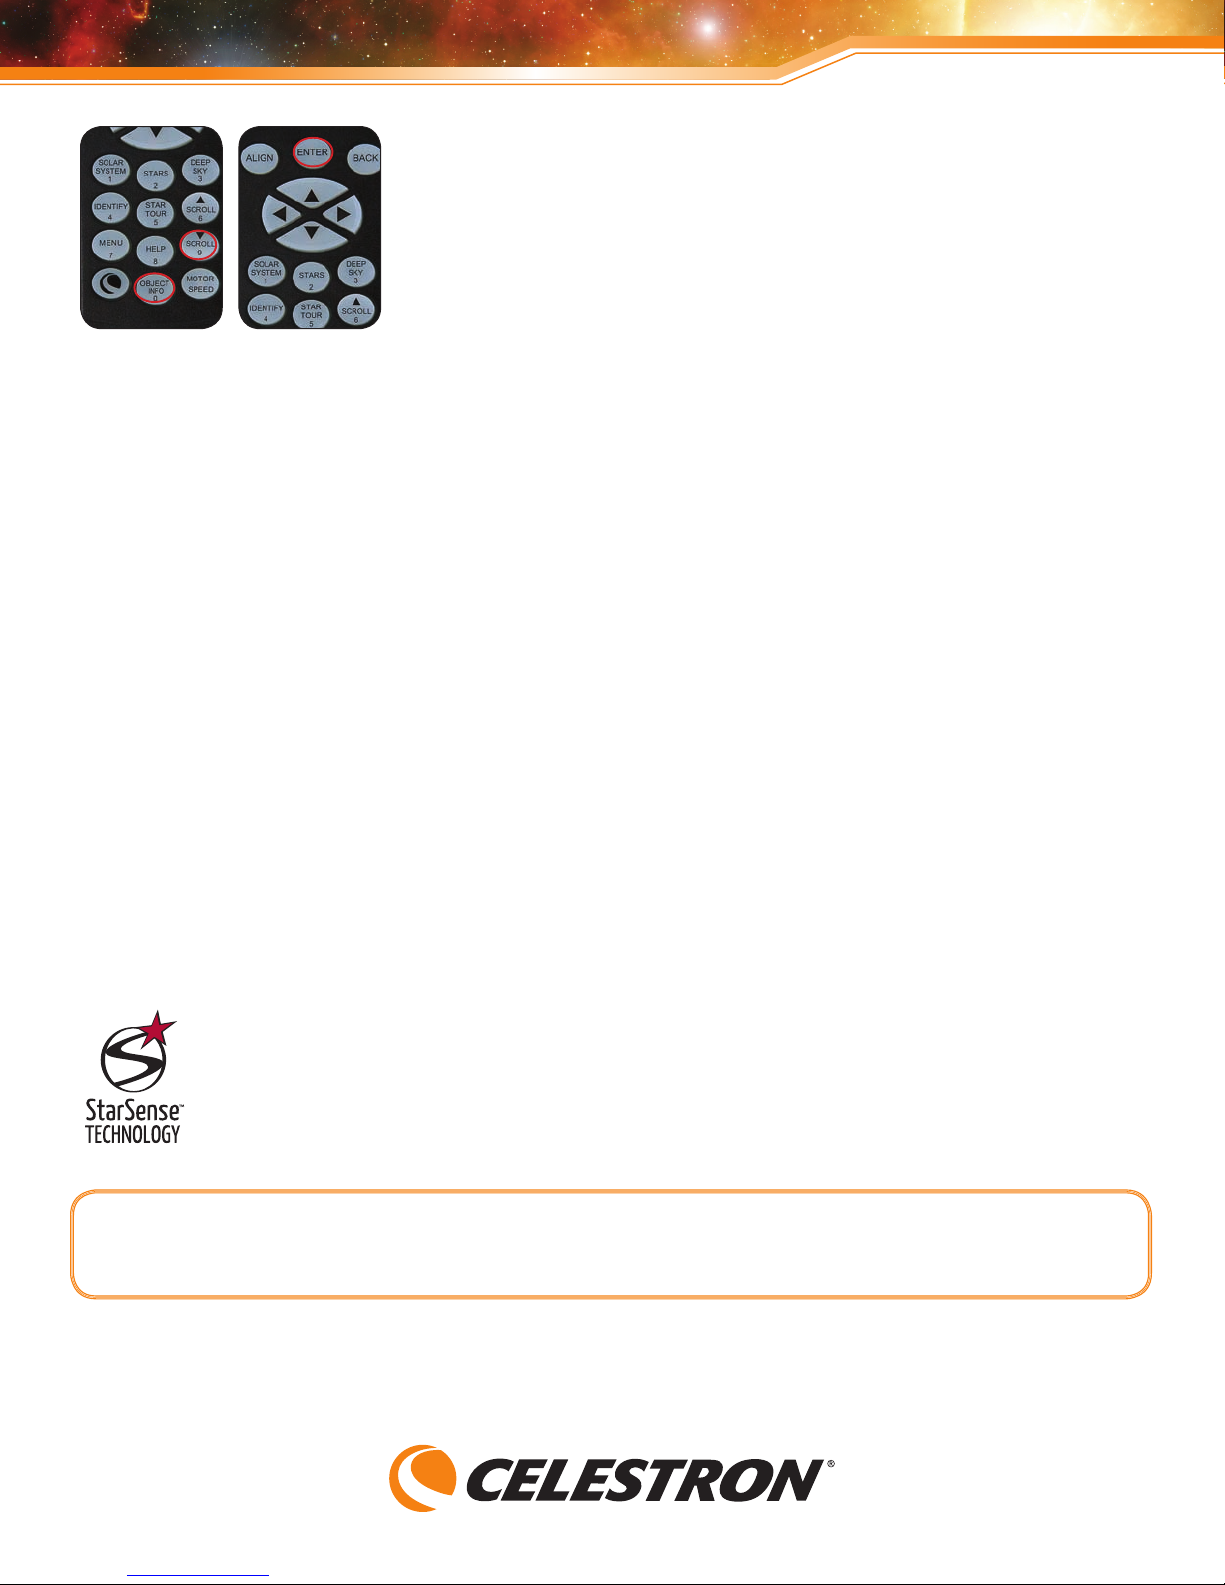
10 Press the OBJECT INFO button
to read information about the object
displayed. Press the DOWN Scroll
button to display the next
object on the tour. Press ENTER to
slew (move) the telescope to the
displayed object.
*Celestron’s SkyProdigy telescope uses an integrated imaging camera and patented StarSense Technology to automatically align
itself with the night sky and determine where the telescope is currently pointing. The camera automatically captures an image of the
sky, which is processed internally to positively identify the stars in the image. Once a positive match is found, SkyProdigy determines
the coordinates of the center of the captured image. The process is automatically repeated two more times so that the system has
three known alignment points that can be used to make an accurate model of the night sky. From this information, the user can
select any celestial object in the hand controller’s database, and SkyProdigy will automatically move itself to the correct position.
*SkyProdigy’s internal camera does not have an external output allowing users to view or save the captured images. Captured
images are used internally solely for the purpose of self-aligning the SkyProdigy telescope.
For general usage information, please consult your user’s manual.
If you have questions or problems with set-up, please contact
Celestron Technical Support: 310-803-5955
Designed and intended for those 13 years of age and older.
 Loading...