

Page 1
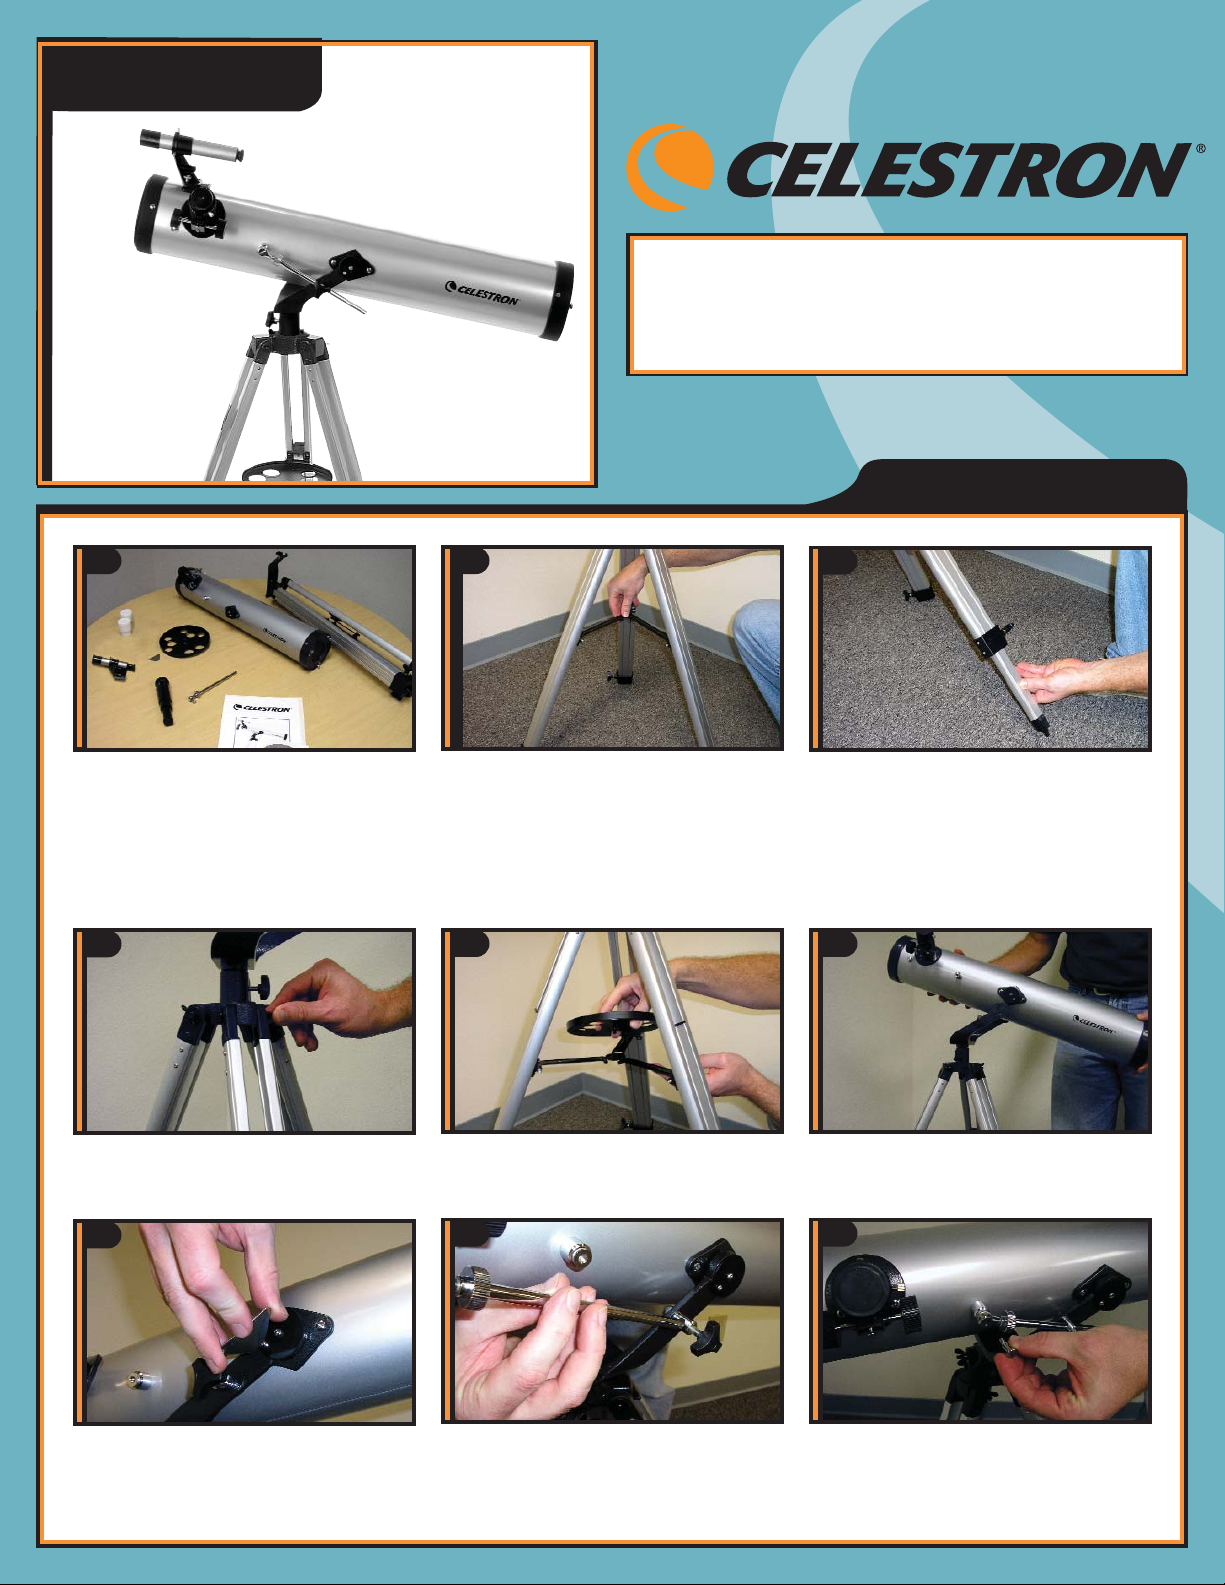
Use the three tightening screws located at the
bottom of each leg to secure the extended legs
in place. All three legs should be the same
length to provide a level platform for the
telescope.
To set up the tripod, spread the legs outward
until they are fully extended and push down
center locking brace. Extend the center portion
of each of the three tripod legs down 6-8".
Quick Set-up Guide
1
2
3
Once the tripod legs have been extended, it
may be necessary to tighten the nuts at the
top of each leg so they are tight & secure.
4
7
Secure the tube to the mount using the two
threaded mounting bolts. Tighten to secure in
place.
5
Locate the optical tube and line up the tube
with the holes on the mount.
6
Insert the slow motion control rod into the
eyebolt attached to the altazimuth mount.
8
Secure slow motion control rod to telescope
tube by attaching the included bolt and
tightening.
9
PowerSeeker 76
Your PowerSeeker 76 includes: optical tube with
two threaded mounting bolts; tripod with center
support bracket & yolk mount attached; two
eyepieces; a 3x barlow lens, finderscope; slow
motion control rod; eyepiece accessory tray; multitool (see step #7); The Sky™ CD software;
documentation including an owner’s manual.
Item# 21044
Place the accessory tray on top of tripod's
center leg brace. Thread the tray into the
threaded hole in the center of the leg brace.
Questions or Problems with Set-up?
CONTACT:
Celestron Technical Support: 310.
803.5955
Page 2
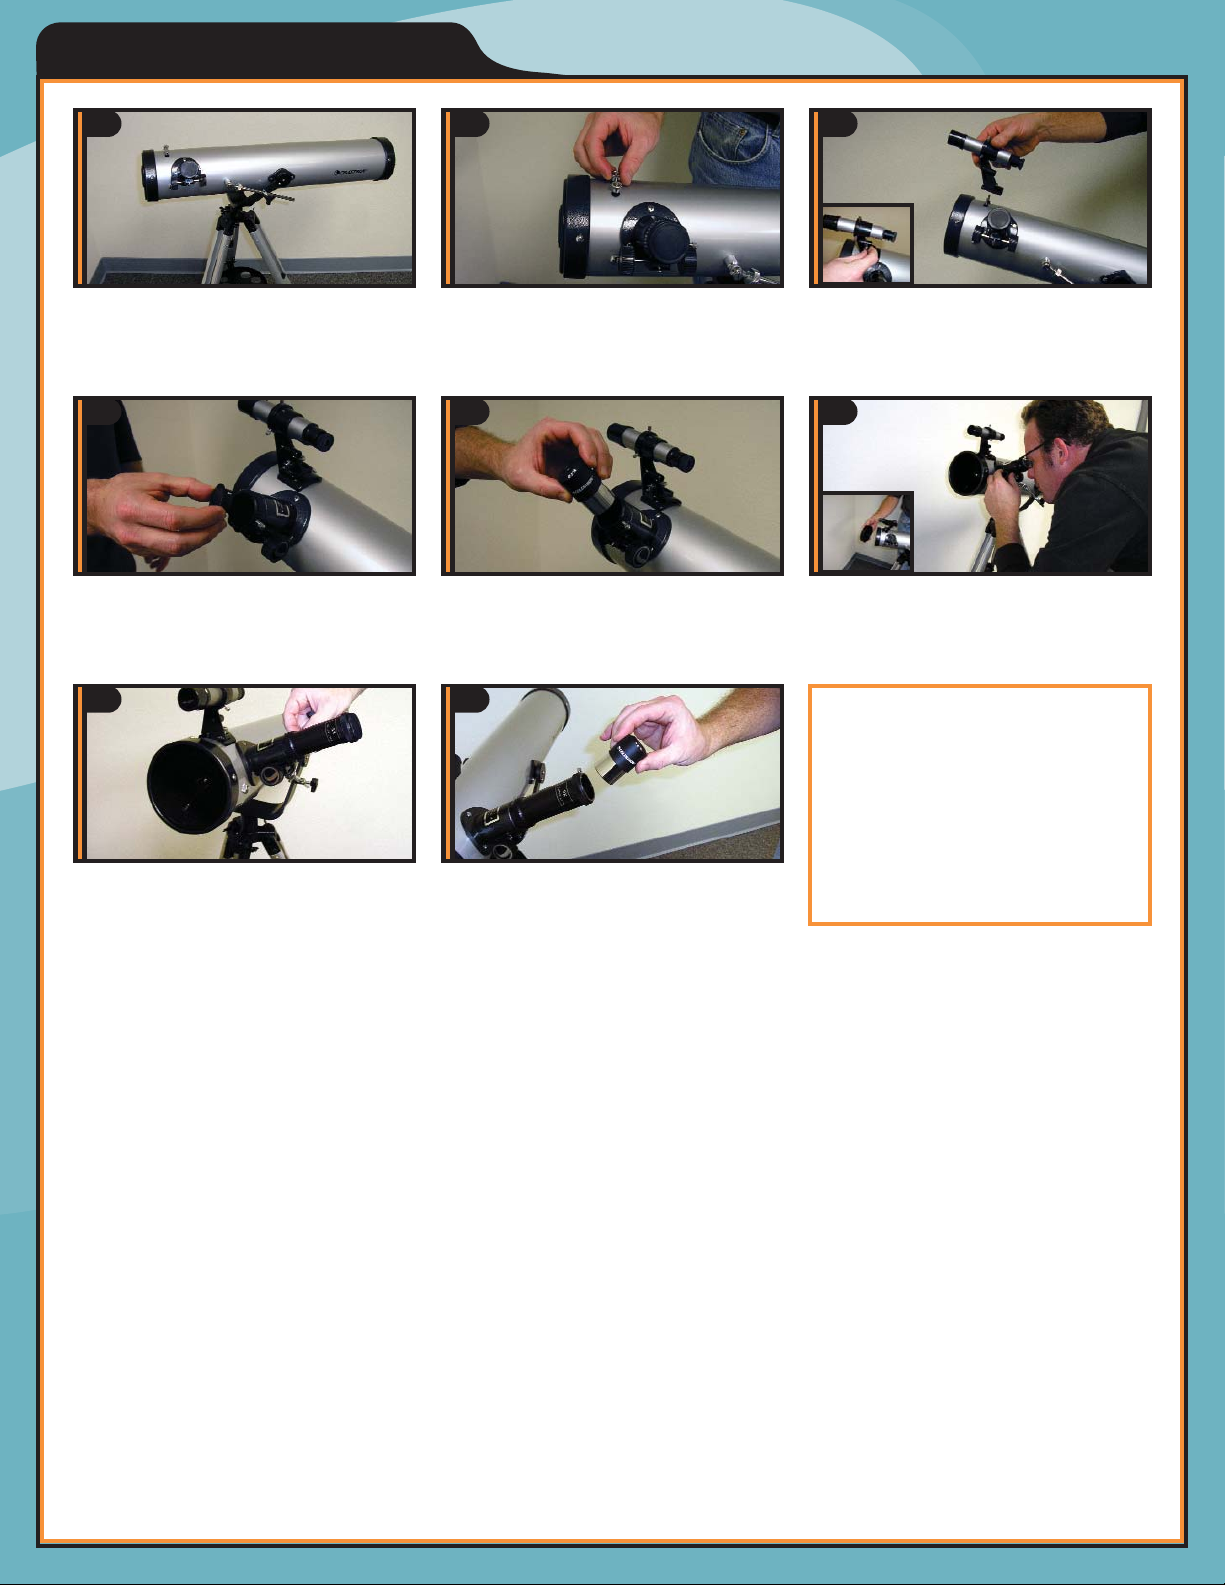
Quick Set-up Guide [cont]
Properly assembled, the tube should appear
as pictured above.
11
Locate the finderscope. Remove the knurled
nuts on the threaded posts at the focuser end
of the telescope tube.
12
13
Loosen the set screw on the focuser so that it
does not obstruct the inner diameter of the
focuser. Remove the plastic cap covering the
end of the focuser.
14
Locate the 20mm eyepiece and remove the
plastic covers. Insert the chrome barrel of the
eyepiece into the focuser and secure in place
by tightening the set screw.
15
Remove the lens cap from the front of the
telescope. To observe, look through the
eyepiece as shown above.
16
For additional magnification, you can use the
included 3x barlow. Place the barlow in the
focuser in place of the eyepiece and tighten
set screw -- remove the cap from the barlow.
17
10
Insert the chrome barrel of the 20mm
eyepiece into the barlow and tighten the set
screw to secure in place.
Orient the finderscope so that the larger lens is
facing towards the front of the tube. Place
finderscope over the posts on the tube and
replace knurled nuts.
For detailed usage
information please
consult your owner’s
manual.
 Loading...