

Page 1
Page 2
ATTENTION
Your CEIVA is currently displaying the
demonstration slideshow.
To enjoy your own personal slideshow, please follow these three
easy steps:
Power on your CEIVA.1.
Confirm that the slideshow is displaying.2.
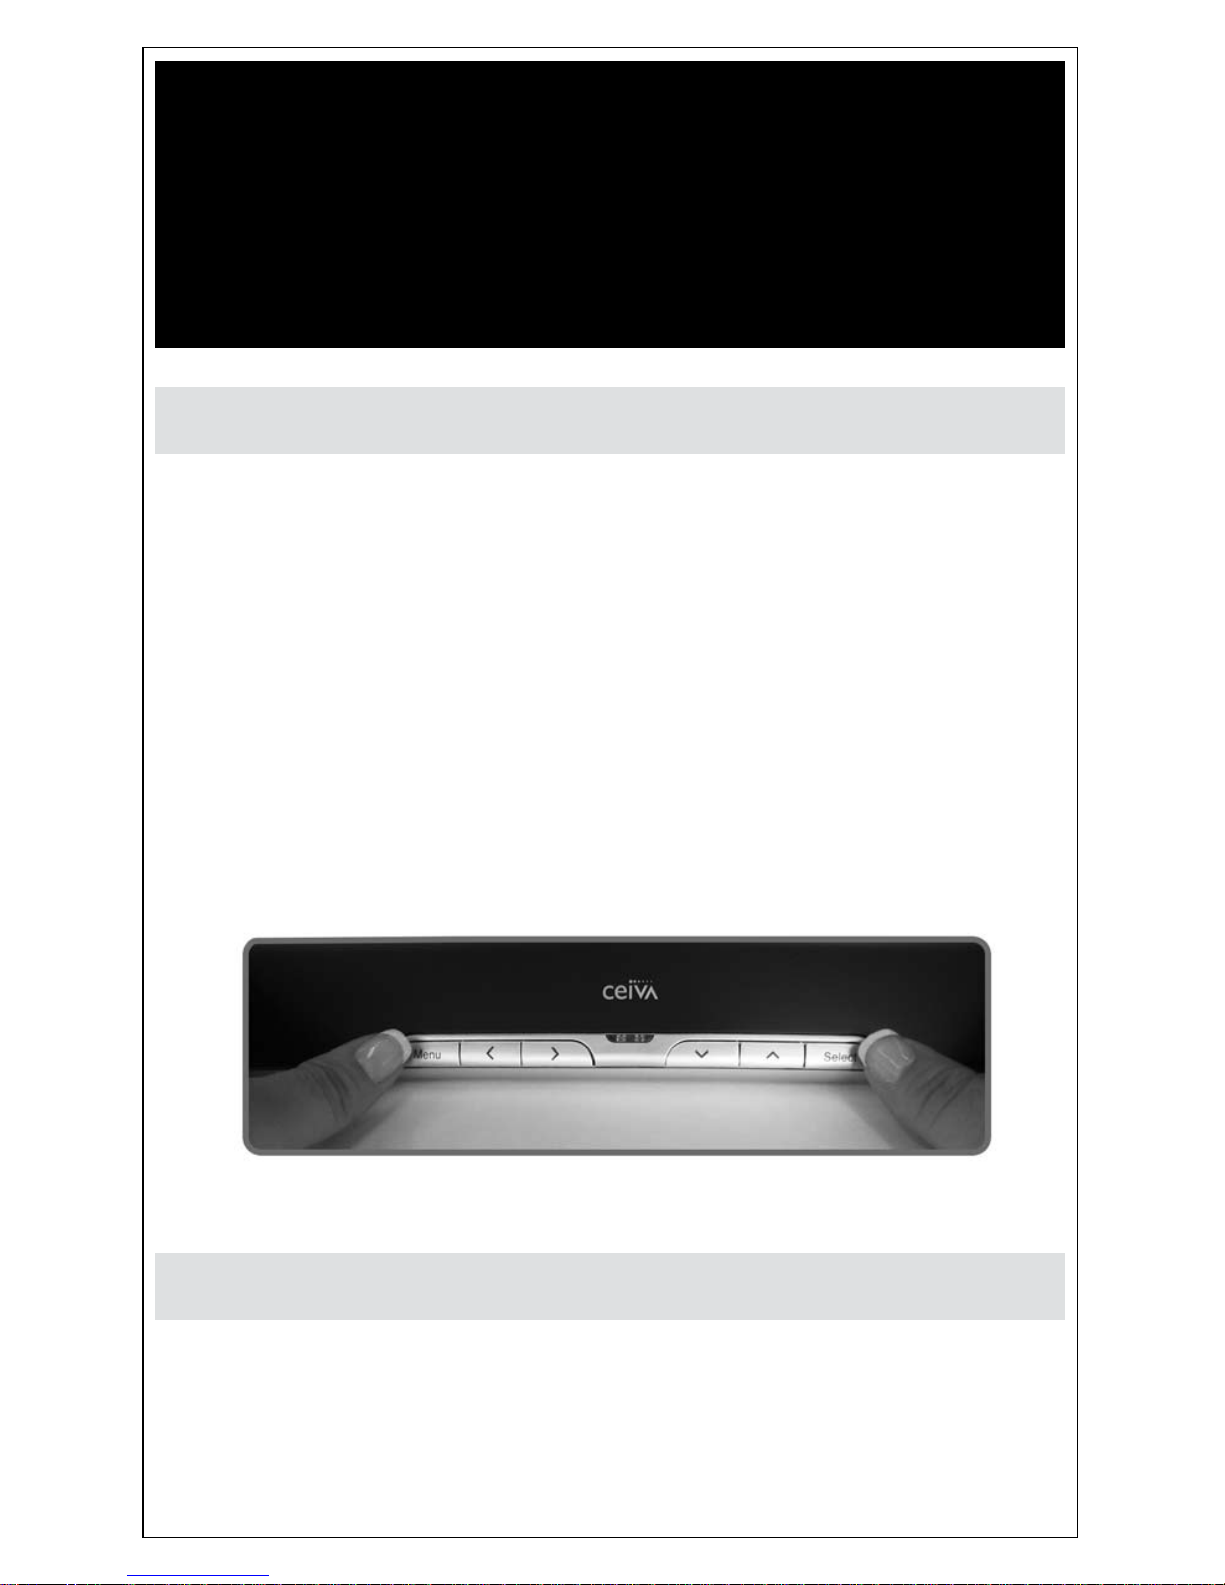
Hold both the Menu and Select buttons down for one 3.
second until the Congratulations screen appears.
This process is only necessary once.
For more information about how to display and receive
photos on your CEIVA, see page 4.
Displaying and Receiving Photos
Exiting the Demonstration Slideshow
Page 3
Showcase Your Photos and Stay Connected
CEIVA Digital Photo Frames™ are the world’s only connected digital picture
frames, renowned for their ease of use and unique patented technology. With
CEIVA®, you have extensive options to see, share, and store the photos that
mean the most to you.
Display Photos Directly from a Camera Memory Card
Instantly display a full color slideshow of photos stored on a memory card •
using the built-in card reader.
Use simple on-screen menus to control display modes, photo rotation and •
deletion, slideshow transitions and timing, brightness, and more.
Set your CEIVA to turn on and off automatically.•
Add a CEIVA PicturePlan® and Receive New Photo Updates
Automatically
Receive and display new photos from friends and family around the world automatically, every day. All you need is a subscription to the CEIVA PicturePlan
service, a high-speed internet connection, and a wireless router. A PicturePlan
enables you to store an unlimited number of photos securely online and share
photos with anyone you choose. Setting up a PicturePlan is easy. For more
information, see page 5 of this Quickstart Guide.
In the Box
2
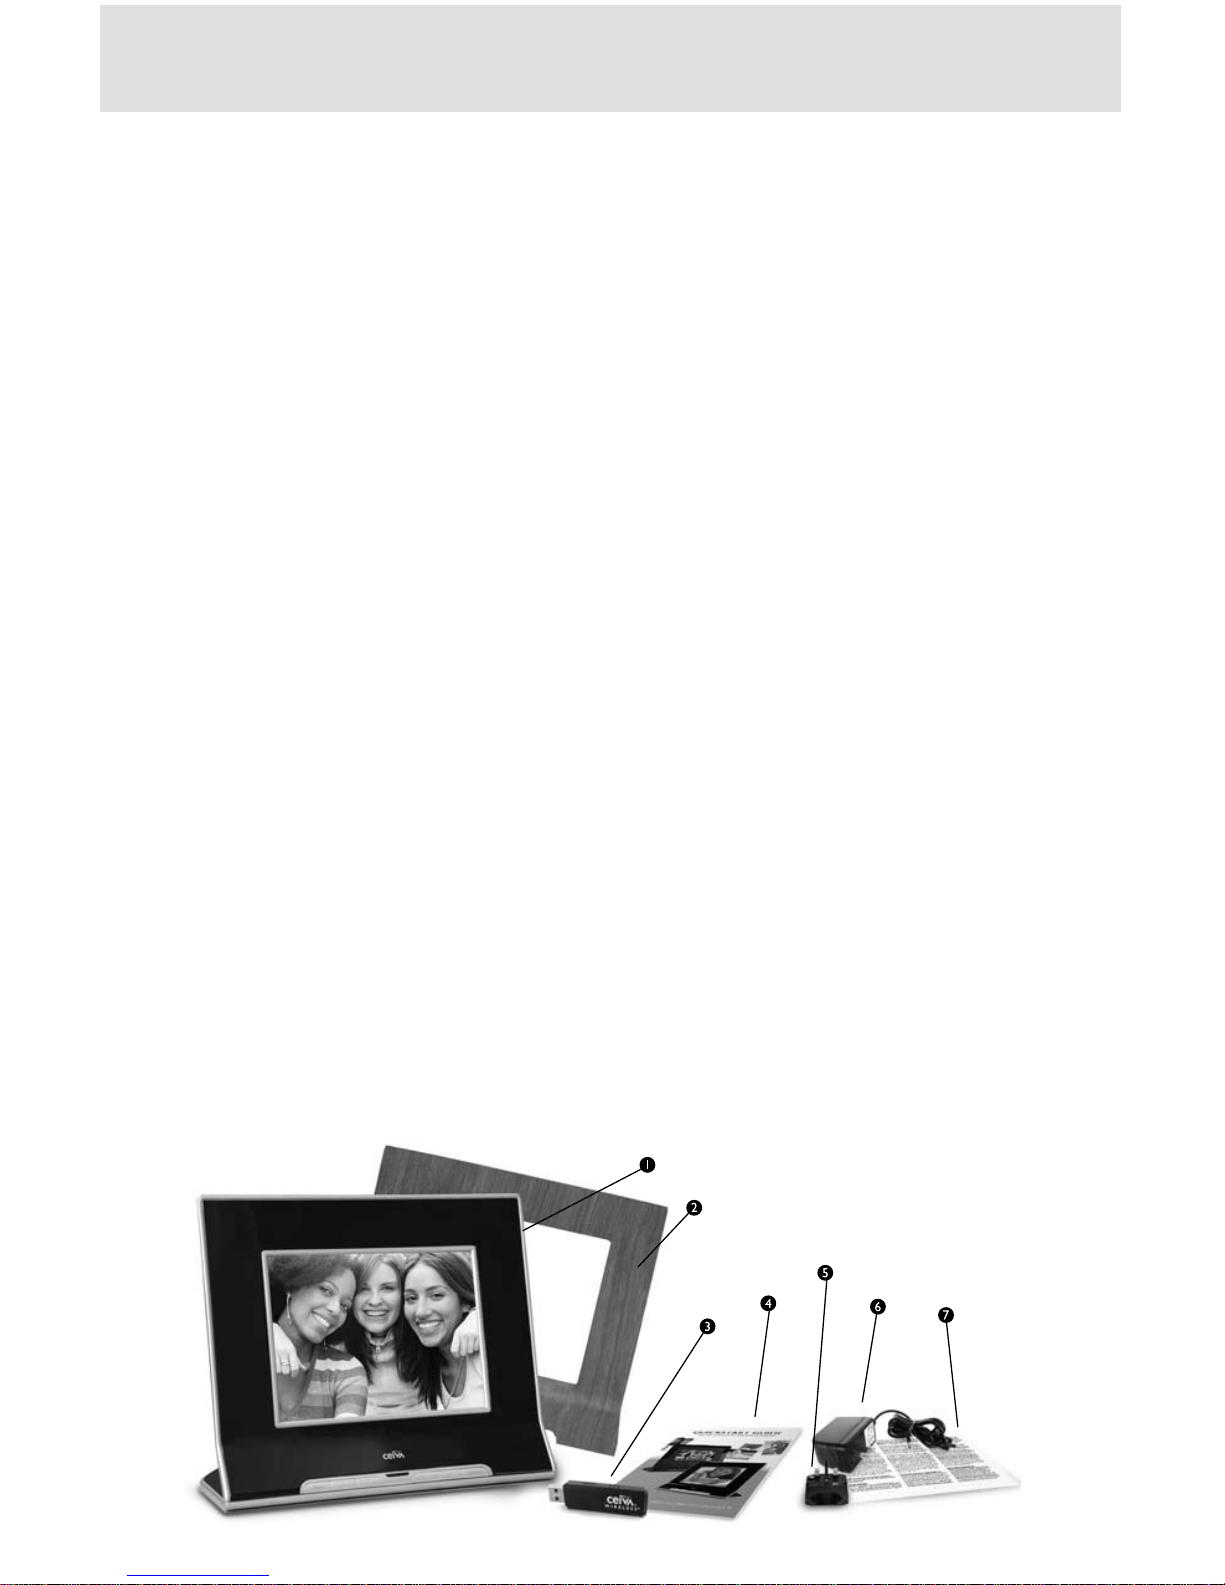
CEIVA Digital Photo Frame1.
Wood Grain Faceplate 2. (LF4008 only)
CEIVA Wireless Adapter3.
Quickstart Guide4.
EU to UK Adapter5.
AC Power Supply6.
Warranty Card7.
Page 4
Components
Is Something Missing or Damaged?
If something is missing or damaged, return to place of purchase. Please
keep the original product packaging in case you need to return your CEIVA
for repairs.
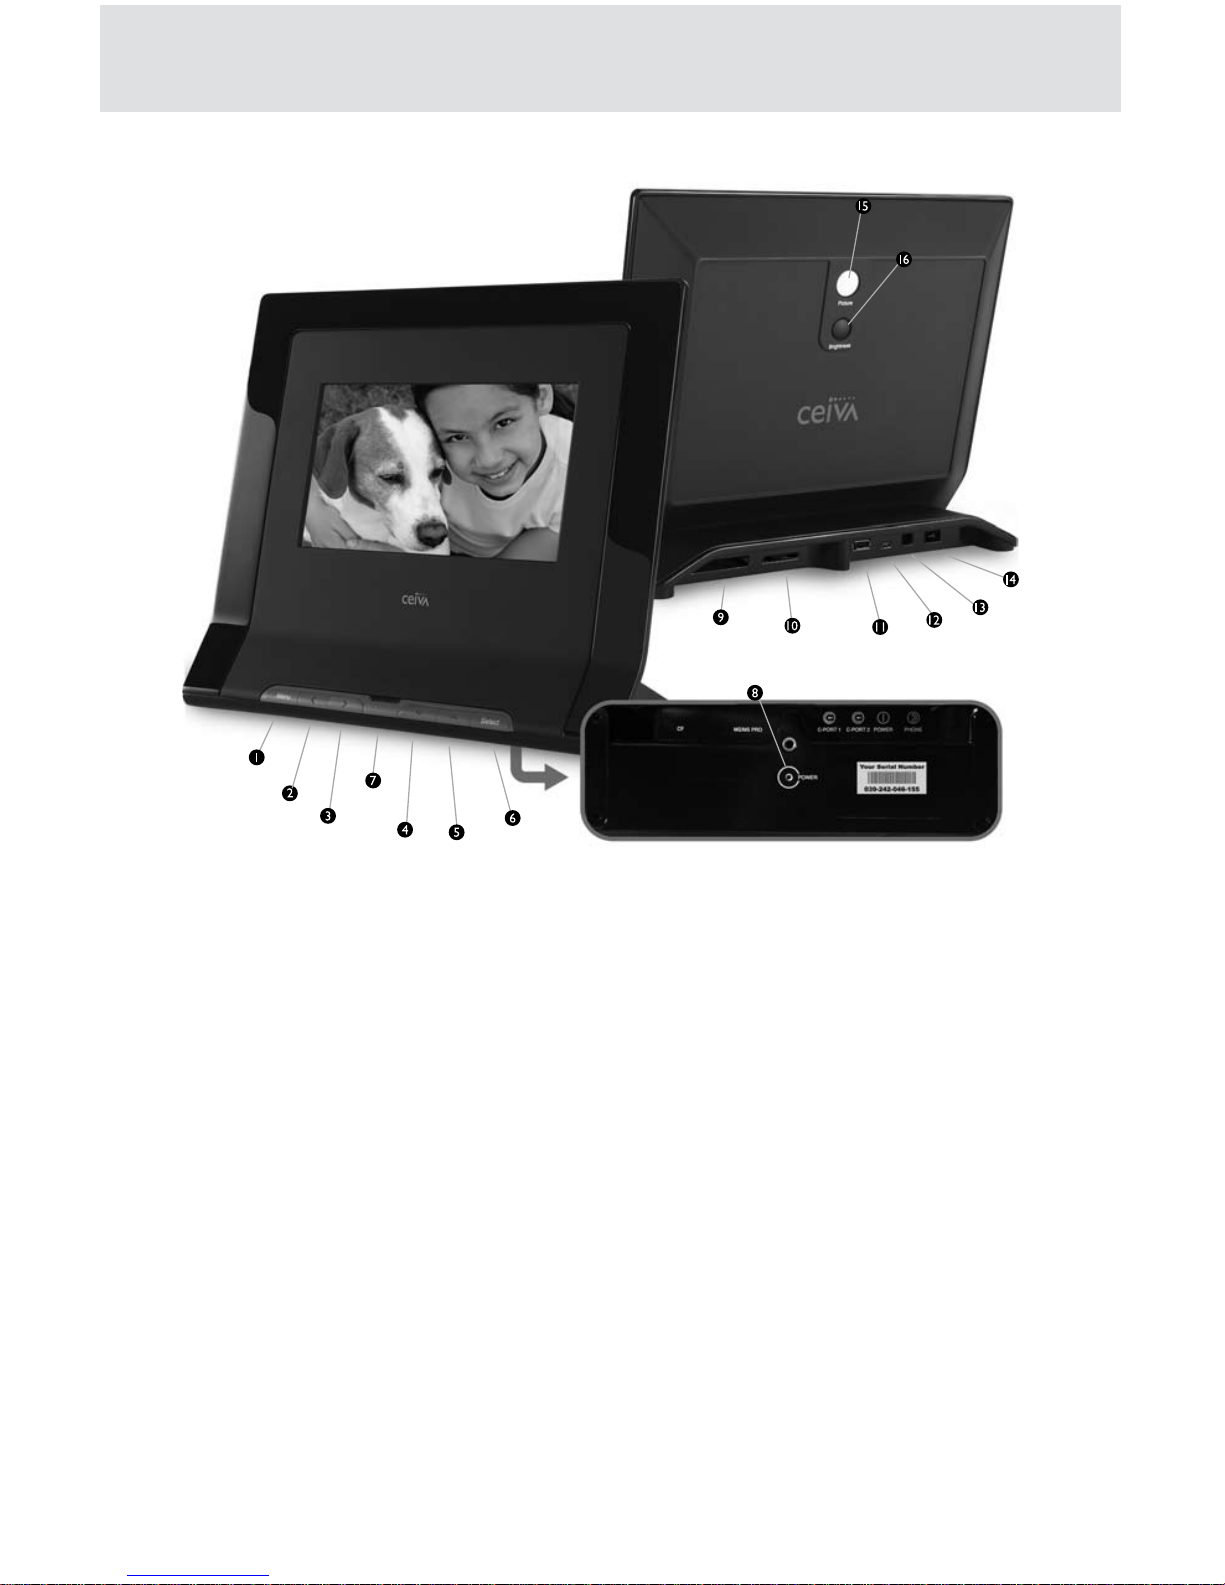
Menu Button1.
Left Arrow Button2.
Right Arrow Button3.
Down Arrow Button4.
Up Arrow Button5.
Select Button6.
New Photo Indicator7.
Power Light8.
CF I/CF II Slot 9.
for Compact Flash® or
Microdrive™ memory card
SD/MMC/MS Slot 10.
for Secure Digital™, MultiMedia Card™, Memory
Stick®, Memory Stick PRO®, Memory Stick
Duo™, Memory Stick PRO Duo™, SmartMedia™,
xD-Picture Card™, miniSD
™
(Some memory cards may require adapter;
please visit http://help.ceiva.com)
C-Port 111.
C-Port 212.
Power Port13.
Picture Button14.
Brightness Button15.
3
Setting Up Your CEIVA Is Easy
Page 5

How your CEIVA works
Your CEIVA displays a continuous slideshow of pictures. Your source for these
pictures can be a memory card plugged directly into the back of your CEIVA.
You can also receive new photo slideshows automatically every day from your
family and friends around the world. All you need is a CEIVA PicturePlan, a
high-speed Internet connection and a wireless router (see Page 5).
Create Your Free CEIVA Account and Register Your CEIVA
You must create a free online CEIVA account and register your CEIVA in order
to get CEIVA Customer Care support and receive free software updates,
special member discounts, and services. Creating your CEIVA account also
enables you to activate your optional PicturePlan service (see page 5).
To create your account and register, go to http://gettingstarted.ceiva.com and
follow the step-by-step instructions. Please have your serial number available
when registering. The serial number is located on the bottom of your CEIVA.
NOTE: If you try to connect your CEIVA to the CEIVA Network™ before registering it,
it will display an error message.
Choose a Location for Your CEIVA
When choosing a location for your CEIVA, make sure:
Your CEIVA will be easy to see.1.
Your CEIVA will not be exposed to direct sunlight, water, moisture or 2.
extreme temperatures.
A power outlet is nearby.3.
Your CEIVA is in range of your wireless internet connection. For an eth-4.
ernet connection, you need an adapter (sold separately at your local retailer).
Set up Your CEIVA to Display Pictures
Plug one end of the power cord into the round power access port (la-1.
beled Power) located on the back of your CEIVA. Plug the other end of
the power cord into an electrical outlet that is not controlled by a light
switch. Your CEIVA includes a EU standard Europlug. Also included is a
1363 plug adapter for use in the United Kingdom. We recommend that
you use a surge protector power strip to prevent surges of electrical
current from damaging your CEIVA.
Setting Up Your CEIVA Is Easy
4
Page 6

NOTE: After completing this initial setup, do not unplug your CEIVA power cord to
turn the frame on or off, unless a CEIVA Customer Care team member asks you to
do so for troubleshooting purposes. For information on how to turn the screen off
during routine use, please see page 7.
Insert your memory card into the appropriate slot in your CEIVA*. Your 2.
CEIVA may take a few moments to load all your pictures.
Press the Up or Down Arrow button to choose how you would like to 3.
view your photos and confirm your choice with the Select button. For
information on using your CEIVA menus, see page 6.
* NOTE: Please see page 2 for a list of compatible memory cards.
Get Connected with PicturePlan!
Receive and display new photos from friends and family around the world.•
Invite anyone you choose to share photos with you for free.•
Send photos directly from your camera phone or online CEIVA account.•
Store and organize all your photos in secure personal albums.•
Connect your CEIVA via an existing home network using the CEIVA Wire-•
less™ adapter or the CEIVA Broadband™ adapter (sold separately).
Upload photos automatically from a memory card over wireless and broad-•
band connections to your personal albums on the CEIVA Network.
Turn photos into one-of-a-kind greeting cards with personal messages at •
the gallery.
Connecting for the First Time
You will need:
The name of your network (SSID)•
Your network key, password or passkey, if your network requires one•
Activate your PicturePlan service
Log into your CEIVA account online at www.ceiva.com to activate the subscription.
Plug in your CEIVA Wireless Adapter
Insert your CEIVA wireless adapter into the
C-Port 1 slot.
Get Connected
5
Operating Your CEIVA
Page 7

Configure your wireless settings
Press the Menu button to display menu settings. See page 7 for easy 1.
instructions on how to operate the CEIVA in Menu Mode.
From the main menu screen, choose Settings. 2.
From the Settings screen, choose Connection Settings.3.
From the Connection Settings screen, choose How To Connect.4.
From the How To Connect screen, choose Wireless and press the Select 5.
button. Press the Select button again to save your selection.
From the Setup Wireless screen, choose Select Wireless Network. The 6.
frame will automatically scan for available networks and display them on
the following screen.
On the Select Wireless network screen, use the Left and Right Arrow 7.
buttons to scroll through available networks. If you do not see your
network in the list hit Refresh to scan again. Press the Select button to
choose a network. Press the Select button again to save your selection.
If your network does not require a key (password), you are finished. 8.
If your network requires a key, please enter it at this time via the onscreen keyboard. Selecting each letter is the same process as texting
on a mobile phone keypad. Press the Select button twice to save your
selection.
Choose Exit to exit Menu Mode.9.
Push and hold the white Picture button located on the back of your 10.
CEIVA until you see the message, “You can let go now, I’m dialing in.”
Then, relax while your CEIVA connects to the CEIVA Network. A status
screen will indicate the connection progress. Once completed, your
CEIVA is ready to receive and display photos—automatically!
For advanced wireless network setup instructions and troubleshooting, please
visit http://ceivawireless.ceiva.com.
If you do not have a wireless router for your broadband Internet connection,
you will need to purchase a CEIVA Broadband adapter separately from your
local retailer. Please refer to http://ceivabroadband.ceiva.com for setup
information.
Operating Your CEIVA
6
Page 8
How do I use the menus?
You can use menus to rotate photos, add and remove photos from the slideshow, control slideshow transitions and timing, set on and off times, adjust
brightness, and more.
To start Menu Mode on your CEIVA, press the Menu button.•
Use the Up, Down, Left, and Right Arrow buttons to scroll between menu •
options. Also, use the Left and Right buttons to change numeric settings
for certain features.
Press the Select button to choose a highlighted menu option.•
Press the Menu button, or choose the Back option in the lower left corner •
of the menu screen, to return to the previous menu page.
Choose the Exit option in the lower right corner of the menu screen to •
exit the menu at any time.
For more detailed information on menus, please visit http://menus.ceiva.com.
How do I get photos onto my CEIVA?
There are many ways to get your photos on your CEIVA. The simplest way is
to insert your camera memory card into the back of your CEIVA for an instant
slideshow. If you have a PicturePlan, you can also send photos to your CEIVA
from your online CEIVA account, your desktop using free photo editing software or from your camera phone.
For more detailed information on sending photos, please visit http://help.ceiva.com.
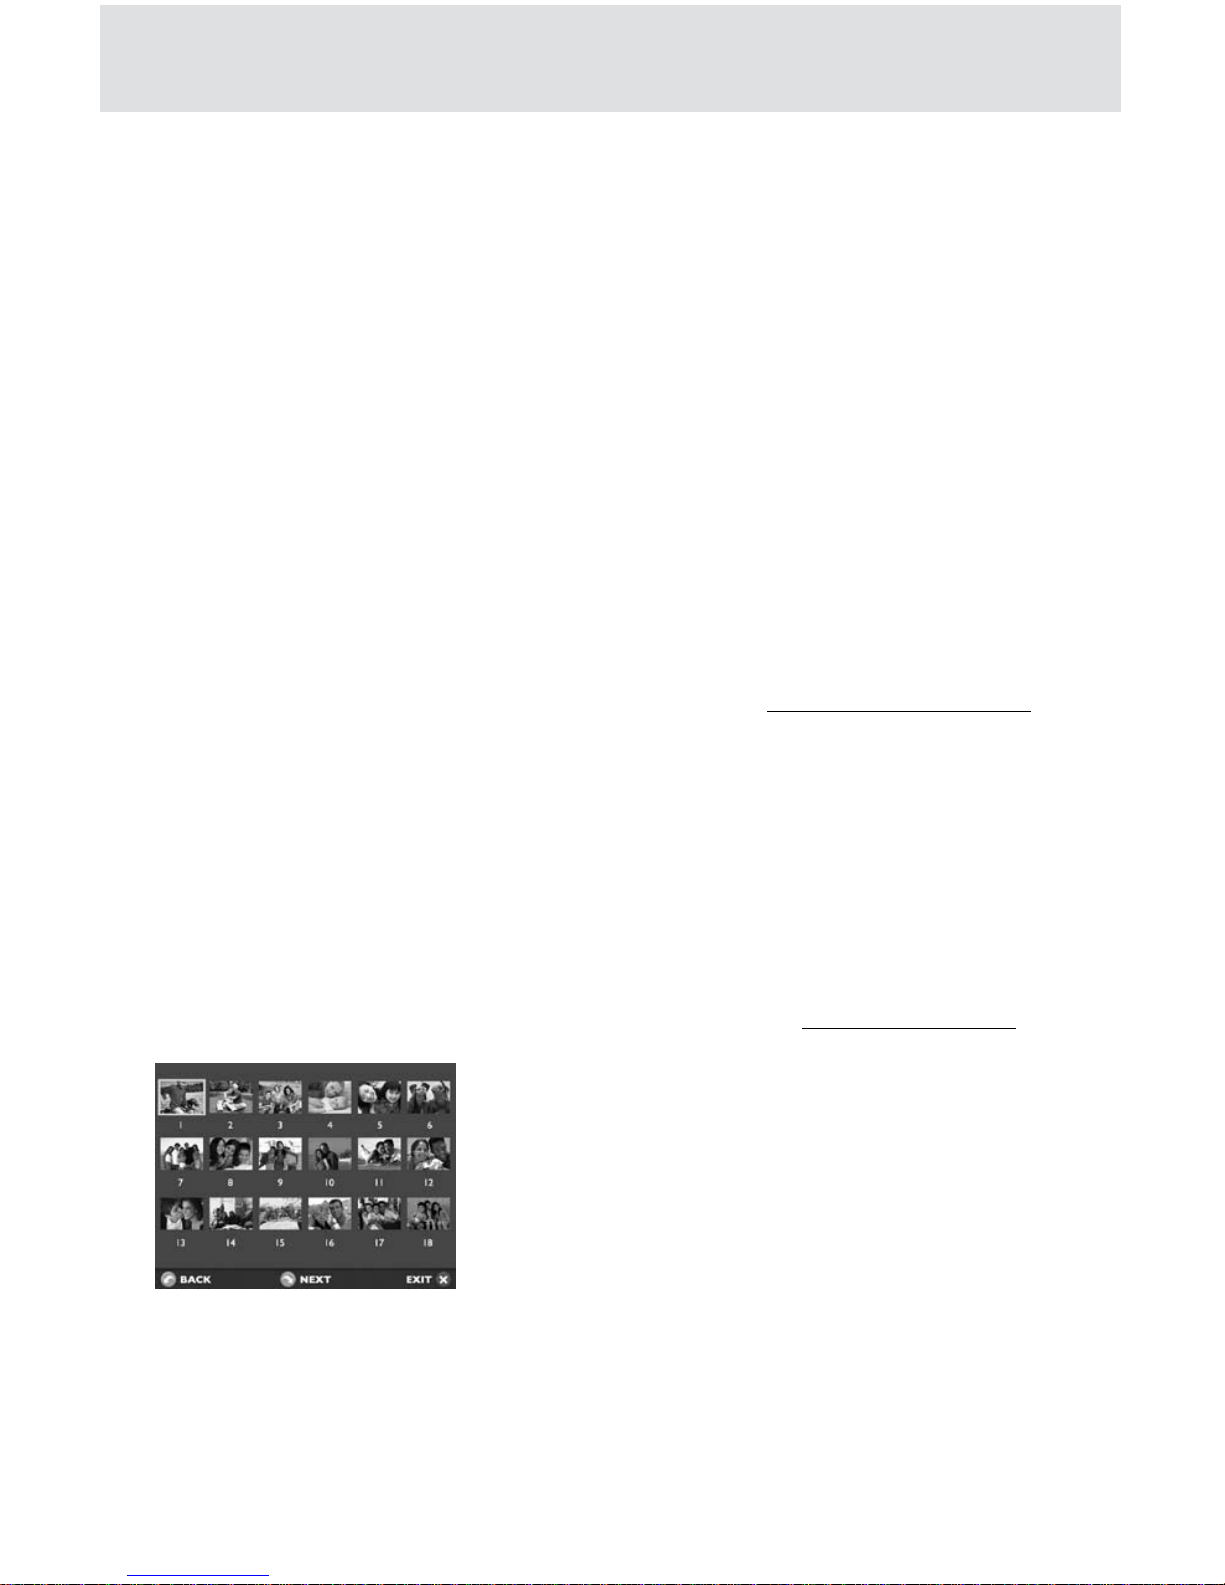
How do I browse my pictures?
Press the Select button to display thumbnail previews of all the photos in your slideshow. Use the
arrow buttons to scroll until you see the photo
you are searching for. Press the Select button to
choose that photo or simply select Exit to return
to your slideshow.
How do I rotate a photo?
With thumbnail previews displayed (see above), scroll to the photo that you
wish to rotate. Press the Select button to choose that photo and then press
the Menu button. Choose Rotate and press the Select button. Choose the de-
Operating Your CEIVA
7
Operating Your CEIVA
Page 9
gree of rotation for the photo and then press the Select button. The default is
None. Press the Select button when Save is highlighted to confirm the changes.
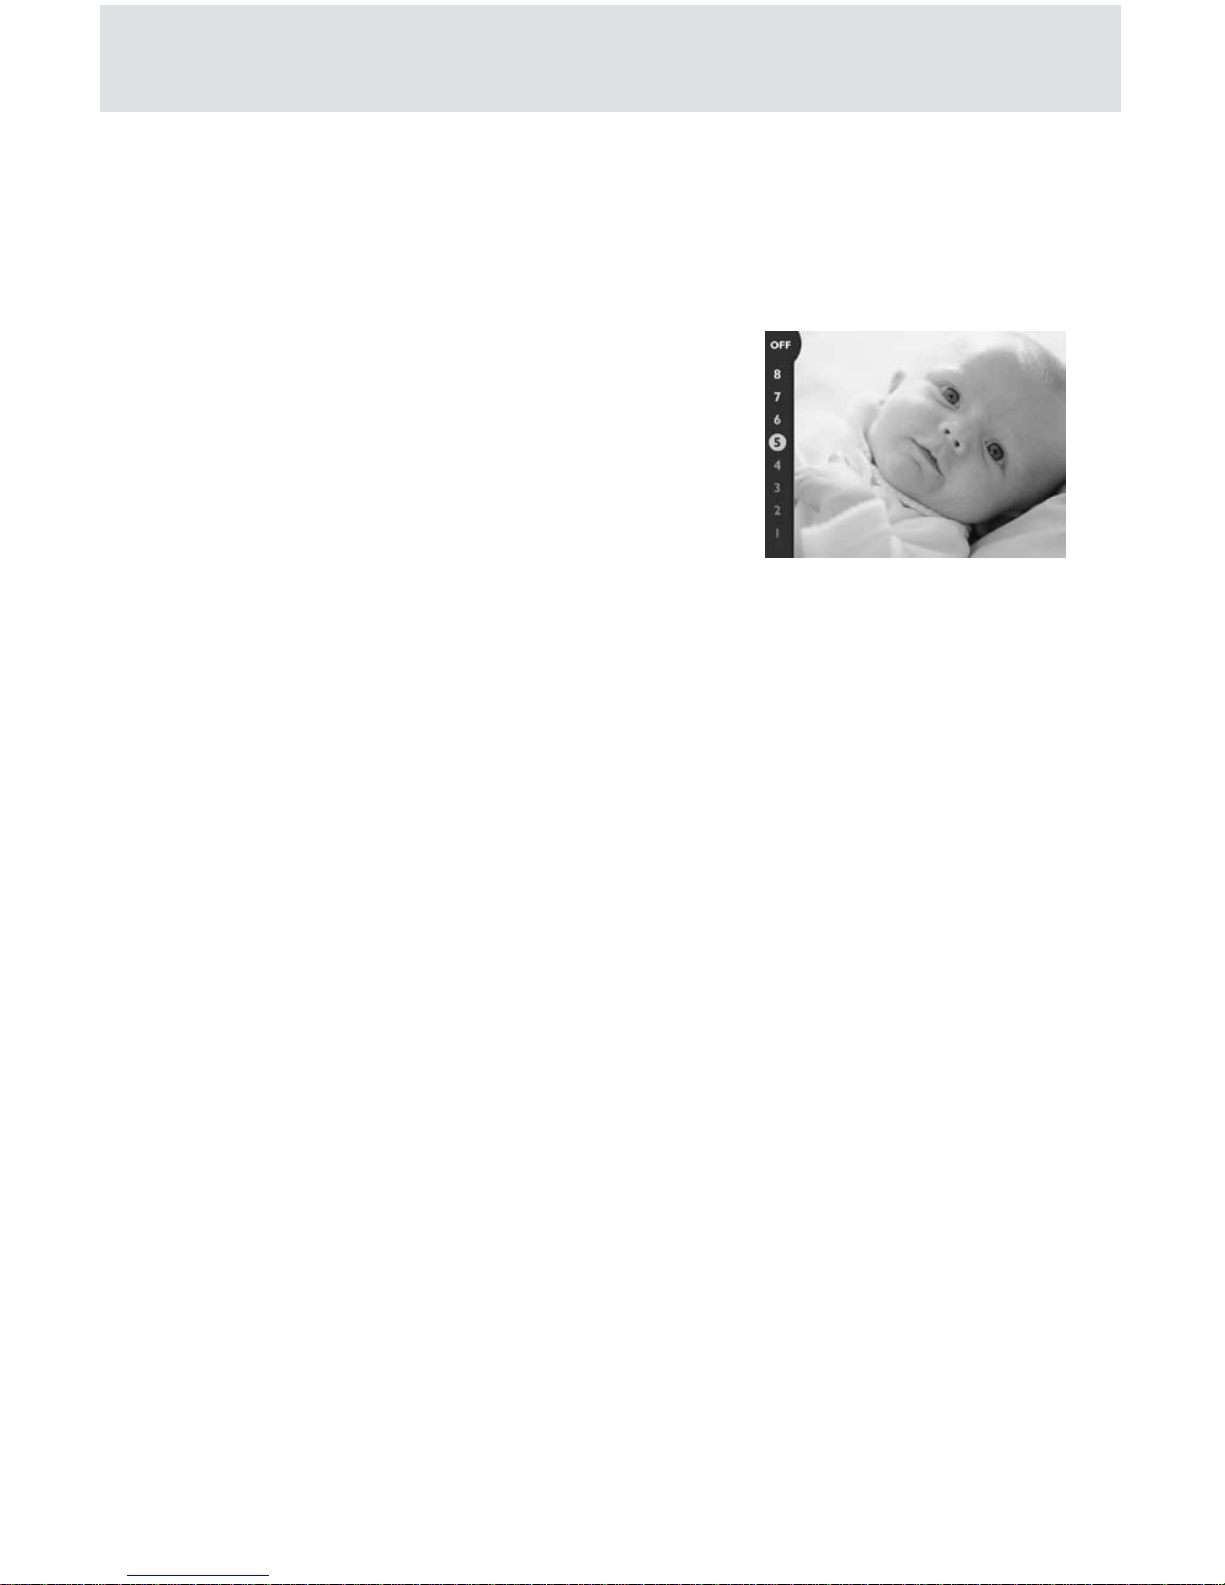
How do I adjust the brightness on my screen?
When your CEIVA is in Slideshow Mode, you can
press the Up and Down Arrow buttons to adjust
the display brightness of the frame. Press and
release the Up button to increase the brightness
one level. Press and release the Down button to
decrease the brightness one level. When you are
finished, the screen will automatically resume your
slideshow after a short pause.
How do I delete a photo from the slideshow?
With thumbnail previews displayed (see above), scroll to the photo that you
wish to delete. Press the Select button to choose that photo and then press
the Menu button. Choose Delete, and press the Select button. When you
mark a photo for deletion that was sent from the CEIVA Network, a trash
can icon will appear on the Info Bar. The photo will be removed the next time
your CEIVA connects to the CEIVA Network.
To cancel your delete request and keep the photo in your slideshow rotation,
repeat the steps for this feature, choosing Undelete instead of Delete.
When you delete a slideshow photo that is stored on a memory card, you will
not remove the photo from your memory card, only from the slideshow. You
can manually browse through photos on the memory card to reinsert a photo
into the slideshow.
How do I turn off my screen? How do I turn it back on?
Press the Down Arrow button to access the brightness bar, and press the
Down Arrow button multiple times until you reach the “Off” setting. To turn
the screen back on, simply press any of the buttons on the front of the frame.
You can also set your CEIVA to turn on and off automatically, using the Set
Times menu function. If you are not a PicturePlan member, please set the time
for your CEIVA manually on this screen to enable this function. PicturePlan
members and those connected to a wireless network have the time
automatically set for them.
Operating Your CEIVA
8
Page 10

Operating Your CEIVA
How do I customize my slideshow?
Whenever you press a button in Slideshow mode—to scan previews, for example—the slideshow automatically pauses. It will automatically resume within
a preset amount of time, depending on your slideshow settings. The default is
30 seconds. To restart the slideshow immediately, hold down the Right Arrow
button until you see the message, “Let go now to start the slideshow, or keep
holding to connect.” You can configure your slideshow based on your personal
preferences using the Slideshow Settings menu function.
How do I make my CEIVA connect to the CEIVA Network?
If you have a PicturePlan, your CEIVA will automatically connect to the CEIVA
Network to retrieve new photos as often as you like, depending on how you
configure it. You can set this feature online or by using the Connection Frequency menu function. The default is once per day.
When your CEIVA is not scheduled to connect to the CEIVA Network, you
can hold down the Right Arrow button until you see the message, “You can let
go now, I’m dialing in.” to make a manual connection.
How do I care for my CEIVA?
Dust your CEIVA regularly with a clean, soft, dry cloth. Do not spray liquids
directly onto your CEIVA. Do not immerse your CEIVA in water or otherwise
get it wet.
My CEIVA isn’t displaying photos from my memory card.
Make sure your CEIVA is in Slideshow mode. Remove the memory card, and
reinsert it. If your CEIVA does not display photos after you insert your memory card into the card reader, make sure that photos are stored on the card
by testing it on your computer or digital camera. Make sure the photos on the
card are in JPEG format, and that they are smaller than 12 megapixels in size.
Operating Your CEIVA
9
Page 11

My CEIVA displays an error message.
If your CEIVA is having difficulties connecting to the CEIVA Network, the
screen will display a variety of error messages. Here are a few things you’ll
want to check:
Make sure that all connections between your CEIVA and power outlets and •
internet are securely plugged in.
If you are using a CEIVA PicturePlan, verify that you have registered your •
CEIVA and have activated or purchased a subscription. Your CEIVA will not
connect to the CEIVA Network unless you have an active subscription.
Your CEIVA will not connect to a phone system. •
NOTE: For detailed information on how to address these and other network problems, please visit http://help.ceiva.com. For detailed information on how to address
broadband or wireless network issues, please visit http://ceivabroadband.ceiva.com or
http://ceivawireless.ceiva.com.
My slideshow isn’t running.
Make sure that you have at least two photos in your CEIVA slideshow. Then,
press the Right button on your CEIVA until you see the message, “You can let
go now to start the slide show, or keep holding to connect.”
My CEIVA screen is dark.
Press the Up or Down Arrow button on your CEIVA a few times to ensure
that your CEIVA is not in “lights-out” mode.
For accessories, see your local retailer.
Accessories
Operating Your CEIVA
10
Page 12

© 2007 CEIVA Logic, Inc., Burbank, CA 91502. All Rights Reserved. Protected by United States
Patent No. 6,442,573; D545,782. Other Patents Pending. QSGUK091407
Need More Assistance?
Please visit http://help.ceiva.com, or email CEIVA®
Customer Care at [email protected].
Please include your serial number. The serial number
is located on the bottom of your CEIVA.
 Loading...