

Page 1
Tools
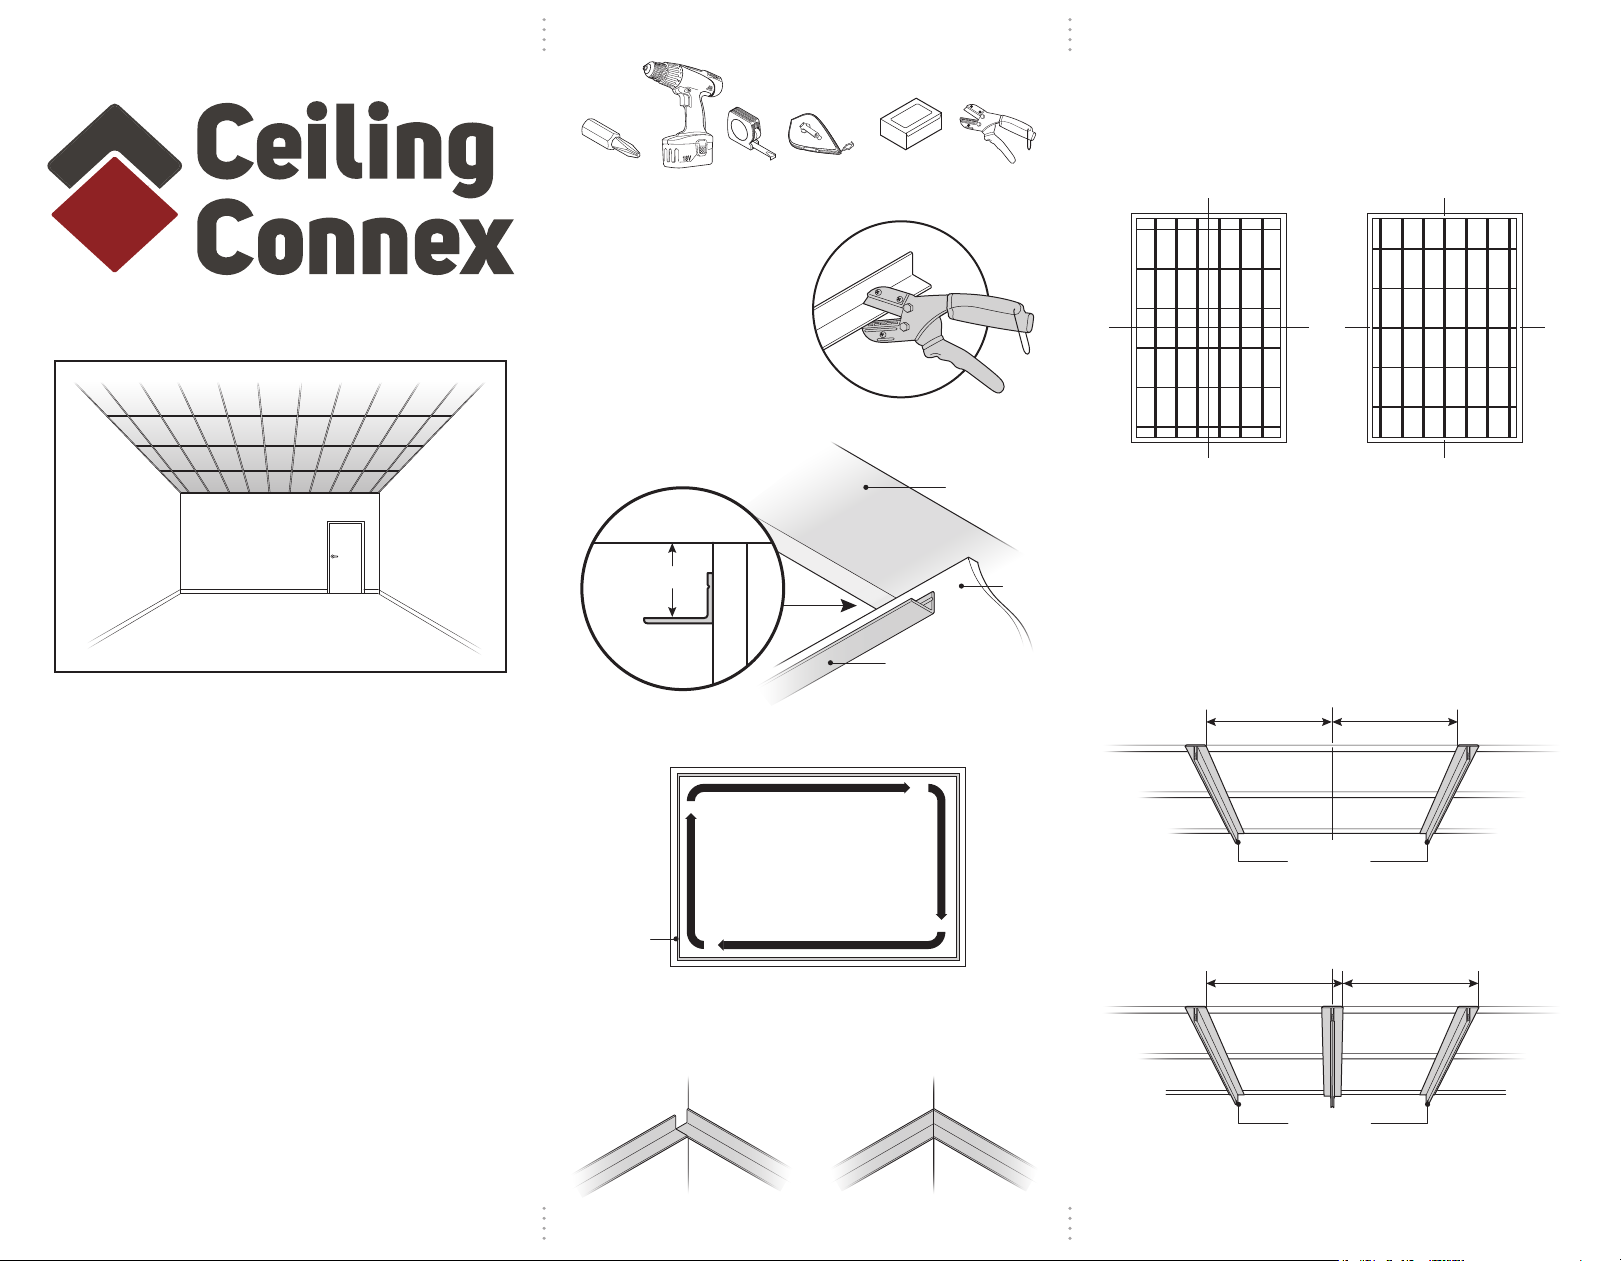
4. Layout Room
Optimal layout will provide equal sized boarder tiles on opposite walls.
You can either have a full tile centered about the room or a room
centered on the grid.
www.ceilingconnex.com
#2
Phillips Bit
NOTE: When cutting the
CeilingConnex Material,
use either a sharp razor blade,
Anvil Style Cutter or miter saw
with a ne blade. Ripsaw blade is
not acceptable.
Power Drill
Tape
Measure
Chaulk Line
1” Drywall Screws
or 7/32 - 1/4" finish
staples and gun
Razor Anvil
1. Mount Wall "L" Bracket Level 3/4" to
1" from the bottom of the Ceiling Joists.
CEILING JOIST
CEILING JOIST
3
““
to 1
/
4
WALL
WALL “L” BRACKET
2. Install Wall “L” Bracket around perimeter of room as shown.
Cutter
WALL
Full Tile Centered
C
L
C
L
Which option you choose depends on lighting locations, room
dimensions to maximize border tile size or personal preference.
Hang Main Runners perpendicular to ceiling joists or if surface
mounted perpendicular to the rooms longest dimension.
Tile Centered Layout
Measure and mark 11.5" in each direction from centerline, this will be
the inside dimension of your rst two rows of Main Runners.
Measure and mark every 24" till you have laid out the room.
C
L
1
“
/
11
2
Grid Centered
C
L
1
“
/
11
2
C
L
Phone: 605-484-0875
Email: [email protected]
311 Lilly Ln
Yankton, SD 57078
Follow Us:
facebook.com/ceilingconnex
pinterest.com/ceilingconnex
Made in the USA
WALL
“L” BRACKET
3. Fasten every 16" - 24". The corners can either be mitered to 45˚ or
butt jointed.
Butt Jointed
Mitered 45˚
MAIN RUNNER
Grid Centered Layout
Center the rst main runner on the center line of the room.
Measure and mark every 24" till you have laid out the room.
C
24” 24”
Mark remaining measurements using a chalk line.
NOTE: The 24" is from left edge to left edge or right edge to right edge
- Not Left Edge to Right Edge.
L
MAIN RUNNER
Page 2
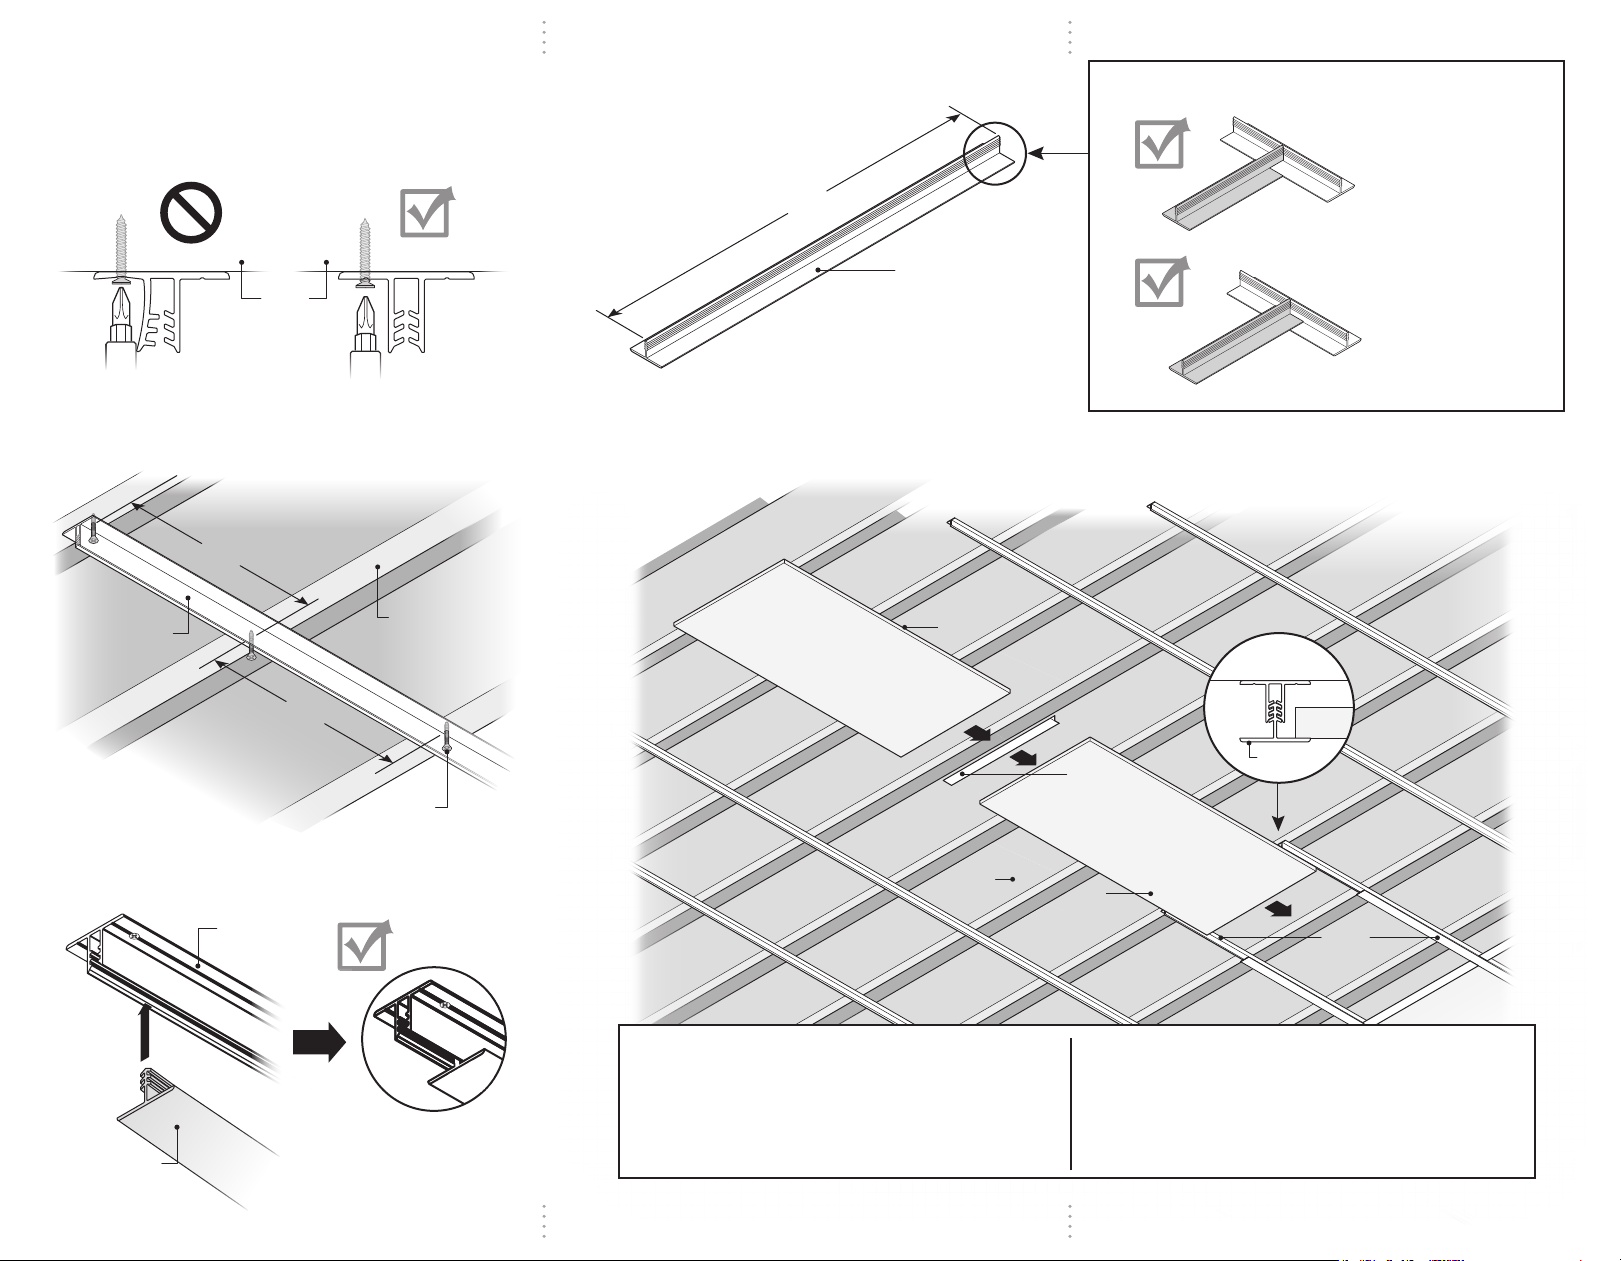
5. Fastening Main Runners can be done with either a
1" sheetrock screw or for quicker installation an air stapler
is sucient.
Do not over tighten screws / staples as it can deform
the plastic.
CEILING
JOIST
7. Cut Cross Tees to 23 3/4" utilizing Lower Support T's.
3
“
/
23-
4
CROSS TEE
Notched
Uncut
NOTE: Ends of Lower
Support T’s may either
be notched or left uncut,
depending upon your
preference.
Fasten Main Runner every 16" - 24" on opposite sides
to provide proper support for the tiles.
16” - 24”
MAIN RUNNER
CEILING JOIST
16” - 24”
1” DRYWALL
SCREW
6. Once Main Runners have been installed, snap in a pair of
Lower Support T's. DO NOT OVERLAP SEAMS.
MAIN
RUNNER
8. Slide in Tile, a Cross Tee and another Tile into the pair of tracks as
shown. Repeat till room is complete.
TILE
CEILING
JOIST
CROSS
TEE
TILE
CEILING JOIST
PAIR OF
TRACKS
TILE
PAIR OF
TRACKS
LOWER SUPPORT T
Every room is dierent. Please use this
instruction manual as a guide but
changes and modifcations may be
required depending on your room and
selected ceiling tile.
If you have any questions or concerns, please call
Phone: 605-484-0875
or visit our website at:
www.ceilingconnex.com
or e-mail us at at:
Email: [email protected]
 Loading...