

VRA VRB
SWA
1
2
SWD
1
2
SWA
1
2
UP
DOWN
OK
CANCEL
POWER
SWC
1
2
3
SWB
1
2
3
Operating instructions
89102RC
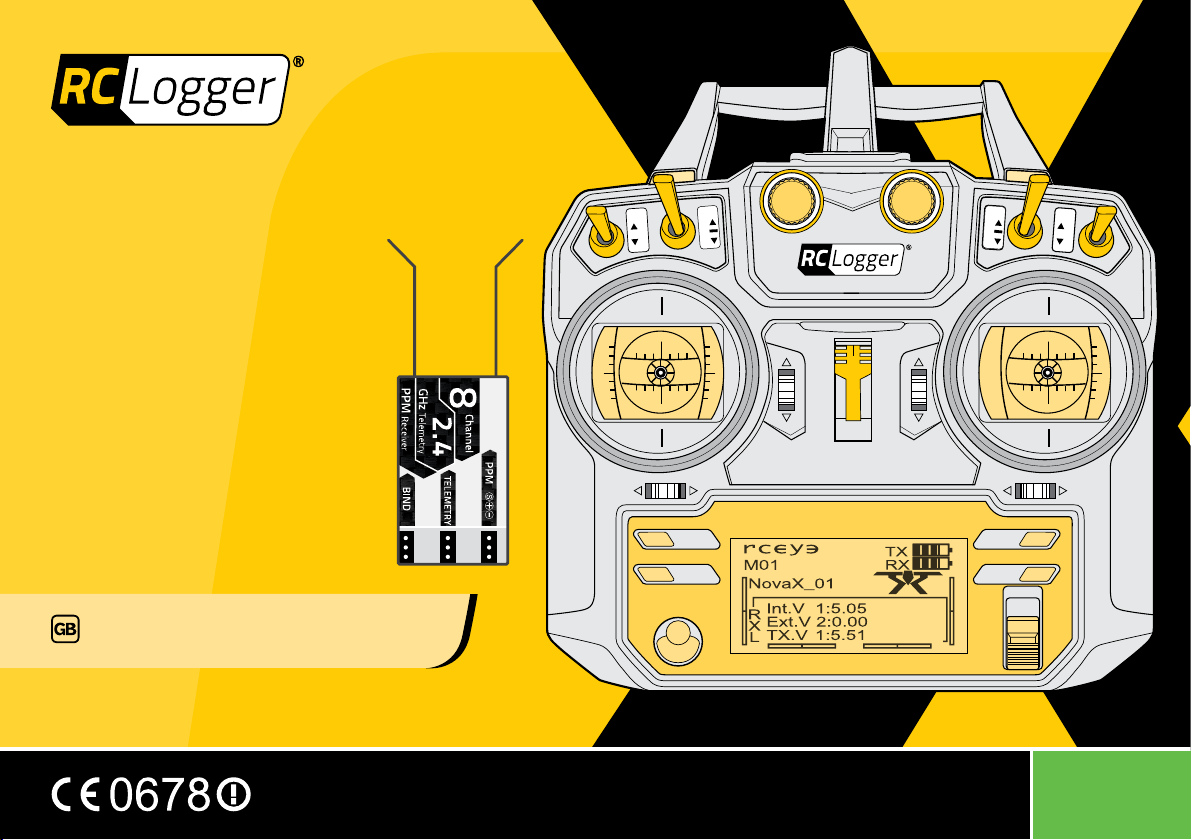
RC Logger R8 Radio System
M2

2

TABLE OF CONTENTS
1. INTRODUCTION ....................................................................5
2. DELIVERY CONTENTS ..........................................................5
3. MODULES .............................................................................5
4. LATEST OPERATING INSTRUCTIONS ..................................6
5. SYMBOLS ..............................................................................6
6. INTENDED USE ....................................................................6
7. SAFETY INSTRUCTIONS .......................................................7
7.1 Persons/Product .................................................................................7
7.2 Radio signal ........................................................................................7
7.3 Before commissioning.........................................................................7
7.4 During operation .................................................................................8
7.5 Batteries ..............................................................................................8
7.6 Miscellaneous .....................................................................................8
8. UNPACKING ..........................................................................8
9. PARTS AND COMPONENTS .................................................9
10. RECEIVER (RX) ....................................................................10
10.1 Bind transmitter and receiver ............................................................10
10.1.1 PPM port on NovaX350 ..................................................10
10.1.2 External power source ....................................................11
10.2 Receiver statuses ............................................................................. 11
11. TRANSMITTER ....................................................................11
11.1 Batteries ............................................................................................11
11.2 Basic functions .................................................................................. 11
11.2.1 Turning the transmitter on and off ...................................11
11.2.2 Home screen ..................................................................12
11.2.3 Main menu ......................................................................12
11.2.4 Backlight .........................................................................13
11.2.5 LCD brightness ...............................................................13
11.3 Telemetry data ..................................................................................13
11.4 System settings.................................................................................13
11.4.1 Selecting a model ...........................................................13
11.4.2 Naming a model ..............................................................13
11.4.3 Copying a model .............................................................13
11.4.4 Resetting a model ...........................................................14
11.4.5 RX setup .........................................................................14
11.4.6 Trainer mode ...................................................................14
11.4.7 Student mode .................................................................15
11.4.8 Timer settings .................................................................15
11.4.9 Alarm settings .................................................................15
11.4.10 Firmware version ............................................................15
11.4.11 Firmware update .............................................................16
11.4.12 Factory reset ...................................................................16
11.5 Functions settings .............................................................................16
11.5.1 Reversing channels ........................................................16
11.5.2 End points .......................................................................16
11.5.3 Display ............................................................................17
3

11.5.4 Auxiliary channels ...........................................................17
11.5.5 Subtrim ...........................................................................18
11.6 Trimming ...........................................................................................18
11.7 Direction of antennas during operation .............................................18
11.8 Channel learning ...............................................................................18
11.8.1 Auxiliary switch SWD ......................................................18
12. MAINTENANCE, CARE AND REPAIR .................................19
12.1 Removing the throttle spring .............................................................19
13. DISPOSAL ............................................................................22
13.1 General .............................................................................................22
13.2 Batteries ............................................................................................22
14. PRODUCT SUPPORT ...........................................................22
15. TECHNICAL DATA ...............................................................22
15.1 Transmitter (Tx) ................................................................................22
15.2 Receiver (Rx) ....................................................................................22
16. DECLARATION OF CONFORMITY ......................................23
17. FCC COMPLIANCE STATEMENT ........................................23
18. LEGAL NOTES .....................................................................23
4

1. INTRODUCTION
Dear customer,
®
Thank you for making the excellent decision to purchase this RC Logger
have a high-quality product with a name that represents outstanding products.
This product complies with the applicable National and European standards and
regulations. We kindly request the user to follow the operating instructions, to preserve
this condition and to ensure safe operation! These operating instructions relate to this
product. They contain important notices on commissioning and handling. Please take this
into consideration when you pass the product on to third parties.
Please keep these instructions for future reference!
All company names and product designations contained herein are trademarks of the
respective owners. All rights reserved.
We wish you a great deal of enjoyment with your new RC Logger
From here onwards the RC Logger R8 Radio transmitter is
simply referred to as »Transmitter and the RC Logger R8
Radio receiver as »Receiver.
product. You now
®
product!
2. DELIVERY CONTENTS
1x Transmitter
1x PPM Receiver
1x PPM cable
1x Telemetry cable
1x Binding cable
1x USB cable (Trainer port to A-type USB plug)
1x Metal plate
1x Operating instructions
3. MODULES
The operating instructions have been designed in a fashion that you as the
end user can easily navigate them and operate the product safely and to
your full satisfaction. For easier handling, we have divided up the operating
instructions/maintenance manuals into different modules.
Each set of instructions is labelled with its corresponding MODULE INDICATOR in the
right bottom corner on the cover page (e.g. M2). These indicators are used when crossreferring to other modules.
Introduction | 5

4. LATEST OPERATING INSTRUCTIONS
ENGLISH:
Please download the latest version of
the operating instructions from our website at
www.rclogger.com. Navigate to the product page and open
the ”Downloads” tab. Click on ”Operating instructions” to
start the download.
DEUTSCH:
Bedienungsanleitung von unserer Website herunter, unter
www.rclogger.com. Navigieren Sie bis zur Produktseite
und öffnen Sie das Register ”Downloads” . Klicken Sie auf
”Operating instructions”, um den Download zu starten.
Bitte laden Sie die neueste Ausgabe der
5. SYMBOLS
RED stands for danger and alert. Read these sections
always to avoid accidents and product damage.
BLUE provides you with additional useful information, and
highlights important facts.
GREEN stands for user safety. GREEN also stands for good
practice, protecting your product from damage.
6. INTENDED USE
Use the »Transmitter to control the »NovaX 350 model quad copter, for which it has been
specically designed. The »Transmitter is solely intented for private use in the model
making area. Do not use it for commercial applications.
Any use other than the one described can damage the device. Moreover, this involves
dangers such as short circuit, re and electric shock, etc. Observe the safety information
under all circumstances! The product must not become damp or wet.
For safety and approval purposes (CE), you must not rebuild and/or modify this product.
If you use the product for purposes other than those described above, the product may
be damaged. In addition, improper use can cause hazards such as short circuiting, re,
electric shock etc. Read the instructions carefully and keep them.
Make this product available to third parties only together
with its operating instructions.
6 | Latest Operating Instructions

7. SAFETY INSTRUCTIONS
Read the operating instructions carefully and especially
observe the safety information. If you do not follow the
safety instructions and information on proper handling
in this manual, we assume no liability for any resulting
personal injury or damage to property. Such cases will
invalidate the warranty/guarantee.
7.1 Persons/Product
> The device is not a toy. Keep it out of the reach of children and pets.
> Do not leave packaging material lying around carelessly. These may become
dangerous playing material for children.
> If it is no longer possible to operate the product safely, take it out of operation and
protect it from any accidental use. Safe operation can no longer be guaranteed if the
product:
» is visibly damaged,
» is no longer working properly,
» has been stored for extended periods in poor ambient conditions, or
» has been subjected to any serious transport-related stresses. The product
must not become damp or wet. It uses delicate electronic components which
are sensitive to temperature uctuations and are optimised for a particular
temperature range. Operating temperatures below 0°C must be avoided.
> Do not place the product under any mechanical stress.
> Handle the product carefully. Jolts, impacts or a fall even from a low height can damage
the product.
> Never expose the product to direct sunlight or excessive heat for an extended period
of time.
> Do not place the »Transmitter on the ground when model and »Transmitter are turned
on. In case the »Transmitter tips over, the motors may accidentally start and the model
take off.
> Do not use the product during rainy weather or thunderstorms, in wet conditions, or
when lightning is expected or present.
7.2 Radio signal
> Maintain a distance of at least 20 cm between the »Transmitter’s antenna and persons.
> Large objects, walls, pillars, etc. may reduce the radio signal quality, which may result
in the loss of control over the model. Avoid ying behind such objects.
> High voltage power lines or communication broadcasting towers may inuence the
quality of the radio signal and lead to signal loss. Keep sufcient distance.
> Do not touch or hold the »Transmitter’s antenna during operating. This may
consequently degrade the quality of the transmitted signal.
> The strongest area of transmission is located at the sides of the antenna. As such, do
not point the antenna directly at the model. You may easily correct this situation by
adusting the angle between antenna and model (e.g. Slightly turn the »Transmitter to
the left or right).
7.3 Before commissioning
> Before every ight, check the functional reliability of the product. Watch out for any
visible damage such as defective plug connections or damaged cables and wires.
> Before you y, make sure the batteries have sufcient capacity. If the batteries are
empty, always replace the complete set.
> Before you turn on the »Transmitter, move sticks and set switches to their neutral or
zero positions.
> Always switch on the »Transmitter rst before connecting the battery to the model.
> Test all controls and ensure proper functioning. If »Transmitter and model support "Fail
Safe" functionality run the necessary tests before every ight.
Safety Instructions | 7

7.4 During operation
> Do not take any risks when operating the model. Your own safety and that of your
environment is solely down to you being responsible when dealing with the model.
> Use the product only if your ability to respond is unrestricted. The inuence of tiredness,
alcohol or medication can cause incorrect responses.
>
Never switch off the »Transmitter while the model is in use. After landing, always disconnect
the ight battery rst and then switch the »Transmitter off.
7.6 Miscellaneous
> Consult an expert when in doubt about operation, safety or connection of the device.
> Maintenance, modications and repairs are to be performed exclusively by an expert
or at a qualied shop.
> If you have questions that remain unanswered by these operating instructions, contact
our technical support service or other technical personnel.
7.5 Batteries
> Correct polarity must be observed while inserting the batteries.
> Batteries should be removed from the device if it is not used for a long period of time to
avoid damage through leaking. Leaking or damaged batteries might cause acid burns
when in contact with skin, therefore use suitable protective gloves to handle corrupted
batteries.
> Batteries must be kept out of reach of children. Do not leave batteries lying around.
There is a risk that children or pets swallow them.
> All batteries should be replaced at the same time. Mixing old and new batteries in the
device can lead to battery leakage and device damage.
> Batteries must not be dismantled, short-circuited or thrown into re. Never recharge
non-rechargeable batteries. There is a risk of explosion!
8 | Unpacking
8. UNPACKING
> Work on a soft and clean mat.
> Open the box, take out all parts and open the polybags. Place all parts on the mat, but
keep them together as packed in the polybags.
 Loading...