

Page 1

OPERATING INSTRUCTIONS – ENGLISH
Supplied by EME Services Ltd
BEFORE USING THE STIMULATOR
1. INTRODUCTION ........................................................................26
2. MEDICAL BACKGROUND ...........................................................27
3. PRECAUTIONARY MEASURES ..................................................... 28
PATIENT INFORMATION
4. OVERVIEW ................................................................................ 29
CONTROL BUTTONS ............................................................................. 29
DISPLAY SYMBOLS ..............................................................................30
5. OPERATION .............................................................................. 31
STEP-BY-STEP USE ...............................................................................31
AUTO STIMULATION MODE ...................................................................33
TIMER .................................................................................................33
PROGRAM PAUSE .................................................................................34
6. REPLACEMENT OF BATTERIES ....................................................35
PROFESSIONAL INFORMATION
7. PROGRAMS .............................................................................. 36
PRESET PROGRAMS ............................................................................. 36
CUSTOM PROGRAMS ...........................................................................38
PROGRAM LOCK .................................................................................. 40
DISABLE THE AUTO FUNCTION ..............................................................40
COMPLIANCE .......................................................................................40
25
ADDITIONAL INFORMATION
8. ACCESSORIES ...........................................................................41
9. CARE INSTRUCTIONS ................................................................ 41
10. TROUBLESHOOTING.................................................................. 42
11. FREQUENTLY ASKED QUESTIONS .............................................. 43
12. TECHNICAL DATA ...................................................................... 44
KEY TO THE SYMBOLS..........................................................................45
13. ELECTRODE PLACEMENT GUIDE .................................... SEE COVER
Page 2

26
1. INTRODUCTION
Supplied by EME Services Ltd
CEFAR Medical AB has been a medical supplier of professional TENS Pain Relief products for more than
30 years. The company was established in Sweden in 1975 and is currently represented in large parts of
the world.
The Cefar stimulators are widely used and endorsed by medical professionals and top athletes around the
world.
TENS is effective, has no side effects and it’s economical. Through clinical research, areas of application
for TENS and EMS are rapidly expanding. Cefar is working actively to further develop the method towards a
natural treatment alternative for the consumer.
More information about TENS (Transcutaneous Electrical Nerve Stimulation), EMS (Electrical Muscle
Stimulation) and our products can be found on our web site: www.cefar.se
CEFAR PRIMO PRO is a dual channel nerve stimulator (TENS) designed for use by both professionals and
home users. It provides relief of a wide range of pains, like back pain and neuropathic pain. The stimulator features 7 preset pain programs and 3 custom programs. Program and amplitude can be individually
set for each channel, which means that two different forms of stimulation may be used simultaneously.
With CEFAR PRIMO PRO all kinds of TENS treatment are covered including mixed frequency stimulation.
Page 3

2. MEDICAL BACKGROUND
Supplied by EME Services Ltd
WHAT IS TENS?
TENS = Transcutaneous Electrical Nerve Stimulation. TENS is an effective method offering Pain Relief.
TENS utilises the nervous system’s own pain relief mechanisms to ease both acute and chronic pain.
WHEN IS TENS USED?
Good results are observed in acute and long-term pain conditions of many kinds, but above all when the
pain originates in joints, the skeleton, muscles, skin, viscera, or nervous system. In some cases, TENS
on its own may be sufficient, and in other cases it may provide a valuable complement to other forms of
treatment.
HOW DOES IT WORK?
With the Pain Relief programs, impulses are sent through the nerves to block the pain impulses. Pain
Relief is usually most efficient during stimulation, but the effect can also last after the program has finished. It also increases the circulation. The Pain Relief programs do not always treat the cause of pain. If
the pain persists, seek medical advice.
WHEN AND HOW SHOULD I USE TENS?
The programs in the CEFAR PRIMO PRO can be used on any occasion when Pain Relief or Muscle
Relaxation is needed. All the programs can be used as often as required. Guidelines for using the preset
treatment programs with indication examples, suggested electrode placements and recommended treatment time are included in this manual.
27
Page 4

28
3. PRECAUTIONARY MEASURES
Supplied by EME Services Ltd
Inspect the equipment prior to use.
•
•
Use the stimulator only as stated in the operating instructions.
•
Only Cefar accessories should be used with the stimulator
WARNING!
•
People with implanted electronic equipment, such as pacemakers and intracardiac defibrillators, must not be treated
with TENS.
•
Pregnant women should not be treated with TENS during the first trimester (12 weeks).
•
Due to the location of the carotid arteries and the carotid bodies, do not stimulate the front or sides of the neck, since
a drop in blood pressure can occur.
•
Stimulation should not take place while the user is connected to high-frequency surgical equipment. It may cause
burn injuries on the skin under the electrodes, as well as problems with the stimulator.
•
Do not use the stimulator in the vicinity of shortwave or microwave therapy equipment, since this may affect the
output power of the stimulator.
•
Keep the stimulator out of reach of children.
CAUTION
•
Stimulate with precaution while treating angina pectoris.
•
The electrodes are only to be placed on healthy skin. Avoid skin irritation by ensuring that good contact is achieved
between electrodes and skin.
•
Do not place electrodes directly over the uterus or connect pairs of electrodes across the abdomen if you are pregnant. The reason is that, theoretically, the current could affect the foetus’s heart (although there are no reports of it
being harmful).
•
If skin irritation should occur, treatment should be temporarily discontinued. If problems continue, contact your
health care provider. Hypersensitivity to tape and gel can occur in isolated cases. The problem usually disappears
when the tape or gel is changed to another type.
•
Do not use electrodes with a surface < 5 cm2, as there will be a risk of suffering a burn injury. All Cefar electrodes fulfil
this requirement. Caution should always be exercised with current densities > 2 mA/cm2.
•
Observe caution when using electrotherapy at the same time as the patient is connected to monitoring equipment
with body worn electrodes. The stimulation might interfere with the signals to the monitoring equipment.
•
Never open the battery cover during stimulation in order to avoid electrical shock.
•
Turn off the stimulation before removing the electrodes from the skin. If an electrode comes off, turn off the stimulation before picking it up. Getting electrical stimulation through the fingers is unpleasant but not harmful.
•
Observe caution when stimulating in the immediate vicinity of cellular phones that are switched on, since this may
affect the output power of the stimulator.
•
Observe caution if you use the stimulator while driving, unintentional stimulation changes might extract focus from the
driving and create a hazardous situation.
Page 5
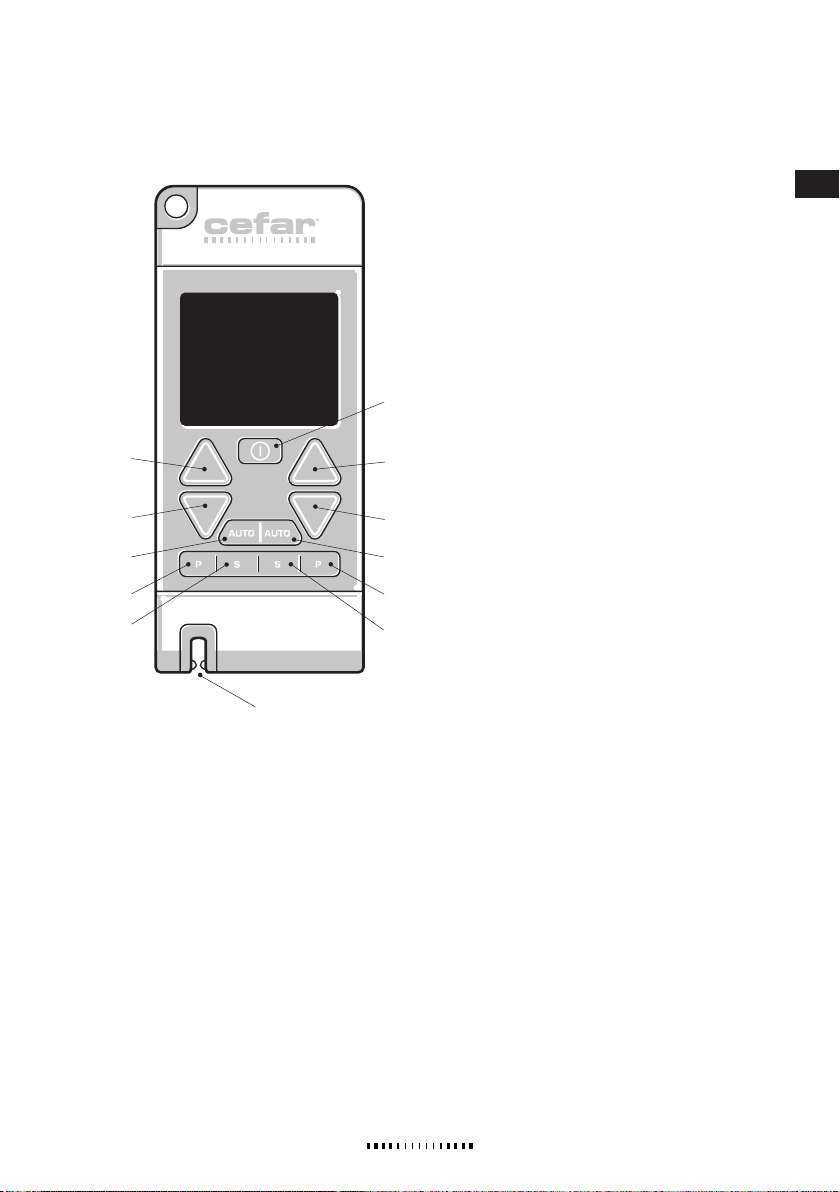
4. OVERVIEW/CONTROL BUTTONS
1
2
3
3
4
4
5
5
6
6
2
7
Supplied by EME Services Ltd
1. ON/OFF
· Turns the stimulator on and off.
· Turns the stimulator off even when the key lock
is activated.
· Can be used for terminating the stimulation
at all times.
29
2. INCREASE (left and right channel)
· Increases the amplitude (intensity of stimulation).
Press and hold the button to increase the amplitude
continuously.
Note! Always increase the amplitude cautiously.
· Terminates AUTO stimulation mode.
· Increases the number of minutes when setting the
timer.
· Used when turning the program lock on and off (left
button).
· Scrolls through choices in programming mode.
3. DECREASE (left and right channel)
· Decreases the amplitude (intensity of stimulation).
Press and hold the button to decrease the amplitude
continuously.
· Deactivates the key lock.
· Terminates AUTO stimulation mode.
· Decreases the number of minutes when setting the
timer.
· Used when turning the program lock on and off (left
button).
· Scrolls through choices in programming mode.
4. AUTO (left and right channel)
· Starts the AUTO test mode.
· Confirms the selected amplitude level in AUTO test
mode.
5. PROGRAM (left and right channel)
· Selects a program (1-10).
· Pauses an ongoing program.
· Used when activating/deactivating the program lock
(left button).
6. PROGRAMMING/CONFIRMATION (S=SET)
(left and right channel). SEE
CHAPTER CUSTOM PROGRAMS.
· Turns the stimulator into programming mode for custom programs 8-10 when pressed for 2 seconds.
· Confirms settings in programming mode.
· Initiates the timer setting when pressed during active
stimulation.
7. CABLE HOLDER
Page 6
30
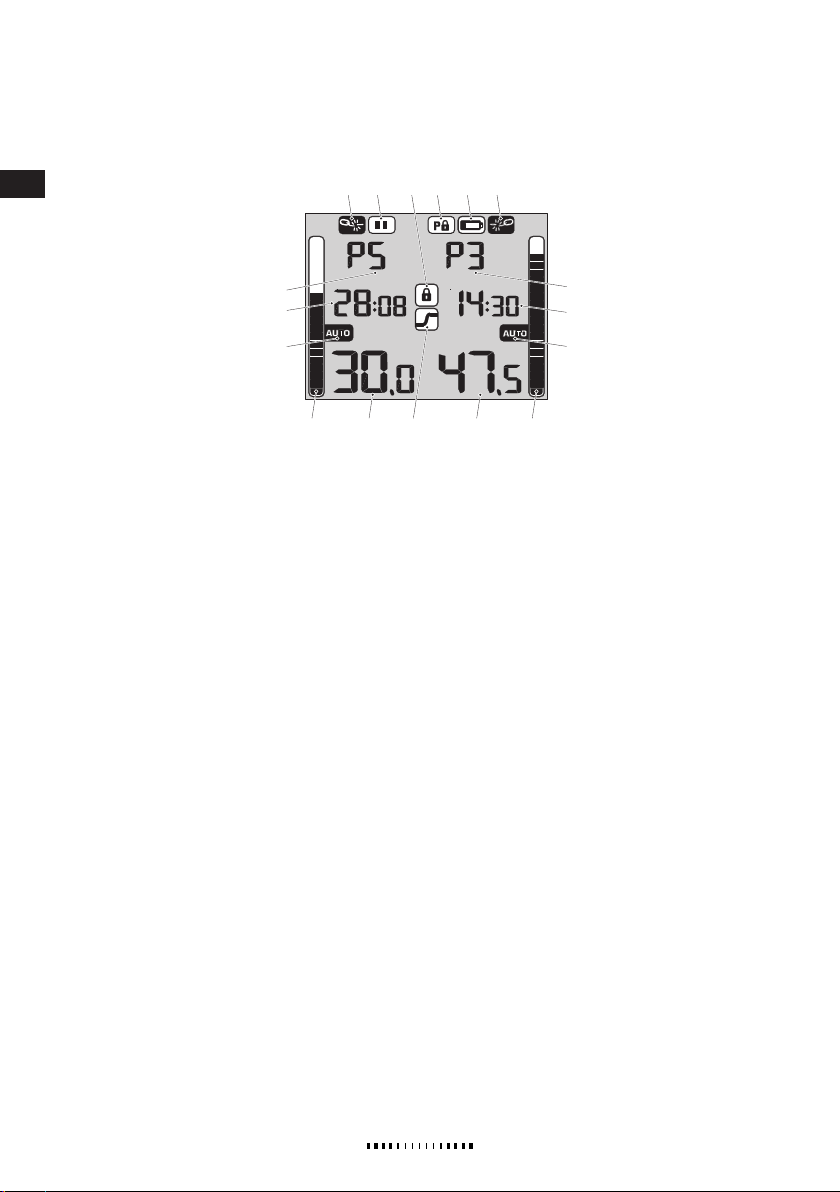
4. OVERVIEW/DISPLAY SYMBOLS
1 2 3 4 5 1
109 911 10
7
6
8
7
8
6
Supplied by EME Services Ltd
1. BROKEN CIRCUIT
Broken circuit. The reason for a broken circuit may be too high resistance or cable breakage. See chapter
TROUBLESHOOTING.
2. PAUSE
Paused program.
3. KEY LOCK
Activated key lock. The key lock is automatically activated if no key is pressed for 10 seconds.
Deactivate the key lock by pressing the left or right DECREASE button.
4. PROGRAM LOCK
Activated program lock.
5. BATTERY STATUS
Empty batteries. This symbol is shown when the batteries are almost empty.
6. PROGRAM NUMBER (left and right channel)
Selected program number.
7. REMAINING TIME (left and right channel)
Remaining program time in minutes and seconds. Time is flashing during timer setting.
8. AUTO STIMULATION MODE (left and right channel)
Activated automatic amplitude setting. “AUTO” is flashing during test mode and steady during stimulation.
9. AMPLITUDE BARGRAPH (left and right channel)
Selected amplitude as a bargraph.
10. AMPLITUDE LEVEL (left and right channel)
Selected amplitude in mA (not shown in Auto stimulation mode).
11. HIGH/LOW FREQUENCY
High/Low frequency indication for mixed frequency programs. The upper part of the symbol is flashing during high
frequency and the bottom part during low frequency.
Page 7
5. OPERATION
AUTOPAUTO
S
Supplied by EME Services Ltd
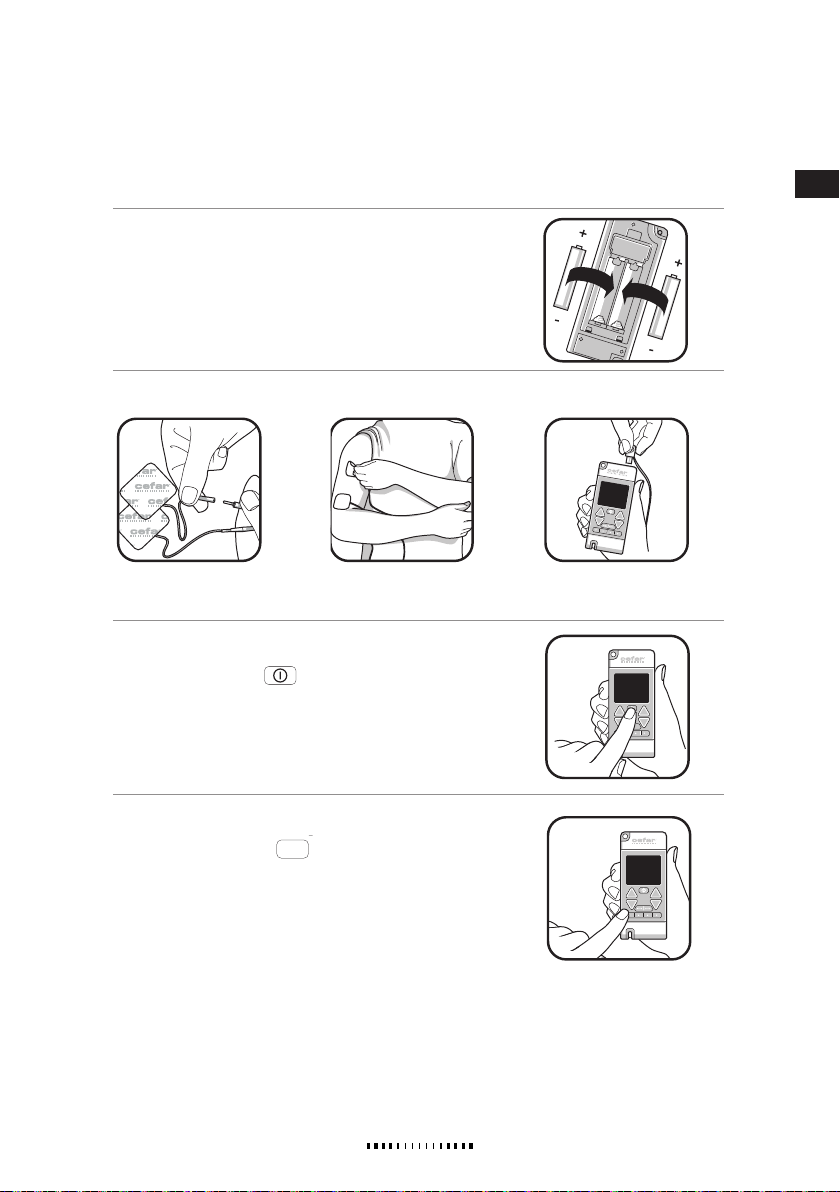
STEP-BY-STEP USE
1. INSERT THE BATTERIES
Insert the batteries (see chapter REPLACEMENT OF BATTERIES).
2. ATTACH THE ELECTRODES
A. Connect the electrodes to
the cable.
3. SWITCH THE STIMULATOR ON
Press the ON/OFF button
ing the stimulation at all times, even when the key lock is activated.
Always switch the stimulation off before removing electrodes from the
skin.
B. Attach the electrodes to
your body.
. This button can be used for terminat-
31
C. Connect the cable to the
CEFAR PRIMO PRO.
4. SELECT A PROGRAM (1-10)
Press the PROGRAM button
edly until the program of your choice is shown on the display. If you want
to use both channels, then select a program for the other channel. Any
combination of programs is possible except for Program 7, which must
be selected for both channels.
Note!
When selecting programs the amplitude must be set to 00.0 mA
for both channels.
For further information on the programs, see section PRESET PROGRAMS.
for the left or right channel repeat-
Page 8
32
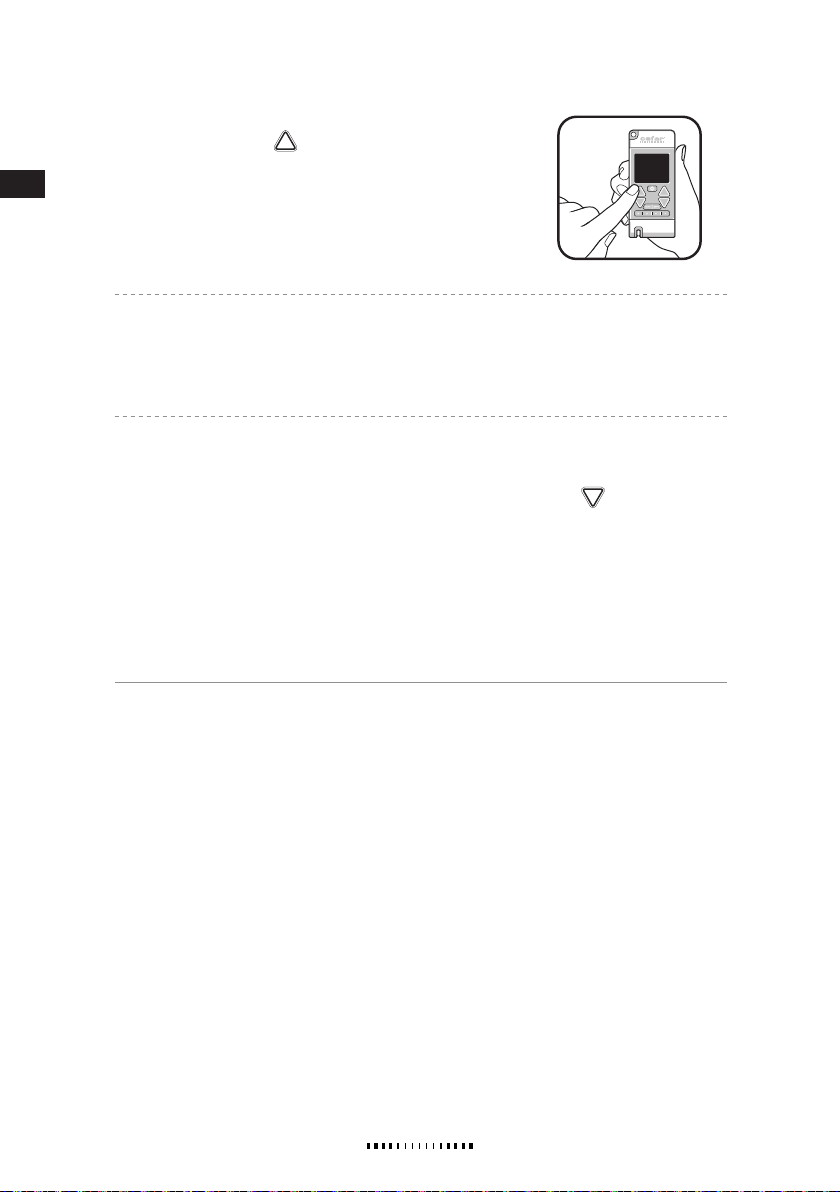
5. START THE STIMULATION
Supplied by EME Services Ltd
Press the INCREASE button
a comfortable level of stimulation. Press and hold the button to
increase the amplitude continuously.
Note!
Always increase the amplitude cautiously!
Note! Program 5 (mixed frequency): Set the amplitude for conventional stimulation (80 Hz) when the
upper part of the high/low frequency symbol is flashing. When the stimulator after 3 seconds switches over
to burst stimulation (2 Hz) and the bottom part of the symbol is flashing, set the amplitude for this frequency. The frequencies switch every three seconds.
The treatment time is preset, but can be changed by using the timer function, see section TIMER.
An automatically activated key lock prevents unintentional changes during treatment. The key lock is activated if no button is pressed for 10 seconds. Press any of the DECREASE buttons
key lock.
When the program is finished, Remaining time “00:00” is flashing on the display.
The last used programs are saved when the stimulator is turned off and then pre-selected the next time the
stimulator is turned on.
The stimulator turns off after 5 minutes of inactivity to spare batteries.
for each channel until you reach
to deactivate the
Page 9
AUTO STIMULATION MODE
AUTO
AUTO
AUTO
AUTO
AUTO
AUTO
S
Supplied by EME Services Ltd
To provide a pain relieving effect, the level of stimulation should be perceived as a little bit stronger than
the pain intensity. Since the body initially adapts to the set level of stimulation, it is often required to
adjust the amplitude a couple of times to reach the optimal level of stimulation.
By using the Auto stimulation mode the amplitude is automatically adjusted, and the optimal level is
reached after a few minutes of stimulation.
To use the Auto stimulation mode:
Follow steps 1-4 in the section STEP-BY-STEP USE.
5. START THE AUTO TEST
Press the AUTO button
the amplitude increases gradually.
6. FINISH THE AUTO TEST
Press the AUTO button
If you press AUTO too late, or want to start again for any reason, press the AUTO button again to start over.
7. REPEAT THE AUTO TEST FOR THE OTHER CHANNEL
If you want to use the Auto stimulation mode for both channels, repeat steps 5-6 for the other channel.
8. THE STIMULATION STARTS
The program starts after a few seconds, and the amplitude is automatically adjusted to an optimal level of
stimulation.
Even if you use Auto stimulation mode, you can increase or decrease the amplitude at any time by pressing
the INCREASE or DECREASE buttons
matic amplitude setting is lost.
for the left or right channel. “AUTO” starts flashing on the display, and
again when you feel the stimulation at a comfortable level.
until the stimulation feels pleasant. If doing so, the auto-
33
TIMER
You have the option to change the timing from “- -“ to 60 minutes. If you choose to stay on “- -“, the stimulation will go on until you stop the stimulation manually. The preset treatment time for Program 1–5 and 7
is set to “- -“ minutes and for Program 6 to 10 minutes, but an integrated timer allows you to set the treatment time yourself.
When setting the timer, use the left side buttons of the stimulator for the left channel and the right side
buttons for the right channel.
To set the timer:
1. Select a program and start the stimulation, see section STEP-BY-STEP USE.
2. Press the PROGRAMMING/CONFIRMATION button
function.
on the active channel to initiate the timer
Page 10
34
3. Increase the time by pressing the INCREASE button
AUTO
AUTO
S
AUTOPAUTO
S
AUTOPAUTO
S
Supplied by EME Services Ltd
you press the button. Decrease the time by pressing the DECREASE button
by 1 minute each time you press the button. The time is flashing on the display, while setting the timer.
4. Press the left/right PROGRAMMING/CONFIRMATION button
. The time is increased by 1 minute each time
. The time is decreased
to confirm the timer setting.
PROGRAM PAUSE
You can pause the programs up to 5 minutes.
To pause a program:
1. If key lock is on, press any of the DECREASE buttons
2. Press any of the PROGRAM buttons
to pause the program for both channels.
Start stimulation again by pressing any of the PROGRAM buttons
If the channels are paused for more than five minutes, the stimulator turns off automatically to spare batteries.
to deactivate it.
.
Page 11
6. REPLACEMENT OF BATTERIES
Supplied by EME Services Ltd
A battery symbol is shown on the display when the batteries are almost empty . As long as the
stimulator is working normally you can continue the treatment. When stimulation feels weaker than usual or
the stimulator turns off, it is time to replace the batteries.
If the stimulator is not used for some time (approximately 3 months), the batteries should be removed from
the stimulator.
The stimulator operates on either two non-rechargeable 1.5 V AA batteries or two rechargeable 1.2 V AA
batteries, recharged in a separate charger.
The endurance of the batteries depends on the amplitude and number of channels activated during a program being used. For example, if you use one channel at P1 with an amplitude of 30 mA the non-rechargeable batteries last approximately 11 hours and rechargeable 7 hours.
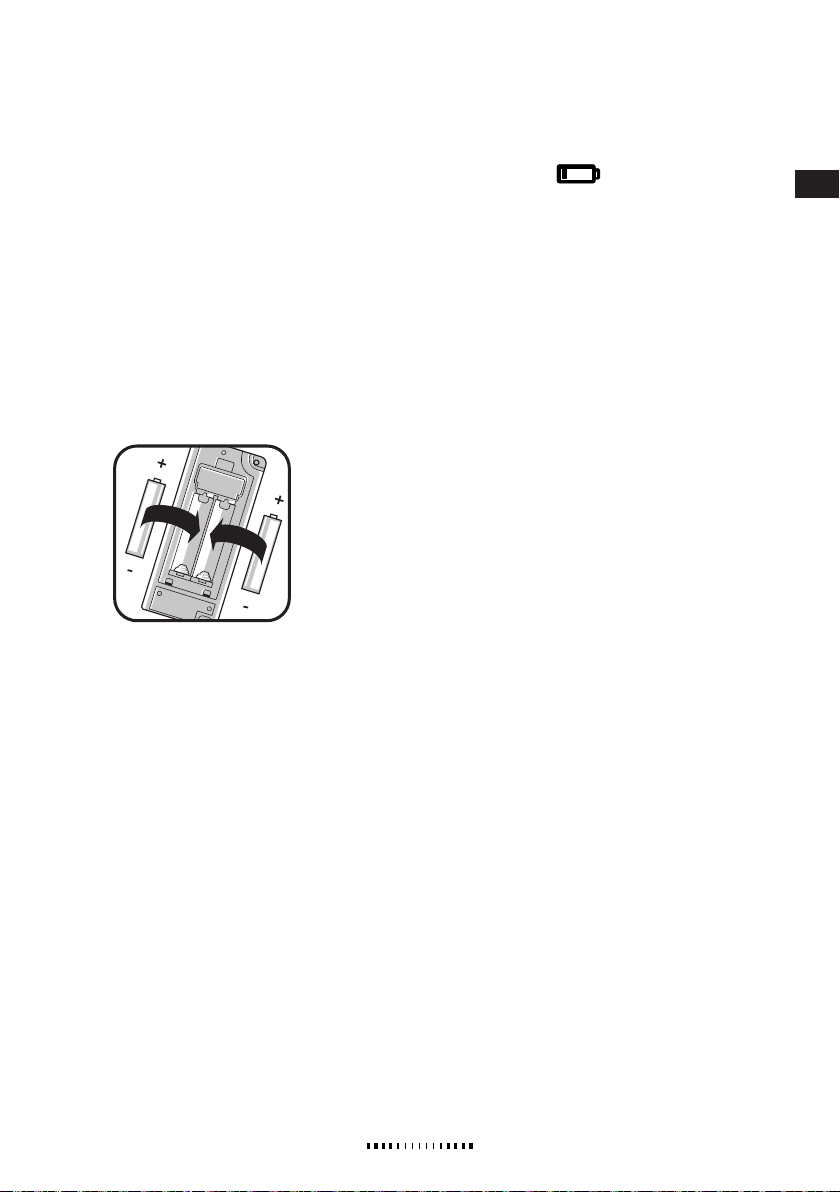
REPLACING THE BATTERIES
1. Turn off the stimulator.
2. Locate the battery compartment on the back of the stimulator.
3. Remove the battery cover by pressing the mark at the top firmly and sliding the cover downwards.
4. Remove the batteries.
5. Insert the new batteries correctly according to the polarity markings (+ and –) inside the battery compartment, see picture.
6. Replace the battery cover.
7. Dispose of the exhausted batteries in accordance with local and national regulations.
NOTE! Non-rechargeable batteries may not be charged due to the risk of explosion.
35
Page 12
36
7. PROGRAMS/PRESET PROGRAMS
Supplied by EME Services Ltd
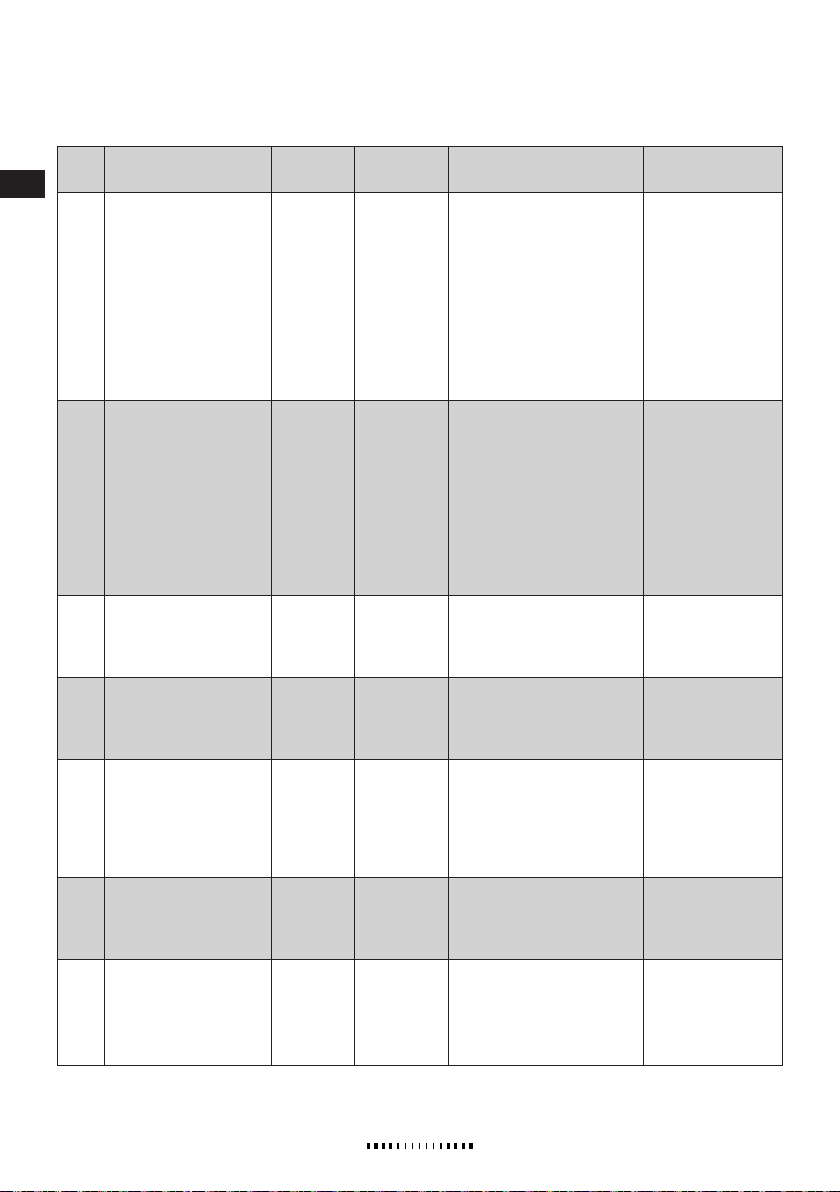
No. Program name Frequency Pulse duration Treatment time Preset time Program description Examples of indications/
Conventional TENS 80 Hz 180 µs No limit (minimum 30 minutes).
1
– – minutes
Burst TENS 2 Hz 180 µs 20–45 minutes, 3 times a day.
2
Modulated pulse dura-
3
tion stimulation
Treating sensitive areas/
4
Facial treatment
Mixed-frequency TENS 80 Hz/
5
Nausea treatment 10 Hz 180 µs About 10 minutes per session.
80 Hz 70–180 µs No limit (minimum 30 minutes).
80 Hz 60 µs No limit (minimum 30 minutes).
180 µs Up to 3 hours per day.
2 Hz
6
CEFAR Flow TENS 80 Hz 70–180 µs No limit (minimum 30 minutes)
Remember that Burst TENS can
cause muscle soreness.
Sessions can be given as often
as every other hour or as little as
three times a day.
7
– – minutes
– – minutes
– – minutes
– – minutes
10 minutes Program 6 is specially designed for treating nausea. Place the black electrode on
– – minutes
Page 13
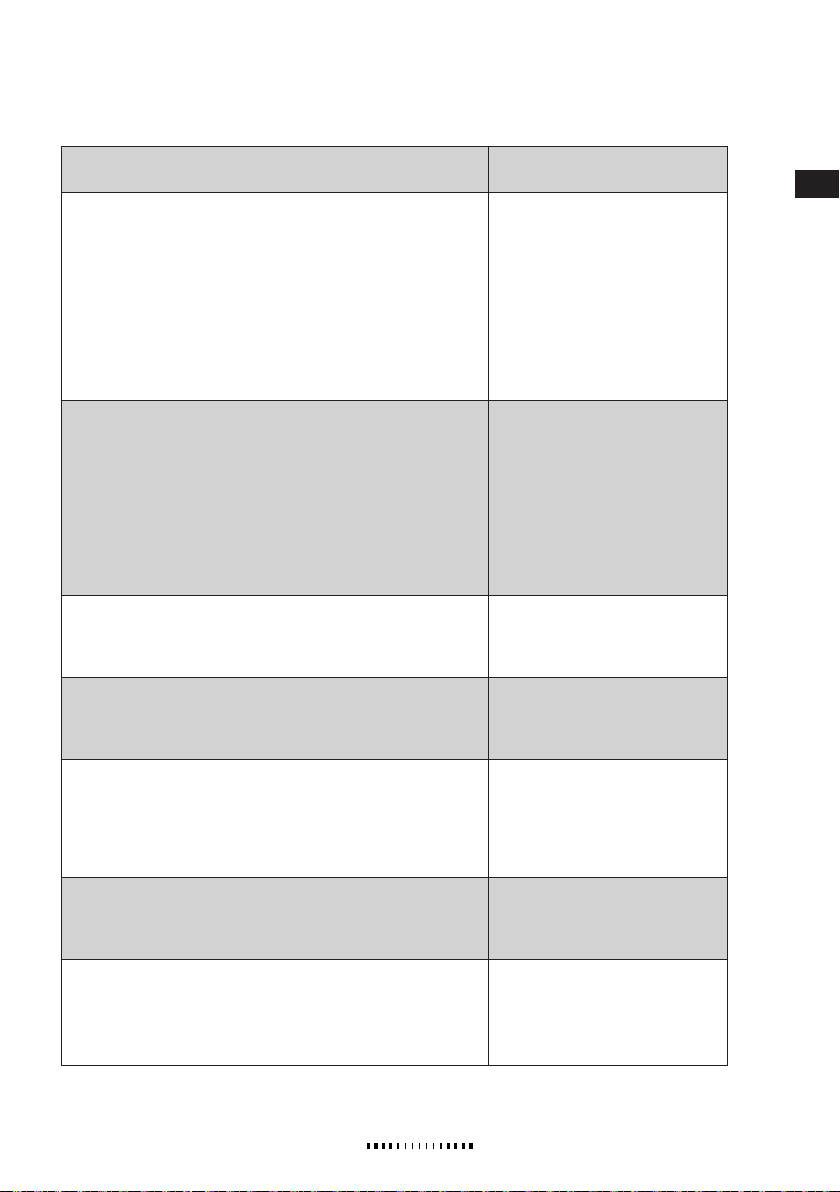
Each program is described with the indications it is best suited to treat, how the electrodes should be placed, and how long the treat-
Supplied by EME Services Ltd
ment should last. To each example of indication is at least one Electrode Placement number, which refers to the suggested electrode
placements shown in the cover of the manual.
Conventional TENS (high-frequency stimulation) is the first choice for both acute
and long-term pain, both neurogenic and nociceptive. Conventional TENS is
based on the Gate Control theory, which states that electric stimulation of A-beta
fibers inhibits impulse transfer in the pain pathways.
As a rule, the electrodes should be placed on or near the painful area, or over
an area segmentally related to the painful area. Adjust the amplitude so that
the stimulation gives strong, but pleasant paraesthesia – tingling. When using
high-frequency stimulation, it’s important to ensure that the patient has normal
sensory of touch in the area where the electrodes are placed.
Burst TENS (low-frequency stimulation) is usually most effective for radiating
(projected) pain in the arms and legs (rhizopathy), for conditions with reduced
or changed sensory of touch, for deep muscular pain, or when the post-treatment effect of Conventional TENS is too short. Burst TENS treatment alleviates
pain by stimulating muscles to release the body’s own morphine-like substances,
endorphins.
Place the electrodes on a muscle in the painful area so that a visible contraction
occurs, or on acupuncture points in the painful area. The stimulation should feel
pleasant and give visible muscle contractions. Remember that the patient often
feels the stimulation clearly before contractions become visible.
Modulated pulse duration stimulation is a type of high-frequency stimulation
where the pulse duration varies continuously. This can cause an undulating sensation, which may be more pleasant than a constant pulse duration. Use program
3 for pain alleviation and a massage effect on muscles like the trapezius.
Program 4 has a shorter pulse duration than the other programs. A short pulse
duration is suitable for treating sensitive, nerve-rich areas like the face and high
up on the neck. With a shorter pulse duration the amplitude can be increased,
which makes it easier to find the right level without the patient experiencing pain.
Mixed frequency stimulation is also called Han stimulation (3 sec at 2 Hz and 3
sec at 80 Hz). Stimulation frequencies switch every three seconds, giving a combination of high- and low-frequency stimulation, which can offer a more effective
treatment.
Place the electrodes as you would for low-frequency stimulation – on a muscle in
the painful area.
acupuncture point PC6 (inside of the wrist) and the red one on acupuncture point
TE5 (outside of the wrist).
Electrodeplacement no.
Neck pain ..........................................3
Shoulder pain ....................................4
Elbow pain .........................................8
Rheumatic pain .............................. 10
Fractured rib ................................... 16
Lumbago ..................................13, 14
Menstrual pain ............................... 17
Phantom limb pain .........................18
Hip pain ......................................... 20
Osteoarthritic pain in the knee.. 22, 23
Wound healing ................................ 24
Mononeuropathy ............................. 11
Central pain .................................. 6, 7
Cervical rhizopathy .............................5
Sciatica ..........................................19
Knee pain ....................................... 23
Trapezius pain ..........................12, 25
Lumbago ..................................13, 14
For more examples, see Program 1.
Tension type headache ......................1
Facial pain .........................................2
Neck pain ..........................................3
Postherpetic neuralgia .................... 15
Neck pain ..........................................3
Shoulder pain ....................................4
Lumbago ..................................13, 14
Hip pain ......................................... 20
Thigh pain ...................................... 21
Postoperative nausea.........................9
Chemotherapy-induced nausea ..........9
37
Always use 2 channels and 4 electrodes with Program 7. A modulated pulse duration stimulation is obtained, but since the channels are alternately active, a massaging, pumping effect is experienced.
Place the electrodes as for high-frequency stimulation when a pain relieving and
massaging effect is desired.
Trapezius pain ..........................12, 25
Lumbago ........................................ 14
Thigh pain ....................................... 26
Shoulder pain ....................................4
Page 14
38
CUSTOM PROGRAMS
AUTOPAUTO
S
AUTO
AUTO
S
AUTO
AUTO
S
AUTO
AUTO
S
Supplied by EME Services Ltd
With the CEFAR PRIMO PRO it is possible to create and store three custom programs for individual needs.
To create a custom program follow the programming procedure below. To use a custom program, follow the
instructions in the section STEP-BY-STEP USE. The program time is preset to 30 minutes but can be changed
with the timer function, see section TIMER.
Programming
Use the left side buttons of the stimulator to do the programming for the left channel and the right side
buttons for the right channel.
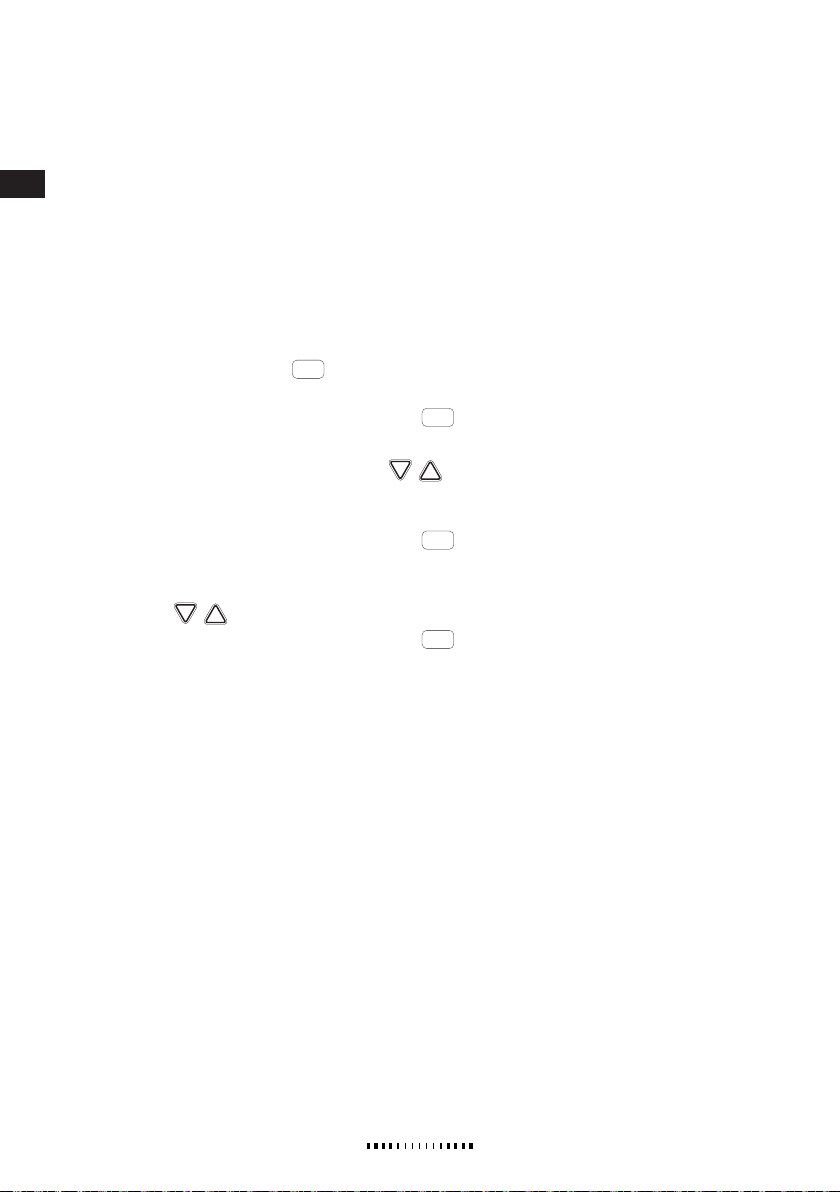
1. Press the PROGRAM button
one of these programs.
2. Press the PROGRAMMING/CONFIRMATION button
mode.
3. Press the INCREASE (OR DECREASE) button
alternate on the display: C, B, PWM, FM, MF. The programming chart below shows the setting possibilities for each stimulation type.
4. Press the PROGRAMMING/CONFIRMATION button
are now moved to the next stage in the programming procedure (see the programming chart).
5. A preset value is shown on the screen, but you can change it by pressing the INCREASE (OR DECREASE)
button
. The valid range for this value is shown in the programming chart.
6. Press the PROGRAMMING/CONFIRMATION button
the next stage (if any) in the programming procedure (see the programming chart).
7. Repeat step 5 and 6 until the value in the last stage is set.
8. The programming procedure is finished and you will automatically exit the programming mode. The new
program is now selected in the channel you used for programming and ready for use.
The program is saved for future use and can be used on both channels.
A custom program can be changed by redoing the programming.
repeatedly until Program 8, 9 or 10 is shown on the display. Select
for 2 seconds to enter the programming
repeatedly to see the different stimulation types
to confirm your choice of stimulation type. You
to confirm your setting. You are now moved to
Page 15
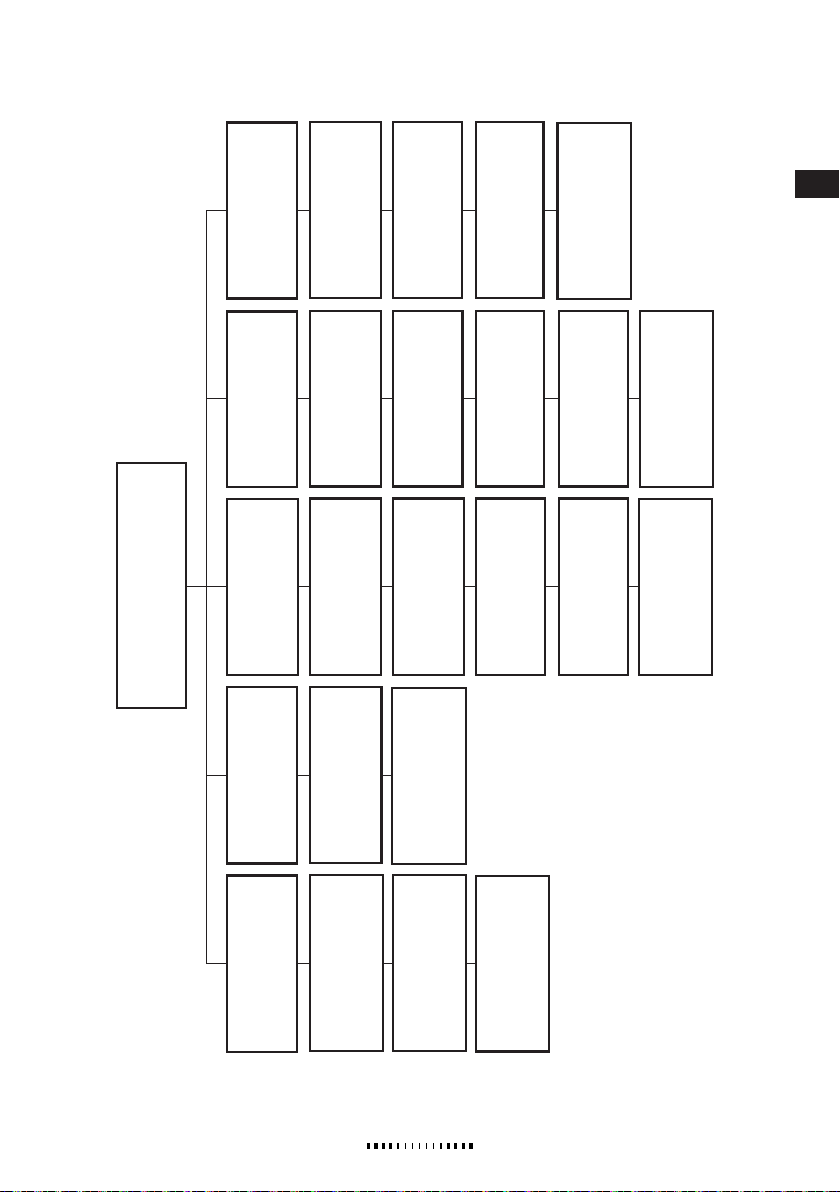
(MF)
Supplied by EME Services Ltd
Mixed frequency
39
– – min.
Time
1-60, – – min.
Preset:
Range:
Preset: 2 Hz
Frequency 1 (Burst)
Frequency 2
Range: 1–5 Hz
Preset: 80Hz
Range: 6–120 Hz
Stimulation time
Preset: 3 s
Range: 1–10 s
P8, P9, P10
Programming
CEFAR PRIMO PRO
(FM)
Frequency
modulation
(PWM)
modulation
Pulse width/duration
(B)
Burst
(C)
Conventional
50–300 µs
Pulse duration
Preset: 180 µs
Range:
Frequency
Preset: 80 Hz
Range: 2–120 Hz
Frequency
Preset: 2 Hz
Range: 1–5 Hz
Frequency
Preset: 80 Hz
Range: 2–120 Hz
Frequency 1
Preset: 20Hz
Preset: 70 µs
Pulse duration 1
– – min.
Time
Preset:
180 µs
Pulse duration
Preset:
Range: 2–120 Hz
50–300 µs
Range:
1-60, – – min.
Range:
50–300 µs
Range:
Frequency 2
Pulse duration 2
Time
Preset: 40Hz
Range: 2–120 Hz
50–300 µs
Preset: 180 µs
Range:
– – min.
Preset:
1-60, – – min.
Range:
Modulation time
Modulation time
– – min.
Time
Time
1-60, – – min.
Preset:
Range:
– – min.
1-60, – – min.
Preset:
Range:
Preset: 5 s
Range: 5–15 s
Preset: 3 s
Range: 1–10 s
Page 16
40
AUTOPAUTO
S
AUTOPAUTO
S
AUTOPAUTO
S
AUTOPAUTO
S
AUTOPAUTO
S
AUTOPAUTO
S
AUTOPAUTO
S
PROGRAM LOCK
Supplied by EME Services Ltd
The stimulator can be locked to prevent changing of programs.
To activate/deactivate the program lock:
1. Select the program you want to lock/unlock, see section STEP-BY-STEP USE.
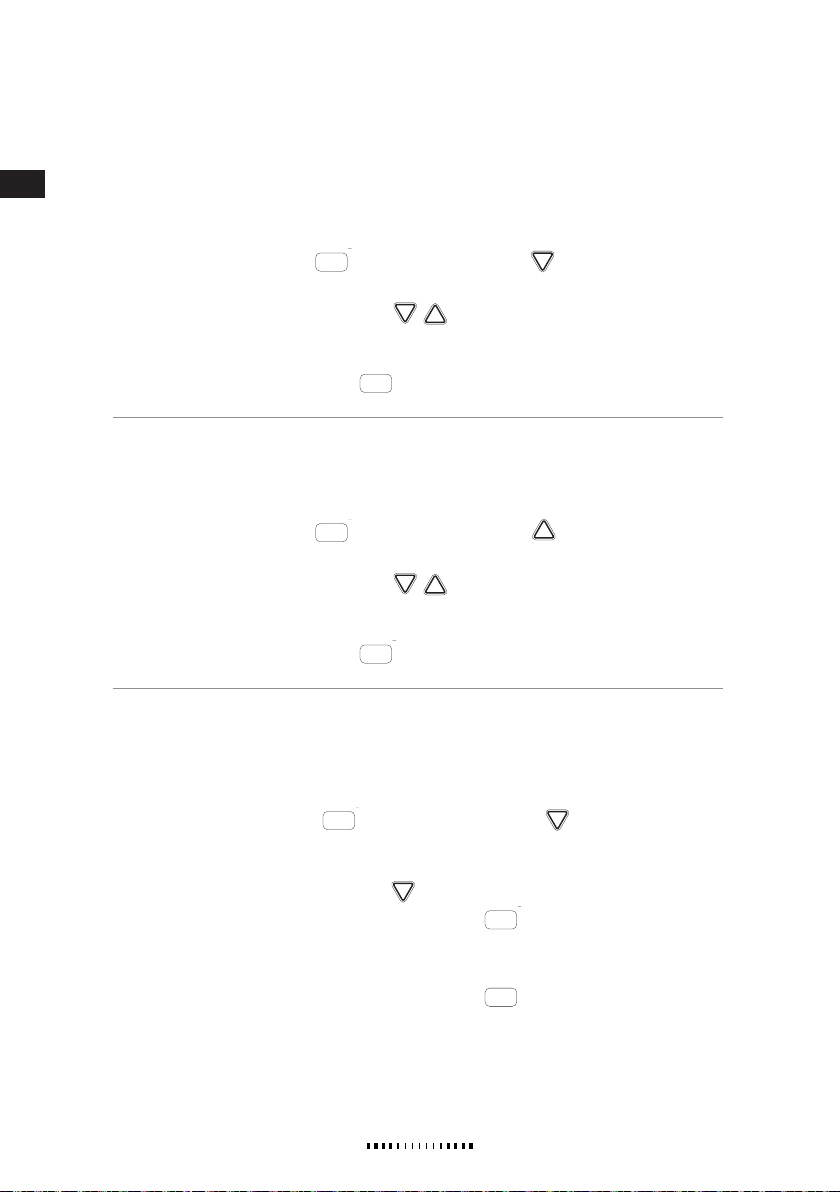
2. Press the left PROGRAM button
and the left DECREASE button
simultaneously for 2
seconds.
3. Press the left INCREASE or DECREASE button
. “ON” is shown on the left side of the display
when activating the program lock and “OFF” when deactivating it. (The button toggles between ON and
OFF).
4. Press the left or right PROGRAM button
to finish the program lock setting.
DISABLE THE AUTO FUNCTION
The stimulator can be locked to disable the AUTO function.
To enable/disable the auto function:
1. Press the left PROGRAM button
and the left INCREASE button
simultaneously for 2
seconds.
2. Press the left INCREASE or DECREASE button
. “ON” is shown on the left side of the display
when the auto function is enabled and “OFF” when the function is disabled. (The button toggles between
ON and OFF).
3. Press the left or right PROGRAM button
to finish the setting.
COMPLIANCE
Compliance gives you the possibility to monitor the use of the stimulator:
1. Turn the stimulator ON.
2. Press the right PROGRAM button
seconds.
3. The left side of the display shows the usage time in hours and the right side in minutes. To reset the
usage time, press the right DECREASE button
4. Wait for 5 seconds or press the left or right PROGRAM button
5. The left side of the display shows the total usage time in hours and the right side in weeks. The total
usage time cannot be reset.
6. Wait for 5 seconds or press the left or right PROGRAM button
and the right DECREASE button
for 2 seconds.
.
to exit compliance mode.
simultaneously for 2
Page 17
8. ACCESSORIES
Supplied by EME Services Ltd
The electrodes will eventually wear out and need to be replaced. It is recommended to replace the electrodes after approximately 20-40 times of usage.
For purchase information, contact your Cefar dealer or visit www.cefar.se.
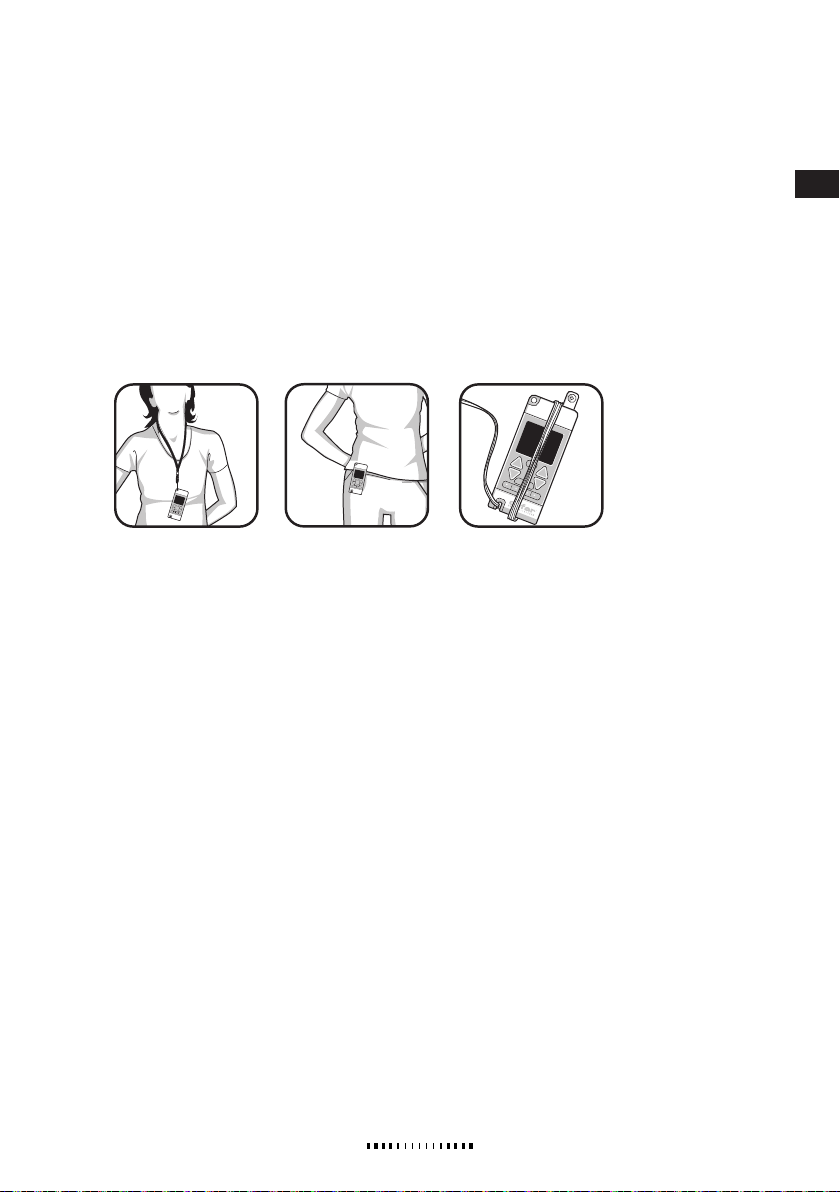
CEFAR PRIMO PRO comes with a neck strap and a belt clip, allowing you to wear the stimulator around
your neck or on your belt and have your hands free during treatment.
The cables are best preserved if left attached to the stimulator between sessions.
9. CARE INSTRUCTIONS
Taking care of and cleaning the Cefar equipment is simple with the following instructions:
Keep stimulator and accessories in the original case when they are not in use. It may, however, be
•
practical to allow the electrodes to remain on the body between treatments. Carbon rubber electrodes
can generally remain for 2–3 hours without the electrode gel drying out (does not apply to adhesive
gel). They must then be taken off, washed, and dried before being applied again. This is especially
important for persons with sensitive skin. In connection with stimulation, make sure that the electrodes
are firmly in place.
•
When using carbon rubber electrodes, use plenty of electrode gel and avoid drying out by applying tape
around all the edges of the electrodes. Rinse the carbon rubber electrodes and the skin with water after
use. Do not use detergent for the electrodes.
Self-adhesive multi-use electrodes are re-moistened if necessary with a few drops of water and kept
•
air-tight (in a plastic bag) on protective paper when they are not in use.
•
Never expose the stimulator to water. Wipe it off with a damp cloth if necessary.
•
Do not jerk cables or connections.
•
The cables are best preserved if left attached to the stimulator between sessions.
41
Page 18
42
10. TROUBLESHOOTING
Supplied by EME Services Ltd
THE STIMULATION DOES NOT FEEL THE SAME AS USUAL
· Check that all settings are correct (see section STEP-BY-STEP-USE) and make sure that the electrodes are
correctly placed.
· Slightly change the position of the electrodes.
THE STIMULATION FEELS UNPLEASANT
· The skin is irritated. For advice on skin care, see chapter PRECAUTIONARY MEASURE.
· The electrodes begin to lose their stickiness and do not stick properly to the skin. Moisten the adhesive
surface with a few drops of water before placing on the skin.
· The electrodes are worn out and need to be replaced.
· There is insufficient electrode gel on the carbon rubber electrodes.
· Slightly change the position of the electrodes.
THE STIMULATION FEELS WEAK OR NOT AT ALL
· Check if the batteries need to be replaced, see chapter REPLACEMENT OF BATTERIES.
· Electrodes are too old and need replacement.
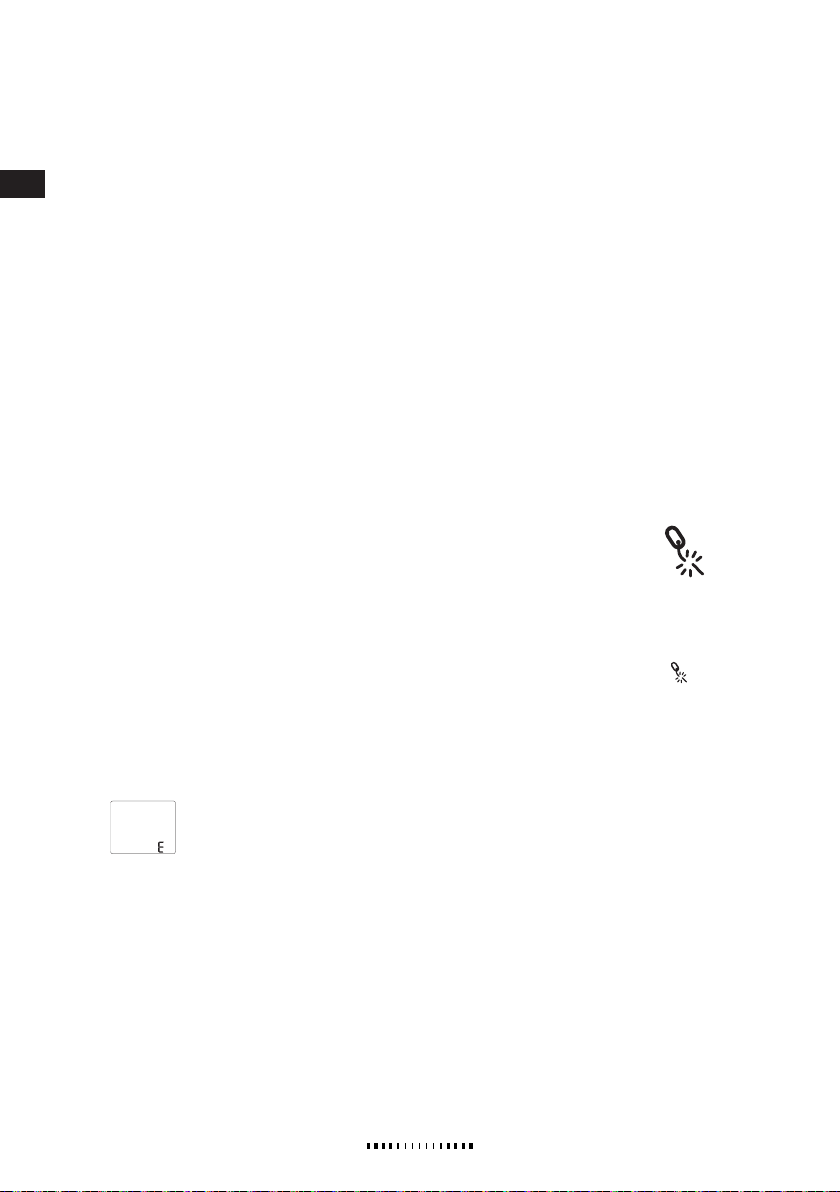
THE BROKEN CIRCUIT SYMBOL IS SHOWN ON THE DISPLAY SYMBOL
The broken circuit symbol indicates that the resistance is too high, or that a cable is broken.
· A too high resistance can be caused by a bad connection between the electrodes and your skin, or that the
electrodes need to be replaced.
· A cable breakage can be checked by pressing the cable´s pins against one another while increasing the
amplitude for the corresponding channel to 11 mA. If the amplitude now drops to 0.0 mA and starts
flashing, the cable needs to be replaced.
Never increase the amplitude above 20 mA when you check for cable breaks, since this can damage
Note!
the stimulator.
THE STIMULATOR IS NOT WORKING
If the error symbol appears on the display when you start the stimulator, it means that the stimulator is
broken and needs to be replaced.
Note!
Do not use the stimulator – contact your Cefar dealer.
Cefar will only be responsible for service and repairs performed by Cefar or a distributor appointed by
Cefar.
Page 19

11. FREQUENTLY ASKED QUESTIONS (FAQ)
Supplied by EME Services Ltd
CAN ANYONE USE ELECTRICAL STIMULATION?
People with implanted electrical equipment for example a pacemaker and an intracardiac defibrillator
must not be treated with electrical stimulation. Pregnant women should not use electrical stimulation
during the first 12 weeks of the pregnancy. Read the safety precautions in this manual (PRECAUTIONARY
MEASURES).
FOR HOW LONG TIME CAN I STIMULATE?
Follow the recommendations given by your health care provider. Generally high-frequency TENS (80 Hz) can
be used without an upper time limit, but at least 30 minutes at each occasion. Low-frequency TENS
(2 Hz) can cause sore muscles but normally 20-45 minutes 3 times a day is recommended.
CAN I USE TENS ON ALL KINDS OF PAIN?
TENS can be used for both acute and long time pain. General instructions can be read in chapter MEDICAL
BACKGROUND. Contact your health care provider if the cause for and area of treatment is changed.
WHICH DISTANCE SHOULD I HAVE BETWEEN THE ELECTRODES?
It is recommended to have a distance of 3 to 30 cm between the electrodes.
FOR HOW LONG LAST THE ELECTRODES?
The self-adhesive electrodes last for approximately 20 to 40 occasions. The durability depends on how
good the care and maintenance instructions are followed. Read the care and maintenance instructions
delivered with the electrodes.
ARE THERE ANY SIDE EFFECTS WITH ELECTRICAL STIMULATION?
No, on the contrary to for example analgesic medicine, TENS stimulation is completely without side effects.
ARE THERE ANY PROOFS OF TENS WORKING AS AN ALLEVIATION OF PAIN?
TENS is an established and well-documented method that has been used by the medical service for many
years. Research and medical studies are carried out all the time. Read more about current studies on
Cefar´s home page www.cefar.se.
43
Page 20

44
12. TECHNICAL DATA
Supplied by EME Services Ltd
CEFAR PRIMO PRO is a nerve stimulator (TENS) with two independent channels. It has seven preset programs and three custom programs. Programs and amplitude can be individually set for each channel.
Treatment with electrical stimulation requires the stimulation current to penetrate the resistance of the
skin and the electrode, about 1500 ohms. CEFAR PRIMO PRO can penetrate this resistance and maintain
a current of up to 60 mA. With a change in load from 100 to 1500 ohms, the stimulation current changes
less than 10% from the set value.
The stimulator operates on either two non-rechargeable 1.5 V AA batteries or two rechargeable 1.2 V AA
batteries, recharged in a separate charger.
CEFAR PRIMO PRO
Number of channels . . . . . . . . . . . . . . . . . . . . . . . . . .2 (independent)
Constant current . . . . . . . . . . . . . . . . . . . . . . . . . . . . Up to a resistance of 1500 ohm
Stimulation current/channel
. . . . . . . . . . . . . . . . . . . . . . . . . . . . . . . . . .Asymmetrical biphasic pulse, 100% compensated
Waveform
Number of preset programs
Number of custom programs. . . . . . . . . . . . . . . . . . . . 3
Stimulation forms
Burst
Modulated pulse duration/frequency
Mixed frequency
Alternated modulated pulse duration (CEFAR Flow TENS)
Max pulse duration. . . . . . . . . . . . . . . . . . . . . . . . . . .300 μs
Max frequency
Timer
Environment for
storage, use and shipping
Air humidity 30%–75%
Air pressure 700 hPa–1060 hPa
Power source . . . . . . . . . . . . . . . . . . . . . . . . . . . . . . . 2 x 1.5 V AA non-rechargeable or
2 x 1.2 V AA rechargeable batteries
Current consumption for
one channel, 80 Hz, 30 mA
I r.m.s. max/channel . . . . . . . . . . . . . . . . . . . . . . . . .11 mA
Size . . . . . . . . . . . . . . . . . . . . . . . . . . . . . . . . . . . . .120 x 50 x 30 mm
Weight
. . . . . . . . . . . . . . . . . . . . . . . . . . . . . . 120 Hz
. . . . . . . . . . . . . . . . . . . . . . . . . . . . . . . . . . . . .0 to 60 min
. . . . . . . . . . . . . . . . . . . . . . . . . . . . . . . . . . .approx. 180 g
. . . . . . . . . . . . . . . . . . . .0–60 mA
. . . . . . . . . . . . . . . . . . . . .7
. . . . . . . . . . . . . . . . . . . . . . . . . . . .Conventional
. . . . . . . . . . . . . . . . . . . . . .Temperature 10ºC–40ºC
. . . . . . . . . . . . . . . . . . . .150 mA
Page 21

KEY TO THE SYMBOLS
Supplied by EME Services Ltd
Read the operating instructions before to use.
Patient part type – Body Floating.
0413
Complies with MDD 93/42/EEC requirements. Notified body Intertek ETL Semko (0413).
INFORMATION RELATED TO ELECTROMAGNETIC COMPATIBILITY (EMC).
CEFAR PRIMO PRO is designed to be used in typical domestic or clinical environments and approved according to the EMC safety standard of EN 60601-1-2.
CEFAR PRIMO PRO emits very low levels in the radio frequency (RF) interval. Therefore it is not likely to
cause any interference in nearby electronic equipment (radios, computers, telephones etc.).
CEFAR PRIMO PRO is designed to withstand foreseeable disturbances originating from electrostatic discharges, mains supply magnetic fields and radio frequency transmitters (such as mobile telephones).
45
Page 22

46
Supplied by EME Services Ltd
 Loading...