

Page 1
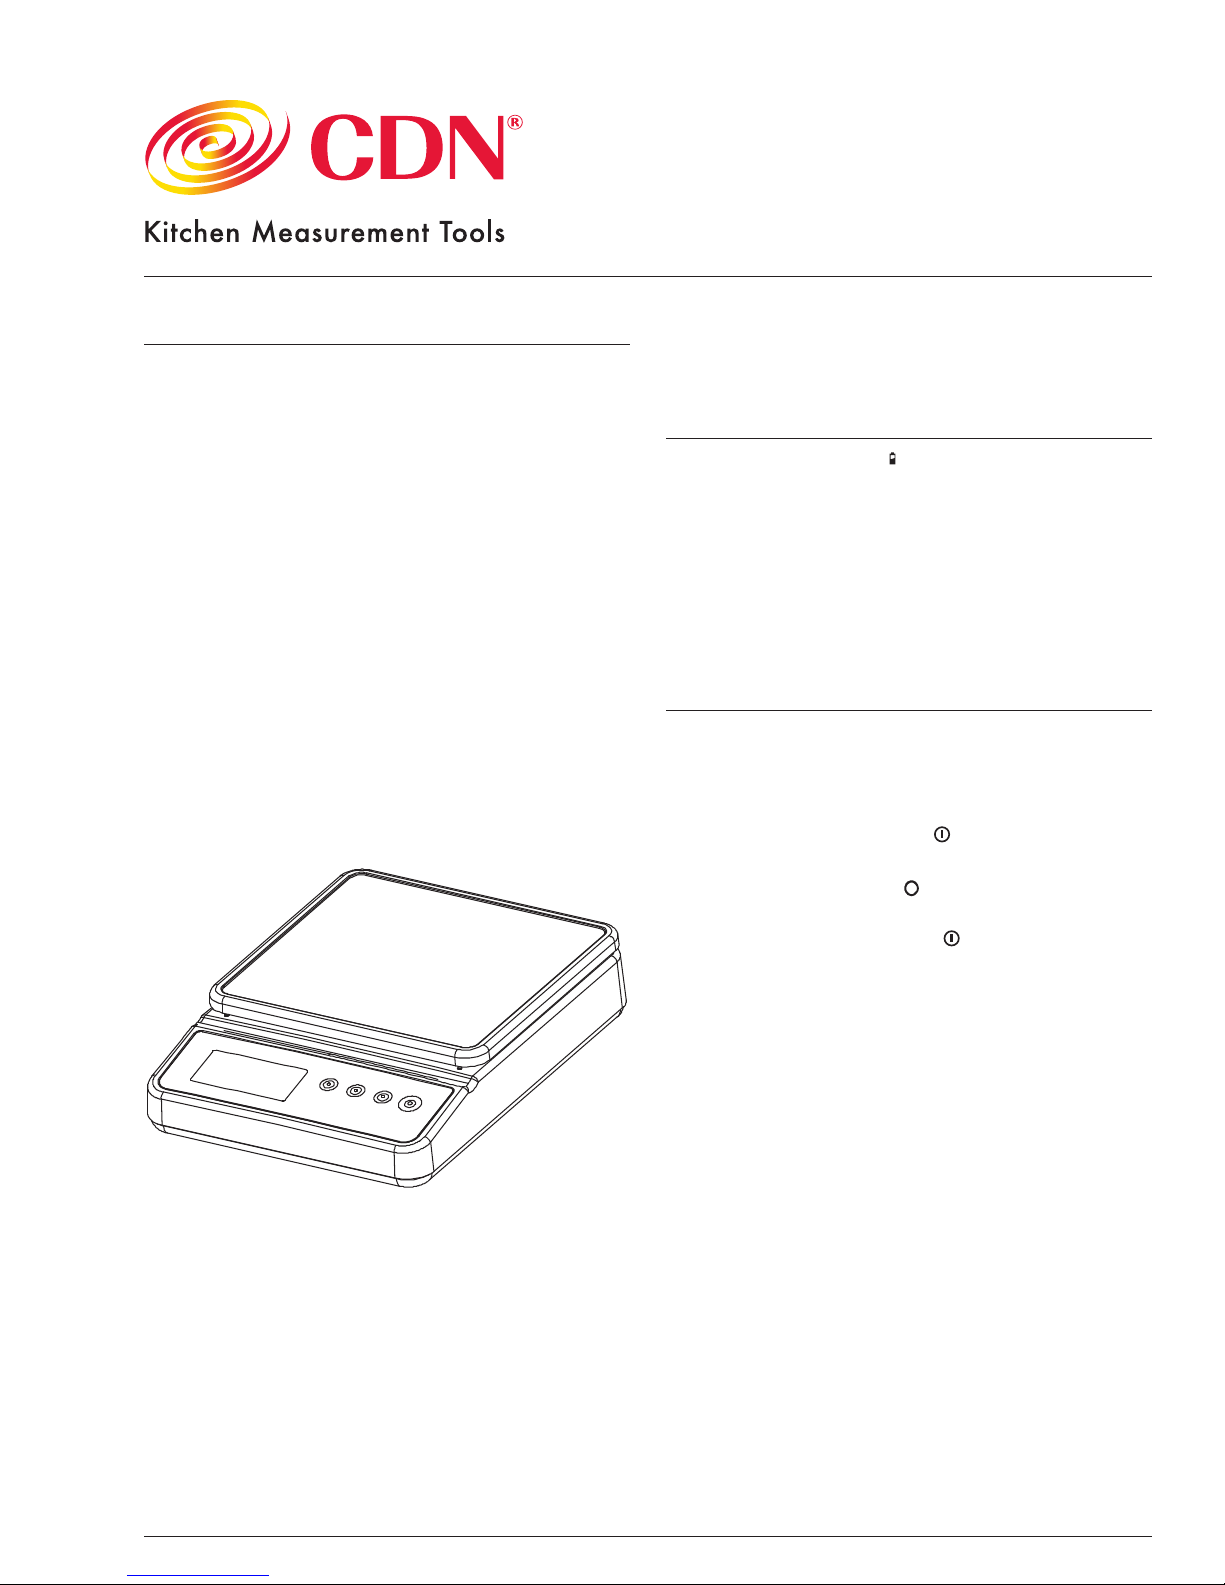
Model: SD1110
Rechargeable
Portion Control Scale
11 pounds/5 kilograms/176 ounces
by pounds:ounces, ounces, fractional ounces and grams
Features
• Submersible
• Programmable
• Tare function
• Backlit display
• Field calibration
• Low/high limit alerts
• Stainless steel housing
• Removable stainless steel platform
• Rechargeable battery
• Power adapter
• Stability indication
• Selectable units
• Overload indication
• Battery status indication
• On/off button
• Auto-off after 2 minutes
Note: In the following instructions, names of the control
buttons are shown in CAPS. Function information that
appears on the display is shown in BOLD CAPS.
Charging the Battery
The LOW BATTE RY icon ( ) appears on the display
when battery status is low and needs to be charged.
The battery is built-in and does not need to be
replaced.
1. Insert the adapter plug into the jack on the back
of the scale. Allow the scale to charge for 5 hours.
The scale will then operate continuously for
approximately 14 hours
Operating Instructions
Place the scale gently on a hard and at surface and
make sure it is steady before use to obtain accurate
measurements.
A. On/Off
1. Press the POWER button ( ) to turn on. The display
ashes all segments and then returns to zero.
2. The STABILITY icon ( ) appears in the lower left
corner of the display when the weight is stable.
3. Press the POWER button ( ) to turn off.
B. Auto Off
The scale automatically turns off after 2 minutes
of inactivity.
C. Backlit Display
Press and hold the UNIT button for 3 seconds to
turn the backlit display on and off.
D. Unit Selection
1. Press the UNIT button to select the desired unit.
The display cycles through g, lb:oz, lb:/oz, lb, oz,
and /oz,
2. Press the SET button to conrm and return to
weighing mode.
Page 2

E. Tar e
The tare function resets the scale display to zero
in order to measure only the weight of an item. It is
frequently used to subtract the weight of containers.
1. When the scale is on, place a container on
the platform.
2. Press the TARE button to reset the display to zero.
3. Place the item into the container or directly on
the scale platform. The weight of only the last
item added will appear on the display.
4. Continue to repeat steps 2 and 3 to measure the
respective weights of additional items.
5. To clear the tare, remove all items from the
platform and press the TARE button. The display
is reset to zero.
F. Low/High Limit Alerts
The scale may be set to alert you when an item’s
weight is under or over a set limit.
1. Press and hold the TARE button for 3 seconds.
The scale beeps as LOW and the zero weight
appears on the display.
2. Place a weight equal to the low weight limit on
the platform and press the SET button. A beep
indicates that the low limit is set.
3. HIGH appears on the display. Add weight to the
platform until the weight is equal to desired
high weight limit. Press the SET button. A beep
indicates that the high limit is set.
4. Remove all items from the platform.
5. An alert will now sound if an item placed on
platform is over or under the set limits. LOW
or HIGH appears on the left side of the display
when these conditions exist.
6. To clear the Low/High limits, press both SET and
TARE buttons simultaneously.
G. Field Calibration
1. When scale is off, press and hold POWER button
( ) until the scale turns on. When all segments
are on, release the POWER button and press
the UNIT button 3 times within one second.
The display shows 11111, then 55555, and then
the version number and checksum appear before
resetting to zero.
2. Making sure there is no load on the platform,
press the SET button to save the zero value.
3. Put a 5 kg calibration weight on the platform.
4. Press the SET button again to start the
auto-calibration. The scale shows 5000 g and
then CAL before automatically turning off.
The calibration is complete.
H. Battery Status
Low Battery: Battery status is low and needs to
be charged. See Charging the Battery on page 1.
I. Error Messages
oL indicates an overload when the item being
measured exceeds the capacity of the scale.
Immediately remove the overweight item to avoid
causing permanent damage to your scale.
J. Programmable Modes
The scale has been pre-congured at the factory
and should not require conguration for use in
most applications. In the event that the factory
settings do not meet the requirements of your
application, the following describes the steps
to congure the scale.
1. Units
The scale has been pre-congured at the factory
for six units of measure. In the event that these do
not meet the requirements of your application, the
following describes the steps to limit the number
of unit choices available. The sequence of units is
lb/OZ, lb OZ 1/8, lb, OZ, 1/8 OZ and g
a. Press the POWER button ( ) to turn on.
b. Press and hold the SET button for 3 seconds.
When SEt appears on the display, release the
SET button to enter the conguration mode.
UNIT appears on the display.
c. With UNIT appearing on the display, press the
SET button to select lb/OZ (pounds/ounce)
units (11 lb @ 0.1 oz). Both the unit and its
status appear on the display.
d. Press the UNIT button to toggle between ON
(enabled) and OFF (disabled).
e. Press the SET button to conrm the status
and to select the next unit in the sequence.
f. Repeat steps d. and e. for each respective
unit. Upon conrming the status for g, UNIT
appears on the display.
g. Press the UNIT button three times. END
appears on the display.
h. Press the SET button to save the settings and
return to weighing mode.
2. Auto Off
The scale has been pre-congured at the factory
to automatically turn off after 120 seconds
(2 minutes) of inactivity. In the event that your
application requires longer shut-off times or
none at all, the following describes the steps
to congure this feature.
a. Press the POWER button ( ) to turn on.
b. Press and hold the SET button for 3 seconds.
When SEt appears on the display, release the
SET button to enter the conguration mode.
UNIT appears on the display.
2
Page 3

c. With UNIT appearing on the display, press the
UNIT button. AOFF appears on the display.
d. Press the SET button to begin selection of
the auto off time (in seconds). 120 appears
on the display.
e. Press the UNIT button to cycle through the
selections: 120, 180, 240, 300 or OFF.
f. When the desired time is displayed, press the
SET button to conrm the selection. AOFF
appears on the display.
g. Press the UNIT button twice. END appears on
the display.
h. Press the SET button to save the settings and
return to weighing mode.
3. Gravity Compensation
The gravity compensation for your scale has
been pre-congured at the factory and should
not require changing in most locations. In the
event that the factory settings do not meet the
requirements of your location, contact CDN for
the value for your location. With GrAu enabled,
the scale will use the default value of 9.797. If
the GrAu is disabled, the scale will use the value
obtained from CDN and entered by the operator
for the gravity compensation.
a. Enabling/Disabling Gravity Compensation
1) Press the POWER button ( ) to turn on.
2) Press and hold the SET button for
3 seconds. When SEt appears on the
display, release the SET button to enter
the conguration mode. UNIT appears on
the display.
3) With UNIT appearing on the display, press
the UNIT button twice. GrAu appears on
the display.
4) With GrAu appearing on the display, press
the SET button again to enable the gravity
compensation. ON appears on the display.
5) Press the UNIT button to toggle between
ON (enabled) and OFF (disabled).
6) Press the UNIT button again to disable
the gravity compensation. OFF appears
on the display.
7) Press the SET button to conrm the
selection. GrAu appears on the display.
8) Press the UNIT button. END appears on
the display.
9) Press the SET button to save the settings
and return to weighing mode.
b. Gravity Compensation Value Editing
Contact CDN for the value to enter for
your location.
Note: Gravity compensation must be disabled for this
value to take effect.
1) Press and hold the UNIT button and press
the POWER button ( ) to turn on the scale
and enter the value editing mode. 9.797 (or
the current value) appears on the display.
2) Press the TARE button to choose a number
from 0 to 9 to enter the desired gravity value.
3) Press the UNIT button to move to the next
digit to the right.
4) Repeat steps 2 and 3 for the
remaining digits.
5) Press the SET button to conrm the entered
gravity value and return the scale to the
normal operating mode.
Note: Clean the scale platform before each use.
Note: Replacement AC adapter, removable platform & 5 kg
calibration weight available.
USAGE GUIDELINES
• Scales are precision instruments and must be
handled with extreme care.
• Battery technology works best at room temperature.
• Place the scale gently on a hard and at surface and
make sure
it is steady before use.
• The maximum capacity of the scale is 11 lb/5 kg,
which is the capacity before using the tare function.
• Do not place overweight items on the scale.
• Store the scale in a position that keeps it free from
any load bearing weight. Storing the scale with
pressure on the load cells can distort the weight
measurements over time.
• Hold the scale from the bottom when moving.
CARE OF YOUR PRODUCT
• IP67 — protected from water up to 3 feet for
30 minutes, completely protected against dust.
• Wipe clean with a damp cloth.
• Store the scale at room temperature between
32 to 104°F/0 to 40°C.
3
Page 4

PRECAUTIONS
• Keep the scale and/or adapter away from children.
• Do not clean the scale with abrasive or corrosive
compounds, which may scratch the surface and
corrode the electronic circuits.
• Do not subject the scale to excessive force, shock,
dust, temperature or humidity, which may result in
malfunction, shorter electronic life span, damaged
battery and/or distorted parts.
• Do not tamper with the scale’s internal components.
Doing so will invalidate the warranty and may cause
unnecessary battery damage and/or distorted parts.
• Do not subject the scale to excessive exposure to
direct sunlight.
• IP67 — protected from water up to 3 feet for
30 minutes, completely protected against dust.
• Always read the users manual thoroughly
before operating.
Specications
Measurement Range 11 lbs/176 oz/5000 g
Unit of Measure lb /oz /g
Resolution 0.1 oz, 1/8 oz, 0.005 lb, 0.05 oz, 1/8 oz, 1 g
Operating Range 32°F~104°F/0°C~40°C/≤90% RH
Accuracy 2000g ± 6g ; 500 0g ± 15g
Power Supply 4.8V 1800mAH built-in rechargeable battery;
AC Adapter: 100 -240VAC 50/60Hz input, 9V DC
(1000mA) output
Dimensions 7.32 W x 9.625 H x 2.125 D (inches)/
18.6 W x 24.4 H x 5.4 D (mm)
Weight 62 oz / 1760 g
Accessories AC Adapter (AD-AC1110)
Removable stainless steel platform
(AD -PF1110)
5 kg calibration weight (WT05)
The information in this document has been reviewed
and is believed to be accurate. However, neither the
manufacturer nor its afliates assume any responsibility
for inaccuracies, errors or omissions that may be
contained herein. In no event will the manufacturer or its
afliates be liable for direct, indirect, special, incidental
or consequential damages arisen by using this product
or resulting from any defect/omission in this document,
even if advised of the possibility of such damages.
The manufacturer and its afliates reserve the right to
make improvements or changes to this document and the
products and services described at any time, without notice
or obligation.
1-Year Limited Warranty: Any instrument that
proves to be defective in material or workmanship
(excluding batteries) within one year of original
purchase will be repaired or replaced without
charge upon receipt of the unit prepaid at:
CDN, PO Box 10947, Portland, OR 97296- 0947
USA. This warranty does not cover damage in
shipment or failure caused by failure to adhere
to the accompanying instructions, inadequate
maintenance, normal wear and tear, tampering,
accident, misuse, unauthorized modication,
obvious carelessness or abuse. CDN shall not
be liable for any consequential or incidental
damages whatsoever.
CE Note: This device could be sensitive to electrostatic
discharge. If electrostatic discharge or malfunctioning
occurs, please re-install the battery to reset this unit.
© 10-2016 Co mponent D esign No rthwes t, Inc. Made in Chi na CD99 99319en - 10/16 L-DE SIGN 614.525 .1472
For mor e detail ed
information o n our
produ cts, pl ease vis it
CDNkitchen.com.
 Loading...