

CDA DV1180 Series, dk1150 Series, DK1151 Manual For Installation, Use And Maintenance
Customer Care Department • The Group Ltd. • Harby Road • Langar • Nottinghamshire • NG13 9HY
T : 01949 862 012 F : 01949 862 003 E : service@cda.eu W : www.cda.eu
DV1180..
Built-in Electric Double Oven
Manual for Installation, Use and Maintenance
2
Important
This appliance is designed and manufactured solely for the cooking of domestic (household) food and is not
suitable for any non domestic application and therefore should not be used in a commercial environment.
The appliance guarantee will be void if the appliance is used within a non domestic environment i.e. a semi
commercial, commercial or communal environment.
The CDA Group Ltd cannot be held responsible for injuries or losses caused by incorrect use or installation of
this product. Please note that CDA reserve the right to invalidate the guarantee supplied with this product
following incorrect installation or misuse of the appliance.
Appliance Information:
Please enter the details on the appliance rating plate below for reference, to assist CDA Customer Care in the
event of a fault with your appliance and to register your appliance for guarantee purposes.
Appliance Model
Serial Number
Declaration of CE Conformity
This double oven has been designed, constructed and marketed in compliance with:
• Safety requirements of EU Directive “Low Voltage” 2006/95/EC;
• Protection requirements of EU Directive “EMC” 2004/108/EC;
• Requirements of EU Directive 93/68/EEC;
• Requirements of EU Directive 2011/65/EU.
Important Information for Correct Disposal of the Product in Accordance with
EC Directive 2002/96/EC.
At the end of its working life, the product must not be disposed of as urban waste. It
must be taken to a special local authority dierentiated waste collection centre or to
a dealer providing this service.
Disposing of a household appliance separately avoids possible negative consequences
for the environment and health deriving from inappropriate disposal and enables
the constituent materials to be recovered to obtain signicant savings in energy and
resources. As a reminder of the need to dispose of household appliances separately,
the product is marked with a crossed-out wheeled dustbin.

3
IMPORTANT SAFETY PRECAUTIONS AND RECOMMENDATIONS
IMPORTANT: This appliance is designed and manufactured
solely for the cooking of domestic (household) food and is
not suitable for any non domestic application and therefore
should not be used in a commercial environment.
The appliance guarantee will be void if the appliance is used
within a non domestic environment i.e. a semi commercial,
commercial or communal environment.
Read the instructions carefully before installing and using
the appliance.
• After having unpacked the appliance, check to ensure that it is not
damaged and that the oven door closes correctly.
In case of doubt, do not use it and consult your supplier or a
professionally qualied technician.
• Packing elements (i.e. plastic bags, polystyrene foam, nails,
packing straps, etc.) should not be left around within easy reach
of children, as these may cause serious injuries.
• Some appliances are supplied with a protective lm on steel and
aluminium parts. Thislmmustberemovedbeforeusingthe
appliance.
• IMPORTANT: The use of suitable protective clothing/gloves is
recommended when handling or cleaning this appliance.
• Do not attempt to modify the technical characteristics of the
appliance as this may become dangerous to use. The manufacturer
declines all responsibility for any inconvenience resulting from the
inobservance of this condition.
• Do not operate your appliance by means of an external timer or
separate remote-control system.
• Do not carry out cleaning or maintenance operations on the
appliance without having previously disconnected it from the
electric power supply.
• WARNING: Ensure that the appliance is switched off before
replacing the oven lamp to avoid the possibility of electric shock.

4
• Do not use a steam cleaner because the moisture can get into the
appliance thus make it unsafe.
• Do not touch the appliance with wet or damp hands (or feet).
• Do not use the appliance whilst in barefoot.
• If you should decide not to use this appliance any longer (or
decide to substitute another model), before disposing of it, it
is recommended that it be made inoperative in an appropriate
manner in accordance to health and environmental protection
regulations, ensuring in particular that all potentially hazardous
parts be made harmless, especially in relation to children who
could play with unused appliances.
• The various components of the appliance are recyclable. Dispose
of them in accordance with the regulations in force in your country .
If the appliance is to be scrapped, remove the power cord.
• After use, ensure that the knobs are in the off position.
• Children less than 8 years of age shall be kept away unless
continuously supervised.
• This appliance can be used by children aged from 8 years and
above and persons with reduced physical, sensory or mental
capabilities or lack of experience and knowledge if they have been
given supervision or instruction concerning use of the appliance in
a safe way and understand the hazards involved. Children shall
not play with the appliance. Cleaning and user maintenance shall
not be made by children without supervision.
• The manufacturer declines all liability for injury to persons or
damage to property caused by incorrect or improper use of the
appliance.
• WARNING: During use the appliance and its accessible parts
become hot; they remain hot for some time after use.
– Care should be taken to avoid touching heating elements inside
the oven.
– The door is hot, use the handle.
– To avoid burns and scalds, young children should be kept away .
• Make sure that electrical cables connecting other appliances in
the proximity of the oven cannot become entrapped in the oven
door.

5
• WARNING: When correctly installed, your product meets all safety
requirements laid down for this type of product category . However
special care should be taken around the rear or the underneath of
the appliance as these areas are not designed or intended to be
touched and may contain sharp or rough edges, that may cause
injury.
• FIRST USE OF THE OVEN - it is advised to follow these
instructions:
– Furnish the interior of the oven as described in the chapter
“CLEANING AND MAINTENANCE”.
– Switch on the empty oven on max to eliminate grease from the
heating elements.
– Disconnect the appliance from the electrical power supply, let
the oven cool down and clean the interior of the oven with a
cloth soaked in water and neutral detergent; then dry carefully.
• CAUTION: Do not use harsh abrasive cleaners or sharp metal
scrapers to clean the oven door glass since they can scratch the
surface, which may result in shattering of the glass.
• Do not line the oven walls with aluminium foil. Do not place baking
trays or the drip tray on the base of the oven chamber.
• FIRE RISK! Do not store ammable material in the oven.
• Always use oven gloves when removing the shelves and food
trays from the oven whilst hot.
• Do not hang towels, dishcloths or other items on the appliance or
its handle – as this could be a re hazard.
• Clean the oven regularly and do not allow fat or oils to build up in
the oven base or tray. Remove spillages as soon as they occur.
• Do not stand on the open oven door.
• Always stand back from the appliance when opening the oven
door to allow steam and hot air to escape before removing the
food.
• SAFE FOOD HANDLING: Leave food in the oven for as short
a time as possible before and after cooking. This is to avoid
contamination by organisms which may cause food poisoning.
Take particular care during warmer weather.
• WARNING: T ake care NOT to lift the appliance by the door handle.
6
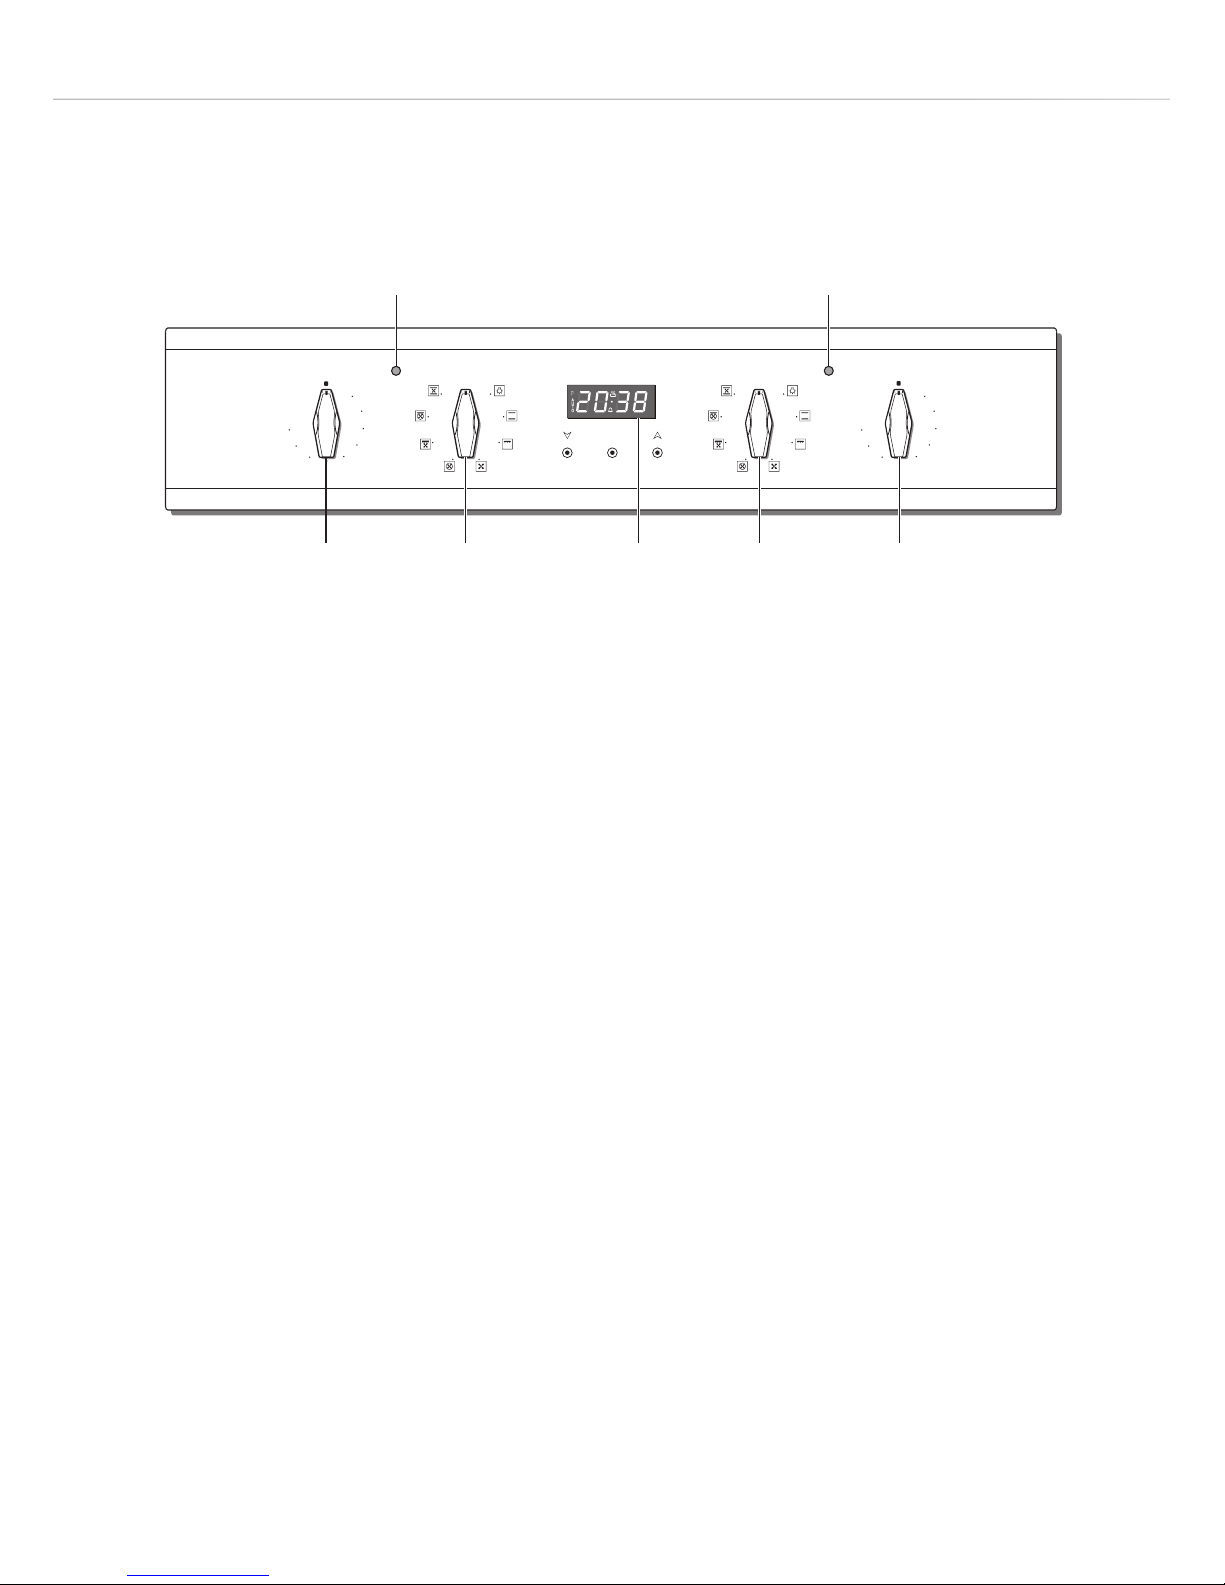
Controls Description
1. Oven temperature knob (Top oven)
2. Oven function selector knob (Top oven)
3. Clock and timer with “touch control” keys (Top main oven only)
4. Oven function selector knob (Bottom oven)
5. Oven temperature knob (Bottom oven)
6. Bottom oven temperature indicator lamp
7. Top oven temperature indicator lamp
TEMPERATUREFUNCTION
0
MODE
TOP OVEN LOWER OVEN
FUNCTIONTEMPERATURE
0
225
200
175
150
125
100
75
50
250
225
200
175
150
125
100
75
50
250
1 2 3 4 5
67
Control Panel
Fig. 1

7
Multifunction Oven
General Features
As its name indicates, this is an oven that presents particular
features from an operational point of view. In fact, it is possible to
insert 7 dierent programmes to satisfy every cooking need.
The 7 positions, thermostatically controlled, are obtained by 4
heating elements which are:
• Bottom element 1300 W
• Top element 1000 W
• Grill element 2000 W
• Circular element 2200 W
Note:
Upon rst use, it is advisable to operate the oven for 30 minutes in the position
and to eliminate
possible traces of grease on the heating elements.
Repeat the operation for another 15 minutes with the grill element on as explained in the chapters TRADITIONAL
GRILLING and USE OF THE GRILL.
Operating Principles
Heating and cooking in the MULTI-FUNCTION oven are obtained in the following ways:
a. by Normal Convection
The heat is produced by the upper and lower heating elements.
b. by Forced Convection
A fan sucks in the air contained in the oven mue, which sends it through the circular heating element
and then sends it back through the mue. Before the hot air is sucked back again by the fan to repeat the
described cycle, it envelops the food in the oven, provoking a complete and rapid cooking.
It is possible to cook several dishes simultaneously.
c. by Semi-Forced Convection
The heat produced by the upper and lower heating elements is distributed throughout the oven by the
fan.
d. by Radiation
The heat is radiated by the infra red grill element.
e. by Radiation and Ventilation
The irradiated heat from the infra red grill element is distributed throughout the oven by the fan.
f. by Ventilation
The food is defrosted by using the fan only function without heat.

8
How to Use the Oven
WARNING: The door is hot, use the handle.
ATTENTION - MOST IMPORTANT
Pay special attention not to touch the hot heating element inside
the oven cavity.
TEMPERATURE
225
200
175
150
125
100
75
50
250
FUNCTION
0
Fig. 2
Fig. 3
Thermostat Knob (Fig. 2)
To turn on the heating elements of the oven, set function selector knob to the required position and the
thermostat knob to the desired temperature.
To set the temperature, turn the thermostat control knob indicator mark to the required temperature.
The elements will turn on or o automatically which is determined by the thermostat.
The operation of the heating elements is signalled by a light placed on the control panel.
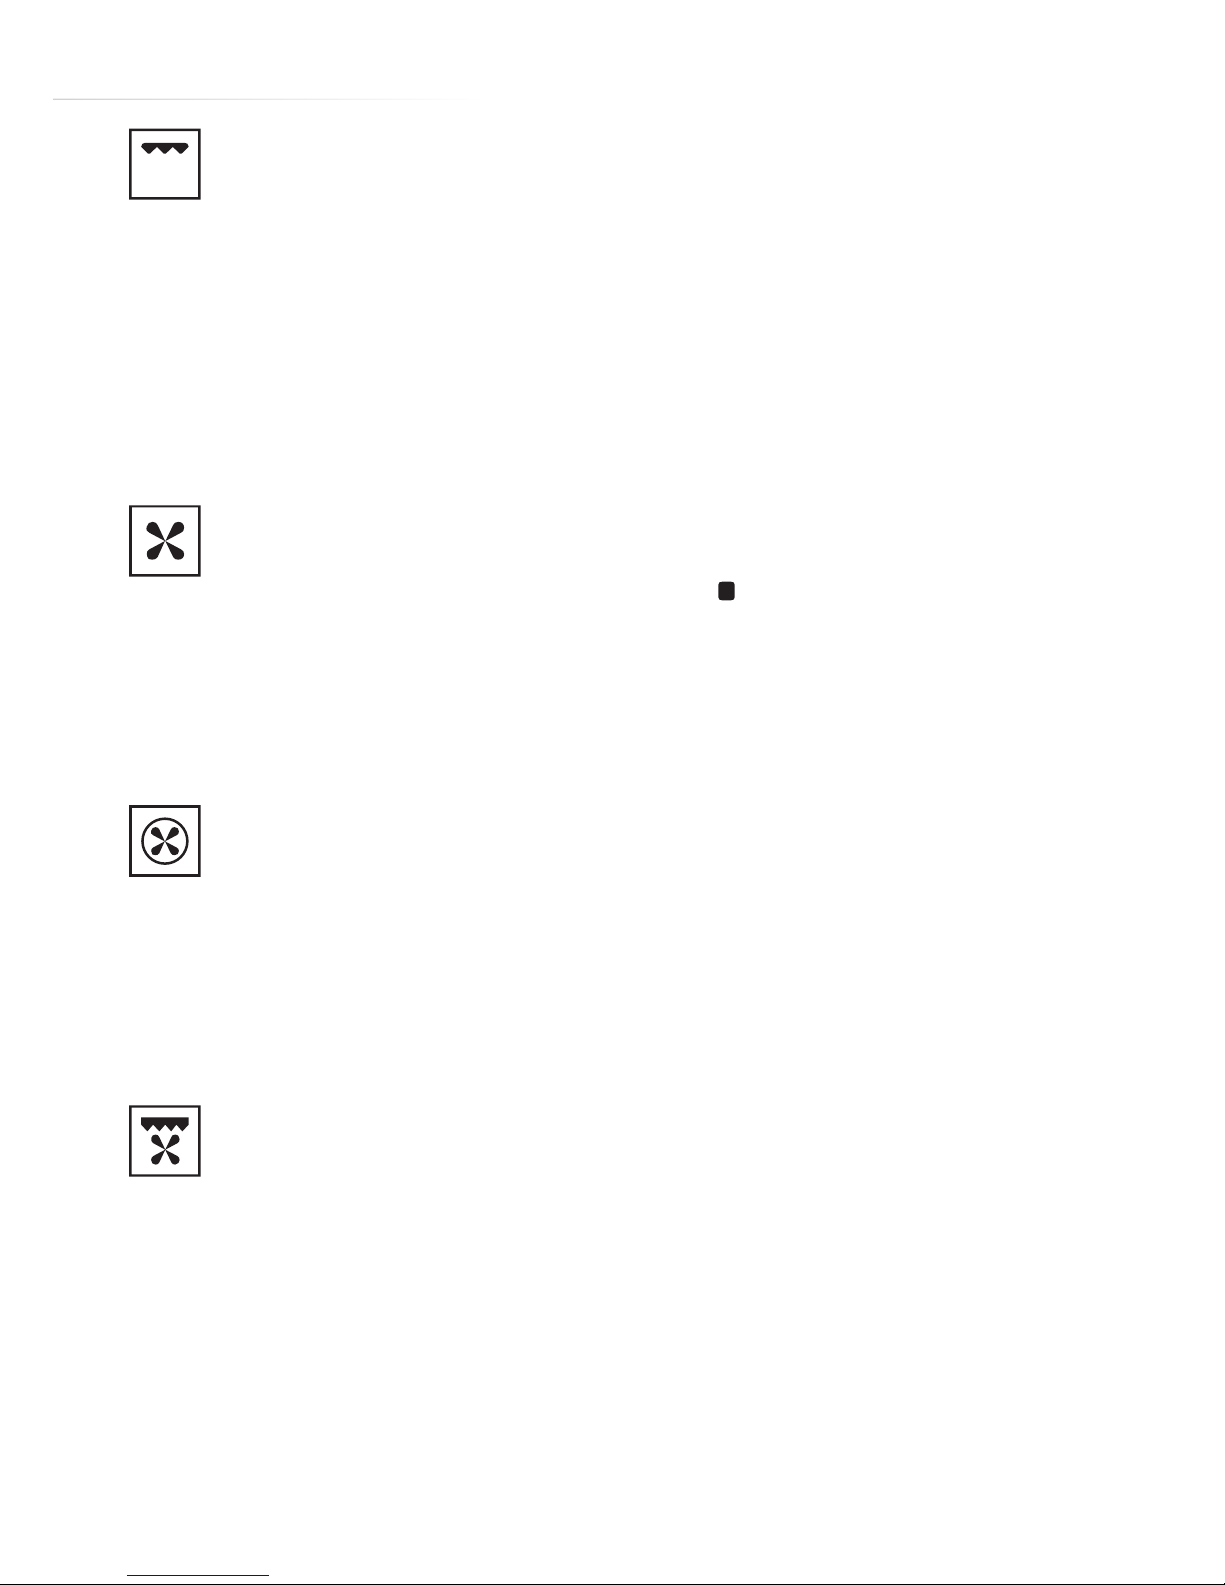
Function Selector Knob (Fig. 3)
Rotate the knob clockwise to set the oven for one of the following functions:
Oven light
By turning the function selector knob to this setting, the oven light will illuminate in the oven cavity.
The oven light will operate on all selected functions.
Traditional Convection Cooking
The upper and lower heating elements come on. The heat is dispersed by natural convection and the
temperature must be set to between 50 °C and 250 °C with the thermostat knob.
The oven must be preheated before cooking.
Recommended for:
Food that requires the same degree of cooking both inside and out, for example roasts, spare pork ribs,
meringues etc.
9
Traditional Grilling
The infrared grill element comes on. The heat is dispersed by radiation.
Use with the oven door closed. The temperature can be regulated via the thermostat knob to between 50
°C and 225 °C.
For cooking hints, see the chapter “USE OF THE GRILL”.
Recommended for:
Intense grilling, browning, cooking au gratin and toasting etc.
It is recommended that you do not grill for longer than 30 minutes at any one time.
Caution: the oven door becomes very hot during operation. Keep children well out of reach.
Defrosting Frozen Foods
Only the oven fan comes on. Use with the thermostat knob set to “ ” - other positions have no eect.
The food is thawed by ventilation without heating.
Recommended for:
Quick thawing of frozen foods; one kg requires approximately 1 hour.
Thawing times vary according to the quantity and type of food to be thawed.
Hot Air Cooking
The circular element and fan come on. The heat is dispersed by forced convection and the temperature can be
regulated to between 50 °C and 250 °C via the thermostat knob. The oven does not require preheating.
Recommended for:
Food which has to be well-cooked outside and soft or rosy inside, for example lasagne, lamb, roast beef, whole
sh etc.
Ventilated Grill Cooking
The infrared grill element and the fan come on. The heat is dispersed mainly
by radiation and the fan then
distributes it all over the oven.
Use with the oven door closed. The temperature can be regulated via the thermostat knob to between 50
°C and 200 °C.
The oven must be preheated for approximately 5 minutes. For cooking hints, see the chapter “GRILLING AND
AU GRATIN”.
Recommended for:
Grilling where quick browning on the outside is required to keep the juices in.
For example: veal steaks, chops, hamburgers etc.
It is recommended that you do not grill for longer than 30 minutes at any one time.
Caution: the oven door becomes very hot during operation. Keep children well out of reach.

10
Maintaining Temperature After Cooking or Slowly Heating Foods
The upper heating element, the circular element and the fan come on.
The heat is dispersed by forced convection with greater intensity in the upper part.
The temperature can be set to between 50 °C and 140 °C via the thermostat knob.
Recommended for:
Keeping food warm after any type of cooking. Slow heating of cooked food.
Convection Cooking with Ventilation
The upper and lower heating elements come on and the fan.
The heat coming from above and below is dispersed by convection with ventilation.
The temperature can be set to between 50 °C and 250 °C via the thermostat knob.
Recommended for:
Voluminous dishes and large quantities which require the same degree of cooking both inside and out, for
example rolled roasts, turkey, roast legs, cakes etc.
Cooking Advice
Sterilization
Sterilization of foods to be conserved, in full and hermetically sealed jars, is done in the following way:
a. Set the switch to position
.
b. Set the thermostat knob to position 185 °C and preheat the oven.
c. Fill the dripping pan with hot water.
d. Set the jars onto the dripping pan making sure they do not touch each other and the door and set the
thermostat knob to position 135 °C.
When sterilization has begun, that is, when the contents of the jars start to bubble, turn o the oven and let
cool.
Regeneration
Set the switch to position
and the thermostat knob to position 150 °C.
Bread becomes fragrant again if wet with a few drops of water and put into the oven for about 10 minutes at
the highest temperature.
Simultaneous Cooking of Dierent Foods
With the function selector in position
and the ventilated oven allows you to cook dierent types of
food at the same time.
Fish, cakes and meat can be cooked together without the smells and avours mixing.
The only precautions required are the following:
• The cooking temperatures must be as close as possible with a maximum dierence of 20 - 25 °C between
the dierent foods.
• Dierent dishes must be placed in the oven at dierent times according to the cooking time required for
each one. This type of cooking obviously provides a considerable saving on time and energy.
 Loading...