

Page 1
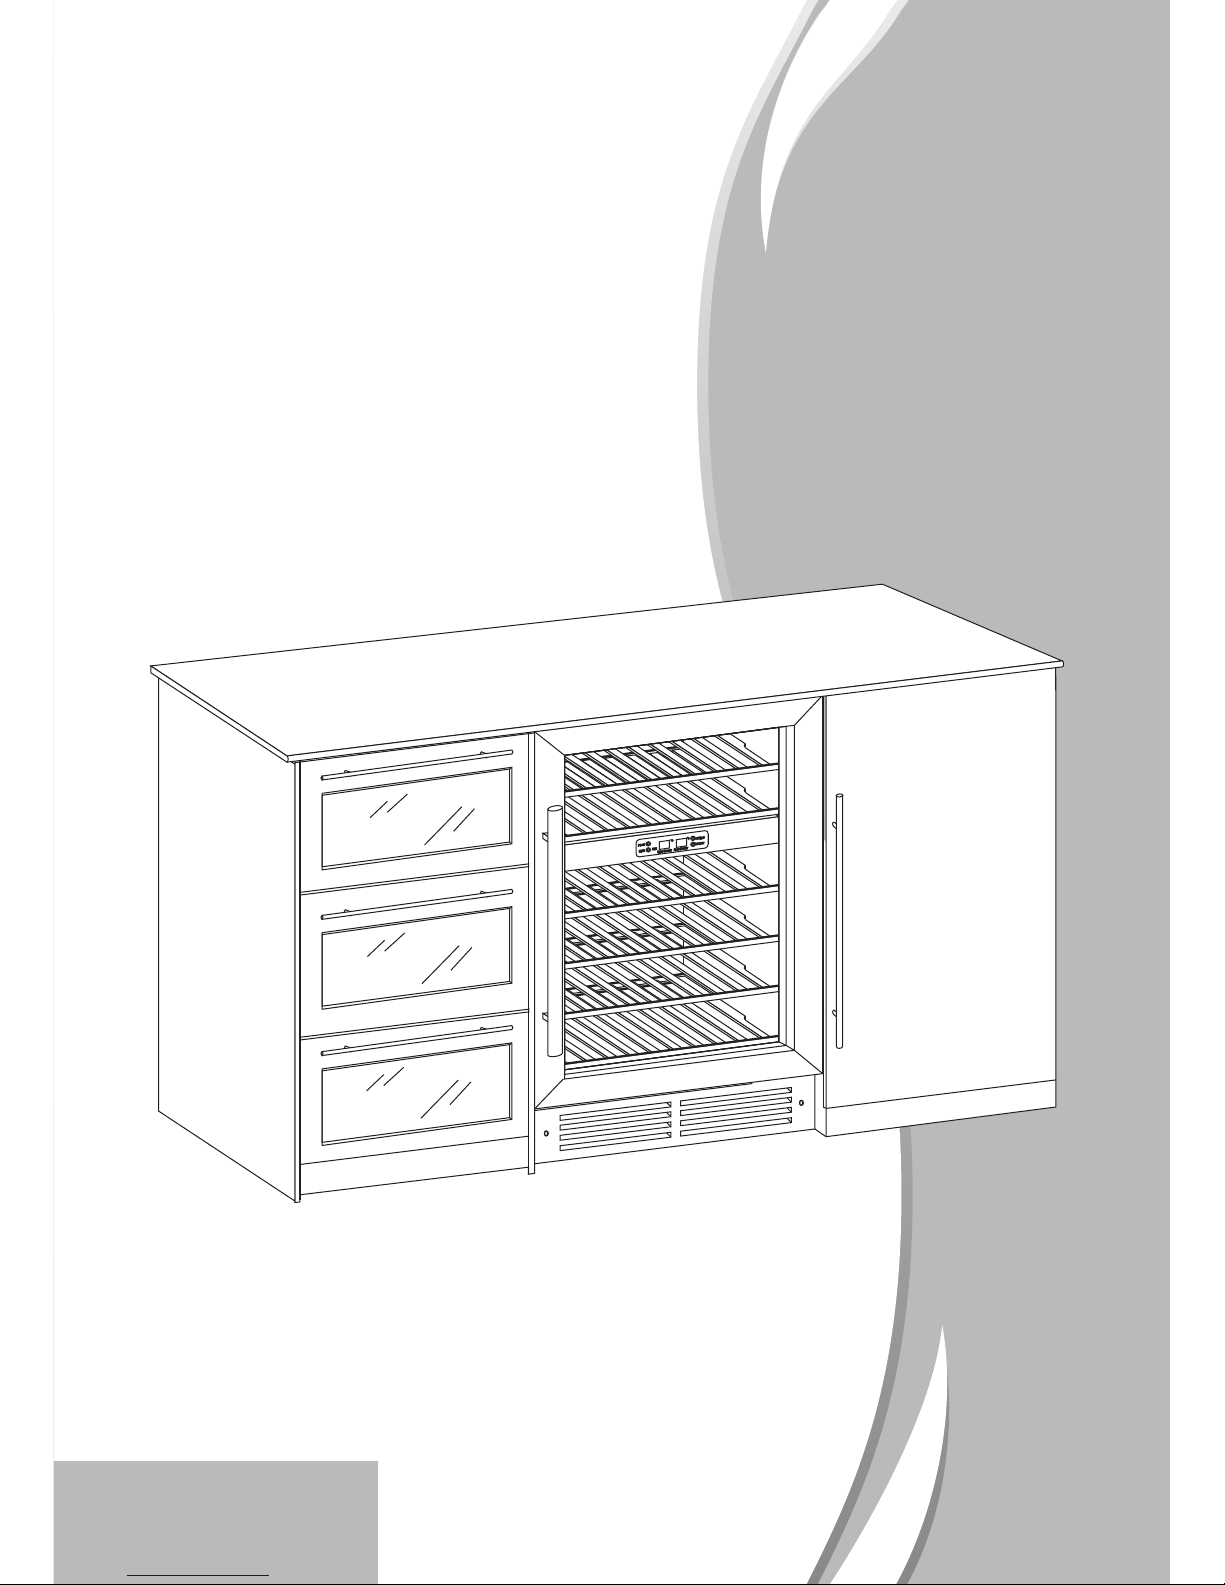
BWC600SS
Built-in
Wine Cooler
Page 2

2
Important Safeguards
When using an electrical appliance,
basic precautions should always be
followed to reduce the risk of fire,
electric shock, and injury to persons,
including the following:
For Your Safety
Read all instructions carefully, even if you are
quite familiar with the appliance.
• Use this appliance only as described in this
manual. Other uses not recommended may
cause fire, electric shock or personal injury.
• This appliance is not intended for use by
young children or infirm persons unless
they have been adequately supervised by a
responsible person to ensure that they can use
the appliance safely.
• Young children should be supervised
to ensure that they do not play with the
appliance.
• To protect against the risk of electric shock,
DO NOT IMMERSE the unit, cord, or plug in
water or spray any other liquid.
• Unplug the appliance from the plug socket
when not in use, when moving from one
location to another and before cleaning.
• To disconnect the appliance, grip the plug and
pull it from the wall outlet. Never pull by the
cord.
• Do not operate the appliance in the presence
of explosive and/or flammable fumes.
• Do not place the appliance or any of its parts
near an open flame, cooking or other heating
appliance.
• Do not operate the appliance with a damaged
cord or plug, if the product malfunctions, or if it
is dropped or damaged in any manner.
• The use of attachments not recommended by
the manufacturer may be hazardous.
• Place the unit on a dry level surface.
• Do not operate if the housing is removed or
damaged.
• A loose fit between the wall socket and plug
may cause overheating and damage to the
plug. Contact a qualified electrician to replace
loose or worn socket.
• Locate the unit away from direct sunlight and
sources of heat (stove, heater, radiator, etc.).
WARNING: To reduce the risk of fire,
electric shock or personal injury, unplug
or disconnect the appliance from the
power supply before servicing.
Save These Instructions
If you are experiencing problems, check the
Troubleshooting Guide at the back of this manual.
It lists causes of minor operating problems that
you can correct yourself.
Page 3
3
Connection to the
Mains Supply
Check that the voltage marked on the product
corresponds with your supply voltage.
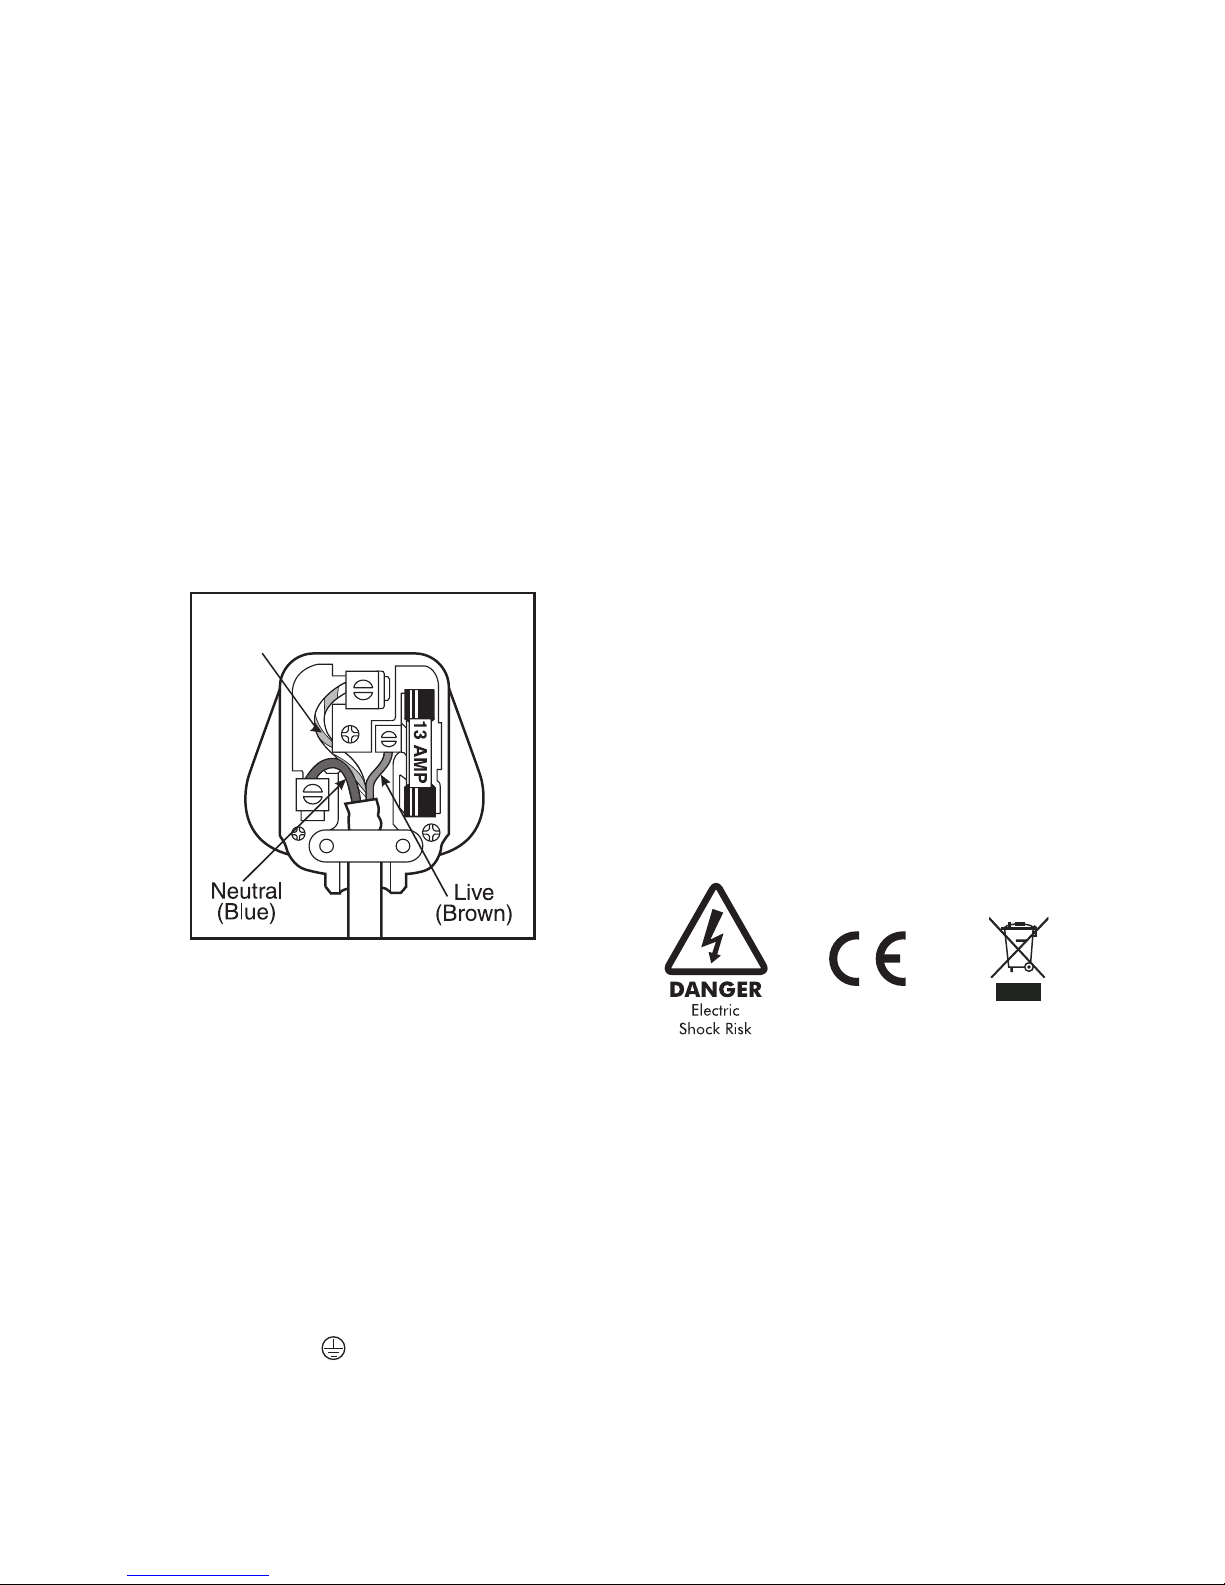
This product is fitted with a 13A plug complying
with BS1363. If this plug is unsuitable or needs to
be replaced, please note the following:
WARNING:
THIS APPLIANCE MUST BE EARTHED
Important: The wires in the mains lead are
coloured in accordance with the following code:
GREEN/YELLOW - EARTH
BLUE - NEUTRAL
BROWN - LIVE
This appliance is fitted with a plug fitted with a
13 amp fuse. Should the fuse fail, then it must
be replaced with an ASTA approved fuse
(conforming to BS1362) of the same rating. If
you need to replace the plug or if the plug is of
the incorrect type for your socket, remove it and
replace it with an appropriate type. Dispose of the
old plug safely.
As the colours of the wires in the mains lead
of this appliance may not correspond with the
coloured markings identifying the terminals in your
plug, proceed as follows: The GREEN/YELLOW
wire is the EARTH and must be connected to
the terminal which is marked with the letter ‘E’ or
by the earth symbol or coloured GREEN or
GREEN/YELLOW.
The BLUE wire is the NEUTRAL and must be
connected to the terminal which is marked with
the letter ‘N’ or coloured BLACK.
The BROWN wire is the LIVE wire and must be
connected to the terminal which is marked with
the Letter ‘L’ or coloured RED.
Always ensure that the plug cord grip is fastened
correctly.
If in doubt consult a qualified electrician who
will be pleased to do this for you. This product
conforms to EC Directive 92/31 /EEC with
respect to Electromagnetic Compatibility.
NON-REWIREABLE MAINS PLUG
If your appliance is supplied with a nonrewireable
plug fitted to the mains lead, you will find that
it incorporates a fuse, the value of which is
indicated either on the base of the plug or on the
fuse carrier. Should the fuse need replacing, you
must use an ASTA approved one (conforming to
BS1362) of the same rating.
If the fuse cover is lost, the plug must not be used
until a replacement is obtained from an electrical
supplier.
If you need to remove the plug, cut it from the
mains lead and immediately dispose of it. Never
attempt to re-use this plug or insert it into a
socket outlet as there is a very great risk of an
electric shock.
Earth
( Green/Yellow
)
Page 4
4
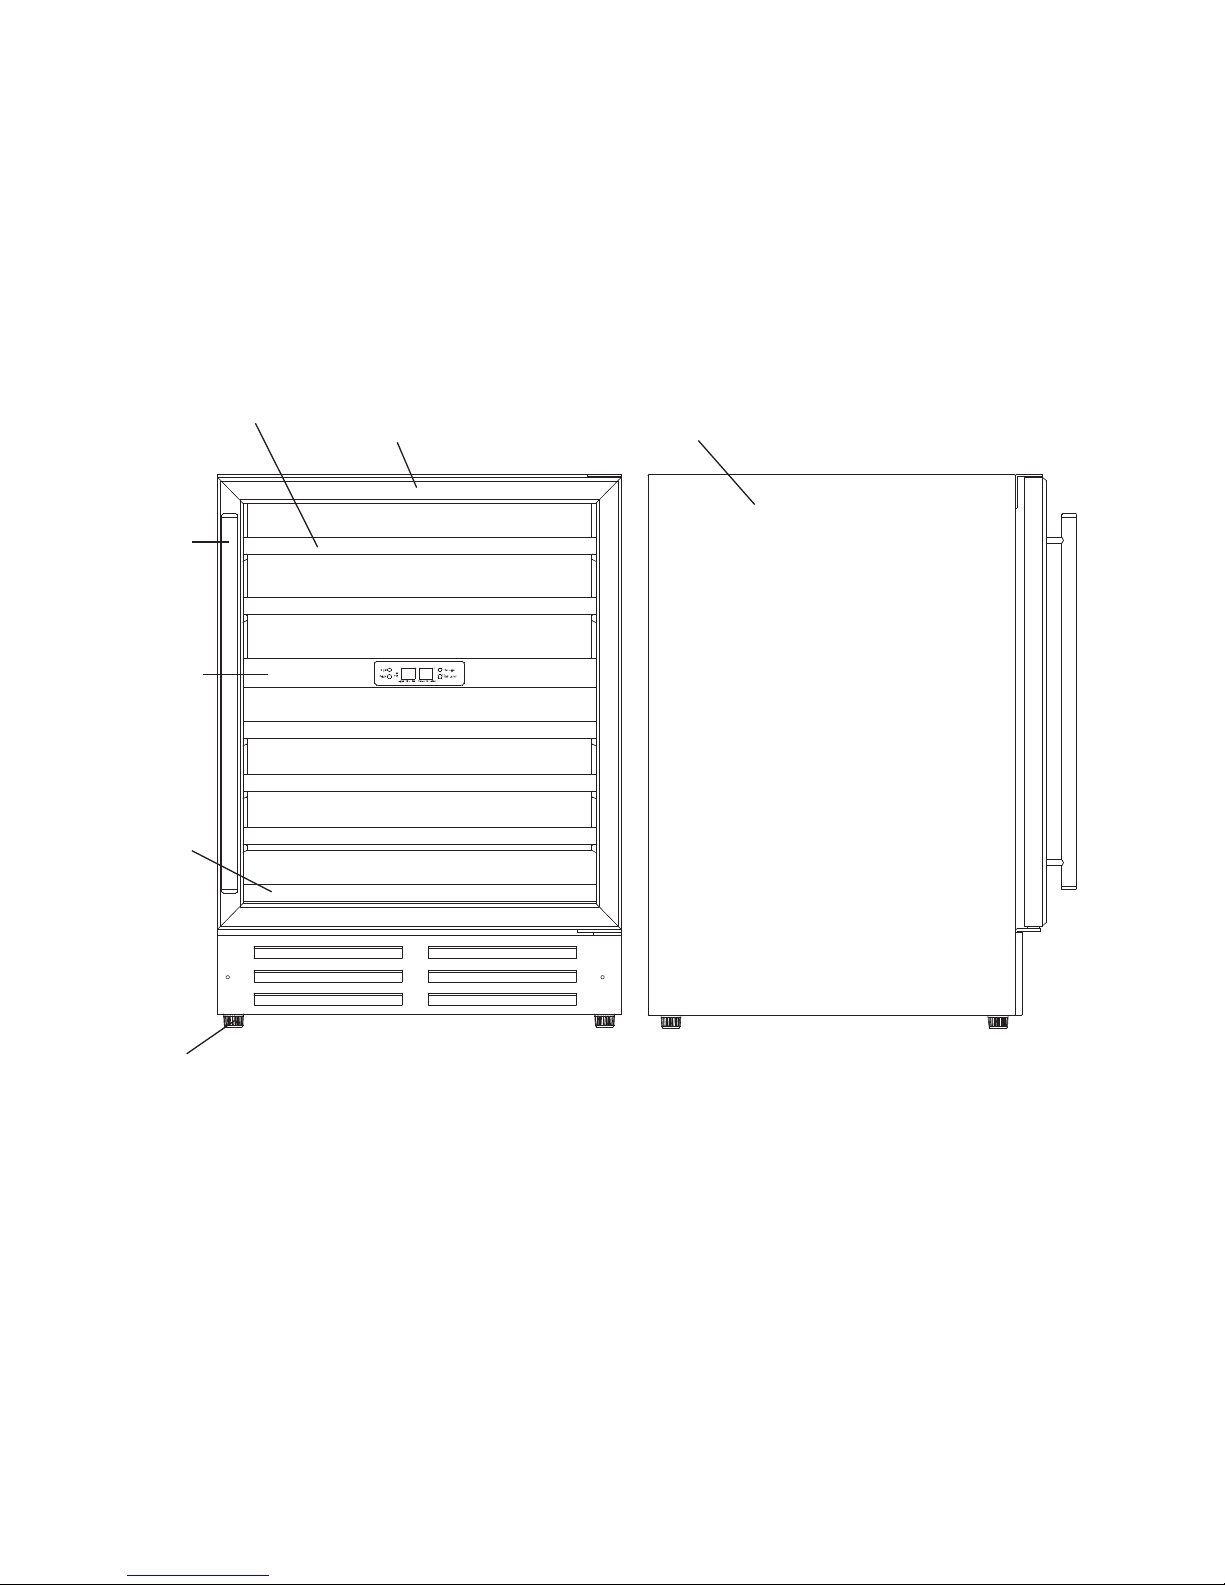
Features of Your Wine Cooler
Handle
Digital
Control
Panel
Door
Bottom
Shelf
Adjustable
Legs
Cabinet
Shelves
Page 5

5
Installation Instructions
Before Using Your Wine Cooler
• Remove all exterior and interior packing.
• Before connecting the Wine Cooler to
the power source, let it stand upright for
approximately 2 hours. This will reduce
the possibility of a malfunction in the
cooling system caused by handling during
transportation.
• Clean the interior surface with lukewarm water
using a soft cloth.
• The door on this appliance can be opened
from either the left or the right side. The unit
is delivered with the door opening on the left
side. Should you wish to open the door from
the right, follow the instructions ‘Reversing the
door swing of your appliance’.
Installation of Your Wine Cooler
• The appliance is designed to be built in
between kitchen cabinets and is supplied with
adjustable feet that can be altered to fit various
worktop heights. This wine cooler is fully
compatible with any 600mm deep kitchen unit.
• Place your Wine Cooler on a floor that is
strong enough to support it when it is fully
loaded. To level your Wine Cooler, adjust the
front leveling leg at the bottom of the Wine
Cooler.
• Locate the Wine Cooler away from direct
sunlight and sources of heat (stove, heater,
radiator, etc.). Direct sunlight may affect the
acrylic coating and heat sources may increase
electrical consumption. Extreme cold ambient
temperatures may also cause the unit not to
perform properly.
• Avoid locating the unit in damp areas.
• Plug the Wine Cooler into an exclusive,
easily accessible plug socket. Any questions
concerning power and/or earthing should be
directed towards a qualified electrician or an
authorised products service centre.
• The air vent at the front of the appliance must
never be covered or blocked in any way.
595
589 (Door)
850
870-890
730150
560
617
572
523
716
Page 6

6
Attention
• Store wine in sealed bottles.
• Do not overload the cabinet.
• Do not open the door unless necessary.
• Do not cover shelves with aluminum foil or any
other shelf material which may prevent air
circulation.
• Should the wine cooler be left empty for long
periods it is suggested that the appliance
is unplugged, and after careful cleaning,
leave the door ajar to allow air to circulate
inside the cabinet in order to avoid possible
condensation, mold or odours forming.
Installing the Handle
1. Remove the door gasket on the side you
wish to install the handle - you can see two
designated holes for handle installation.
2. Install the handle tightly as shown above with
two screws provided.
3. Replace the door gasket.
FRONT
BACK
Screws
Handle
Door
View A
A
Page 7

7
Reversing the Door
Swing of Your Appliance
Should you desire to reverse the opening
direction, please follow the instructions below .
Figure 1 Figure 2
Figure 3 Figure 4
1 Lock Screws
2 Right Lower Hinge
3 Door Shaft Assembly
4 Right Top Hinge
5 Door
6 Cabinet
7 Left Top Hinge
8 Left Lower Hinge
Note: All parts removed must be saved to
allow the door swing to be reversed.
1. Open the glass door and remove the two screws
under the right bottom corner of the glass door
that are used to hold the right lower hinge to the
glass door. Be careful to support the glass door
with hands to prevent it dropping after removing
the screws. (Figure 1)
2. Pull down to remove the glass door and place
it on a padded surface to prevent scratching it.
(Figure 2)
3. Remove the right top hinge and right lower
hinge. (Figure 3). Remove the left top hinge
and left lower hinge from the plastic bag that
includes the instruction manual then install them
at the designated positions at the left side of
cabinet.
4. Turn around the glass door 180° and reinstall it.
Page 8

8
Operating Your
Wine Cooler
The Wine Cooler should be placed in a position
where the ambient temperature is between
0-35°C. If the ambient temperature is above or
below this range, the performance of the unit may
be affected. For example, placing your unit in
extreme cold or hot conditions may cause interior
temperatures to fluctuate. The range of 5-18°C
may not be reached.
The Controls of Your Wine Cooler
RUN
Indicator light illuminates to signify the cooling
mode is currently in operation.
Light
To control the inner light turn on/off.
Power
To control this appliance turn on/off.
“Set Upper” Button
Used to set temperature in upper zone.
“Set Lower” Button
Used to set temperature in lower zone.
Setting the Temperature Control
The wine cooler has two temperature zones.
• Upper zone – temperature range 5-12°C
• Lower zone – temperature range 12-18°C
• You can set the required temperature in either
zone by pushing the Set Upper or Set Lower
button. When you push the button for the first
time, the LED readout will show the previously
set temperature for that zone (the temperature
preset at the factory is 12°C.
• To set the temperature in the Upper Zone –
Press Set Upper button once. The present
temperature will flash. Scroll through the
temperature settings until you reach the
required setting. The temperature will
decrease by 1°C every time the button
is pressed until minimum temperature is
reached, at which point it will then revert back
to its maximum setting and start again.
• To set the temperature in the Lower Zone –
Press the Set Lower button and follow the
instructions above.
• To view the temperature set in either zone
at any time, press the corresponding “Set
Upper” or “Set Lower” button, the “Set”
temperature will temporarily flash in the LED
display for 5 seconds.
Shelves
• To prevent damaging the door gasket, make
sure the door is fully opened when pulling
shelves out.
• For easy access to the bottles stored, pull
the shelves out. Shelving is designed with
an emergency stop to prevent them being
removed too far when loaded.
Note:
• When you use the Wine Cooler for the
first time or restart the Wine Cooler
after having been shut off for a long
time, there could be a few degrees
variance between the temperature you
select and the one indicated on the
LED readout. This is normal and it is
due to the length of the activation time.
Once the Wine Cooler is running for a
few hours everything will be back to
normal.
• If the unit is unplugged, power lost,
or turned off, you must wait 3 to 5
minutes before restarting the unit. If
you attempt to restart before this time
delay, the Wine Cooler will not start.
o
C
Lower Chamber
Set Lower
Set Upper
RUN
Light
Power
o
C
Upper Chamber
Page 9

9
Care and Maintenance
Removing Shelves
• To remove any of the shelves from the rail
compartment, remove the plastic stops on
either side of the shelf by unscrewing the
Phillips screws that holds each post in place.
Please ensure these are replaced when the
shelf is put back.
Humidity Control
The wine cooler is equipped with a system for
maintaining the correct level of humidity. Fill the
small plastic reservoir (humidity box) ¾ full with
water, and fit onto the runners found on the top
shelf of the wine cooler. Check the water level
regularly and refill as necessary.
Please ensure the reservoir is positioned correctly
on the runners on the top shelf to avoid the
possibility of water spillage.
See figure “AA”
FIG “AA”
Replacing Your Light Bulb
NOTE:
Before removing the light bulb, turn off
the appliance and disconnect from the
power supply. Failure to do so could
result in electrical shock or personal
injury.
• Turn off the light.
• Remove the screw with a Phillips
screwdriver.
• Pull down to remove the lamp cover .
• Unscrew the bulb .
• Replace with a 15-watt bulb that is the same
shape and size.
• Replace the lamp cover and tighten screw .
Lamp Cover Interior Section
Screw Bulb
Top Lamp Holder
Note: The bulb should not exceed 15
watts.
1
2
3
5
6
4
Page 10

10
Cleaning Your Wine Cooler
• Turn off the power, unplug the appliance, and
remove all items including shelves and rack.
• Wash the inside surfaces with a warm water
and baking soda solution. The solution should
be about 2 tablespoons of baking soda to a
pint of water.
• Wash the shelves with a mild detergent
solution.
• Wring excess water out of the sponge or cloth
when cleaning any area of the controls.
• Wash the outside cabinet with warm water
and mild liquid detergent. Rinse well and wipe
dry with a clean soft cloth.
Power Failure
• Most power failures are corrected within a few
hours and should not affect the temperature
of your appliance if you minimize the number
of times the door is opened. If the power is
going to be off for a longer period of time, you
need to take the proper steps to protect your
contents.
Holiday Time
• Short holidays: Leave the Wine Cooler
in operation for holidays of less than three
weeks.
• Long absences: If the appliance will not be
used for several months, remove all items,
turn off the appliance and unplug. Clean and
dry the interior thoroughly. To prevent odour
and mold growth, leave the door open slightly:
blocking it open if necessary.
Moving Your Wine Cooler
• Remove all items.
• Securely tape down all loose items (shelves)
inside your appliance.
• Turn the adjustable leg up to the base to avoid
damage.
• Tape the door shut.
• Be sure the appliance stays secure in the
upright position during transportation. Also
protect outside of appliance with a blanket, or
similar item.
Energy Saving Tips
• The Wine Cooler should be located in the
coolest area of the room, away from heat
producing appliances, and out of the direct
sunlight.
Page 11

11
Problems with Your Wine Cooler
You can solve many common Wine Cooler problems easily, saving you the cost of a possible service call.
Try the suggestions below to see if you can solve the problem before calling customer service.
Problem
Wine Cooler does not operate.
Wine Cooler is not cold enough.
Turns on and off frequently.
The light does not work.
Vibrations.
The Wine Cooler seems to make too much noise.
The door will not close properly.
Possible Cause
Not plugged in.
The appliance is turned off.
The circuit breaker tripped or a blown fuse.
Check the temperature control setting.
External environment may require a higher setting.
The door is opened too often.
The door is not closed completely.
The door gasket does not seal properly.
The room temperature is hotter than normal.
A large amount of contents has been added to the
Wine Cooler.
The door is opened too often.
The door is not closed completely.
The temperature control is not set correctly.
The door gasket does not seal properly.
Not plugged in.
The circuit breaker tripped or a blown fuse.
The bulb has burned out.
The light button is “OFF”.
Check to assure that the Wine Cooler is level.
A slight humming noise may come from the flow of
the refrigerant, which is normal.
As each cycle ends, you may hear gurgling
sounds caused by the flow of refrigerant in your
Wine Cooler.
Contraction and expansion of the inside walls may
cause popping and crackling noises.
The Wine Cooler is not level.
The Wine Cooler is not level.
The door was reversed and not properly installed.
The gasket is dirty.
The shelves are out of position.
Troubleshooting Guide
 Loading...