

Page 1
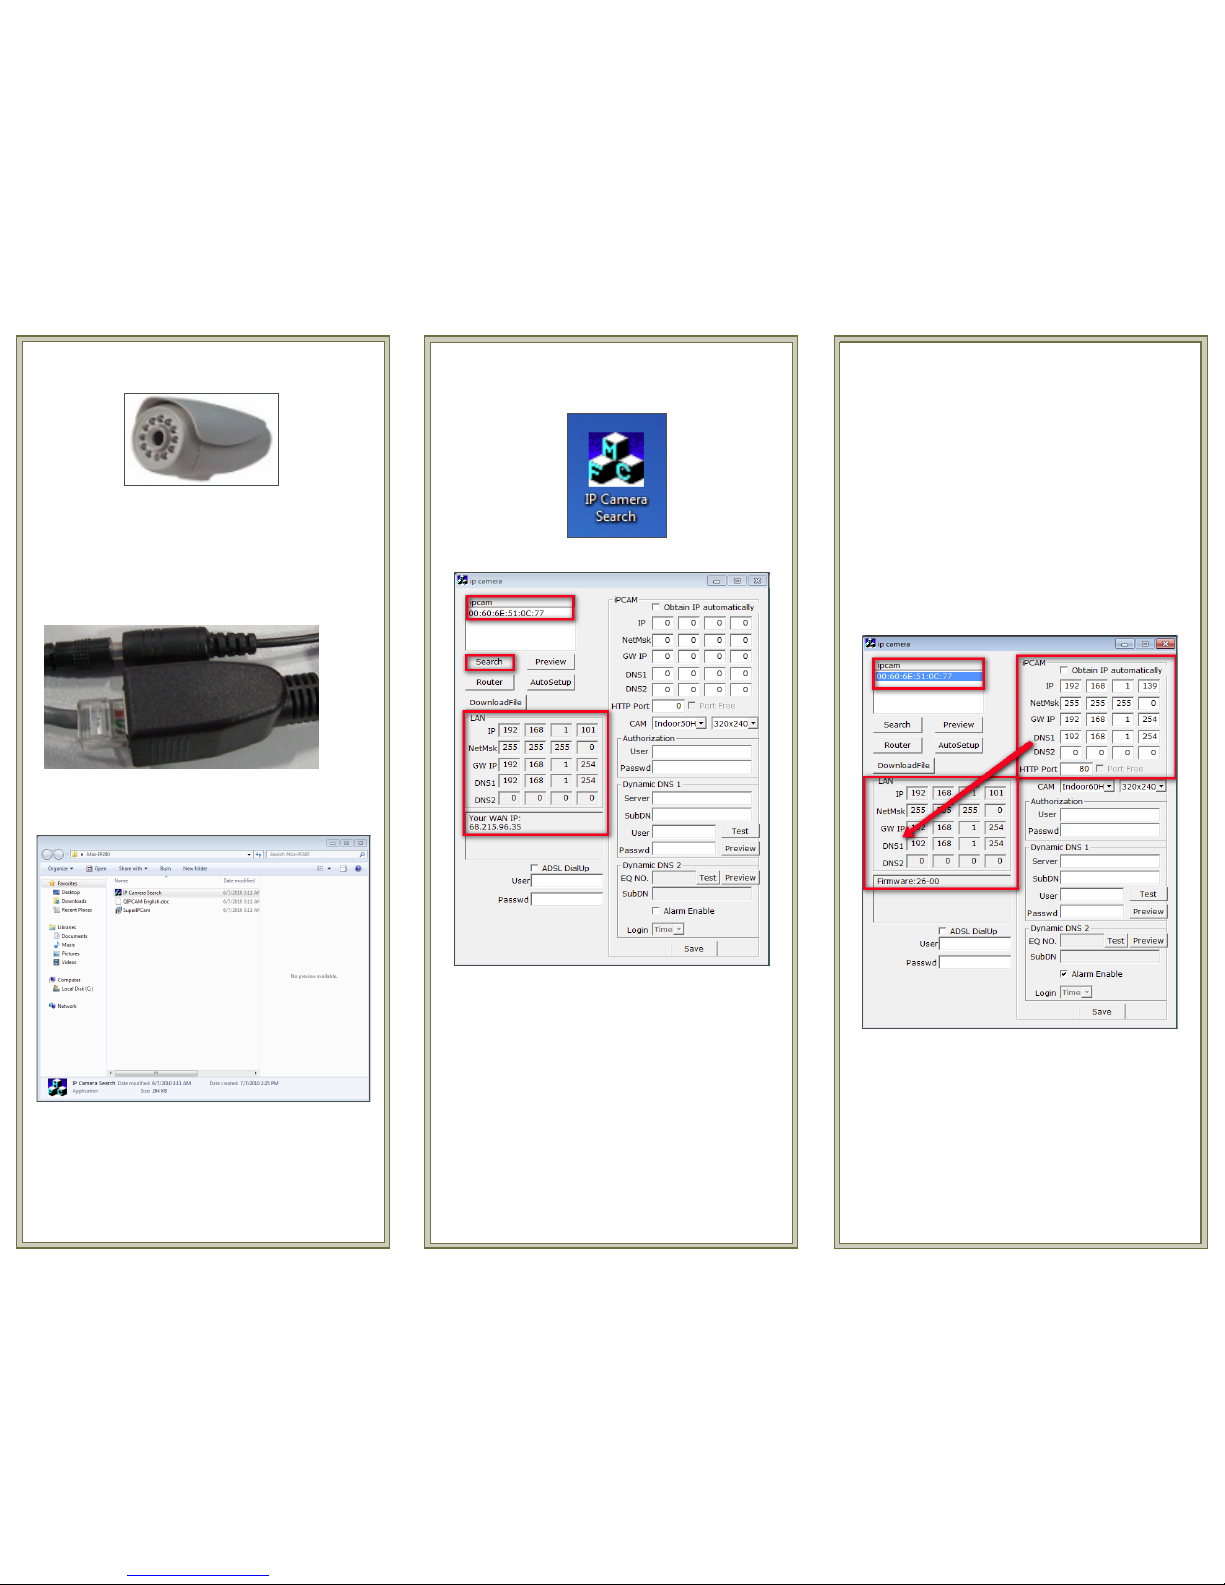
3.0 Now run the IPCamera Search
Application
The following window will open.
MAX-IP280
Quick Guide
1.0 Installation
Begin by applying a 12v power supply to the
camera and connecting your Max-IP280 to your
network once you have mounted your camera.
2.0 Install both the IPCamera Search and
SuperIP Cam applications on your PC.
Note * Your Max-IP280 must be on the same
network as the PC running the IP Camera Search.
You may also use a crossover cable direct from the
camera to your PC.
Click the search button. If your connection is
properly done and your Max IP280 is on the same
network as your PC you will see the MAC address
of your MAX-IP280 appear. This indicates that the
software has found your camera and is ready to be
configured.
In the LAN section you will notice the IP
configuration of your PC and the WAN IP of your
current network. The WAN IP is the IP you will
use to to connect to your IP camera when outside
your network.
4.0 Configure IP Camera
The next step is to click and highlight the MAC
address for the IP camera. This will display the
IP information in your MAX-IP280. You may
manually change the IP address in the IP camera
if you would like or click the AutoSetup button
to have the Software do this for you.
Note* Ensure that the DNS IP on your IP
camera is the same as your LAN DNS. If this is
incorrect you will not be able to view your
camera remotely.
Next select the HTTP port you would like
to use to view your camera remotely. The
default port is 80. You will now need to open
this port within your router to view the
camera remotely. If you will only be using
this camera on your local network you do
not have to open this port on your router.
Page 2
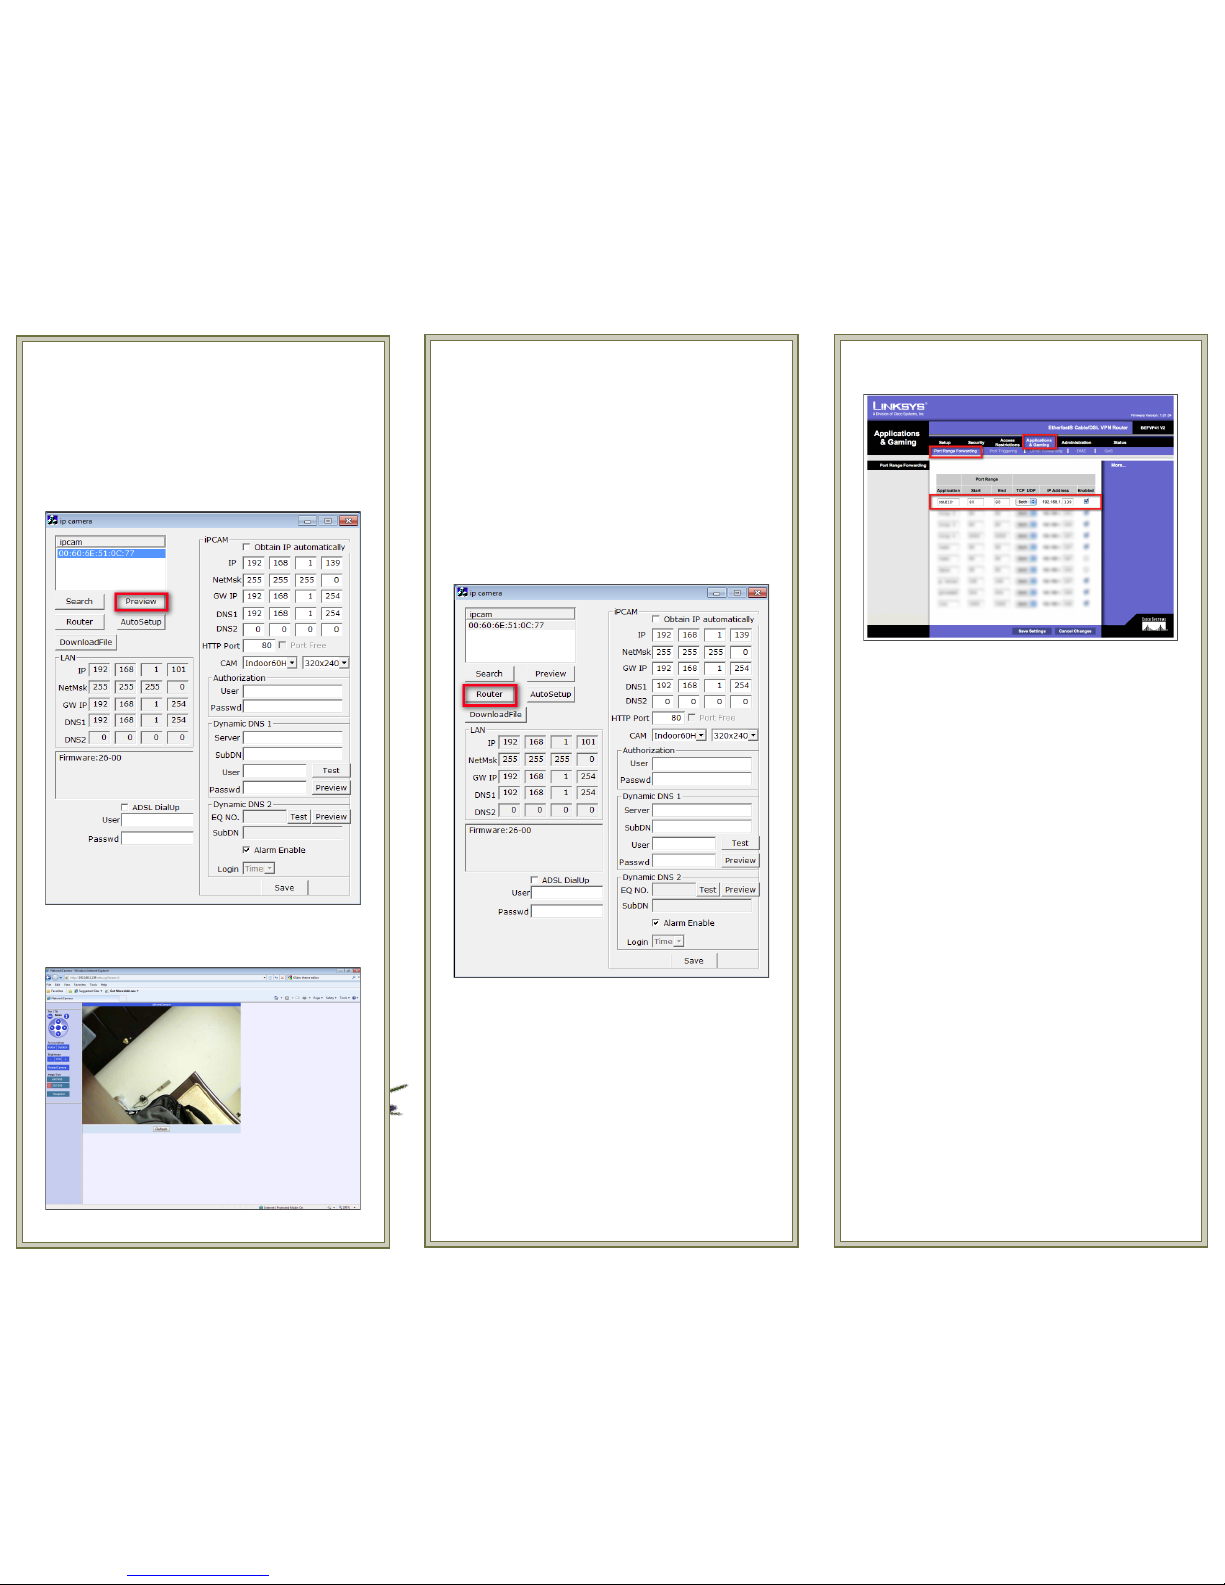
5.0 Test IP Camera
Now click on Preview to test your camera on the
network. This should open your Internet
Explorer Web Browser and allow you to see
your live IP camera.
This is what you should see. If you have video
your IP camera is properly configured.
6.0 Configure your Router
The last step in the process is to open up the
HTTP port in your router to allow you to view
your camera remotely. Click the Router button.
The system will attempt to access your router
and allow you to program the opening of the
ports. If your router page does not open you may
need to access your router directly. Please refer
to your routers manual for guidance.
For this example I will be using a Linksys router
to open my ports.
In a Linksys router you want to choose the
Applications and Gaming Tab followed by the
Port Range Forwarding Tab.
The router will then ask you for the Application
name. Enter any name you like. Next, you enter
the Port Range. In this case our HTTP port is 80
so you enter 80 for both the Start and End. For
TCP/UDP select both followed by the IP
address of your MAX-IP280 camera.
(192.168.1.139) Next check the box labled
Enabled and press the Save Settings button.
Your MAX-IP280 now has its ports forwarded
and is accessible remotely via your WAN IP.
If you do not know how to forward your ports or
are using a different router you may find
instructions at the portforward.com website.
This website has many guides and manuals on
how to open ports on various router models.
You may now proceed to use your SuperCam IP
software to view multiple MAX-IP280 cameras
using the IP information for each of your
cameras.
 Loading...