

Page 1
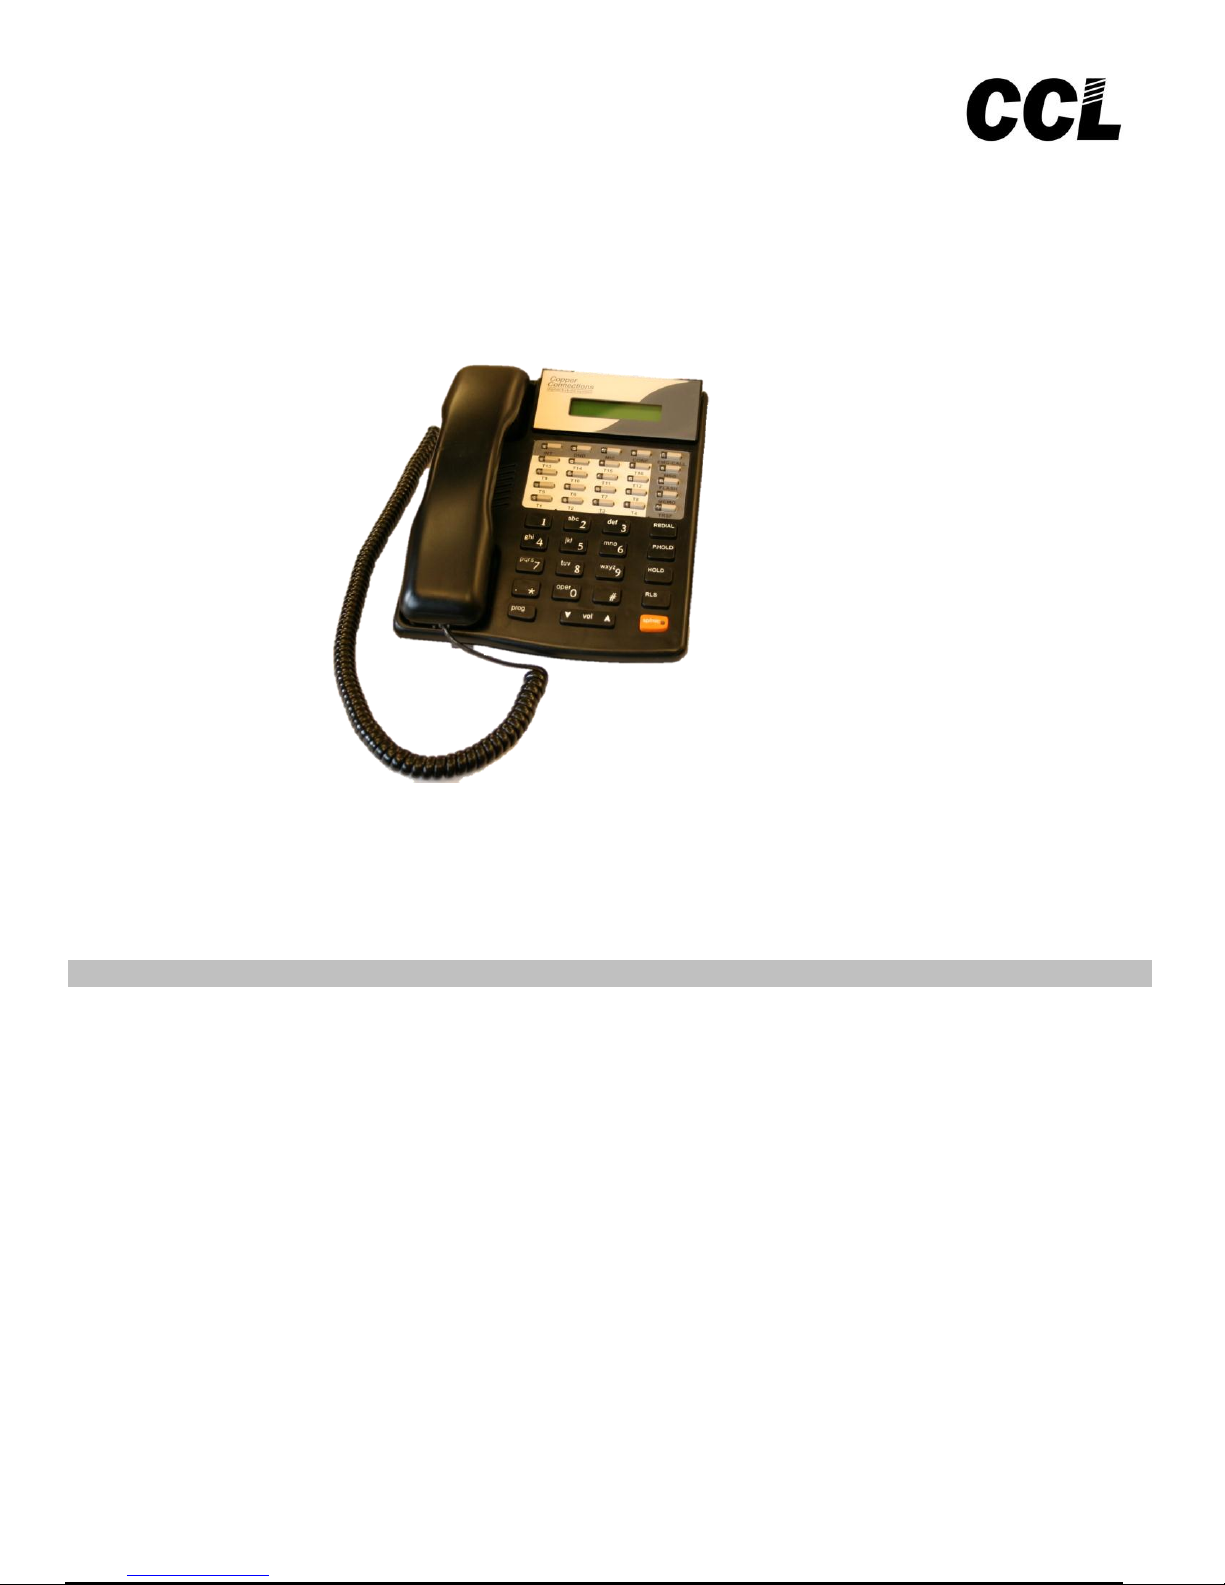
Key Telephone Set
KTS Operating Manual
DG -120 / 248
We extend a warm welcome to you on becoming a part of the Copper Connections family.
Our service support Engineers shall be working hard through our channel partners to ensure your satisfaction
with the product and after sales services. We welcome your feedback / query at
service@copperconnections.com
. Table of Contents .
Abbreviations Used
Numbering Plan
Programming Method & Passwords
Alarm – Set from Extension
Alarm - Set from Operator’s Extension
Auto Answer
Auto Attendant
Auto Call Back from Busy Extension / Junction
Barge-In
Barge-In Disallow
Boss Secretary Feature
Broker’s Call
Call Charge display
Call Consult
Call Forward
Call Parking
Call Pick Up
Call Transfer
CLI (Calling Line Identification)
Conference
Page 2

Day / Night Mode Changeover
Do Not Disturb
DOSA
Dynamic Lock
Emergency Call
Hot Line
Hold a Call / P-Hold
Junction Special Group
Master Cancellation of DND, Follow Me, Call Forward, Auto Call
Memory Dialing - Common
Memory Dialing - Personal
Message
Mini Email
One Touch Keys (DSS Keys)
Operator Console - Extra
Paging
Private Line
Queued Call
Redial
Ring / Voice Paging
Service Extension
Speaker Phone Mode Operation
Volume Control
Operator’s Features
Attending Incoming Calls
Holding an Extension & Dialing Out
Check In
Check Out
Entering of the bills
DND Override
DSS (Direct Station Selector)
Forceful Release of Junction or Extension
Form Feed for Printer
Hotel Name
Message Reminder
Guest Message - Cancellation
Private Line
Room Shifting
Reprint Room Bill
Temporary Check Out
Temporary Check In
KTS Keys Functions
Terms of Warranty
Note- Copper Connections reserves the right to alter equipment specifications and descriptions contained
herein and makes no commitment to update or keep current the information herein. All information
herein is subject to change at any time without notice. No part of this publication shall be deemed to
be part of any contract or commitment whatsoever.
- Product specifications and features are subject to changes without prior notice due to our constant
endeavor to improve the product.
- All features mentioned in this manual are not part of standard systems. Some features need optional
hardware/software upgradation.
- Not every feature in this manual is likely to have been installed in your system or extension.
Page 3

. Abbreviations Used .
Junction Line / PNT - Telephone Lines provided by the Department of Telecommunication
SLT - Single Line Telephone (Normal Telephone Set)
KTS - Key Telephone Set
DSS - Direct Station Selection (Every KTS has DSS keys
Flash - Pressing ‘FLASH’ key on SLT or depressing Hook switch
for fraction of a second
COS - Class of Service
. Numbering Plan .
Extension Numbers
In default the extension numbers are 200, 201, 202, …. And so on.
To make an internal call, lift handset and dial the desired extension number.
Junction Numbers
In default the Junction numbers are 700, 701, etc.
You can make an external call through any of the Junction lines connected to the system, provided you have the rights.
To make an external call
Dial the Junction Access code (which is 0 in default)
The PBX will select the free Junction line from 700, 701, …and give its dial tone
Dial the external number
Note: In case the called Junction line is busy, use Auto Call Back facility.
. Programming Method & Passwords .
The PBX has altogether 2 type of Passwords:
PBX Password & Extension Password.
PBX Password
It is for PBX programming. In default it is `1234’.
In case of Office version, PBX Programming can be done from KTS as well as
SLT.
In case of Hotel version, PBX Programming is possible only from Operator’s
KTS.
PBX Programming from KTS
Press [prog] key
KTS will display `PASSWORD’
Enter the PBX Password.
(By default PBX Password is `1234’).
Now `MODE’ will be displayed.
Proceed with the desired programming.
On successfully accepting the command, display will show `PASS’ else `ERROR’
For next command, press [HOLD] key.
KTS will display `MODE’. Now proceed with the next command without any
password.
To come out from the programming mode, press [RLS] key.
Bulk Programming
To do a similar programming for more than one Extension/Junctions, a single
command can be given.
However, all the extensions or Junctions numbers should be in series to affect such
programming.
Press ‘prog’ key + 1234 (PBX Password) + 00 CC S E ..
Where CC = Programming code.
S = 3 Digit Starting parameter, which denotes starting Extension,
Junction, group, etc.
E = 3 Digit Ending parameter, which stands for last Extension.,
Junction, group, etc.
Example: To program extensions 210 to 220 to have class of services 3 and 1 for
day and night mode respectively, the command would be
Press ‘prog’ key + 1234 (PBX Password) + 00 42 210 220 3 1 1
Changing the PBX Password
PBX Password can be changed through the following command:
Press ‘prog’ key + 1234 (PBX Password) + 81 NNNN NNNN 1
Where, NNNN is the new password entered twice.
Page 4

Note: Once password is forgotten there is no way to retrieve it or change it. The
password can be set back to its default setting of 1234 only by
disconnecting the power supply to the RAM chip of the system.
Extension Password
Every extension has its own Password to control some of its own features like Dynamic Lock, etc.
The default Extension Password of all Extensions is:
777 in Office Version and
77 in Hotel Version..
Extension feature programming is done from its own respective KTS / SLT.
Extension Features Programming through Extension Password
Extension Features are programmed by the Extension user through its own
“Extension Password”.
From KTS or SLT, dial 55+777 (or 77 in case of Hotel Version) followed by the
feature programming.
Extension Password Reset using PBX Password
To reset the Extension Password of an Extension to its default value of 777,
Press ‘prog’ key + 1234 (PBX Password)
Dial 38 EX 1
Where, Ex = 200, 201...etc.
IN OFFICE VERSION
To change Extension Password
Dial 55 + 777 (Default Extension Password)
Dial 2 NNN NNN (Where ‘NNN’ is the 3 digit new passcode)
Hear Confirmation tone
Press [rls] key
IN HOTEL VERSION
To change Extension Password
Dial 55 + new password + 9
To reset the Password
Dial 55 + existing Password + 8
If a guest forgets his extension’s password then first the password should be reset to the default password by using the
command `55 + Password + 8'. Now a new password can be set by the command i.e. 55 + password + 9.
Note : When a room is checked out, the password of the room becomes '77'.
: This feature can be used only if the room is checked in and this feature cannot be accessed from the operator
and it cannot
be activated from the operator extension.
. Alarm – Set from Extension .
(Only with Hotel Version)
A guest can set his own alarm for his extension. The extension will ring at the set time and on lifting the handset, hold
on music will be heard. If DISA card is installed in the PBX, alarm message will be played in place of Hold Music.
Procedure to set alarm from own KTS
Dial 51 + HH + MM
where, HH = Hours in 24 hours format
MM = Minutes.
Hear confirmation tone.
Press [rls] key.
To cancel the alarm
Dial 51 + 00 + 60
Hear confirmation tone
Press [rls] key
Note: This feature can be used only if the room is checked in.
: Alarm cannot be set for the operator’s extension.
: The operator can also set the alarm for any room. If both guest and operator are
setting the wake up alarm then latest setting will be effected.
. Alarm - Set from Operator’s Extension .
(Only With Hotel Version)
Operator can set the wake up alarm for any room. At the time of alarm, the telephone in the room will ring. If the guest
does not pick up the handset of the instrument within one minute, the alarm will be diverted to the main operator
indicating that the alarm ring had failed.
Page 5

Alarms can be set only for the next 24 Hours. If at the time of alarm the extension is busy then it will ring after one
minute. If self-alarm is also set by the guests then the latest setting will be effected.
To set an Alarm for a room
Press [emg/alarm] key
Dial the room number. An arrow will be displayed on the KTS
Enter the wake up alarm time in 24 hours format HH MM
Press [rls] key
To Cancel the Alarm
Press [emg/alarm] key
Dial the room number. An arrow will be displayed on the KTS
Dial 00 60
Press [rls] key
Note: This feature can be used only if the room is checked in and these features cannot be accessed from the operator
extension and they cannot be activated on the operators extension.
Auto Answer .
This feature activates your phone to answer all incoming internal calls automatically. Incoming internal calls to your
extension will automatically get connected after a predetermined number of rings so that you can answer the call
without lifting the handset or pressing any key. The auto answer feature has to be programmed by the system
programming.
Office Version
TO ENABLE / DISABLE AUTO LIFT IN KTS
Dial 55 + 777 (Default Extension Password) !! Pwan: Is it 77 or 777 ???? If 77
then change in SLT Manual as well
Dial 66 – To Enable auto lift & auto drop.
Dial 67 – To Enable auto drop only.
Dial 60 – To Disable auto lift & auto drop
Hotel Version
TO ENABLE / DISABLE AUTO LIFT IN KTS
Dial 55 + 77 (Default Extension Password) + 6 – To Enable auto lift & auto drop.
Dial 55 + 77 (Default Extension Password) + 7 – To Enable auto drop only.
Dial 55 + 77 (Default Extension Password) + 0 – To Disable auto lift & auto drop
Note: This feature can be used only if the room is checked in and these features cannot be
accessed from operator or to the operator.
Caution: Leaving your work station while auto answer is activated will cause your extension
to answer an incoming internal call. If any conversation is going on in the room, the
caller will inadvertently be listening to the conversation.
. Auto Attendant .
(REQUIRES A DISA CARD)
In Office Version
The DISA card can be used as an auto attendant for all incoming calls. The DISA card plays greeting message and
transfers the call to the extension, depending on the number dialed by the caller. Each DISA card can handle 2
incoming calls simultaneously. The DISA card can store 7 different messages as given below:
Level 1 Operator message Maximum message time 10 sec.
Level 2 Night message Maximum message time 10 sec.
Level 3 Successful storing of numeric msg. Maximum message time 5 sec.
Level 4 Welcome message Maximum message time 10 sec.
Level 5 Extension busy message Maximum message time 10 sec.
Level 6 Invalid number dialed message Maximum message time 10 sec.
Level 7 No answer from extension message Maximum message time 10 sec.
To activate the auto attendant feature, the Junction line must be programmed for DID landing in the system
programming. When an external caller dials on an incoming Junction line which is set in DID , he gets a Junction ring
back tone for 3-4 seconds after which the call will be picked by the DISA card. The DISA card will then play the
message. The various stages of processing in the DISA card are explained below:
STAGE I: After the incoming Junction call is picked up by the DISA card, the caller will hear the message from Level 4
‘Welcome message’. The caller can then dial an extension number he wishes to reach. The numbers must be dialed in
the tone mode (DTMF). If no extension number is dialed, the caller will be automatically connected to the DISA answer
port. When the caller dials a valid number, he is connected to the required extension if it is free. If the extension is busy
or remains unanswered for 40 seconds, he will receive Level 5 or Level 7 message accordingly. If the caller has dialed
an invalid number, the message from level 6 will be played and the call will be transferred to the DISA answer port.
Page 6

STAGE II: The operator message (Level 1) follows this STAGE I. This message asks the caller to wait for assistance
or to leave a numeric message. To store a numeric message the caller has to dial # Telephone number #. If the
numeric message is for KTS extension, it will be displayed on the called KTS. But the numeric message left for an
analog extension will be displayed on main operator along with the extension number.
STAGE III: This stage is reached only if the caller has opted to leave his telephone number. If the caller’s telephone
number is stored successfully, system will play the confirmation message (i.e. Level 3) & the Junction line will be
released automatically.
STAGE IV: This stage is valid only if the night VRR is enabled in the system programming. After office hours, when the
caller calls up, he is connected to level 2, where he gets a night message. After playing the night message, the line will
be released.
A sample of the messages in the various levels are given below:
Level 1 - (Operator MSG) - Please hold on, your call is being transferred to the operator or you can leave your
telephone number by pressing # followed by your telephone no & ending with #.
Level 2 - (Night Message) - The office hours are over. Please call at 9.30 tomorrow morning.
Level 3 - (Successful storing of telephone number) - Your telephone number is successfully stored. Thank you for
calling.
Level 4 - (Welcome Message) - Welcome to Copper connections. Dial 214 for Mr. ABC, 204 for Mr. XYZ or wait for
assistance.
Level 5 - (Busy Message) - The dialed extension number is busy. Dial another extension number or wait for
assistance.
Level 6 - (Invalid Message) - The dialed extension number is invalid. Dial another extension number or wait for
assistance.
Level 7 - (No Answer Message) - The dialed extension number is not responding. Dial another extension number or
wait for assistance.
Note: One DISA card can handle only 2 Junctions simultaneously. In case of single DISA card, if third DID call lands, it
will wait for 10 seconds for DISA & if still DISA is not free then call will be diverted to the DISA answer port. Additional
DISA card can be added depending on the requirement.
: DISA answer can be set through the system programming. By default, the Operator extension is set as DISA
answer port.
Hotel Version
The DISA card can be used to store voice messages, which can be used for the following purposes:
1. To play a greeting message for all incoming Junction line programmed for DISA landing.
2. To play an alarm message when an extension user lifts his handset on an alarm call.
3. To play an intimation message, if there is any message for a guest.
Each DISA card has 2 ports on which the same message will be recorded.
The greeting message is of 10 seconds duration. This message will be played for all the incoming Junction calls, which
are programmed for DISA landing. After the message is played, the call will be connected to the operator only. Each
card is capable of handling 2 incoming calls simultaneously. If third DID call lands, it will wait for 10 seconds for DISA &
if still DISA is not free then call will be diverted to the DISA answer port.
Note: DISA answer port can be set through the system programming. By default, the
Operator extension is set as DISA answer port.
The “Wakeup Alarm message” is of 10 seconds duration. This message will be played when an extension user lifts his
handset on an alarm call. While this message is played, the extension user can dial any extension number.
The “Intimation message” is of 10 seconds duration. This message is used to intimate the guest that there is some
message waiting for him.
The intimation message can be activated only by the operator. On activating this message for an extension, the [msg]
LED of the KTS will light up.
On lifting the handset, the guest will get the intimation message instead of the dial tone. Now the guest can dial the
operator extension number to get his message.
Note: If the message is not cancelled then the MSG LED will continue to glow until the
operator cancels the message.
A sample of the various messages:
Wake up Alarm message “ This is the wake up alarm call. For any help call reception”
Intimation message "There is a message for you at reception. To collect the message, please Dial "9".
Welcome Message “ Welcome to Hotel COPPER CONNECTIONS INTERNATIONAL. Please Hold on, you will be
attended shortly.”
. Auto Call Back from Busy Extension / Junction .
If the called extension or Junction is found busy, this feature automatically connects as soon as the called line is free. If
the call back is for an extension, your extension will ring as soon as the called extension becomes free.
Page 7

Simultaneously, the called extension will also ring. If the call back is for a Junction line, the Junction will be allotted to
you as soon as it becomes free and your extension will ring. On lifting your handset, you will get Junction dial tone.
To activate Auto Call Back on a busy line:
On getting busy tone after dialing the extension number or Junction access code, dial ‘8’
Hear confirmation tone
Keep the handset
. Barge-In .
This feature enables a user to monitor any extension or Junction line without audio warning to the monitored party.
Barge-in can be activated while attempting to call a busy extension or Junction line.
To activate barge in on a busy extension or Junction line:
Dial 6
To Cancel Barge- In:
Keep the handset
Note: When a port is protected against listening in by activation of the Privacy feature, you will get engaged tone.
. Barge-In Disallow .
(Only with office version)
This feature allows an Extension user to prevent any other extension to barge-in to its conversation. The Extension
must have the “Barge-In Disallow” enabled (Refer Programming Manual).
PROCEDURE
To allow others to Barge-In
Dial Extension Pass Word + 42 + Press [rls] key
To disallow other extensions to Barge-In
Dial Extension Pass Word + 50 + Press [rls] key
Example: If, Ext 205 is given this authority (through programming 34+EX Y) then it can allow / disallow other
extensions to Barge-Into its conversations through its own Extension Password.
. Boss Secretary Feature .
Any extension can route its incoming internal & external calls through any other extension using this facility. The first
extension becomes BOSS while second extension works as ‘SECRETARY’. All incoming calls for ‘BOSS’ will land at
‘SECRETARY’ extension while only secretary is able to call the ‘BOSS’ and transfer the calls to him. However, the
‘BOSS’ can dial outside directly or ask the ‘SECRETARY’ to make a call and transfer it to him.
Note: Boss & Secretary extension has to be defined as per the Programming Manual.
. Broker’s Call .
This feature allows you to put a call on hold and then converse with a third party, while switching between the two
calls. The party not in conversation is automatically put on hold.
To activate Broker’s call:
Press [HOLD] key
Dial the third party number and wait for answer
Press [HOLD] key to alternate between parties any number of times
Call Charge display .
While making an external call, the display will first show the numbers dialed by you. On maturity of the call, the display
will show the charge for the call and also the time duration for the call. The duration and call charges will be updated
automatically until you are talking on the Junction line.
. Call Consult .
This feature allows you to consult with a third party while conversing with an external or internal caller. While
consulting, the original caller will be put on hold and he will get hold on music. After consultation is complete, the two
original parties will be reconnected and the consulted party is then released.
Press [HOLD] key to hold the conversing party
Dial another extension number (Second party).
Talk with second party.
If second party disconnects, you will be connected to first party automatically.
Or you can toggle in between first & second party by using the [HOLD] key.
. Call Forward .
(In case of Office Version)
Page 8

Call Forward – All Conditions
An extension user can forward calls on its extension to some other extension.
Procedure:
Dial 55 + 777 (Default Extension Password)
Dial 3 + extension number where you want the calls to be forwarded + 1
Hear Confirmation tone
Keep the handset down
Call Forward – When not answered
An extension user can forward incoming calls on his extension to some other extension after a predetermined number of
rings at his extension.
Procedure:
Dial 55 + 777 (Default Extension Password)
Dial 3 + Extension number where you want the calls to be forwarded + 2
Hear Confirmation tone
Keep the handset down
Call Forward – When Busy
An extension user can forward incoming calls on his extension to some other extension in case of his extension being
busy.
Procedure:
Dial 55 + 777 (Default Extension Password)
Dial 3 + extension number where you want the calls to be forwarded + 3
Hear Confirmation tone
Keep the handset down
Note: Call Forward-When busy and Call Forward-When not answered, will not work for extensions that are programmed
for round robin.
Cancellation of the Do Not Disturb, Follow Me, Call Forward, Auto Call back
Dial 55 + 777 (Default Extension Password)
Dial 50
Hear Confirmation tone
Keep the handset down
(In case of Hotel Version)
Any room can forward its incoming internal and external calls to any other room using this feature.
Procedure
Dial 52 + extension number where the calls are to be forwarded
To cancel
Dial 55 + 777 (Default Extension Password) + 2
Note: This feature can be used in Hotel version only if the room is checked in.
: This feature cannot be activated on the operator extension.
. Call Parking .
(Only With Office version)
In case you want to hold a conversing party for a longer time, you can park the call using this feature. The party put on
park will get hold on music. The parked party can be retrieved from your extension or from any other extension.
To Park A Call:
Press [HOLD] key
Dial 6
Hear Confirmation Tone
Keep the handset
To Pick a Parked Call from Own Extension:
Lift Handset
Dial 86
Start Conversation with the retrieved party
To Pick A Parked Call from Another Extension:
Lift Handset of extension from where you want to pick up the call
Dial 53 + Own extension number
Start Conversation with the retrieved party
Note: If the parked call is not picked up within a predetermined time, the call will automatically return to the originating
extension from which the call was parked. If call is not attended for 4 minutes then it will be disconnected.
. Call Pick Up .
Page 9

This feature allows you to answer calls ringing on other extensions. There are two types of call pickup – Pick ringing
Junction line and Pick any ringing extension.
In Office Version
To Pick Ringing Junction line
Dial 88
To Pick Ringing Extension
Dial 54 + ringing extension number
Note: The priority in which the calls are picked up when an extension user dials 88 is:
i) Ringing Junction ii) Ringing Extension iii) Queued Junction line to an extension (not operator).
In Hotel Version
To Pick Ringing Junction line
Dial 88
To Pick Ringing Extension
Dial 54 + ringing extension number.
Note: Only ringing service phone can be picked up by dialing 88.
. Call Transfer .
Any internal or external call received / originated at any extension can be transferred from that extension to other
extension. The call can be transferred after screening or without screening.
Press [HOLD] key
Hear confirmation tone
Dial the Extension number to which you want to transfer the call.
At this point, you can either screen the call or transfer unscreened.
Screened Transfer
Hear ring back tone
Wait for answer
Announce the call
Keep the handset to transfer the call or Press [HOLD] key again to return to the calling party.
Unscreened Transfer
Hear ring back tone
Keep the handset, the call will be transferred
Note 1: While transferring a call, to return to the calling party when the transfer destination is busy or does not answer,
Press [HOLD] key again.
Note 2: During Unscreened transfer, whenever there is no answer from the destination extension, the call will come
back to that extension who transferred the call. If at the time of call back, transferring extension is busy, the call
will be diverted to the operator.
. CLI (Calling Line Identification) .
The KTS displays the Telephone Number of the Caller when an incoming Junction call rings on it. This works if TKB-CLI
card or TKB-H-CLI card is used.
. Conference .
Two types of conferences are possible as listed below. Both type of conferencing requires DID card to be installed in
the PBX.
3 Party Conference (Hotel Version & Office Version)
This feature enables to activate conference as explained below:
While talking with a party (internal or external)
Press [hold] key to hold the first party and dial the number of second party
While conversing with the second party, press [conf] key to start a three party conference
Note: 3 Party Conference will work only if DISA card is installed in the PBX.
: For having a 3 party conference with two Junction lines and yourself, you must have the rights to pick the second
Junction while holding the first Junction. This right is given by system programming. 3 Party Conference can not
be done from SLT.
Eight Party Conference (Only with Office Version)
This feature requires an additional card i.e. 8 party conference card. You can establish conference among internal /
external callers or called parties.
To start a conference call
Make conversation with a party (Internal / External) and park the call
Disconnect and call other parties, park each of them one at a time
Dial 83 to initiate conference
Note: 8 Party Conference will work only if Conference card is installed in the PBX. DISA Card is not required for 8
Page 10

Party Conference.
: Conference will get over when the initiator disconnects. If a participant of the conference wants to leave the
conference, he has to keep the handset.
. Day / Night Mode Changeover .
The features of extensions and the Junction lines can be programmed differently for the Day mode and Night mode.
The PBX can then shift from Day Mode to Night mode or vice versa in following 2 ways:
Automatically at the set times
Manually though Night Code
Manual changeover over rides the automatic changeover.
Manual changeover setting if left unchanged will get overridden by the Automatic changeover timings and the system
would come back to the auto changeover mode.
Manual changeover is done as explained below:
In case of Office Version
Dial 6 + ZZ + M
where, ZZ = Night code (99 in default)
M = 1 for Day Mode
0 for Night Mode
Press [rls] key
Night Code can be changed as explained in Programming Manual.
In case of Hotel Version
Dial 499 + ZZ + M
Where, ZZ = Night Code (99 in default)
M = 1 for Day Mode
= 0 for Night Mode.
Press [rls] key
. Do Not Disturb .
This feature enables you to inhibit your telephone from ringing, but you can still make outgoing calls. Any incoming call
for your extension will be automatically cancelled and the caller will get busy tone.
In Office Version
To activate DND
Dial 84
Hear Confirmation tone
Keep the handset
UNCONDITIONAL DND
If the DND is locked through system programming then DND cannot be availed by an extension by dialing `84’, but
unconditional DND can be activated by an extension in such case.
To activate unconditional DND
Dial 55 + 777 (Default Extension Password)
Dial 59
Hear Confirmation tone
Keep the handset
To Cancel DND
Lift handset
Dial 55 + 777 (Default Extension Password)
Dial 50
Hear Confirmation tone
Keep the handset
In Hotel Version
To activate DND
Lift Handset
Dial 84
Hear Confirmation tone
Keep the handset
To Cancel the DND
Lift Handset
Dial 55 + Extension Password (Default is 777) + 3
Note: This feature can be used only if the room is checked in & these features cannot be accessed from operator and it
cannot be activated on the Operators extension. The default own password is '777'
Page 11

. DOSA .
(Only with office version)
The DOSA feature enables you to access the Junction lines connected to the system and make outgoing calls from a
remote location. The access to the Junction lines is through your personal passcode, which is set in the system.
Further, the DOSA Lock has to opened by you from your extension, to allow DOSA calls, using your passcode.
For DOSA feature, the Junction line must be defined in the DID mode. To activate DOSA, you must first call your office
number which is defined in DID mode. You will get a Junction ring back tone for 2-3 seconds after which the system
will pick the line and start playing the DISA message.
Now dial `90 + Your Extension Number + Your Personal Code’.
After this, you will hear the music for 2 or 3 seconds and then silence. Now you can access any other Junction line by
dialing the Junction access code and then proceed to dial the required external number. Usage of Junction lines will
depend on the class of service defined for your extension. The default duration of the call is fixed at 30 seconds. If you
want to extend the call beyond 30 seconds you must dial `*X’ during conversation, where “X” can have values 3 to 9
corresponding to 30 to 90 seconds and 0 corresponding to 100 seconds. If you are not extending the call, the call will
get disconnected after 30 seconds.
In case you get engaged tone, then for dialing another telephone number or to redial the same number, dial *1 to
disconnect the current call. After this, you can dial the Junction access code and proceed as explained above.
To come out from DOSA
dial `2’.
All Calls made through DOSA will be accounted to your extension. The DOSA calls using your passcode is possible
only if you have opened the DOSA lock from your extension.
To Open DOSA Lock
Get into Own supervisory mode
Dial 41
Hear Confirmation tone
Press [rls] key
To close DOSA Lock
Get into Own supervisory mode.
Dial 40.
Hear Confirmation tone.
Press [rls] key
Note: DOSA facility is available only with a DISA card. In the Default settings, DOSA is locked for all extensions.
. Dynamic Lock .
An extension can cancel or allow Junction dialing facility from its extension by using its own password. This feature is
used by extensions who do not want others to use its extension during his absence.
In Office Version
Dial 55 + 777 (Default Extension Password)
Dial 1 + C
Hear Confirmation tone
Press [rls] key
Where, C = 0 for no external call
= 1 for Restricted Dialing
= 2 for Level One off
= 3 for STD Off
= 4 for ISD Off
= 5 for allowing all calls
Note: Only those values of C shall work that are allowed to the extension.
In Hotel Version
To lock dialing facility from the extension
Dial 55 + 77 (Default Extension Password) + 4
Hear confirmation tone.
Press [rls] key.
To unlock your extension
Dial 55 + 77 (Default Extension Password) + 5
Hear confirmation tone
Press [rls] key
Note: This feature can be used only if the room is checked in.
: This feature cannot can not be activated on Operators extension.
. Emergency Call .
Page 12

This feature allows you to break into an established two party call. It can be used for conveying any emergency
message for either of the two conversing parties. On activating emergency call on an extension, the party who was
conversing with this extension will automatically go on hold and he will hear hold on music.
To activate emergency call
On getting busy tone after dialing an extension number, press [EMG] key
Start conversation
To release emergency call
Press [RLS] key
. Hot Line . .
(Only with office version)
This facility enables you to set hotline with an extension or even an external number. If an extension user is set for hot
line then by just lifting the handset the extension you have set for hotline will ring giving you a ring back tone. If an
external number is set for hotline then by just lifting the handset the external number is dialed automatically. If one of
the Junction lines is set on Hot line mode then that Junction line will get connected on picking up the handset.
It can be configured to work in following two different ways
1. Where Hotline is connected immediately on lifting the handset
2. Where system dial tone is obtained for the first 3 seconds during which you can
dial any internal or external number. If nothing is dialed within 3 seconds, the
hotline will be connected.
To Set Immediate Hotline with extension:
Dial 55 + 777 (Default Extension Password)
Dial 90 followed by the extension number
Press [HOLD] key
Hear Confirmation tone
Press [RLS] key or press [sp/mic] key
To Set Immediate Hotline with Junction Dial tone:
Dial 55 + 777 (Default Extension Password)
Dial 90 followed by the Junction Access code (0 or 700, 701 etc..)
Press [HOLD] key
Hear Confirmation tone
Press [RLS] key or press [sp/mic] key
To Set Immediate Hotline with an external number:
Dial 55 + 777 (Default Extension Password)
Dial 90 followed by the trunk access code, followed by the external number
Press [HOLD] key
Hear Confirmation tone
Press [RLS] key or press [sp/mic] key
To Set Delayed Hotline with extension:
Dial 55 + 777 (Default Extension Password)
Dial 91 followed by the extension number
Press [HOLD] key
Hear Confirmation tone
Press [RLS] key or press [sp/mic] key
To Set Delayed Hotline with Junction Dial tone:
Dial 55 + 777 (Default Extension Password)
Dial 91 followed by the trunk access code (0 or 700, 701 etc.)
Press [HOLD] key
Hear Confirmation tone
Press [RLS] key or press [sp/mic] key
To Set Delayed Hotline with an external number:
Dial 55 + 777 (Default Extension Password)
Dial 91 followed by the trunk access code followed by the external number
Press [HOLD] key
Hear Confirmation tone
Press [RLS] key or press [sp/mic] key
To Cancel Hotline:
Cancellation of Immediate hotline is done as per the Programming Manual i.e. `31 EXT 9’.’.
Procedure for cancellation of Delayed hot line:
Dial 55 + 777 (Default Extension Password)
Dial ‘50’.
Page 13

. Hold a Call / P-Hold .
Holding a Call
A conversing party (Extension or Junction) can be placed on hold by the following procedure for onward activities as
Call Consult, Call Transfer, Call Parking or Conference.
PROCEDURE
During conversation, press [hold] key
Hear service confirmation tone
To retrieve a call put on hold
Press [hold] key
Start conversation
Note: The party put on hold will get hold on music.
: With Hotel version, a call can be put on hold only if the extension has the call transfer right.
P-Hold
P-HOLD is the Public hold. You can use this feature if you want to hold a Junction line for a long time. The line put on
PHOLD will get hold on music and the corresponding LED of the line on the KTS will start blinking fast. A call put on
PHOLD can be picked up by any extension in the system.
To put a Junction call on PHOLD
While conversation press [PHOLD] key
To Pick a Call put on PHOLD
Lift handset.
Press the corresponding single touch key for the line put on PHOLD
Start conversation with the retrieved party
. Junction Special Group .
Junctions in this group can not be picked by dialing `0’. They are accessed by dialing 89 or direct Juncti on access codes.
When a Junction Line is programmed in Special Junction Group, It is then accessible to all Extensions (even to extensions
of different Extension Groups).
This grouping is generally required in following cases:
Where Hotlines are to be used
Where some Junction Lines are used for tie linking of two PBXs.
Where different group for STD/ISD Junctions are to be created.
To access Junctions of Special Group, dial 89.
This special Junction Group is accessible to all extensions except for Extensions whose COS= 0.
Master Cancellation of DND, Follow Me, Call Forward, Auto Call Back
This feature is used to cancel all feature settings of your extension like Do Not Disturb, Follow Me, Call Forward, Auto
Call back at one time.
To cancel All feature settings:
In Office Version
To cancel all feature settings
Dial 55 + 777 (Default Extension Password)
Dial 50
Hear Confirmation tone
Press [rls] key
In Hotel Version
To cancel all the features of any room extension, just Chk-out that room.
All the features will come to default setting.
. Memory Dialing - Common .
(Only with office version)
The system has Memory Codes of 90 numbers, which can be used by all the extensions. The Memory Codes Common are divided into 2 parts of 45 numbers each. The numbers stored in the first part can be dialed only by those
extensions that have the required class of service. The numbers stored in the second part can be dialed by any
extension, irrespective of the class of service of the extension. The Common Memory codes can be stored through
programming given in Programming Manual.
Following is the command to dial out through Common Memory Dialing:
To dial numbers stored in Common Memory:
Press [MEMO] key
Dial XX
Where, XX= 10 - 99.
Note: Common Memory Codes 10 to 54 are class of service controlled i.e. only those telephone nos. which pertain to
Page 14

the class of service of an extension can be dialed.
Common Memory Codes 55 to 99 are mode free codes. These can be accessed by all extensions irrespective of
their class of service.
. Memory Dialing – Personal .
(Only with office version)
Each extension in the system has an exclusive bank of 10 numbers, which can store 10 external numbers. The
external numbers, which can be stored, depends on the class of service of the extension. These external numbers can
then be dialed by dialing a 3 digit code assigned to them.
To store a number in Personal Codes:
Dial 55 + 777 (Default Extension Password)
Dial 8 + Bnk + Ln + Number to be stored + Press [HOLD] key
Press [RLS] key
Where, Bnk = 0 to 9 Code number
Ln = Junction access code. 0 or 700. 701..etc.
To dial a number from personal memory Codes:
Press [MEMO] key
Dial XX
Where, XX= 00 - 09.
Note: The memory codes can be erased by overwriting a new number at the same location.
. Message .
(Only with office version)
Messages can be left by a caller or by the voice mail for your extension. A message waiting will be indicated by the
illuminated [MSG] key. More than one message can be left for your extension. You can also leave your message for
another KTS extension.
To leave internal message i.e. own extension number to another KTS user
Press [MSG] key on getting a busy tone or ring back tone
Hear confirmation tone
Keep the handset
To view message when the MSG key lights up
Press [MSG] key
Press [FLASH] key to erase message
Or
Press [RDL] key to get connected to the extension, which has left the message
Note: If more than one message is left for your extension, you can view the next message only after erasing the
message on the top.
. Mini Email .
(Only with office version)
The system has 6 fixed messages, which can be activated by any extension. On activating these messages, a KTS
extension dialing your extension will get the corresponding message displayed on the LCD.
To activate mini email:
Dial 55 + 777 (Default Extension Password)
Dial 7 X
where, X = Value from the table given below for the required message.
Hear Confirmation tone
Press [RLS] key
The values of X for the various messages are listed below:
MESSAGE VALUE OF X
OUT FOR LUNCH 100 00
BACK AT HH:MM 2 HH MM (where HH is hours in 24 hours format & MM is minutes)
GONE FOR DAY 300 00
BUSY IN MEETING 400 00
BACK ON DD/MM 5 DD MM (where DD & MM are the Date & Month respectively)
CALL AT ‘Ext No.’ 6 NNNN (where NNNN is the extension no. in 4 digits)
Note: Even after the message has been set by you, your extension will continue to ring normally whenever a call lands.
(Both internal & external).
To Cancel Mini Email:
Dial 55 + 777 (Default Extension Password)
Dial 52
Page 15

Hear Confirmation tone
Press [RLS] key
. One Touch Keys (DSS Keys) .
Each KTS has 16 one touch keys (also called DSS keys) which can be programmed according to your requirement.
The keys have bicolour LEDs which can be used to indicate the status of an extension or a Junction line. The keys can
also be programmed to store any Memory Code - Common. The programming has to be done using the Program
interface. The keys will glow red when the programmed extension or Junction line is busy with any extension or
Junction. They will glow green when they are busy with your extension. You can use these keys to access any
extension or trunk by just pressing the corresponding key.
. Operator Console – Extra .
In default, the first extension (2000) of the system is the main operator.
Up to 3 more Operator Extensions can be defined in the PBX.
Refer Programming Manual for their setting.
These extra Operators can be enabled (login) or disabled (logout).
In office Version
To log-in as extra operator
Dial 55 + 777 (Default Extension Password)
Dial 57
Get confirmation tone
Press [rls] key
To log-out as extra operator
Dial 55 + 777 (Default Extension Password)
Dial 85
Get confirmation tone
Keep the handset
Note: The main operator cannot be logged in or logged out.
: After Logging Out, the extension works like a normal extension.
In Hotel Software
To log-in as extra operator
Dial 55 + 77 (Default Extension Password)
Dial 7
Get confirmation tone
Press [rls] key
To log-out as extra operator
Dial 55 + 77 (Default Extension Password)
Dial 85
Get confirmation tone
Keep the handset
Note: The main operator cannot be logged in or logged out.
: After Logging Out, the extension works like a normal extension.
. Paging .
The PBX has provision for interfacing with a public address system. You can have a direct access to the Public
Address System by dialing a two digit code to make announcements.
DG 120 has 1 Paging Port on the CPU card and in case of DG240 there are 2 Paging Ports on the Tone Card.
PROCEDURE
Lift Handset
Dial 80 (In Case of DG240, dial 80 for the first Port and 81 for the 2nd)
Announce your message
Keep the handset
Note: This feature requires an additional Amplifier and Speakers.
: Extension wise Paging facility can be controlled as explained in Programming Manual.
. Private Line .
OFFICE VERSION
A Junction line can be set as a private line to any extension user. Private line can be accessed by only that extension.
Note: Setting of the private line is explained in programming manual.
HOTEL VERSION
A Junction line can be set as a private line of a room. The private line can be set only if the room is already checked in.
Page 16

On setting a private line for a room, if the telephone in the room is lifted, there will be system dial tone for 3 seconds
duration (during which any of the internal numbers can be dialed) and then its private Junction line will automatically get
connected to the room extension. Also incoming calls on this Junction line will land directly at that room.
. Queued Call .
This feature enables you to handle more than one incoming call. If you are busy with one call then you will get a warning
tone of second call landing on your extension. The warning tone sound will be heard only once. You can pick up the
queued call by either of the two ways given below:
To Pick up Queued call
Disconnect the current call by keeping the handset
The queued call rings
Lift handset to start conversation
OR
Park the current call by dialing the Call park code. (With office version)
Keep the handset down
The queued call rings
Lift handset to start conversation
After Conversation, Keep the handset down
Pick up the parked call by dialing the parked call pick up code
The beep tone which you get when a call is queued to your extension can be disabled.
To disable the beep tone
Dial 55 + 777 (Default Extension Password)
Dial 61
Hear Confirmation tone
Keep the handset down
To enable the beep tone
Dial 55 + 777 (Default Extension Password)
Dial 60
Hear Confirmation tone
Keep the handset down
. Redial .
For redialing the last dialed Telephone number on Junction line press [REDIAL] key.
Note: In case of delayed dial tone from DOT, redial will not work.
. Ring / Voice Paging .
(Discontinued)
This feature can be used by any extension that dials a key phone extension number. The calling extension can activate
the speakerphone of the key phone being called and start conversation. The speakerphone gets disconnected as
soon as the caller disconnects. In case the caller does not get a reply on activating the speaker, because of the
absence of the user, then he can revert back to the ringing mode in order to draw the users attention if he is nearby.
To activate the speakerphone when dialing a KTS extension:
On getting a ring back tone
Dial 2
Now whatever you speak will be heard through the base speaker of the KTS
To revert back to ringing mode:
Dial 1
Hear Ring back tone
Note: Operator cannot be activated using this feature.
. Service Extension .
This feature is workable in Hotel version mode.
One extension on every floor can be programmed as Service Extension and all Extensions of the Rooms can be
attached to their respective Service Extensions.
Every room would dial a common number for Service extension but would get connected to their respective floor wise
service extensions.
This feature is generally used for Room Service purpose.
Refer Programming Manual for its programming.
To call Service Extension (room service):
Dial 87
Wait for answer
Page 17

. Speaker Phone Mode Operation .
Your key telephone is equipped with a speaker. It is also equipped to operate as a speaker phone which enables you
to converse without lifting your handset. Pressing the [SP/MIC] key will automatically switch on the microphone and
speaker. All dialing or conversation is automatically Handsfree, while the handset remains on the cradle.
When you are using the speakerphone and wish to use the handset for private conversation, lift handset.
When you are using the handset and wish to use the speakerphone, first press the [SP/MIC] key & replace the handset
on the cradle. To disconnect the call in Handsfree mode press the [RLS] key or press {spk/mic} key
. Volume Control .
The audio level of the KTS Base Speaker and the Handset Speaker can be separately adjusted.
To set the base speaker volume:
Use the “Vol” key on the KTS while the KTS is ringing.
To set the Handset speaker volume:
Use the “Vol” key on the KTS while talking through the Handset.
. Operator’s Features .
Attending Incoming Calls
The operator can attend both incoming internal and external calls on the KTS. All incoming calls for the operator will be
queued and can be attended one by one by the operator. There are two cases wherein the operator can attend the
incoming call.
1. If the operators extension is free and an incoming call rings on the operator KTS, the display of the KTS will show
the number from which the call originated. In case of incoming Junction calls, the display will show the Junction
number. These calls can be attended by just lifting the handset.
2. If the operators extension is busy and another call lands at the operators extension, the KTS will ring, indicating that
there is a new call in the queue. Now the operator can pick the line in the queue by either disconnecting the current call
by pressing the [rls] key or by putting the current call on PHOLD by pressing the [PHOLD] key. The call in queue will
be automatically connected after the current call is released. Similarly, all the calls in the queue can be attended one
by one. It is advisable to release each call by pressing the [rls] key rather than replacing the handset on the cradle so
that all the calls in the queue can be attended one by one.
Holding an Extension & Dialing Out
This feature can be used when the extension user wants an external number to be dialed by the operator. After the
extension user has given the external number, press [hold] key to put him on hold on music. Then select a Junction
line by pressing the Junction key or by dialing “0” and dial the required external number. After dialing, wait for the ring
back tone & then press [rls] key to connect the Junction line to the extension.
Check In
(Only With Hotel Version)
A guest room extension can access the Junction only if that room extension is checked-in.
To Check-In a Room
Put the handset on cradle.
Press [Chk-In] key, the display will show “CHECK IN : ”
Enter the required room number. If a valid room number is entered, the display will
show an arrow.
Enter the guest name using the DSS keys.
After entering the guest name, press [hold] key to complete the Chk-In process.
If advance is enabled, "+" will appear and you can enter the advance amount taken
from the guest and press [hold] key to complete the Chk-In process.
Now a guest can directly make a call depending on his class of service. All the calls made from the room will be stored
in the memory. System will record the current date and time as the check in date and time of the room.
Note: During the checking-in a guest, name can be entered only with the help of DSS.
Corresponding alphabet of every key of DSS is marked on the DSS keys. Maximum
Rs. 9999 can be entered as advance.
Check Out
(Only With Hotel Version)
Page 18

When a guest wants to Chk-out, operator will have to Chk-out that room to get the details of outgoing calls that were
made by the guest from the room. This feature will work only if a printer is connected to the system and is in ‘ON LINE’
condition.
To Chk-Out a guest
Press [Chk-Out] key, the display will show “CHECK OUT ”.
Enter the required room number. If the console is programmed to calculate the
various bills (like food, laundry etc.), enter the data as explained below.
After entering all the bill amount, the bill will be printed automatically, and the room
loses the direct dialing facility.
The current time and date will be recorded as the check out date and time of the room
and it will be printed in the bill.
Whenever a room is checked out, the guest name will be washed out. Therefore, if a
Room is rechecked -out , the guest name will not be printed.
Note: If you try to check out a room when the printer is not connected or it is in ‘OFF LINE’
condition, or previous check out is not complete, display will show “ Error".
Entering of the bills
This feature is used for entering the various bills such as food, laundry etc. The maximum amount that can be entered
is 4 digits for ‘Rupees’ followed by 2 digits for ‘Paise’. To enter less than 4 digits for Rupees value, press 002 key of
DSS after entering the Rupees amount. Now the decimal point will automatically appear in the display and you can
proceed to enter the Paise value. However, if you have to enter a 4-digit Rupees value, there is no need to use the 002
key of DSS. After entering the 4-digit Rupee value, the decimal point will appear in the display. If you don’t want to
enter Paise value, press 002 key of DSS for next entry. For example, if you want to enter the value Rs.450.70; Press
450 & 002 key of DSS key & then press 70. In case you want to enter the value Rs.5750.00; Press 575000
continuously.
When a room is being checked out, after entering the correct room number, the display will show the following
messages in sequence:
"Sr. No.".
“Rent.. ”.
“Food....”.
“Laundry..”.
“Misc..”.
“Tax..”.
Enter each bill as explained above. After entering the Tax amount, the printer will start printing. The telephone bill of
the room will be calculated automatically and the amount will be included in the grand total. The Hotel name, the name
of the guest, Check in and Check out date and time will be printed along with the bill amounts, in the printout. The bill
will also have the details of Junction calls made from the room such as, the time at which the call was made, the
number dialed, the duration of the call and the amount charged for the call. The bill will be printed with advance taken
from the guest and balance left to be paid.
Note: If any wrong entry is made while filling the bill amount, press [rls] key to cancel all
entries.
DND Override
Operator can override any extension that is set in DND mode.
To override any DND extension
Dial the extension number, display will show `DND’
Press the [emg] key, that extension will start to ring
Note: This feature does not cancel the DND on the called extension.
DSS (Direct Station Selector)
The Direct Station Selector (DSS) has 120 keys, each of which also has an LED. The DSS can be programmed to
work along with your KTS. This programming has to be done in the system programming. The DSS keys can be
programmed according to your requirement. The keys can be programmed to show the status of an extension or a
Junction line. It can also be programmed to store a Memory Dialing-Common number. The DSS keys can be operated
similar to the one touch keys on your key set.
Forceful Release of Junction or Extension
This feature can be used for disconnecting any Junction line or extension, which is in conversation.
To forcefully release a line
Dial 51 + extension number or Junction number
Page 19

Hear confirmation tone
Press [rls] key
Form Feed for Printer
The printer connected to the system can be given a form feed command. This feature will be useful when connecting
an inkjet or a DeskJet printer to the system.
To give form feed for the printer
Dial 50 + any three digit valid numbers
Now the printer will move the paper to the next page
Hotel Name
(Only With Hotel Version)
This feature allows you to enter the Hotel Name. The Hotel name will be printed on the top of the checkout bill. A DSS
is required for entering the hotel name.
To enter Hotel name
Press [Chk-In] Key, the display will show `CHECK IN’.
Press 9. Display will show an arrow.
Now enter the hotel name by using the DSS Keys. After entering the hotel name, press '002' key of the DSS.
Display will show 'PASS'.
Message Reminder
(Only With Hotel Version)
Any message for a guest can be registered by using this feature. On registering a message for a guest, if the room has
a KTS extension, the MSG LED on the KTS lights up. If the room has a normal single line telephone (SLT), the
telephone will give a small ring every minute. When the guest lifts the handset of his telephone, he will get the
intimation message. However, the guest can dial any extension number when the message is being played. This
message will continue to play until operator cancels the message reminder.
To activate the Message Reminder for a room
Dial the room number
Press [msg] key while hearing ring back tone
Press [rls] key
Guest Message - Cancellation
When a guest calls the reception for collecting his message, operator has to press [msg] key while conversing with the
guest. This will cancel the message reminder for the guests room.
Private Line
OFFICE VERSION
A Junction line can be set as a private line to any extension user. Only that extension user can access private line. By
using this feature, misuse of the STD Junction can be avoided.
NOTE: Setting of the private line will be done through system programming. By doing so, private line will not land at
your extension.
HOTEL VERSION
A Junction line can be set as a private line of a room. The private line can be set only if the room is already checked in.
On setting a private line for a room, if the telephone in the room is lifted, there will be system dial tone for 3 seconds
duration (during which any of the internal numbers can be dialed) and then its private Junction line will automatically
get connected to the room extension. Also incoming calls on this Junction line will land directly at that room.
To set a private line
Keep the receiver off hook and press the [flash] key, the display will show “PRIVATE”
Now enter the room number, for which the private line has to be set. The display will
show an arrow
Press the required Junction line except the 1st Junction, `PASS‘ will be displayed
Press [rls] key
The private line will get automatically removed when the Check out command is given for that room. The private line
can also be removed without checking-out that room.
To cancel the private line
Keep the receiver off hook and press the [flash] key, followed by the room number.
The display will show an arrow followed with the Junction number that was set as
Page 20

private line
Press displayed Junction number to remove it
Press [rls] key
Room Shifting
(Only With Hotel Version)
This feature allows you to shift a guest from one room to another. On shifting a room, all the bills of the guest in the
previous room will be shifted to his new room.
To shift the room
While receiver is on the hook, press [Rm – Shift] key. Display will show “ Shift Rm”.
Enter old room number. If room number is correct and it is checked in display will
show an arrow.
Enter the new room number. If new room number is correct and it is not checked in,
then the display will show “PASS” and all calls, check in time, amount and
name will be shifted to the new room.
Press [rls] key.
Note: A room can be shifted only once. Please note while shifting a room, advance amount
will not be shifted.
Reprint Room Bill
(Only With Hotel Version)
This feature allows you to take the reprint of the bills of any checked-out room. The reprint of the previous bills is
possible only if room has not yet been checked in again.
To print check out bills again (Re-checkout)
Press [Chk-Out] key. Display will show "CHECK OUT: “.. Enter desired room
number. If room number is correct and it is not checked in, the recheck-out of
that room will get printed.
Press [rls] key.
Temporary Check Out
(Only With Hotel Version)
This feature is used when a guest has gone out of his room and he doesn’t want misuse of his telephone in his
absence. This feature temporarily checks out his room. After temporary check out of a room, the room will loose direct
dialing facility.
To Temporary Chk-Out a room
Press [T-CHK-OUT] key, display will show “CHECK OUT : Temp”
Dial the required room number. If a valid room number is entered, the display will
show `PASS’
Press [rls] key
Note: After using this command, the printout of that particular room will not get printed. So
this feature can be used without connecting the printer. The printout can be taken
only after using the CHECK OUT command.
Temporary Check In
(Only With Hotel Version)
This feature is used to restore the dialing facility to the room, which was temporarily checked out.
To Temporary Chk-In a room
Press [T-CHK-IN] key, display will show “CHECK-IN: Temp”.
Press the required room number. If a valid room number has been entered, the
display will show “PASS”.
Press [rls] key.
KTS Keys Functions
Junction keys
16 dual colored LED’s are provided along with 16 keys, which give indication of the Junction line. By default, the
Junction number 1 occupies the position of key number 1, Junction number 2 occupies the position of key number 2
and so on. Upto 16 Junction lines can occupy the 16 keys provided. Thus, the Junction lines can be accessed by
directly pressing the respective key. Dual colored LED indications, red and green, are provided for each Junction line.
If the Junction line is used by the key telephone user himself, the green LED glows, and if the Junction line is used by
some other extension user, the red LED glows. Thereby the user can easily distinguish which of the lines are used by
self and which of the lines are in use by other extensions.
Page 21

The key telephone user also has an option to use some or all of the default Junction keys as some other keys. For
more details, please refer the program; “ FLEXIBLE KEYS SETTING”.
LED Indications
LED’s are provided with most of the keys to indicate that a particular key is being used.
CHK-IN / MEMO KEY
This Key is used for dialing numbers stored in memory.
MSG KEY
In order to leave an internal message to a busy extension, press [msg] key. This message will be stored and, when
the called Key phone becomes free, the MSG indicator will start blinking. On pressing the [msg] key, the numeric
message stored will be displayed. This numeric message can be an internal extension number or an external number
stored via the DISA card. In order to get connected to this number, press [rdl] key. The number will automatically be
dialed.
The [msg] key is also used to view the auto redial numbers. Press [msg] key when no other numeric messages are
pending to view the auto redial number and the number of auto redial trials left.
CHK-OUT/CONF KEY
This Key is used to activate conference. Please refer to ‘THREE PARTY CONFERENCE’ feature in the Operating
manual.
CALL / ALARM KEY
During emergencies, when the called KTS extension is found busy, the user can press the [ECALL] key on his
extension. On pressing the [ecall/alarm] key, the LED of the called party’s KTS will start blinking, which tells the called
party that there is an emergency. The called party can then put his present call on hold and press the [ECALL] key
and answer the call. After he finishes conversation, he can get back to his previous call by simply pressing the [rls]
key.
LCD DISPLAY
A 2 X 16 LCD display is provided which gives the time, numbers dialed from the Key phone, in house caller’s name
along with his room number. During programming, the details can also be viewed on the Key phone.
RLS KEY
This key is used to disconnect a call after the conversation is over. Alternatively, on completion of programming, press
[rls] key to come back to stand by mode.
TRSF / SHIFT KEY
This key is used to transfer an incoming or an outgoing call to an extension. To transfer the call, press [trsf] key
followed by the extension number or the DSS key of that particular extension.
T-OUT/P-HOLD KEY
A call in use by the key telephone user can be kept on personal hold by pressing the [P-HOLD] key. This will ensure
that these calls are not picked up by other key telephone users. In order to retrieve the call back, press [P-HOLD] key
again.
PROG KEY
This key is used for programming the features of the system. For details regarding the programming of the system,
please refer the system programming section.
SP/MIC KEY
This key is used to activate the speakerphone. In order to activate the speakerphone, press the [SP/MIC] key and
start dialing out or speaking if a call has come on the key telephone.
HOLD KEY
This key is used to put a call on hold. Calls put on hold using the [hold] key can be accessed by other Key telephone
users also. Alternatively, in programming mode, [hold] key is used to go to the next mode for programming.
Page 22

T-IN/FLASH KEY
In order to clear an Auto redial number stored or to clear internal message, press [flash] key after pressing [msg] key
while viewing the auto redial number or the internal message. In order to view the auto redial number or the internal
message number, please refer the next point.
RDL KEY
To redial the last dialed number and also to call the internal message station, press the [rdl] key.
. Terms of Warranty .
Copper Connections Pvt. Ltd. warrants that this product is manufactured under stringent quality standards, making it free from defects in material and
workmanship, as per the following terms and conditions:
1. The limited warranty for the system is valid for a period of twelve months from the date of purchase or fifteen months from the date of manufacture
which ever is earlier.
2. The limited warranty extends only to the original consumer/ purchaser of the product and is not assignable or transferable to any subsequent
purchaser/end user.
3. During the limited warranty period, Copper Connections Pvt. Ltd. or its authorised service network will repair or replace, at Copper Connections Pvt.
Ltd. option, any defective product or parts thereof with a new or factory rebuild replacement items and return the product to the consumer in working
conditions. No charge will be made to the consumer for either parts or labour in repairing or replacing the product. All replaced parts shall become
the property of Copper Connections Pvt. Ltd..
4. Repaired product will be warranted for a balance of original warranty period.
5. Upon request from Copper Connections Pvt. Ltd. or its authorised service center, the consumer must provide purchase receipt or other information
to prove the date and place of purchase.
6. The consumer shall have no benefit or coverage if any of the following conditions are applicable:
a) The product has been subjected to abnormal use, abnormal condition, improper storage, exposure to moisture or dampness, exposure to
excessive temperature or fire etc., unauthorised modifications, unauthorised connections, unauthorised repairs including but not limited to use
of unauthorised spare parts in repairs, misuse, neglect, abuse, accident, alteration, improper installation.
b) Copper Connections Pvt. Ltd. was not notified by consumer of the alleged defect or malfunction of the product during the limited warranty
period.
c) The product was used with or connected to equipment not fit for use with Copper Connections Pvt. Ltd. system or used in other than its intended
use.
d) THE SYSTEM IS NOT CONNECTED TO A PROPER EARTH OR INCASE HIGH VOLTAGES APPEAR ON EARTH.
e) THE DAMAGE IS CAUSED BY LIGHTENING ON EXTENSIONS/ JUNCTION LINES/ OR SPIKES/ SURGES/ HIGH VOLTAGES FROM AC
MAIN SUPPLY.
7. The consumer may contact the authorised dealer to call the service personnel for carrying out repairs or maintenance and the same would be
attended within a reasonable response time assigned to the dealer.
8. The consumer will be billed for parts or labour charges not covered by this limited warranty.
9. If the product is brought to Copper Connections Pvt. Ltd. for repairs, after the warranty period Copper Connections Pvt. Ltd. normal service policy
shall apply and customer shall be charged accordingly.
10. In no event shall Copper Connections Pvt. Ltd. or their authorised dealer be liable for special or consequential damages or any delay in the
performance of this warranty due to causes beyond their control. Copper Connections Pvt. Ltd. shall not be liable for incidental or consequential
damage or a loss of anticipated benefits or profits, loss or impairment of privacy of conversation, work stoppage or loss or impairment of data arising
out of the use or inability to use the product.
11. Copper Connections Pvt. Ltd. neither assumes nor authorises any authorised service center or any person or entity to assume for it any other
obligation or liability beyond what is expressly provided by this limited warranty. All warranty information, product features and specifications are
subject to change without prior notice.
12. Any dispute arising out of this warranty shall be subjected to jurisdiction of the arbitrator within the city of Delhi.
13. The decision of Copper Connections Pvt. Ltd., on defects, damages etc shall be final and binding on the parties and no dispute regarding this, could
be agitated before any civil court.
PART NO. DG-KTS-OPR-9
_______________________________________
ISO 9001:2008 Certified company
Copper Connections Pvt. Ltd
195-196, DSIDC Complex, Okhla Industrial Area, Ph-1, New Delhi-110020. Ph: +91-11-40625555
www.copperconnections.com
 Loading...