

Page 1
Technical instructions
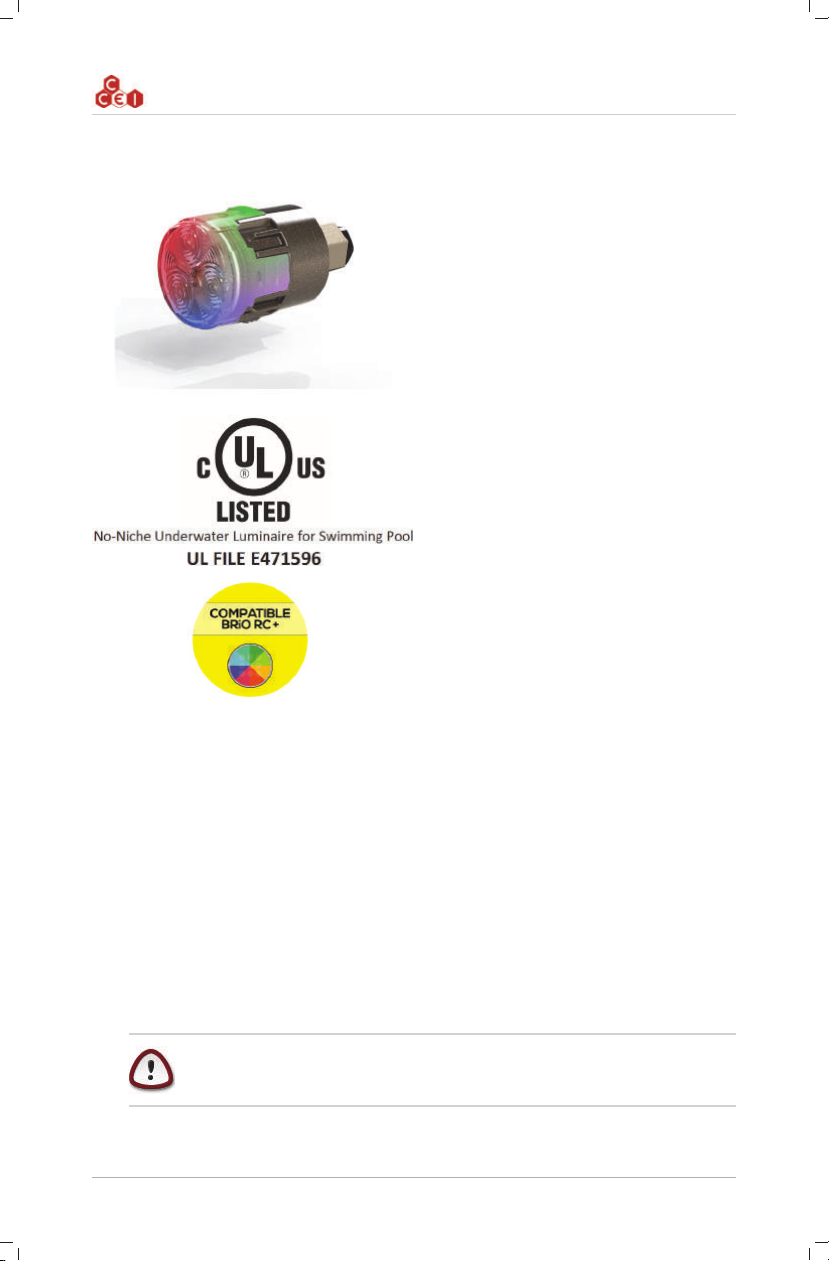
Mini Brio X15CA
Underwater LED lighting
Réf : PK10R303
Table of Contents
1. Packaging Contents ..................................................................................................................... 2
2. Technical features ....................................................................................................................... 3
3. Description .................................................................................................................................. 4
3.1. Warnings .......................................................................................................................... 4
3.2. Technical support ............................................................................................................. 4
4. Use - Autonomous mode ............................................................................................................ 5
5. Safety .......................................................................................................................................... 5
6. Installation .................................................................................................................................. 6
6.1. Wall through installation .................................................................................................. 6
6.2. Placement in a wall ........................................................................................................ 10
6.3. Electrical Connections .................................................................................................... 11
7. Transformer power .................................................................................................................... 11
A. Declaration of Conformity ..................................................................................................... 12
Read all of this leaflet carefully before installing, operating or using this product.
MPNT0326 v1.0EN (05/02/2016)
Page 2

Technical instructions Mini Brio X15CA v1.0EN
1. Packaging Contents
1 Mini Brio X15 projector with
• Locking/unlocking tool
• 2xAWG18 cable: Depending model
– 4,6m (15ft)
– 15,2m (50ft)
– 30,4m (100ft)
• Wall through: Depending model
– Wall through PF10R191 for fiberglass or concrete pool (supplied with 2" gasket + 2" locknut)
– Wall through PF10R192 for liner pool (supplied with 2" gasket + 2 liner gasket + 4 inox screws
+ liner flange + 2" locknut)
• Projector / Wall through O-ring (D35xd3,5mm)
• Technical manual (this document)
www.ccei.ca
2
Page 3
Technical instructions Mini Brio X15CA v1.0EN
2. Technical features
Sizes Ø 47 mm (1-11/16in) / length 84mm (3-5/16in)
Installation Only in a threaded 1.5" niche ref. PF10R191 or PF10R192
Power supply 12 V ~ (AC) 50Hz/60Hz
Power consumed 12W maximum (according to colour)
Cable lenght Projector only Complete box
Weight
4,6m (15ft) 0,5kg (1,1lb) 1,2kg (2,6lb)
15,2m (50ft) 1,2kg (2,6lb) 1,9kg (4,2lb)
30,4m (100ft) 2,2kg (4,4lb) 2,9kg (6,4lb)
LED type
Protection index IP-68
Max. luminous flux According to colour/411 lm maxi (white)
Color control By BRIO-RC+ or by toggle switch
Risk group 1 (low risk) according to IEC62471:2006
3 powerful RGB LEDs
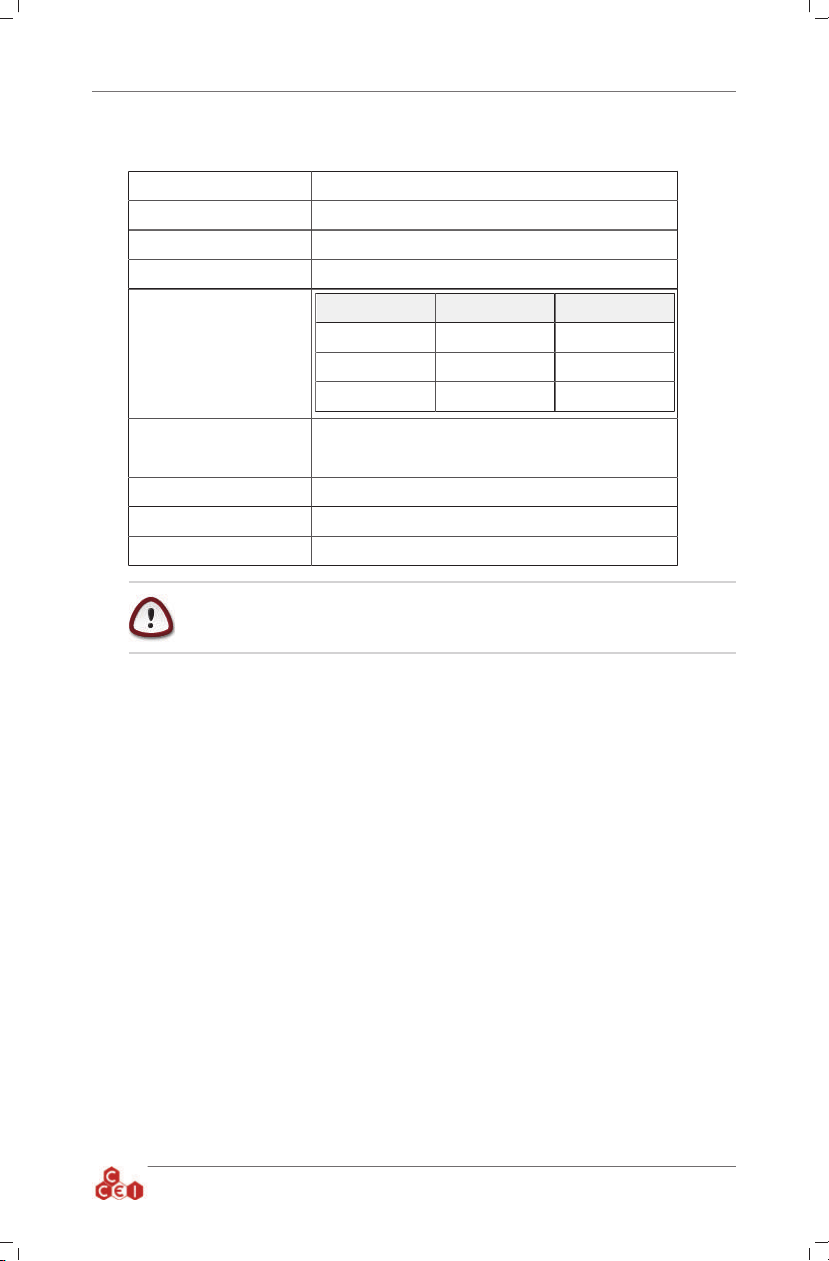
The projector must never be powered other than in water.
www.ccei.ca
3
Page 4
Technical instructions Mini Brio X15CA v1.0EN
3. Description
The Mini Brio X15 power LED projectors are designed to replace incandescent lighting, reduce your
energy consumption and light up your pool in any colour.
They come with powerful LED to improve the quality and reliability
of the lighting of your pool while reducing your energy consumption.
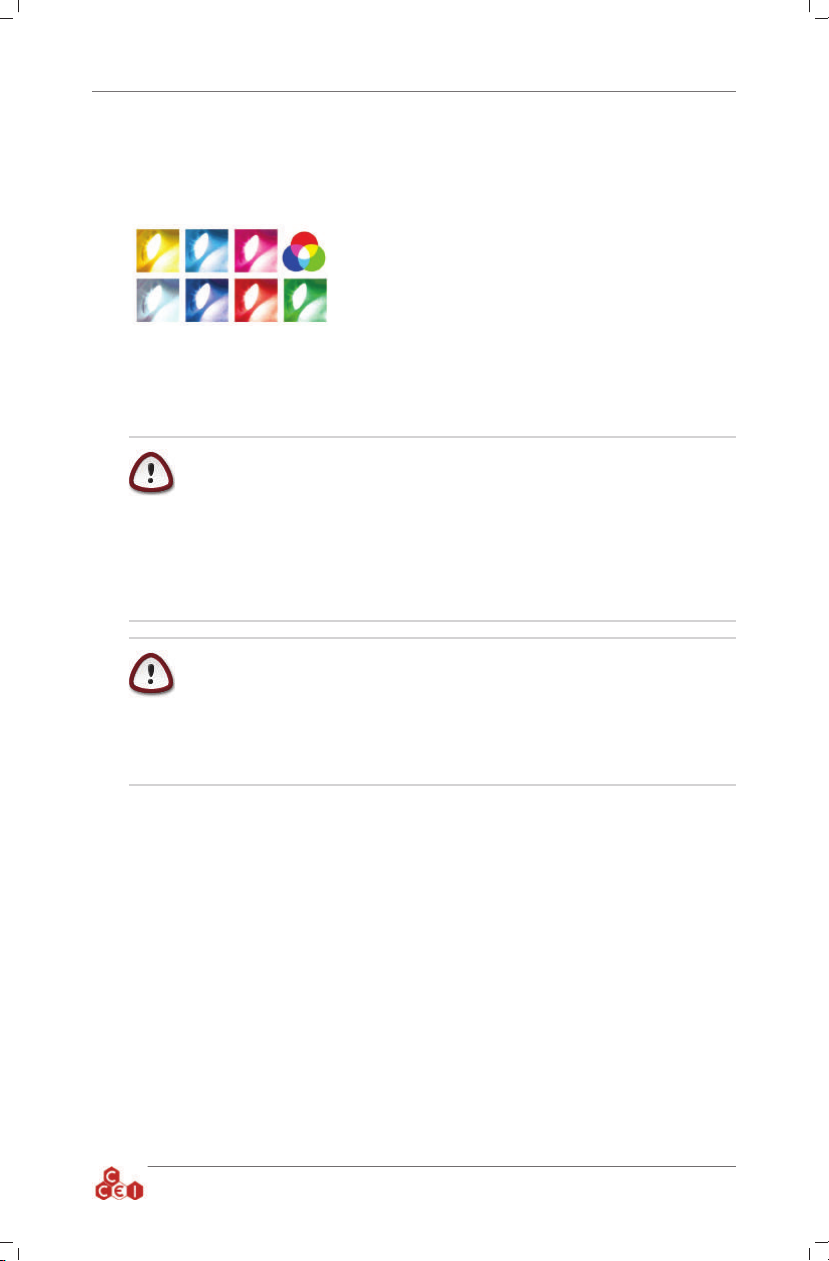
The colours are created by mixing 3 primary colours: Red, Green
and Blue (RGB Technology).
By adjusting the intensity of these three colours, it is possible to
create an endless amount of shades.
3.1. Warnings
This product must be installed by a licensed or certified electrician or a qualified
pool professional in accordance with the current National Electrical Code (NEC),
NFPA 70 or the Canadian Electrical Code (CEC), CSA C22.1. All applicable local
installation codes and ordinances must also be adhered to. Improper installation
will create an electrical hazard which could result in death or serious injury to pool
users, installers or others due to electrical shock, and may also cause damage to
power source. Always disconnect the power to the pool light at the circuit breaker
before servicing the light. Failure to do so could result in death or serious injury
to service person, pool users or others due to electrical shock.
For countries in compliance with International Electrotechnical Commission
(IEC) regulatory standards: The light fixture must be installed by a licensed or
certified electrician or a qualified pool service person, in accordance with current
IEC 364-7-702 and all applicable local codes and ordinance. Improper installation
will create an electrical hazard, which could result in death or serious injury to
pool user, installer or other due to electrical shock and may also cause damage to
the property.
3.2. Technical support
Website : www.ccei.ca / Phone : +1.514.649.7748
www.ccei.ca
4
Page 5
Technical instructions Mini Brio X15CA v1.0EN
4. Use - Autonomous mode
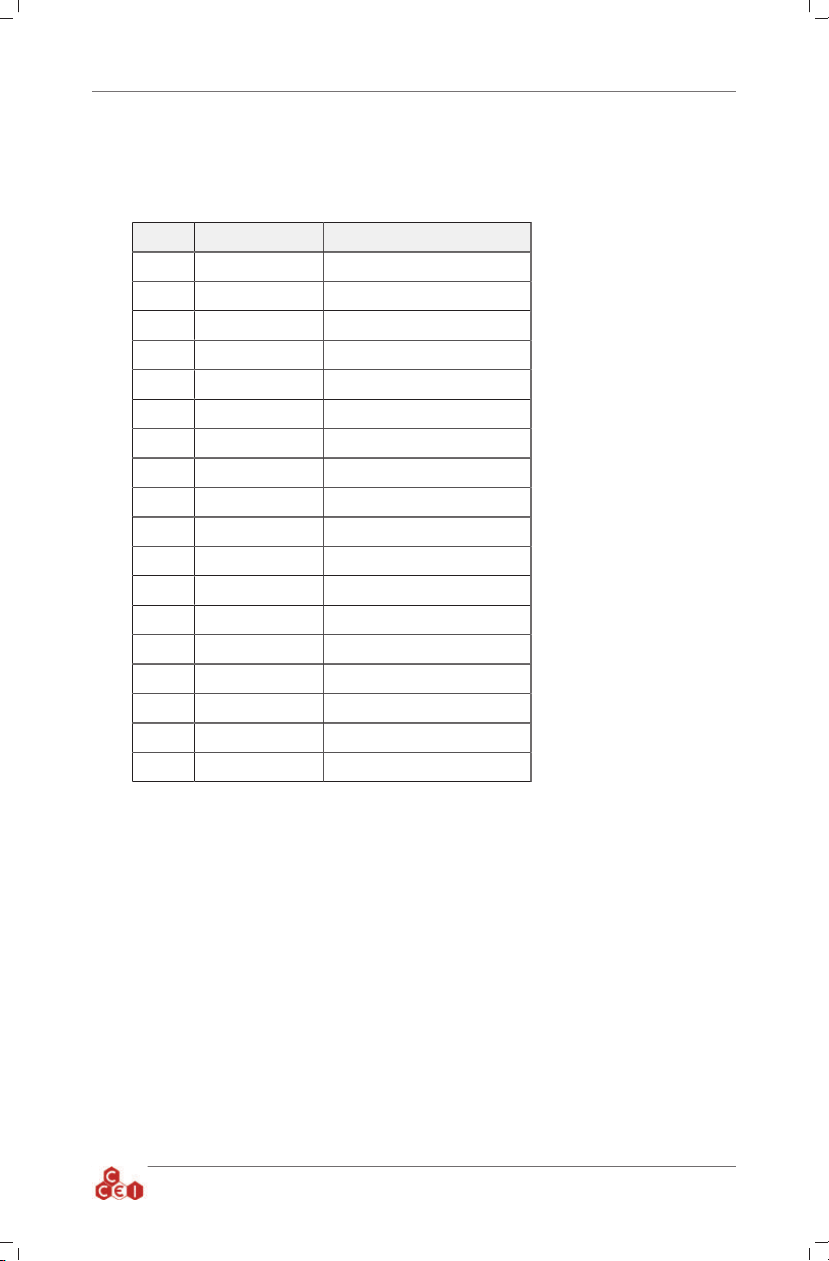
In the absence of a control unit, the projectors operate autonomously and the user can choose between
18 modes: 11 set colours and 7 programmes;
Mode Type Description
1 Set colour Pure white
2 Set colour Blue
3 Set colour Blue lagoon
4 Set colour Cyan
5 Set colour Violet
6 Set colour Magenta
7 Set colour Pink
8 Set colour Red
9 Set colour Orange
10 Set colour Green
11 Set colour Sea green
12 Sequence Quick "Rainbow"
13 Sequence Slow "Rainbow"
14 Sequence Procession of 11 set colours
15 Sequence Colourful psychedelic flashes
16 Sequence Blue/White/ Cyan
17 Sequence Random sequence 1
18 Sequence Random sequence 2
Change of mode
The mode can be changed by cutting the power supply of the projectors for a very short space of
time (less than 1s).
By successive interruptions, it is
possible to display the 18 operating modes. After mode 18, the
Mini Brio X15 return to the first
colour (mode 1)
Reset
To reset the projectors and take
them to mode 2 at the same time,
the power supply should be cut
for approximately 2s.
When the projector is started up
after a cut of several seconds
(more than 4s), the Mini Brio
X15 loads back up in the mode
displayed at the time it was last
shut down.
5. Safety
If the temperature inside the Mini Brio X15 is abnormaly high, a safety device shuts off the lighting
and produces a red flashing light. As soon as the normal temperature returns, the projectors return to
normal working order.
www.ccei.ca
5
Page 6
Technical instructions Mini Brio X15CA v1.0EN
6. Installation
6.1. Wall through installation
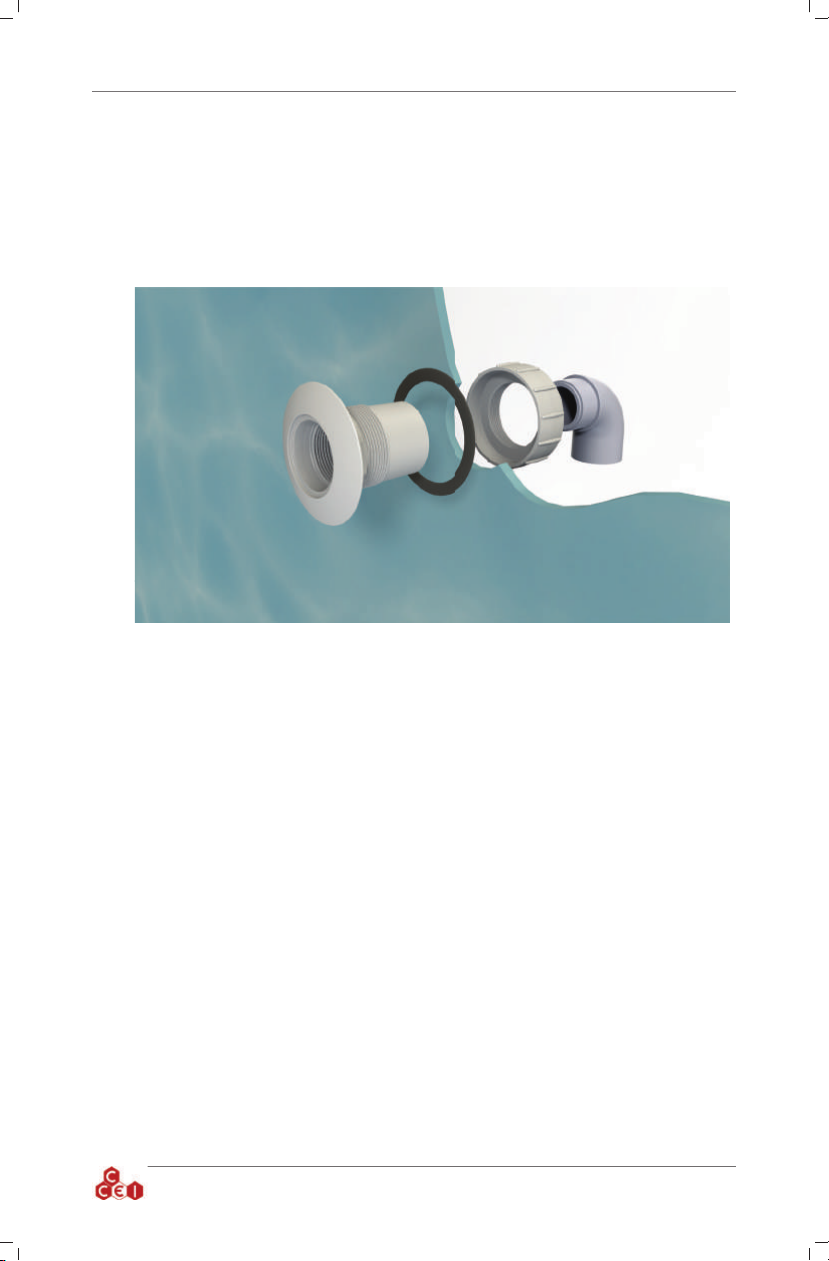
6.1.1. Fiberglass pool
Prior to installing, drill a hole in the pool using a 60-mm (2 3/8-in) diameter cylinder saw. The wall
through is connected on the rear to a 1,5" threaded coupling.
www.ccei.ca
6
Page 7
Technical instructions Mini Brio X15CA v1.0EN
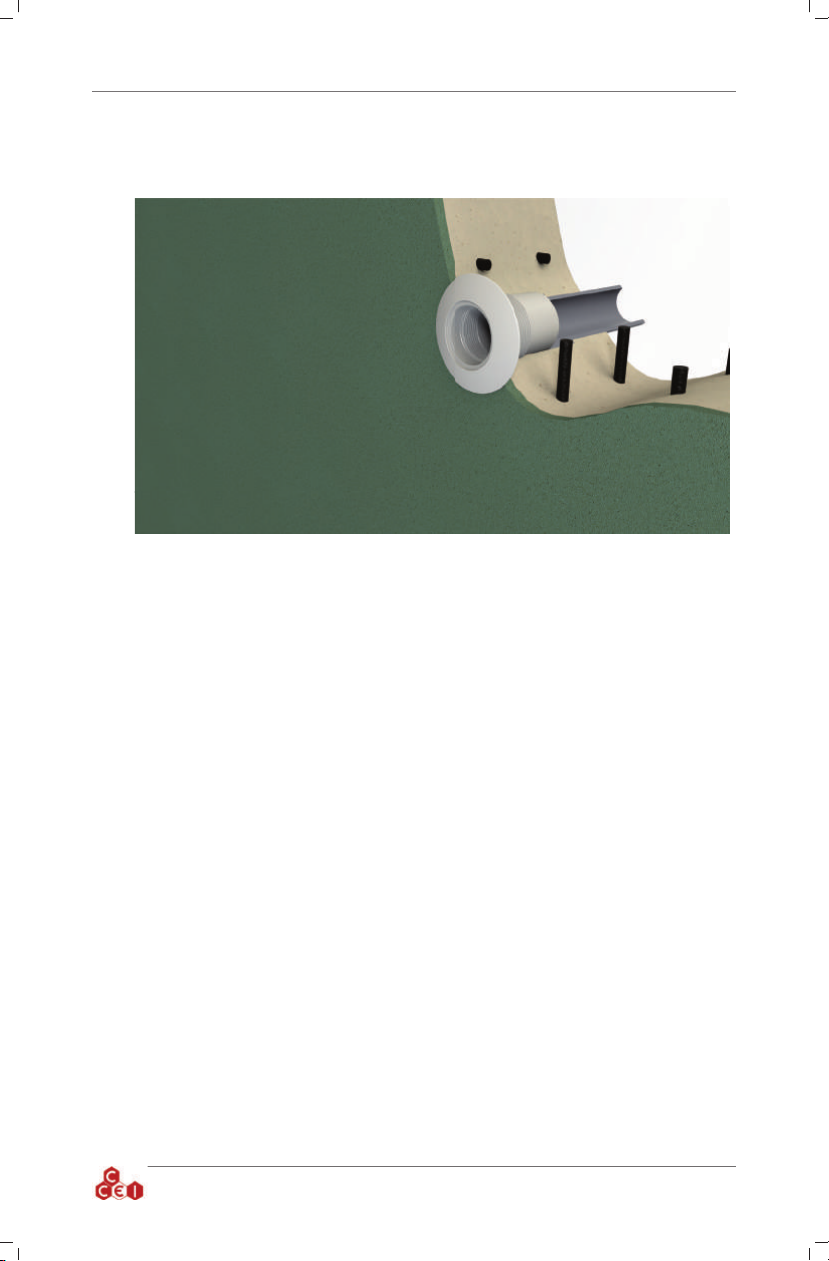
6.1.2. Concrete pool
Assemble a pipe of sufficient length with a 1,5" threaded coupling onto the wall through before sealing
the assembly.
www.ccei.ca
7
Page 8
Technical instructions Mini Brio X15CA v1.0EN
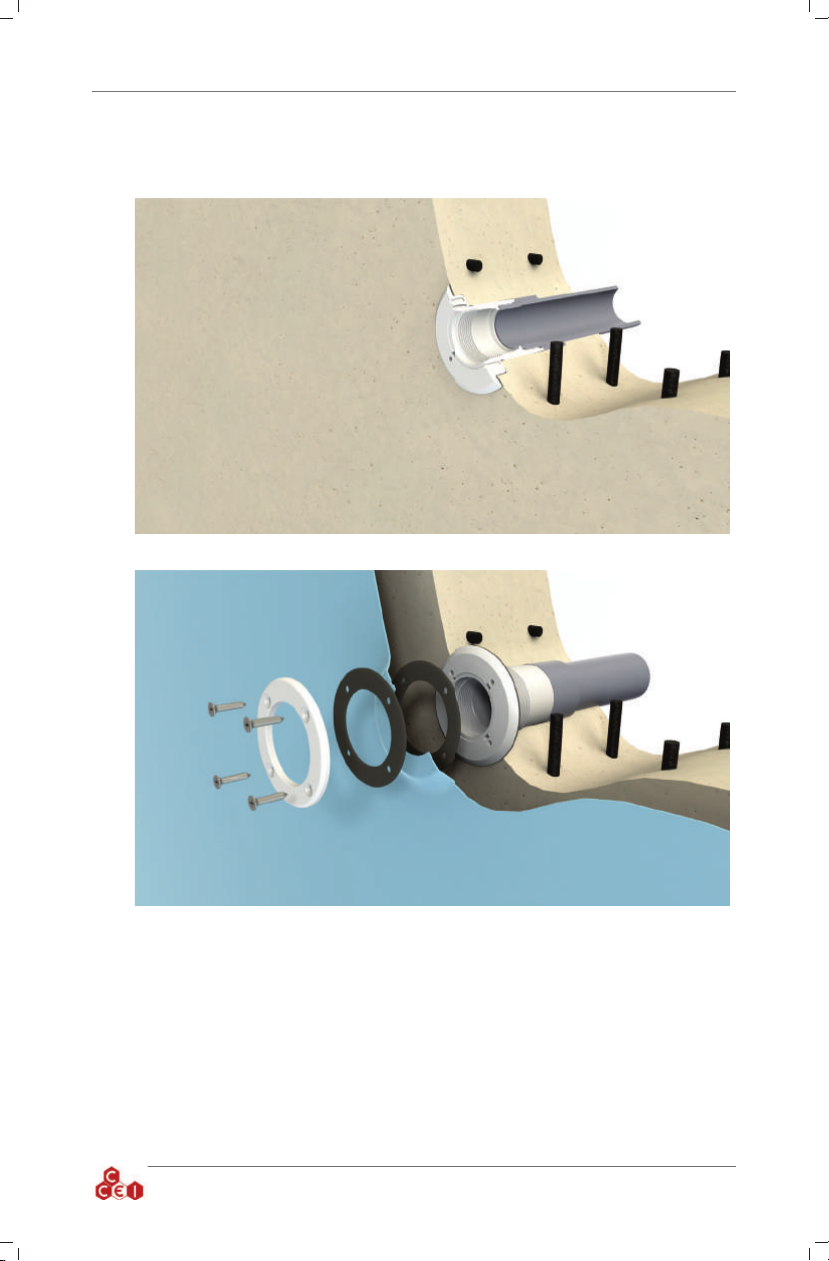
6.1.3. Concrete + liner pool
Assemble a pipe of sufficient length with a 1,5" threaded coupling onto the wall through before sealing
it.
Then glue a first gasket before placing the liner ;
www.ccei.ca
8
Page 9
Technical instructions Mini Brio X15CA v1.0EN
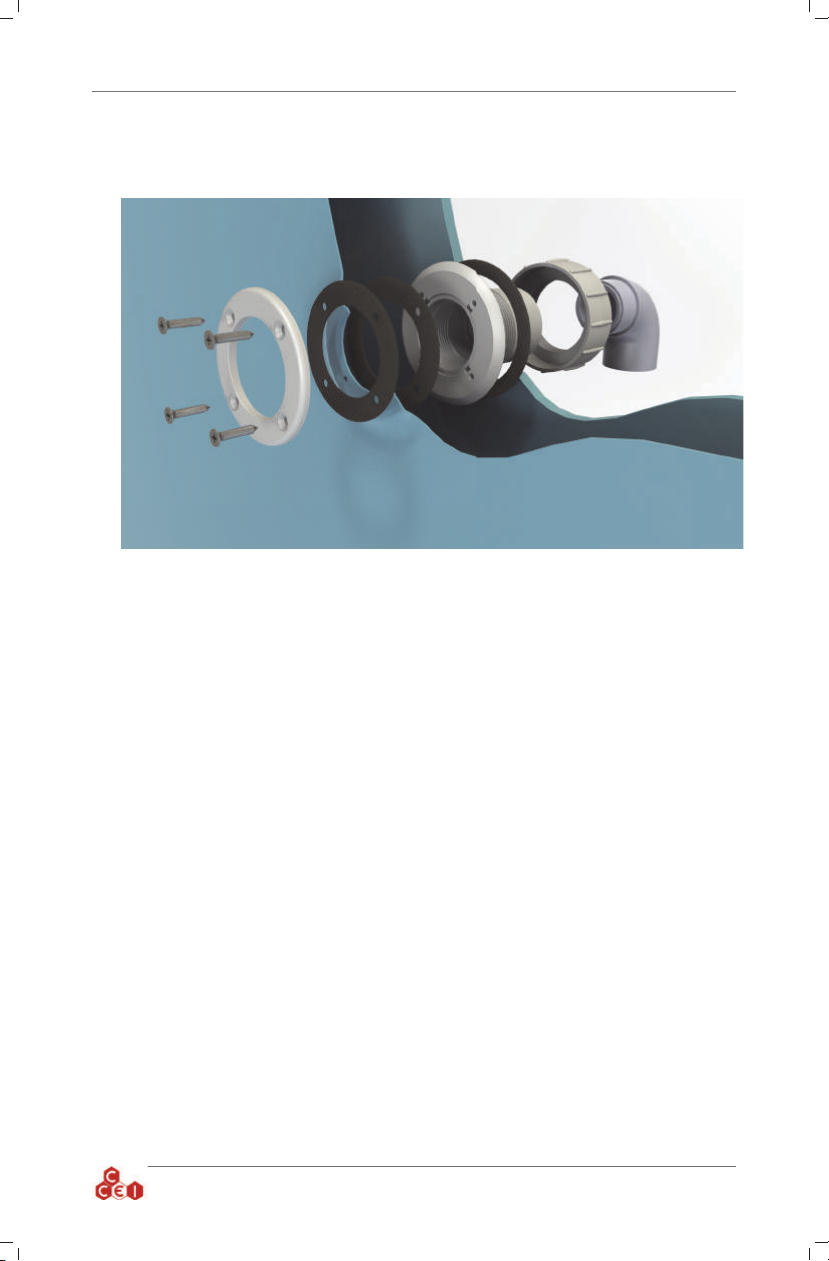
6.1.4. Panels + liner pool
Prior to installing, drill a hole in the pool using a 80-mm (3 1/8-in) diameter cylinder saw. Think to glue
the first liner gasket before installing it.
The wall through is connected on the rear to a pipe with a 1,5" threaded coupling.
www.ccei.ca
9
Page 10
Technical instructions Mini Brio X15CA v1.0EN
6.2. Placement in a wall
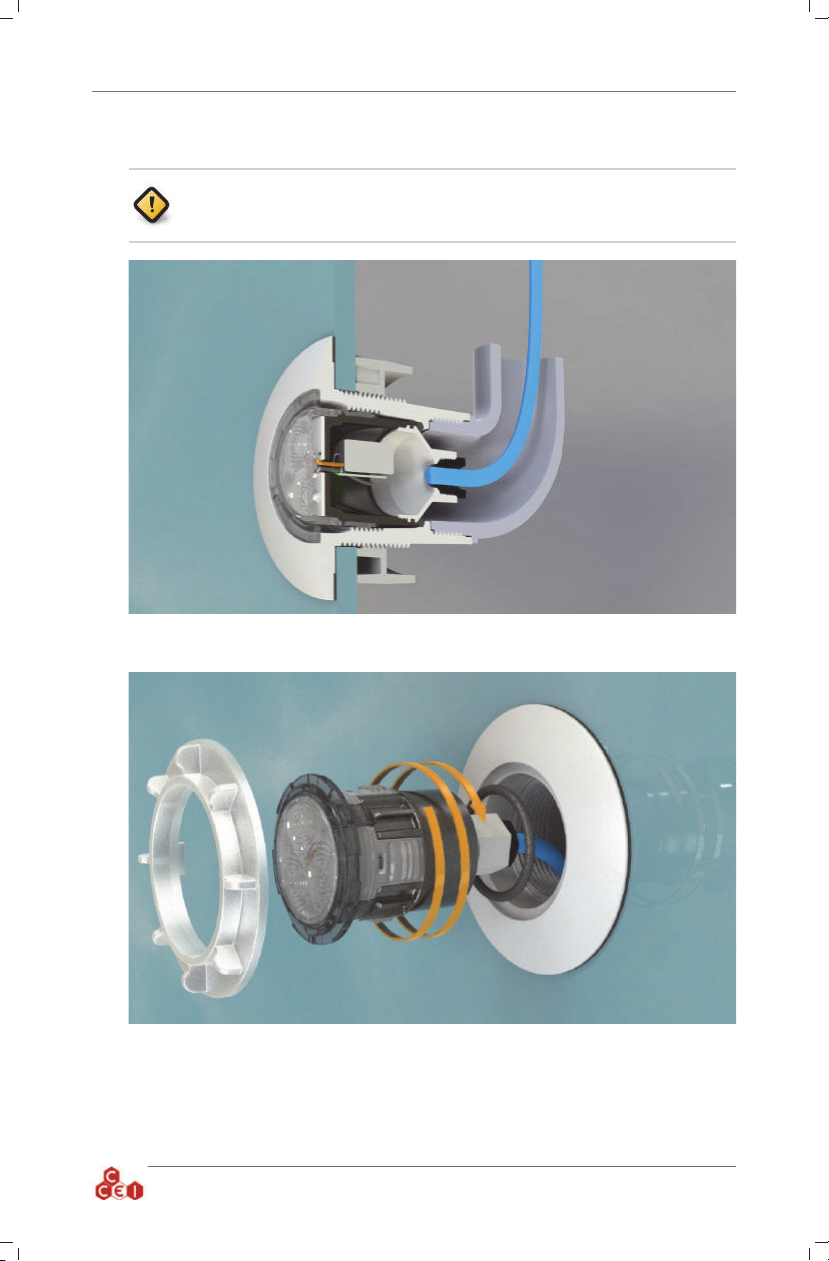
BRIO Mini Brio X15CA LED projectors must only be installed in a threaded 1.5"
niche ref. PF10R191 or PF10R192. We recommend that installation is performed
by a professional.
6.2.1. In wall through
1. Pass the gasket and the projector cable through the wall passage up to the connection box.
2. Push and screw the projector to the back.
3. Use provided tool to securely screw the projector.
www.ccei.ca
10
Page 11
Technical instructions Mini Brio X15CA v1.0EN
6.3. Electrical Connections
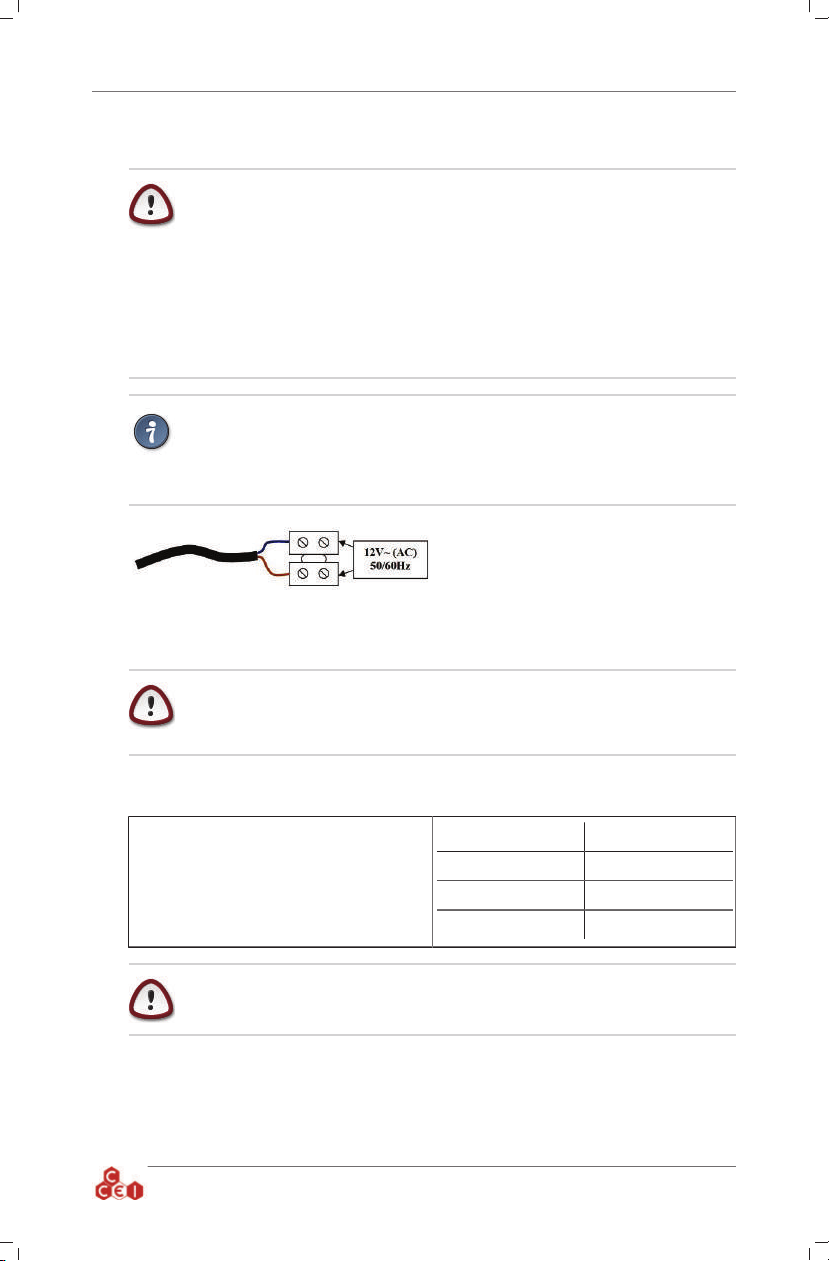
Installing this product could expose you to an electric shock. We strongly recommend that you use a qualified professional. An installation error could put you at
risk and irreversibly damage the product and the equipment connected to it.
In compliance with the current National Electrical Code (NEC), underwater lighting must always be supplied with SELV (Safety Extra Low Voltage). Turn off the
power supply upstream before doing anything to the electrical installation.
Risk of Electrical Shock. Connect only to a circuit protected by a ground-fault
circuit-interrupter (GFCI). If you cannot verify that the circuit is protected by a
GFCI, contact a qualified electrician.
THE LED LIGHT AND PLASTIC NICHE FORM A COMPLETE NON-METALLIC LOW VOLTAGE LIGHTING SYSTEM. THIS CONFIGURATION
DOES NOT REQUIRE BONDING OR GROUNDING WHEN POWERED BY A
LISTED TRANSFORMER AND INSTALLED IN COMPLIANCE WITH THE
CURRENT NATIONAL ELECTRIC CODE (NEC).
The electrical connection must be performed dry,
in a sealed connection box whose cable glands
must be tightened in order to avoid any water infiltration.
Once startup and the operation tests are complete, it is recommended to drown the connection with a
reusable soft hydrophobic insulating gel. (ref. CCEI PNSP0002)
The soft external cable of this lighting system cannot be replaced.
If this cable is damaged, the lighting system must be disposed of or returned to the
manufacturer for possible reconditioning.
7. Transformer power
The transformer to be used should have a secondary voltage of 12V (12.5V according to the
model). Its power should be in keeping with the
power of the projectors to be connected.
At any rate, the sum of the powers of the projectors
should remain below or equal to the power
It is preferable to use power supplies from the same manufacturer.
Transformer power Max. no. of X15
50 4
100 8
300 25
www.ccei.ca
11
Page 12
Technical instructions Mini Brio X15CA v1.0EN
A. Declaration of Conformity
The Company CCEI Inc. (Québec 1170122155) declares that the product Mini Brio
X15CA satisfies the safety and electromagnetic compatibility requirements of Euro-
pean directives 2006/95/EC and 2004/108/EC and is UL listed under file E471596.
Pierre-Yves Flattot
Montreal, 05/02/2016
Distributor's stamp
Date of Sale: . . . . . . . . . . . . . . . . . . . . . . . Serial No: . . . . . . . . . . . . . . . . . . . . . . . . . . .
www.ccei.ca
12
 Loading...