

CC and C Technologies WL1302 Users Manual

User’s Manual
Version: 2.1
Wireless LAN Access Point

Trademarks
Copyright @2003
Contents are subject to change without notice.
All trademarks belong to their respective proprietors.
Copyright Statement
THIS DOCUMENT CONTAINS OF PROPRIETARY TECHNICAL INFORMATION THAT IS THE PROPERTY OF
THIS COMPANY. AND NO PART OF THIS DOCUMENTATION MAY BE REPRODUCED, STORED IN A RETRIEVAL
SYSTEM OR TRANSMITTED IN ANY FORM OR BY ANY MEANS, ELECTRICAL OR MECHANICAL, BY
PHOTOCOPYING, RECORDING, OR OTHERWISE, WITHOUT THE PRIOR WRITTEN CONSENT OF THIS
COMPANY.

USER’S MANUAL OF WLAN ACCESS POINT Version: 2.1
Revision History
DATE REVISION
2003/7/14 First release
2003/7/22 Release 1.1; add information about time required on boot-up sequence.
2003/7/24 Release 1.2; modify the boot-up sequence notice in chapter 1
2003/8/4 Release 2.0; add configuration examples
2003/9/9 Release 2.1; modify power supply to DC 7.5V
i

USER’S MANUAL OF WLAN ACCESS POINT Version: 2.1
Terminology
ANSI American National Standards Institute
AP Access Point
CCK
Complementary Code Keying
CSMA/CA Carrier Sense Multiple Access/ Collision Avoidance
CSMA/CD Carrier Sense Multiple Access/ Collision Detection
DHCP Dynamic Host Configuration Protocol
DSSS Direct Sequence Spread Spectrum
FCC Federal Communications Commission
FTP File Transfer Protocol
IEEE Institute of Electrical and Electronic Engineers
IP Internet Protocol
ISM Industrial, Scientific and Medical
LAN Local Area Network
MAC Media Access Control
NAT Network Address Translation
NT Network Termination
PSD Power Spectral Density
RF Radio Frequency
SNR Signal to Noise Ratio
SSID Service Set Identification
TCP Transmission Control Protocol
TFTP Trivial File Transfer Protocol
WEP Wired Equivalent Privacy
WLAN Wireless Local Area Network
ii

USER’S MANUAL OF WLAN ACCESS POINT Version: 2.1
Table of Contents
REVISION HISTORY .....................................................................................................................I
TERMINOLOGY ........................................................................................................................... II
1 INTRODUCTION....................................................................................................................1
1.1 PACKAGE CONTENTS ........................................................................................................... 1
1.2 PRODUCT SPECIFICATIONS .................................................................................................. 1
1.3 PRODUCT FEATURES ........................................................................................................... 2
1.4 TOP PANEL DESCRIPTION .................................................................................................... 2
1.5 REAR PANEL DESCRIPTION.................................................................................................. 3
2 INSTALLATION ..................................................................................................................... 4
2.1 HARDWARE INSTALLATION ................................................................................................. 4
2.2 SOFTWARE INSTALLATION ................................................................................................... 4
3 SOFTWARE CONFIGURATION ......................................................................................... 5
3.1 PREPARE YOUR PC TO CONFIGURE THE WIRELESS LAN ACCESS POINT ............................. 5
3.2 CONNECT TO THE WIRELESS LAN ACCESS POINT .............................................................. 7
3.3 MANAGEMENT AND CONFIGURATION ON THE WIRELESS LAN ACCESS POINT.................... 7
3.3.1 S
TATU S............................................................................................................................ 7
3.3.2 WIRELESS BASIC SETTINGS ............................................................................................ 8
3.3.3 WIRELESS ADVANCED SETTINGS .................................................................................... 9
3.3.4 WIRELESS SECURITY SETUP.......................................................................................... 11
3.3.5 WIRELESS ACCESS CONTROL........................................................................................ 12
3.3.6 LAN INTERFACE SETUP ................................................................................................ 14
3.3.7 S
TATI ST IC S .................................................................................................................... 15
3.3.8 UPGRADE FIRMWARE .................................................................................................... 16
3.3.9 SAV E /RELOAD SETTINGS.............................................................................................. 17
3.3.10 PASSWORD SETUP ......................................................................................................... 17
4 FREQUENTLY ASKED QUESTIONS (FAQ).................................................................... 19
4.1 W
HAT AND HOW TO FIND MY PC’S IP AND MAC ADDRESS? ............................................. 19
4.2 WHAT IS WIRELESS LAN? ................................................................................................ 19
4.3 WHAT ARE ISM BANDS? ................................................................................................... 19
4.4 H
iii
OW DOES WIRELESS NETWORKING WORK?...................................................................... 19

USER’S MANUAL OF WLAN ACCESS POINT Version: 2.1
4.5 WHAT IS BSSID? .............................................................................................................. 20
4.6 WHAT IS ESSID? .............................................................................................................. 20
4.7 WHAT ARE POTENTIAL FACTORS THAT MAY CAUSES INTERFERENCE? ................................ 21
4.8 WHAT ARE THE OPEN SYSTEM AND SHARED KEY AUTHENTICATIONS? ............................. 21
4.9 WHAT IS WEP? ................................................................................................................. 21
4.10 WHAT IS FRAGMENT THRESHOLD?.................................................................................... 21
4.11 WHAT IS RTS ( REQUEST TO SEND) THRESHOLD?............................................................. 22
4.12 WHAT IS BEACON INTERVAL?............................................................................................ 22
4.13 WHAT IS PREAMBLE TYPE? ............................................................................................... 23
4.14 WHAT IS SSID BROADCAST? ............................................................................................ 23
5 CONFIGURATION EXAMPLES........................................................................................ 24
5.1 EXAMPLE ONE – DHCP ON THE LAN .............................................................................. 24
5.2 EXAMPLE TWO – FIXED IP ON THE LAN .......................................................................... 26
iv

USER’S MANUAL OF WLAN ACCESS POINT Version: 2.1
1 Introduction
The Wireless LAN Access Point is a portal that can act as the connection point between the
Ethernet CSMA/CD protocol and the wireless CSMA/CA protocol. The Access Point can be
easily integrated into your existing wireless network. In large installations, the roaming
functionality provided by multiple Access Points allows wireless users to move freely
throughout the facility while maintaining seamless, uninterrupted access to the network.
This document describes the steps required for the initial IP address assign and other AP
configuration. The description includes the implementation of the above steps.
Notice: It will take about 25 seconds to complete the boot up sequence after powered on
the WLAN Access Point; all LEDs are blank while booting except the Power
LED, and after that the WLAN Activity LED will be flashing to show the WLAN
interface is enabled and working now.
1.1 Package contents
The package of the WLAN Access Point includes the following items,
The Access Point
The AC to DC power adapter
The Documentation CD
1.2 Product Specifications
Product Name WLAN Access Point
Standard 801.11b(Wireless), 802.3(10BaseT), 802.3u(100BaseT)
Data Transfer Rate 11Mbps(Wireless), 100Mbps(Ethernet)
Modulation Method DBPSK/ DQPSK/ CCK
Frequency Band 2.4GHz – 2.497GJz ISM Band, DSSS
RF Output Power < 17 dBm
Receiver Sensitivity 11Mbps better than 8% PER @ -80 dBm
Operation Range 30 to 300 meters (depend on surrounding)
Antenna External Antenna
LED Power, Active (WLAN), Act/Link (Ethernet)
Security 64 bit/ 128 bit WEP, MAC address filtering
LAN interface One 10/100BaseT with RJ45 connector
Power Consumption 7.5V DC Power Adapter
1
USER’S MANUAL OF WLAN ACCESS POINT Version: 2.1
Dimension 120 * 75 * 34 mm
Operating Temperature 0 – 50oC ambient temperature
Storage Temperature -20 - 70oC ambient temperature
Humidity 5 to 90 % maximum (non-condensing)
1.3 Product Features
Complies with IEEE 802.11b standard for 2.4GHz Wireless LAN.
Supports 11Mbps data transfer rate with automatic fallback to 5.5M, 2M and
1Mbps.
Supports bridging function between wireless and wired Ethernet interfaces.
Supports 64-bit and 128-bit WEP encryption/decryption function to protect the
wireless data transmission.
Supports IEEE 802.3x full duplex flow control on 10/100M Ethernet interface.
Supports DHCP client for Ethernet LAN interface auto IP address assignment.
Supports clone MAC address function.
Supports WEB based management and configuration.
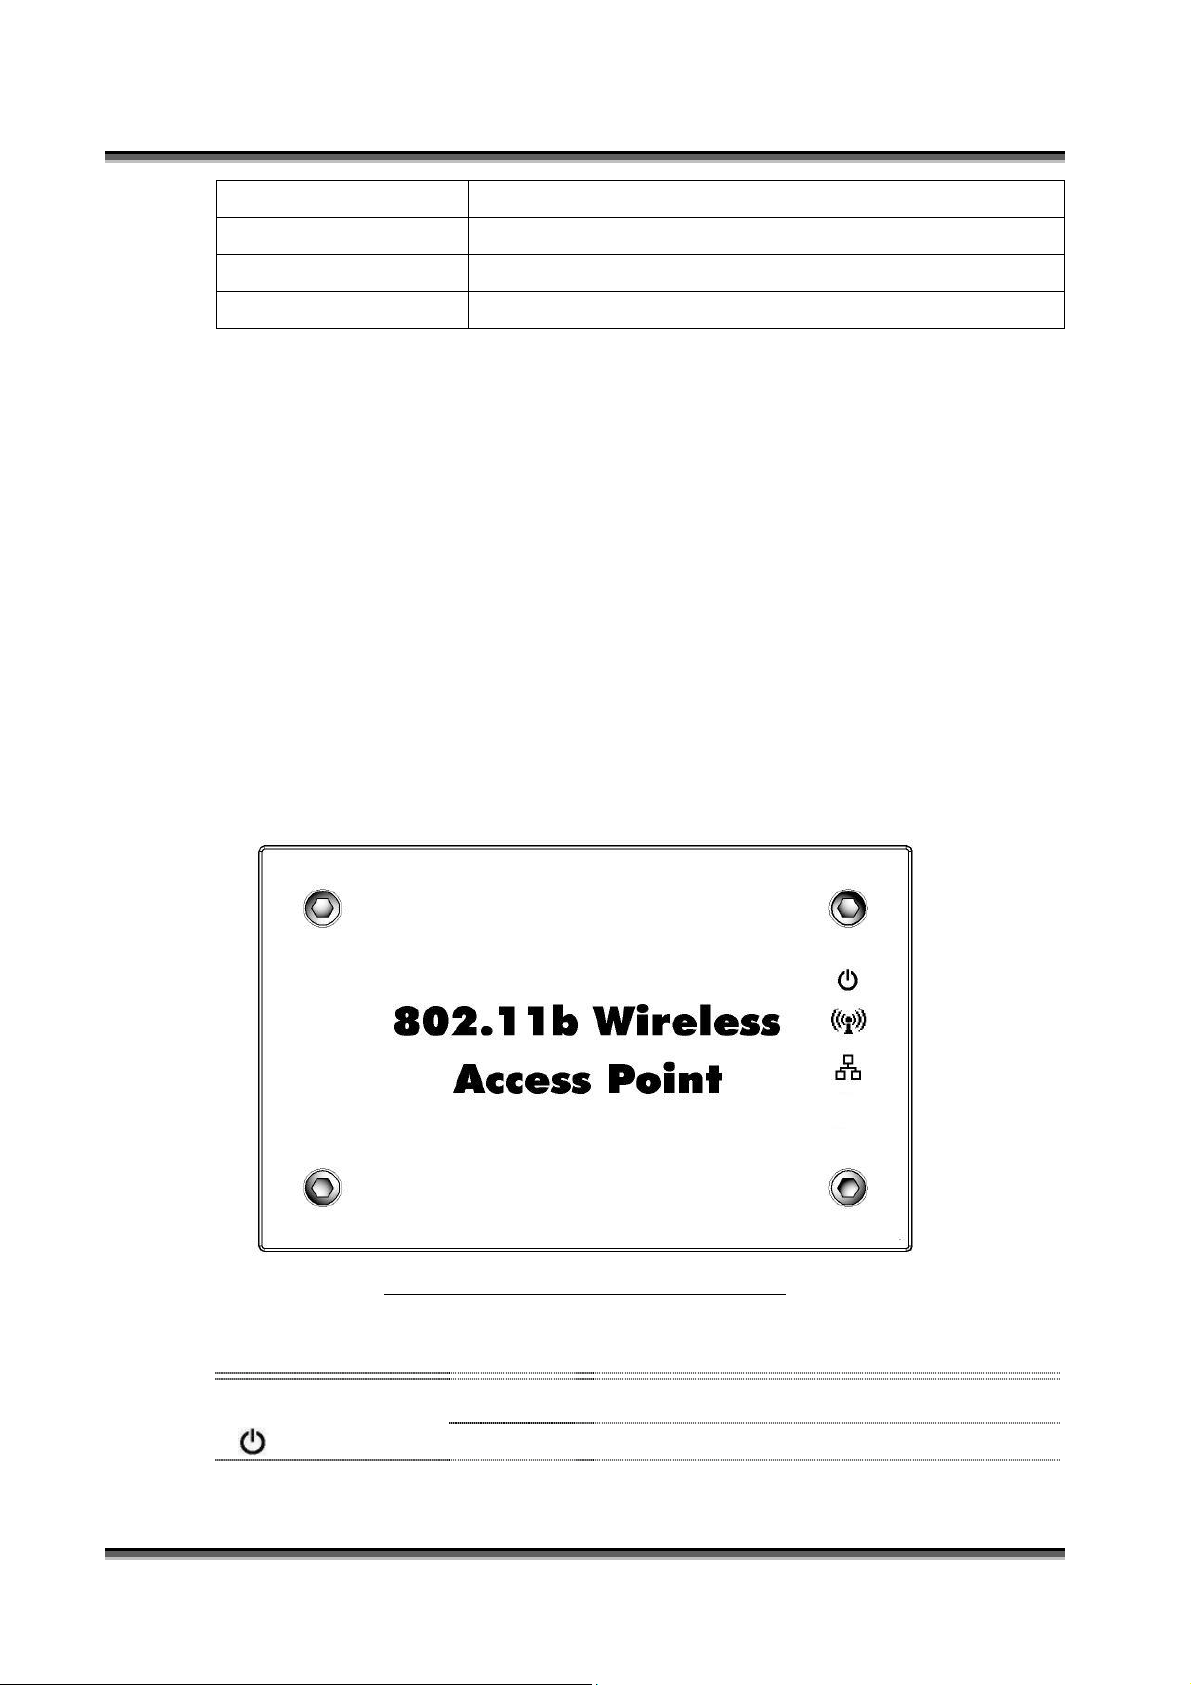
1.4 Top Panel Description
Figure 1 –WLAN Access Point Top Panel
LED Indicator State Description
1. Power LED
2. WLAN Activity LED Flashing Data is transmitting or receiving on the antenna.
2
On The WLAN AP is powered on.
Off The WLAN AP is powered off.
USER’S MANUAL OF WLAN ACCESS POINT Version: 2.1
3. LAN LINK/ACT LED Flashing Data is transmitting or receiving on the LAN interface.
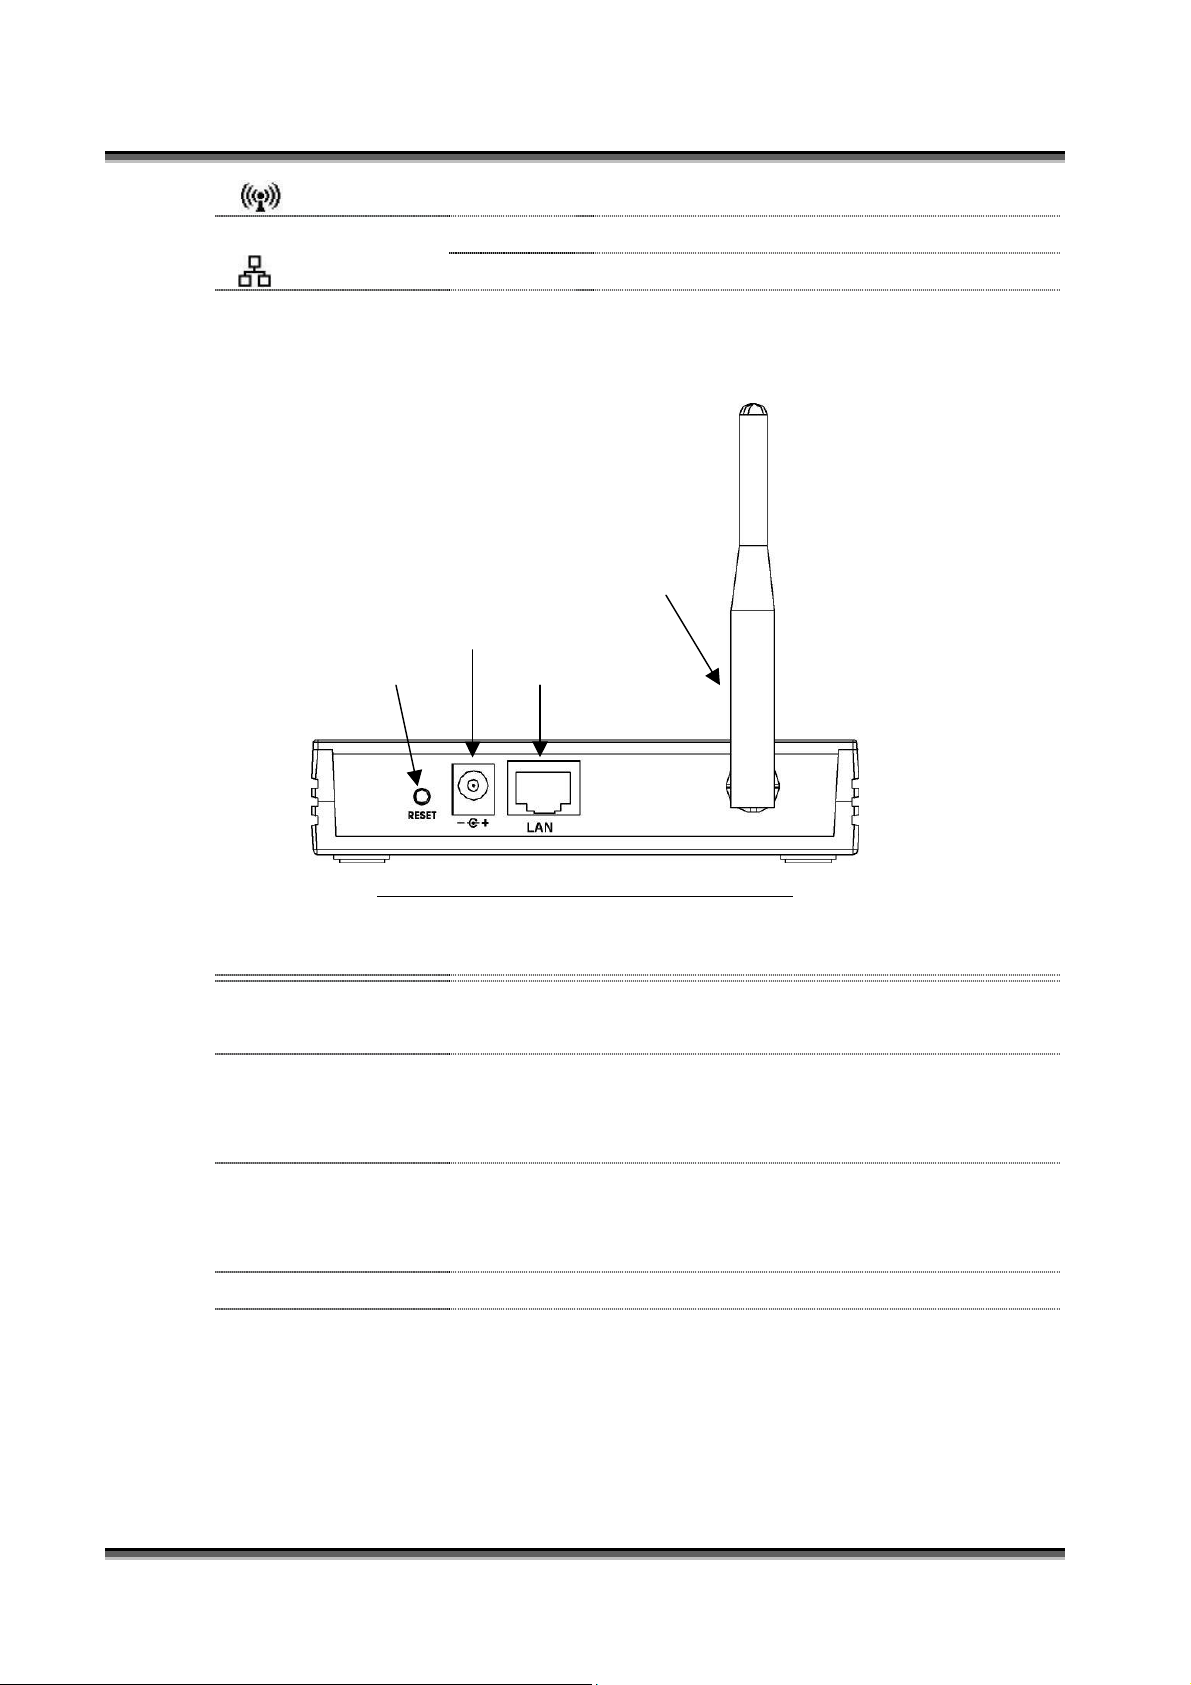
1.5 Rear Panel Description
Reset
Off No data is transmitting or receiving on the antenna.
Off No connection is established on LAN interface.
Antenna
Power
LAN
Figure 2 – WLAN Access Point Rear Panel
Interfaces Description
1. Reset Push continually the reset button 5 seconds to reset the configuration
parameters to factory defaults.
2. Power The power jack allows an external DC +7.5 V power supply connection.
The external AC to DC adaptor provide adaptive power requirement to the
WLAN AP.
3. LAN The RJ-45 socket allows LAN connection through a Category 5 cable.
Support auto-sensing on 10/100M speed and half/ full duplex; comply with
IEEE 802.3/ 802.3u respectively.
4. Antenna The Wireless LAN Antenna.
3

USER’S MANUAL OF WLAN ACCESS POINT Version: 2.1
2 Installation
2.1 Hardware Installation
Step One: Place the Wireless LAN Access Point to the best optimum transmission
location.
The best transmission location for your WLAN Access Point is usually at the
geographic center of your wireless network, with line of sign to all of your mobile
stations.
Step Two: Connect the Wireless LAN Access Point to your wired network.
Connect the Wireless LAN Access Point by category 5 Ethernet cable to your
switch/ hub/ router/ xDSL modem or cable modem. A straight-through Ethernet
cable with appropriate cable length is needed.
Step Three: Supply DC power to the Wireless LAN Access Point.
Use only the AC/DC power adapter supplied with the Wireless Access Point; it may
occur damage by using a different type of power adapter.
The hardware installation finished.
2.2 Software Installation
There are no software drivers, patches or utilities installation needed, but only the
configuration setting. Please refer to chapter 3 for software configuration.
4

USER’S MANUAL OF WLAN ACCESS POINT Version: 2.1
3 Software configuration
There are web based management and configuration functions allowing you to have the jobs
done easily.
The Wireless LAN Access Point is delivered with the following factory default parameters.
Default IP Address: 192.168.1.254
Default IP subnet mask: 255.255.255.0
WEB login User Name: <empty>
WEB login Password: <empty>
3.1 Prepare your PC to configure the Wireless LAN Access Point
For OS of Microsoft Windows 95/ 98/ Me:
1. Click the Start button and select Settings, then click Control Panel. The Control
Panel window will appear.
Note: Windows Me users may not see the Network control panel. If so, select View
all Control Panel options on the left side of the window
2. Move mouse and double-click the right button on Network icon. The Network
window will appear.
3. Check the installed list of Network Components. If TCP/IP is not installed, click the
Add button to install it; otherwise go to step 6.
4. Select Protocol in the Network Component Type dialog box and click Add button.
5. Select TCP/IP in Microsoft of Select Network Protocol dialog box then click OK
button to install the TCP/IP protocol, it may need the Microsoft Windows CD to
complete the installation. Close and go back to Network dialog box after the TCP/IP
installation.
6. Select TCP/IP and click the properties button on the Network dialog box.
7. Select Specify an IP address and type in values as following example.
IP Address: 192.168.1.1, any IP address within 192.168.1.1 to 192.168.1.253 is
good to connect the Wireless LAN Access Point.
IP Subnet Mask: 255.255.255.0
8. Click OK and reboot your PC after completes the IP parameters setting.
For OS of Microsoft Windows 2000, XP:
1. Click the Start button and select Settings, then click Control Panel. The Control
Panel window will appear.
2. Move mouse and double-click the right button on Network and Dial-up Connections
5
 Loading...