

Page 1
ZC-OH2 TAMPER-RESISTANT
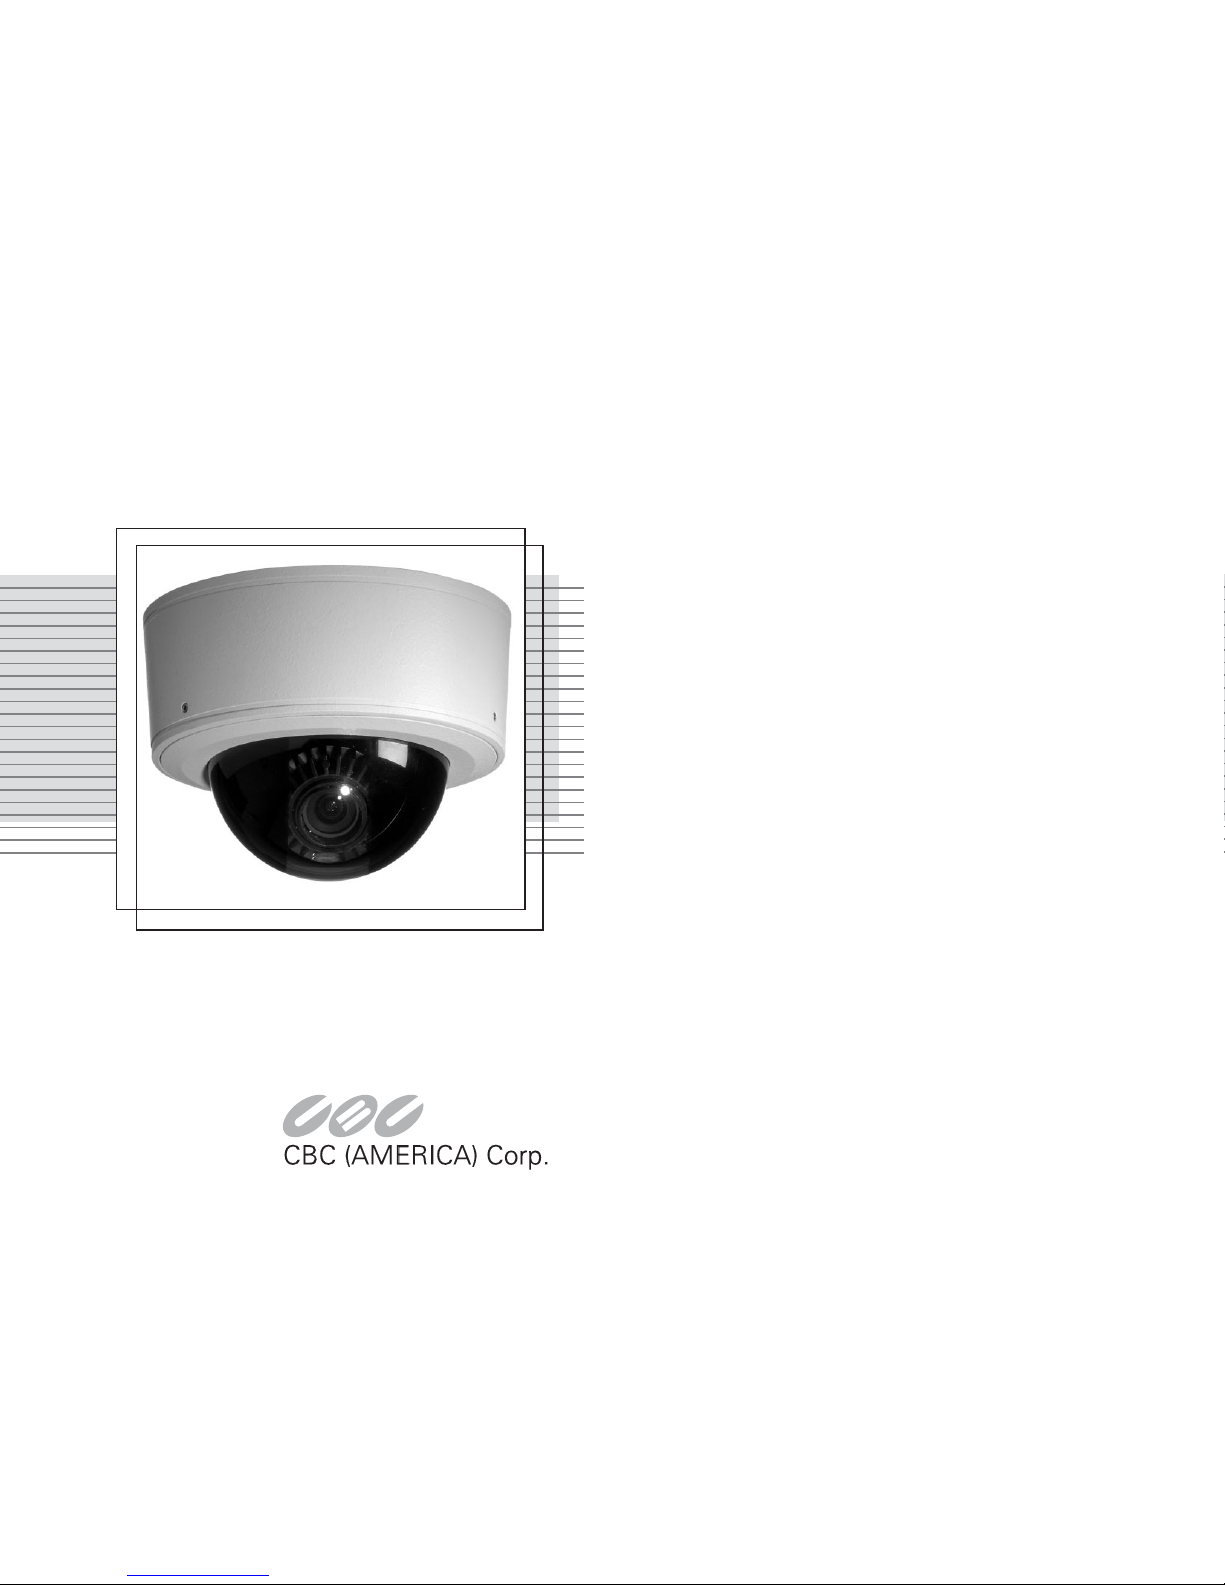
INDOOR/OUTDOOR HOUSING
INSTRUCTION MANUAL
Please carefully read and observe all instructions and warnings contained in this manual
or on the product. Improper installation may damage the device and void the warranty.
FOR USE WITH ALL GANZ ZC SERIES MINIDOME CAMERAS
Page 2

32
IMPORTANT
Installation should be performed by a qualified service person and conform
to all local codes.
DESCRIPTION
Model ZC-OH2 is a tamper resistant indoor or outdoor housing which is
designed to accommodate all CBC ZC series minidome cameras. This
housing will accept the following cameras:
Model ZC-D1024EHA Hi-Res B/W Camera with 2-4mm A/I varifocal
Model ZC-D1036EHA Hi-Res B/W Camera with 3-6mm A/I varifocal
Model ZC-D1049EHA Hi-Res B/W Camera with 4-9mm A/I varifocal
Model ZC-D2550EHA Hi-Res B/W Camera with 5-50mm A/I varifocal
Model ZC-D1024NHA Hi-Res Color Camera with 2-4mm A/I varifocal
Model ZC-D1036NHA Hi-Res Color Camera with 3-6mm A/I varifocal
Model ZC-D1049NHA Hi-Res Color Camera with 4-9mm A/I varifocal
Model ZC-D2550NHA Hi-Res Color Camera with 5-50mm A/I varifocal
MAJOR FEATURES
•Polycarbonate dome with rugged cast aluminum housing withstands the
blow from a 10 pound sledgehammer
•O-Ring Sealed housing is completely air-tight and water-tight (when
properly installed) and is suitable for virtually any weather condition
• Quick and easy installation utilizing 8 different dome camera options
• Housing mounts directly to any wall, ceiling or 4S Electrical box
• Interchangeable dome with tinted, gold and chrome options
INSTALLATION
1) Standard Housing Installation
a) Caution: Do Not Remove Screws. Loosen the 3 set screws
from the dome base using the supplied allen key and remove the
dome cover. the O-Ring makes a tight seal, so a thin-bladed screwdriver may be needed to separate the dome cover from the housing
base.
b) Remove the rubber plugs from the mounting holes inside the base.
Remove only those plugs for the mounting holes that will be used.
c) Using a minimum 7/32” drill bit, drill the cable feed hole and feed the
video/power cable through the mounting surface.
d) Holding the dome against the mounting surface, mark and drill the 4
mounting holes. Fasten the base to the mounting surface using the
supplied #8 Phillips screws, rubber washers and plastic anchors. Be
sure to re-install the rubber plugs into any unused mounting holes.
(Depending on the mounting surface, other hardware may be
needed.)
Note: (If using other mounting hardware)
To prevent damage from leakage, apply silicone sealant
around the inside of the 4 mounting holes before inserting
screws or bolts.
2) Optional Conduit Base Installation (Model ZC-CB2)
a) Install optional conduit base using supplied screws and anchors or
other hardware. Apply a bead of silicone sealant between the base
and mounting surface.
b) Route conduit to base and inset into conduit hole. Lock down the
conduit end with allen head set screw.
c) Feed the power/video cable from the housing base to the loose
wires from the conduit. It may be necessary to shorten the
power/video cable so that all of the spliced connections fit within the
center of the conduit base.
e) Making sure all the connections are tucked into the center of the
conduit base, install the housing base to the conduit base using the
supplied 4 machine screws. Apply a bead of silicone sealant between
the housing base and conduit base.
Page 3

54
3) Install ZC Series Dome Camera
Note: Before installing the ZC series camera into the housing,
remove its front dome cover, plastic retaining ring and video
cable. Only the base of the camera will be installed into the
housing.
a) Place the camera base into the housing, making sure that the 4
power and video wires feed through the hole in the camera base.
b) Fasten the camera to the housing base.
For 2-4mm, 3-6mm and 4-9mm models: Use the supplied #6 X 1/2"
machine screws and spacers.
For 5-50mm models: Use the supplied #6 X 5/16" machine screws.
Spacers should not be used with this model.
c) Make the 4 wiring connections in accordance with the instructions
below.
4) Connect Power
Important: Make wiring connections only after it has been
determined that power has been disconnected. Failure to do
so could lead to permanent damage to the camera and void
the warranty.
The ZC series cameras will accept either 12 Volts DC
or 24 Volts AC. If using 12VDC, be sure to determine the polarity
before connection. The Red wire connects to 12VDC (+) Positive terminal and the Black wire connects to the Ground terminal. When using
12VDC, use only a regulated power supply with a minimum 300mA output, (model C12DCR recommended). For 24VAC input, connect the
Red and Black wires to the 2 power input terminals.
5) Connect Video
Connect the White wire to the Video-Out Terminal and the Green wire
to the Ground Terminal as shown in Figure 1. Note: A BNC con-
nector (included) can be crimped on to the white and green
video signal wires using the supplied butt connectors. It is recommended these connections be crimped with a crimping tool
and covered with shrink tubing.
WIRING DIAGRAM:
RED 12VDC+ OR 24VAC
B
LACK 12VDC GROUND OR 24VAC
W
HITE VIDEO SIGNAL OUT
GREEN VIDEO GROUND
Note: If necessary, needle nose pliers can be used to make power and
video connections.
Note: Special Focusing Instructions when using 5-50mm dome.
If the 5-50mm lens is set to a focal length of 20mm or greater, the dome
cover must be held in front of the lens while focusing to obtain proper
focus.
6) Install the Desiccant Pack
After the camera has been installed, attach the supplied desiccant pack
to the camera. Remove the desiccant pack from its storage bag.
Remove plastic from the double-sided tape and attach to the camera
bracket as shown in Figure 1. The desiccant pack is used to absorb any
moisture trapped inside the dome during installation. To avoid excessive
moisture buildup, it is recommended that the camera not be installed in
rainy or excessively damp conditions. The desiccant pack can be
replaced if condensation develops inside the housing.
7) Re-Install Dome Cover
Place the dome cover on the housing base. Push the cover lightly onto
the base and tighten the 3 tamper resistant screws until the cover seals
tight against the housing base. Caution: Do Not Over Tighten!
CHANGING THE POLYCARBONATE DOME
The ZC-OH2 housing is supplied with a clear dome with painted slot as the
standard. In the event the dome is scratched or damaged or if a different
dome is required (tinted, gold or chrome), the dome can be replaced.
Remove the 4 retaining screws and washers on the inside of the dome
cover and remove the aluminum retaining ring. The dome can then be
removed. Due to a tight seal, some pressure may be required to the top of
the dome to break the seal. After installing the new dome, replace the
retaining ring and tighten the 4 screws and washers until the retaining ring is
flush with the adjacent surface.
Regulatory Notice, FCC Rules: Part 15 This device has been tested
and found to comply with the limits for a Class B digital device, pursuant to
Part 15 of the FCC Rules. These limits are designed to provide reasonable
protection against harmful interference in a residential installation. This
equipment generates, uses and can radiate radio frequency and, if not
installed and used in accordance with the instructions, may cause harmful
interference to radio communications. However, there is no guarantee that
the interference will not occur in a particular installation.
Page 4

76
MAINTENANCE NOTES
If the housing cover is opened frequently or if the O-Ring dries out, apply a
light coat of good quality silicone based grease to the O-Ring to maintain a
water-tight seal. Replacement O-rings and other replacement parts are
available through CBC (America) Corp.
OPTIONS
1. Side Conduit Adapter Plate
In applications where a hole cannot be made through the mounting
surface, an adapter plate is available which accepts 1/2” conduit from
the side (Model ZC-CB2).
2. Pendant Mount
A pendant mount adapter is available for applications which require the
dome to be dropped from the ceiling from a pipe. the pendant mount
adapter accepts a 1” NPT pipe thread (Model ZC-PM2).
3. Wall Mount
The wall mount combines the pendant mount with a wall mount bracket
for various wall mounting applications.
4. Housing Color
Different housing colors (either painted or anodized) are available for a
minimum lot.
HOUSING SPECIFICATIONS
Construction: Cast Aluminum, stainless steel hardware, polycarbonate dome.
Finish: Off-White Powder Coat Paint
Ratings: Designed to meet NEMA 5, IP67
Dimensions: 5.82” diameter,4.25” overall height
Unit Weight: 1 lb, 15 oz.
Te mp Range: -20 degrees to +140 degrees F (ZC series dome cameras)
*Design and product specifications subject to change without notice.
FIGURE 1
Mounting holes covered by rubber plugs. (4)
Video signal out
(WHITE)
Video ground
(GREEN)
12VDC positive
or 24VAC (RED)
12VDC ground or
24VAC (BLACK)
Housing base with camera installed
Attach desiccant
pack here
Mounting holes
for camera base (2)
POWER AND VIDEO CONNECTION WIRES (4)
ZC-OH2 INDOOR/OUTDOOR HOUSING INSTRUCTION MANUAL
Page 5

OPTIONAL PENDANT MOUNT
MODEL ZC-PM2
OPTIONAL WALL MOUNT
MODEL ZC-WM2
O
PTIONAL CONDUIT BASE MODEL ZC-CB2
NEW YORK: 55 MALL DRIVE • COMMACK, NY 11725
T
EL 1-800-422-6707 • 631-884-9700 • FAX 631-543-5428
CALIFORNIA: 20521 EARL STREET • TORRANCE,CA 90503
TEL 1-800-888-0103 • 310-793-1600 • FAX 310-793-1505
TOKYO HEADQUARTERS: 2-15-13,TSUKISHIMA,CHUO-KU
• TOKYO 104, JAPAN • TEL 03 536-4500 • FAX 03 536-4780
www.cbcamerica.com/cctv
©2002 CBC America Corp. ,All Rights Reserved.10/02
100 0024 001 CBC 10/02
Data subject to change without notice.
Printed in USA
 Loading...