

Page 1

1 Introduction and Package Contents
In
troduction
Congratulations on your purchase. You can expect only the
sharpest and most brilliant color images from this monitor.
Featuring easy to use OSD controls and built in speakers, you will
find this monitor both easy to use and a pleasure to look at.
Please unpack the monitor with care, and verify that all the parts
listed below are included. If any parts are missing, please
contact with your local distributor.
Please save the packing box for possible future return for service.
Package Contents
• One LED Monitor
V DC Adapter/Power cord
• 12
• D-Sub 15-pin VGA connector Cable
• User's Guide
Hardware Installation
The following sections in this guide give clear, step-
by-step
descriptions of the installation process and explain how to use
the monitor for optimum results.
Please pay attention to the Regulations and Warnings Section of
this user’s manual before setting up the display monitor. Failure
to do so may inadvertently result in personal injuries or machine
damage.
1
Page 2
Specifications
Under 5W in Power Saving Mode (240 Vac)
Japanese, Polish
Size
17”
19”
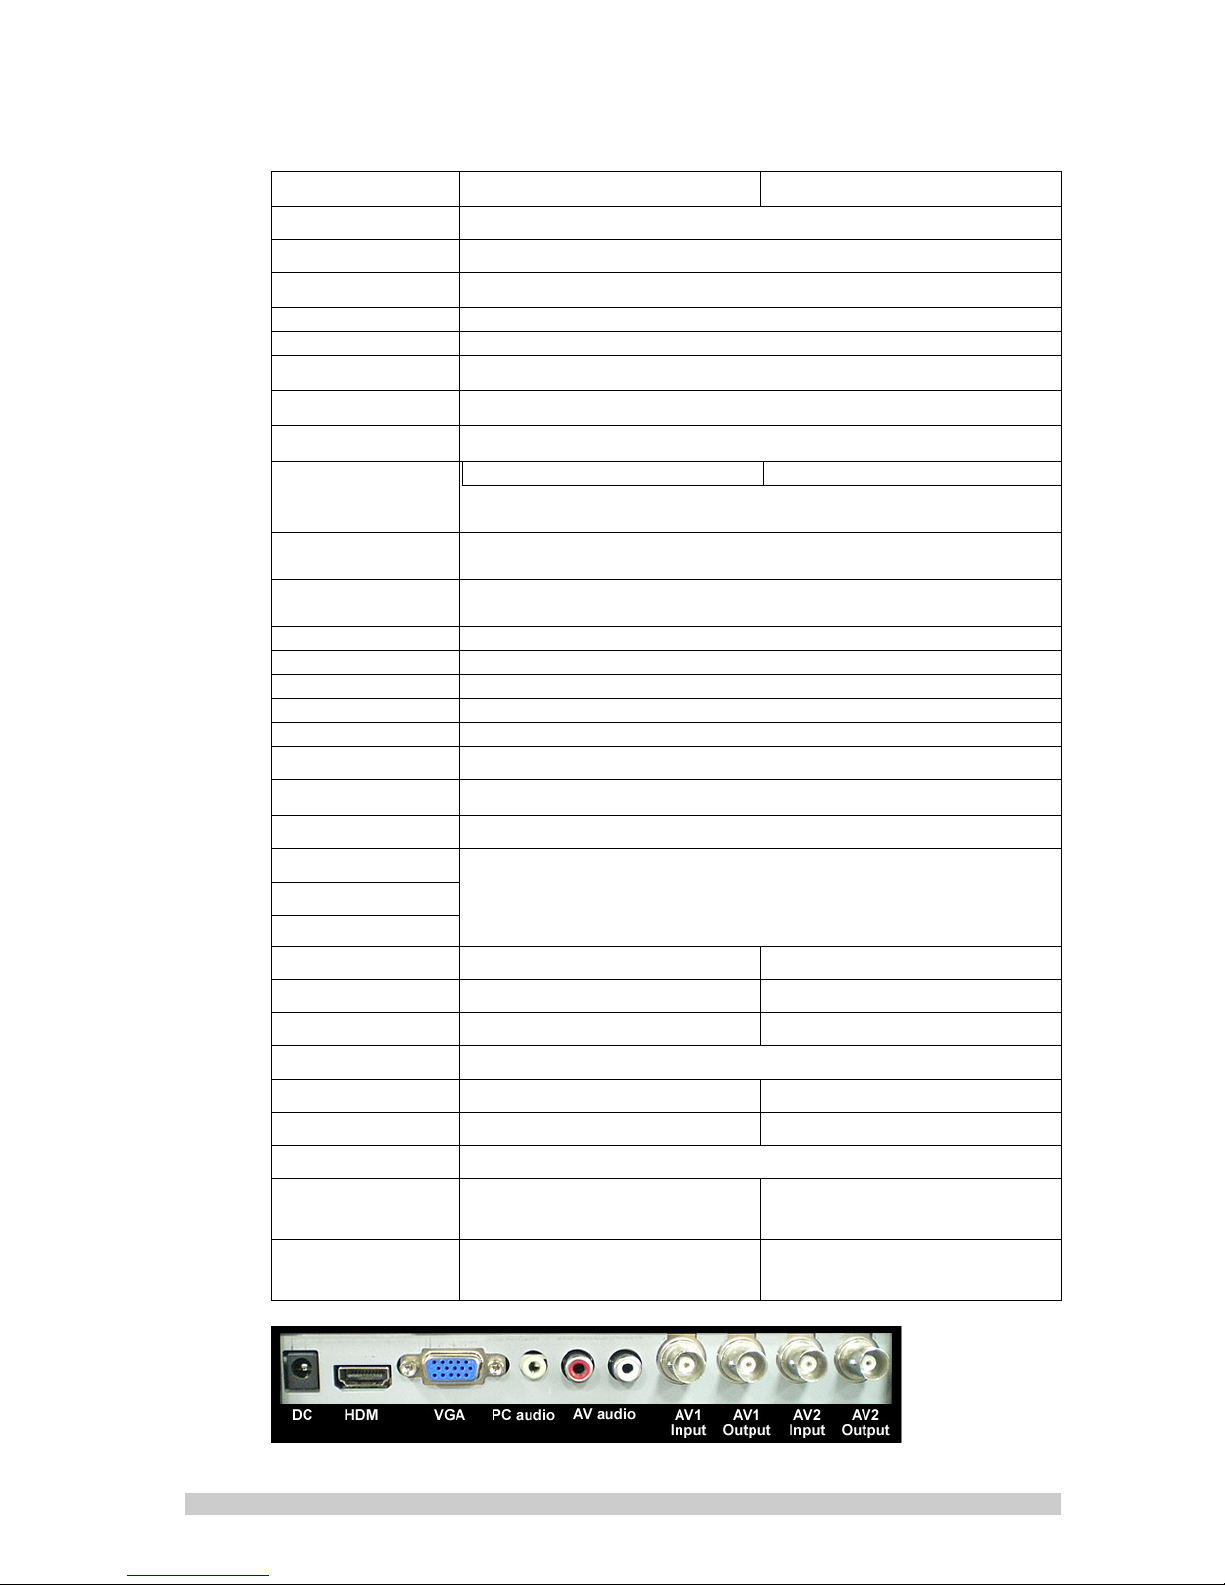
Output Interface (BNC) x
2
Input Interface (BNC) x 2, (VGA) x 1, (RCA) x 2 (PC Audio) x 1 , (HDMI) x 1
Output video (BNC) x
Speaker 1.5W x
Display Mode Video 1
/ Video 2/ VGA / HDMI
AC power AC 100~
Input power 12VDC 3
Temperature Operati
Power
Consump
tion
OSD Control
OSD Languages
20W max in on mode 25W max in on mode
Under 3W in Power Saving Mode (100 Vac)
Picture
English
Mode, Contrast, Brightness, Color, Tint, Sharpness,
, German, French, Italian, Spanish, Russian, Turkish,
on: 0°~40°C , Storage:-10°~60°C
.33A, 40 Watt Max
Color Temp, DNR
2
2
240V 50/60Hz
Auto Adjustment Yes
De-interlace Yes
Wall mount Yes (Op
Accessories Manual,
tional) 75mm VESA mount
Power Adaptor, VGA cable
Safety FCC, CE, ROHS
Tilt -5°~15°
Humidity
10%~90%
C
Monitor scan Micropr
Horizontal frequency
Vertical frequency
VESA specifications
0.264x0
Pixel pitch
Pixel format
Response time 5ms 5ms
Color depth 8-bit;1
Contrast ratio 10,000:
Luminance of white 300cd/m2 3
Viewing angle (H/V) Horizont
Display area
Weight
(monitor only)
.264mm 0.294x0.294mm
1280x10
24 1280x1024
1 10,000:1
al : 170° / 160° , Vertical -170° / 160°
337.9 x
270.3
(H x V)mm
3.2 KGS 3.3 Kg
ocessor controlled
31kHz~65kHz
56Hz~75
DPMS,DDC1/2B
Hz
6,77,216 colors
00cd/m2
376.3 x 301.06
(H x V)mm
2
Page 3

Timing
Item
Resolution H Freq.(kHz) V Freq.(Hz)
1 640x400@70 31.460 70
2 640x480@60 31.469 59
3 640x480@72 37.861 72
4 640x480@75 37.500 75
5 720x400@70 31.460 70
6 800x600@56 35.156 56
7 800x600@60 37.879 60
8 800x600@72 48.077 72
9 800x600@75 46.875 75
10 1024x768@60 48.363 60
11 1024x768@70 56.476 70
.080
.940
.809
.000
.080
.250
.317
.188
.000
.004
.069
N
ote:
1. Please note, selecting frequencies outside these ranges may result in an abnormal images or
2. The resolution will be showed on the screen while VGA mode be selected.
12 1024x768@75 60.023 75
13 1280x1024@60
14 1280x1024@75
damage to the monitor.
For example:
63.981 60
79.976 75
.029
.020
.025
3
Page 4

Descriptions
The
monitor displays PAL or NTSC standard color images in CCTV
systems. 2 looping composite video BNC inputs, Audio input RCA,
an analog VGA input using 15-pin D-sub, and an HDMI (High
Definition Multimedia Input) connector.
Features
– 17 inch plastic cased / metal cased models
– AC 100-240V Power Supply
– NTSC/PAL Auto Detect
– High Resolution Display 1280 x 1024
– VGA Input
– Composite Video Input
– HDMI Input
– On-screen Display (OSD) with Multiple Languages
– PIP / POP Function
Quick Installation
1. Connect power cord and power adaptor.
2. Connect video cable
• Make sure both the LED display and computer are turned off.
• Connect the video cable from the LED display to the computer.
3. Turn ON LED display and computer
4. Select input source
• Select the proper input source corresponding to the video
Signal, AV1/ AV2 / VGA / HDMI.
5. VGA mode only
• Press button Auto on front panel to automatically adjusts
H- Position, V-Position, Pixel Clock and Phase for an optimal
image.
4
Page 5
2 Monitor and OSD Control
Mo
nitor and OSD Control
The LED color monitor has a simple control layout for controlling
the monitor and OSD (On Screen Display) functions. The table
below summarizes the control keys and their related functions.
Keys Function Description
Toggle the display between standby mode and on.
(P
ress “Power” and waiting 6 sec., monitor will be display )
Automatically adjusts H-Position, V-Position, Pixel Clock
an
d Phase for an optimal image in PC mode only.
Switch setting item.
In
crease the value of the choose item.
Switch setting item.
De
crease the value of the choose item.
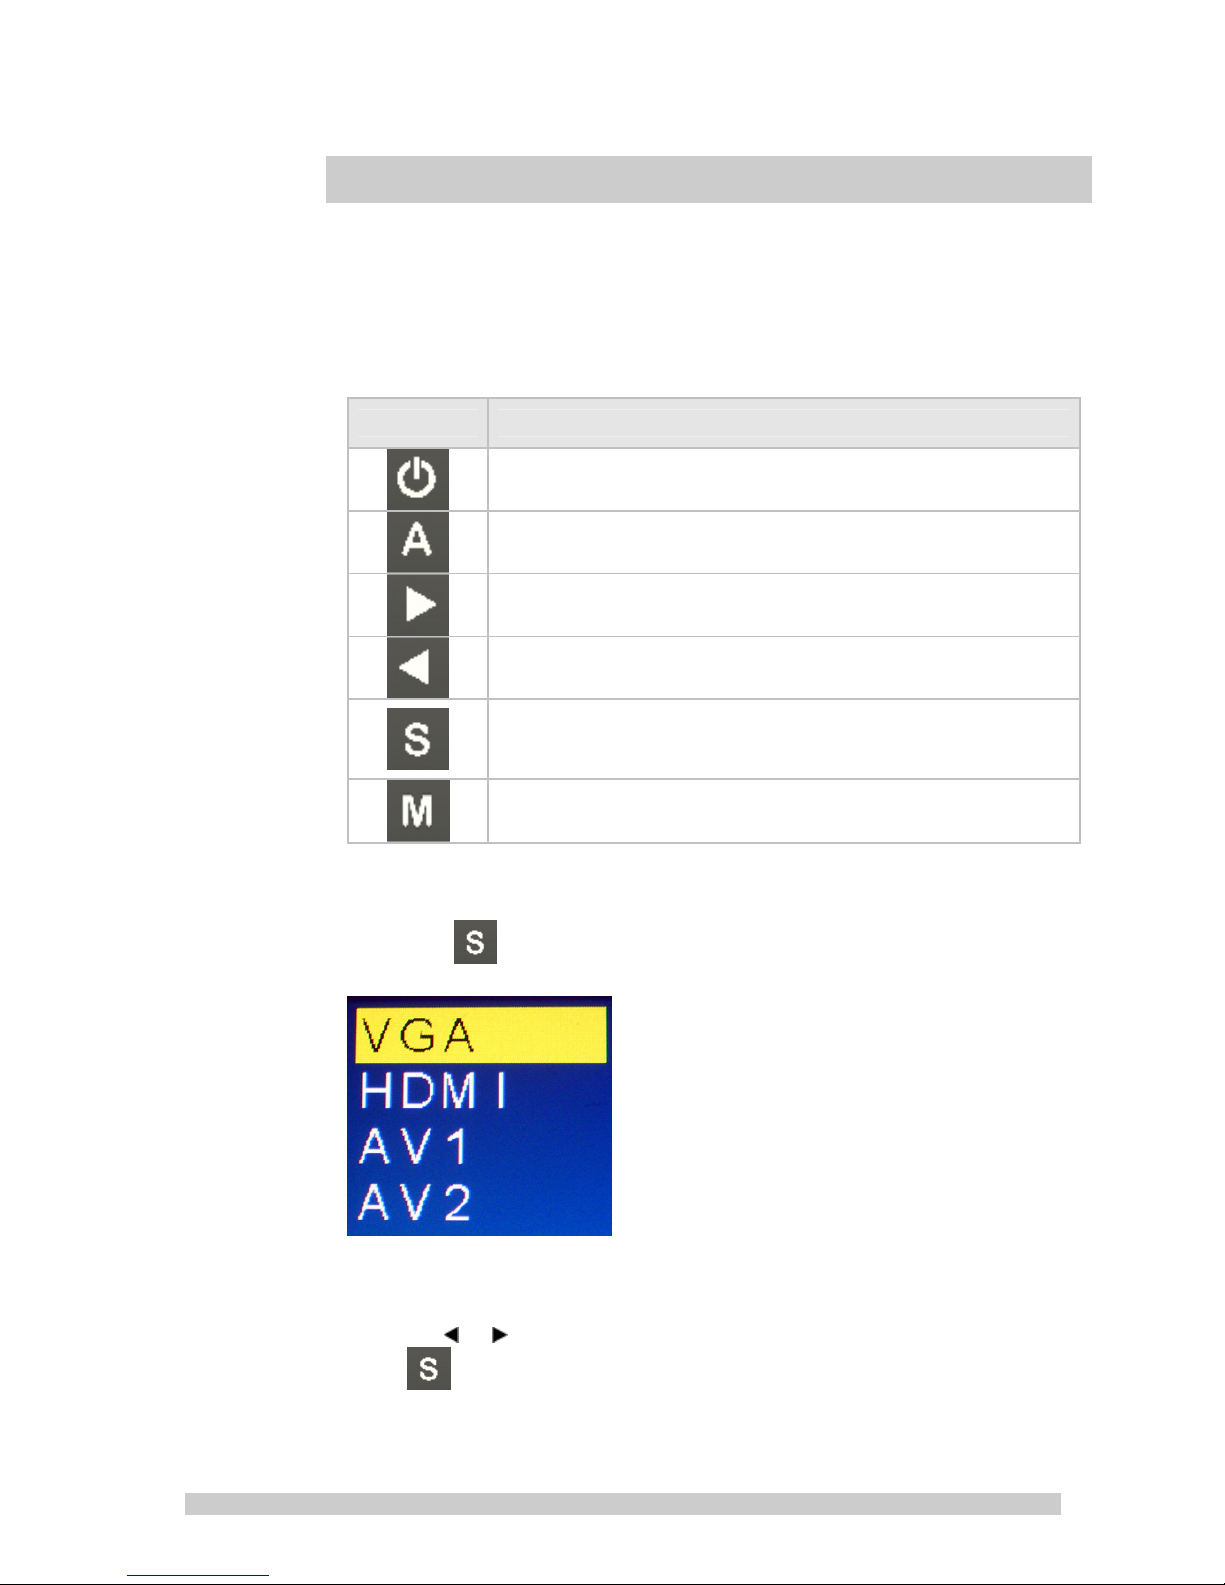
Se
lect Source “PC”, ”AV1”, ”AV2”. (while in the OSD
menu this button is used as select, advance and
confirm)
Enter the main menu of the on-screen display (OSD).
Source Select
Pr
ess the
select button to bring up source selection
Us
e the “
”, “ ” keys to advance to the proper selection and
press select button to confirm the setting.
5
Page 6
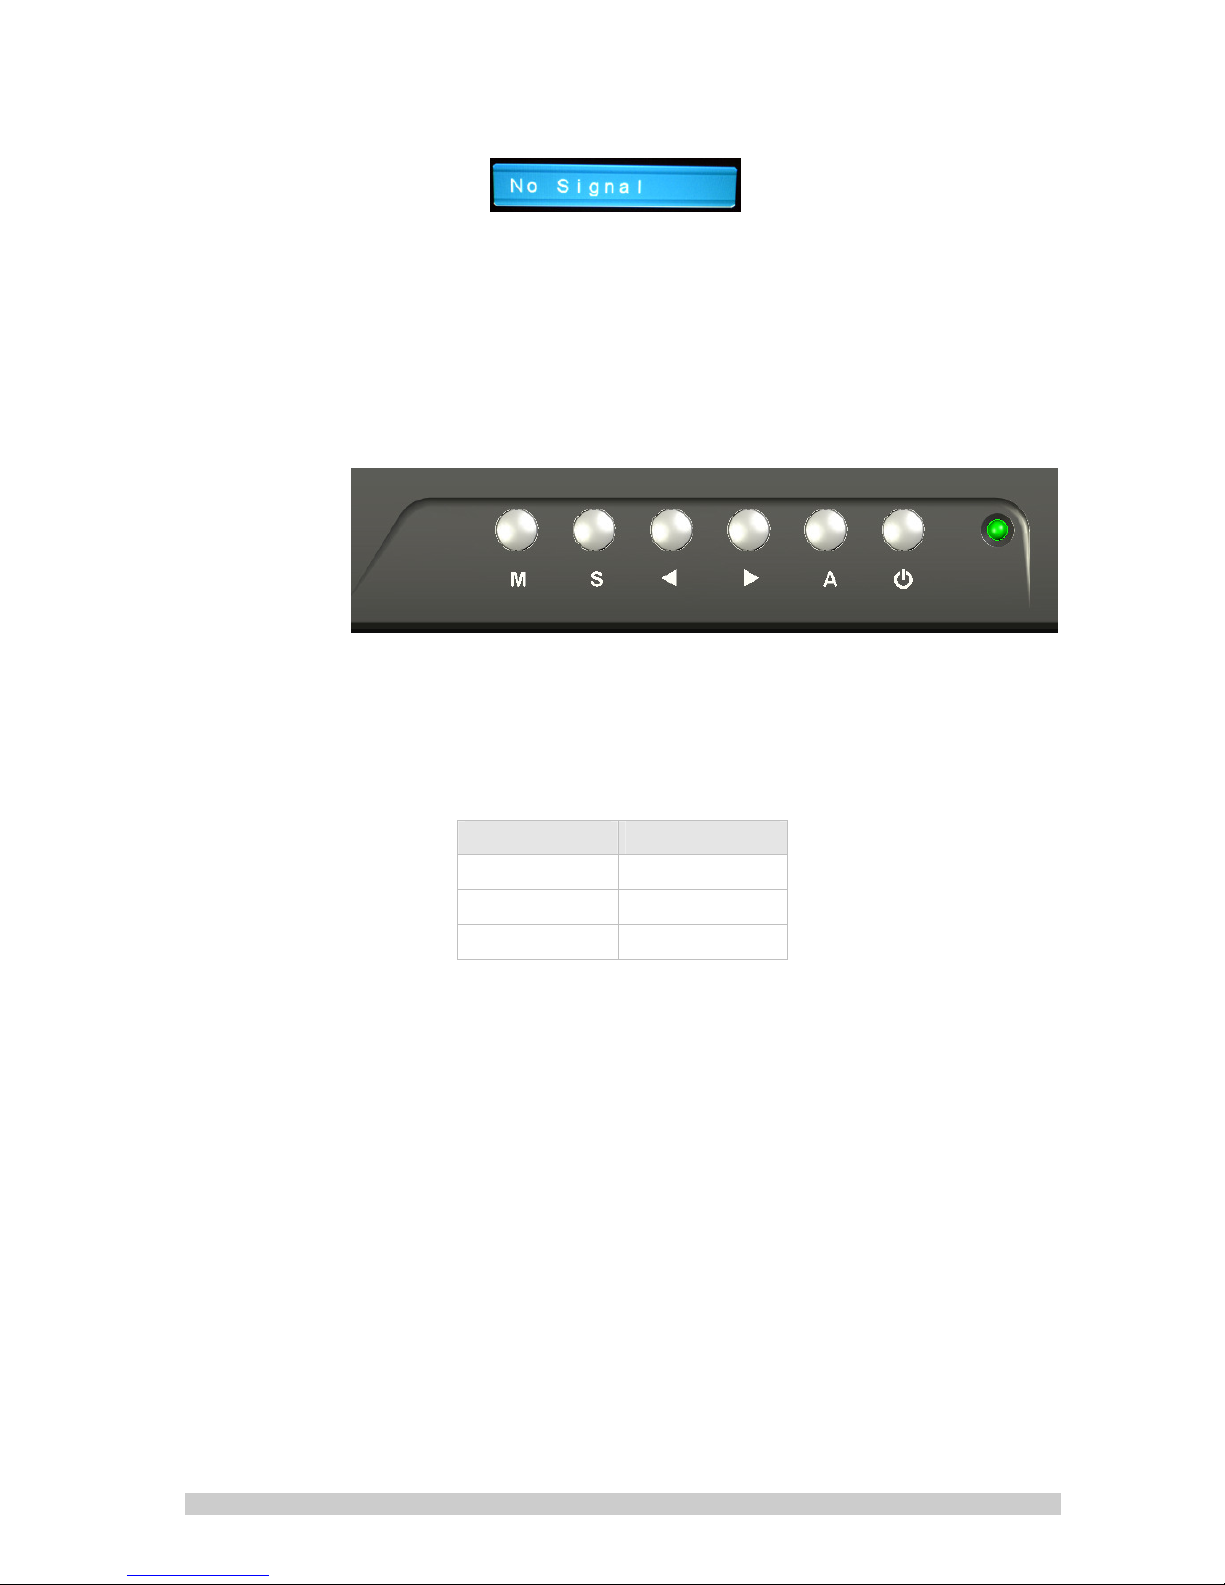
Note:
The message will be displayed on the
sc
reen if there’s no VGA signal detected in VGA mode, and the
power will be off automatically after 10 seconds. Please press the
power button again to restart the monitor.
LED Status Display
The
following table describes the various power states of the LED
monitor as represented by different LED colors.
Power State
On Gr
Standby Red
No power Blank
LED Color
een
Note: The LED will also be red if AV1 or AV2 is selected and there is no video
signal detected.
6
Page 7
3 OSD Control Function List
OSD Menu
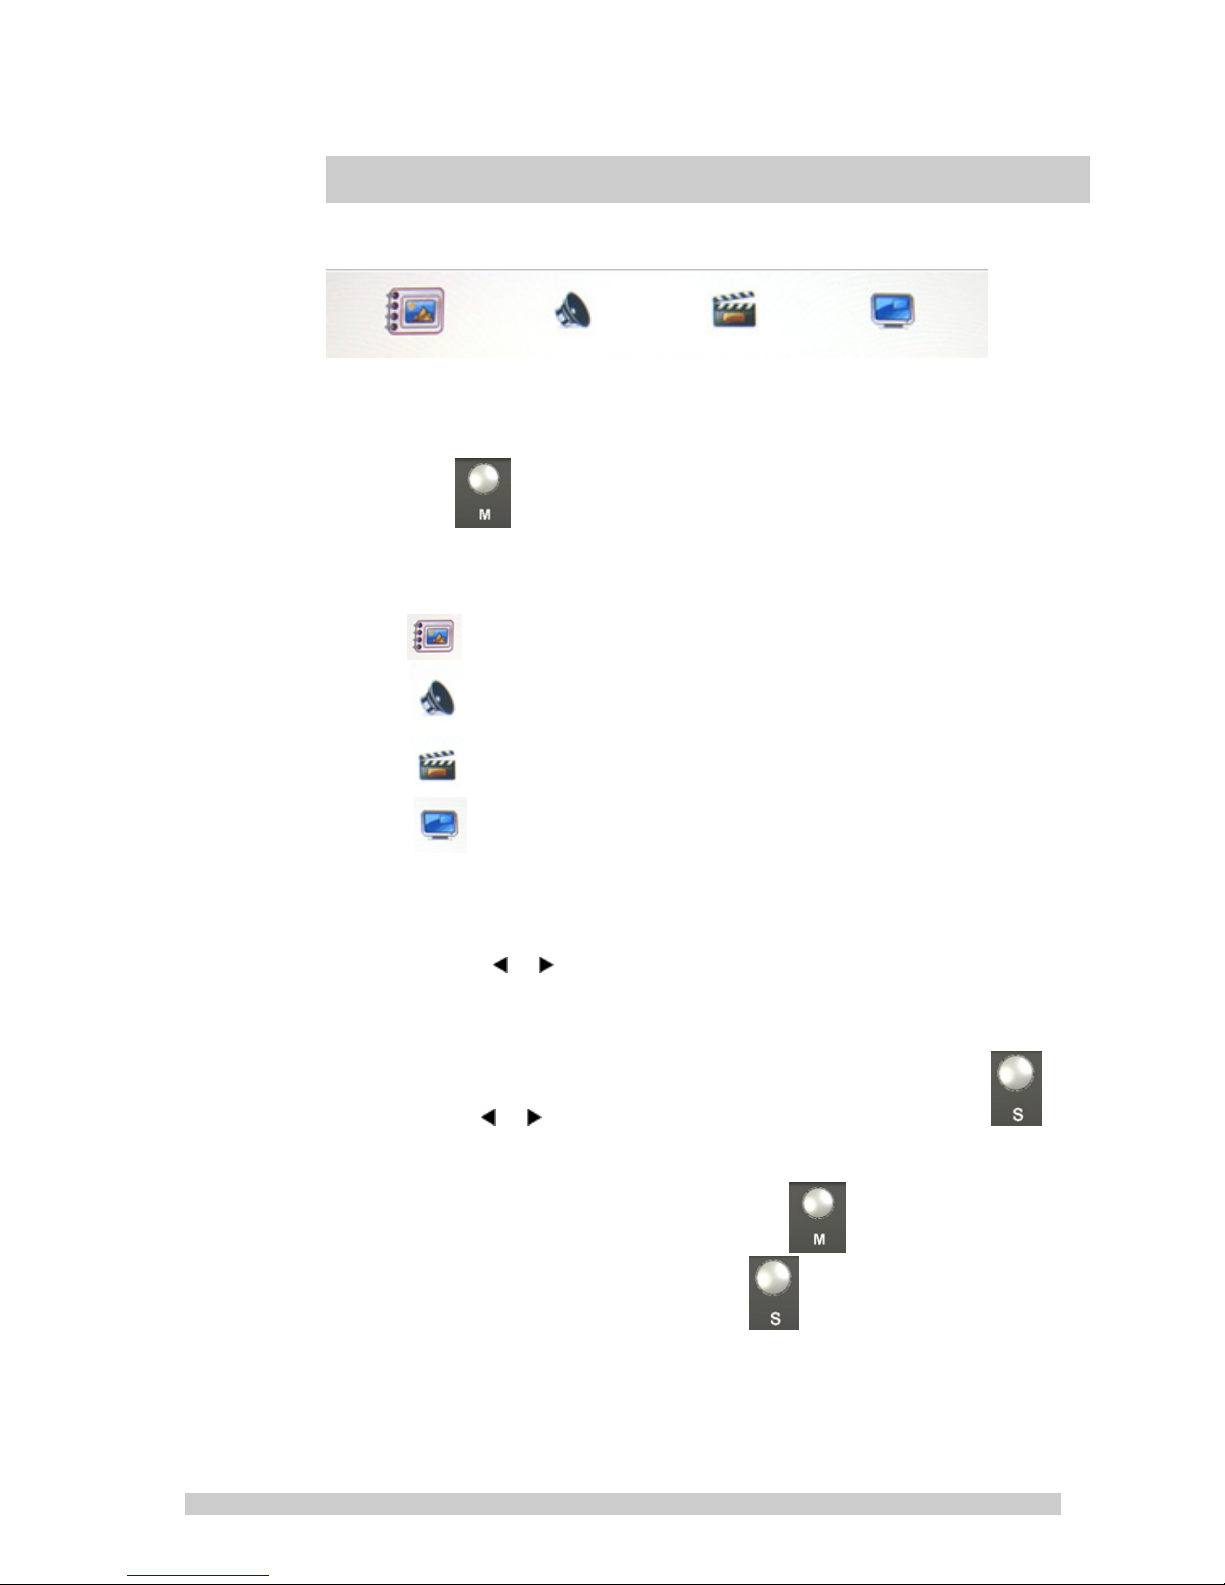
Main OSD function menu
Press
on front panel to access OSD
Ma
in menu functions as following:
Pre
th
that menu.
Picture setup: Setup for overall image quality
Audio Setup: Setup of audio inputs
General Setup: Setup of basic sittings
PIP Setup: Setup for multiple signal display
ss the “
en press the select button to access and to advance within
”, “ ” keys to select the appropriate function
Use the “
se
When the setting completed, press the
ret
e
xit OSD programming.
7
”, “ ” keys to change the parameter then press
lect button to confirm and advance to the next selection.
menu button to
urn to the main menu. Press the
menu button again to
Page 8

AV1/AV2 Mode –
Pi
cture Mode
1. Picture Mode
2. Contrast
3. Brightness
4. Tint
5. Saturation
6. Sharpness
7. Color Temp.
” OR “ ” to select the picture mode
ss “
Pre
“M
ovie, Vivid, User, Standard”
Th
is is used to set the brightness of the screen.
Press “
Th
Press “
Th
Press “
Th
Press “
Ad
Press “
Pr
“
” OR “ ” to adjust the parameter.
is is used to adjust the image contrast.
” OR “ ” to adjust the parameter.
is is used to adjust the image Tint.
” OR “ ” to adjust the parameter.
is is used to adjust the image saturation.
” OR “ ” to adjust the parameter.
just the sharpness. It makes the image become soft.
” OR “ ”” to adjust the parameter.
ess “
Cool , Warm , Normal “
” OR “ ” to adjust the color tones.
8. DNR
8
Press “ ” OR “ ” to adjust the noise reduction.
“High , Low, Off, Mid “
Page 9

So
und Mode
1. Volume Press “
2. Mute Pr
ess “
” OR “ ” to adjust volume level.
” OR “ ” to select sound “ Off, On ”.
9
Page 10

Setting Mode
1. Language Press “ ” OR “ ” to select language.
Mo
2. H. Position
3. H Zoom
4. V Position
5. V Zoom
6. Scale Mode
7. Reset Recall Default value.
ve the display picture left or right.
Press “
Ad
Press “
Mo
Press “
Ad
Press “
Ad
Press “
” OR “ ” to adjust the parameter.
just the H-size of the display picture
” OR “ ” to adjust the parameter.
ve the display picture up or down.
” OR “ ” to adjust the parameter.
just the V-size of the display picture
” OR “ ” to adjust the parameter.
just the V-size of the display picture
” OR “ ” to adjust “ Full, 16:9 ”.
PI
P/POP Setup Mode
1. Multi Window Pre
10
ss “ ” OR “ ” to select “PIP, POP,Off ” mode.
Page 11

2. SubSource Press “ ” OR “ ” to select “AV, VGA” mode.
Ad
3. Size
4. Position
5. Border Color
6. Sound Source Press “ ” OR “ ” to select “Main, Sub” mode.
7. Swap Press “Select” to Swap the Source of Main and Sub.
just the size of Sub Source window.
Press “
Mo
Press “
Ch
Press “
” OR “ ” to select “Large, Small ”
ve the position of Sub Source window.
” OR “ ” to select “U L, B L, B R, U R ” position.
oose the border color of Sub Source window.
” OR “ ” to select “Black, Blue” color.
Not
e:
AV1 and AV2 can not be displayed at the same time on the
monitor in PIP / POP mode.
If POP mode is selected both images are scaled to fit the screen.
11
Page 12

VGA Mode –
Pi
cture Mode
1. Contrast
2. Brightness
3. Color Temp.
4. Auto Adjust
s is used to set the brightness of the screen.
Thi
Press “
Th
Press “
Pr
“
Se
graphics adaptor
” OR “ ” to adjust the parameter.
is is used to adjust the image contrast.
” OR “ ” to adjust the parameter.
ess “
Cool , Warm , Normal “
” OR “ ” to adjust the color tones.
lect Auto Adjust to Auto synchronizes screen to
12
Page 13

So
und Mode
1. Volume Press “
2. Mute Pr
ess “
” OR “ ” to adjust volume level.
” OR “ ” to select sound “ Off, On ”.
13
Page 14

Setting Mode
1. Language Press “ ” OR “ ” to select language.
Mo
2. H. Position
3. H Zoom
4. V Position
5. V Zoom
6. Clock Press “ ” OR “ ” to adjust the parameter.
7. Phase Press “ ” OR “ ” to adjust the parameter.
8. Scale Mode
ve the display picture left or right.
Press “
Ad
Press “
Mo
Press “
Ad
Press “
Ad
Press “
” OR “ ” to adjust the parameter.
just the H-size of the display picture
” OR “ ” to adjust the parameter.
ve the display picture up or down.
” OR “ ” to adjust the parameter.
just the V-size of the display picture
” OR “ ” to adjust the parameter.
just the V-size of the display picture
” OR “ ” to adjust “ Full, 16:9 ”.
9. Reset Recall Default value.
14
Page 15

PIP
/POP Setup Mode
1. Multi Window Press “
2. SubSource Press “ ” OR “ ” to select “AV, VGA, HDMI” mode.
3. Size
4. Position
5. Border Color
6. Sound Source Press “ ” OR “ ” to select “Main, Sub” mode.
7. Swap Press “Select” to Swap the Source of Main and Sub.
Ad
Press “
Mo
Press “
Ch
Press “
” OR “ ” to select “PIP, POP, Off ” mode.
just the size of Sub Source window.
” OR “ ” to select “Large, Small ”
ve the position of Sub Source window.
” OR “ ” to select “U L, B L, B R, U R ” position.
oose the border color of Sub Source window.
” OR “ ” to select “Black, Blue” color.
Not
e:
AV1 and AV2 can not be displayed at the same time on the
monitor in PIP / POP mode.
If POP mode is selected both images are scaled to fit the screen.
15
Page 16

HDMI Mode –
Pi
cture Mode
1. Contrast
2. Brightness
3. Color Temp.
4. Auto Adjust
s is used to set the brightness of the screen.
Thi
Press “
Th
Press “
Pr
“
Se
graphics adaptor
” OR “ ” to adjust the parameter.
is is used to adjust the image contrast.
” OR “ ” to adjust the parameter.
ess “
Cool , Warm , Normal “
” OR “ ” to adjust the color tones.
lect Auto Adjust to Auto synchronizes screen to
16
Page 17

So
und Mode
1. Volume Press “
2. Mute Pr
ess “
” OR “ ” to adjust volume level.
” OR “ ” to select sound “ Off, On ”.
17
Page 18

Setting Mode
1. Language Press “ ” OR “ ” to select language.
Mo
2. H. Position
3. H Zoom
4. V Position
5. V Zoom
6. Scale Mode
7. Reset Recall Default value.
ve the display picture left or right.
Press “
Ad
Press “
Mo
Press “
Ad
Press “
Ad
Press “
” OR “ ” to adjust the parameter.
just the H-size of the display picture
” OR “ ” to adjust the parameter.
ve the display picture up or down.
” OR “ ” to adjust the parameter.
just the V-size of the display picture
” OR “ ” to adjust the parameter.
just the V-size of the display picture
” OR “ ” to adjust “ Full, 16:9 ”.
PIP
/POP Setup Mode
1. Multi Window Press “ ” OR “ ” to select “PIP, POP, Off ” mode.
18
Page 19

2. SubSource Press “ ” OR “ ” to select “AV, VGA, HDMI” mode.
Ad
3. Size
4. Position
5. Border Color
6. Sound Source Press “ ” OR “ ” to select “Main, Sub” mode.
7. Swap Press “Select” to Swap the Source of Main and Sub.
just the size of Sub Source window.
Press “
Mo
Press “
Ch
Press “
” OR “ ” to select “Large, Small ”
ve the position of Sub Source window.
” OR “ ” to select “U L, B L, B R, U R ” position.
oose the border color of Sub Source window.
” OR “ ” to select “Black, Blue” color.
Not
e:
AV1 and AV2 can not be displayed at the same time on the
monitor in PIP / POP mode.
If POP mode is selected both images are scaled to fit the screen.
19
Page 20

5 Mounting
VESA
Bracket
Lay the LED display face down on a towel or blanket. Note the
4 screws that secure the hinge on the lower part of the back
casing. These may be removed to release the desk mount
bracket if required.
Attach a VESA compatible mounting bracket
(VESA 75mm x 75mm is supported)
4 screw for VESA 75mm
20
Page 21

Dimens
ions:
21
Page 22

6 Caring for Your LED Monitor
Car
ing for your LED Monitor
The LED color monitor is a sensitive piece of electronic
equipment. Proper care can prevent accidentally damaging
the LCD panel or the monitor itself. By following these guidelines
you can ensure many years of trouble free use.
1. The LED monitor's plastic casing and LED glass panel can be
cleaned with a soft, lint-free cloth. Never use scrub pads or
other cleaning materials with abrasive surfaces to clean your
LED monitor!
a. For the plastic case, a mild detergent may be used to
clean the surface. However, you should ensure not to
use too much detergent or water as this could leak into
the interior of the casing.
2. Do NOT use cleaning fluids based on alcohol, methylated
spirit, or ammonia. The glass plate has a hard surface coating
to prevent scratches. However, the use of strong chemical
cleaning agents may damage this coating. Use only a mild
soap or detergent and water or specially formulated cleaners
made for cleaning glass panels.
3. Avoid direct contact with water or other liquids. Never use
the LED monitor in or around areas where water may pose a
potential hazard to normal operation.
4. Only use the LED monitor indoors, and avoid monitor contact
with oil, vapor, steam, moisture and dust. The LED monitor
should be used in a clean and low humidity environment.
5. Keep the LED monitor away from heaters or other heat
sources such as lighting equipment or direct sunlight.
6. Keep the LED monitor away from sharp object to touch the
screen like fingernail and pencil.
WARNING: Any unauthorized modification to this equipment could
result in the revocation of the authorization to operate the equipment
and void the product warranty.
22
Page 23

7 Frequently Asked Questions
Po
wer button does not respond
• Check the power cord to ensure that it is securely plugged
into the monitor base and also into the electrical outlet.
• Ensure there is electrical power coming from the AC outlet.
Use another device to check for power.
• Unplug the power cord of the monitor from the AC outlet,
wait a few minutes, then to plug the power cord into the AC
outlet again. This will reset the monitor and power supply.
No image on the screen
• Ensure that the DB-15 signal cable is properly connected to
e display card/computer.
th
• Check the DB-15 signal cable connector on both ends for
bent or pushed-in pins.
• The display card should be properly seated in its card slot.
• Ensure that the computer's power switch is ON.
• Ensure that the monitor's power switch is ON.
• Unplug the power cord of the monitor from the AC outlet,
wait a few minutes, then to plug the power cord into the AC
outlet again. This will reset the monitor and power supply.
Power LED is RED (with no image on the screen)
• Check the DB-15 signal cable to ensure that it is properly
tached to the graphics display card.
at
• Check the DB-15 signal cable on both ends for bent or
pushed-in pins.
• Make sure the computer is not in a power-saving mode
(move the mouse or press a key on the keyboard).
No sound coming from the audio speakers
• The audio cable should be connected to the lineout on the
audio card and the line-in on the monitor. Ensure that the
audio cable is properly connected.
• Inspect the audio cable for any apparent damage. Double
check by switching to another audio cable to see if the
audio works.
23
Page 24

8 Regulations and Maintenance
FC
C compliance
This device complies with Part 15 of the FCC Rules. Operation is
subject to the following two conditions: (1) this device may not
cause harmful interference, and (2) this device must accept any
interference received, including interference that may cause
undesired operation.
NOTE: This equipment has been tested and found to comply with
the limits for a Class B digital device, pursuant to Part 15 of the
FCC Rules. These limits are designed to provide reasonable
protection against harmful interference in a residential
installation. This equipment generation, uses and can radiate
radio frequency energy and, if not installed and used in
accordance with the instructions, may cause harmful
interference to radio communications. However, there is no
guarantee that interference will not occur in a particular
installation. If this equipment does cause harmful interference to
radio or television reception, which can be determined by
turning the equipment off and on, the user is encouraged to try
to correct the interference by one or more of the following
measures:
• Reorient or relocate the receiving antenna.
• Increase the separation between the equipment and
receiver.
• Connect the equipment to an outlet on a circuit different
from that to which the receiver is connected.
• Consult the dealer or an experienced radio/TV technician
for help.
cautions
Pre
* Read all of these instructions and save them for later use.
* Follow all warnings and instructions on the product.
* Product
- Do not cover or block the vent holes in the case.
24
Page 25

- Do not insert sharp objects or spill liquid into the LED monitor through
ca
binet slots. They may cause accident fire, electric shock or failure.
- Disconnect the power plug from the AC outlet if you will not use it for an
indefinite period of time.
- Do not attempt to service this product yourself, as opening or removing
covers may expose you to dangerous voltage potentials or other risks.
- Do not touch the screen directly with your fingers. You may damage the
screen, and oil from your skin is difficult to move.
- Do not apply pressure to the screen. The LED is very delicate.
* Power
- Use the type of power indicated on the marking label.
* Plugs
- Do not remove any of the prongs of the monitor’s three-pronged power
plug.
- Disconnect the power plug from the AC outlet under following conditions:
◎ If you will not use it for an indefinite period time.
◎ When the power cord or plug is damaged or frayed.
◎ If the product does not operate normally when the operation
instructions are followed. Adjust only those controls that are covered by
the operating instructions. Improper adjustment of other controls may
result in damage and will often require extensive work by a qualified
technician to restore the product to normal operation.
◎ If the product has been dropped or the cabinet has been damaged.
◎ If the product exhibits a distinct change in performance, indicate a
need for service.
* Power and extension cords
- Do not allow anything to rest on the power cord.
- Do not locate this product where persons will walk on her cord.
25
Page 26

- Use the proper power cord with correct attachment plug type. If the
po
wer source is 120 V AC, use a power cord that has UL and C-UL
approvals. If the power source is a 240 V AC supply, use the tandem (T
blade) type attachment plug with ground conductor power cord that
meets the respective European country’s safety regulations, such as VDE
for Germany.
- Do not overload wall outlets or power cords. Ensure that the total of all
units plugged into the wall outlet does not exceed 10 amperes.
- Ensure that the total ampere rating of all units plugged into the extension
cord is not over the cord’s rating.
- If the power supply cord, which came with your monitor, is to be
connected to the PC instead of the wall outlet, this equipment is to be
used with UL/TUV approved computers with receptacle rated 100~240V
AC, 50/60Hz, 2.0A(minimum).
* Environment
- Place the monitor on a flat and leveled surface.
- Place the monitor in a well-ventilated place.
- Keep the monitor away from:
Extremely hot, cold or humid places, places directly under sunlight, dusty
surroundings, equipment that generate strong magnetic fields.
26
 Loading...