

Catskill Craftsmen 1843 User Manual
CRAFTSMEN, INC.
Assembly Instructions
Model 1842-1843
A. These units are Ready-To-Assemble. Catskill uses positive fastening methods such as wood
screws and in some places hidden Bastion Fasteners. You will need some standard household tools:
hammer and screwdriver. A power screwdriver is recommended. Where possible, we have packaged
some of the screws in separate labeled packages. To keep hardware separate after packets are
open, we suggest you place each type of screw into separate containers. Note labels for screws
and when they are to be used in assembly in the instructions.
B. A friend is recommended to assist with assembly as this will ease the process. Some of the parts
are large and awkward to hold in place, an extra pair of hands will help.
If you have any questions regarding assembly or missing or damage parts, call our customer support
number: 607-652-7321 or 888-732-7321 E-Mail at info@catskillcraftsmen.com
Customer Support hours are 7am-4pm Mon. - Fri. Eastern Time zone.
Model 1842
Model 1843 With Drop Leaf

Parts List Model 1842
Drawer Front (1)
P/N DF-1842
D4
Right Drawer Side (1)
P/N DS-1842/R
Top Front Brace (1)
K2
Knife Rack Side (2)
P/N KR-SIDE-1842
P/N B-38/2 1/2/TF-1842
D1
B1
D3
Left Drawer Side (1)
P/N DS-1842/L
D2
Drawer Back (1)
P/N DBK-1842
GS
Glide Support (2)
P/N GLDSUP-1842
B2
Bottom Front Brace (1)
P/N B-38/2 1/2/BOT-1842
K1
Knife Rack Face (1)
P/N KR-1842
D5
Drawer Bottom (1)
P/N DBOT-1842
DOL
S2
Small Middle Shelf (1)
P/N SMS-1842
DCL
S1
Center Shelf (1)
P/N CS-1842
DCR
D6
Door Spacer (1)
P/N DORS/21 9/16 1842
DP
Divider Panel (2)
P/N DP-1842
DOR
Left Outside Door (1)
P/N DOR-1842LO
Left Center Door (1)
P/N DOR-1842LC
Right Center Door (1)
P/N DOR-1842RC
Right Outside Door (1)
P/N DOR-1842RO
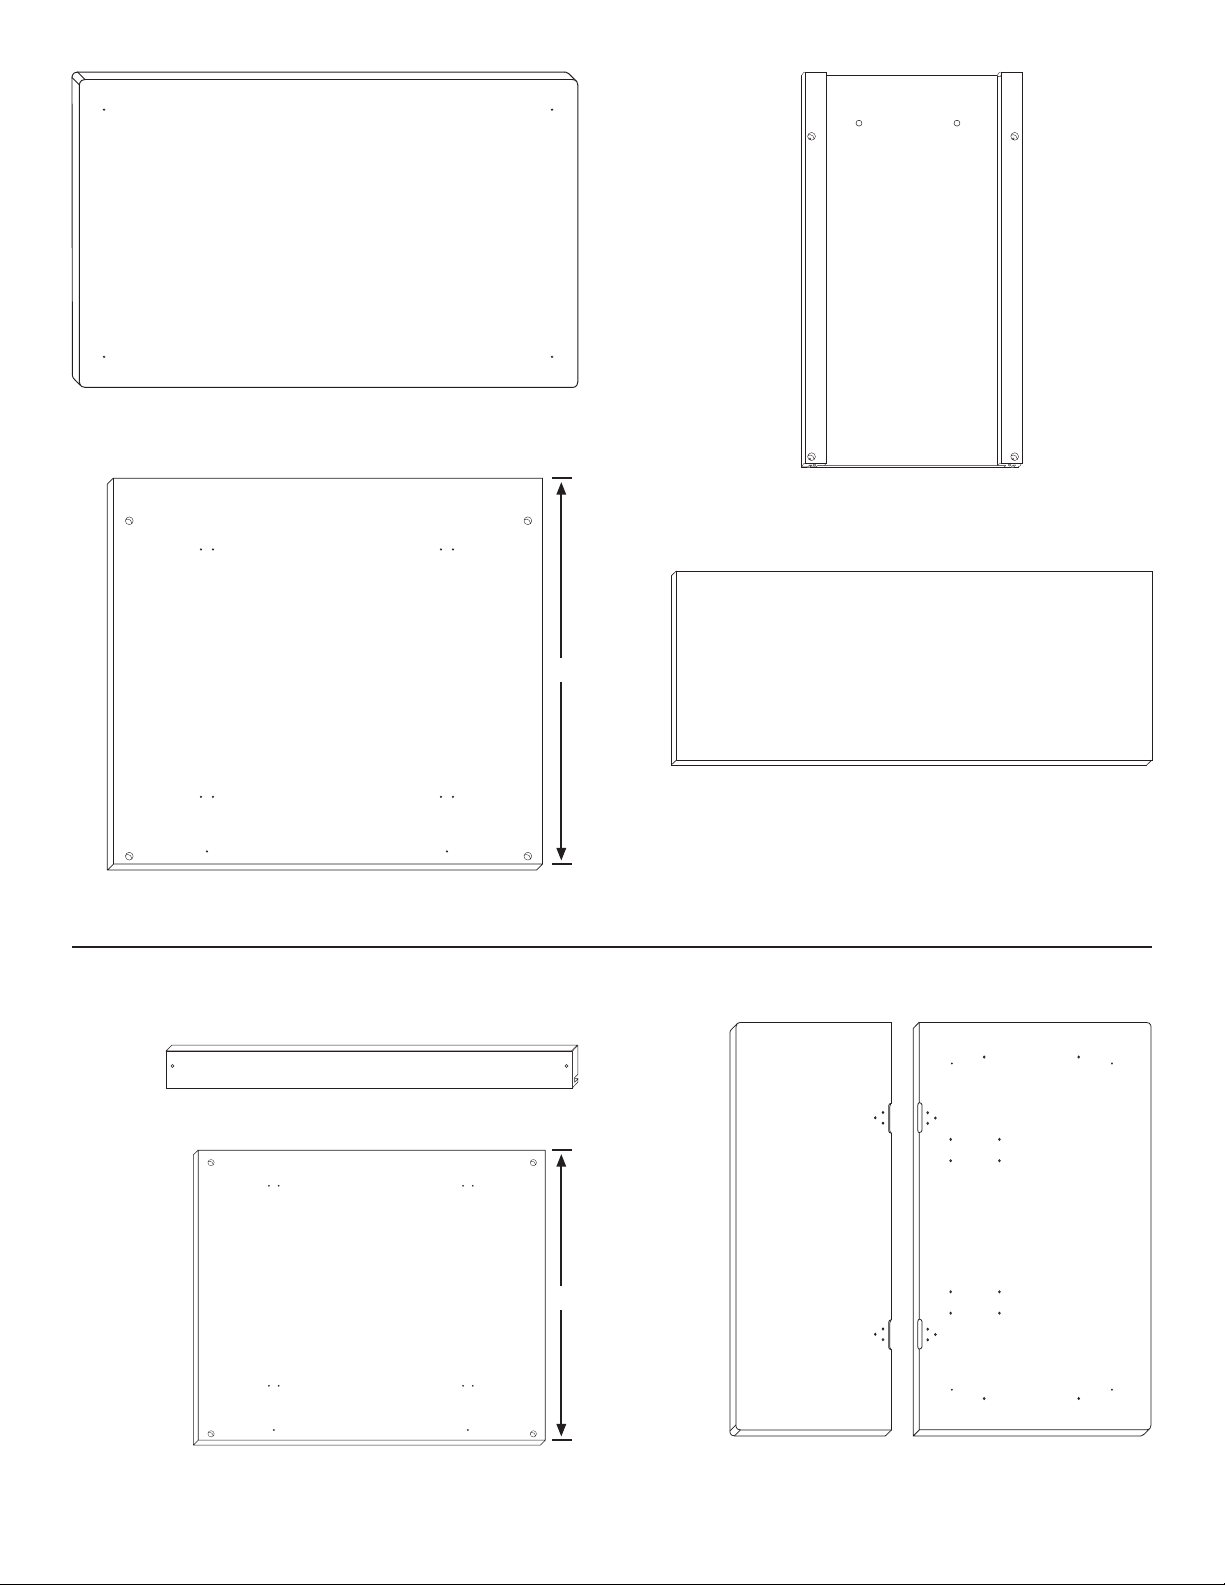
TT
Table Top (1)
P/N TT-1842
SP
Side Panel (2)
P/N SP/HDL-1842
BP
Back Panel (1)
P/N BP-1842
31
Bottom Shelf (1)
S3
P/N BS-1842
Table Top, Drawer Back, and Back Panel are Replaced
With These Parts in Model 1843
D2
Drawer Back (1)
P/N DBK-1843
TTDL
BP
Back Panel (1)
P/N BP-1843
29 3/4
Drop Leaf (1)
P/N DL-1843
Table Top (1)
P/N TT-1843
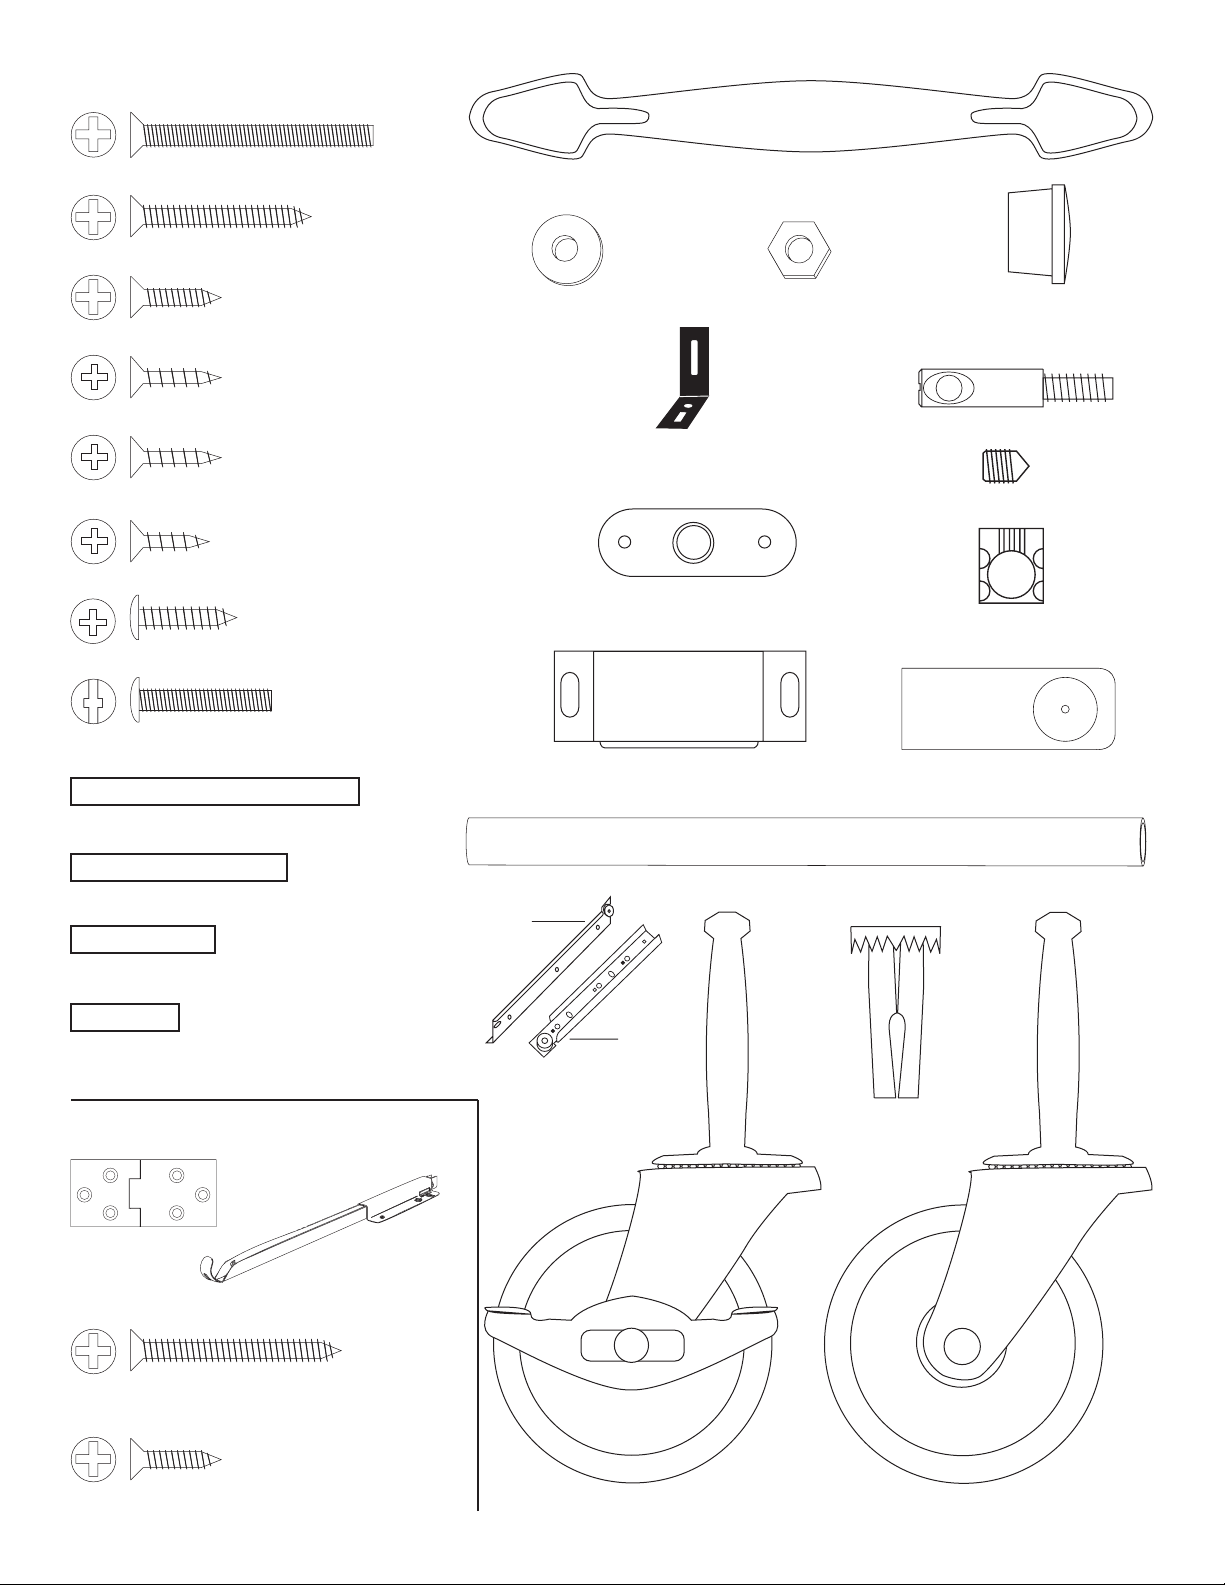
Hardware for 1842
1 3/4 Phillips Flat Head Bolt (8)
(Use brass screws
for knife rack)
1 1/4 Phillips Flat Head #8 Screw (20)
(Used on L Brackets
and to attach the door spacer)
3/16 Flat Washer (8)
5/8 Phillips Flat Head #8 Screw (7)
(Used on L Brackets
and to attach cabinet glides)
5/8 Phillips Flat Head #6 Screw (8)
(Used on Drawer Glides)
5/8 Phillips Flat Head #5 Screw (4)
(Used on Magnet Plate
Included in magnet pack)
1/2 Phillips Flat Head #4 Screw (3)
(Used on Magnet
Included in magnet pack)
5/8 Pan Head Screw (6)
1 Truss Head Machine Screw (12)
Nickel Handle (6)
10-24 Hex Nut (8)
L Bracket (4)
Magnet Plate (3)
Magnet (3)
5/8 Wooden Disk (8)
Bastion Post (2)
Bastion Set Screw (2)
Bastion Barrel Nut (2)
Towel Bar Post (2)
2 Long 3/16 DIA. Steel Pin (8)
1 1/2 Long 3/16 DIA. Steel Pin (8)
1 Long 3/16 DIA. Steel Pin (26)
3/4 Long 3/16 DIA. Steel Pin (4)
Add Pack for 1843
Hinge (3)
P/N Drop Leaf Support (2)
(Used on
Drawer Back)
1 1/2 Phillips Flat Head #8 Screw (2)
Polished Nickel Towel Bar (1)
Drawer
Cabinet
Drawer Glide (1 Set )
Caster Socket (4)
5/8 Phillips Flat Head #8 Screw (26)
Locking Wheel Casters (2)
Wheel Casters (2)
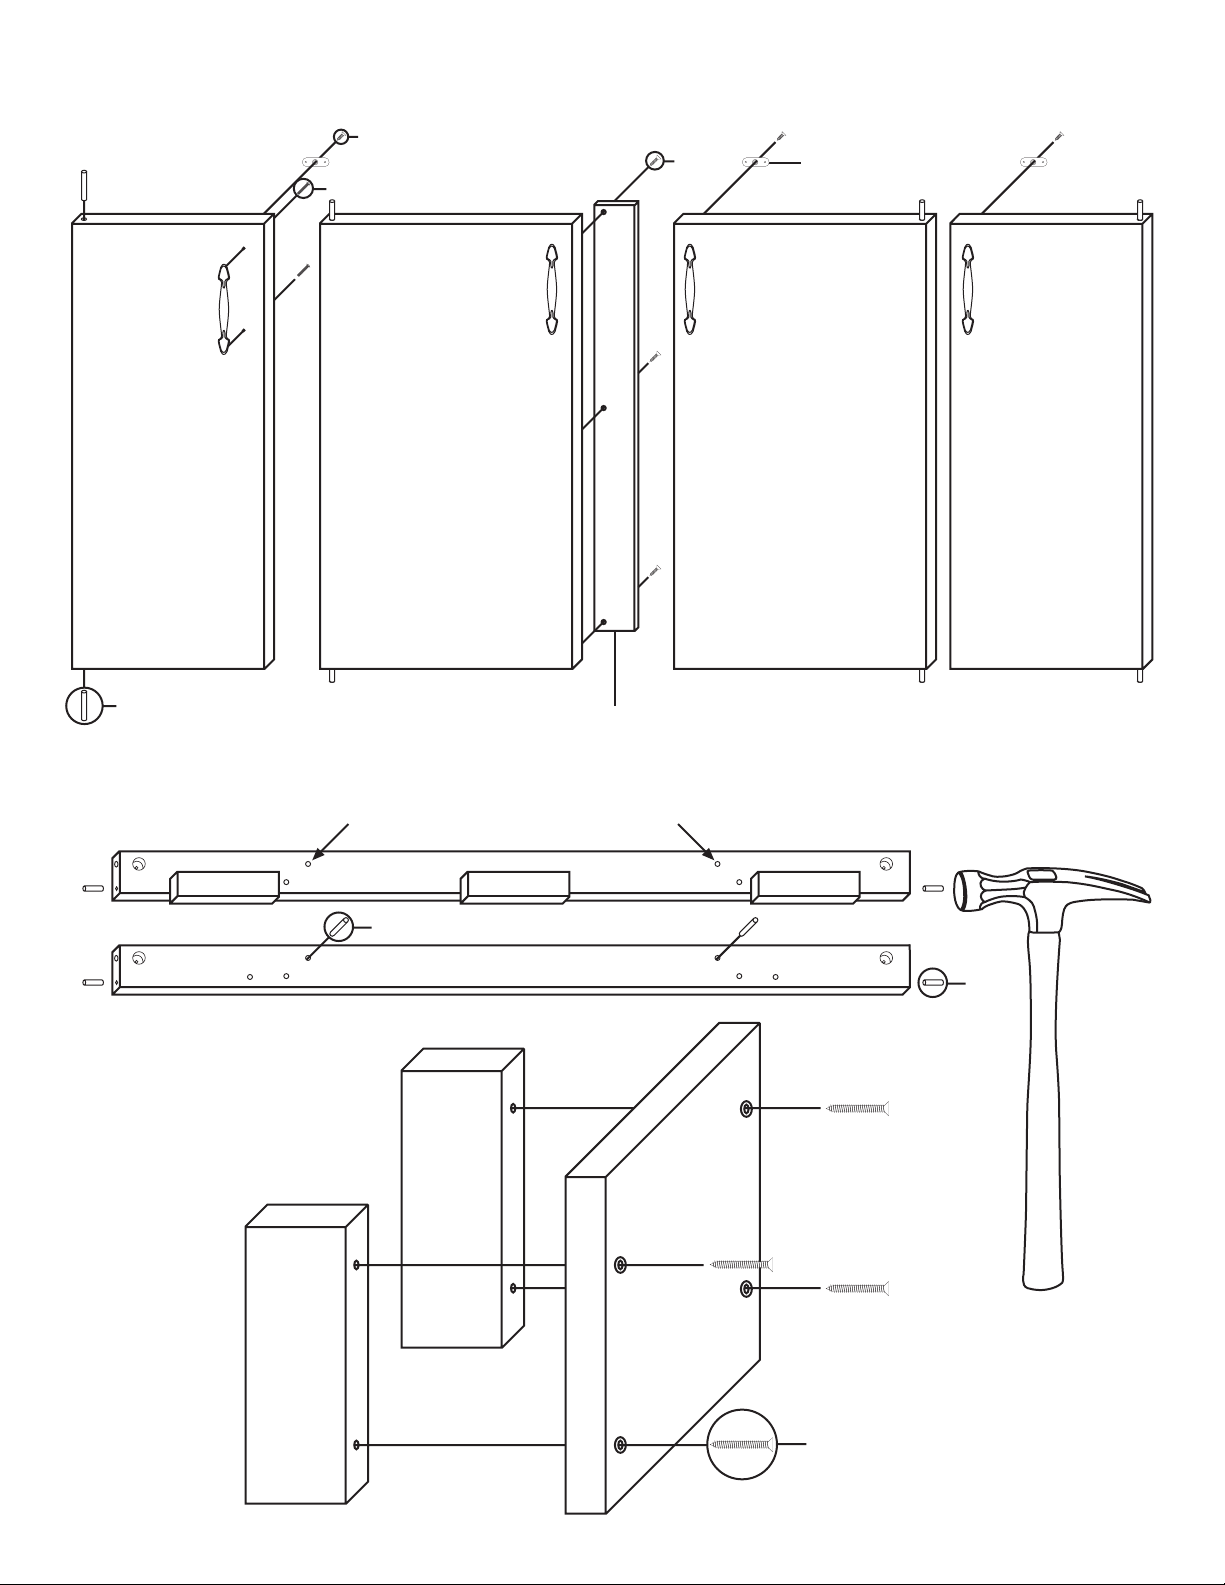
STEP 1
Door Assembly:
DOL DCL DCR DOR
1 1/2 Pin
1/2 #4 Flat Head Screw
(Included in magnet pack)
1 Truss Head Screw
Flush at bottom, space at top to clear magnet
5/8 #8
The counter sunk hole
goes out so the bumps
go toward the wood.
STEP 2
Brace Preparation:
STEP 3
Knife Rack Assembly:
Almost flush
at bottom,
space at top
K2
Not used Not used
B1
1 Pin
B2
K2
K1
3/4 Pin
1 1/4 #8 Brass Screw
STEP 4
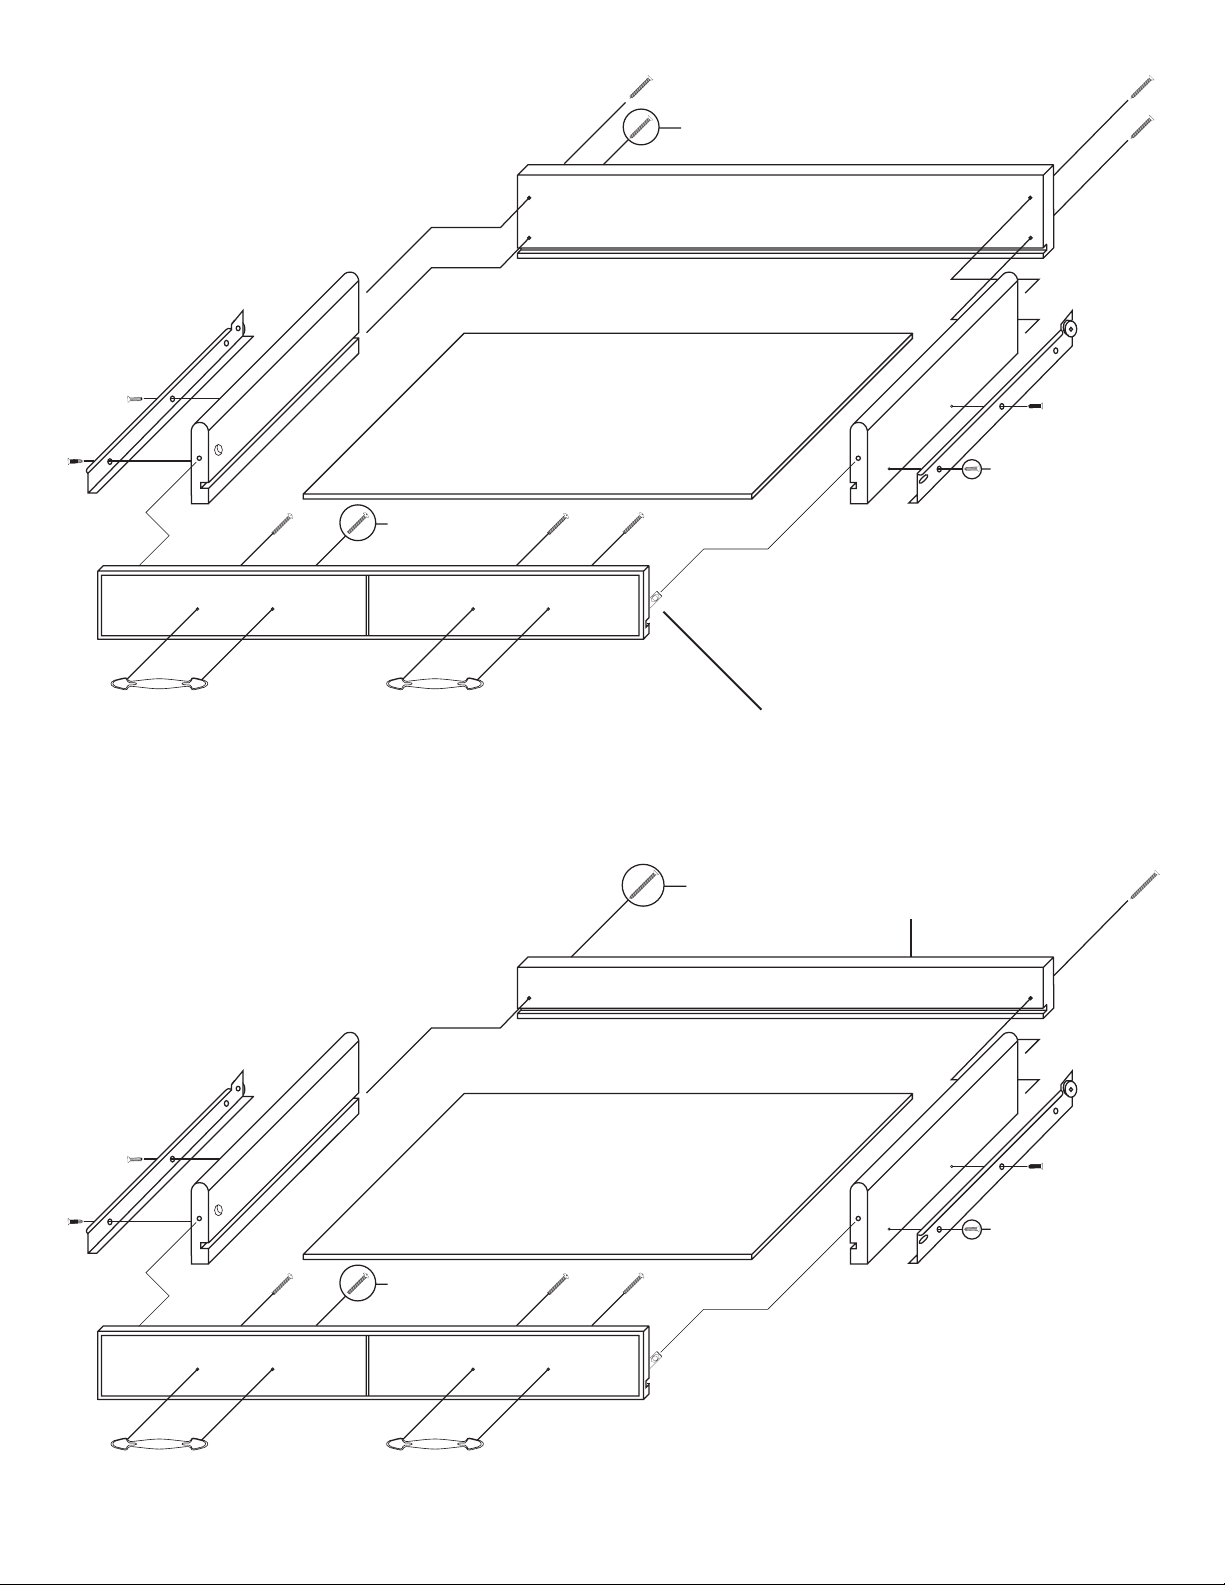
1842 Drawer Assembly:
1 1/4 #8
D2
D3
1843 Drawer Assembly:
1 Truss Head Screw
D1
See next page to learn how the bastion fastening system works.
D5
1 1/2 #8
D4
5/8 #5
Note: Drawer Back is shorter than
the Drawer Sides to allow clearance
for Drop Leaf Supports
D3
D2
D4
D5
5/8 #5
1 Truss Head Screw
D1
 Loading...