

Catskill Craftsmen 1622 User Manual
CRAFTSMEN, INC.
Assembly Instructions
Model 1622
Fold-A-Way Table
GENERAL: Your folding table has been engineered to fit together with a minimum of
effort if you follow the instructions step-by-step. Assembly should take about an hour.
The only tools you need are a medium Phillips screwdriver and a hard hammer. A flat
scrap of wood or plastic will come in handy to protect surfaces when hammering to seat
braces or disks. A power screwdriver will speed assembly, but is not necessary. A little
vegetable oil on the wood screw threads will make it easier to attach the feet to the table
ends/sides.
Read through the instructions completely to familiarize yourself with the various parts
and the progression of the assembly process. Inventory your parts against the parts list. If
anything is missing or damaged, contact us directly for prompt, free parts replacement.
Once your table is assembled, remember that it is made of solid northeastern hardwood
and will need to be cared for as outlined in the enclosed booklet, All About Your Butcher
Block Unit. Your table is designed to open either leaf individually or both leaves. When folded,
the unit takes up only 10 of outward space. Holes in the Table end/sides are hand holes
for easy movement of the 37 lb. unit. Casters are not practical on this unit as it would make
the unit top heavy if elevated on casters.
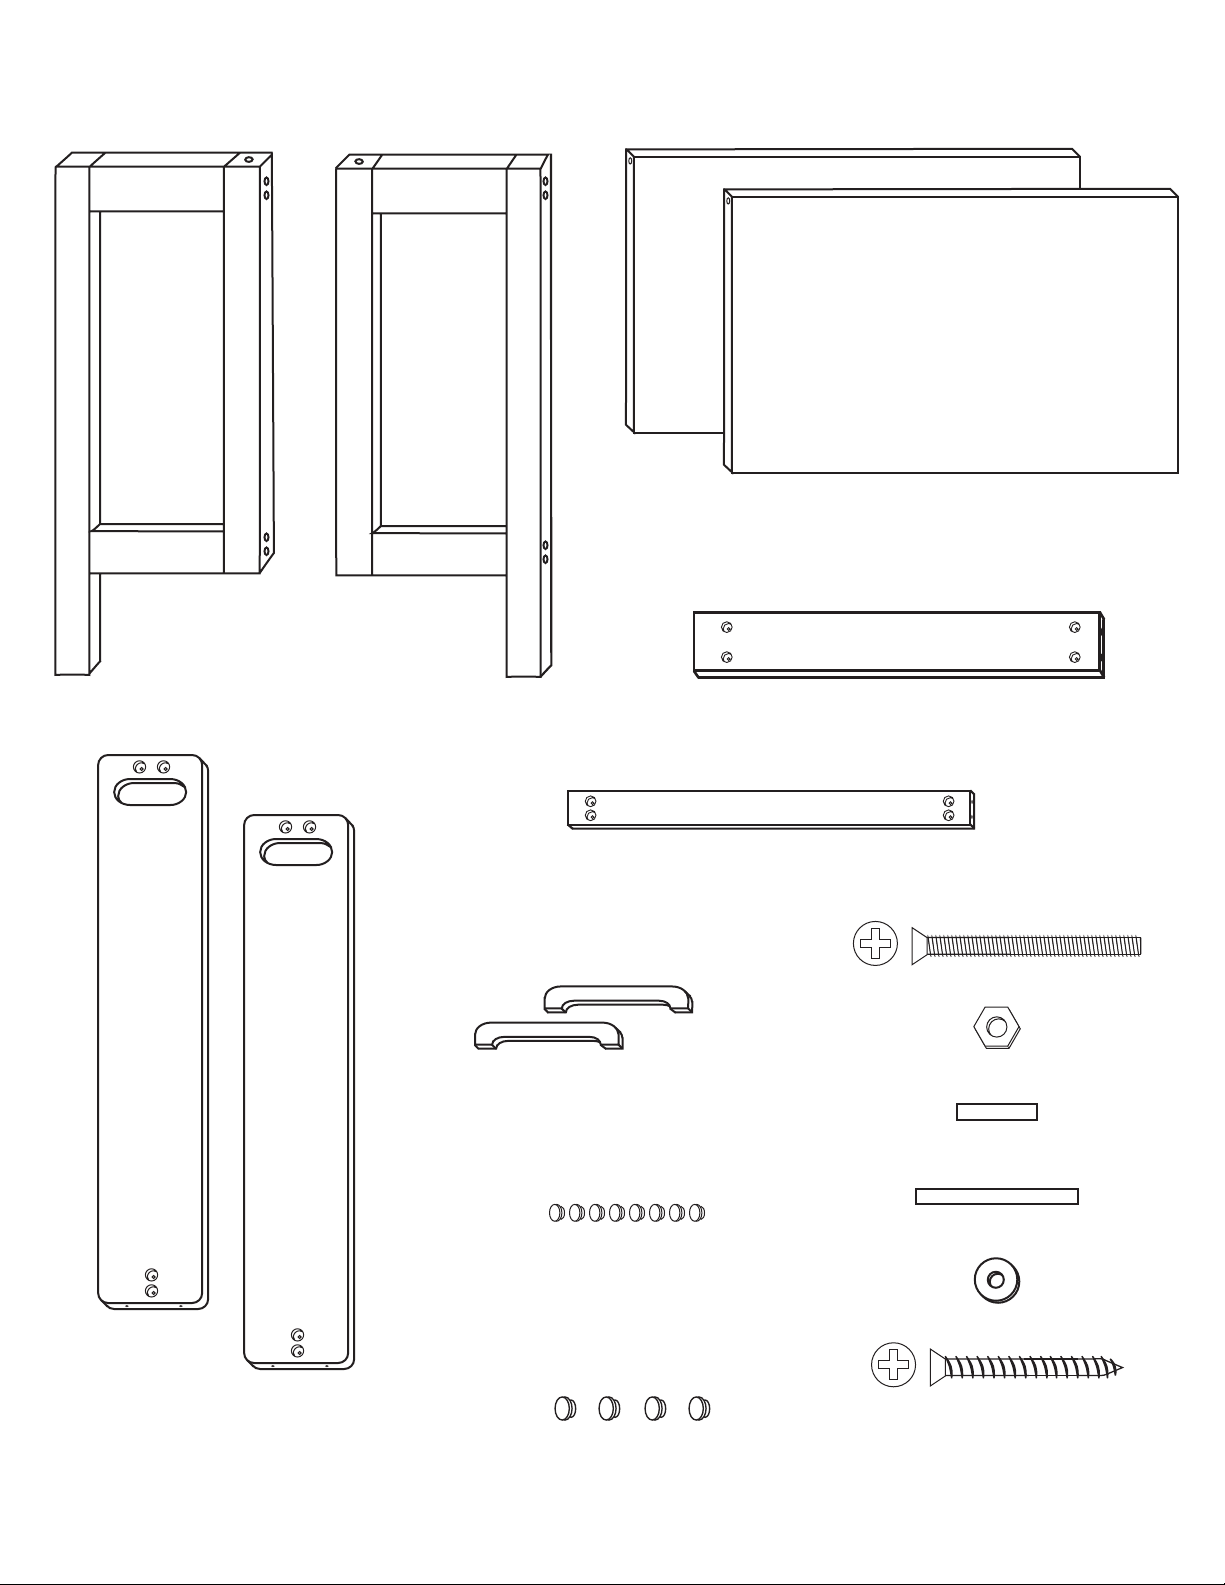
PARTS LIST
(2) Drop Leaves (Identical)
(2) Factory Assembled Swing Legs (Identical)
(1) Bottom Support Brace for Main Frame (2 Wide)
(2) Feet for Main Frame (Identical)
(8) 5/8 Wooden Disks Fit in Holes
on Table Ends/Sides (Identical)
(1) Top Support Brace for Main Frame (3 Wide)
(8) 2 Machine Screws (Bolts) for Basic Assembly
(8) Nuts for Machine Screws
(4) 3/4 Steel Pins
(4) 1 1/2 Steel Pins
(2) Table Ends/Sides (Identical)
(6) Small Washers for Pivot Pins
(4) 1 3/4 Long #8 Wood Screws to Attach Feet
(4) 3/4 Wooden Disks Fit in Nut Access Holes
in the Bottom Support Brace (Identical)
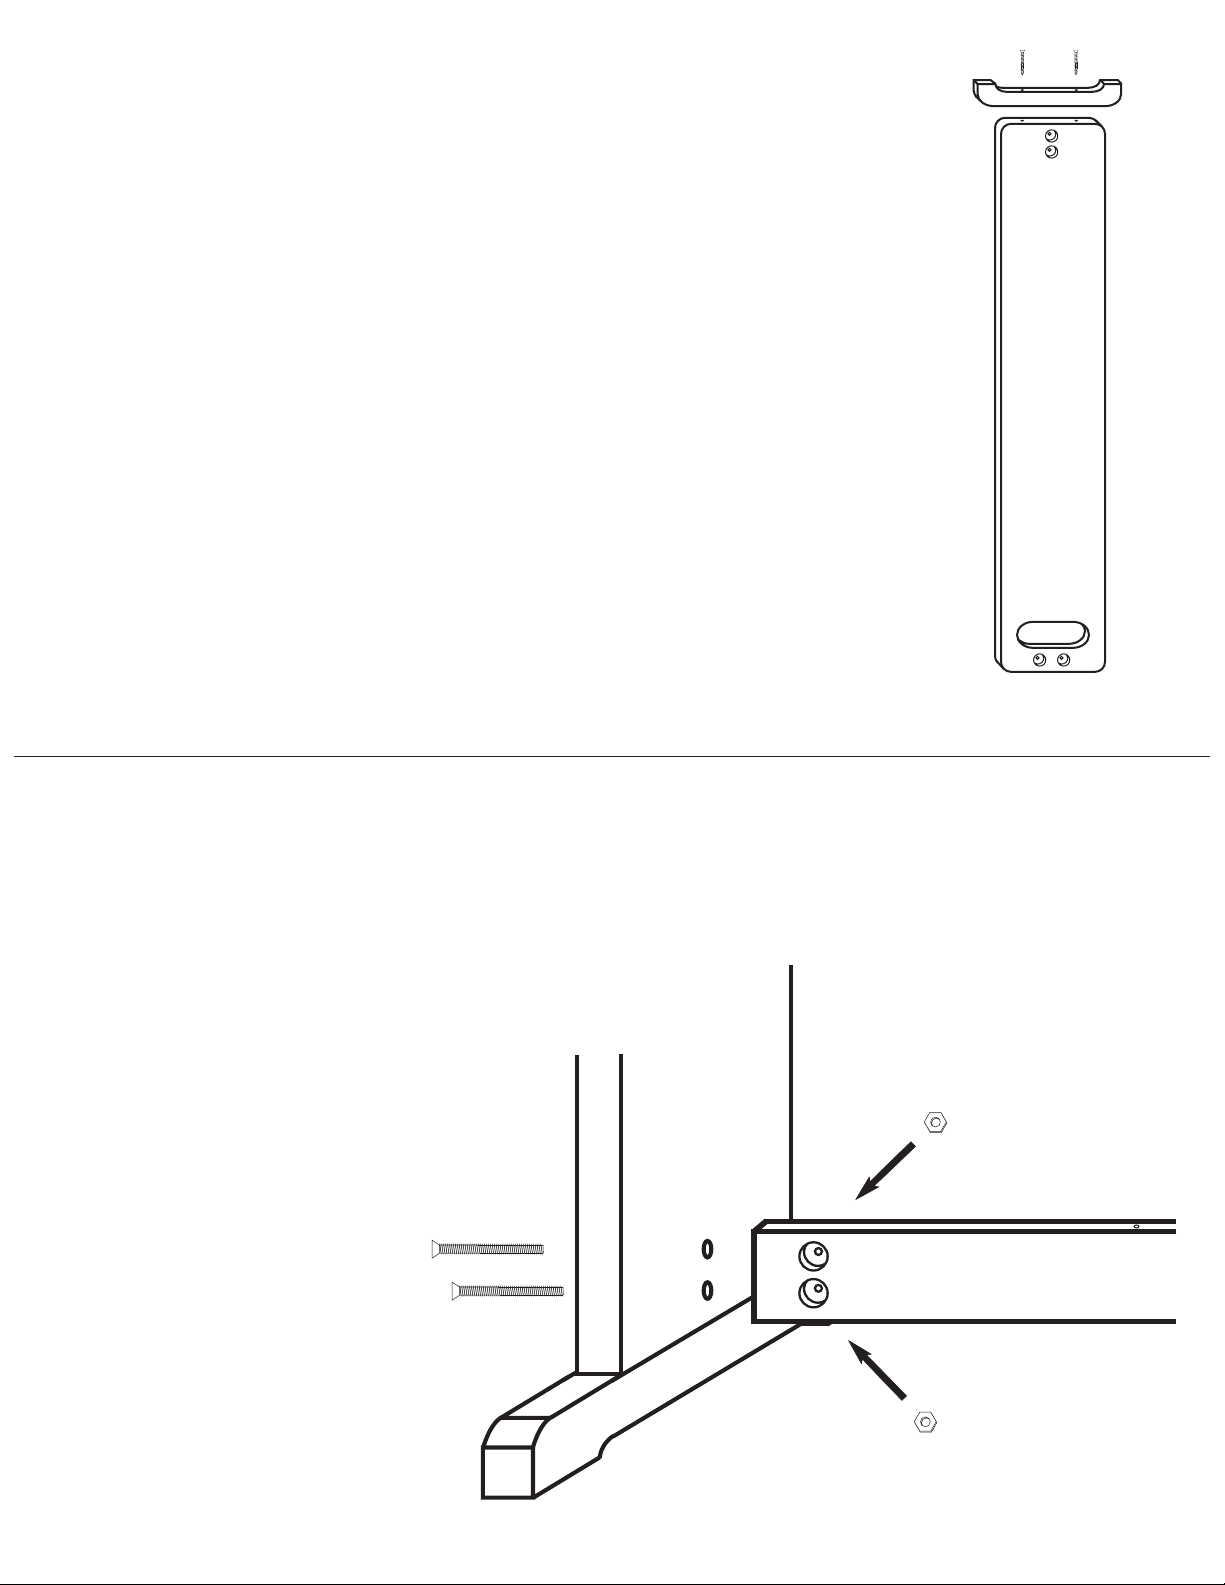
STEP 1
Tools needed: medium Phillips screwdriver
Hardware needed: (4) wood screws 1 3/4 #8
Parts needed: (2) Table Ends, (2) Feet
Preparation: dip screw tips in vegetable oil to
ease installation of screws into hardwood.
Invert Table ends (identical) and attach feet (identical) with
1 3/4 #8 screws as shown in illustration 1
Illustration 1
STEP 2
Tools needed: medium Phillips screwdriver
Hardware needed: (4) 2 machine screws and (4) nuts
Parts needed: Table Ends with feet attached
and the bottom support brace
Join the leg assemblies at bottom
support brace using (2) machine
screws/nuts per side. Place
nut on finger tip, insert into
the nut access hole in the
brace, align with machine
screw and loosely tighten so that
frame stands alone.
Illustration 2
 Loading...