

Catskill Craftsmen 1576 User Manual
CRAFTSMEN, INC.
Assembly Instructions
Model 1575
Wide Cuisine Cart
GENERAL:
1. You have purchased model 1576. Overall dimensions of an assembled unit is 32” x 17” x 53”
2. Should you need assistance or need to replace a damaged or missing part, DO NOT RETURN
THE UNIT TO THE STORE where you purchased it, simply give us a call at 607-652-7321 from
7:30 - 4:00 PM Eastern time and we’ll send you the prepaid part via UPS usually that same day!
Please have model number and part description ready when you call.
3. Read the assembly instructions and the enclosed brochure before beginning assembly.
Assembly is very easy if you read and follow the instructions step by step.
4. Tools required: Phillips screwdrivers, medium and small; medium flat blade screwdriver and
hammer.
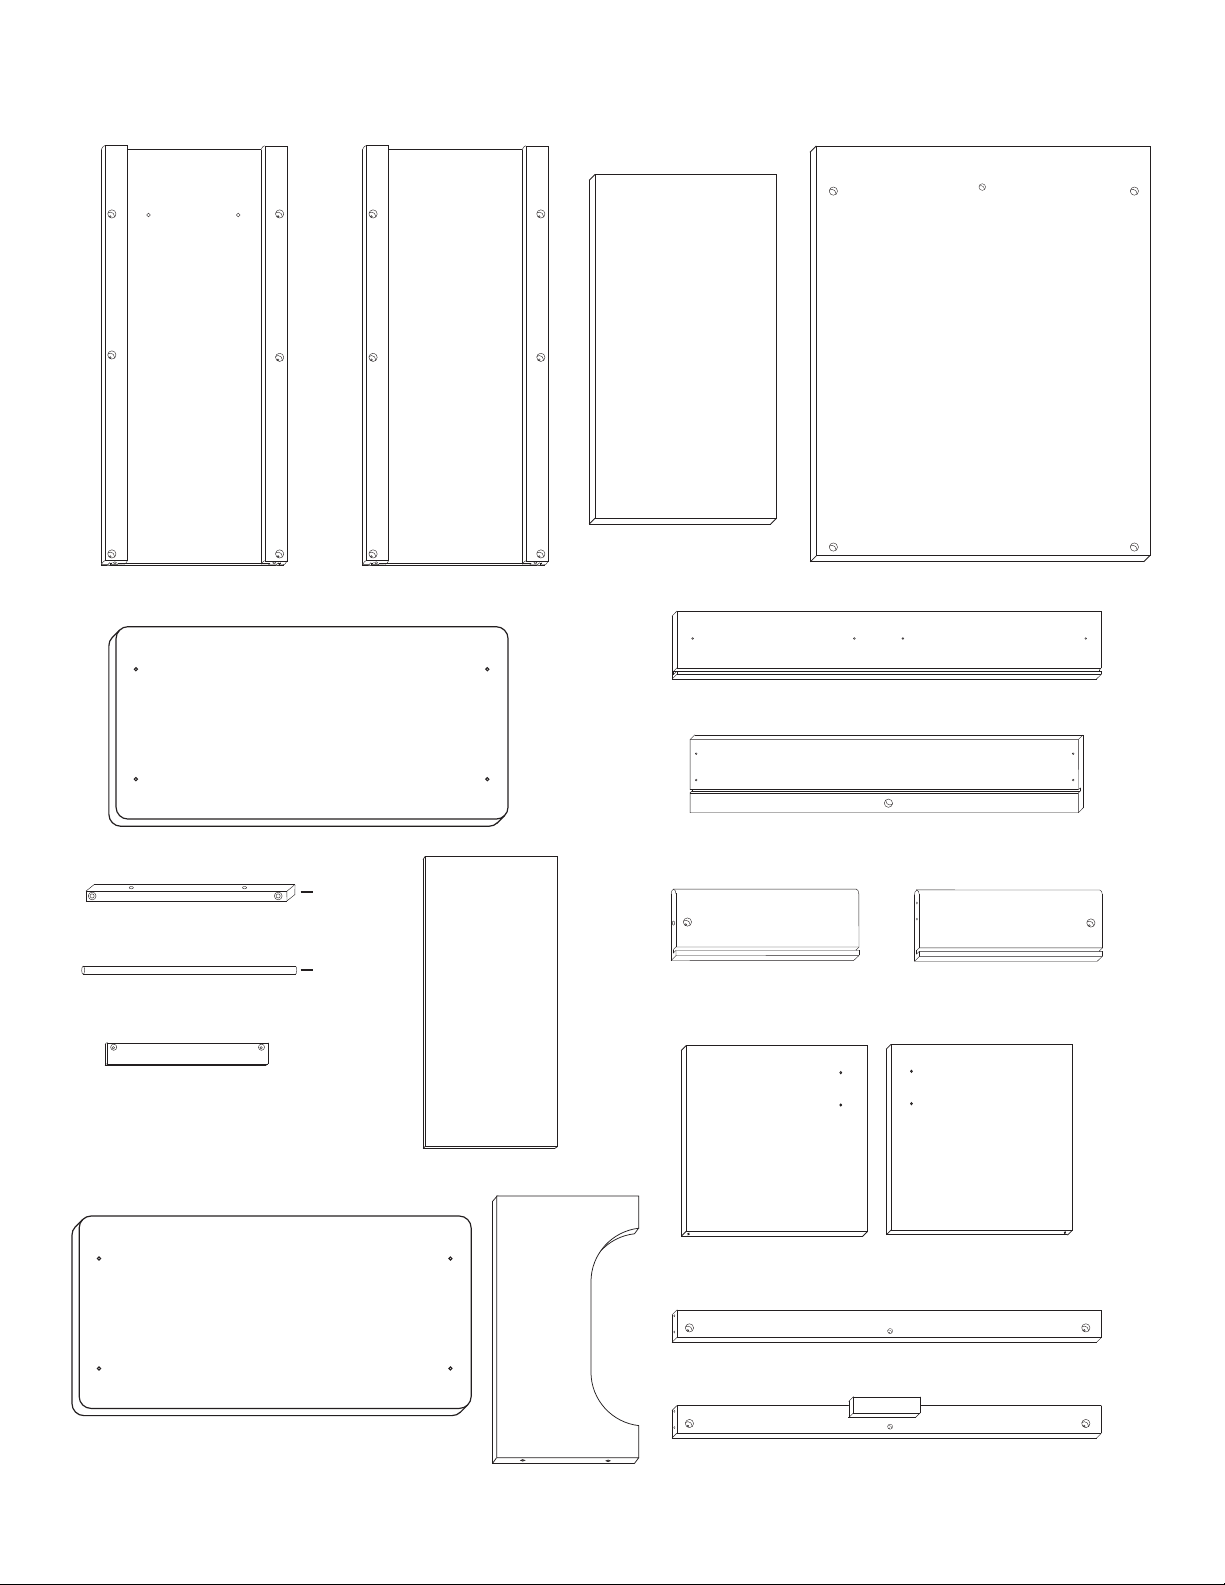
CABINET PARTS
TOP
TOP
TOP
P1 P2 P3
Handle Side Panel (1)
T1
Cabinet Top(1)
Table Top Stick (2)
Plain Side Panel (1)
T2
S
Shelf (2)
D1
Drawer Front (1)
D2
Drawer Back (1)
D4
Back Panel (1)
D3
Drawer Dowel (1)
D6
Door Spacer (1)
R1
Rack Top(1)
D7
D5
Drawer Bottom (1)
R2
Rack Side Panels (2)
Drawer Side Left (1)
D8 D9
Left Door (1)
B2
Top/Bottom Brace (2)
B1
Middle Brace (1)
Drawer Side Right (1)
Right Door (1)
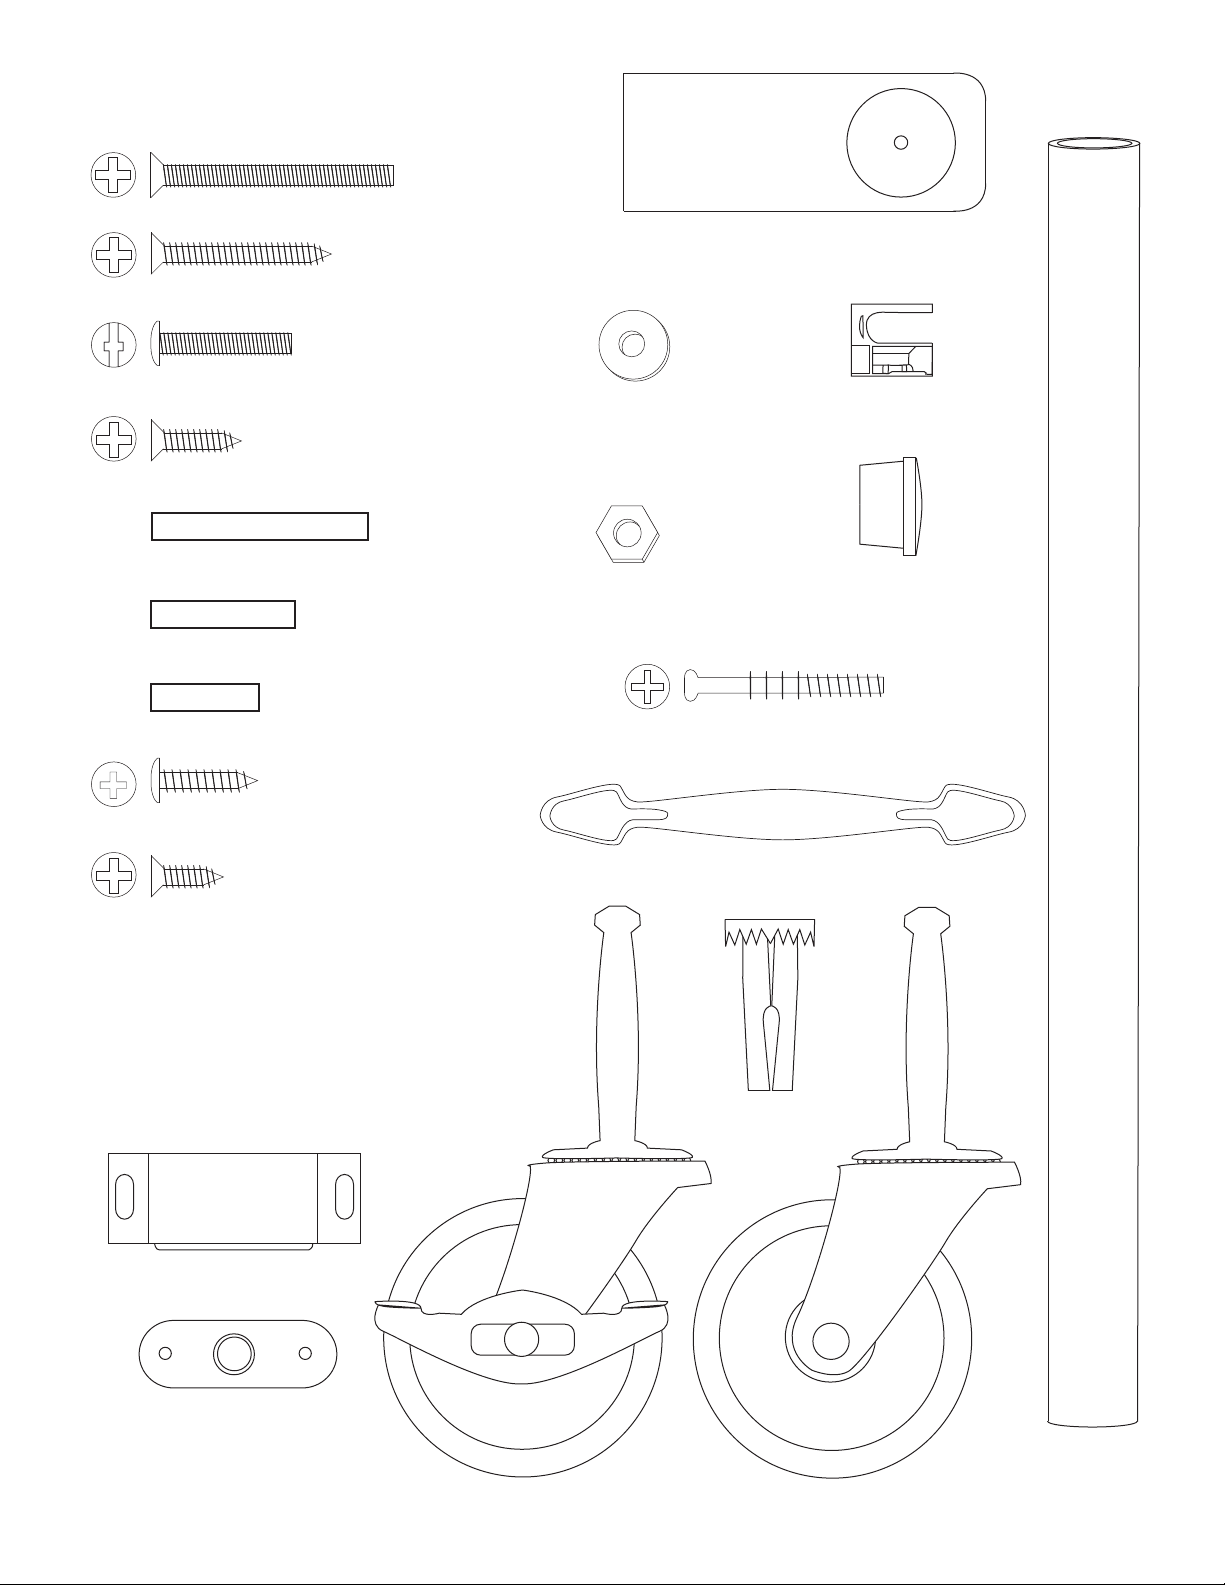
CABINET HARDWARE
1 3/4” Phillips Flat Head Machine Screw (10)
1 1/4” Phillips Flat Head #8 Screw (22)
1” Truss Head Machine Screw (6)
3/16” Flat Washer (4)
5/8” Phillips Flat Head #8 Screw (2)
1 1/2” Long 3/16” DIA. Steel Pin (4)
10-24 Hex Nut (10)
1” Long 3/16” DIA. Steel Pin (8)
3/4” Long 3/16” DIA. Steel Pin (6)
included in
magnet pack
Towel Bar Post (2)
Cam (2)
5/8 Wooden Disk (12)
Cam Posts (2)
5/8” Pan Head Screw (2)
included in
magnet pack
1/2” Phillips Flat Head #4 Screw (1)
Magnet (1)
Nickel Handle (3)
Caster Socket (4)
Magnet Plate (1)
included in
magnet pack
Locking Wheel Caster (2)
Non Locking Wheel Caster (2)
Polished
Nickel Towel
Bar (1)
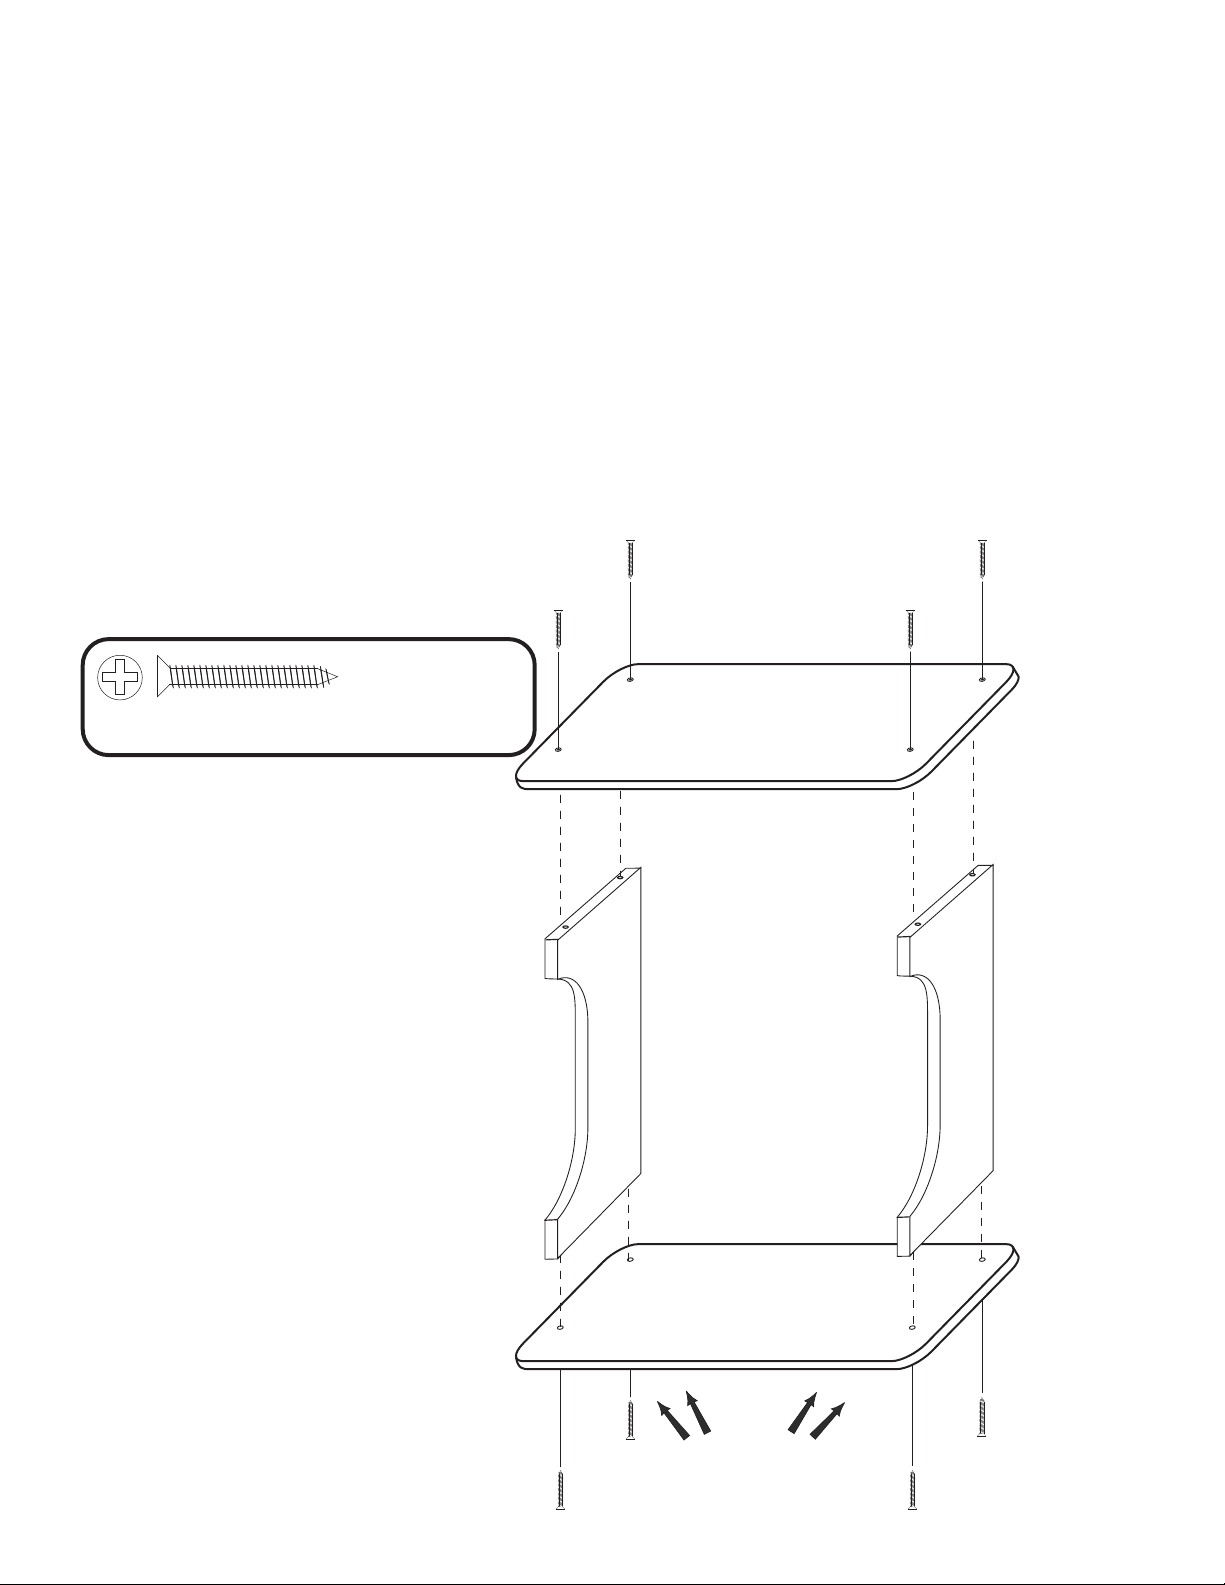
STEP A
1. Attach the Rack Top to the top ends of the Side Panels using 1 1/4” #8 wood screws. MAKE
SURE YOU HAVE THE RACK TOP! The only difference between the Rack Top and the Cabinet Top
is that the Cabinet Top has 4 small pilot holes on the bottom side plus the 4 throughholes; whereas,
the Rack Top only has the 4 through holes. NOTE: On the Rack Top the countersunk (reamed out)
through holes face up and the countersunk holes/pilot holes on the Cabinet Top face down.
The countersunk holes allow the screw heads to be flush with the wood surface when tightened down.
2. Turn this assembly upside down so that the Rack Top is on a smooth flat surface. Attach the
Cabinet Top with four 1 1/4” #8 wood screws. With the unit upside down at this point, the 4 pilot holes
should be up.
3. Leave this assembly UPSIDE DOWN and go to STEP 1. Looking ahead to STEPS 3 & 4,
the bottom of the Cabinet Top IS THE BOTTOM OF THE CART TOP ATTACHED TO THE RACK IN
STEP A4 ABOVE.
NOTE: The cart cabinet will be constructed
upside down using the bottom of the Cart
Top as the base.
8 Used in this step
1 1/4” Phillips Flat Head #8 Screw
ILLUSTRATION A
R2
RACK TOP
T1
R1
R2
CABINET TOP
PILOT HOLES HIDDEN
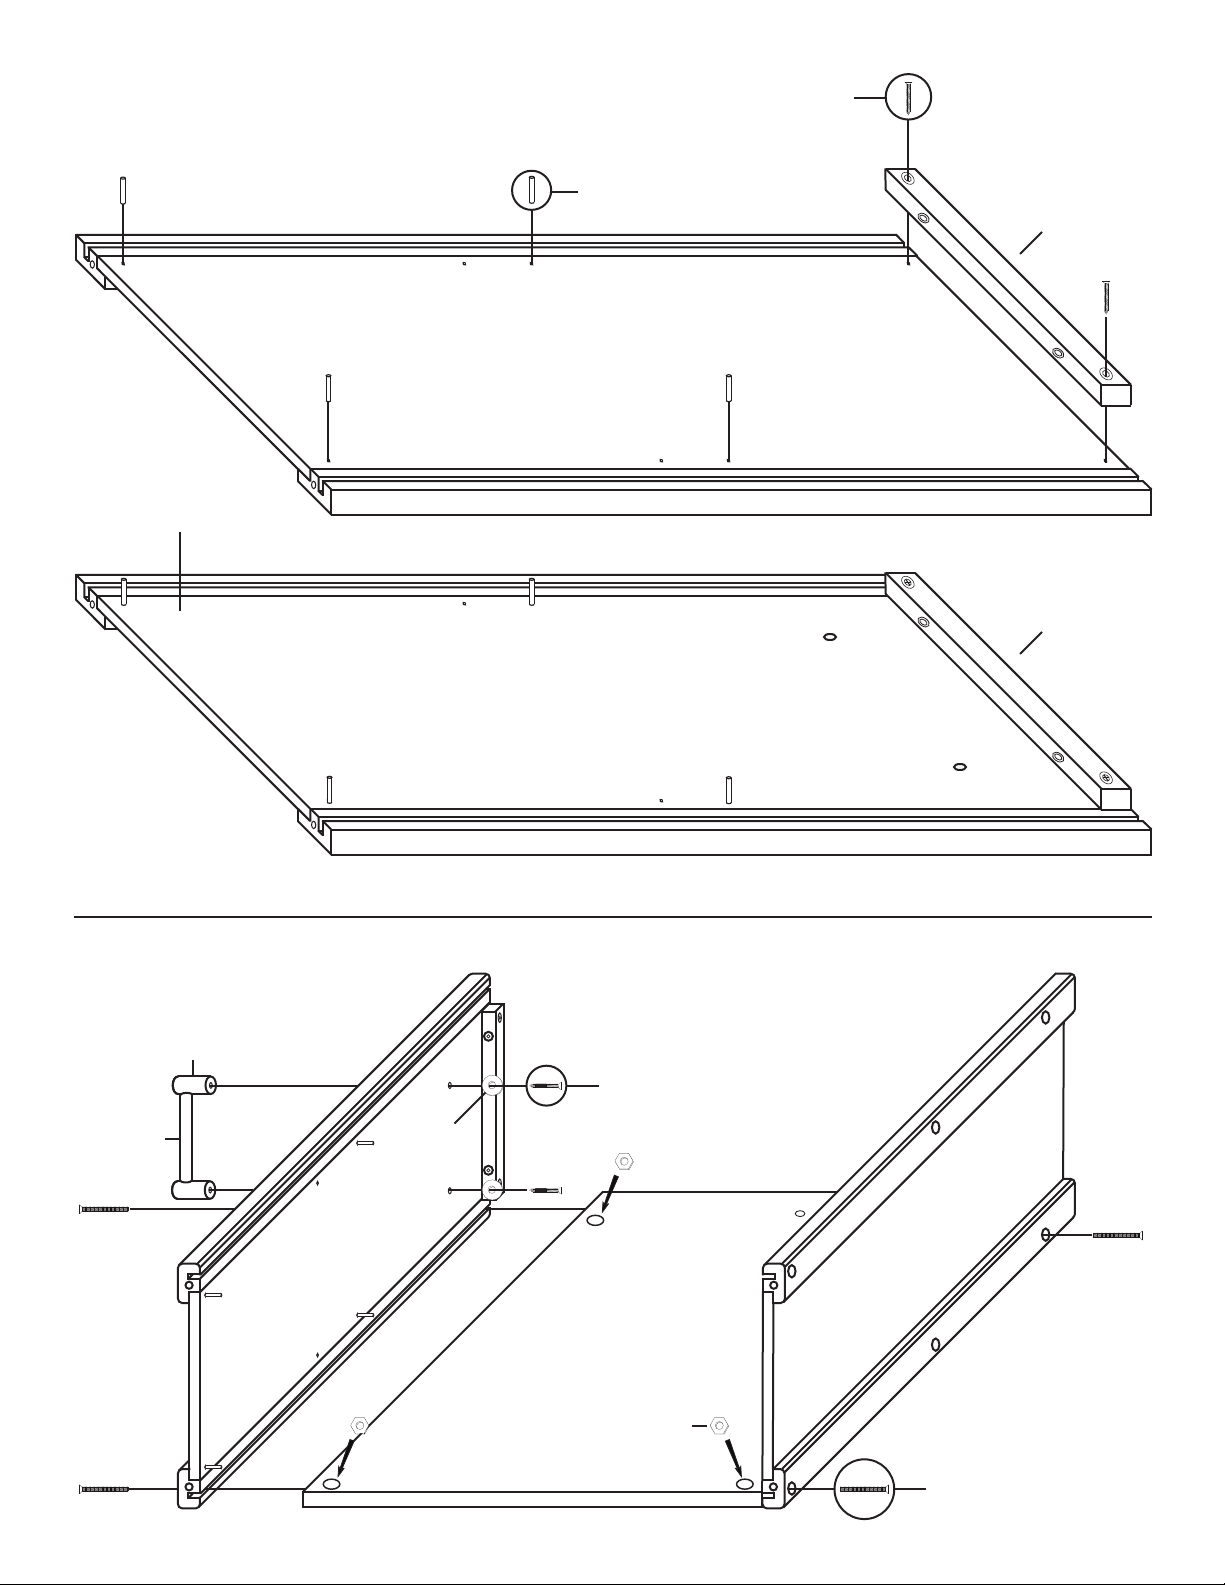
STEP 1
Repeat to other Side Panel
1 1/4” #8 Screw
1” Steel Pin
T2
P2
T2
STEP 2
Towel Bar Post
Towel Bar
P1
Handle can go on either side of cart so
choose which side you want the towel bar
1 1/4” Screw
Washer
P1 P2
P3
Nut
1 3/4” Machine Screw
 Loading...