

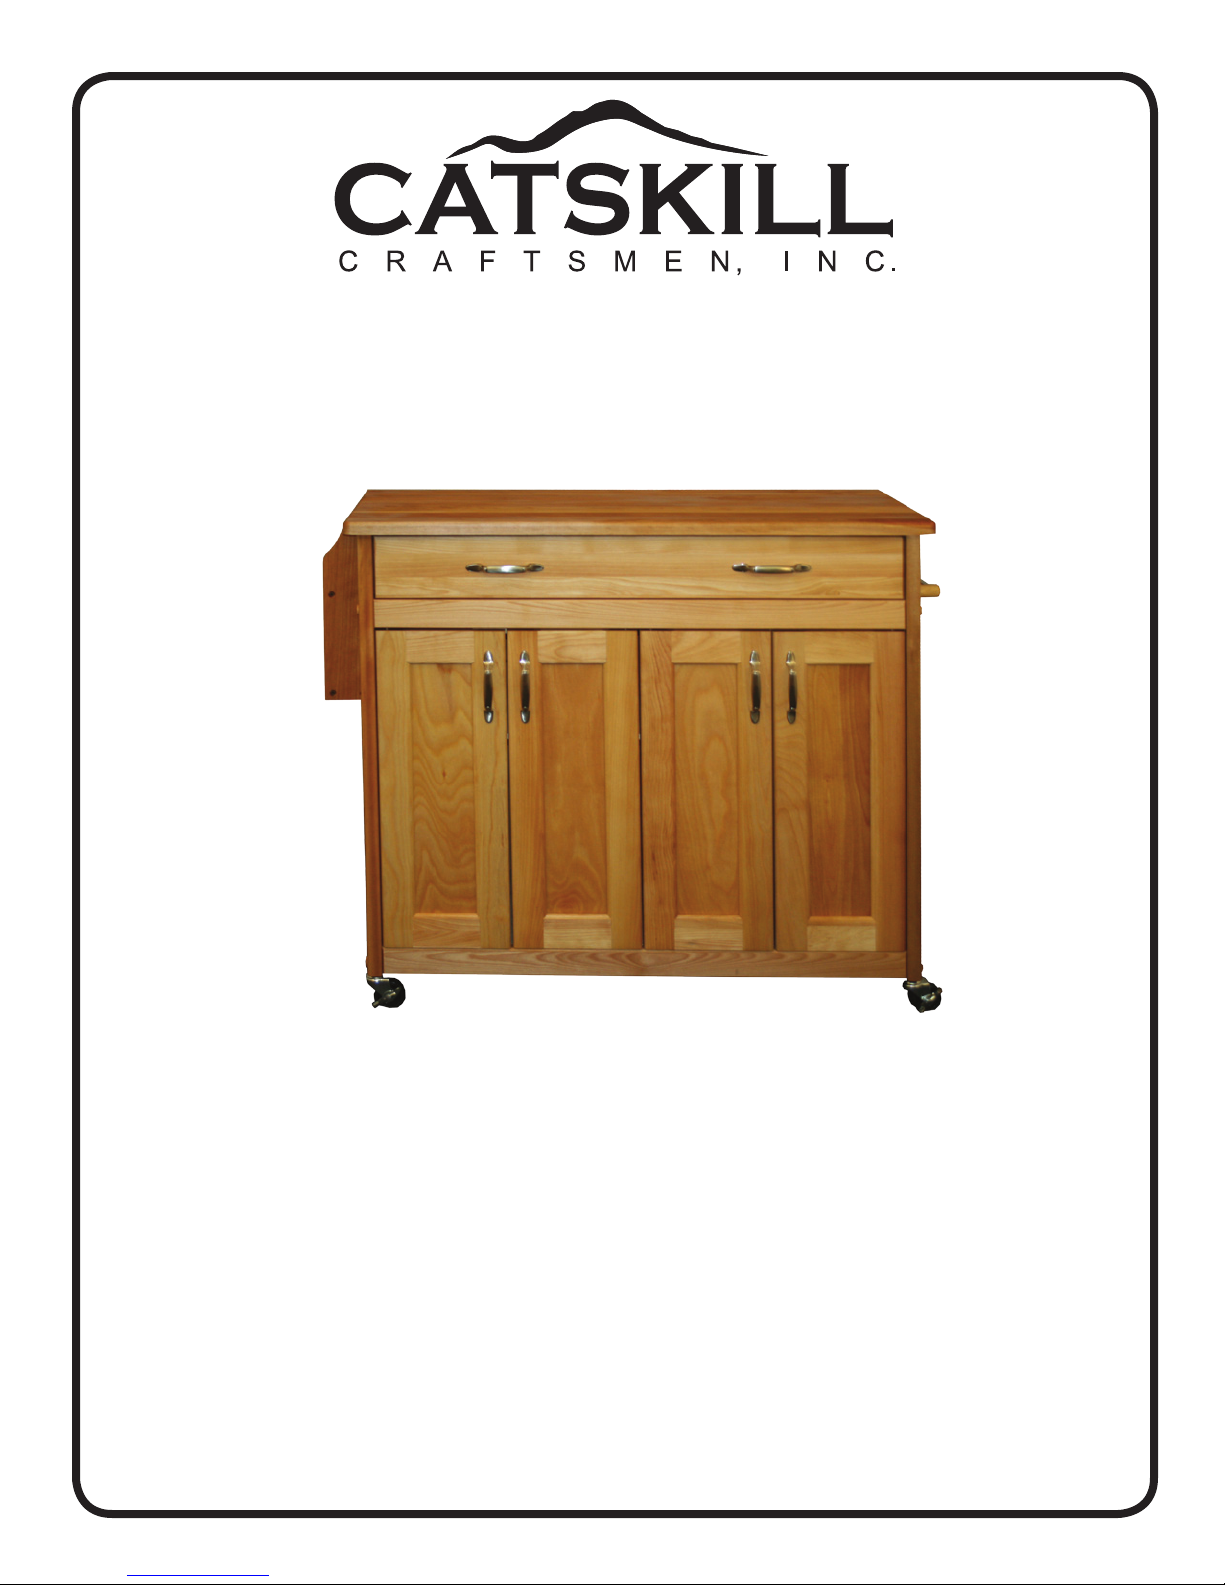
CATSKILL 51538 Assembly Instructions Manual
Assembly Instructions
Model 51538
Mid-Sized Island w/Flat Panel Doors & Drop Leaf
GENERAL:
1. You have purchased model 51538.
2. Should you need assistance or need to replace a damaged or missing part simply give us a call M-F at
607-652-7321 from 7:30 am - 4:30 pm EST and we’ll send you the prepaid part via UPS usually that same
day! You may also email us info@catskillcraftsmen.com.
3. Read the assembly instructions and the enclosed brochure before beginning assembly. Assembly is
easy if you read and follow the instructions step by step. See our website for assembly tips and videos.
4. Tools required: Phillips screwdrivers, medium and small; medium at blade screwdriver and a hammer.
5. Drawer glides are sometimes pre-packed with screws, these are not used.
6. Directions (left/right, front/back) are given as facing the front of an assembled upright unit. A
is recommended to assist with assembly as this will ease the process. Some of the parts are large and
awkward to hold in place, an extra pair of hands will help.
friend
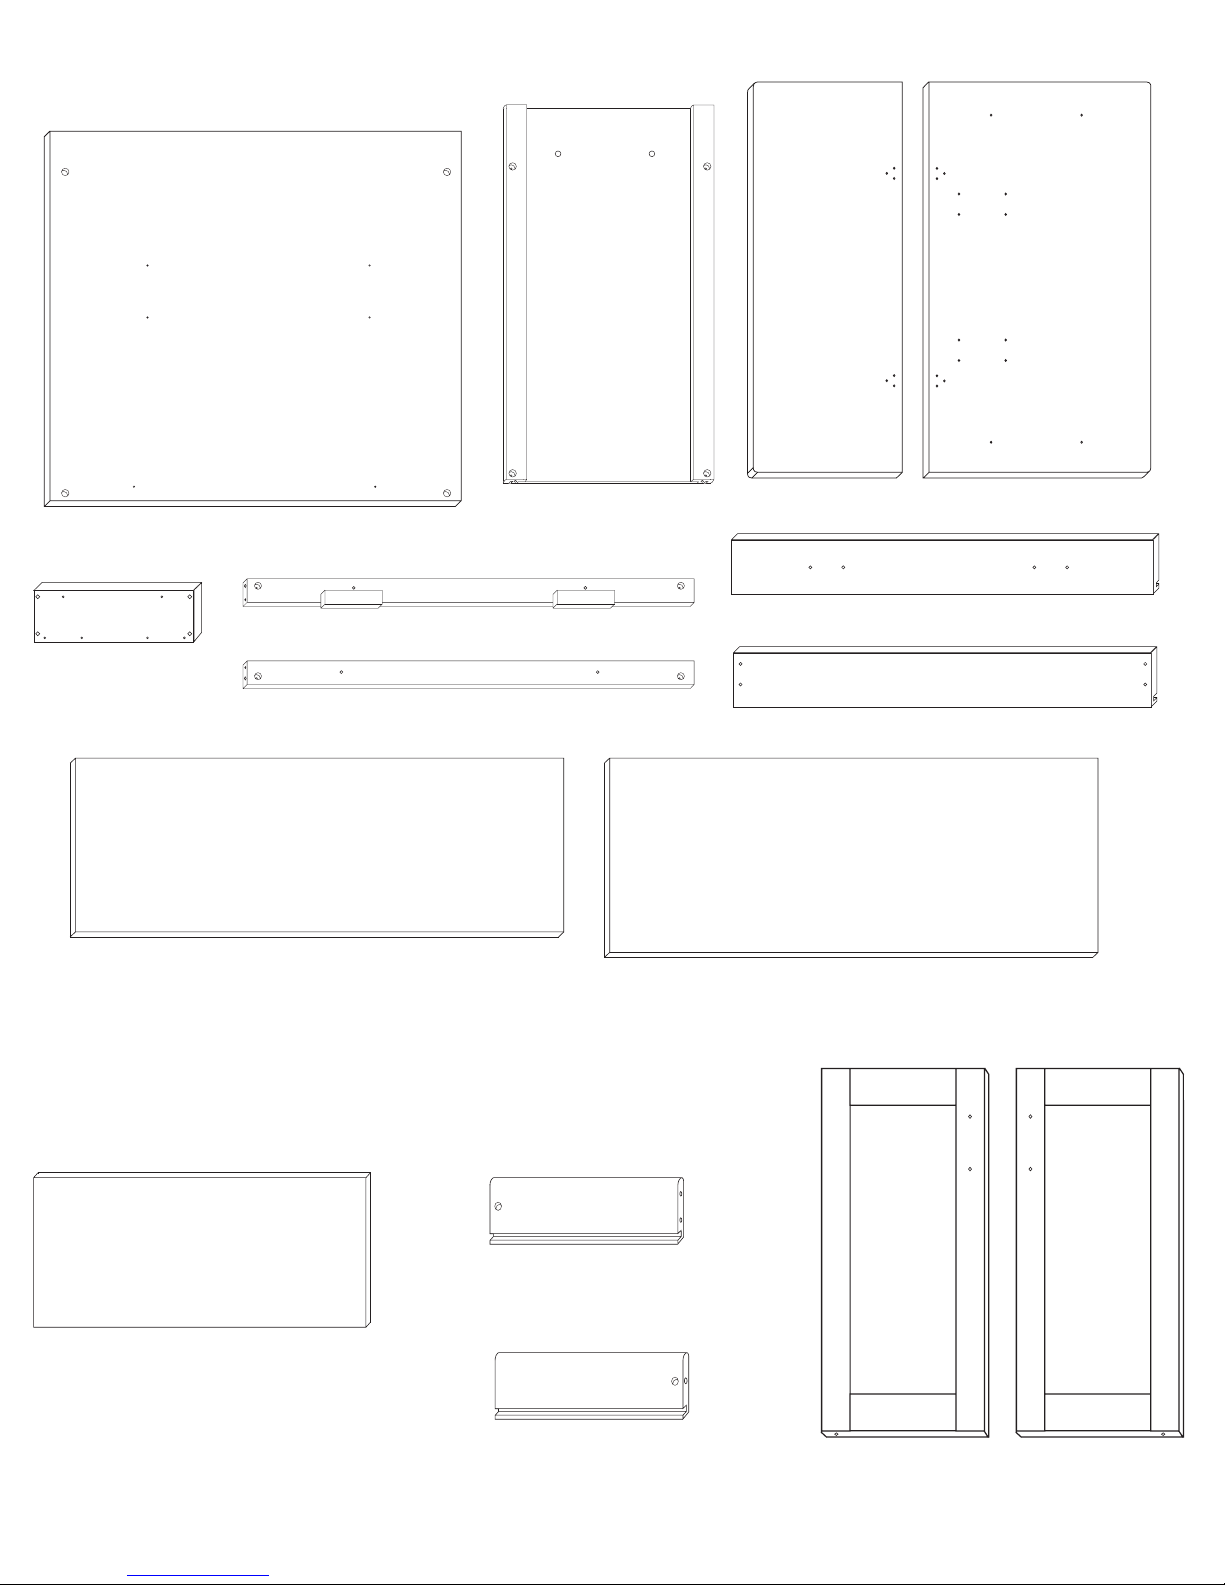
Parts List Model 51538
Back Panel (1)
Glide Support (2)
P/N GLDSUP-51538
P/N BP-51538
Center Shelf (1)
P/N CS-51538
Side Panel (2)
P/N SP/HDL-51538
Top Front Brace (1)
P/N B-34 1/4 / 2 1/2/TF-51538
Bottom Front Brace (1)
P/N B-34 1/4 / 2 1/2/BOT-51538
Drop Leaf (1)
P/N DL-51538
Drawer Front (1)
Drawer Back (1)
Bottom Shelf (1)
P/N BS-51538
Table Top (1)
P/N TT-51538
P/N DF-51538
P/N DBK-51538
Drawer Bottom (1)
P/N DB-51538
Left Drawer Side (1)
P/N DS-51538L
Right Drawer Side (1)
P/N DS-51538R
Left Door (2)
Right Door (2)
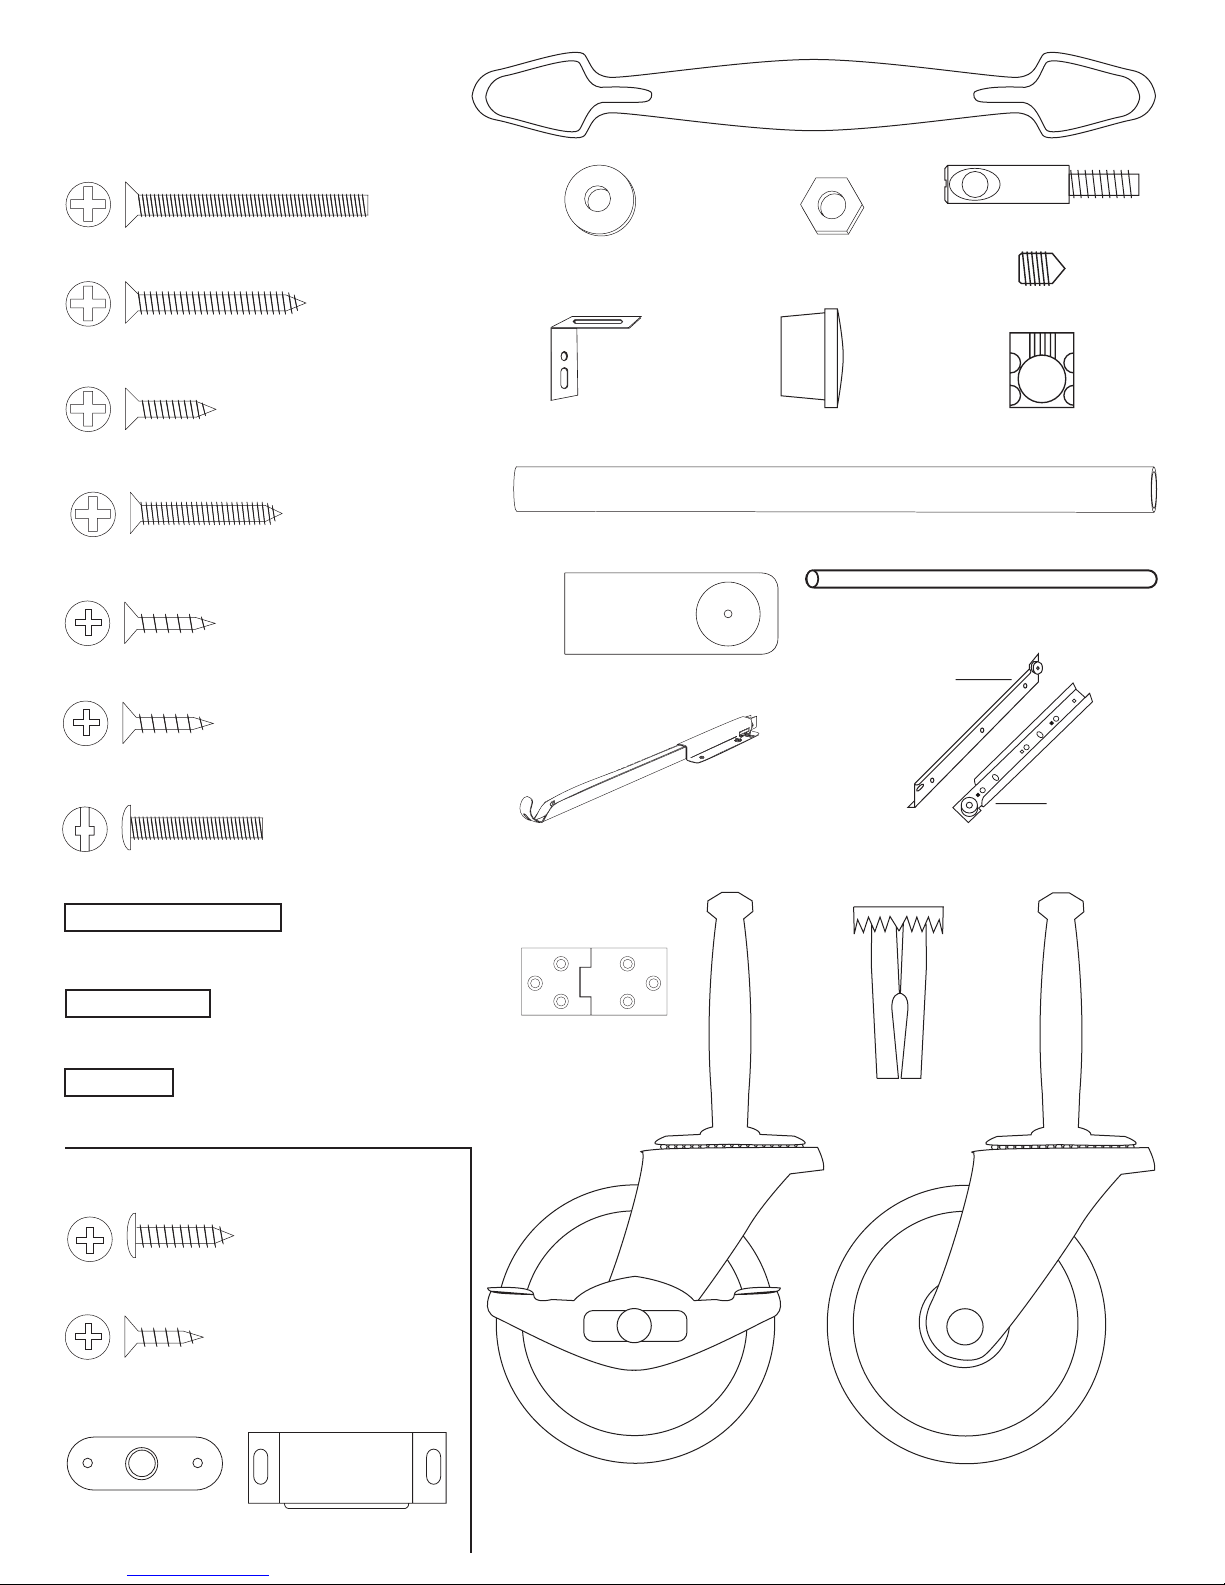
Hardware 51538
Nickel Handle (6)
1 3/4” Phillips Flat Head Bolt (8)
(Use 8 Bronze screws
for spice rack)
1 1/4” Phillips Flat Head #8 Screw (20)
(Used for drop
leaf hardware)
5/8” Phillips Flat Head #8 Screw (20)
(used to attach spice
rack and towel bar)
1” Phillips Flat Head #8 Screw (4)
(Used to attach “L” bracket
and cabinet glides)
5/8” Phillips Flat Head #7 Screw (12)
(Used to attach drawer glides)
5/8” Phillips Flat Head #5 Screw (4)
(Used to attach
drawer handles)
7/8” Truss Head Machine Screw (12)
3/16” Flat Washer (8)
“L” Bracket (4)
10-24 Hex Nut (8)
5/8 Wooden Disk (8)
Polished Nickel Towel Bar (1)
Towel Bar Post (2)
P/N Drop Leaf Support (2)
Bastion Post (2)
Bastion Set Screw (2)
Bastion Barrel Nut (2)
Spice Rack Retaining Rods (2)
Drawer
Cabinet
Drawer Glide (1 Set )
(Door Pins)
1 1/2” Long 3/16” DIA. Steel Pin (8)
(Shelf Pins)
1” Long 3/16” DIA. Steel Pin (14)
(Brace Pins)
3/4” Long 3/16” DIA. Steel Pin (4)
Magnet Packs (4)
(Used on Magnet
Included in magnet pack)
5/8” Pan Head Screw (8)
(Used on Magnet Plate
Included in magnet pack)
1/2” Phillips Flat Head #4 Screw (4)
Magnet Plate (4)
Magnet (4)
Hinge (2)
Locking Wheel Casters (2)
Caster Socket (4)
Wheel Casters (2)
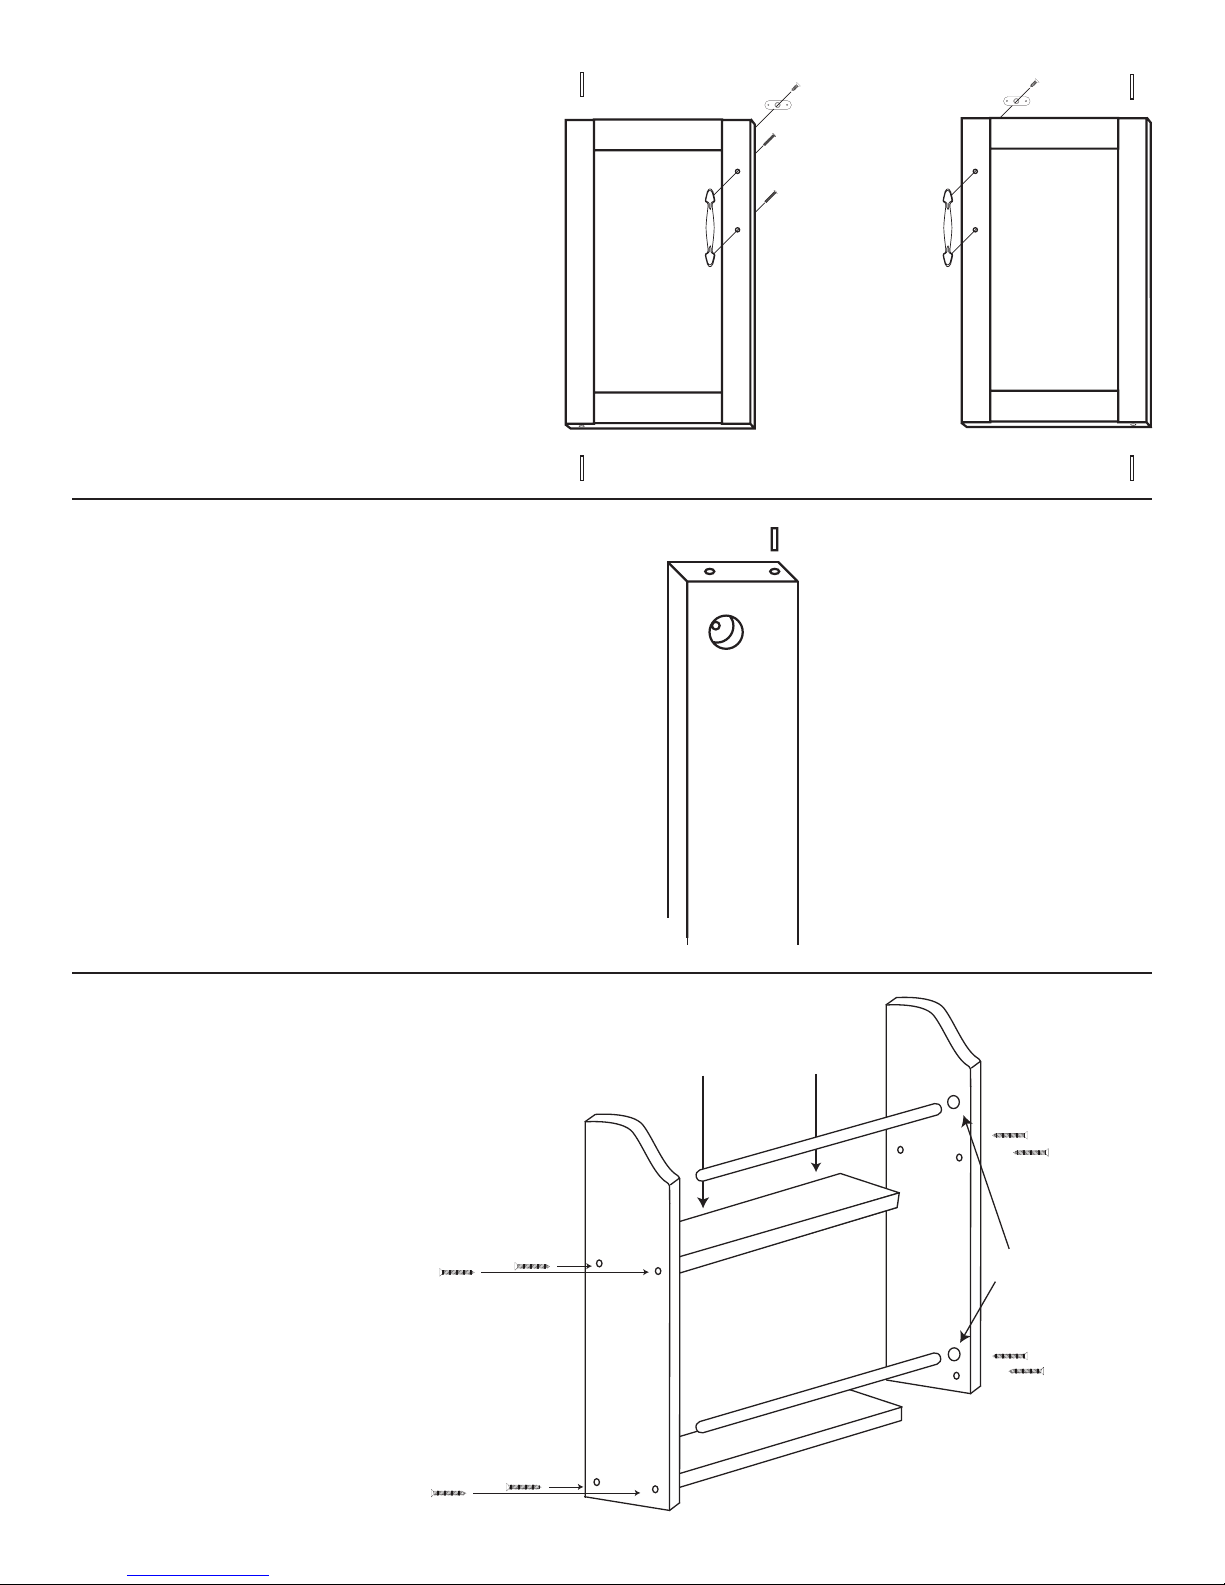
STEP 1
A. Tap/insert ONE 1 1/2” pin into
each end of all the doors. DON’T
OVERDRIVE PINS! Pins should stick
up about 1/2” when seated.
B. Attach the magnet plate (may be
stuck to magnet!) with the 1/2” #4
screw to the top of the doors. Bumps
go toward the wood.
C. Attach door handles with 7/8”
truss head machine screws.
STEP 2
A. Take the 2 front braces and tap/
insert one 3/4” steel pin into each end
of both braces until seated. About 3/8”
will stick out when seated. OK if loose.
STEP 3
Assemble Spice Rack
Fasten Shelves with
1 1/4” Phillips Flat Head
#8 Screw (Bronze)
Pilot holes in shelves
go toward back
Insert retainer
rods into holes
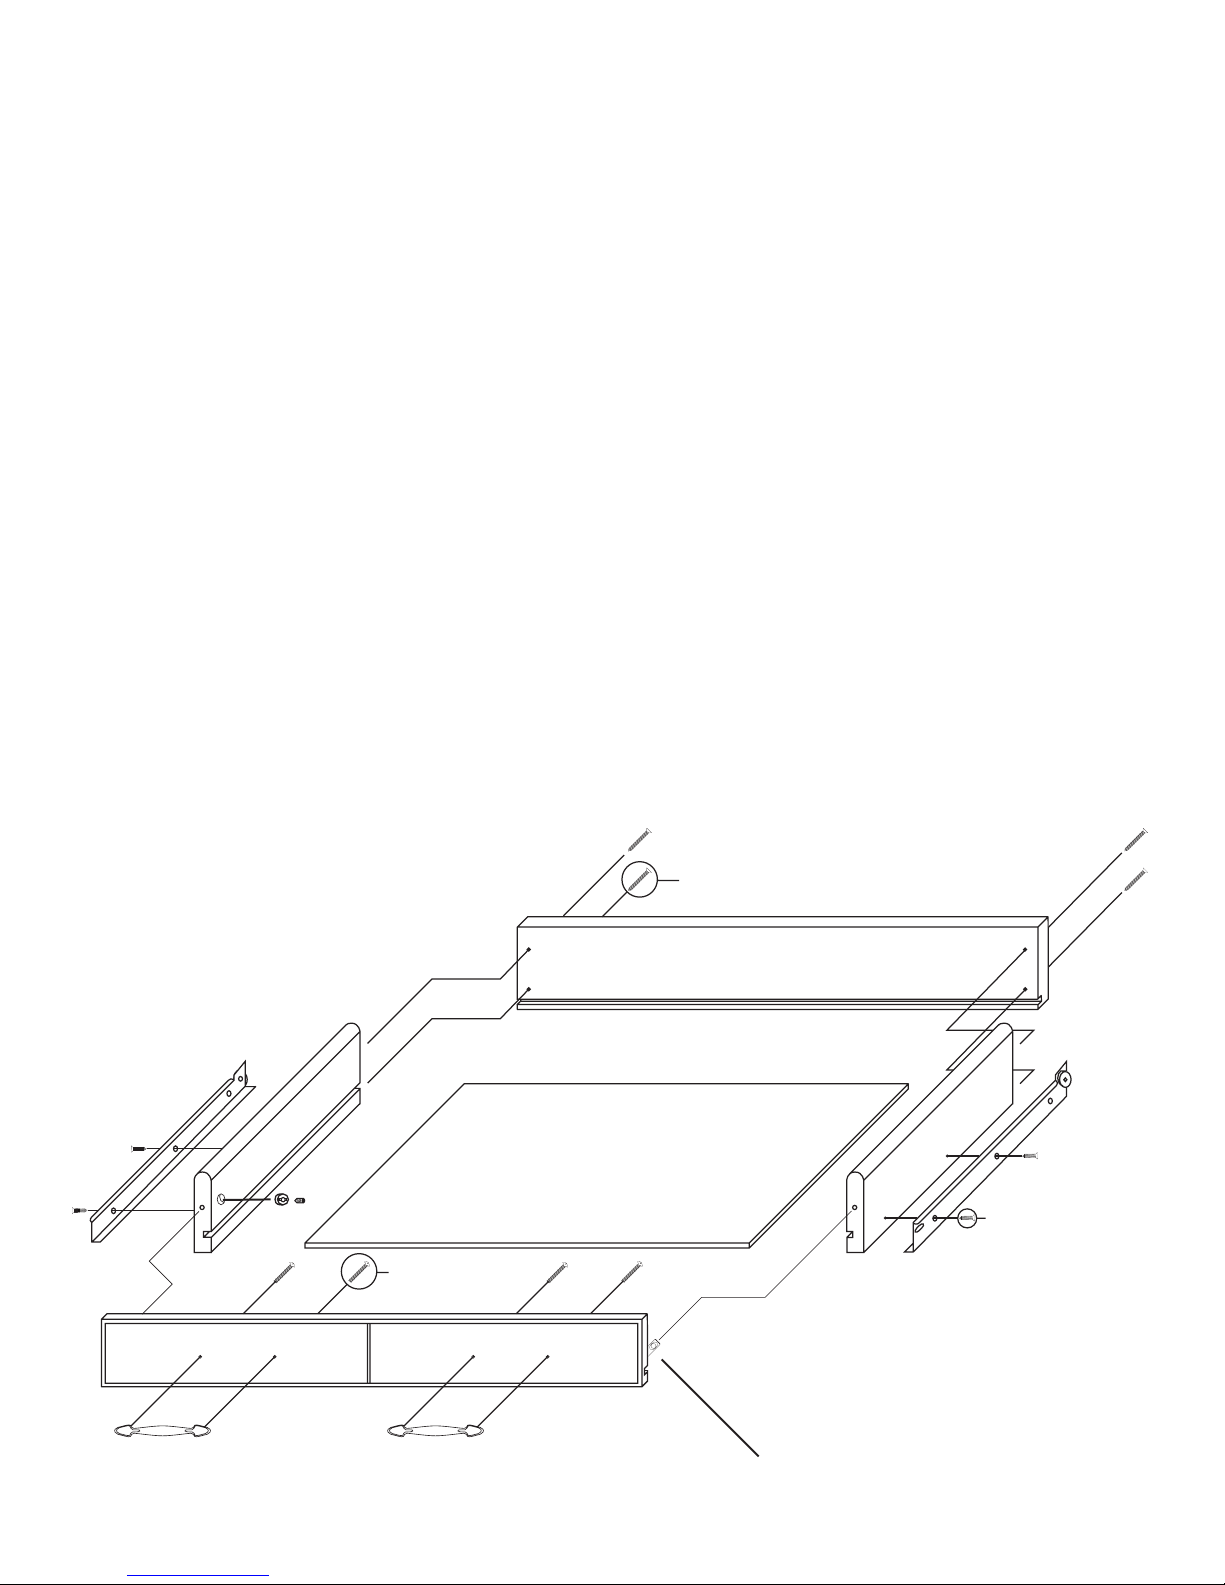
STEP 4
A. Attach the Drawer Back to the Drawer Sides with four 1 1/4” #8 screws. There are left and right
sides. Make sure the slots that run the length of the Sides are aligned with the slot in the Drawer Back
to accept the Drawer Bottom.
B. Slide in Drawer Bottom, best side up, to inside of drawer.
C. Take the 2 bastion posts, align the threaded end of the posts with the post holes located near the
ends of the inside of the Drawer Front. Tighten posts down until the solid shaft of the posts hits the
wood. Back post out until the hole/screwdriver slot in end of post is parallel and in direct line with the
long edges of the Drawer Front.
D. Insert the barrel nuts into the nut access holes on the inside of the Drawer Sides with the threaded
ends of the nuts facing out. Take the Drawer Front and carefully insert the posts into the ends of
the Drawer Sides, through the sides of the nuts until seated. Push nut snug up against the wood in
the nut access hole toward the inside of Drawer Front. Hole should be slightly off-center toward the
Drawer Front. Insert the set screw and tighten down. The ends of the sides should be tight against the
inside Drawer Front.
E. Attach the drawer handles with 7/8” Truss head machine screws.
F. Attach the drawer glides (left and right) to the Drawer Sides using two 5/8” #5 screws per side.
Wheels go toward Drawer Back and are up. The end with no wheels should touch the Drawer Front.
1” Truss Head Screw
1 1/4” #8
5/8” #5
Also see our video on the Bastion Fastening System at www.catskillcraftsmen.com
See next page to learn how the bastion fastening system works.
 Loading...