

Catrike TRAIL, EXPEDITION, 559, 700, POCKET Owner's Manual
...
Owner’s Manual
ALL CATRIKE MODELS
More resources available
at
Catrike.com

Table of Contents
I. Introduction .................................................................................................... 3
II. Register your Catrike ...................................................................................... 4
III. Serial numbers ................................................................................................ 4
IV. Catrike Models ................................................................................................ 5
V. Safety and riding tips ..................................................................................... 6
Safety tips
Riding tips
Maintenance tips
VI. Assembly ....................................................................................................... 11
Wheels
Prepare the spindles
Headset assembly
Handlebar adjustment
Install tie rod
Setting the toe (front wheel alignment)
Brake cable routing
Brake adjustment
Install the boom on the main frame tube
Install the derailleurs
Route the shifter cables
Install the pedals
Install the seat
Set the boom length
Install the chain
Adjust the derailleurs
Seat back adjustment
Install the mirror
Install the flag
Install the computer sensor mount
Adjust the neck rest

VII. Rear Suspension Instructions (Dumont &
RoadAR) ........................................................................................................... 36
VIII. Suspended Spindle Instructions (Dumont &
RoadAR) ........................................................................................................... 43
IX. Folding Assembly Instructions (5.5.9,
Dumont & Trail) ............................................................................................ 50
X. How To Fold (5.5.9, Dumont & Trail)......................................................... 56
XI. Thru-Axle Instructions (700) ....................................................................... 57
XII. Catrike Limited Warranty ............................................................................ 58
XIII. IF YOU HAVE A PROBLEM ........................................................................... 61
XIV. Thank you for choosing Catrike. ................................................................. 62

OWNER’S MANUAL PAGE 3
Introduction
Congratulations on purchasing a Catrike!
You made a great decision buying a Catrike. We are sure you will enjoy riding it for years to
come.
Please take a moment to read through this document, especially, the sections on safety and
riding tips. You may find the most comfortable place to read this manual is sitting (stationary)
on your Catrike!
We hope you enjoy owning and riding your Catrike!
Happy Trails,
Paulo Camasmie
Founder and CEO
OWNER’S MANUAL PAGE 4
Register your Catrike
First, take a moment to register your Catrike. Registration is very important and required to
validate your warranty. We also use the registration to contact you, in the event, we ever need
to inform you about any Catrike safety warnings or recalls of any part.
Register online at the following link: http://www.catrike.com/register
If you are unable to register online (best method for registration is online) you can mail the
form on the back cover of this manual.
Serial numbers
The serial number is located on the main frame of your Catrike. The main frame is the largest
diameter part of the frame and serial numbers are located towards the back of the Catrike
behind/below the seat.
The serial numbers are permanently engraved into the frame. Serial numbers are preceded by
the Catrike logo and they are a 5-digit number (ie. 25555). You might need to look closely as
the serial numbers are engraved prior to powder coating/painting.
On adjustable seat back models Villager, Trail, Road, 559
& Dumont S/Ns are on the top side of the main frame.
On space frame models Expedition, 700, Pocket
S/Ns are on the bottom side of the main frame.

OWNER’S MANUAL PAGE 5
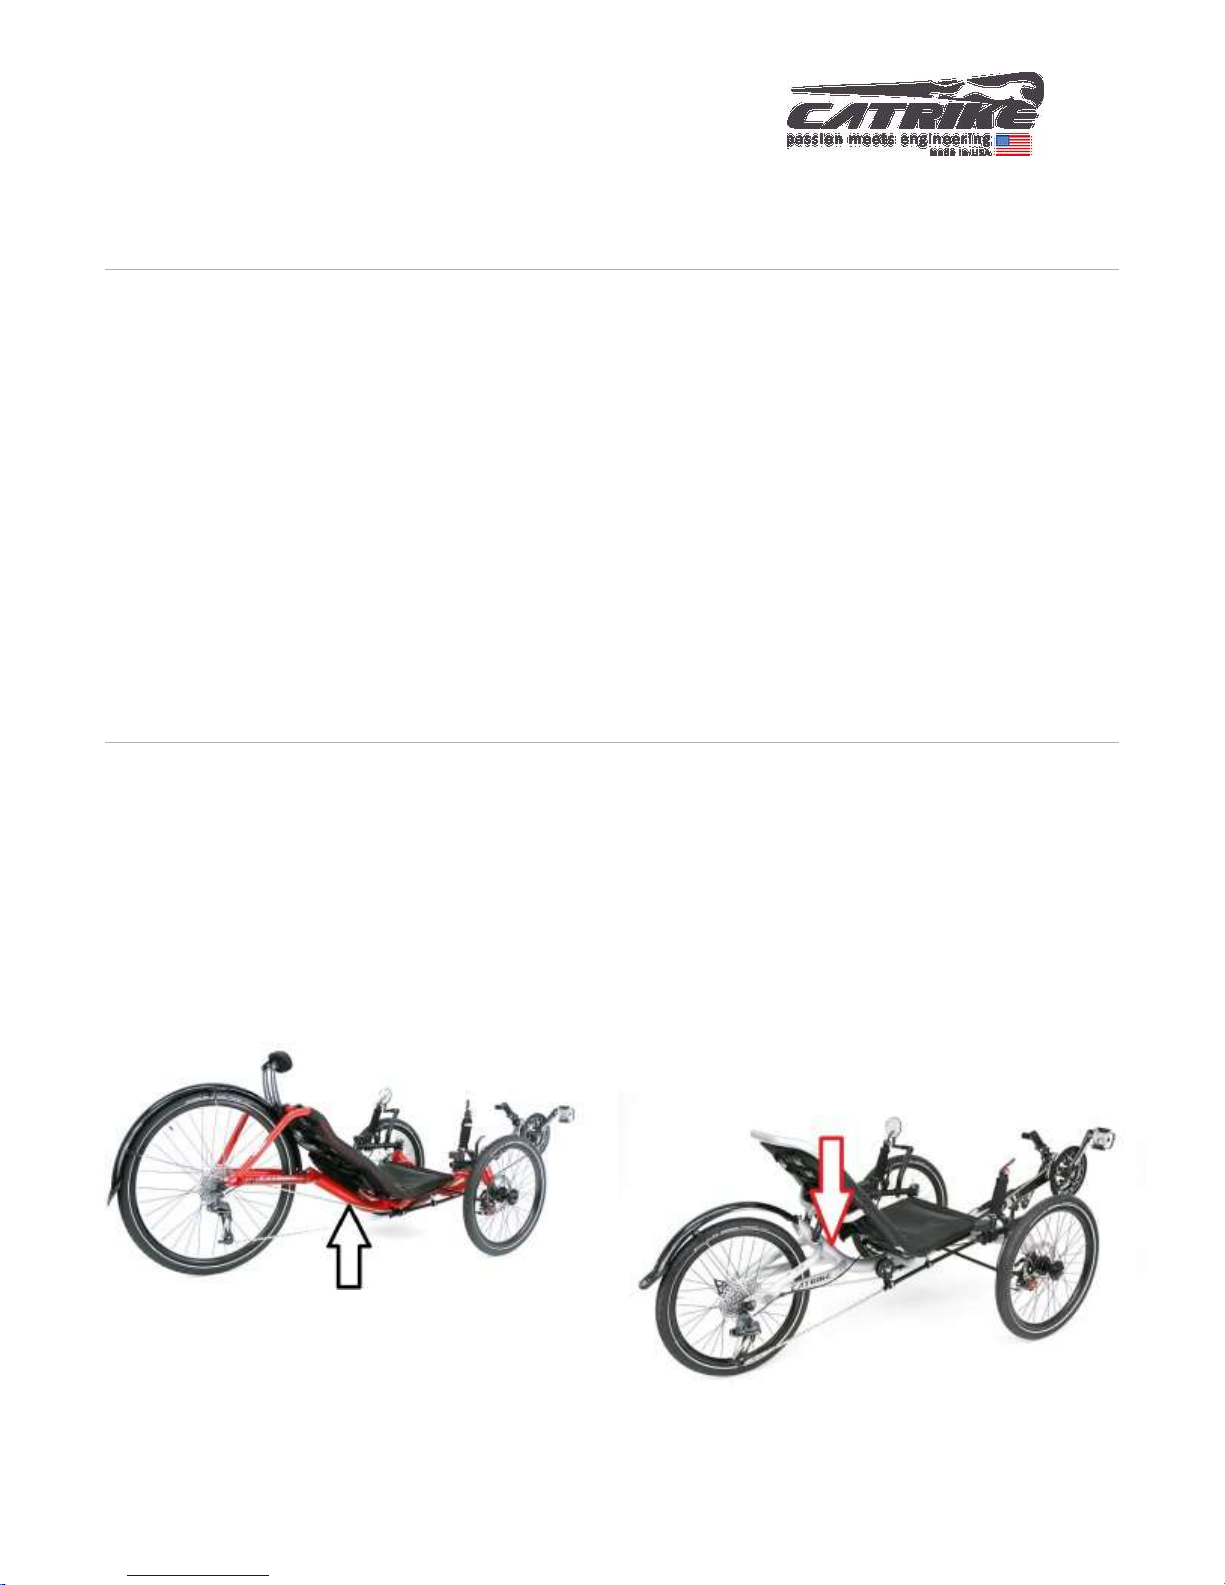
Catrike Models

OWNER’S MANUAL PAGE 6
Safety and riding tips
We make Catrikes for your enjoyment. Your safety is our top priority. Riding safely depends on many things, from
proper equipment to alertness to your attitude on the road. Above all, use common sense.
Safety tips
Bike trails and paths are ideal places to ride Catrikes. You can enjoy the view, relax and
socialize. You will have the most comfort, peace of mind and fun. If you elect, however, to ride
on streets, you do so at your own risk and know that whether it is a regular bicycle or a trike
you should be very careful. A trike is low to the ground and you must be extra careful when
riding with vehicular traffic. It is very important to make yourself visible. In part, you do this
with equipment such as brightly colored clothing and helmets, use of the safety flag that
comes with every Catrike, with blinking lights and reflective stickers. But you also must ride in
such a way that you engage the attention of motorists, making eye contact, signaling your
intentions, being courteous, smiling and waving. Use your voice to get attention. Be alert and
pay attention when riding in traffic and obey all traffic laws and rules of the road. The positive
side is that recumbent tricycles are unique, and once you make sure that you are being seen,
you generally find that motorists leave you more room and respect when you're on our
Catrikes than they do when you're on upright bicycles. Nevertheless, always assume that they
don't see you.
Reflective and high-visibility gear is great (use it all the time), but it's no substitute for lights
when riding at night or in low-light conditions. The new super-high-output LED rear lights are
very effective. Any small headlight (those that look like flashlights) may be enough to help
oncoming motorists see you, but it's not sufficient to actually light your way. If you're going to
ride at night, spend the money and get a good headlight.
While it may seem silly to wear a helmet on a low-slung tricycle, you should always do so. It's
very hard to tip the trike over, but it can happen. Also, if you have a close encounter of the
worst kind with a car or stationary object, chances are you won't stay on the trike. Always wear
a cycling helmet when riding your Catrike. A brightly colored helmet also helps motorists see
you.
You're very low, and it's possible for road grit to get whipped up by the wind or kicked up by
passing cars and hit you in the face. This is especially true in the spring in areas where sand is
used on the roads in winter. It's a good idea to wear sunglasses to protect your eyes.

OWNER’S MANUAL PAGE 7
We strongly recommend the use of the mirror that comes standard with every Catrike. You can
also order dual mirrors (one on each side). However, don't rely entirely on your mirrors. Turn
and look before changing lanes or turning across the line of traffic.
Riding along a line of parked cars can be particularly dangerous for those on low-slung bikes
and trikes. Motorists have a habit of opening their doors suddenly without looking behind
them…and even if they do look, they're concentrating on looking for oncoming cars, not a low
trike. When riding along a line of parked cars, look for occupants inside as you approach. If you
see someone sitting in the car, give them a bit of extra room.
Pedestrians, too, often aren't looking where you are. Use caution when approaching crosswalks
and use your bell, horn or your voice to alert those who may be stepping into the street.
If you carry loaded panniers, avoid putting the weight too high and too far aft, or it can cause
poor, even unsafe, handling.
Riding tips
If you don't have experience with recumbent tricycles, you may find that for the first few rides
you experience noticeable pedal steer (pushing hard on the pedals makes the trike swerve) and
brake steer (grabbing one brake harder than the other causes the trike to swerve). These two
phenomena become much less noticeable as you gain experience. Pedal steer is minimized or
eliminated by pedaling smoothly at a fairly high cadence, rather than mashing hard. Brake steer
is minimized by braking smoothly and evenly…if the trike lurches under braking you're
overdoing it (it's like driving your car…you don't stand on the brakes every time you slow the
car; rather, you learn to modulate the pressure so that the car does not lurch).
The smoothest, most enjoyable ride comes when you learn not to over control the trike. The
steering is very responsive, and does not require much input at all to make the trike change
direction. The less you try to steer, the smoother the ride will be.
It's possible to get the trike up onto two wheels, but this should be avoided. It puts a lot of
stress on the components and can cause loss of control. Bicycle wheels, hubs and tires are not
designed for heavy lateral loads, and if you go up on two wheels you're asking them to do
something they were never meant for. Your Catrike is wonderfully responsive and handles very

OWNER’S MANUAL PAGE 8
well, but it's possible to overdo it. Use common sense. You'll find that the trike stays more
firmly planted when going around a corner at speed if you lean to the inside of the turn.
CAUTION: The brakes on your Catrike are very powerful. It is quite possible to do a
“stoppie” on the Catrike (lock the front wheels and lift the rear wheel off the ground by
jamming on the brakes). In extreme cases, you can hit the chain rings on the ground and
damage them. Use common sense. Don't use maximum braking unless you really need to. (At
high enough speeds, the trike won't lift the rear wheel…it will just skid. And at very low speeds,
there isn't enough momentum to hit the chain rings on the ground.)
CAUTION: Brake Steering: Our frames are designed for a diminished brake steer effect.
However keep in mind that the trike is not a heavy vehicle such as a car. It does not have
hydraulic, electronics or self correcting mechanisms either. It is instead, a very light recreational
vehicle with a mechanical steering linkage that carries a rider sometimes over 8 times its
weight. Therefore the weight & dynamics of the driver can exert total control over the
capabilities of the vehicle. It does demand that the rider develops proper riding skills, such as
smooth pedaling, smooth steering and smooth breaking and that it is always conscious when
riding. The Catrike has front brakes only, since in a breaking situation 90% of the weight is
transferred to the front of the trike. The front brakes are also independent, meaning that you
can break the right wheel only, or the left wheel only. Therefore, especially in high speed or
downhill situations, it is mandatory that you pull both brakes at the same time and with the
same intensity. If you elect however, to brake only with one brake, this could cause the trike to
steer out of your path and cause serious injury or death.
CAUTION: Our peace boom and boom clamp is designed for high pressure clamping and
has an indexing system to keep the boom from twisting more than a few degrees. Make sure
the boom clamp is tight enough, so the boom will not twist while you pedal. The indexing tab
should be used as a guide; it is not intended to keep the boom from twisting under pressure.
Just like a bicycle seat post clamp, it is the rider's responsibility to check the boom clamp for
tightness. There is a plastic shim included between the boom and the main frame to eliminate
any gap and to increase clamping action. Make sure the plastic shim is correctly placed before
riding your Catrike. If for any reason, you are unable to install or tighten the boom clamp or are

OWNER’S MANUAL PAGE 9
missing the boom shim, please do not ride your Catrike and contact your Catrike Dealer.
Failure to do so might cause the boom to twist and cause serious injury.
Maintenance tips
Make it a habit to inspect your trike from time to time, especially when new. Fasteners have a
habit of working loose at first and this can cause a safety hazard. Also, you'll find that the right
front wheel tends to pick up debris from the edge of the road faster than the left front wheel,
because it's running closer to the curb. Catrikes come with Kevlar-belted tires for puncture
resistance, but this does not mean they're immune to flats.
Keeping your trike clean will maximize its life. Wash it from time to time but avoid the use of
pressure washers. They do a great job of getting dirt out of tight spaces, but they do an equally
good job of driving lubricant out of where it needs to be. It's better to use a bucket of water,
mild detergent and a soft brush.
Your Catrike comes equipped with mechanical disc brakes. Use care to not overspray any
solvents or cleaners onto the disc brake rotors or brake pads. Brake pads can absorb cleaners
which is a common cause of brake noise.
Many new owners tend to over-lube the chain. It should not be dripping with lube. A properly
lubricated chain looks dry and clean, and while it may leave a bit of a mark on your hand if you
grab it, it should not be a gloppy mess. Use your favorite lube and follow the instructions.
Always keep your tires filled to the recommended pressure (printed on the tire sidewall). The
tubes are not entirely airtight, and the tire will lose pressure over time. Trikes by nature will
scrub the tires a bit, so they may not last as long as they would on a bicycle. Overly aggressive
riding will shorten tire life.
Your seat mesh will stretch a bit and settle in over time. It's not meant to be drum-tight…it's
meant to support you comfortably. Pull the straps tight from time to time when the trike is
new…eventually the mesh and straps will settle into a stable configuration that you'll find is
quite comfortable.
When using a neck rest, we recommend placing the pad so that it's behind your neck, just
under the lower edge of the helmet, and in a position that lets you rest your neck on it if you

OWNER’S MANUAL PAGE 10
need to but which doesn't force you to have your neck on it all the time. The neck rest is nice
and soft, but it does transmit road vibration.
If you're adjusting the trike to fit another rider, make absolutely certain that the chain is of the
right length. In order to get the maximum possible gear range, the Catrike drive train pushes
the derailleurs close to their maximum capacity. The chain must be long enough to handle the
big chain ring/big cog combination…if it's too short; it's possible to severely damage the drive
train by shifting into this gear combination and applying power. You can get away with a
slightly slack chain, but NEVER ride with a chain that's too short.
Improper toe can cause extremely rapid tire wear. Toe is set by the mechanic during
installation of the tie rod. We've heard reports from the field of improperly set toe, with
resulting excessive tire wear. Don't assume it's been done right! Check it yourself. Toe is
checked by measuring the distance between the front tires at approximately axle height ahead
of the axle, then comparing this measurement with the distance between the tires behind the
axle. The difference should be no more than 1/16 inch with the front narrower than the rear.
Please note: See section titled “Setting the toe (front wheel alignment)” on page 21 for more
details.
OWNER’S MANUAL PAGE 11
Assembly
Assembly instructions
Assembly set up and fitting performed by authorized Catrike dealer.
Your Catrike should be fully assembled, tested and fine-tuned by your Catrike dealer or local
bike store. Here are the assembly instructions in order to show how this process is done.
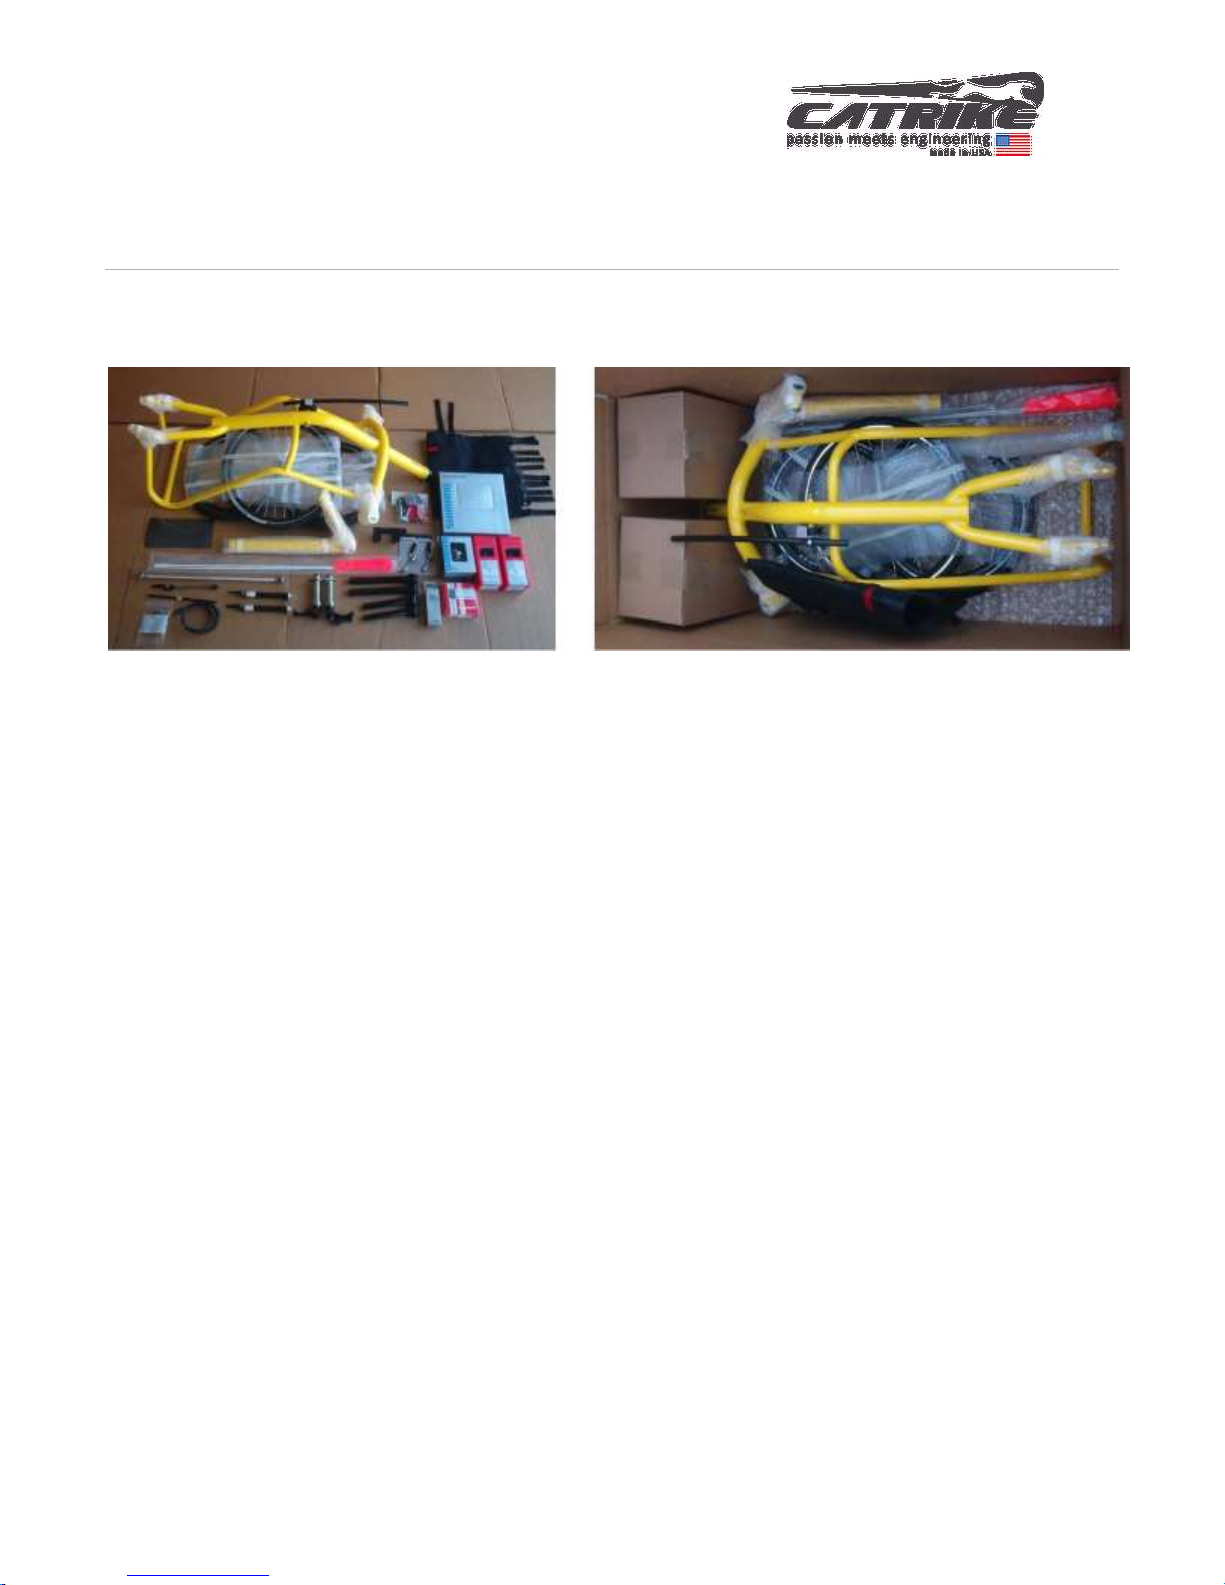
A complete Catrike includes:
✓ Main frame with cups for headsets in place. The idler pulley and chain tube also are pre-
assembled and installed on the frame.
✓ Quick-release boom clamp
✓ Boom
✓ Seat mesh
✓ One tie rod with two aluminum rod-end bearings, jam nuts, and tie rod bolts
✓ Two spindle/axle assemblies with headsets and quick release axles
✓ Two suspended spindles assemblies with quick release axles (RoadAR & Dumont)
✓ Adjustable handlebars
✓ A plastic boom shim
✓ Quick-release rear wheel skewer
✓ Brake cables and two lengths of brake cable housing

OWNER’S MANUAL PAGE 12
✓ Gear cable housing
✓ Cable ferrules and cable ends
✓ Flag mount
✓ Safety flag
✓ Derailleur hanger
✓ Computer sensor mount
✓ Space Neck Rest (Expedition & 700).
✓ RockShox Monarch R Shock (RoadAR & Dumont).
✓ Two front wheels with tubes and tires installed.
✓ One rear wheel with tube and tire installed.
✓ Disk brakes
✓ Brake levers
✓ Shifters
✓ Cassette
✓ Crank Set
✓ Front derailleur
✓ Rear derailleur
✓ Bottom bracket
✓ Chain with (1) MasterLink
✓ Mirror
✓ Pedals
✓ Hand rest
✓ Mirror mount
OWNER’S MANUAL PAGE 13
Tools required for assembly and maintenance
✓ A set of metric Allen wrenches
✓ A metric wrench set
✓ A bicycle chain tool
✓ A small screwdriver (to adjust the derailleurs)
✓ A bicycle cable and housing cutter
✓ Torx drivers
✓ Cassette installation tool (for standard cassette)
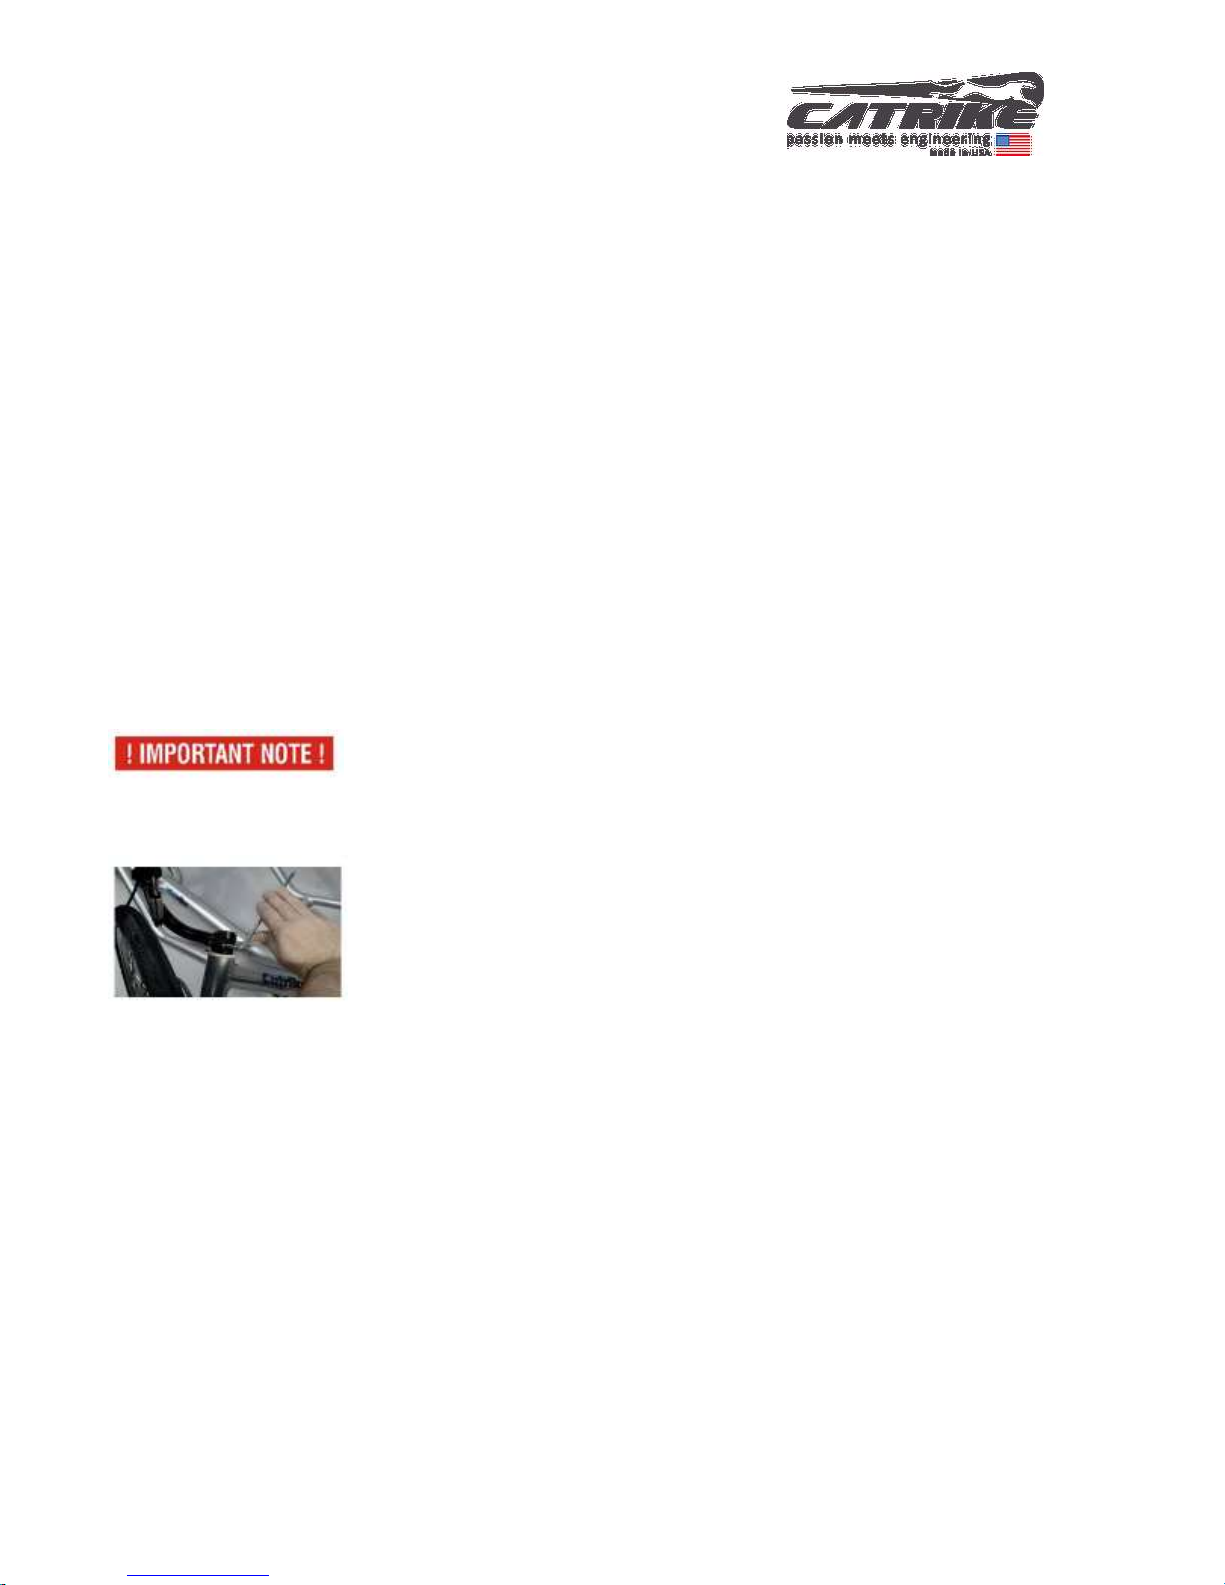
The frame and many other parts of your Catrike are made of
aluminum. It is very easy to strip aluminum threads especially if steel
fasteners are going into them. Be careful not to cross thread or over tighten any fastener.
An easy way to estimate the proper tightness for aluminum fasteners is
to use two or three fingers on the wrench. This limits the amount of
force you can apply to the tool. Use two fingers for small fasteners, or
three for larger ones.
It is very important for you to re-check all of the threaded fasteners (pedals, axle bolts, quick
release on wheels and all other nuts and bolts) on the trike after you've ridden it for a couple of
hours, just to make sure everything is still tight. Periodic checks during the riding season also
are a good idea. Virtually all of the trouble reports we receive are nothing more than fasteners
that have worked loose.
OWNER’S MANUAL PAGE 14
Wheels
Prepare the wheels
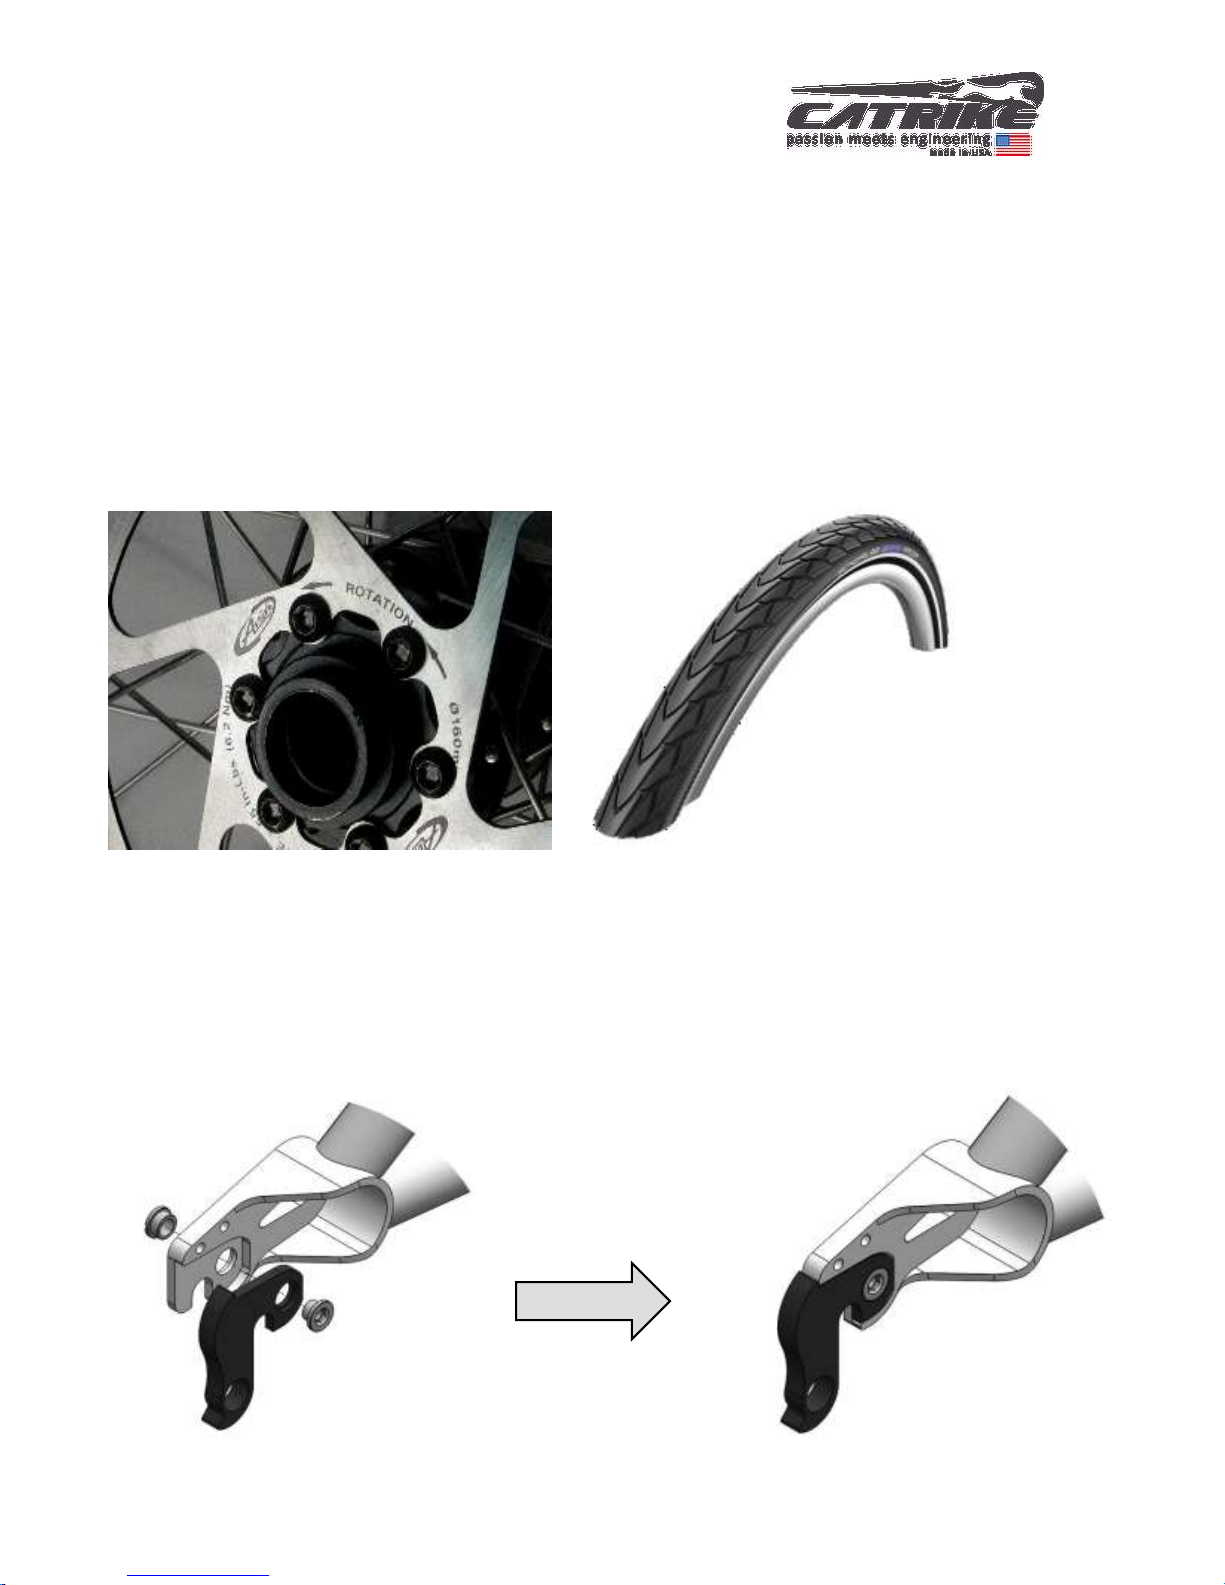
Attach the brake rotors to the front wheels using the screws provided with the brakes.
Both the brake rotors and the tread on the tire are directional so attention must be paid to
how they are mounted. The direction of the brake rotor and tire must match!
Direction of rotation shown on brake rotors Direction of rotation shown on tire sidewall
Installing the derailleur hangar
Insert derailleur hanger into it recess located in the right dropout and tighten mounting
hardware.
OWNER’S MANUAL PAGE 15
Installing the rear wheel
Insert quick release into the non-drive side of the hub and partially thread quick release nut.
Insert rear wheel into dropouts.
Push lever side of quick release against the outside face of the left dropout. With the lever in
the open position, tighten the quick release adjusting nut until nut contacts derailleur hanger.
Move the quick release lever to the closed position shown in the image below. Closing lever
should require a considerable amount of force. If lever is easy to close, reopen quick release
lever and turn adjusting nut an 1/8 of a turn. When sufficient clamping force is achieved, the
lever should leave an imprint on your palm. Repeat until clamping force is sufficient.
Click HERE or scan QR
code below to video aids.
OWNER’S MANUAL PAGE 16
Prepare the spindles
Spindles connect the front wheels to the handlebars and steering mechanism.
• First, identify the right and left spindles
Mount the brake calipers on the spindles. The left-hand assembly has the brake caliper
on top, and the right hand has the brake caliper underneath. Use the provided M6
washers between the head of the calipers mounting brackets and the plates to space
out the bolt.
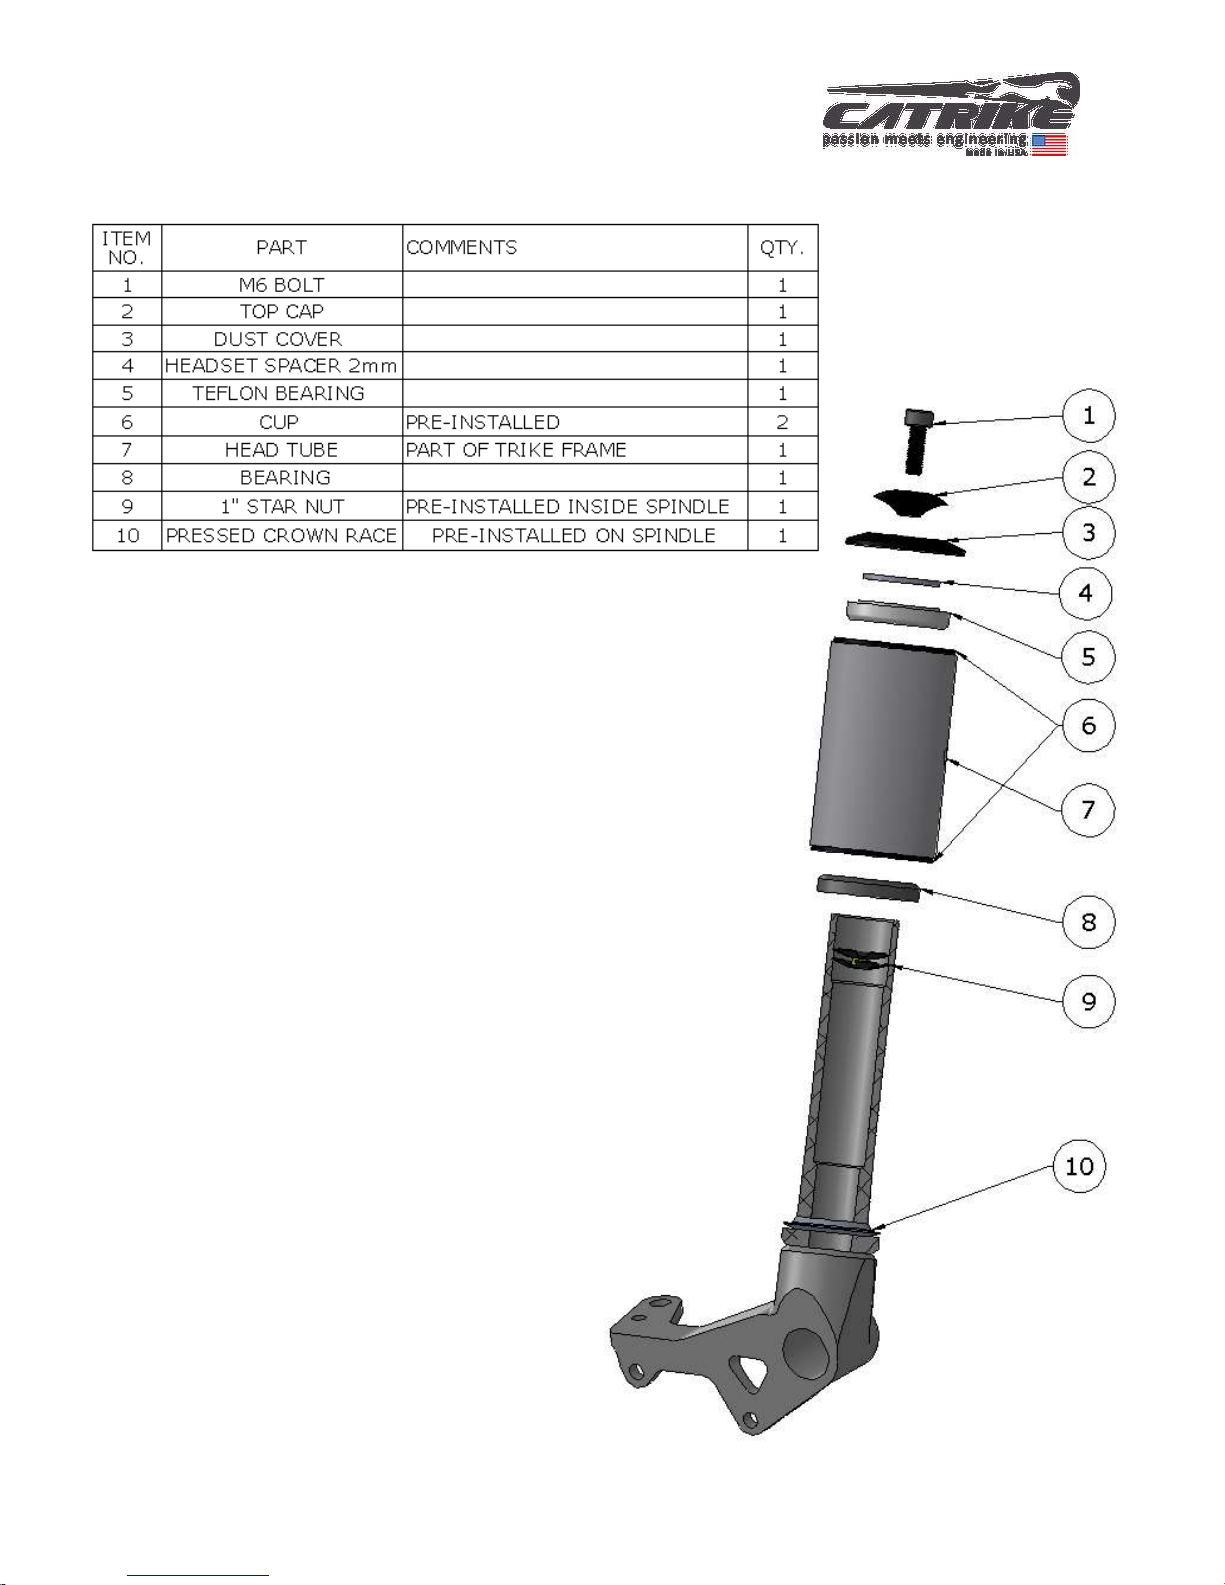
Install the spindles with headsets into the head tubes
• Remove the top half of the head set assembly and slide the spindle up into the head
tube. Reinstall the Teflon bearing and dust cover on the spindle. Install the handle bar
support tube onto the spindle without tightening the bolts. For standard handlebar
positioning, the handle bar supports should angle slightly up, not down (700 probably
best to install handle bar support angled down). Reinstall the head set top cap and
tighten it to 10 inch-pounds (or enough to eliminate play while leaving the wheels to
turn freely). Now adjust the handle bars in the proper position and tighten them down.
Image (shown left) correctly installed:
✓ Spindles
✓ headset
✓ brakes
✓ handlebars
✓ front wheel
OWNER’S MANUAL PAGE 17
Headset assembly
OWNER’S MANUAL PAGE 18
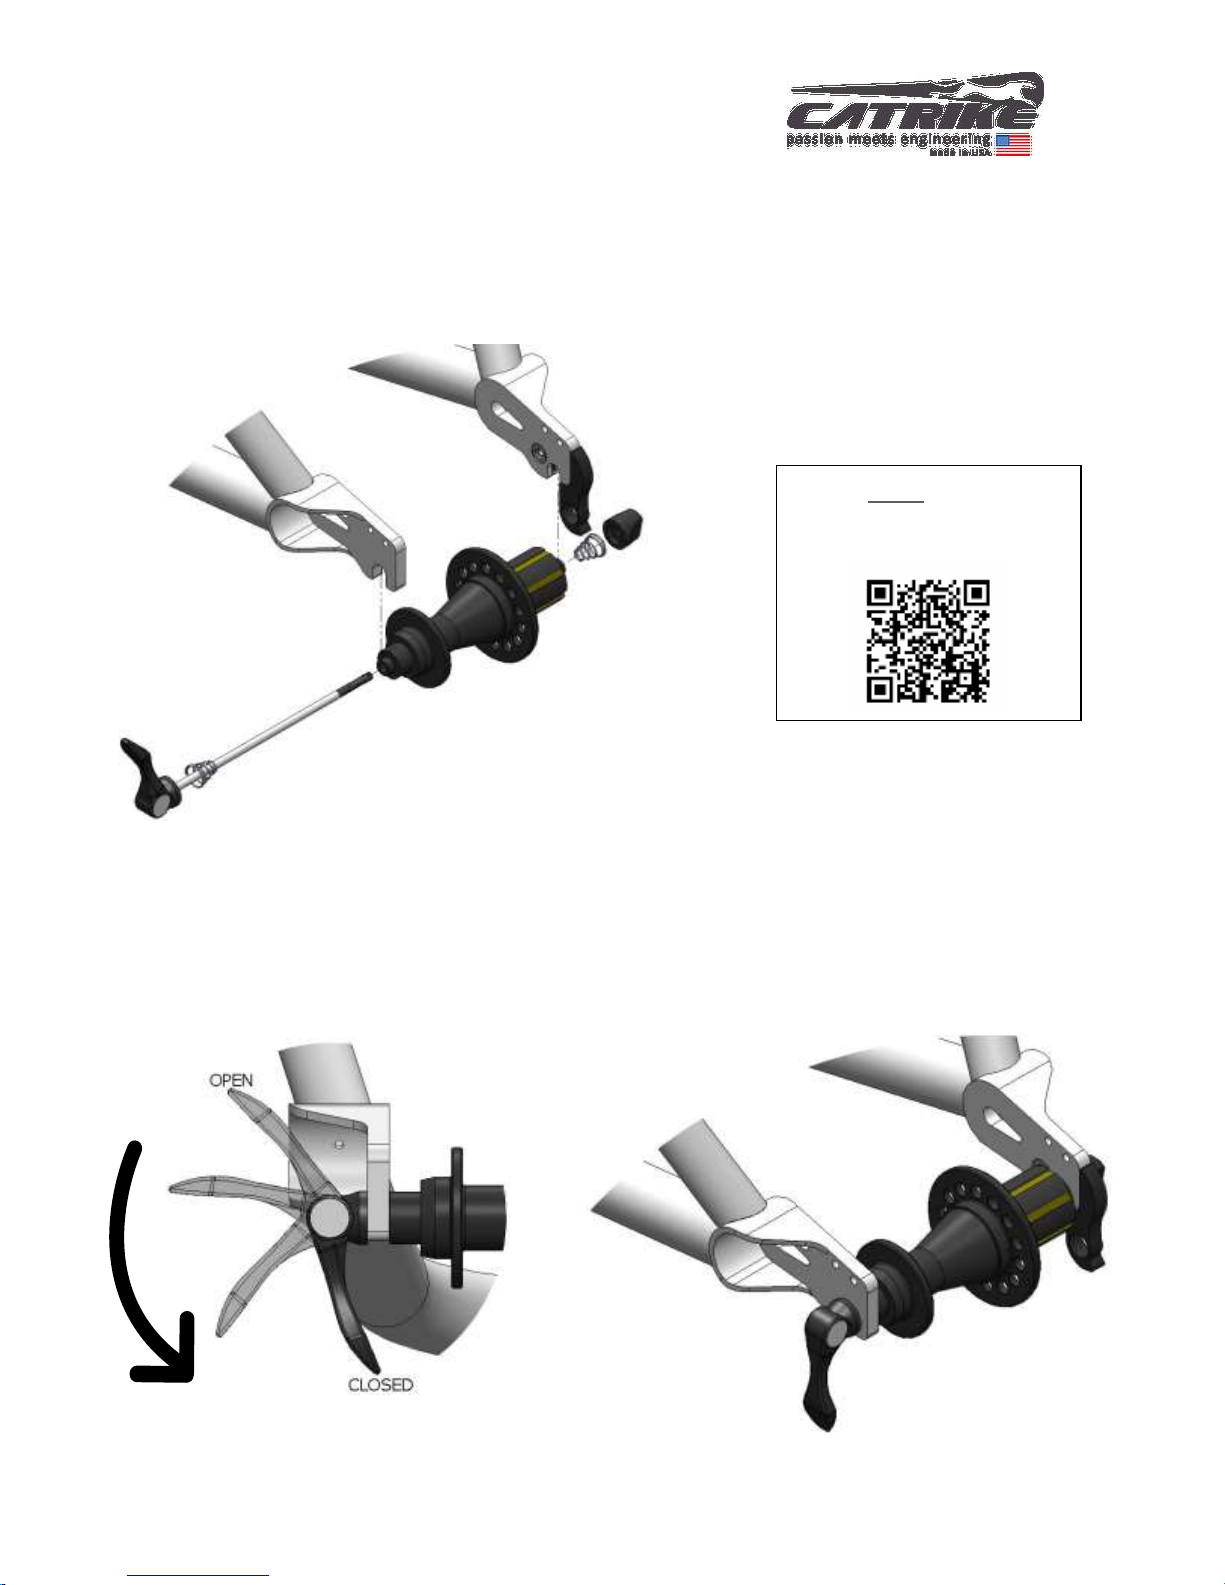
Install front wheels
Attach the front wheels to their respective spindle/steering arm assemblies. First,
identify the left and right wheels and set them on the correct side of the trike. Unscrew
the quick release to remove domed axle nuts for wheel installation.
Now you can place the wheel in position, sliding the disc in between the brake pads.
Place the wheel hub opening directly over the axle, then slide the axle through the hub
from behind the spindle assembly. The quick release lever goes on the inside of the
spindle. The bolt and its retaining ring go on wheel. Place the cone-shaped retaining
ring (flat side in) against the hub, thread the quick release bolt in and hand-tighten it.
Then close the quick release lever for a tight hold.
These quick releases hold the wheels on, so, it’s very important
that they be kept secure. Check them from time to time.
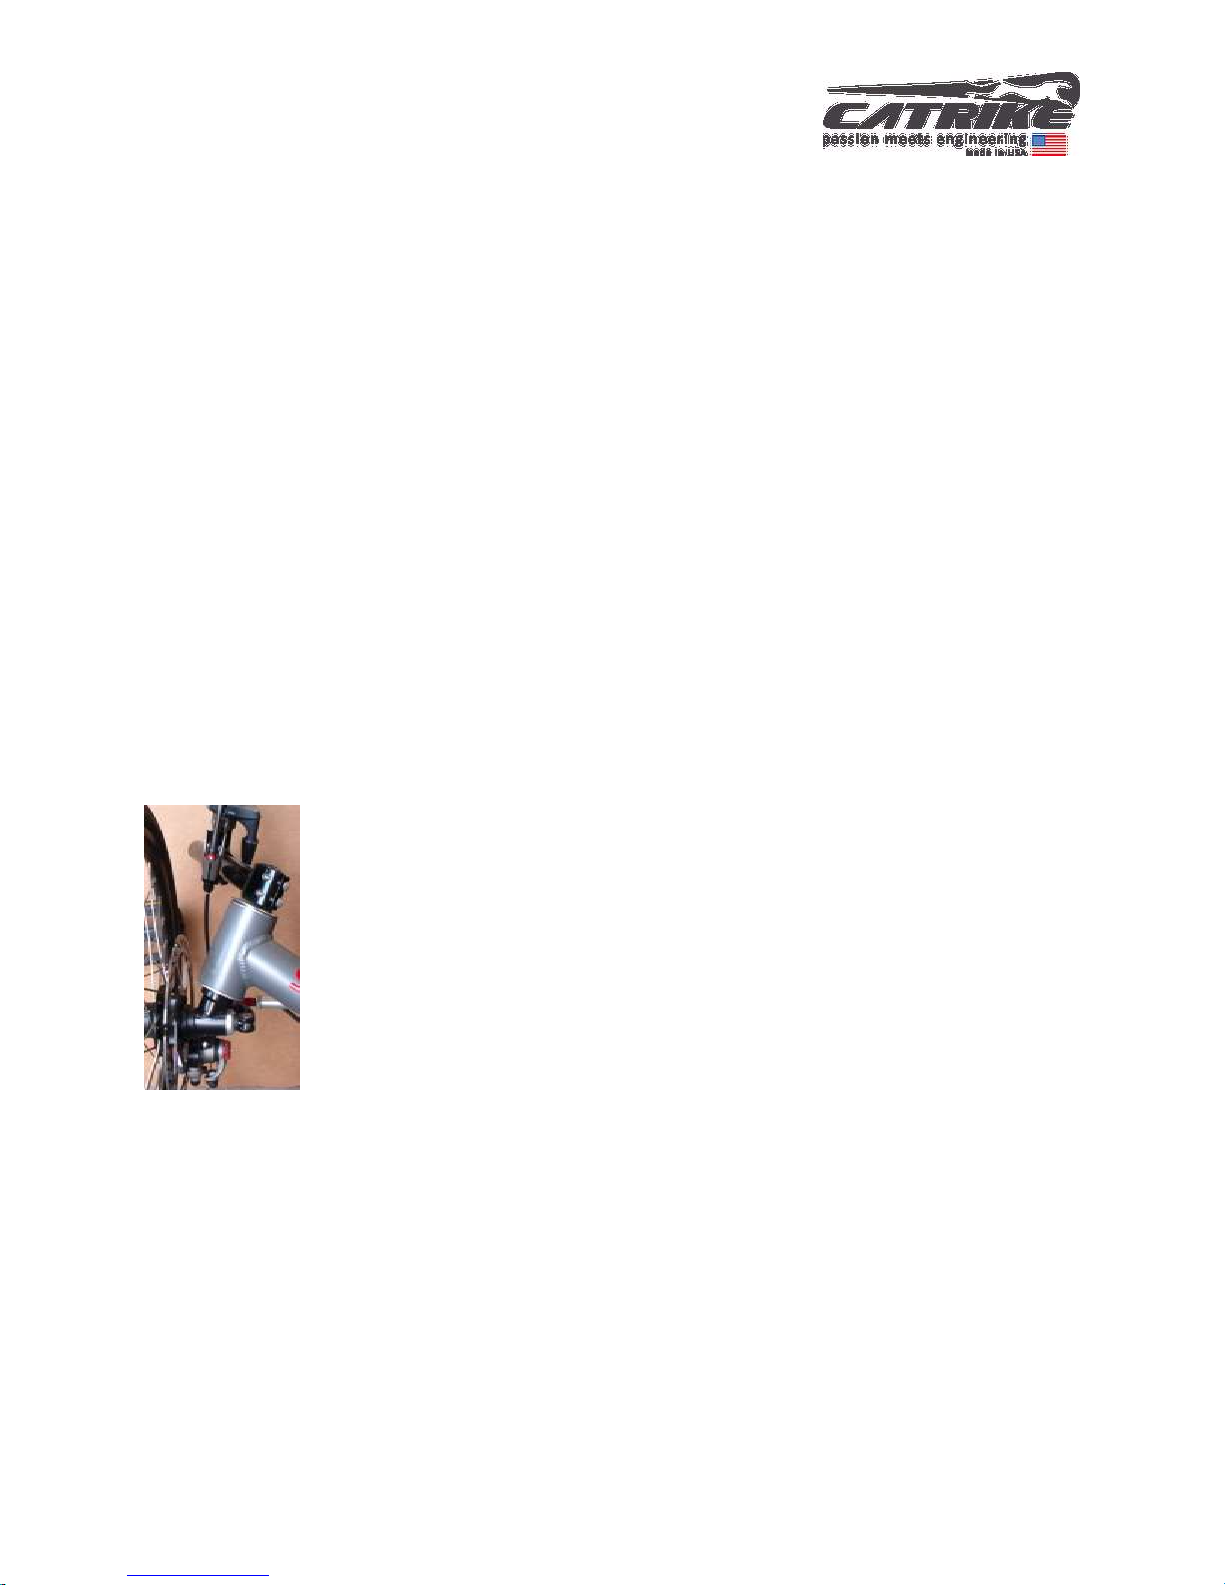
Handlebar adjustment
Your new Catrike adjustable handlebars can be adjusted in many ways to give each
Catrike owner a custom fit. The long, horizontal portion of the handlebar has a gentle
incline to it. For those riders who prefer lower handlebars, this can be installed upside
down to provide a gentle downward slope. The same holds true for the shorter grip
portion of the handlebar. It has a gentle angle leaning forward but can be reversed. You
can see the difference in mounting in the pictures below. The picture on the top shows
the recommended standard setup.
The handlebar sets come in left and right sides. When mounting them upside down,
simply swap sides to keep the heads of the screws on the
inside of the trike, making them easier to reach with the
Allen key.
Domed axle nut on
Outside when installed
Quick Release on Inside
when installed on trike
Click HERE or scan QR
code below to video aids.
OWNER’S MANUAL PAGE 19
Handlebars can be adjusted wide out for a better turning radius or in close to the body
for better aerodynamics. The grip portion of the handlebar is also fully adjustable.
TIP: Be sure the tightening bolts are completely loosened before attempting to move or
rotate the short grip portion of the handlebar to avoid scratching the surface of the bar.
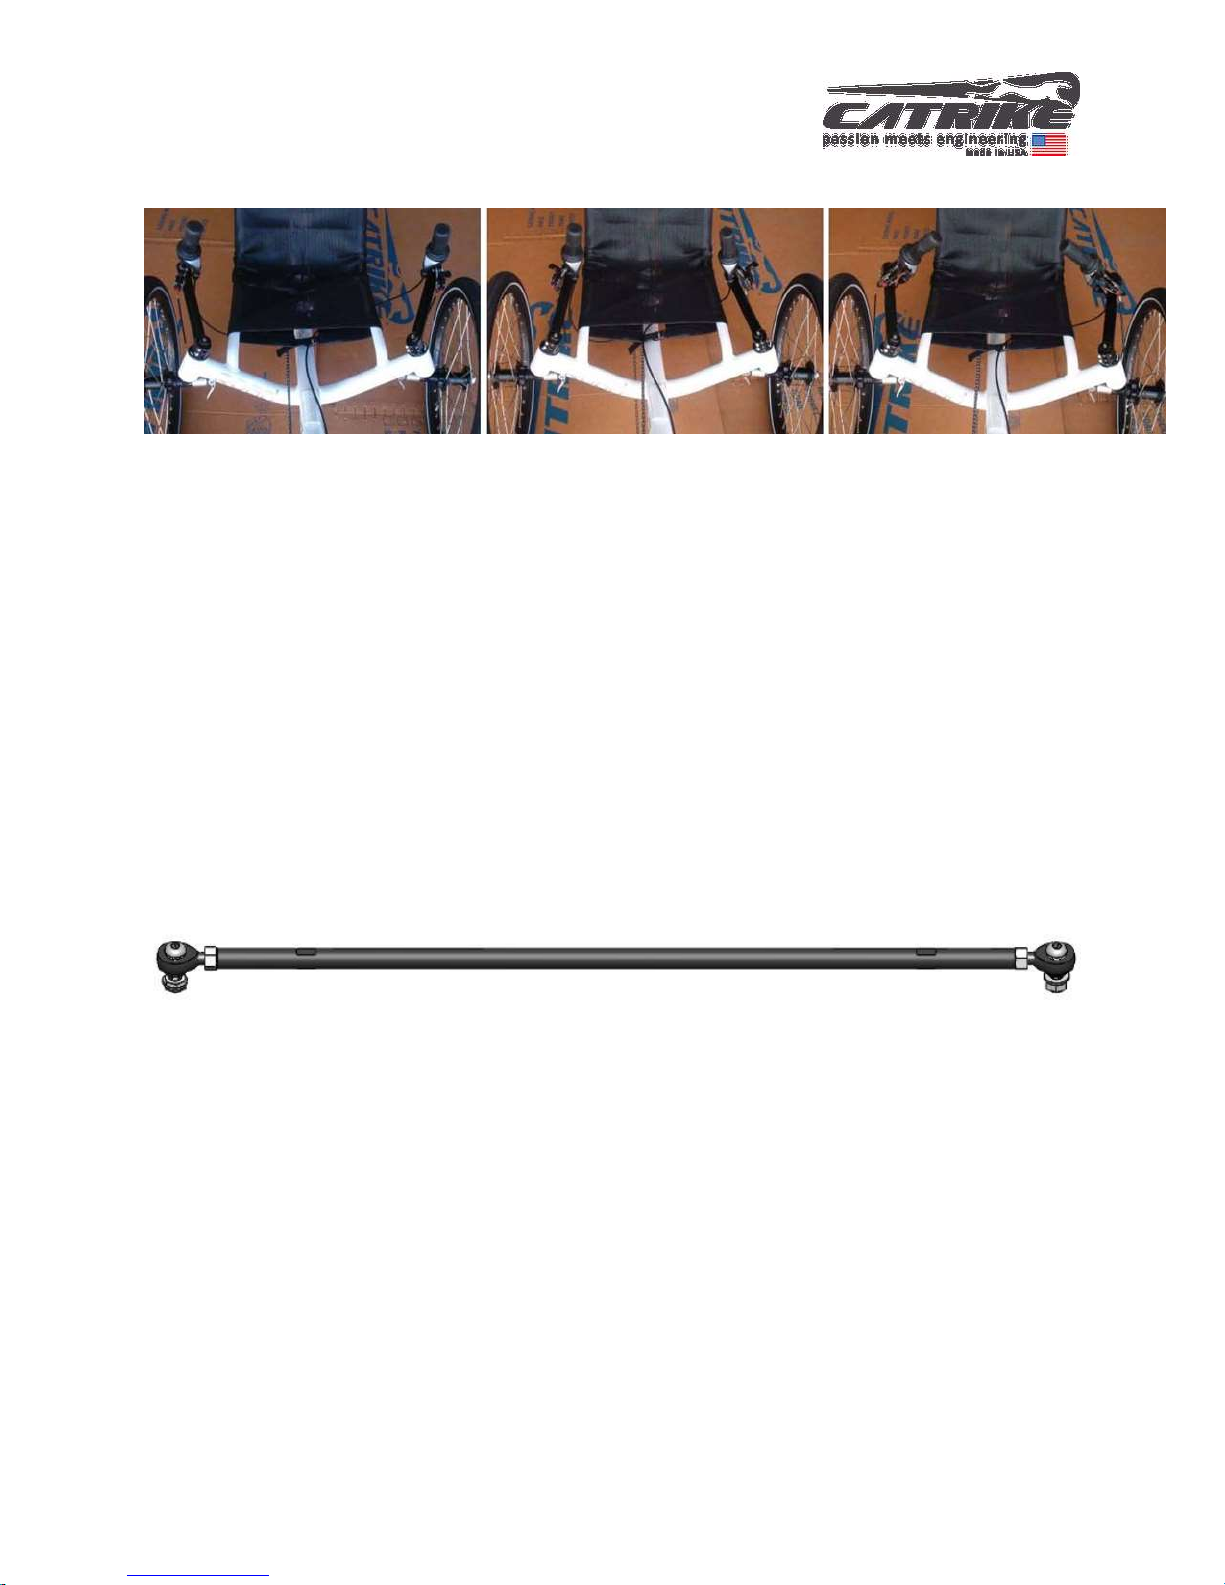
Install tie rod
The rod goes under the seat side rails and over the main frame tube, and bolts in place
on top of the small plates on the spindle assemblies.
All tie rods come with one right hand and one left hand tie rod ends. For now, just
install the tie rod. We'll be checking the toe later in the assembly instructions.
 Loading...