

Cathode Lighting Systems FCLS-Slim, HFCLS-Slim Installation Manual
Installation Manual Page 1
Models FCLS-Slim & HFCLS-Slim
(Regular & High Efficiency Flexible Cathole Light Strip)
For indoor dry or protected indoor damp location installation only.
Operating temperature range 55º F to 90ºF.
INDEX Page 1: Introduction
Page 2: Typical luminaire configuration
Page 3: Preparing the luminaire for installation
Page 4 & 5: Installation sequence overview
Page 6 & 7: Mounting the luminaire
Page 8: Lamp lock feature
Page 9: Connection to the branch circuit
Page 10: Wiring diagram
Page 11: Electrical Information / Checklist / Troubleshooting
SECTION
E168380
Patent 6,454,431
Patent 7,293,895
PLEASE READ THIS MANUAL THOROUGHLY PRIOR TO INSTALLING THIS LUMINAIRE
WARNING: These luminaires are to be installed in surface-mounted, non-concealed locations only. They may
not be recessed into the building structure. No part of the luminaire may be concealed behind drywall, permanent
ceiling, or any other similar structure.
This luminaire must be installed by a licensed electrical contractor, and must be installed in accordance with all
applicable local, and national electric codes.
This flexible cold cathode fluorescent luminaire has been designed to allow a single flexible luminaire to be utilized
with a variety of cold cathode lamp shapes and sizes. The modular connection method used to electrically wire
one luminaire to the next allows for rapid installation. Each luminaire is composed of three anodized aluminum
enclosures, permanently connected by two lengths of flexible electrical cord. The middle enclosure contains the
ballast. The two end-enclosures each contain a lampholder into which lamp ends are inserted and electrically
connected. A jumper cable to interconnect luminaires is provided with each luminaire. Utilizing electrical quick
connects and snap-in strain reliefs, the jumper cable is connected to an adjacent luminaire to the branch circuit.
Integral mounting brackets are incorporated into each of the aluminum enclosures, allowing the electrician to
mount the luminiares with the lamps in place.
8020 Queenair Drive, Gaithersburg, MD 20879 USA • phone: 301 921 4120 • fax: 301 963 3050
email: info@CathodeLightingSystems.com • website: www.CathodeLightingSystems.com
FCLS-Slim Manual 8-11
©2011 Cathode Lighting Systems Inc.
Installation Manual Page 2
TYPICAL LUMINAIRE CONFIGURATION
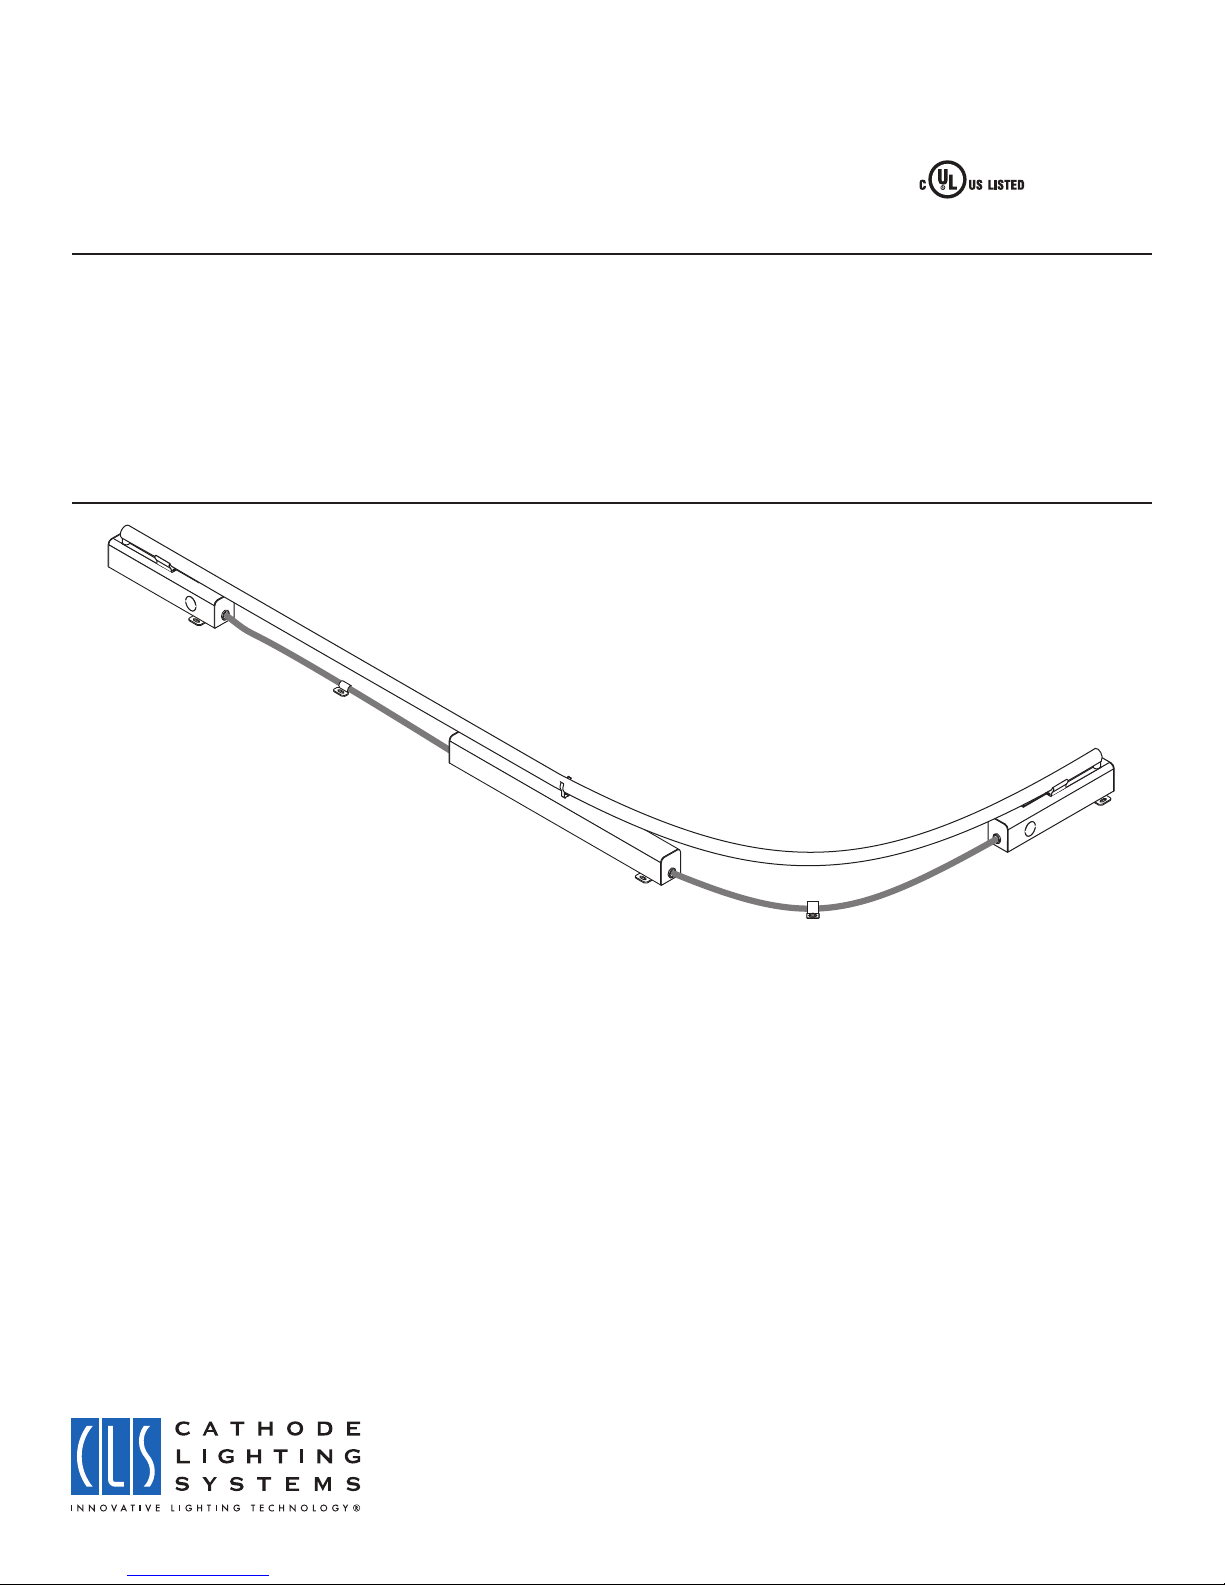
The FCLS-Slim is a flexible fluorescent luminaire, and can be configured in the field to accommodate straight,
curved or bent lamps from Cathode Lighting Systems. Interconnections are made externally from one luminaire to
the next using modular jumper cable assemblies which install quickly and easily.
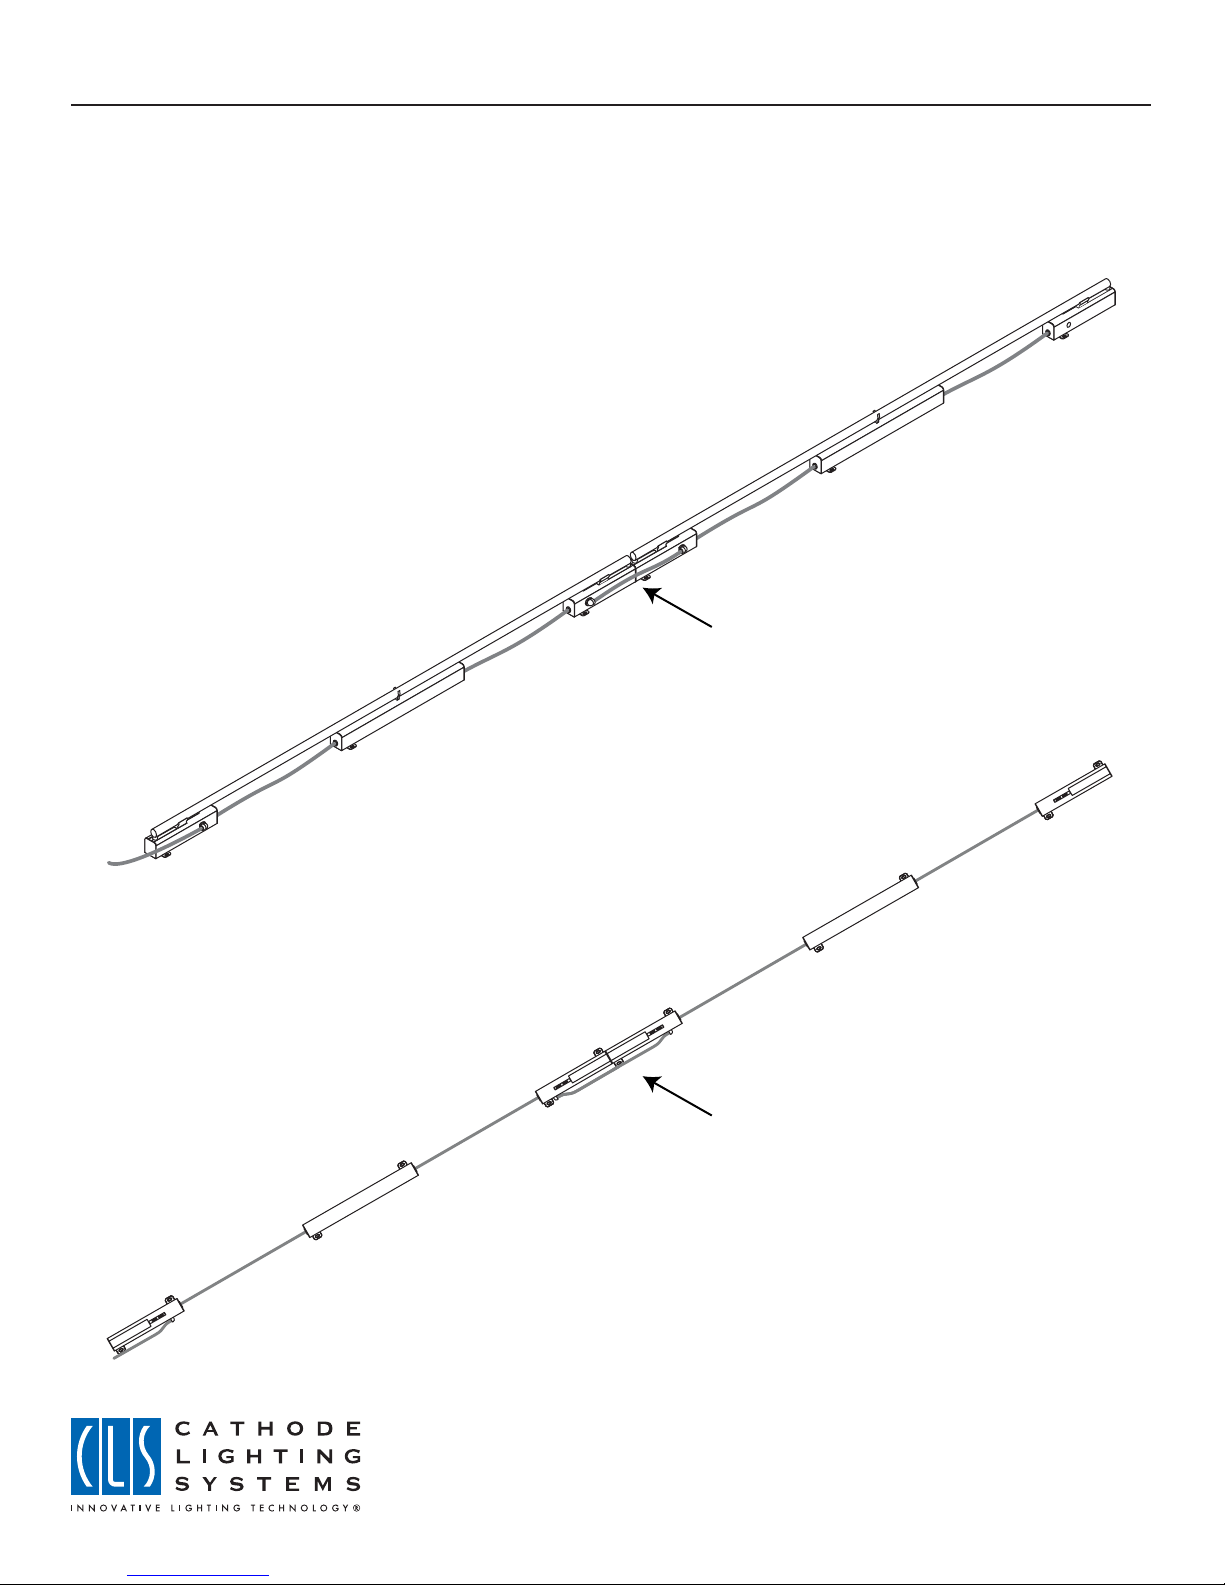
Perspective view of a section of
luminaires, with lamps installed.
Jumper cable
Overhead view of a section
of luminaires, without lamps installed.
8020 Queenair Drive, Gaithersburg, MD 20879 USA • phone: 301 921 4120 • fax: 301 963 3050
email: info@CathodeLightingSystems.com • website: www.CathodeLightingSystems.com
FCLS-Slim Manual 8-11
Jumper cable
©2011 Cathode Lighting Systems Inc.
Installation Manual Page 3
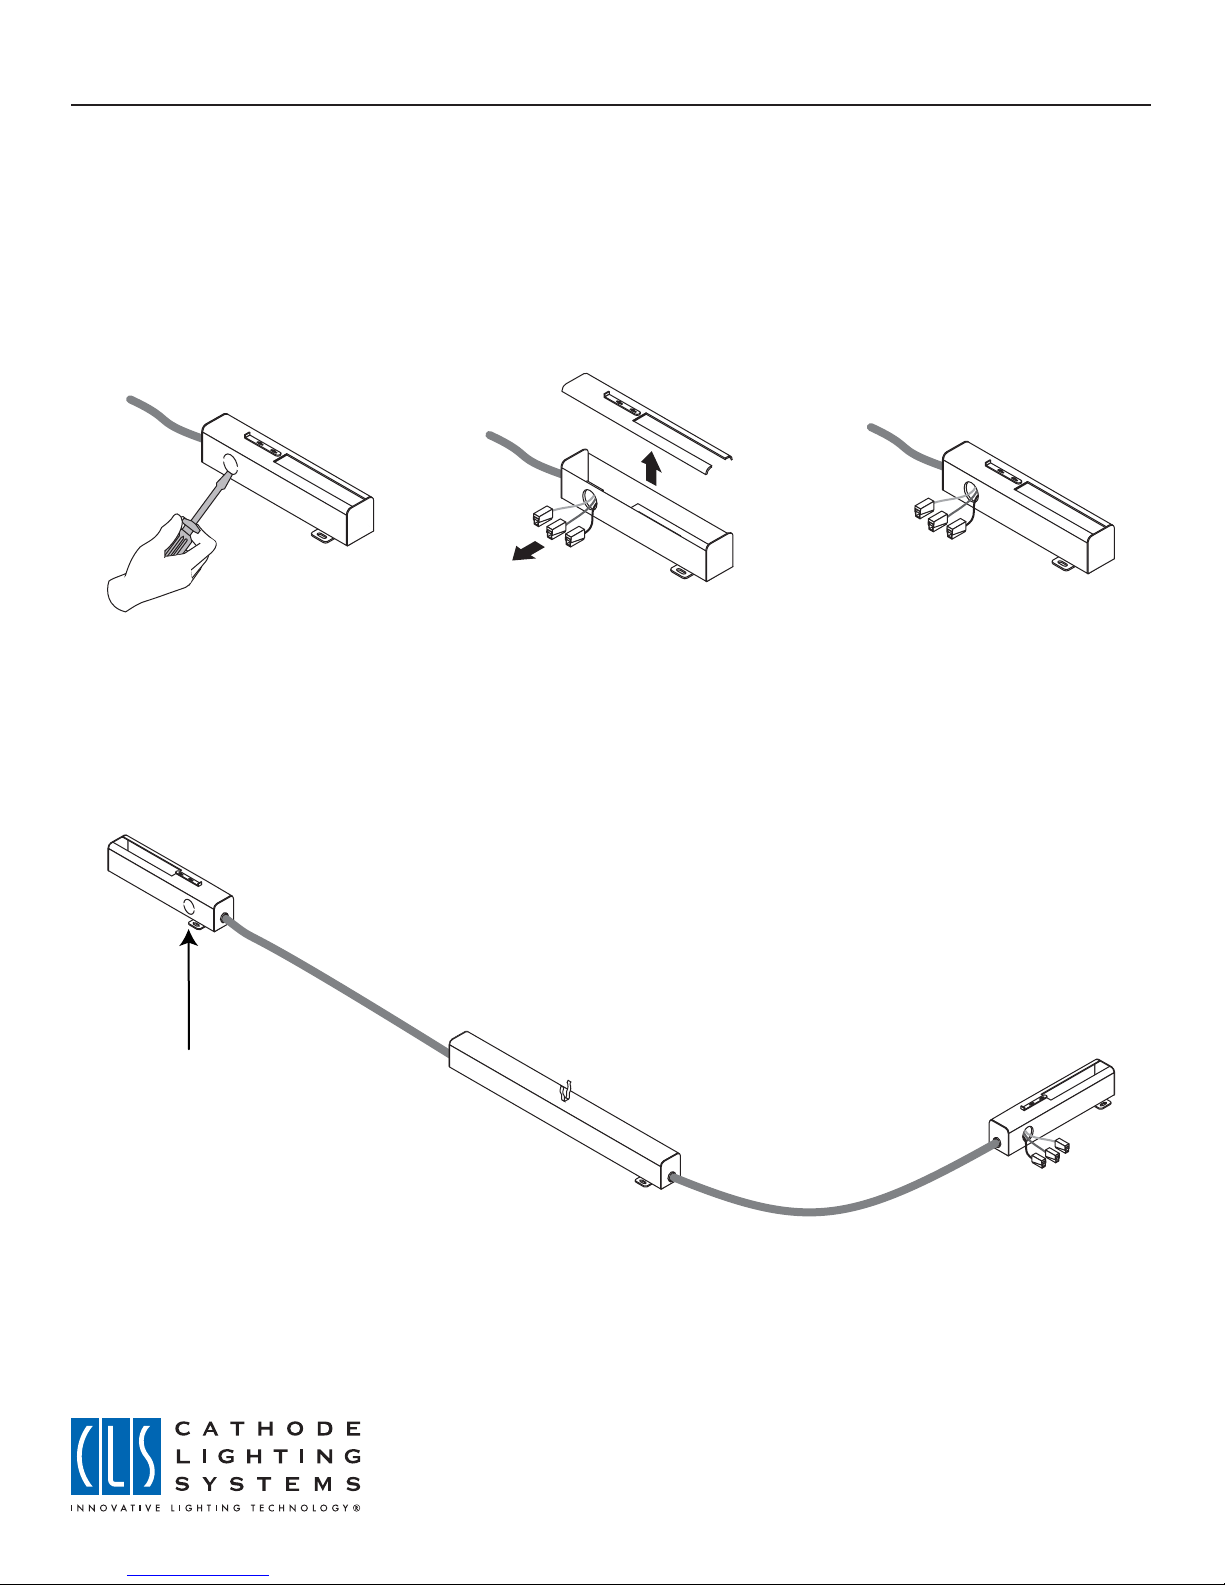
PREPARING THE LUMINAIRE FOR INSTALLATION
Luminaires are shipped pre-assembled from the factory. The only field preparation required is that the pryouts at
the end of each luminaire must be removed and the quick-connect wiring inside must be withdrawn so that it may
be connected to the pre-assembled jumper cables. In some instances, a luminaire (or array of luminaires) will
terminate, and no wiring will be required into the last enclosure. The pryouts are intended to be left undisturbed in
these situations.
Step No. 1:
Remove pryout
Pryouts are to be left in
place if no wiring is required
into the end of a luminaire
Step No. 2:
Remove snap-on cover, discard
pryout slug and careully feed the
three quick connect terminals and
wire through the open hole
Step No. 3:
Replace snap-on cover
8020 Queenair Drive, Gaithersburg, MD 20879 USA • phone: 301 921 4120 • fax: 301 963 3050
email: info@CathodeLightingSystems.com • website: www.CathodeLightingSystems.com
FCLS-Slim Manual 8-11
©2011 Cathode Lighting Systems Inc.

Installation Manual Page 4
INSTALLATION SEQUENCE OVERVIEW
This luminaire is designed to be daisy-chained together, using a pre-assembled jumper (to connect one luminaire to
the next) and quick connect terminals which allow for tool-free wiring. All luminaires are shipped from the factory
with internal quick wiring terminals which must be relocated so that they are accessable from the luminaire’s
exterior. Once they have been relocated, they are connected to the jumper cable and then re-inserted back into
the luminaire.
Step No. 1:
Insert lamp
Step No. 2:
Mount luminaire
Step No. 3:
Connect jumper wires to quick connect terminals: Black to Black (hot) , White to White (neutral) and Green to
Green (ground)
A
B
Pre-assembled
jumper cable
Step No. 4:
Carefully install wiring back into luminaire and push snap-in strain relief into the hole until it clicks into place.
Jumper may now be connected to the adjacent luminaire or to the branch circuit.
A
8020 Queenair Drive, Gaithersburg, MD 20879 USA • phone: 301 921 4120 • fax: 301 963 3050
email: info@CathodeLightingSystems.com • website: www.CathodeLightingSystems.com
FCLS-Slim Manual 8-11
B
©2011 Cathode Lighting Systems Inc.
 Loading...