

Page 1

MAINTENANCE INTERVALS
Operation and Maintenance
Manual Excerpt
© 2010 Caterpillar
All Rights Reserved
®
®
Page 2
Operation and
Maintenance
Manual
SEBU7267
September 1999
416C, 426C, 428C, 436C and 438C
Backhoe Loaders
5YN16590-Up (Machine)
7WN1100-Up (Machine)
8RN4990-Up (Machine)
9JN1050-Up (Machine)
9KN1400-Up (Machine)
1ER900-Up (Machine)
1GR950-Up (Machine)
1JR1150-Up (Machine)
1NR1050-Up (Machine)
1RR1100-Up (Machine)
1TR1850-Up (Machine)
1XR2250-Up (Machine)
1ZR1000-Up (Machine)
2BR1000-Up (Machine)
2CR19310-Up (Machine)
2DR3450-Up (Machine)
Page 3

188
Maintenance Section
Maintenance Interval Schedule
i01126021
Maintenance Interval Schedule
SMCS Code: 7000
Note: All safety information, warnings, and
instructions must be read and understood before
you perform any operation or any maintenance
procedure.
Before each consecutive interval is performed, all
of the maintenance requirements from the previous
interval must also be performed.
The normal oil change interval is Every 500 Service
Hours or Three Months. If the engine is operated
under severe conditions or if the oil is not Caterpillar
oil, change the oil after Every 250 Service Hours
or after One Month. Severe conditions include the
following factors: high temperatures, continuous
high loads, and extremely dusty conditions.
Refer to the results of the S·O·S oil analysis in order
to determine if the oil change interval should be
decreased to 250 hours. Consult your Caterpillar
Dealer for detailed information regarding the
optimum oil change interval.
Note: Certain machines are equipped with engines
that require the engine valve lash to be checked
every 1000 service hours or 6 months. Refer to the
Operation and Maintenance Manual, “Engine Valve
Lash - Check” for further information.
When Required
Engine Oil Level - Check .................................... 208
Extendable Stick Pads - Inspect/Replace ........... 210
Fuel System Water Separator - Drain ................. 214
Hydraulic System Oil Level - Check .................... 220
Kingpin Bearings (Front) - Lubricate ................... 220
Loader Bucket, Cylinder, and Linkage Bearings -
Lubricate ........................................................... 221
Seat Belt - Inspect .............................................. 224
Secondary Steering Test .................................... 225
Stabilizer and Cylinder Bearings - Lubricate ....... 225
Swing Frame and CylinderBearings-Lubricate .. 226
Tire Inflation - Check ........................................... 226
Transmission Oil Level - Check ........................... 229
Walk-Around Inspection ...................................... 232
Wheel Nut Torque - Check .................................. 233
Windows - Clean ................................................. 234
Every 50 Service Hours or Weekly
Axle Universal Joint (Front) - Lubricate............... 190
Cab Air Filter - Clean/Replace ............................ 195
Fuel Tank Water and Sediment - Drain ............... 215
Parking Brake - Check/Adjust ............................. 222
Every 250 Service Hours or Monthly
Axle Universal Joint (Rear) - Lubricate ............... 190
Cooling SystemCoolant Additive (DEAC)- Add .. 199
Differential Oil Level (Front) - Check ................... 203
Differential Oil Level (Rear) - Check ................... 204
Engine Oil and Filter - Change ........................... 208
Final Drive Oil Level (Front) - Check ................... 212
Final Drive Oil Level (Rear) - Check ................... 212
Kingpin Bearings (Rear) - Lubricate ................... 220
Sideshift Stabilizer Wear Pads - Inspect ............. 225
V-Belts - Inspect/Adjust/Replace ........................ 230
Air Conditioner - Test .......................................... 190
Battery - Recycle ................................................ 192
Battery Electrolyte Level - Check ........................ 192
Battery or Battery Cable - Replace ..................... 192
Bucket Cutting Edges - Inspect/Replace ............ 194
Bucket Tips - Inspect/Replace ............................ 195
Engine Air Filter Primary Element -
Clean/Replace .................................................. 205
Engine Air Filter Secondary Element - Replace .. 206
Fuel System - Prime ........................................... 213
Fuses - Replace .................................................. 216
Oil Filter - Inspect ................................................ 222
Radiator Core - Clean ......................................... 223
Window Wipers - Inspect/Replace ...................... 234
Every 10 Service Hours or Daily
Backhoe Boom, Stick, Bucket, and Cylinder Bearings
- Lubricate ......................................................... 191
Backup Alarm - Test ............................................ 191
Brake Reservoir Oil Level - Check ...................... 193
Braking System - Test ......................................... 193
Cooling System Level - Check ............................ 200
Engine Air Filter Service Indicator - Inspect ........ 207
Every 500 Service Hours or 3 Months
Drive Shaft Spline - Lubricate ............................. 204
Engine Oil and Filter - Change ........................... 208
Fuel System Filter - Replace .............................. 213
Fuel System Water Separator Element -
Replace ............................................................. 215
Hydraulic System Oil Filter - Replace ................. 219
Transmission Oil Filter - Replace ........................ 229
Every 500 Service Hours or 3 Months for
Machines Used in Severe (50% or more of
loader work) Applications
Differential Oil (Rear) - Change .......................... 203
Every 1000 Service Hours or 6 Months
Differential Oil (Front) - Change .......................... 202
Differential Oil (Rear) - Change .......................... 203
Engine Valve Lash - Check ................................. 210
Final Drive Oil (Front) - Change .......................... 211
Final Drive Oil (Rear) - Change .......................... 212
Rollover Protective Structure (ROPS) - Inspect .. 224
Page 4

Transmission Magnetic Screen - Clean .............. 226
Transmission Oil - Change .................................. 227
Wheel Bearings (Front) - Lubricate ..................... 233
Every 2000 Service Hours or 1 Year
Engine Valve Lash - Check ................................. 210
Hydraulic System Oil - Change ........................... 217
Every 3000 Service Hours or 2 Years
Cooling System Coolant (DEAC) - Change ........ 196
Cooling System Coolant Extender (ELC) - Add .. 200
Cooling System Water Temperature Regulator -
Clean/Replace .................................................. 201
Every 6000 Service Hours or 4 Years
Cooling System Coolant (ELC) - Change ........... 198
189
Maintenance Section
Maintenance Interval Schedule
Page 5
190
Maintenance Section
Air Conditioner - Test
i00079668
Air Conditioner - Test
(If Equipped)
SMCS Code: 7320
NOTICE
Refrigerant in the air conditioner system can cause
personal injury. Avoid any contact with refrigerant.
Check the refrigerant before warm weather begins.
Check the refrigerant when the system does not
work properly.
The system should be checked with pressure
gauges by a qualified technician. Consult your
Caterpillar dealer for proper installation when the
system needs refrigerant.
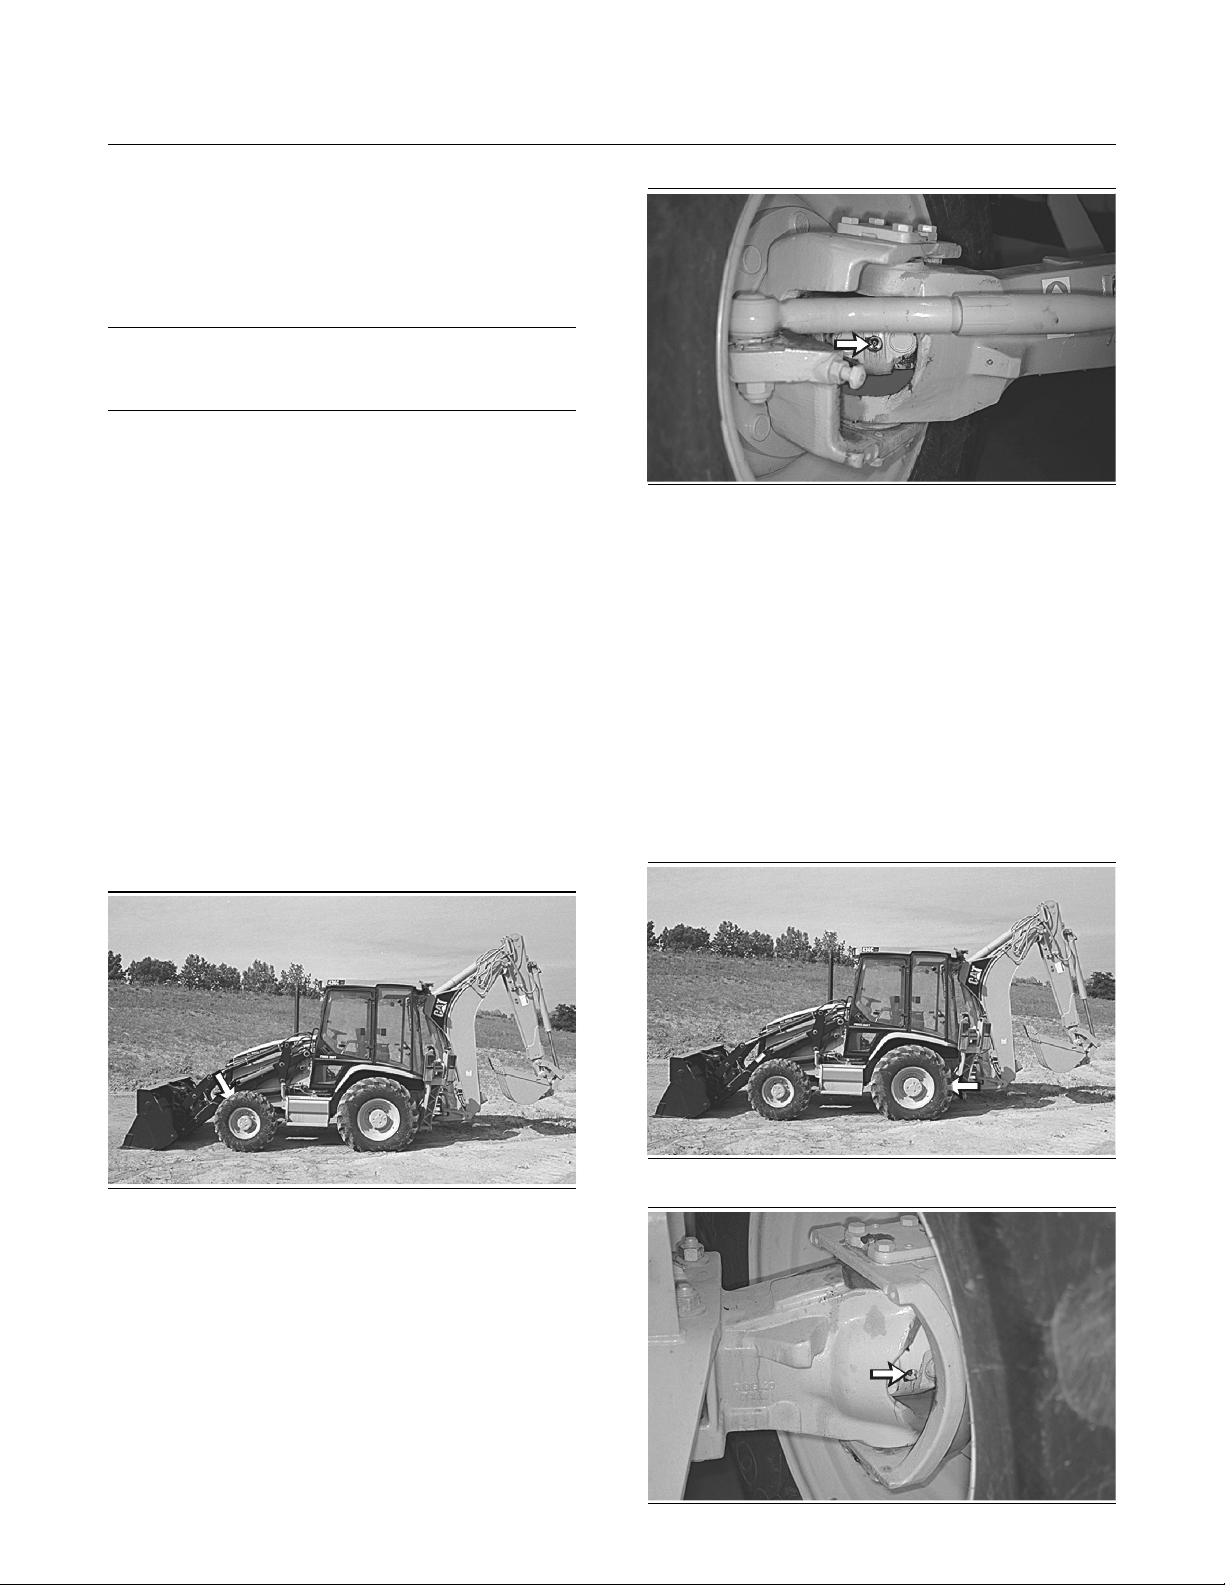
Illustration 266
Apply lubricant to the grease fittings for the drive
shaft to the final drives. There are two grease fittings
for each drive shaft.
g00290596
Operate the air conditioner at least monthly in order
to lubricate the compressor seals. Set the controls
on MAXIMUM for 15 minutes.
i00595214
Axle Universal Joint (Front) Lubricate
SMCS Code: 3251
Illustration 265
g00290595
i00613528
Axle Universal Joint (Rear) Lubricate
(All Wheel Steer Machines
Only)
SMCS Code: 3251
Illustration 267
g00287245
Illustration 268
g00287244
Page 6
Backhoe Boom, Stick, Bucket, and Cylinder Bearings - Lubricate
Apply lubricant to the grease fittings for the universal
joints of each drive shaft to the final drives. There
are two grease fittings for each universal joint.
i01179717
Backhoe Boom, Stick, Bucket,
and Cylinder Bearings Lubricate
SMCS Code: 6501; 6502; 6503; 6510; 6511; 6512;
6513; 6533
191
Maintenance Section
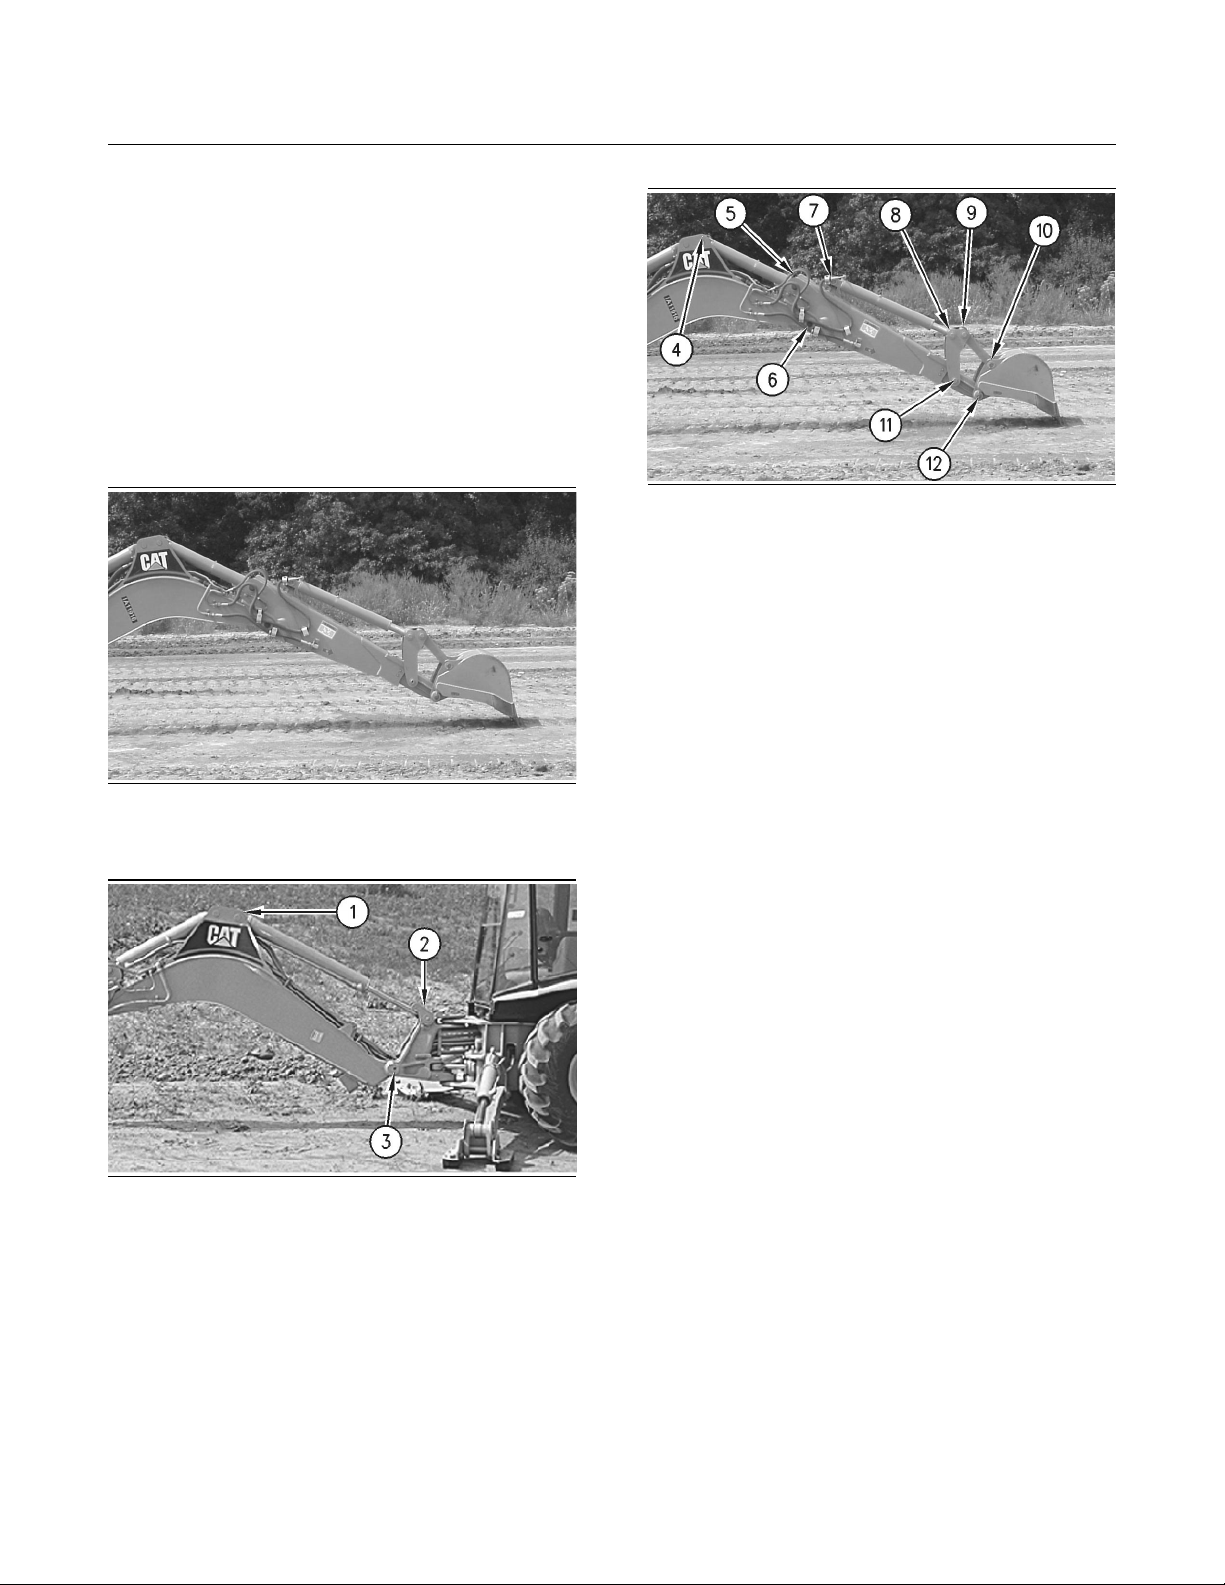
Illustration 269
Position the backhoe into the service position.
g00633021
Illustration 271
Apply lubricant to the grease fitting (4) for the head
end of the stick cylinder. Apply lubricant to the
grease fitting (5) for the rod end of the stick cylinder.
Apply lubricant to the grease fitting (6) for the pivot
pin for the stick.
Apply lubricant to the grease fitting (7) for the head
end of the bucket cylinder. Apply lubricant to the
grease fitting (8) for the rod end of the bucket
cylinder.
Apply lubricant to the grease fitting (9) for the top
of the link.
Apply lubricant to the grease fitting (10) for the
bottom of the link.
Apply lubricant to the grease fitting (11) for the
pivot pin.
Apply lubricant to the grease fitting (12) for the
bucket pivot pin.
g00632950
Illustration 270
Apply lubricant to the grease fitting (1) for the
head end of the boom cylinder. Apply lubricant to
the grease fitting (2) for the rod end of the boom
cylinder.
Apply lubricant to the grease fitting (3) for the boom
pivot. There is one grease fitting on each side of
the machine.
g00287247
i00080741
Backup Alarm - Test
SMCS Code: 7406
Turn the engine start switch key to ON in order to
perform the test.
Apply the service brake. Move the transmission
direction control lever to REVERSE position.
The backup alarm should immediately sound.
The backup alarm will continue to sound until the
transmission direction control lever is moved to the
NEUTRAL position or to the FORWARD position.
Page 7
192
Maintenance Section
Battery - Recycle
i01176086
Battery - Recycle
SMCS Code: 1401
1. Always recycle a battery. Never discard a battery.
2. Always return used batteries to one of the
following locations.
A battery supplier
•
An authorized battery collection facility
•
Recycling facility
•
Illustration 272
g00282160
i00588592
Battery Electrolyte Level Check
SMCS Code: 1401
Table 119
THE TABLE FOR THE BATTERY ELECTROLYTE
Battery Interval
Conventional 100 Hours
Low Maintenance 250 Hours
Maintenance Free Maintenance Free
Tighten the battery retainers on all of the machines.
Tighten the battery retainers at every 1000 hours.
Check the following items at every 1000 hours. If
necessary, check the following items more often.
Clean the top of the batteries with a clean cloth.
•
Clean the battery terminals. As needed, coat the
•
battery terminals with petroleum jelly.
A battery should not require more than 30 cc (1 oz)
of water per cell per week. This should exist with the
proper charging rate and with a moderate climate.
In extreme temperatures, check the water in the
cells weekly.
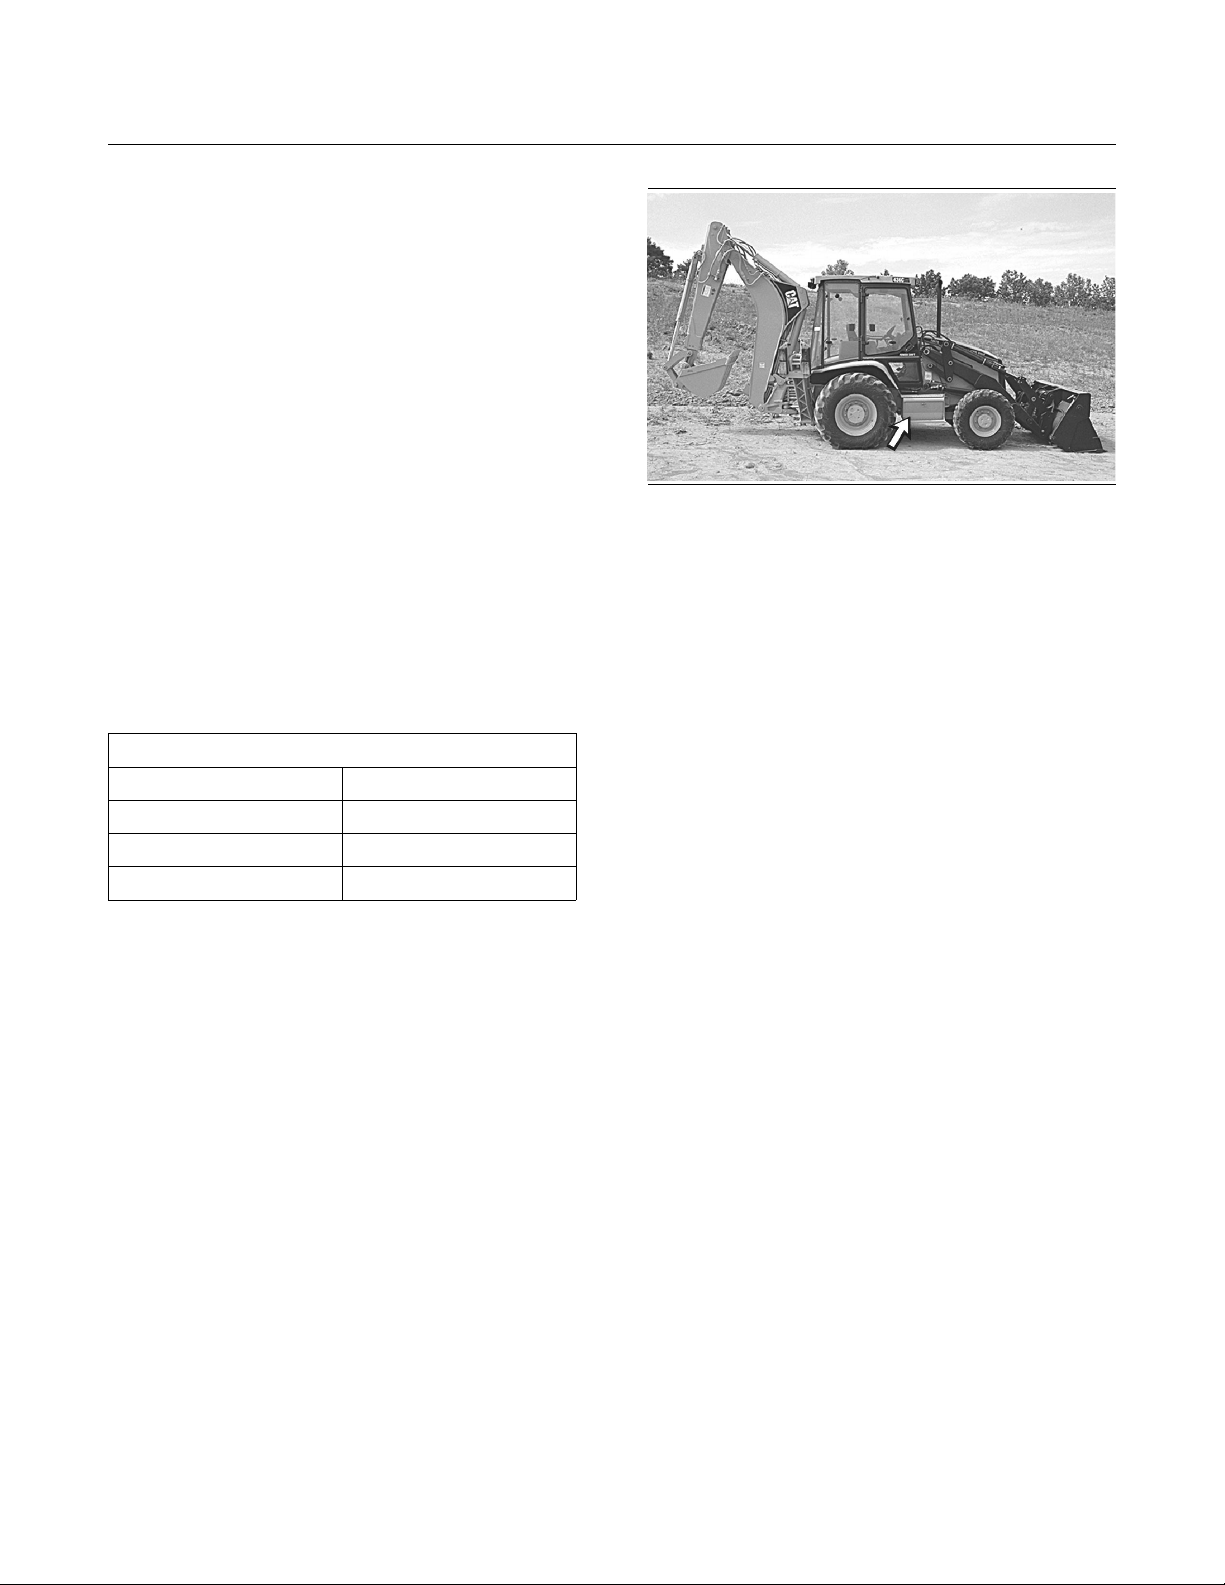
1. Open the battery access cover that is located on
the right side of the machine.
2. Clean the battery surface with a clean cloth.
Keep the terminals clean and keep the terminals
coated with petroleum jelly. Install the post cover
after you coat the post with petroleum jelly.
3. Inspect the electrolyte level in each battery cell.
A maintenance free battery does not require
inspection. Maintain the electrolyte level to the
bottom of the filler openings. Use distilled water.
If distilled water is not available, use clean
drinking water.
4. Close the battery access cover.
i00596682
Battery or Battery Cable Replace
SMCS Code: 1401
1. Turn the engine start switch to the OFF position.
Turn all switches to the OFF position.
2. Disconnect the negative battery cable from the
frame.
Note: Do not allow the disconnected battery cable
to contact the frame of the machine.
3. Disconnect the negative battery cable at the
battery.
4. Perform the necessary repairs. Replace the
cable or the battery, as needed.
5. Connect the negative battery cable at the battery.
6. Connect the battery cable to the frame of the
machine.
Page 8
193
Maintenance Section
Brake Reservoir Oil Level - Check
7. Install the engine start switch key.
Brake Reservoir Oil Level Check
SMCS Code: 4291-535
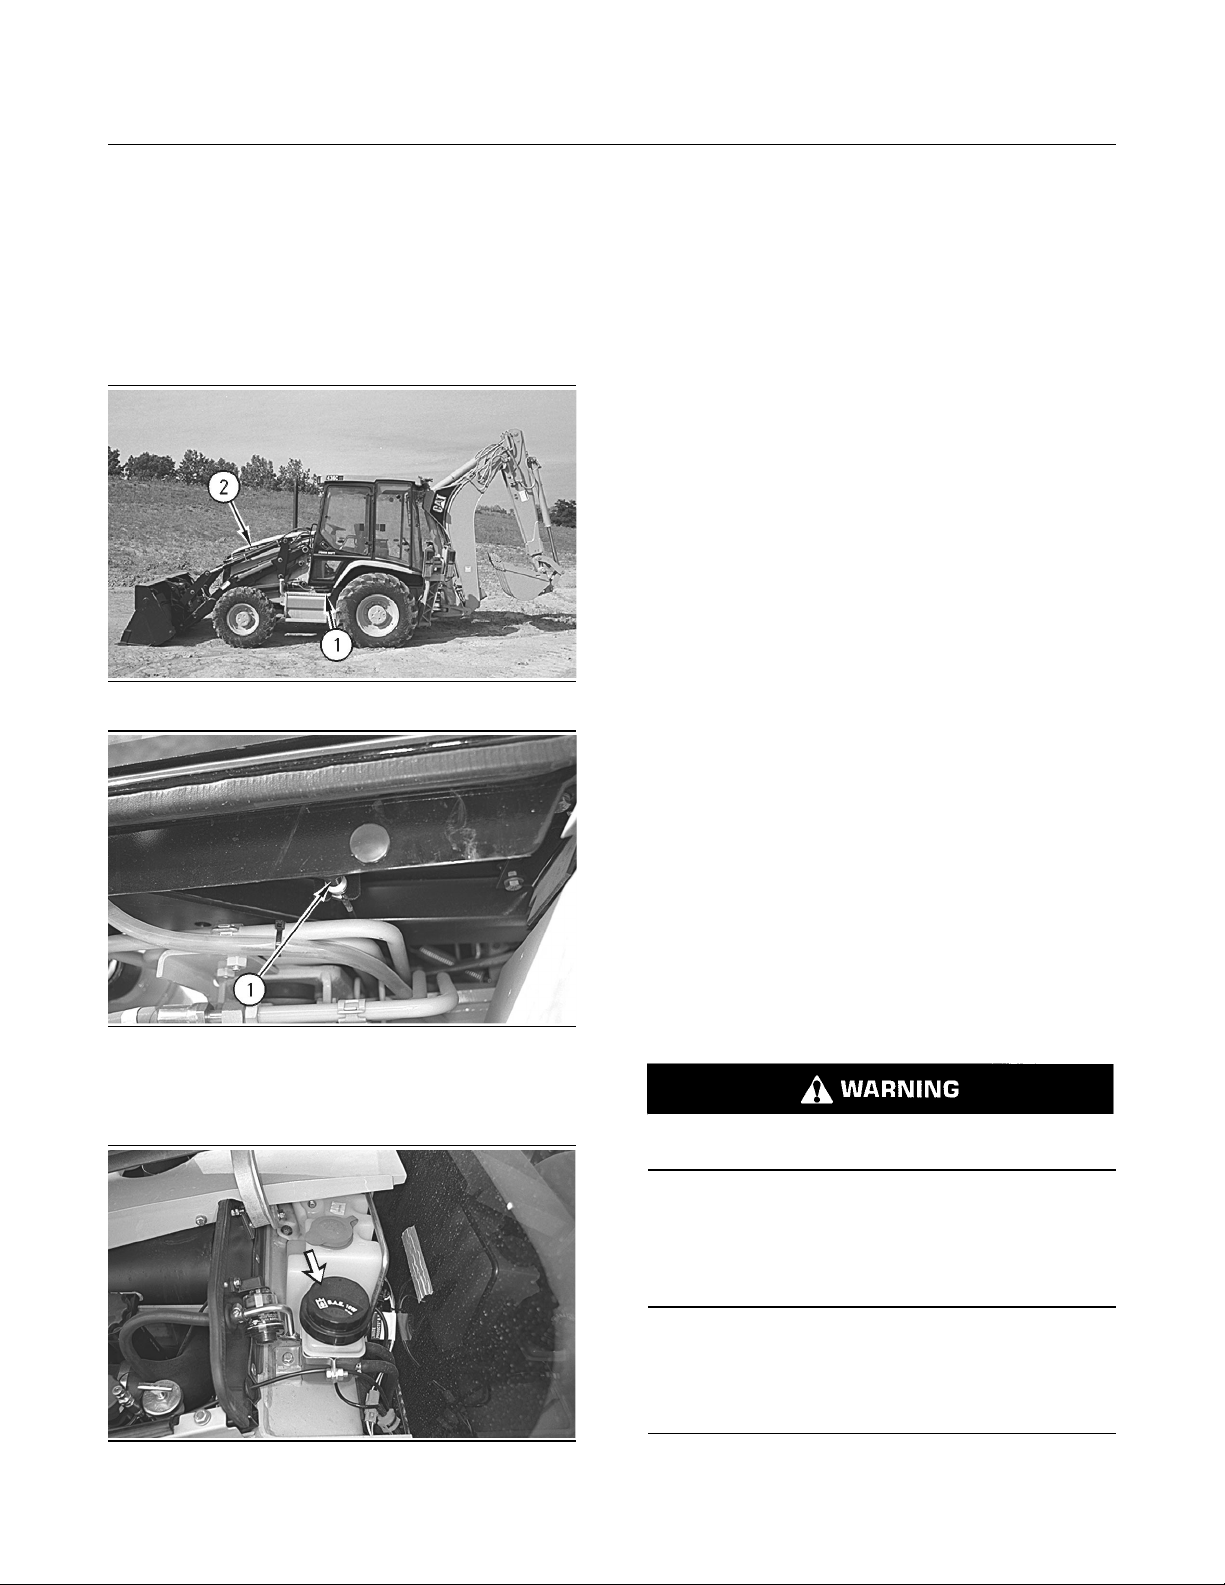
Illustration 273
i00667135
g00287385
Maintain the oil level between the “MIN” mark and
“MAX” mark on the brake reservoir. Add oil, if
necessary.
i00651426
Braking System - Test
SMCS Code: 4251; 4267; 7000
Service Brake Holding Ability Test
Check the area around the machine. Make sure
that the machine is clear of personnel and clear
of obstacles.
Test the brakes on a dry, level surface.
Fasten the seat belt before you test the brakes.
The following tests are used to determine if the
service brake is functional. These tests are not
intended to measure the maximum brake holding
effort. The brake holding effort that is required to
sustain a machine at a specific engine rpm varies
depending on the machine. The variations are the
differences in the engine setting, in the power train
efficiency, and in the brake holding ability, etc.
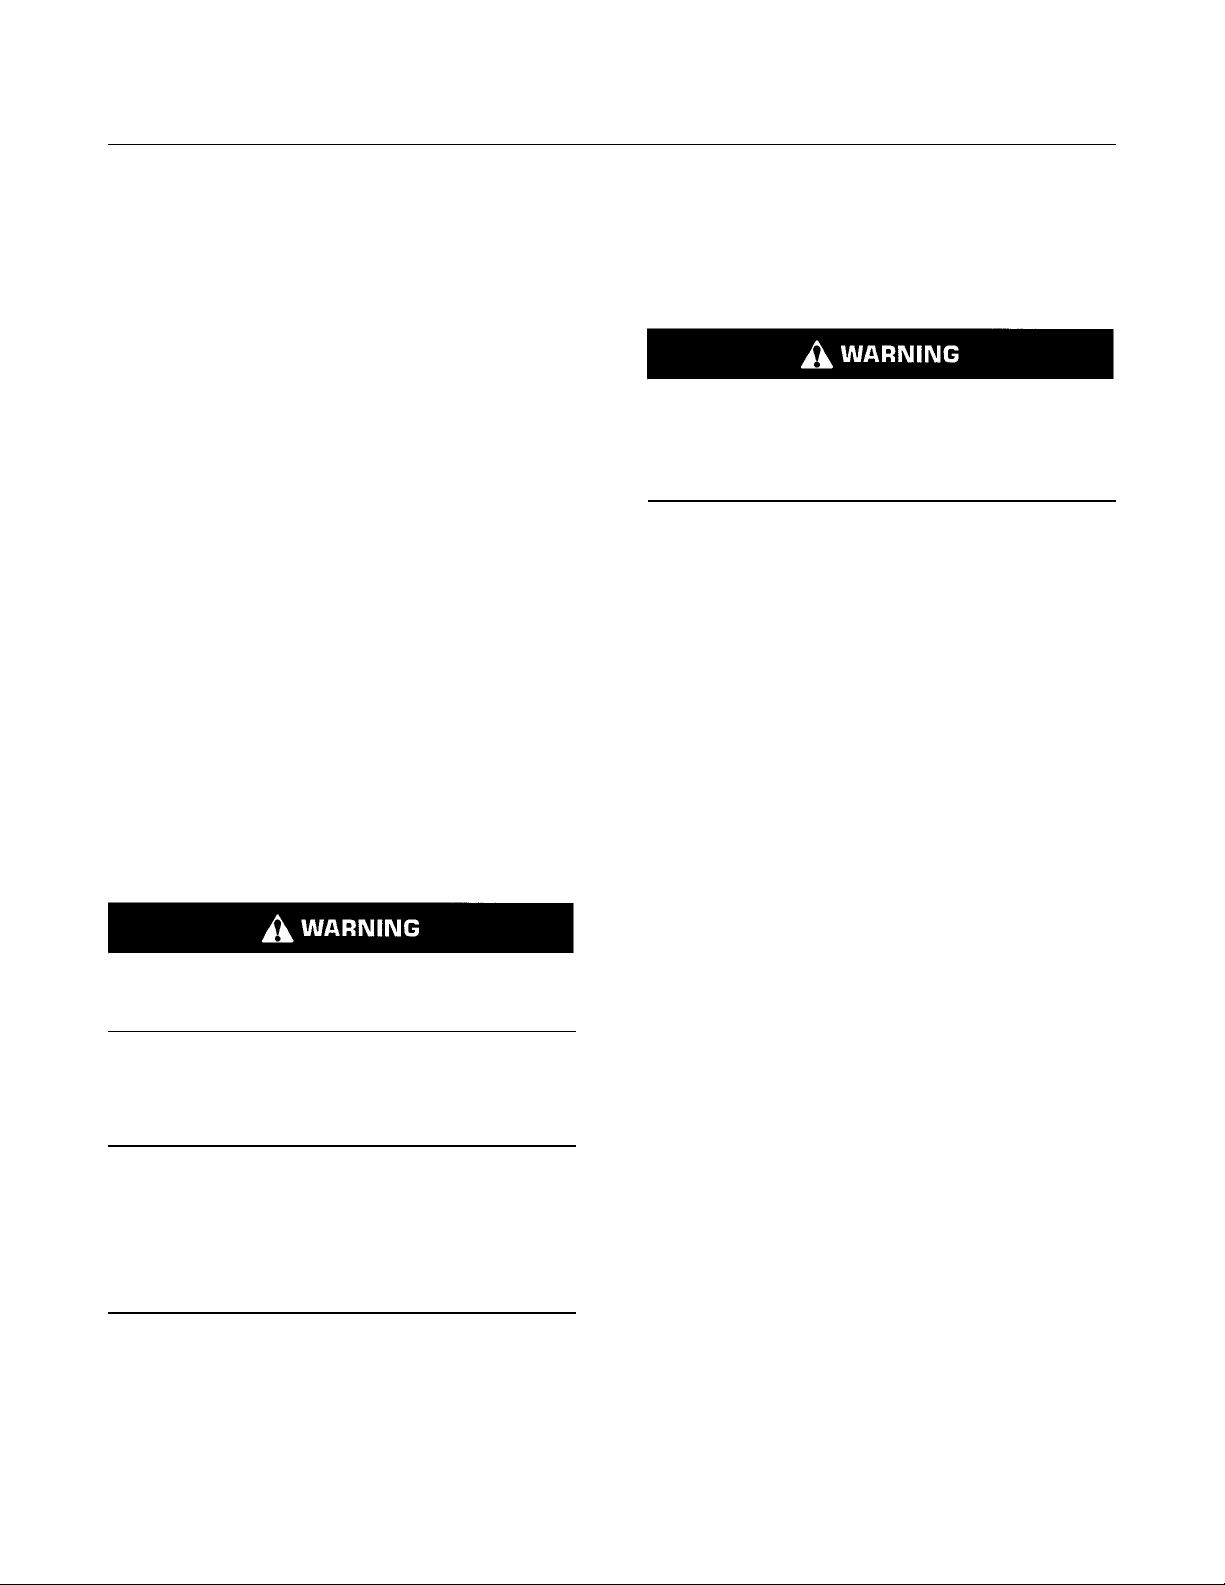
Illustration 274
Pull the hood release lever (1) in order to open the
engine access door (2) on the top of the machine.
g00287410
1. Start the engine. Raise the bucket slightly.
2. Apply the service brake. Release the parking
brake.
3. Move the transmission control lever to THIRD
SPEED FORWARD.
4. Gradually increase the engine speed to high
idle. The machine should not move.
If the machine begins to move, reduce the engine
speed immediately and engage the parking brake.
5. Reduce the engine speed to low idle. Move the
transmission to NEUTRAL. Engage the parking
brake. Lower the bucket to the ground. Stop the
engine.
NOTICE
If themachine movedwhile testing thebrakes, contact
your Caterpillar dealer. Have the dealer inspect and,
if necessary,repair the service brake before returning
the machine to operation.
Illustration 275
g00292107
Page 9
194
Maintenance Section
Bucket Cutting Edges - Inspect/Replace
Secondary Brake Holding Ability
Test
Check the area around the machine. Make sure
that the machine is clear of personnel and clear
of obstacles.
Test the brakes on a dry, level surface.
Fasten the seat belt before you test the brakes.
The following tests are used to determine if the
parking brake is functional. These tests are not
intended to measure the maximum brake holding
effort. The brake holding effort that is required to
sustain a machine at a specific engine rpm varies
depending on the machine. The variations are the
differences in the engine setting, in the power train
efficiency, and in the brake holding ability, etc.
1. Start the engine. Raise the bucket slightly.
2. Engage the parking brake.
3. Move the transmission control lever to THIRD
SPEED FORWARD.
Note: The parking brake indicator light should come
on and the parking brake alarm should sound.
i00058453
Bucket Cutting Edges Inspect/Replace
SMCS Code: 6801
Personal injury or death can result from bucket
falling.
Block the bucket before changing bucket cutting
edges.
1. Raise the bucket. Place a block under the
bucket.
2. Lower the bucket to the blocking.
Do not block up the bucket too high. Block up
the bucket so that the bucket is high enough to
remove the cutting edges and the end bits.
3. Remove the bolts. Remove the cutting edge and
the end bits.
4. Clean the contact surfaces.
4. Gradually increase the engine speed to high
idle. The machine should not move.
If the machine begins to move, reduce the engine
speed immediately and apply the service brake
pedal.
5. Reduce the engine speed. Move the transmission
to NEUTRAL. Lower the bucket to the ground.
Stop the engine.
NOTICE
If themachine movedwhile testing thebrakes, contact
your Caterpillar dealer.
Have the dealer inspect and, if necessary, repair the
parking brakes before returning the machine to operation.
5. Use the opposite side of the cutting edge, if this
side is not worn.
6. Install a new cutting edge, if both edges are
worn.
7. Install the bolts. Tighten the bolts to the specified
torque. Refer to Operation and Maintenance
Manual, “Torques for Ground Engaging Tool
Bolts”.
8. Raise the bucket. Remove the blocks.
9. Lower the bucket to the ground.
10.After a few hours of operation, check the bolts
for proper torque.
Page 10
i00081131
Bucket Tips - Inspect/Replace
SMCS Code: 6805
Block the bucket before changing the bucket
teeth.
To prevent possible injury to the eyes, wear a protective face shield when striking the pin.
195
Maintenance Section
Bucket Tips - Inspect/Replace
The pin, when struck, can fly out and cause injury
to nearby personnel.
1. Drive the pin out of the bucket tip from the
retainer side of the bucket tip. Remove the
bucket tip and the retainer.
2. Clean the adapter, the pin, and the retainer.
Replace any damaged parts. Install the retainer
in the groove.
3. The bucket tip should be installed over the
retainer. Install the bucket tip in the runner
position or in the digger position.
4. Drive the pin through the retainer, through the
adapter, and through the bucket tip from the side
that is opposite the retainer.
i00621342
Cab Air Filter - Clean/Replace
SMCS Code: 7311; 7342
Clean the Filter Element
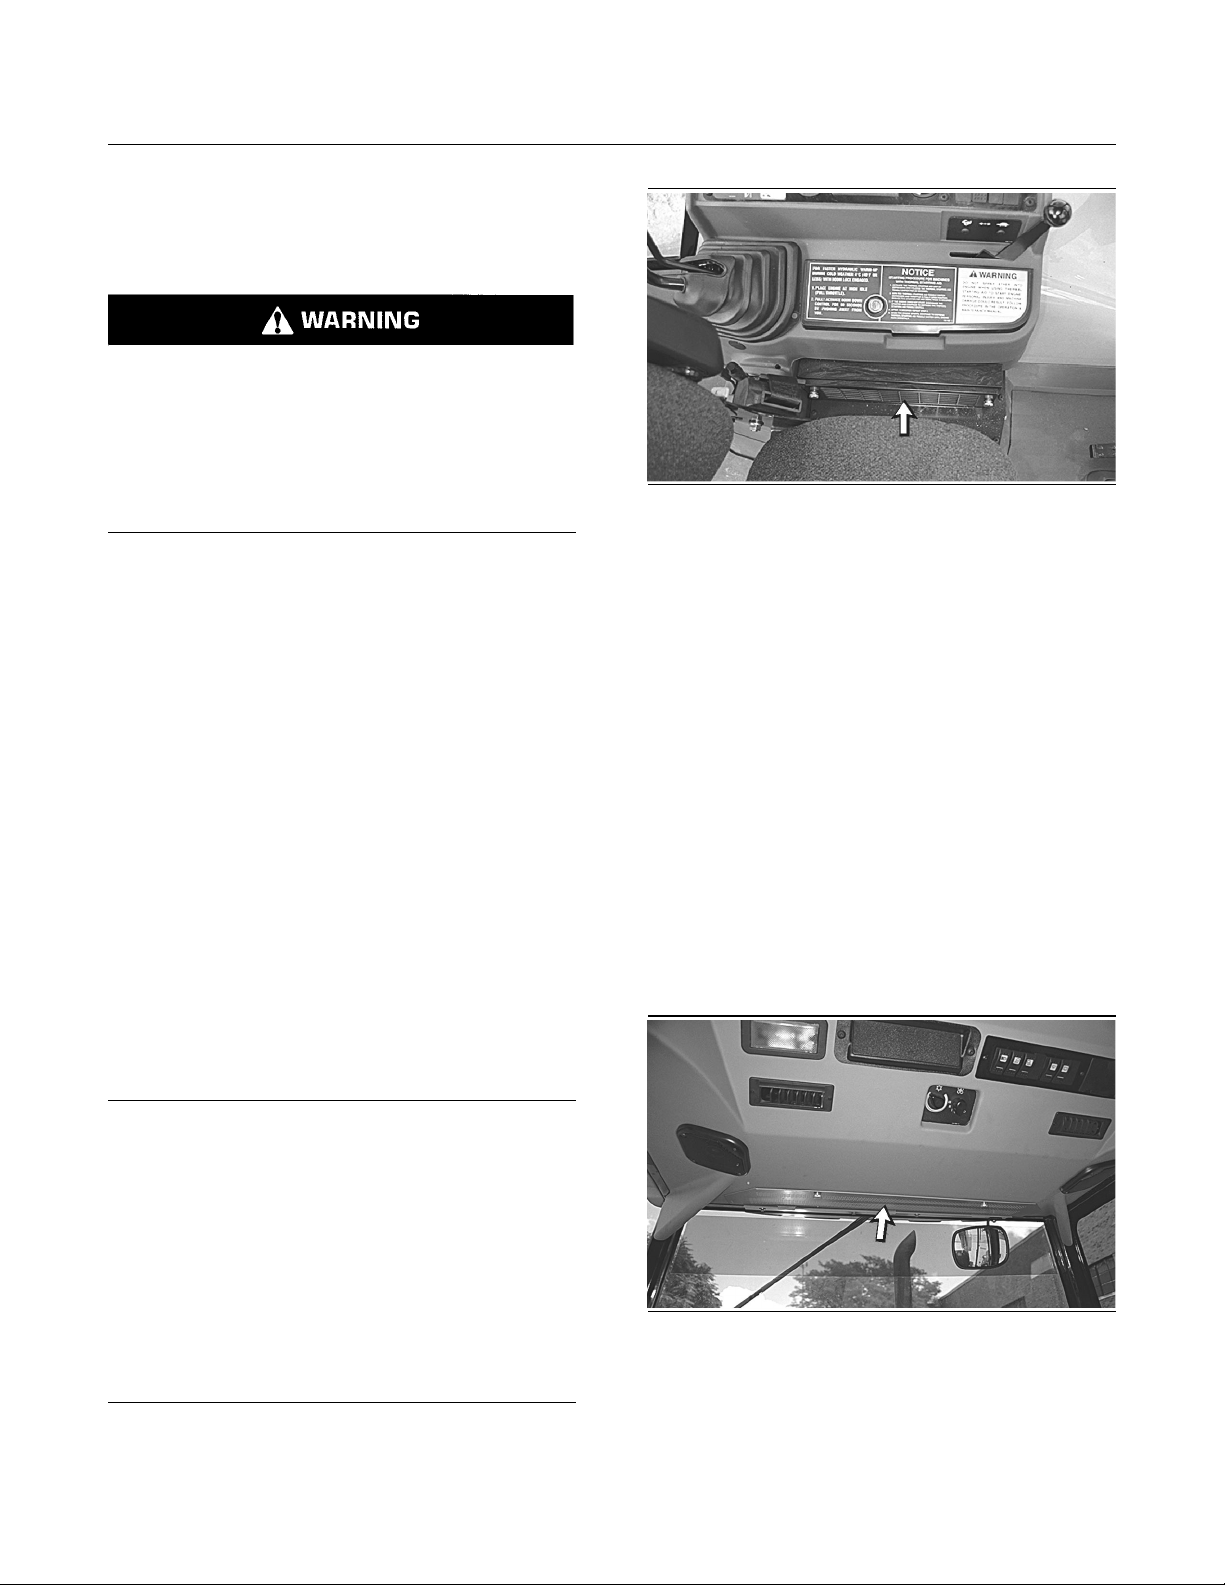
Illustration 276
g00287370
1. Remove the filter cover that is located at the
bottom of the right hand console.
2. Remove the filter element.
3. Clean the filter element with compressed air or
pressure water. Direct the air or the water along
the pleats of the element. You can also wash
the element with clean water and nonsudsing
household detergent.
4. Rinse the filter element thoroughly with clear
water.
5. Allow the filter element to air dry. Inspect the
element for damage. If the filter element is
damaged, replace the filter element.
6. Install the filter element.
7. Install the filter cover.
NOTICE
Do not clean the elements by bumping or tapping
them.
Inspect the elements after cleaning. Do not use an
element with damaged pleats, gaskets or seals.
When cleaning with pressure air,use 205 kPa(30 psi)
maximum to preventelement damage by too much air
pressure.
When cleaning with pressure water, use 280 kPa
(40 psi) maximum to prevent element damage.
Clean the filter element weekly, but clean the filter
element daily when there is a reduction of air
circulation.
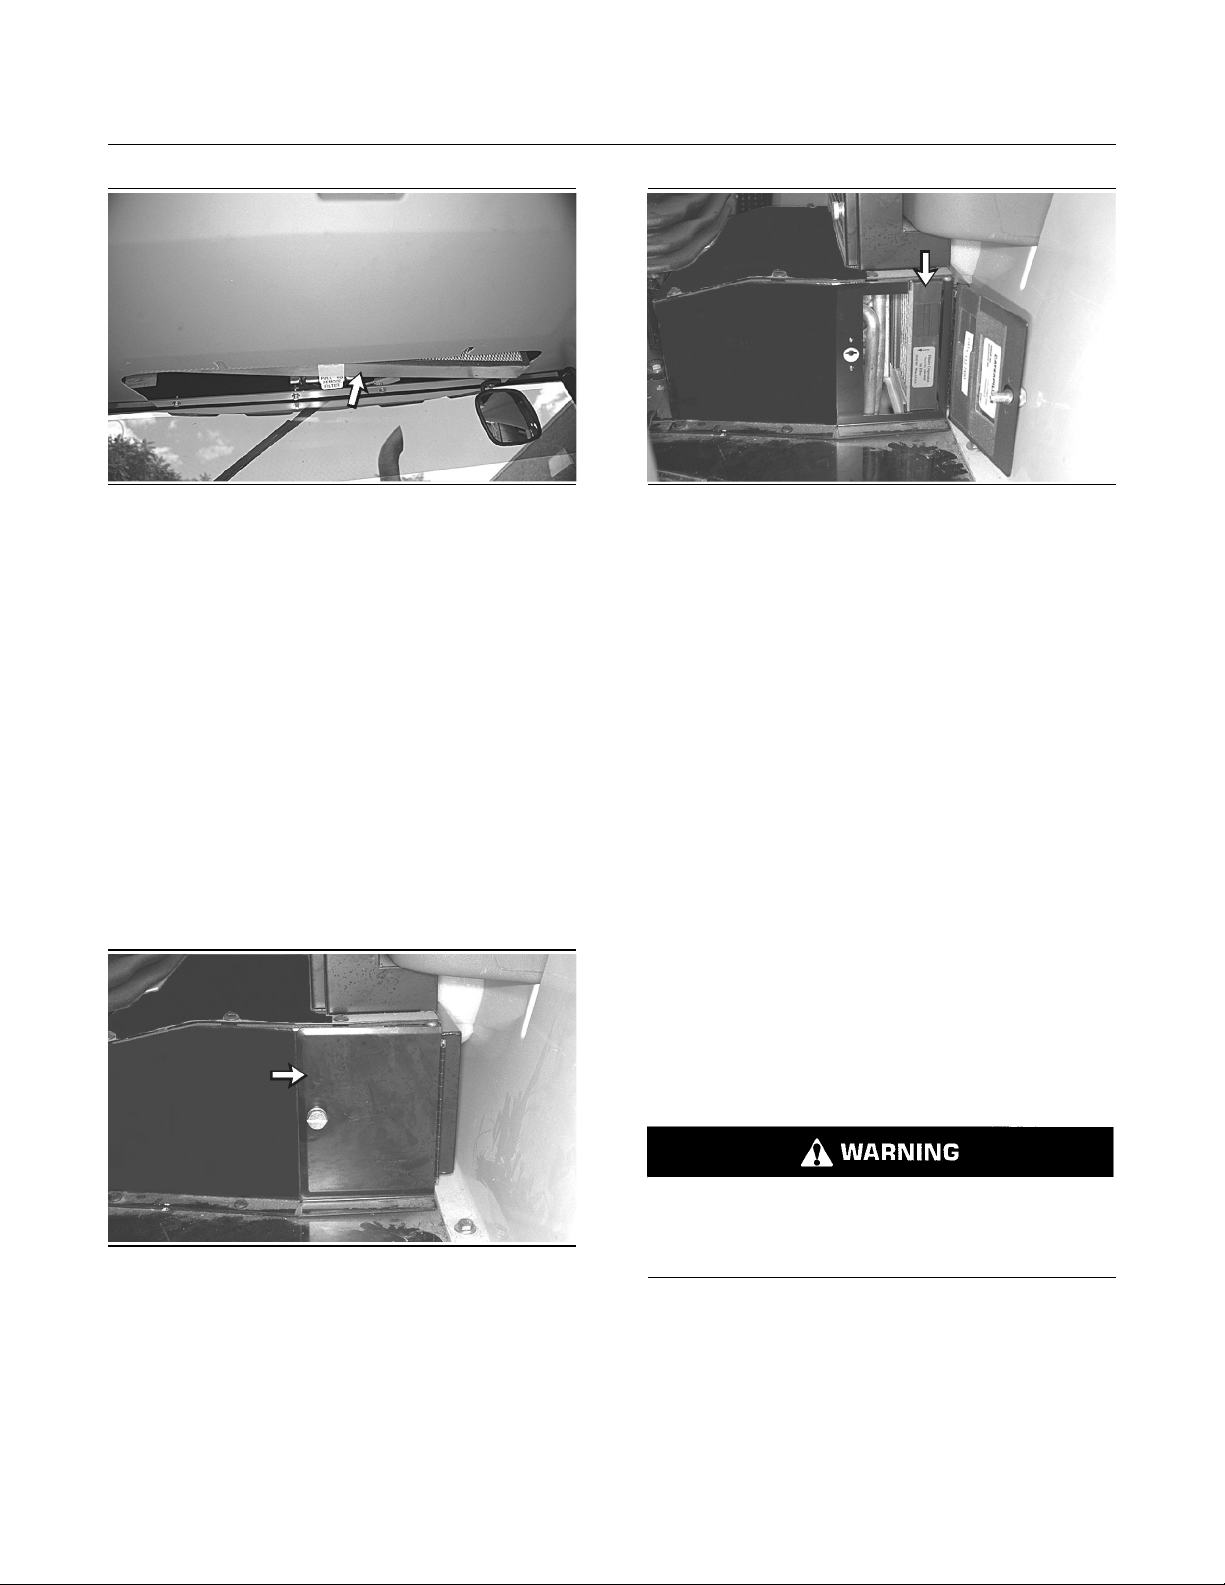
Illustration 277
g00293554
8. Remove the filter cover that is located on the
headliner by the front windshield.
Page 11
196
Maintenance Section
Cooling System Coolant (DEAC) - Change
Illustration 278
g00293552
9. Remove the filter element.
10.Clean the filter element with compressed air or
pressure water. Direct the air or the water along
the pleats of the element. You can also wash
the element with clean water and nonsudsing
household detergent.
11.Rinse the filter element thoroughly with clear
water.
12.Allow the filter element to air dry. Inspect the
element for damage. If the filter element is
damaged, replace the filter element.
13.Install the filter element.
14.Install the filter cover.
Illustration 280
g00293553
16.Remove the filter element.
17.Clean the filter element with compressed air or
pressure water. Direct the air or the water along
the pleats of the element. You can also wash
the element with clean water and nonsudsing
household detergent.
18.Rinse the filter element thoroughly with clear
water.
19.Allow the filter element to air dry. Inspect the
element for damage. If the filter element is
damaged, replace the filter element.
20.Install the filter element.
21.Close the door.
i00598002
Cooling System Coolant
(DEAC) - Change
Illustration 279
g00293555
15.Open the door for the filter that is located at the
bottom of the right hand console.
SMCS Code: 1352; 1353; 1395
Pressurized system: Hot coolant can cause serious burn. To open cap, stop engine, wait until radiator is cool. Then loosen cap slowly to relieve
the pressure.
Note: This procedure pertains to Caterpillar Diesel
Engine Antifreeze/Coolant (DEAC) only. This does
not pertain to machines that are shipped from the
factory with Extended Life Coolant (ELC). This does
not pertain to machines that are maintained with
Extended Life Coolant (ELC).
Page 12
NOTICE
Do not change the coolant until you read and understand the material in the Cooling System Specifications section.
1. Empty the bucket. Remove the pin that secures
the loader lift arm brace to the left loader lift arm.
Raise the loader arm to the maximum height.
2. Position the loader lift arm brace over the left lift
cylinder rod with the flat end against the cylinder
end.
197
Maintenance Section
Cooling System Coolant (DEAC) - Change
3. Push the pin through the holes of the loader lift
arm brace and install the cotter pin.
4. Slowly lower the loader arms until the loader lift
arm brace contacts the top of the lift cylinder
and the bosses on the loader arm.
Drain the coolant whenever the coolant is dirty or
whenever foaming is observed.
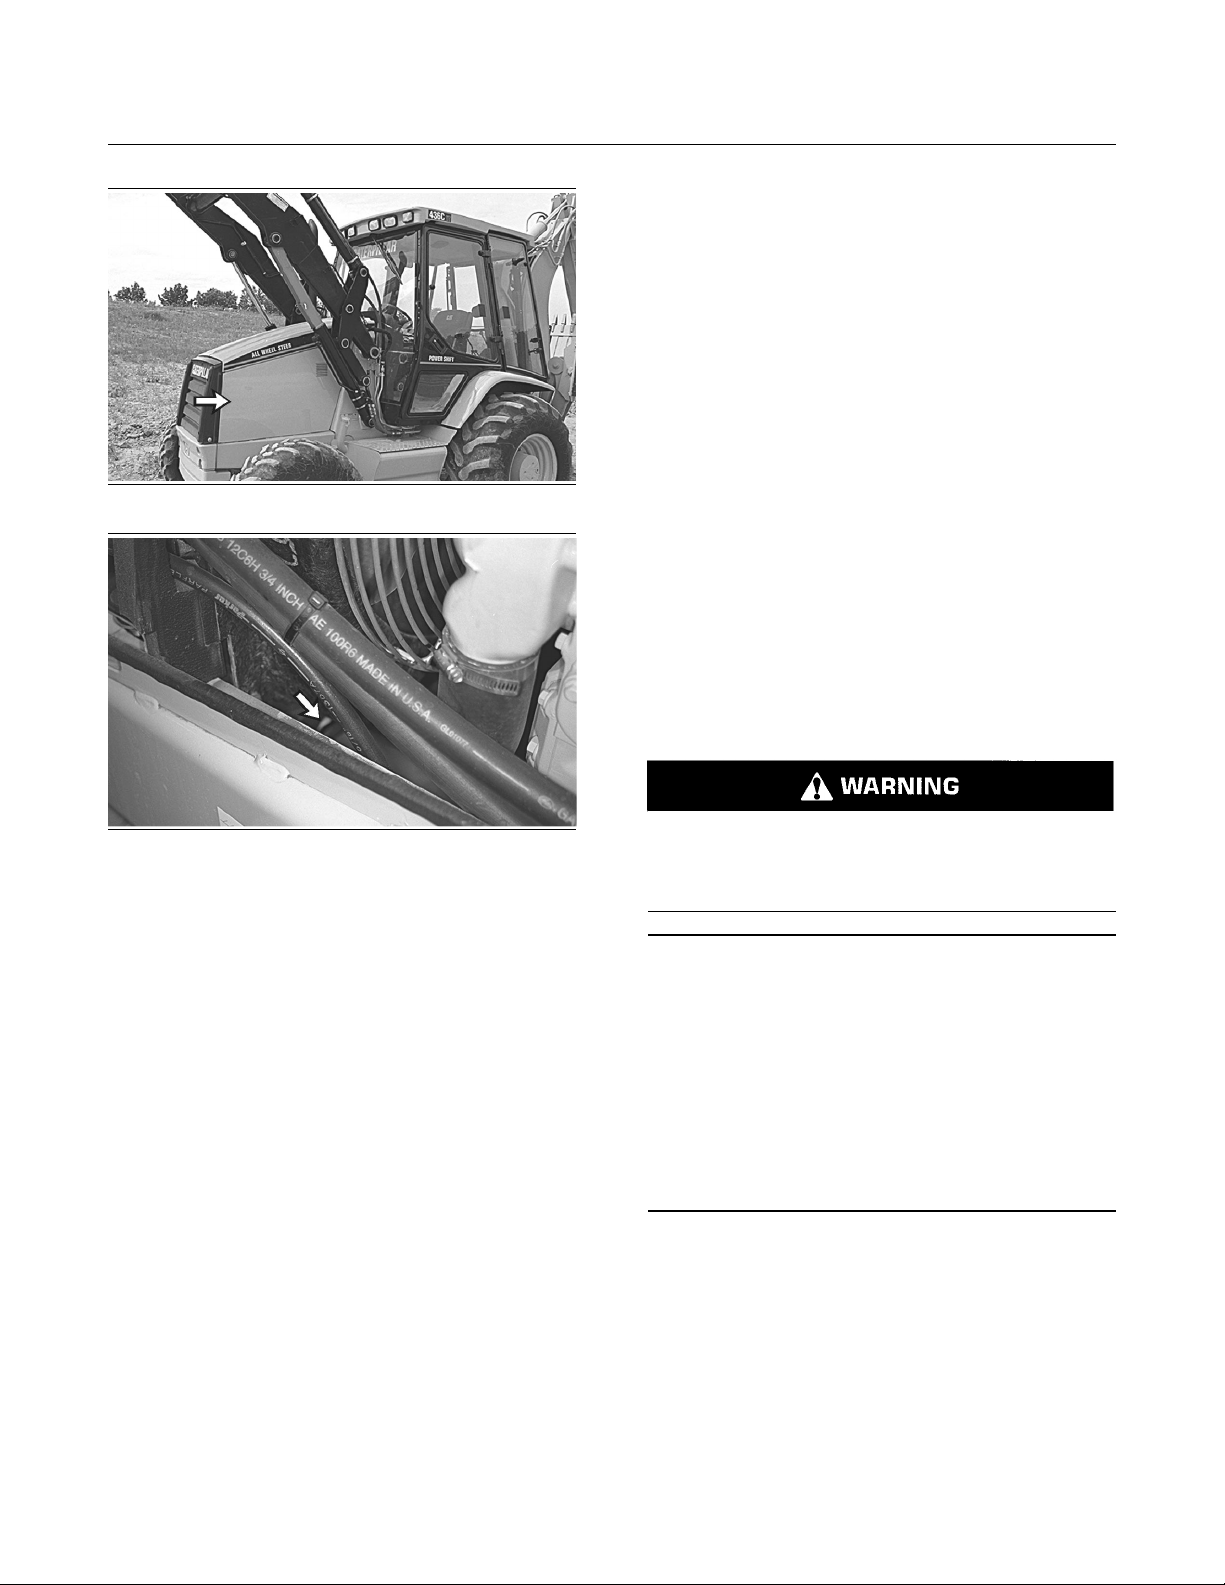
The radiator cap is located under the access panel
on the top of the engine compartment.
Illustration 283
g00287415
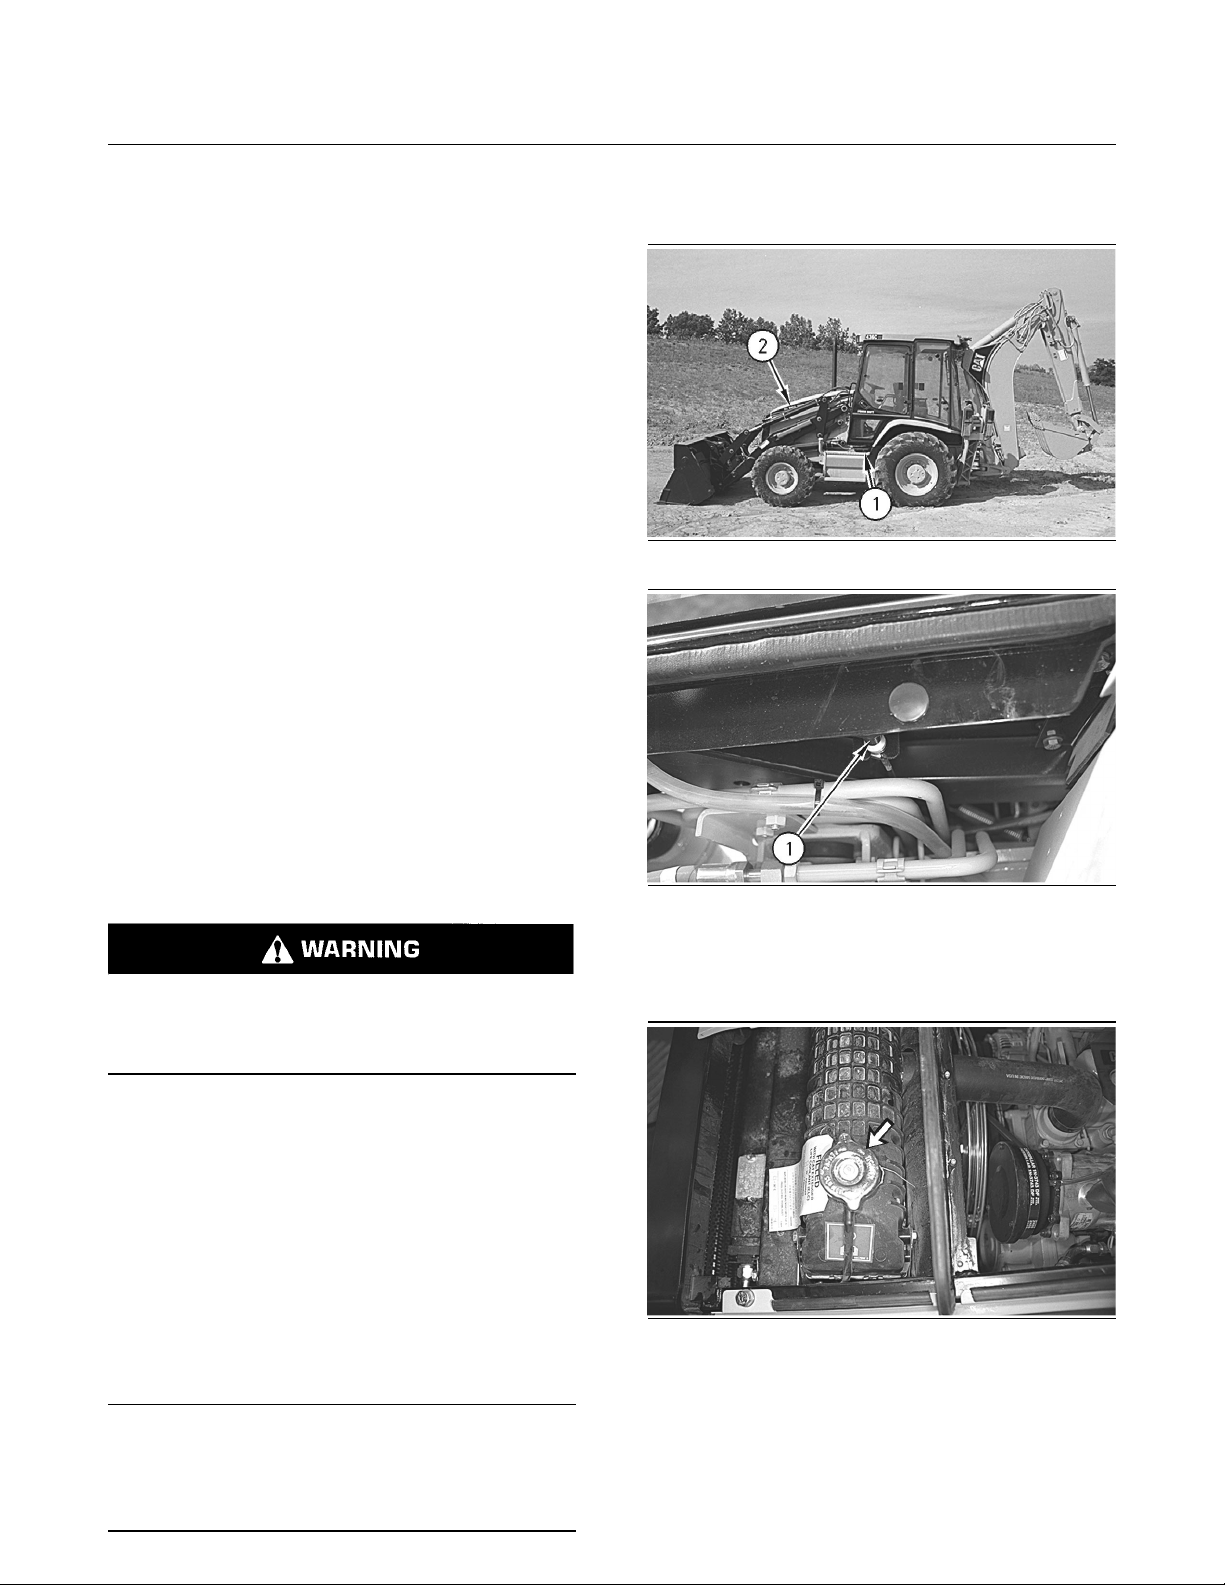
2. Slowly loosen the radiator cap in order to relieve
system pressure. Remove the radiator cap.
Illustration 284
g00293558
Illustration 281
Illustration 282
g00287385
g00287410
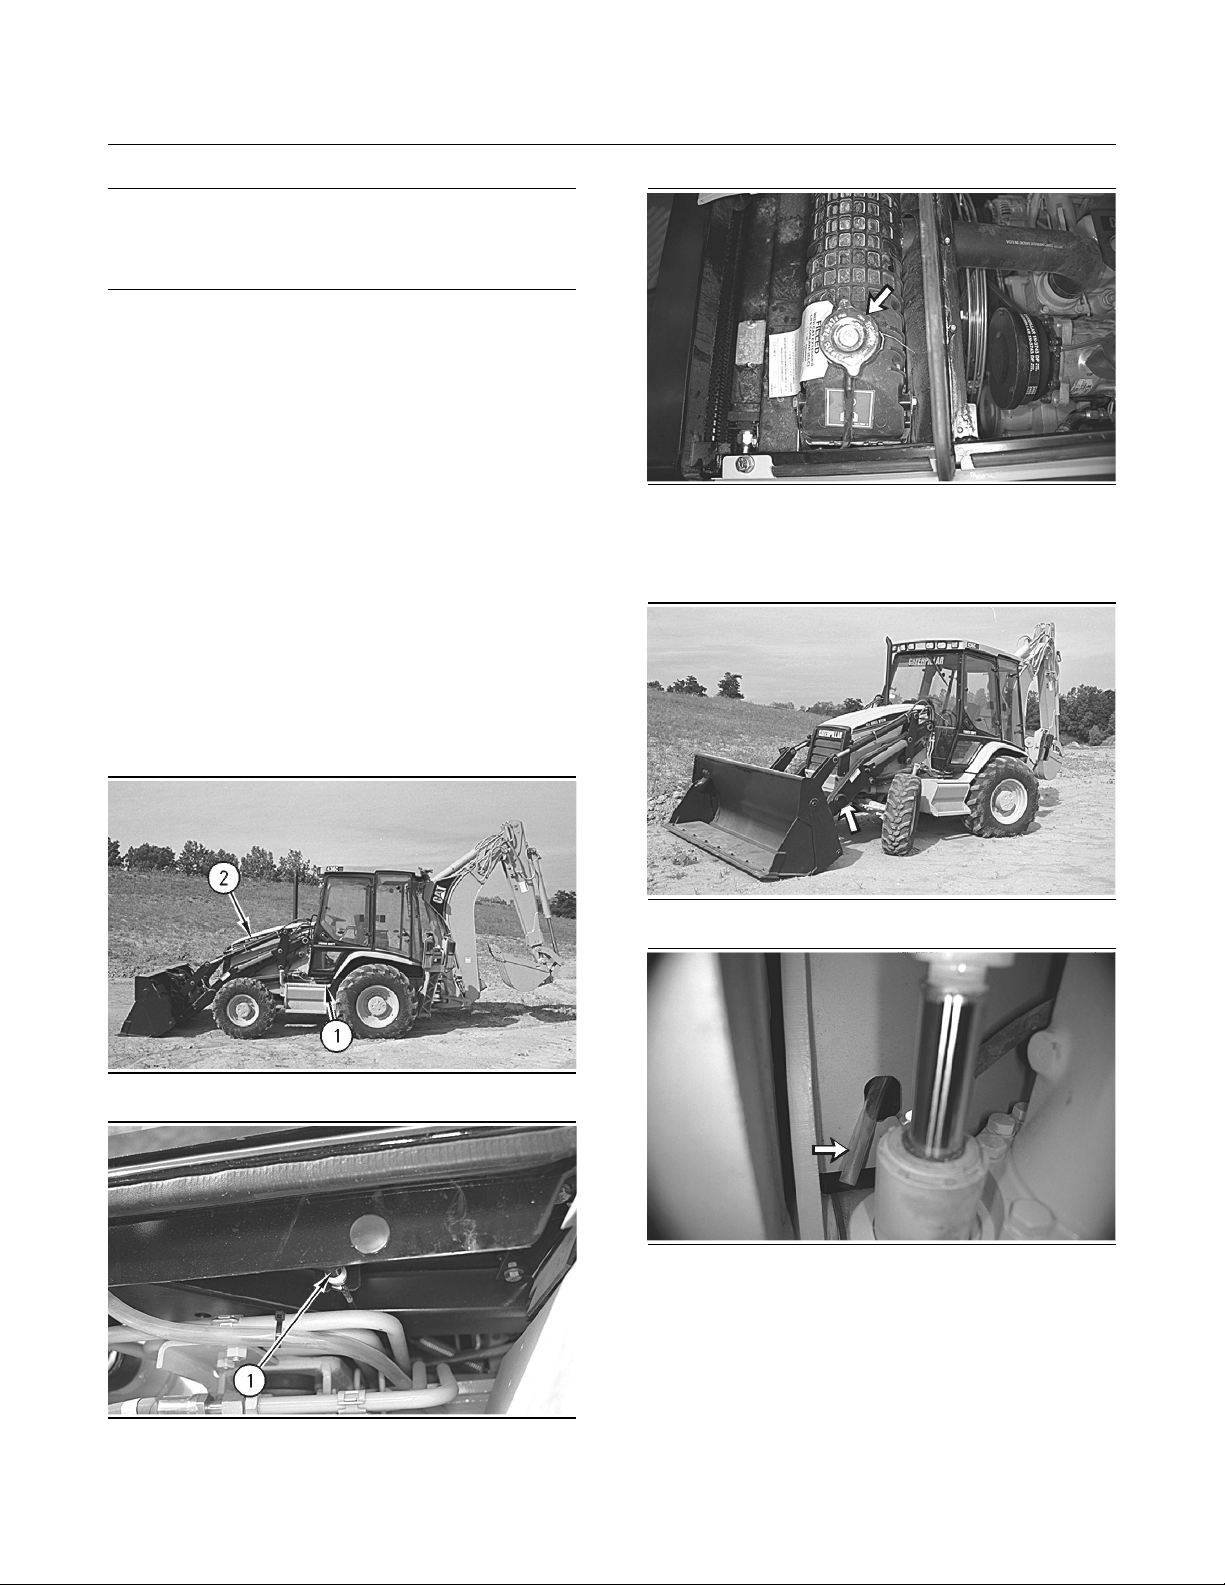
1. Pull the hood release lever (1) in order to open
the engine access door (2) on the top of the
machine.
Illustration 285
g00293559
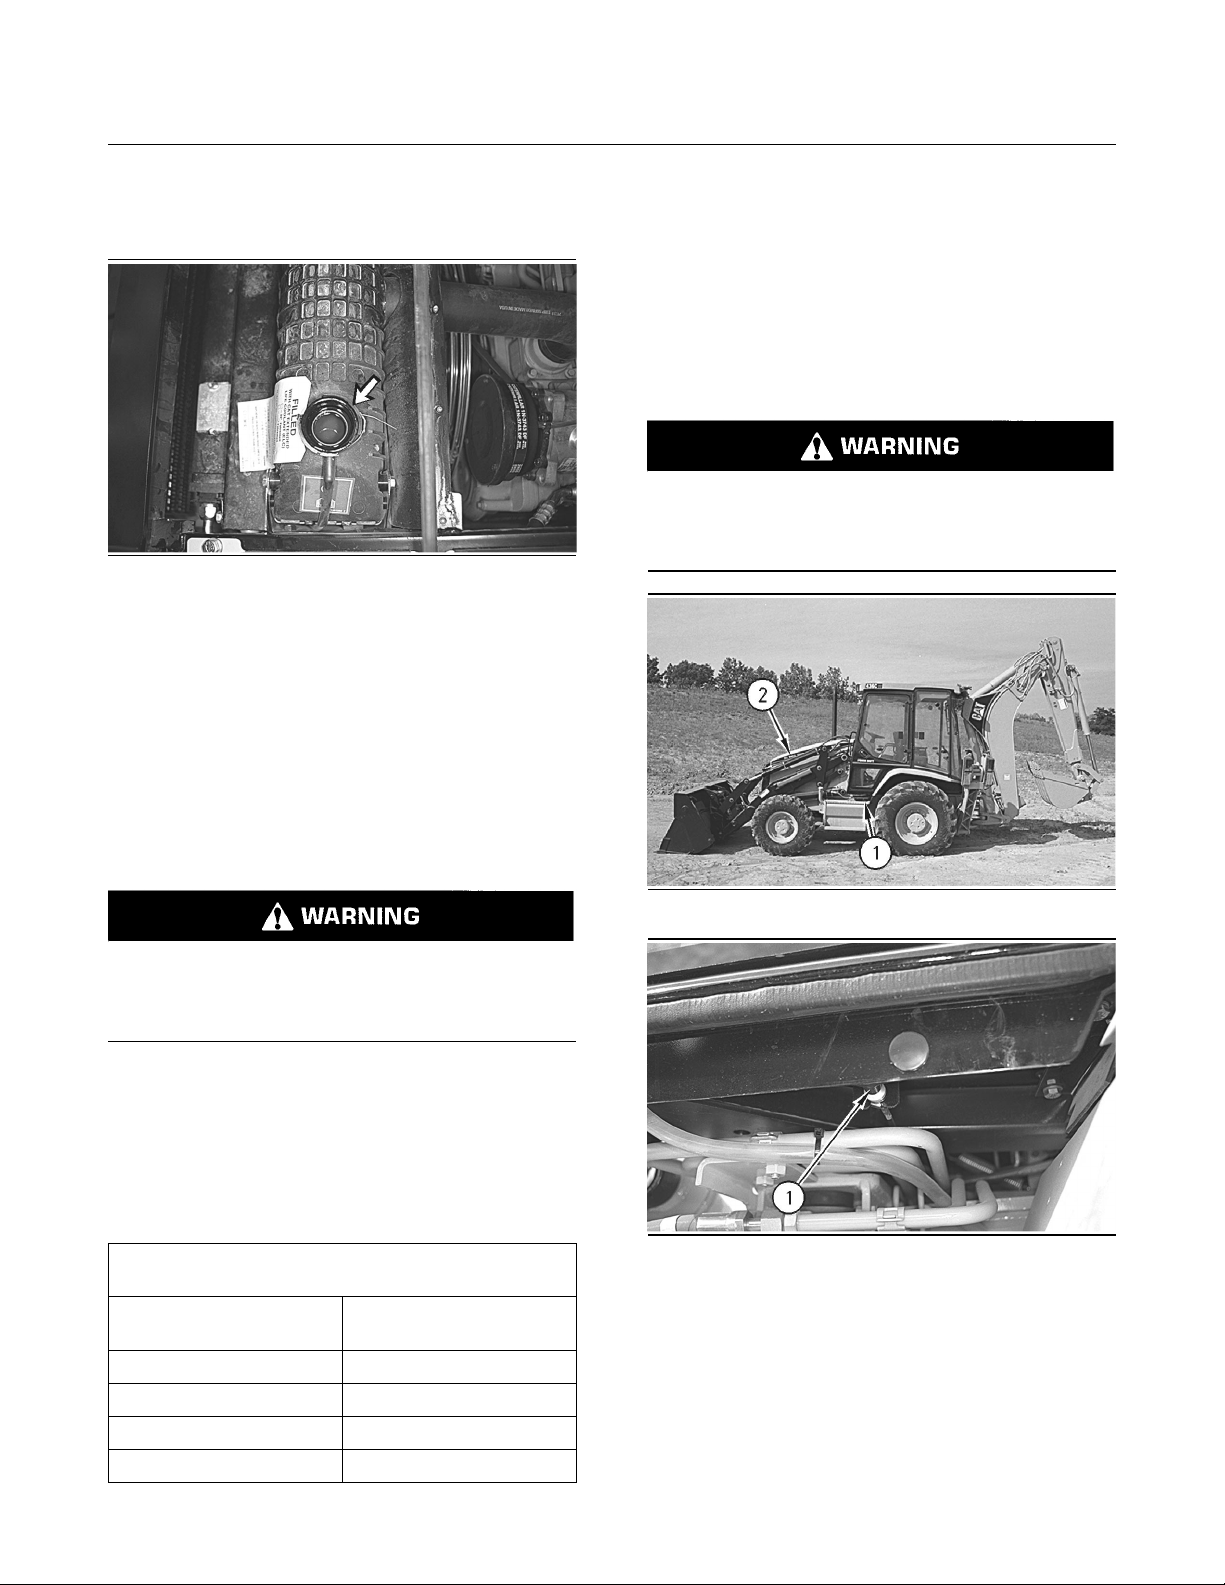
3. Pull the drain hose for the radiator through the
hole under the radiator.
Page 13
198
Maintenance Section
Cooling System Coolant (ELC) - Change
Note: If you are using Caterpillar antifreeze, do not
add the supplemental coolant additive at this time
and/or change the element at this time.
10.Start the engine. Run the engine without the
radiator cap until the thermostat opens and the
coolant level stabilizes.
11.Maintain the coolant level within 13 mm
(0.5 inch) of the bottom of the filler pipe.
12.Install the radiator cap. Replace the radiator cap
if the gasket is damaged.
Illustration 286
Illustration 287
4. Remove the access panel on the left side of the
engine compartment. The drain valve is located
in an access port of the fan shroud. Open the
drain valve. Allow the coolant to drain into a
suitable container.
5. Close the drain valve. Fill the system with a
solution which consists of clean water and of
cooling system cleaner. The concentration of the
cooling system cleaner in the solution should be
between 6 percent and 10 percent.
6. Start the engine. Run the engine for 90 minutes.
Stop the engine. Drain the cleaning solution into
a suitable container.
g00287238
g00293560
13.Stop the engine.
14.Replace the access panel. Close the access
door.
i00095660
Cooling System Coolant (ELC)
- Change
SMCS Code: 1353; 1395
Pressurized system: Hot coolant can cause serious burn. To open cap, stop engine, wait until radiator is cool. Then loosen cap slowly to relieve
the pressure.
NOTICE
Mixing ELC with other products will reduce the effectiveness of the coolant.
This could resultin damage to cooling system components.
If Caterpillar products are not available and commercial products must be used, make sure they
have passed the Caterpillar EC-1 specification for
pre-mixed or concentrate coolants and Caterpillar
Extender.
7. While the engine is stopped, flush the system
with water. Flush the system until the draining
water is transparent.
8. Close the drain valve.
9. Add the coolant solution. See the following
topics:
Operation and Maintenance Manual, “Cooling
•
System Specifications”
Operation and Maintenance Manual, “Refill
•
Capacities”
For information about the addition of Extender
to your cooling system, see the Operation and
Maintenance Manual, “Cooling System Extended
Life Coolant Extender - Add” or consult your
Caterpillar dealer.
Page 14
199
Maintenance Section
Cooling System Coolant Additive (DEAC) - Add
Flushing the Extended Life Coolant
From the Cooling System
Some engines utilize Extended Life Coolant. See the
Operation and Maintenance Manual, “Maintenance
Interval Schedule” in order to determine the service
interval. If a Extended Life Coolant was previously
used, flush the cooling system with clean water. No
other cleaning agents are required.
Flushing a Standard Coolant From
the Cooling System
If you change the coolant of a machine to Extended
Life Coolant from another type of coolant, use
a Caterpillar cleaning agent to flush the cooling
system. After you drain the cooling system,
thoroughly flush the cooling system with clean
water. All of the cleaning agent must be removed
from the cooling system.
Note: See the Operation and Maintenance Manual,
“Cooling System Coolant (DEAC) - Change” for the
draining procedure and for the flushing procedure.
Liquid Supplemental Coolant
Additive
Illustration 288
g00287385
i00599502
Cooling System Coolant
Additive (DEAC) - Add
SMCS Code: 1352; 1353; 1395
Pressurized system: Hot coolant can cause serious burn. To open cap, stop engine, wait until radiator is cool. Then loosen cap slowly to relieve
the pressure.
Note: This procedure pertains to Caterpillar Diesel
Engine Antifreeze/Coolant (DEAC) only. This
procedure does not pertain to machines that are
shipped from the factory with Extended Life Coolant
(ELC) and machines that are maintained with
Extended Life Coolant (ELC).
See Operation and Maintenance Manual, “Cooling
System Specification” for all cooling system
requirements.
Use 8T-5296 Coolant Test Kit in order to check
the concentration.
NOTICE
Excessive additive (greater than the recommended
6%initial fill)together withconcentrations ofantifreeze
greater than 60% cause deposits to form and can result in radiator tube blockage and overheating.
Illustration 289
1. Pull the hood release lever (1) in order to open
the engine access door (2) on the top of the
machine.
Illustration 290
2. Slowly loosen the radiator cap in order to relieve
system pressure. Remove the radiator cap.
3. If necessary, drain enough coolant from the
radiator in order to allow the addition of the liquid
coolant additive.
g00287410
g00287415
Page 15
200
Maintenance Section
Cooling System Coolant Extender (ELC) - Add
4. Add 0.24 Liters (.50 pint) of cooling system
additive for every 38 Liters (10 US Gallons) of
engine cooling capacity.
Illustration 291
g00290601
5. Maintain the coolant level within 13 mm (0.5 inch)
from the bottom of the filler tube.
6. Install the radiator cap. Close the access door.
i00095664
For additional information on the addition of
extender, see Operation and Maintenance Manual,
“Caterpillar Coolant Recommendations” or consult
your Caterpillar dealer.
i00599514
Cooling System Level - Check
SMCS Code: 1353; 1395
Pressurized system: Hot coolant can cause serious burn. To open cap, stop engine, wait until radiator is cool. Then loosen cap slowly to relieve
the pressure.
Cooling System Coolant
Extender (ELC) - Add
SMCS Code: 1352; 1353; 1395
Pressurized system: Hot coolant can cause serious burn. To open cap, stop engine, wait until radiator is cool. Then loose the cap slowly to relieve
the pressure.
When a Caterpillar Extended Life Coolant is
used, an extender must be added to the cooling
system. See the Operation and Maintenance
Manual, “Maintenance Interval Schedule” for the
proper service interval. The amount of extender is
determined by the cooling system capacity.
Table 120
RECOMMENDED AMOUNT OF EXTENDER BY
COOLING SYSTEM CAPACITY
Cooling System Capacity
22 to 30 L (6 to 8 US gal) 0.57 L (.60 qt)
30 to 38 L (8 to 10 US gal) 0.71 L (.75 qt)
38 to 49 L (10 to 13 US gal) 0.95 L (.95 qt)
49 to 64 L (13 to 17 US gal) 1.18 L (1.25 qt)
Recommended Amount
of Extender
Illustration 292
Illustration 293
g00287385
g00287410
Pull the hood release lever (1) in order to open the
engine access door (2) on the top of the machine.
Page 16
201
Maintenance Section
Cooling System Water Temperature Regulator - Clean/Replace
The thermostat should be replaced after the cooling
system has been cleaned. Replace the thermostat
while the cooling system is completely drained or
while the cooling system coolant is drained to a
level that is below the thermostat housing.
Note: If you are only replacing the thermostat, drain
the cooling system coolant to a level that is below
the thermostat housing.
Caterpillar engines incorporate a shunt design
cooling system. It is mandatory to always operate
the engine with a thermostat.
Illustration 294
g00287415
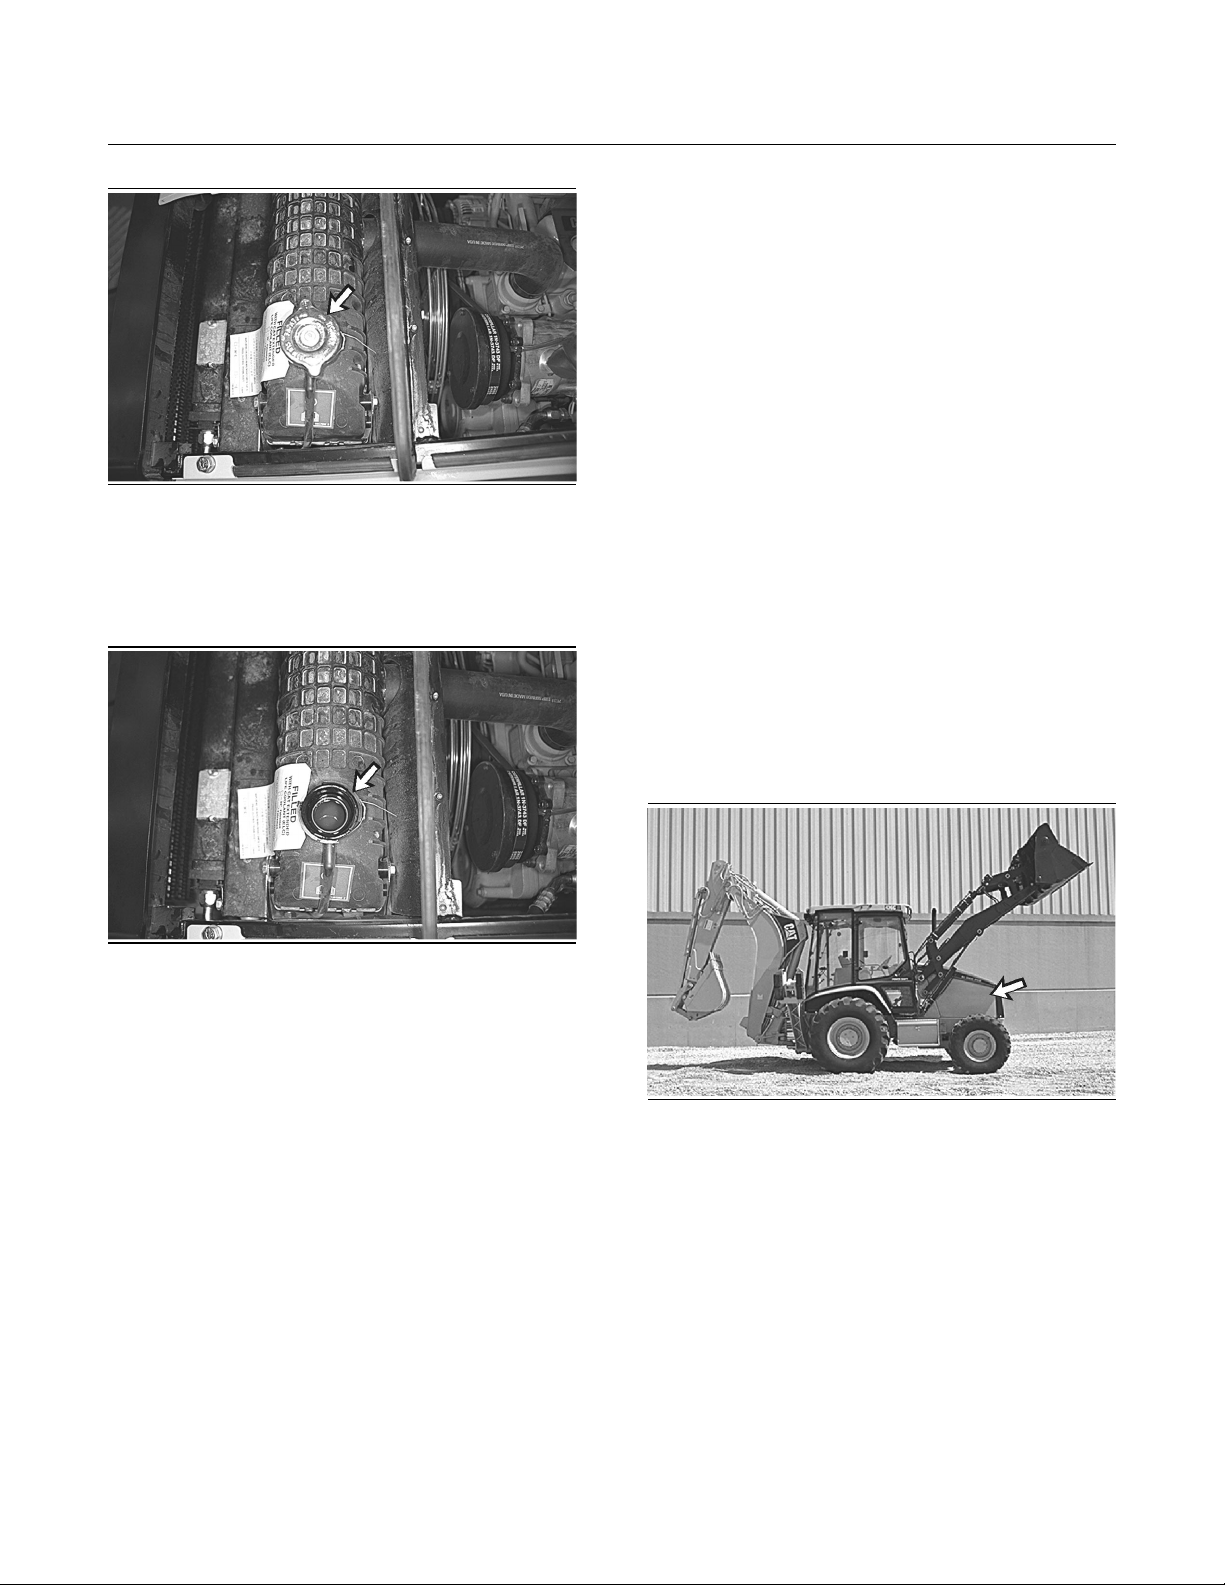
1. The radiator cap is located on the top of the
radiator on the left side of the machine. Remove
the radiator cap slowly in order to relieve system
pressure.
Illustration 295
g00290601
2. Maintain the coolant level within 13 mm (0.5 inch)
of the bottom of the filler tube. If you need to add
coolant daily, check the cooling system for leaks.
1. Empty the bucket. Remove the pin that secures
the loader lift arm brace to the left loader lift arm.
Raise the loader arm to the maximum height.
2. Position the loader lift arm brace over the left lift
cylinder rod with the flat end against the cylinder
end.
3. Push the pin through the holes of the loader lift
arm brace and install the cotter pin.
4. Slowly lower the loader arms until the loader lift
arm brace contacts the top of the lift cylinder
and the bosses on the loader arm.
3. Inspect the radiator cap seal. Replace the
radiator cap seal if the radiator cap seal is
damaged.
4. Install the radiator cap. Close the access panel.
i00599779
Cooling System Water
Temperature Regulator Clean/Replace
SMCS Code: 1355; 1393
Replace the thermostat on a regular basis in order to
reduce the chance of unscheduled downtime and of
problems with the cooling system. Failure to replace
the engine’s thermostat on a regularly scheduled
basis could cause severe engine damage.
Illustration 296
g00287241
5. Remove the engine access panel on the right
side of the machine.
Page 17
202
Maintenance Section
Differential Oil (Front) - Change
i00601036
Differential Oil (Front) - Change
SMCS Code: 3258
Illustration 297
g00290684
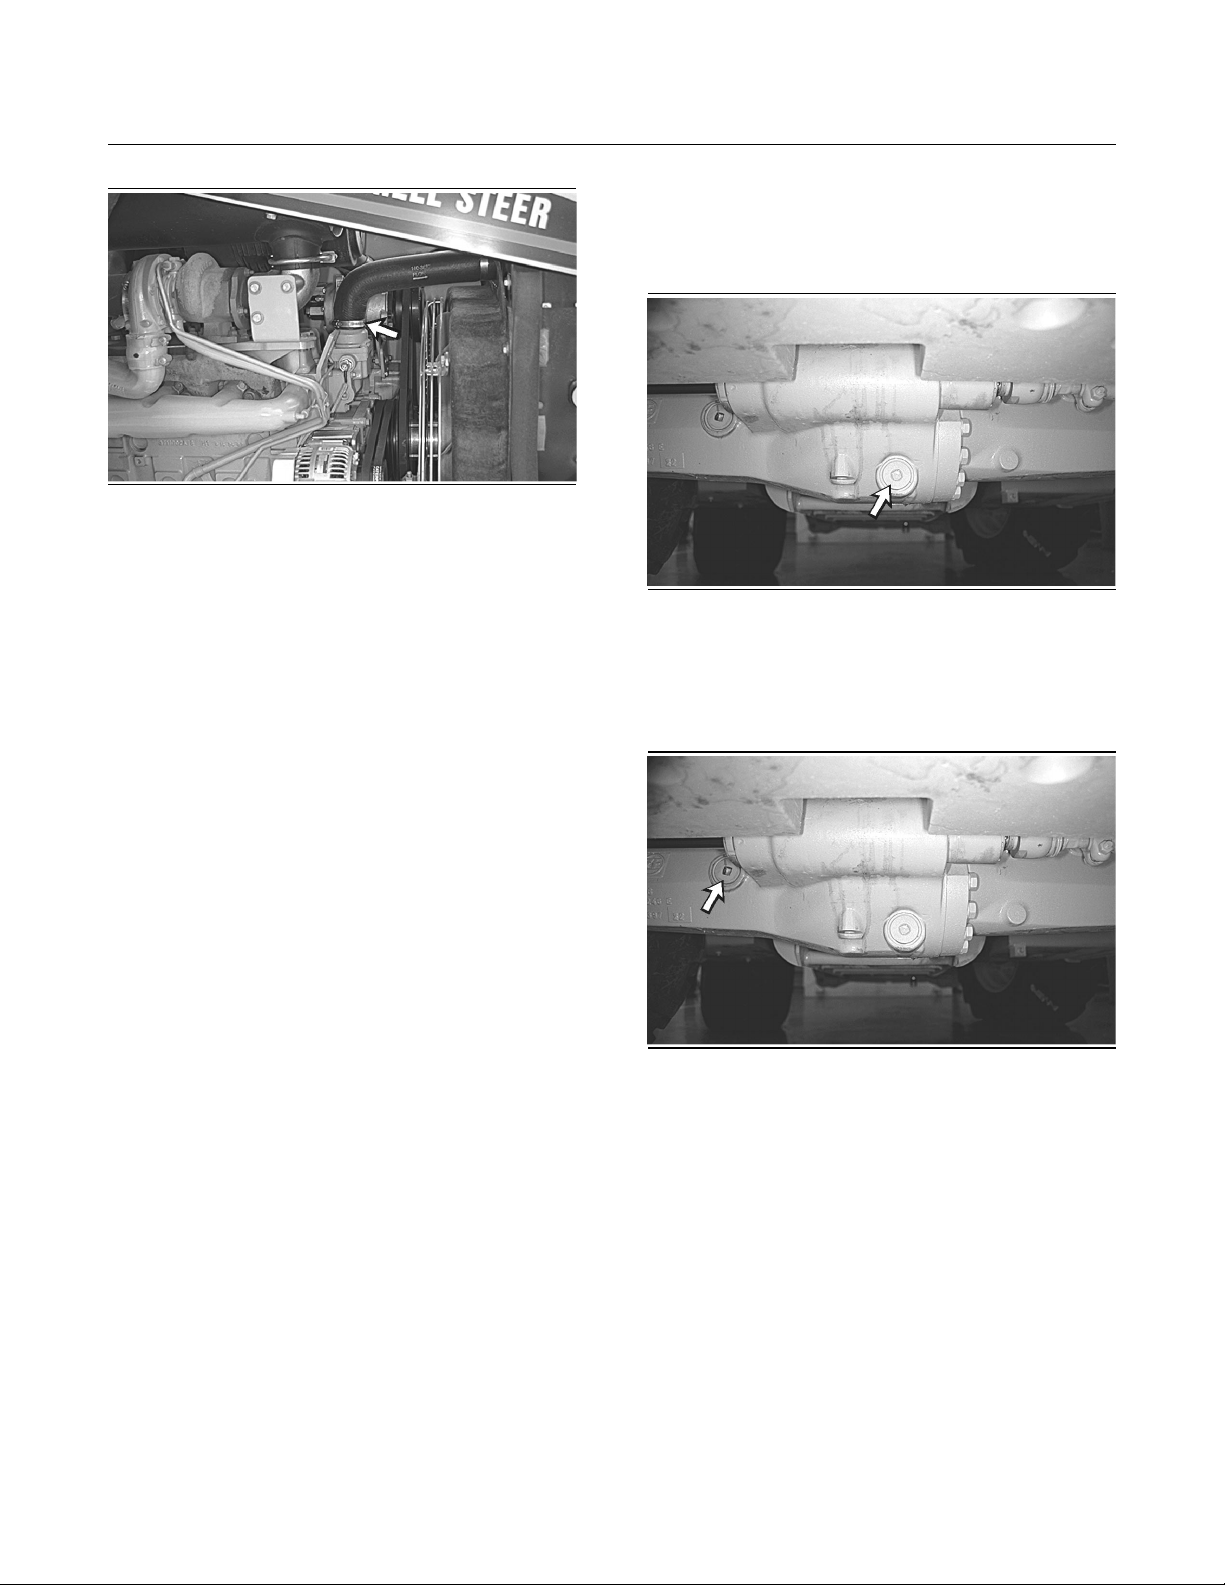
6. Loosen the hose clamp and remove the hose
from the thermostat housing assembly.
7. Remove the bolts from the thermostat housing
assembly. Remove the thermostat housing
assembly.
8. Remove the gasket, the thermostat, and the seal
from the thermostat housing assembly.
9. Install a new seal in the thermostat housing
assembly. Install a new thermostat and a new
gasket. Install the thermostat housing assembly
on the engine cylinder head.
The thermostats can be reused under the
following conditions.
The thermostat is tested and the thermostat
•
meets test specifications.
The thermostat is not damaged.
•
The thermostat does not have excessive
•
buildup of deposits.
Illustration 298
g00290687
1. Remove the oil drain plug and drain the oil into a
suitable container.
2. Clean the drain plug and install the drain plug.
Illustration 299
g00290688
10.Install the hose. Tighten the hose clamp.
11.Refill the cooling system. Refer to Operation
and Maintenance Manual, “Cooling System
Specifications” and Operation and Maintenance
Manual, “Refill Capacities”.
3. Remove the oil level/fill plug. Refer to
Operation and Maintenance Manual, “Lubricant
Specifications” and Operation and Maintenance
Manual, “Refill Capacities” for oil.
4. Add oil until the oil is level with the threads for
the filler plug.
5. Clean the filler plug and install the filler plug.
Page 18
203
Maintenance Section
Differential Oil (Rear) - Change
i00601241
Differential Oil (Rear) - Change
SMCS Code: 3258
Rear Axle
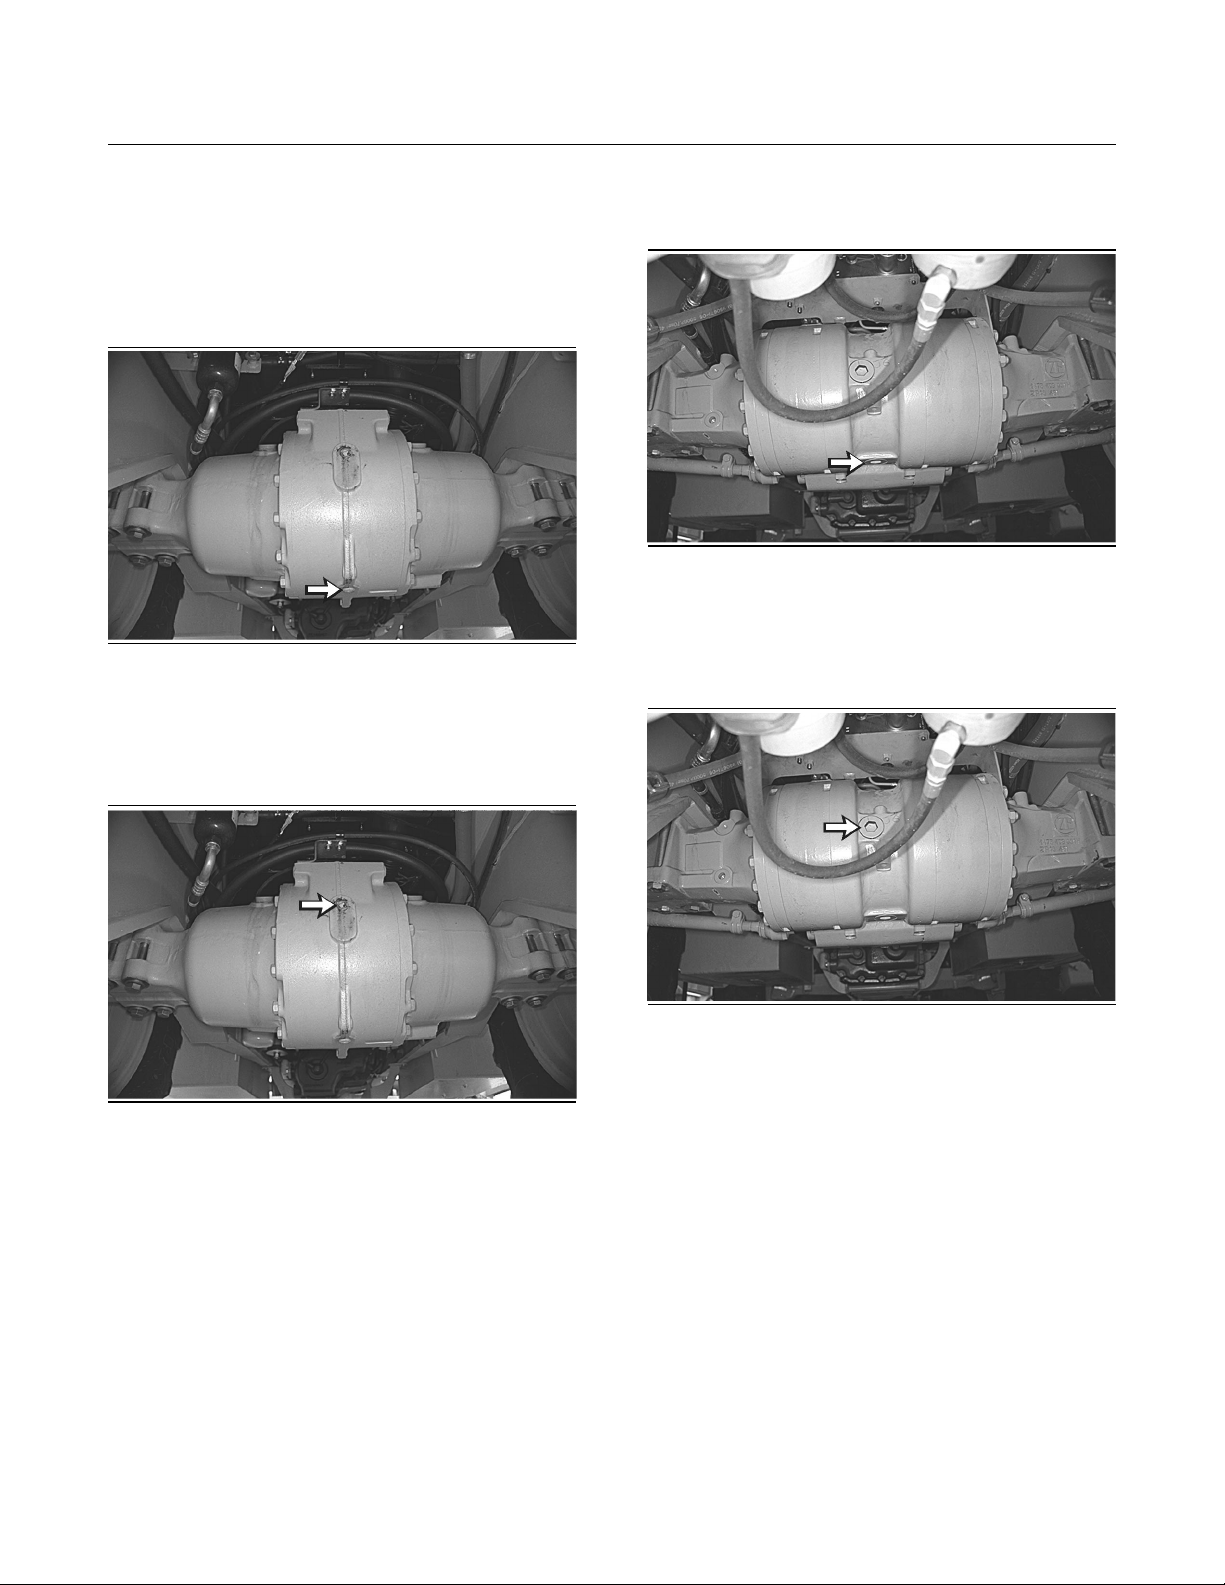
Illustration 300
1. Remove the oil drain plug and drain the oil into a
suitable container.
g00290691
Rear Axle with All Wheel Steer
(AWS)
Illustration 302
1. Remove the oil drain plug and drain the oil into a
suitable container.
2. Clean the drain plug and install the drain plug.
g00290698
2. Clean the drain plug and install the drain plug.
Illustration 301
3. Remove the oil level/fill plug. Refer to
Operation and Maintenance Manual, “Lubricant
Specifications” and Operation and Maintenance
Manual, “Refill Capacities” for oil.
4. Add oil until the oil is level with the threads for
the filler plug.
5. Clean the filler plug and install the filler plug.
g00290697
Illustration 303
3. Remove the oil level/fill plug. Refer to
Operation and Maintenance Manual, “Lubricant
Specifications” and Operation and Maintenance
Manual, “Refill Capacities” for oil.
4. Add oil until the oil is level with the threads for
the filler plug.
5. Clean the filler plug and install the filler plug.
g00290699
i00602597
Differential Oil Level (Front) Check
SMCS Code: 3258
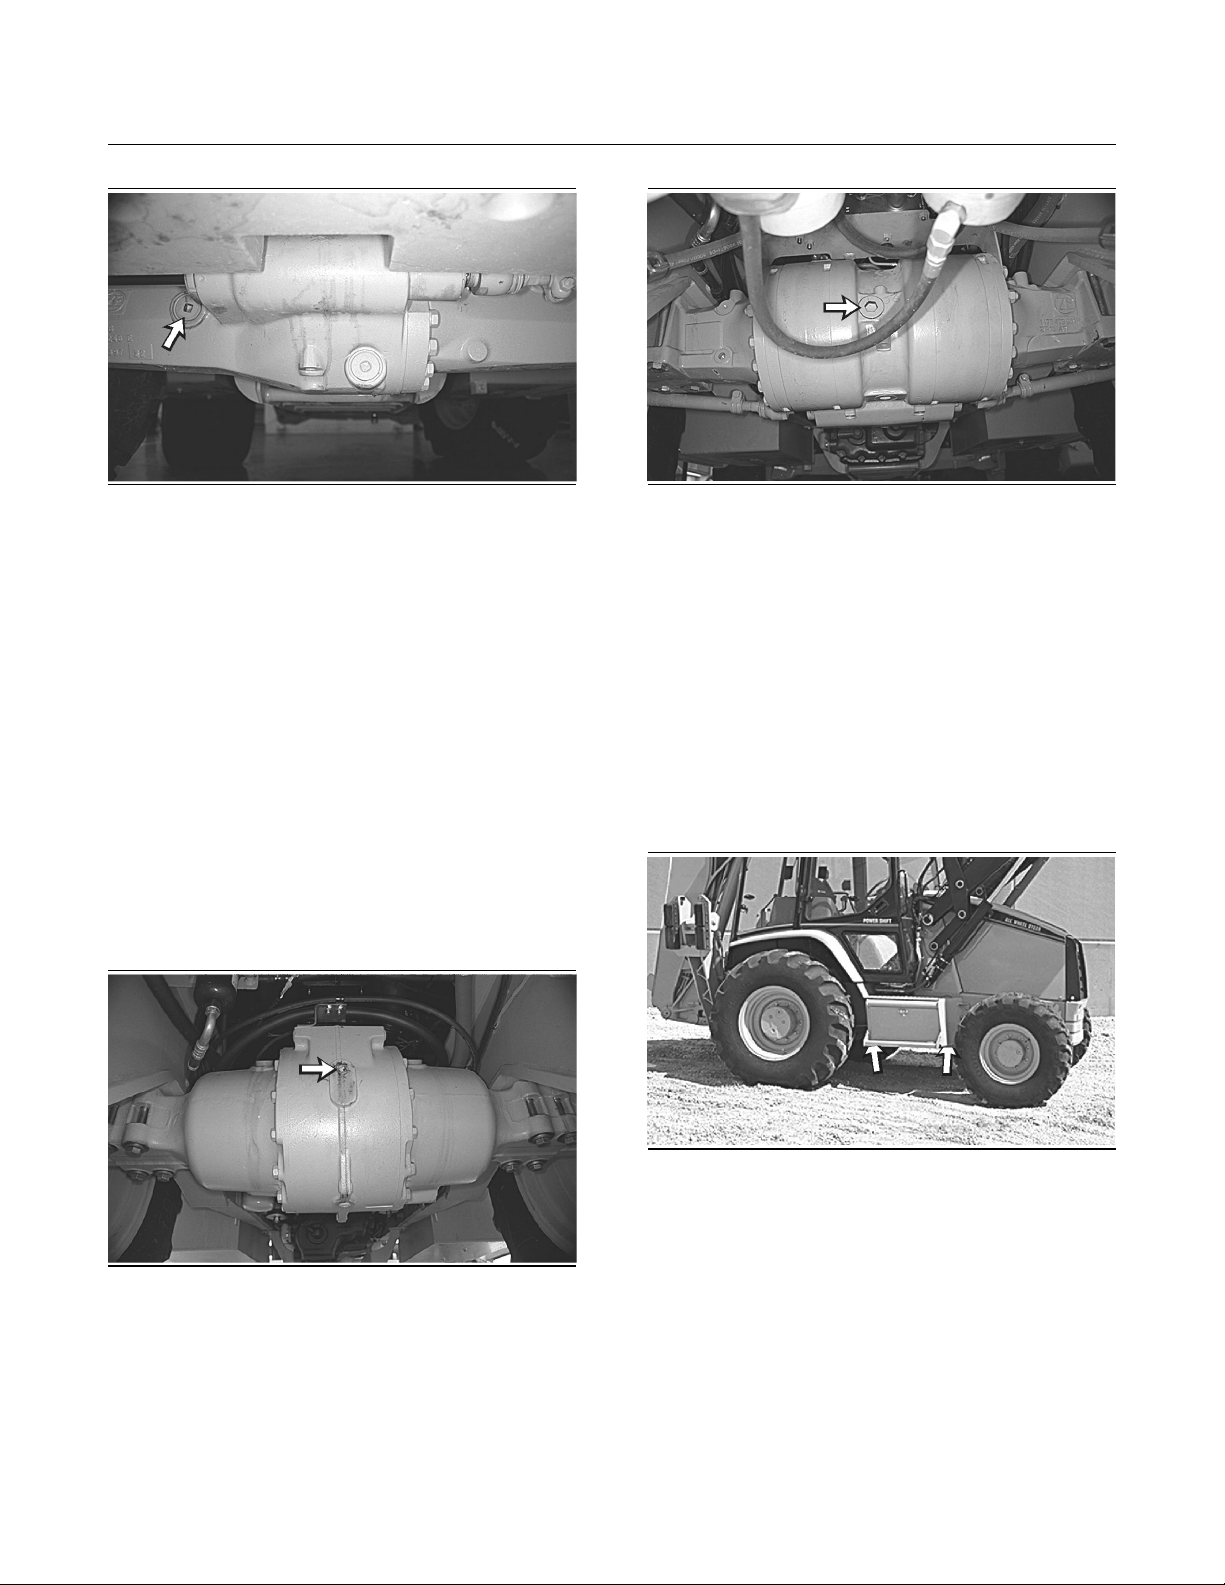
The oil level/fill plug is located near the middle of
the front axle.
Page 19
204
Maintenance Section
Differential Oil Level (Rear) - Check
Illustration 304
g00290688
1. Remove the oil level/fill plug in order to check
the oil.
2. The oil level should be at the bottom of the plug
threads.
3. Clean the oil level/fill plug and install the oil
level/fill plug.
i00602602
Differential Oil Level (Rear) Check
SMCS Code: 3258
The oil level/fill plug is located near the middle of
the rear axle.
Illustration 306
Filler plug on rear differential for All Wheel Steer
g00290699
1. Remove the oil plug in order to check the oil.
2. The oil level should be at the bottom of the plug
threads.
3. Clean the oil plug and install the oil plug.
i00604375
Drive Shaft Spline - Lubricate
SMCS Code: 3253
Illustration 305
Filler plug on standard rear differential
g00290697
Illustration 307
g00290705
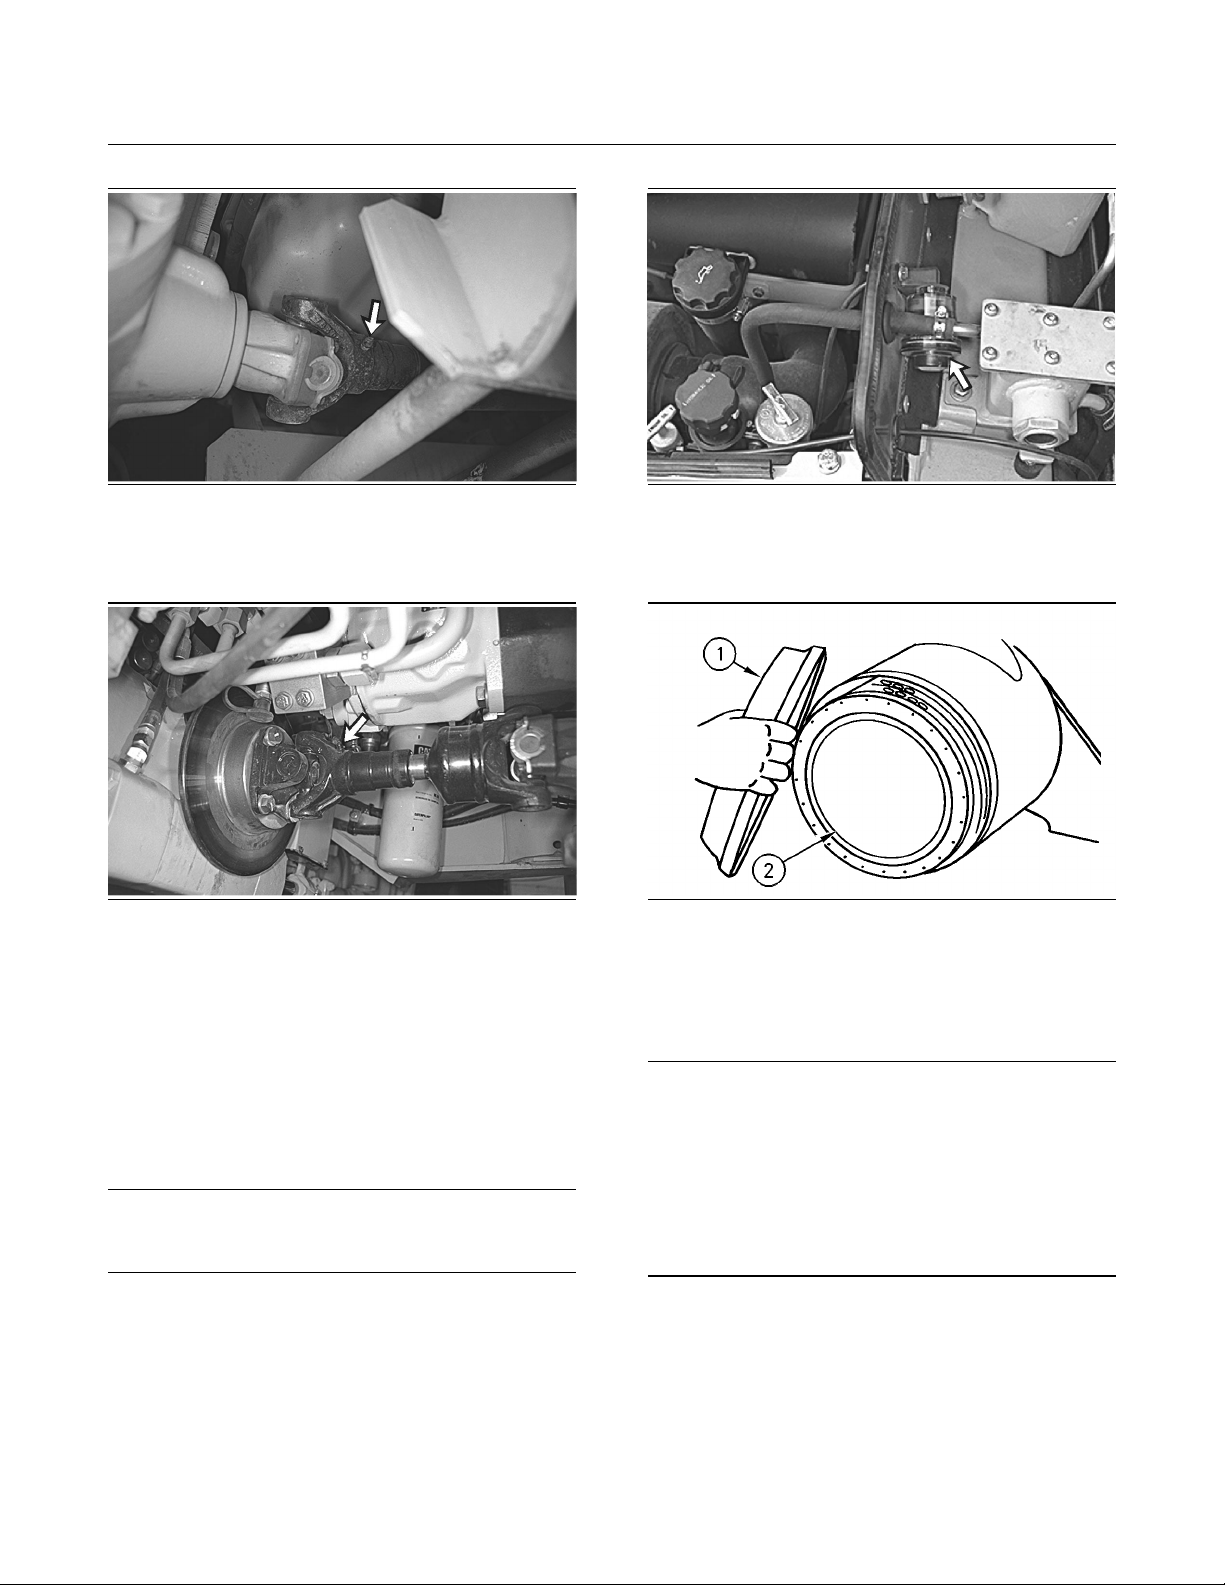
Access the grease fittings for the drive shaft spline
from the bottom of the machine.
Page 20
205
Maintenance Section
Engine Air Filter Primary Element - Clean/Replace
Illustration 308
g00290703
Apply lubricant to the grease fitting for the drive
shaft spline of the front drive shaft.
Illustration 309
g00290704
Apply lubricant to the grease fitting for the drive
shaft spline of the rear drive shaft.
i01035223
Illustration 310
g00287382
Service the air cleaner filter elements when the
yellow piston enters the red zone.
Illustration 311
g00101864
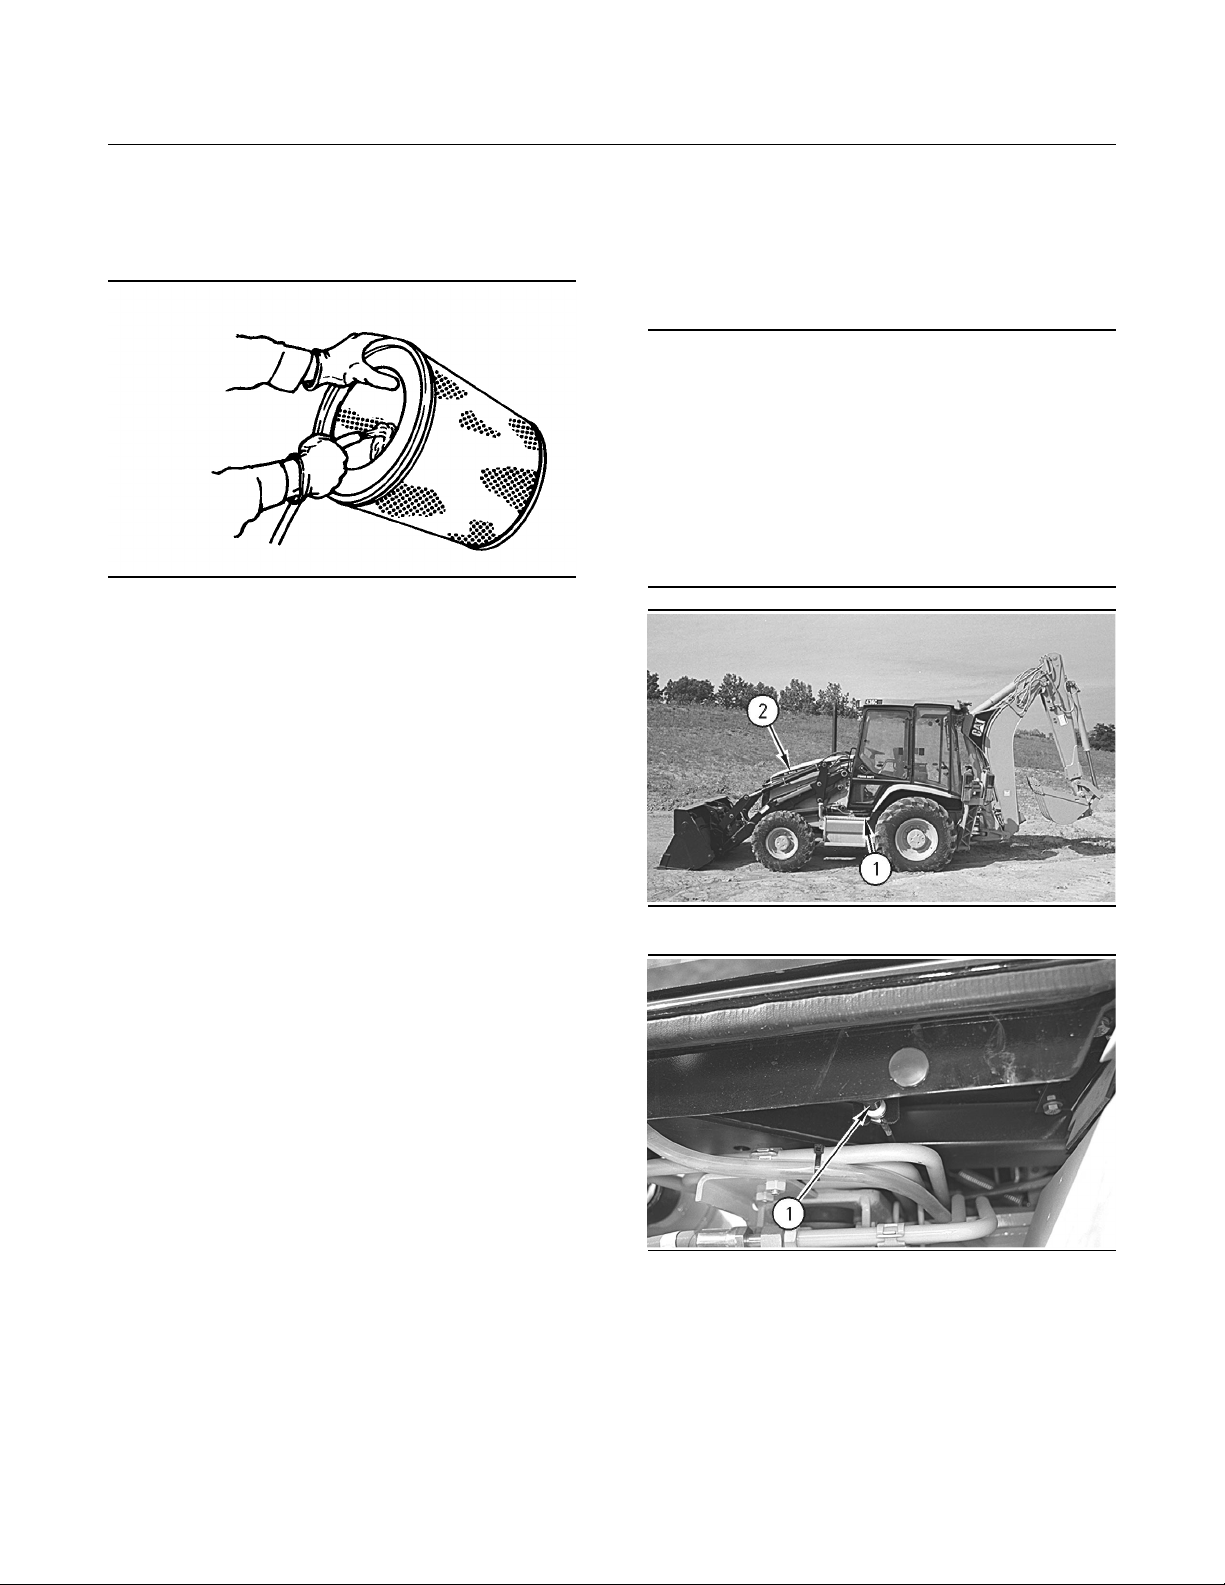
1. Remove the air cleaner housing cover (1).
2. Remove the primary filter element (2) from the air
cleaner housing.
Engine Air Filter Primary
Element - Clean/Replace
SMCS Code: 1051; 1054
NOTICE
Never service the air cleaner when the engine is running, to avoid engine damage.
NOTICE
Do not clean thefilter elements by bumpingor tapping
them. Do not use filterelements with damaged pleats,
gaskets or seals. Engine damage can result.
Make sure the cleaned filter elements are completely
dry before installing into the filter housing. Water remaining in theelements can cause false indicationsof
contamination in Scheduled Oil Sampling test results.
3. Clean the primary filter element.
The filter elements can be cleaned by using the
following methods:
pressure air
•
pressure water
•
detergent washing
•
Page 21
206
Maintenance Section
Engine Air Filter Secondary Element - Replace
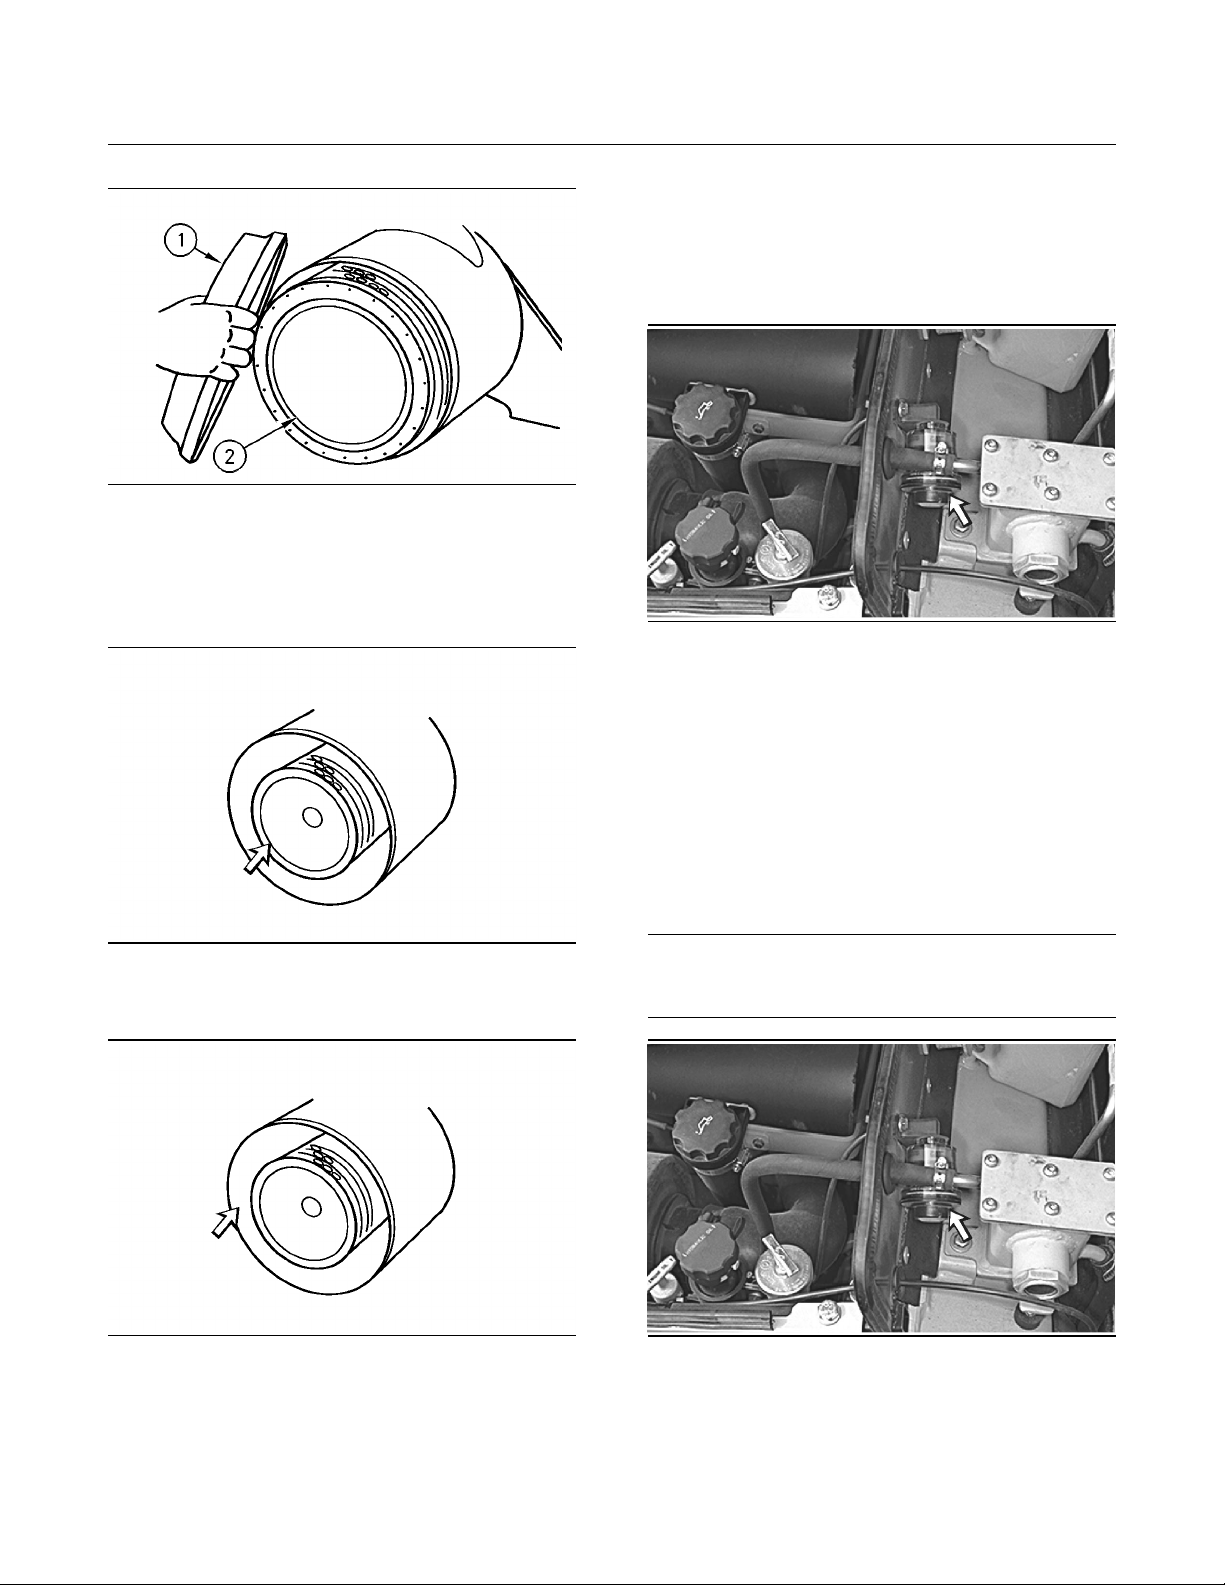
When you use pressure air, the maximum air
pressure is 205 kPa (30 psi). When you use
pressure water, the maximum water pressure is
280 kPa (40 psi).
Illustration 312
a. When you clean the inside pleats and the
outside pleats, direct the air along the pleats
or direct the water along the pleats.
The element can be washed in a solution that
consists of warm water and of nonsudsing
household detergent. Fully rinse the pleats.
Allow the filter to air dry completely.
i00606478
Engine Air Filter Secondary
Element - Replace
SMCS Code: 1051; 1054
NOTICE
Alwaysreplace the secondary filter element.Never attempt to reuse it by cleaning.
Thesecondaryfilter elementshould bereplaced atthe
time the primary element is serviced forthe third time.
The secondary filter element should also be replaced
if theyellow piston in thefilter element indicator enters
the red zone after installation of a clean primary element, or if the exhaust smoke is still black.
g00038608
b. Inspect the filter elements after you clean the
filter elements. Do not use a filter if the pleats,
the gaskets or the seals are damaged.
c. Cover the clean filter elements. Store the
elements in a clean, dry location.
Replace the primary element after the primary
element has been cleaned six times. Also
replace the primary element if the primary
element has been in service for one year.
4. Install a clean filter element and install the cover.
5. Tighten the cover screws finger tight. Do not use
a tool to tighten the cover screws.
Illustration 313
Illustration 314
g00287385
g00287410
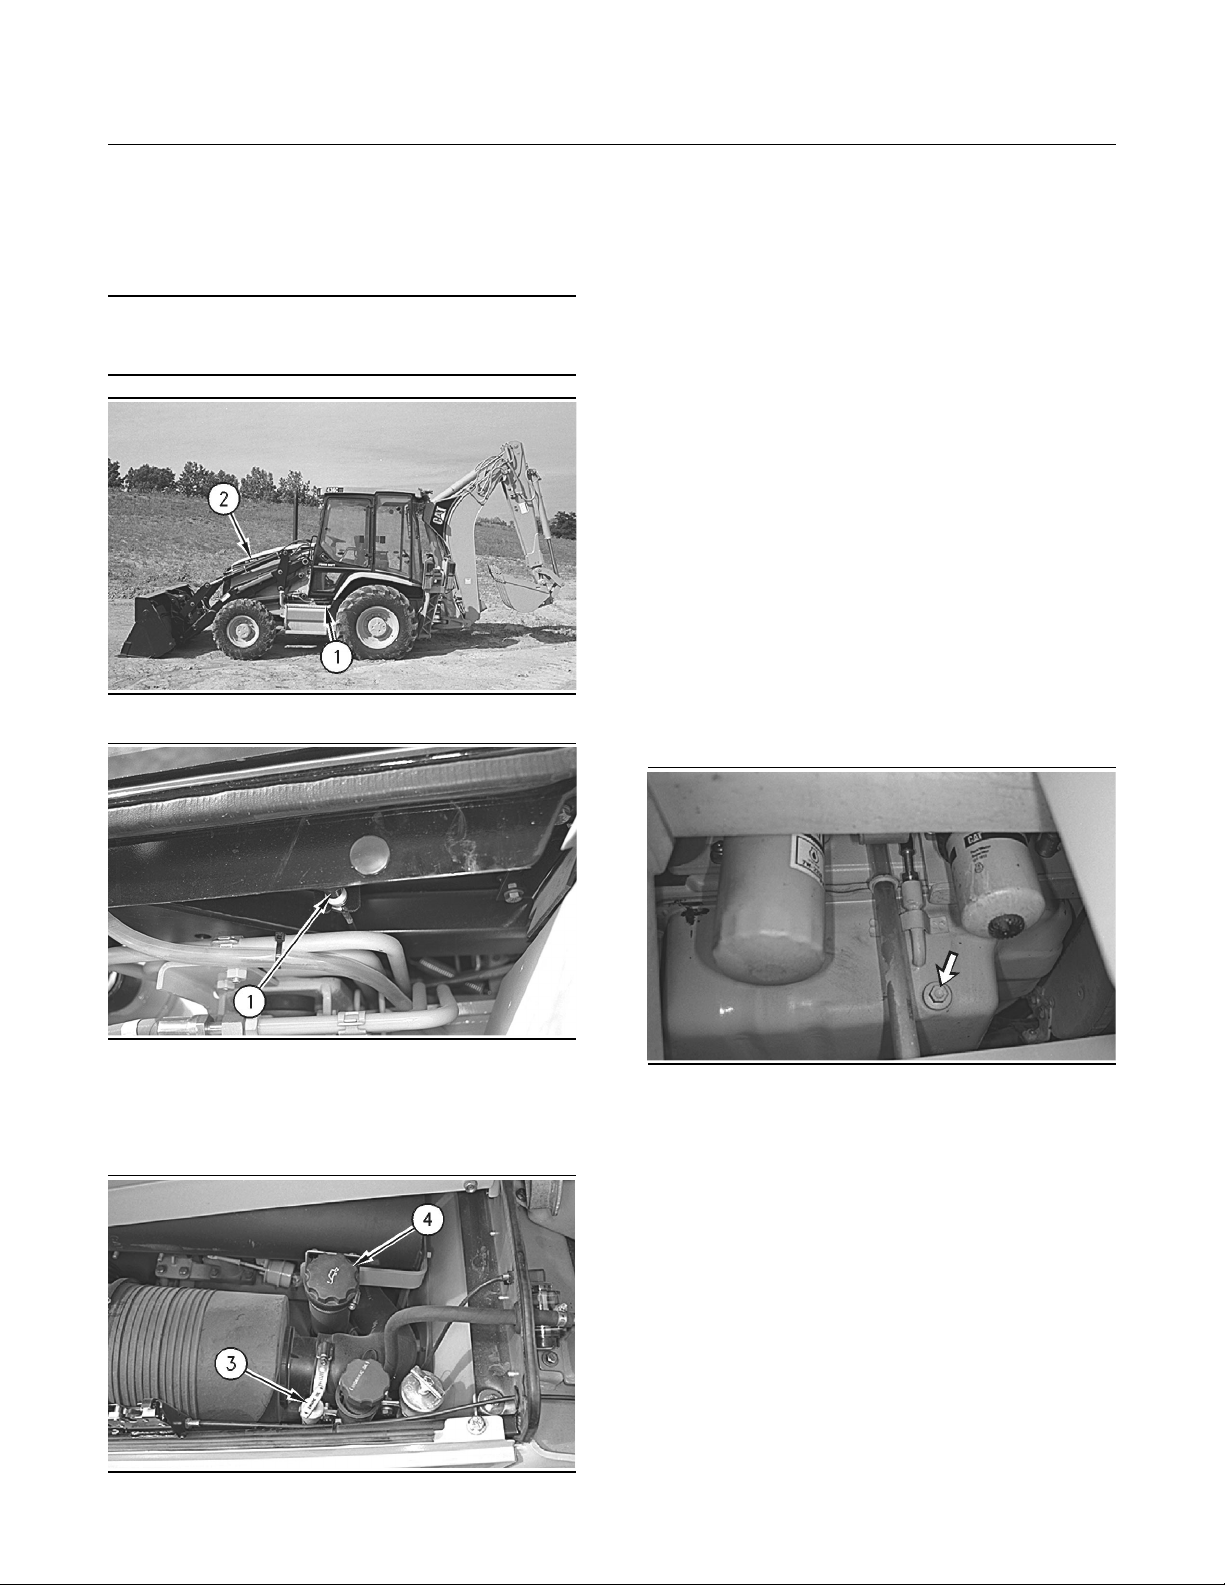
1. Pull the hood release lever (1) in order to open
the engine access door (2) on the top of the
machine.
Page 22
Maintenance Section
Engine Air Filter Service Indicator - Inspect
7. Uncover the air inlet opening. Install a new
secondary element.
8. Install the primary element and the air cleaner
housing cover. Fasten the clips in order to secure
the air cleaner housing cover.
207
Illustration 315
g00101864
2. Remove the air cleaner housing cover (1).
3. Remove the primary filter element (2) from the air
cleaner housing.
Illustration 316
g00038606
4. Remove the secondary filter element.
Illustration 318
g00287382
9. Reset the filter element indicator.
10.Close the engine access door.
i00606530
Engine Air Filter Service
Indicator - Inspect
SMCS Code: 1051; 1054; 7452
NOTICE
Service the air cleaner only with the engine stopped.
Engine damage could result.
Illustration 317
g00101865
5. Cover the air inlet opening. Clean the inside of
the air cleaner housing.
6. Inspect the gasket between the air inlet pipe and
the air cleaner housing. Replace the gasket if
the gasket is damaged.
Illustration 319
g00287382
The filter service indicator is located under the
engine access door on the top of the machine.
Start the engine. Run the engine at high idle. If the
yellow piston in the filter service indicator enters the
red zone, service the air cleaner. Stop the engine.
Page 23
208
Maintenance Section
Engine Oil Level - Check
i00606534
Engine Oil Level - Check
SMCS Code: 1302; 1318; 1326
NOTICE
Do not overfill the crankcase. Engine damage can result.
Illustration 320
g00287385
2. While the engine is stopped, maintain the oil
level between the “ADD” mark and the “FULL”
mark on the engine oil dipstick (3).
3. If necessary, remove the oil filler cap (4) and
add oil.
4. Clean the oil filler cap and install the oil filler cap.
5. Close the engine access door.
i00606560
Engine Oil and Filter - Change
SMCS Code: 1302; 1318; 1326
Note: If the sulfur content in the fuel is greater than
1.5% by weight, use an oil with a TBN of 30. With
the high sulfur fuel, change the oil and the filter
element after every 250 hours or after every month.
If the API category is CF-4 or less, change the oil
and filter element after every 250 hours or after
every month. Otherwise, change the oil and the
filter element after every 500 hours or after every
three months.
Illustration 321
g00287410
1. Pull the hood release lever (1) in order to open
the engine access door (2) on the top of the
machine.
Illustration 322
g00287411
Illustration 323
g00290413
The crankcase drain plug is on the left side of the
oil pan.
1. Remove the crankcase drain plug and drain the
oil into a suitable container. Clean the crankcase
drain plug and replace the crankcase drain plug.
Page 24
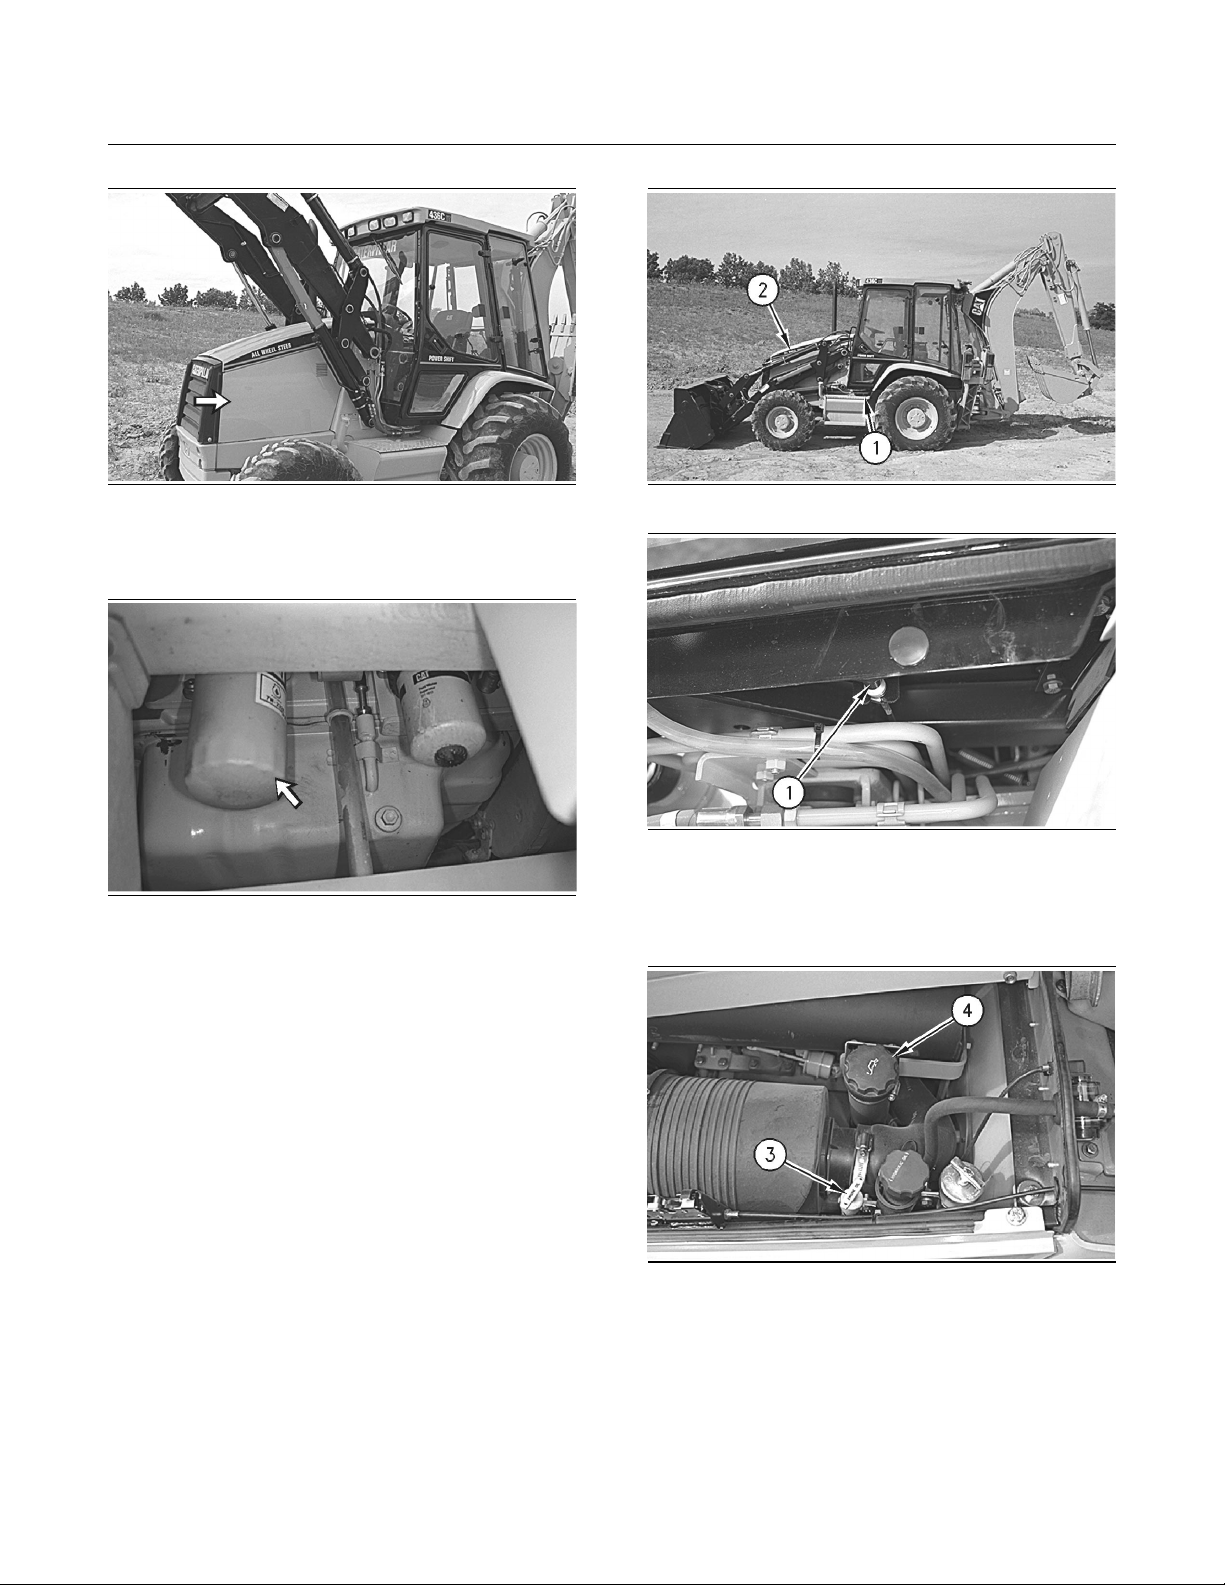
209
Maintenance Section
Engine Oil and Filter - Change
Illustration 324
g00287238
2. Remove the engine access panel on the left side
of the machine.
Illustration 325
g00290708
3. Remove the filter element with a strap type
wrench. Refer to Operation and Maintenance
Manual, “Oil Filter - Inspect”.
4. Clean the filter mounting base with a clean cloth.
Make sure that the old filter gasket has been
removed.
Illustration 326
Illustration 327
g00287385
g00287410
7. Pull the hood release lever (1) in order to open
the engine access door (2) on the top of the
machine.
5. Apply a thin film of clean engine oil to the sealing
surface of the new filter element.
6. Install the new filter element by hand. When the
gasket contacts the filter base, tighten the filter
for an additional 3/4 turn.
Illustration 328
g00287411
8. Remove the oil filler cap (4). Fill the crankcase
with new oil. Refer to Operation and Maintenance
Manual, “Lubricant Viscosities” and Operation
and Maintenance Manual, “Refill Capacities”.
Clean the oil filler cap and install the oil filler cap.
9. Start the engine and allow the oil to warm. Check
for leaks.
Page 25
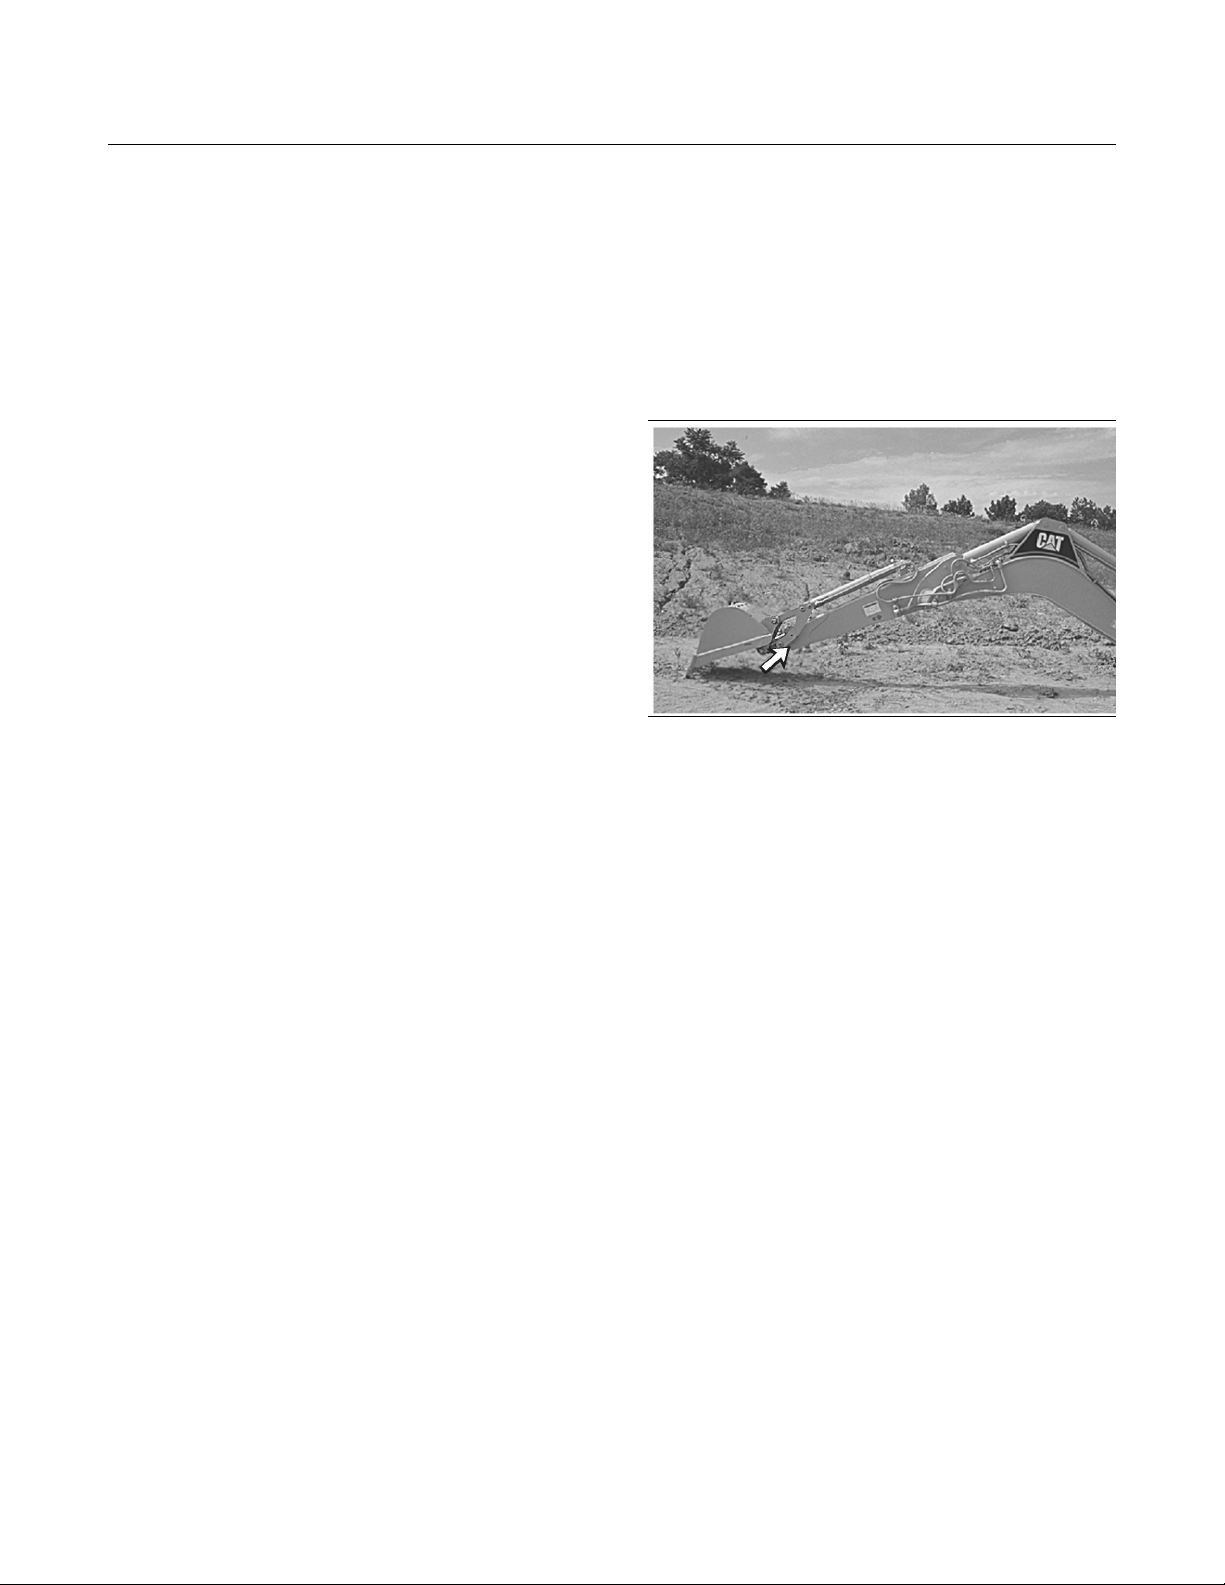
210
Maintenance Section
Engine Valve Lash - Check
10.Stop the engine and allow the oil to drain back
into the oil pan. Maintain the oil level in the
crosshatched region of the engine oil dipstick
(3). Add oil, if necessary.
11.Replace the engine access panel and close the
engine access door.
i01010167
Engine Valve Lash - Check
SMCS Code: 1102-082; 1102-535; 1102; 1209-082;
1209
Note: A qualified service person should perform the
valve lash check and/or the valve lash adjustment.
Special tools and training are required.
Check the engine valve lash after every 1000
service hours or 6 months on machines that are
equipped with the following engine arrangements:
122-8803 Primary Engine Arrangement
•
122-8804 Engine Arrangement
•
Extendable Stick Pads Inspect/Replace
(If Equipped)
SMCS Code: 6533-040-JP; 6533-510-JP
Inspect Wear Pads
Illustration 329
i01184251
g00634728
122-8805 Engine Arrangement
•
122-8806 Engine Arrangement
•
The engine arrangement number is located on the
engine serial number plate.
Check the engine valve lash after every 2000
service hours or 1 year on machines that are not
equipped with the engine arrangements that are
listed above.
Refer to your machine’s Service Manual for
complete instructions.
Check the extendable stick for slop. Shim the
extendable stick pads in order to maintain an
acceptable fit and reduce slop.
Note: Do not apply an excessive amount of a
silicone based lubricant. Dirt can be attracted to the
lubricant and dirt can cause abrasion to the pad
assemblies and wear to the pad assemblies.
The extendable stick pads do not normally require
any lubrication. If the extendable stick becomes
noisy, a small amount of a silicone based lubricant
may be applied.
Adjustment for Top Upper Wear
Pad
1. Extend the extendable stick to one half of the
fully extended position.
2. Move the stick and move the boom down against
the ground. This will take pressure off the wear
pad.
Page 26
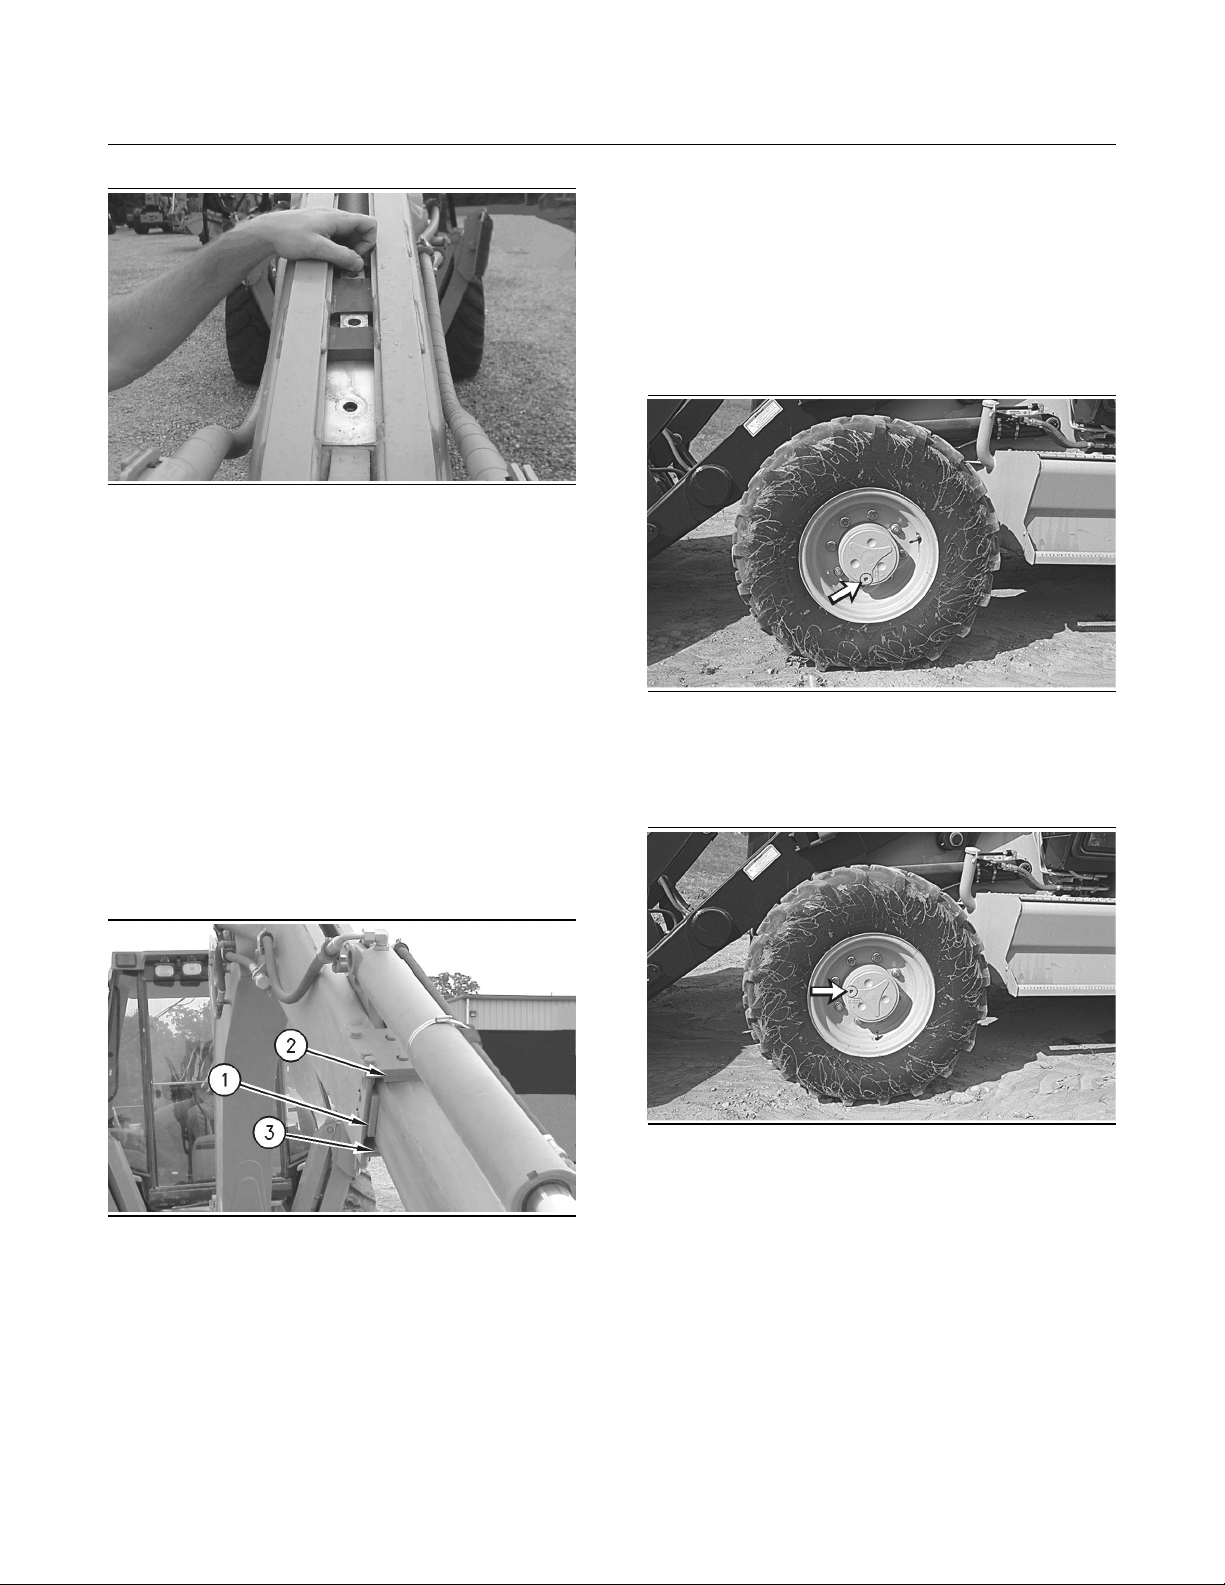
211
Maintenance Section
Final Drive Oil (Front) - Change
Note: Place the bucket on the ground. Apply slight
pressure toward the ground with the stick. Shim the
lower pad or replace the lower pad.
i00609504
Final Drive Oil (Front) - Change
SMCS Code: 4050
Illustration 330
g00635137
3. Remove the bolts that secure the wear pad. Slide
the pad toward the boom. There will be enough
space in order to remove the pad. Either replace
the wear pads or stack shims behind the pad.
4. Shim the wear pad to 1 mm (0.04 inch) .
Note: In order to make adjustments to the remaining
upper wear pads, refer to Disassembly and
Assembly Manual, SENR1209, “Stick, Extendable
Stick, Extendable Stick Cylinder”.
Adjustment for Lower Pads
1. Extend the extendable stick out until there is
enough clearance in order to remove the pads.
Illustration 332
g00287533
1. Position the oil fill/drain plug at the bottom.
Remove the oil fill/drain plug and drain the oil
into a suitable container.
Illustration 331
g00635788
2. The side pads (1) can be shimmed without
moving the stick or without moving the boom.
3. Adjust the boom and adjust the stick in order to
take pressure away from the top pad (2). Adjust
the wear pads by shimming or replacing. Shim
the wear pads to 1 mm (0.04 inch).
4. Adjust the boom and adjust the stick in order to
take the pressure away from the lower pad (3).
Illustration 333
g00287534
2. Position the plug hole at a horizontal position.
Use the line on the final drive as a reference.
3. Add oil until the oil is level with the plug threads.
Refer to Operation and Maintenance Manual,
“Lubricant Specifications” and Operation and
Maintenance Manual, “Refill Capacities” for the
oil.
4. Clean the plug and install the plug.
5. Repeat the procedure for the other final drive.
Page 27
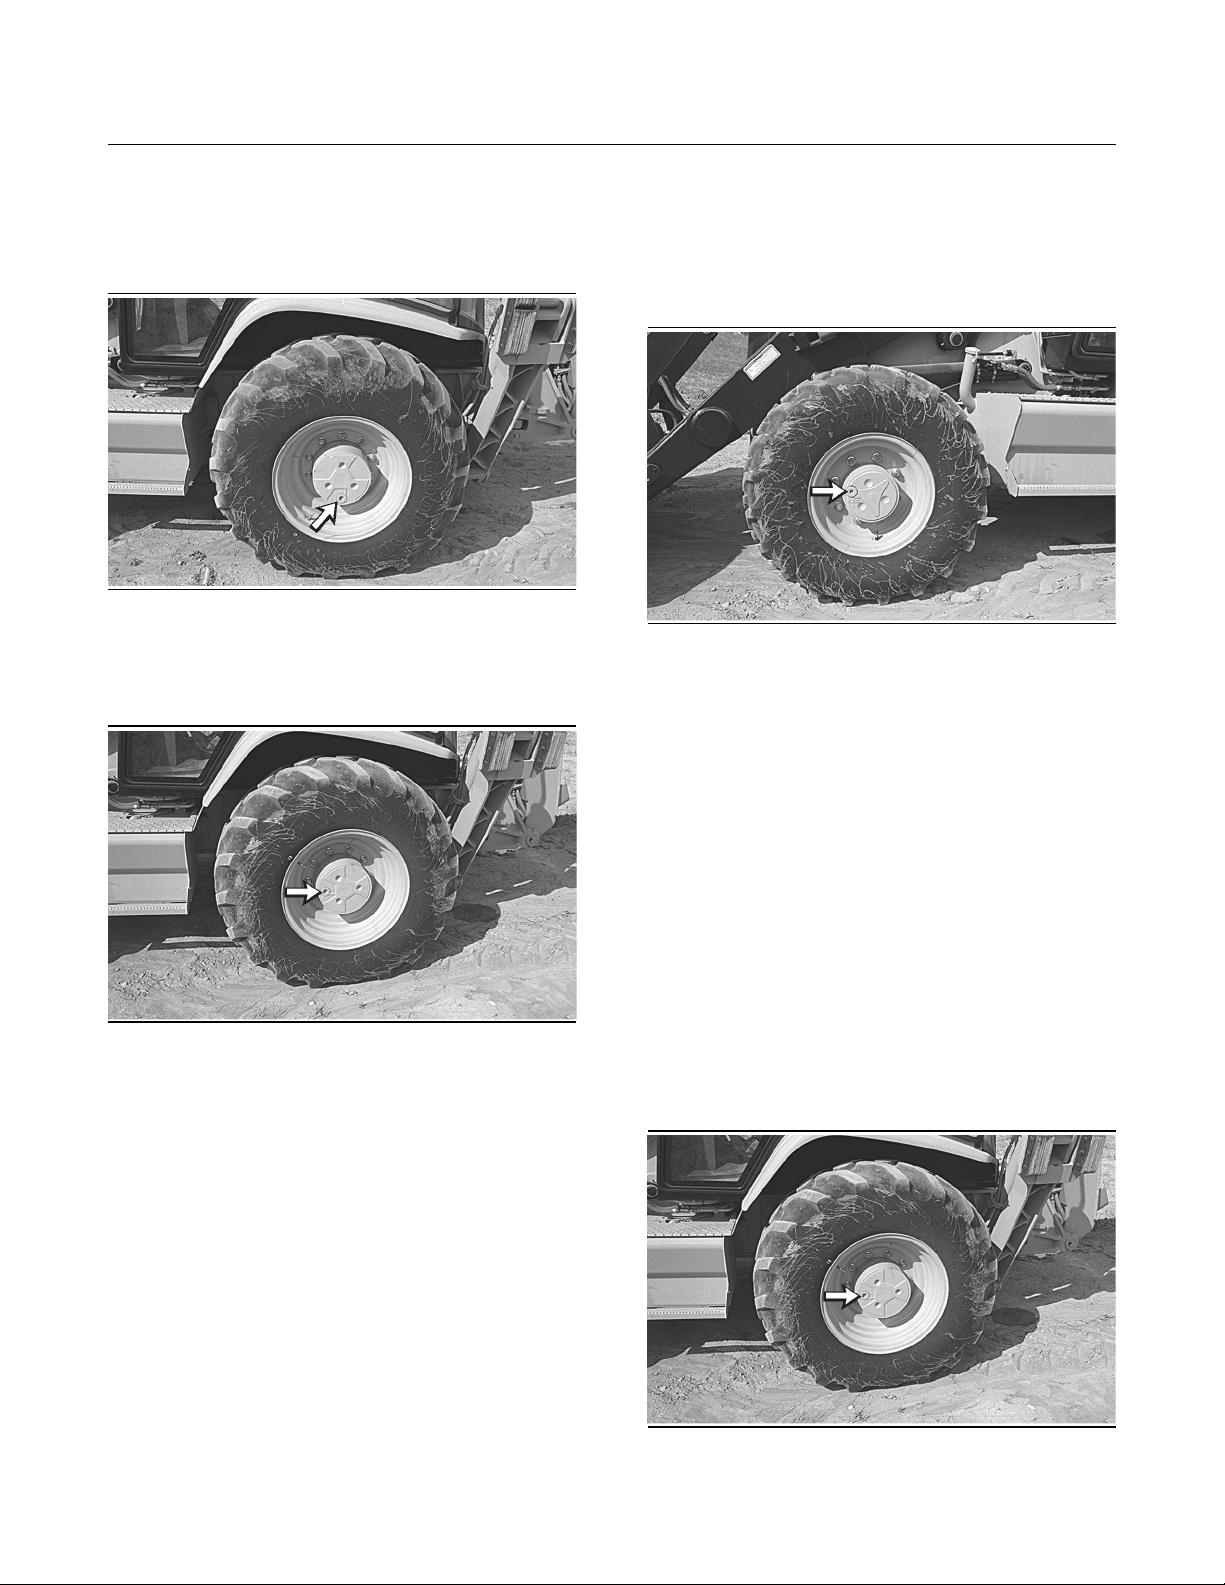
212
Maintenance Section
Final Drive Oil (Rear) - Change
i00609505
Final Drive Oil (Rear) - Change
SMCS Code: 4050
Illustration 334
1. Position the oil fill/drain plug at the bottom.
Remove the oil fill/drain plug and drain the oil
into a suitable container.
g00287536
i00609508
Final Drive Oil Level (Front) Check
SMCS Code: 4050
Illustration 336
1. Position the oil fill/drain plug at a horizontal
position in order to check the oil level.
2. Remove the oil fill/drain plug in order to check
the oil level.
g00287534
Illustration 335
2. Position the plug hole at a horizontal position.
Use the line on the final drive as a reference.
3. Add oil until the oil is level with the plug threads.
Refer to Operation and Maintenance Manual,
“Lubricant Specifications” and Operation and
Maintenance Manual, “Refill Capacities” for the
oil.
4. Clean the plug and install the plug.
5. Repeat the procedure for the other final drive.
g00287537
3. The oil should be level with the bottom of the
plug threads.
4. Clean the plug and install the plug.
5. Repeat the procedure for the other final drive.
i00609510
Final Drive Oil Level (Rear) Check
SMCS Code: 4050
Illustration 337
1. Position the oil fill/drain plug at a horizontal
position in order to check the oil level.
g00287537
Page 28
213
Maintenance Section
Fuel System - Prime
2. Remove the oil fill/drain plug in order to check
the oil level.
3. The oil should be level with the bottom of the
plug threads.
4. Clean the plug and install the plug.
5. Repeat the procedure for the other final drive.
i00609513
Fuel System - Prime
SMCS Code: 1258
Air can enter the system under the following
conditions.
The fuel tank is drained during normal operation.
•
The low pressure fuel lines are disconnected.
•
A part of the low pressure fuel system leaks
•
during engine operation.
If air enters the fuel system, the air must be
eliminated from the system before the engine can
be started.
If the engine has been stopped by air in the fuel
system, perform the following procedures:
Make sure that fuel has been added to the tank.
•
Make sure that the leakage problem has been
•
corrected.
Make sure that the electrical stop control is
•
connected.
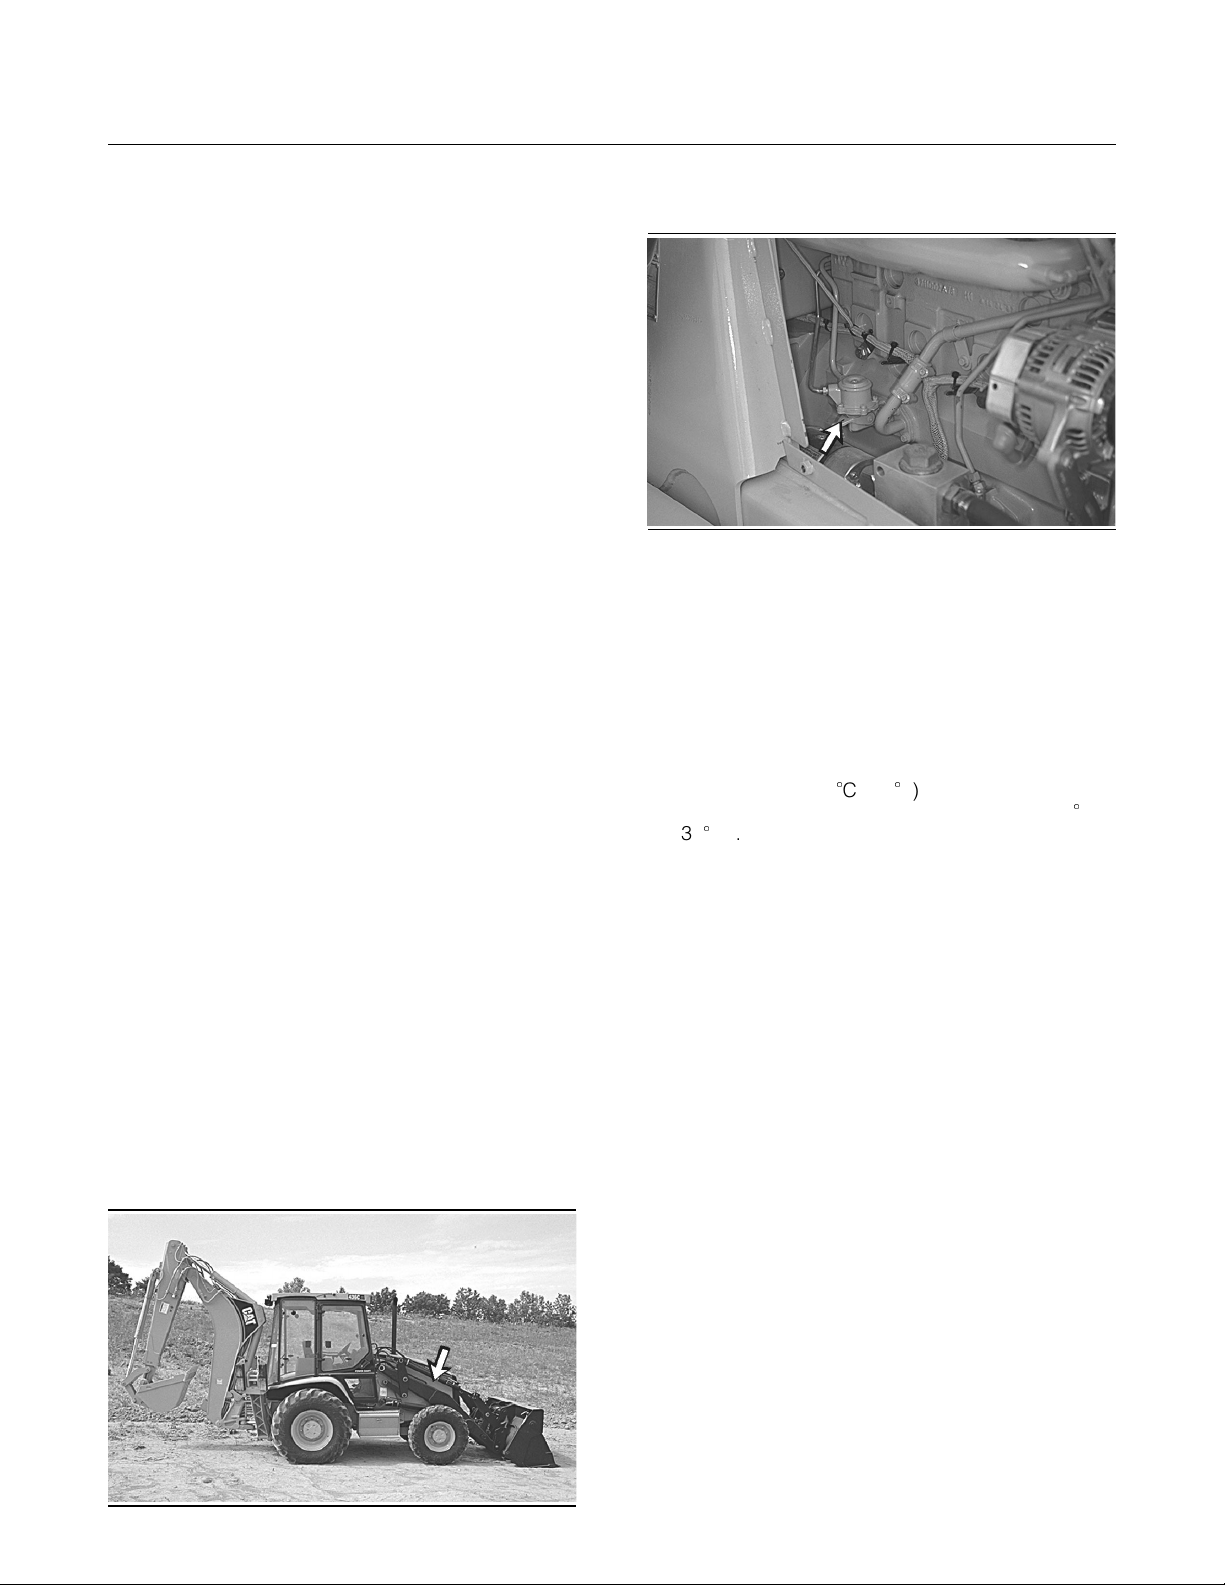
2. Remove the access panel on the right side of
the machine.
Illustration 339
3. Operate the lever of the fuel lift pump slowly
for approximately two minutes. If the drive cam
of the fuel lift pump is at the point of maximum
cam lift, the priming lever will not operate. In
this situation, the crankshaft must be turned one
revolution.
4. Operate the starter motor until the engine starts.
Refer to Operation and Maintenance Manual,
“Starting Above 0
and Maintenance Manual, “Starting Below 0
(32
F)”.
5. Check for air in the fuel system if the engine runs
roughly after the engine runs correctly for a short
period of time. Check for air in the fuel system if
the engine stops after the engine runs correctly
for a short period of time. If there is air in the fuel
system, check the low pressure fuel system for
a leak. Correct the problem and repeat Step3
through Step4.
C (32F)” and Operation
g00291786
C
Operate the starter motor until the engine starts.
•
1. Make sure the electrical stop control is
connected. Turn the engine start switch key to
the ON position.
Illustration 338
g00291785
i00609515
Fuel System Filter - Replace
SMCS Code: 1261
1. Empty the bucket. Remove the pin that secures
the loader lift arm brace to the left loader lift arm.
Raise the loader arm to the maximum height.
2. Position the loader lift arm brace over the left lift
cylinder rod with the flat end against the cylinder
end.
3. Push the pin through the holes of the loader lift
arm brace and install the cotter pin.
4. Slowly lower the loader arms until the loader lift
arm brace contacts the top of the lift cylinder
and the bosses on the loader arm.
Page 29
214
Maintenance Section
Fuel System Water Separator - Drain
5. Stop the engine.
Illustration 340
g00287238
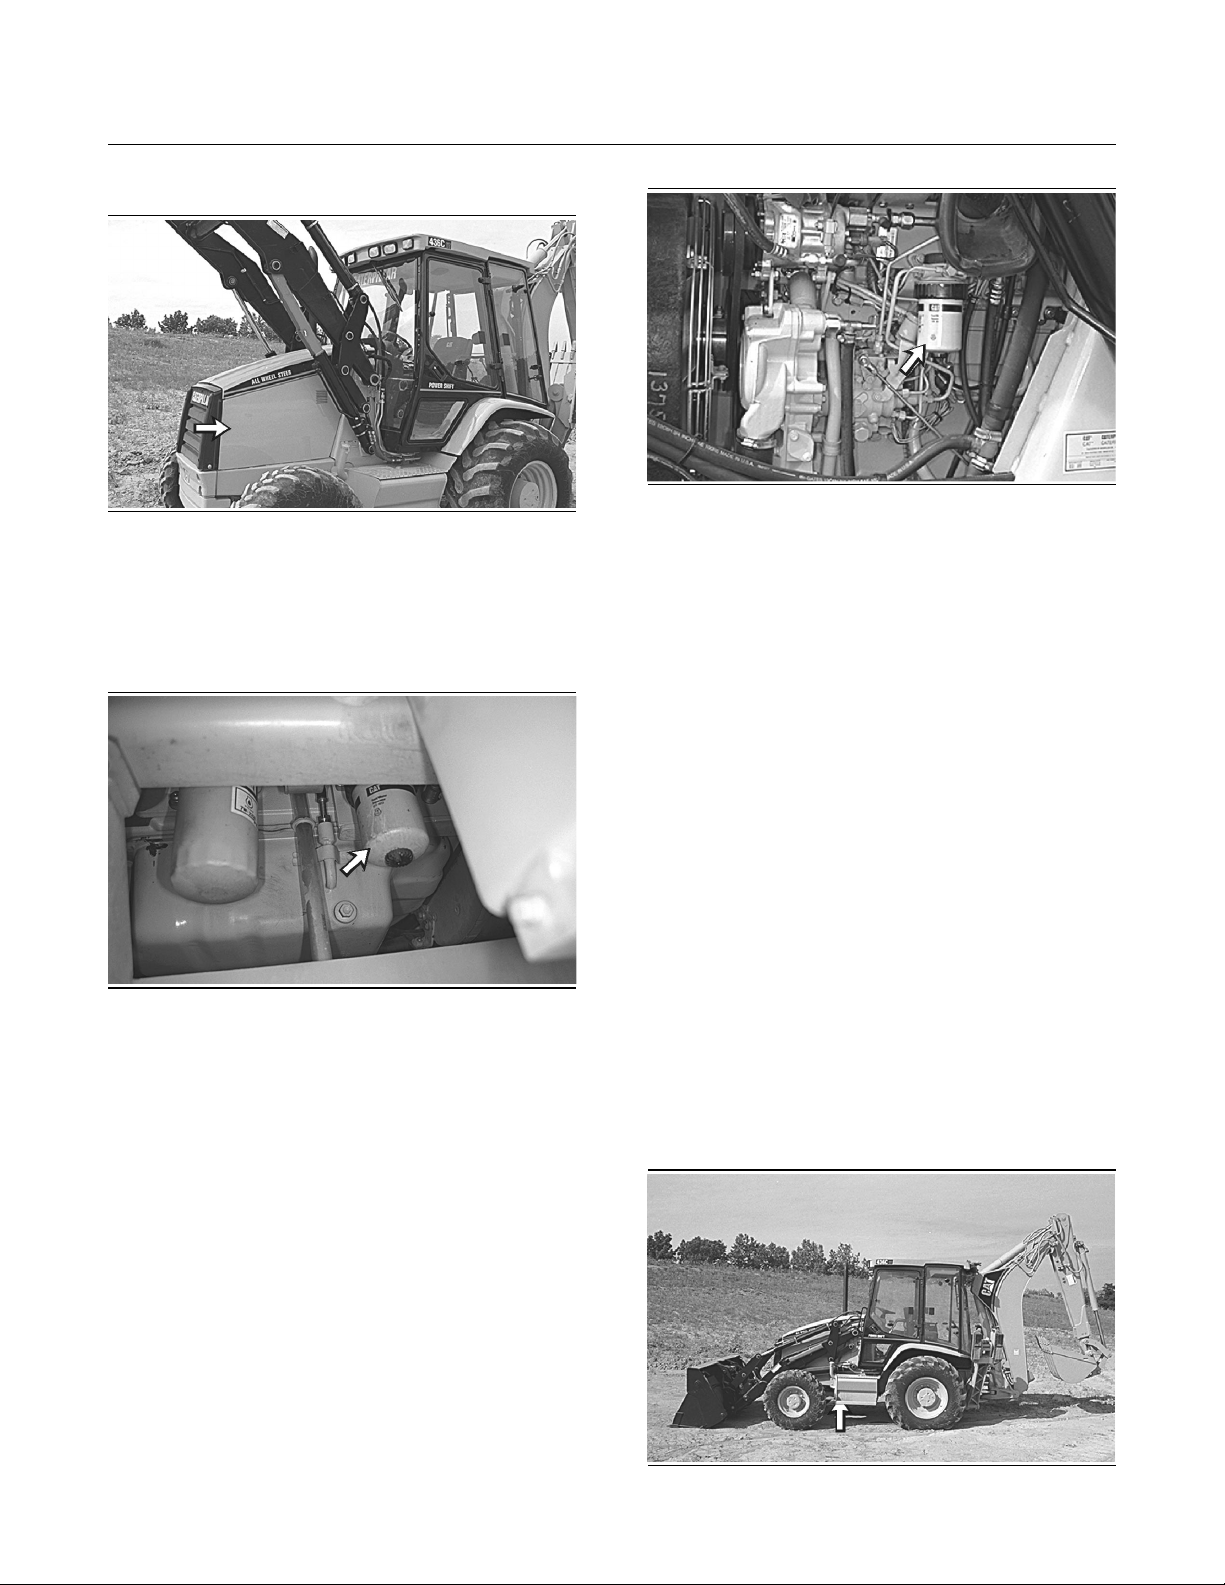
6. Remove the access panel from the left side of
the machine.
The machine uses fuel filters with a push and
twist collar.
Illustration 341
g00291787
7. Remove the primary fuel filter that is located next
to the crankcase drain plug under the machine.
Rotate the locking ring counterclockwise in order
to remove the filter element. Discard the filter
properly.
Illustration 342
g00291788
11.Remove the secondary fuel filter. Rotate the
locking ring counterclockwise in order to remove
the filter element. Discard the filter properly.
12.Clean the filter element mounting base. Remove
any part of the filter element gasket that remains
on the filter element mounting base.
13.Coat the seal of the new filter element with clean
diesel fuel.
14.Install the new filter element. Rotate the locking
ring clockwise in order to fasten the filter to the
mounting base.
15.Prime the fuel system in order to fill the filter
elements with fuel. Refer to Operation and
Maintenance Manual, “Fuel System - Prime”.
16.Replace the access panel.
i00669721
Fuel System Water Separator
- Drain
SMCS Code: 1263-543; 1263
8. Clean the filter element mounting base. Remove
any part of the filter element gasket that remains
on the filter element mounting base.
9. Coat the seal of the new filter element with clean
diesel fuel.
10.Install the new filter element. Rotate the locking
ring clockwise in order to fasten the filter to the
mounting base.
Illustration 343
g00293550
Page 30
215
Maintenance Section
Fuel System Water Separator Element - Replace
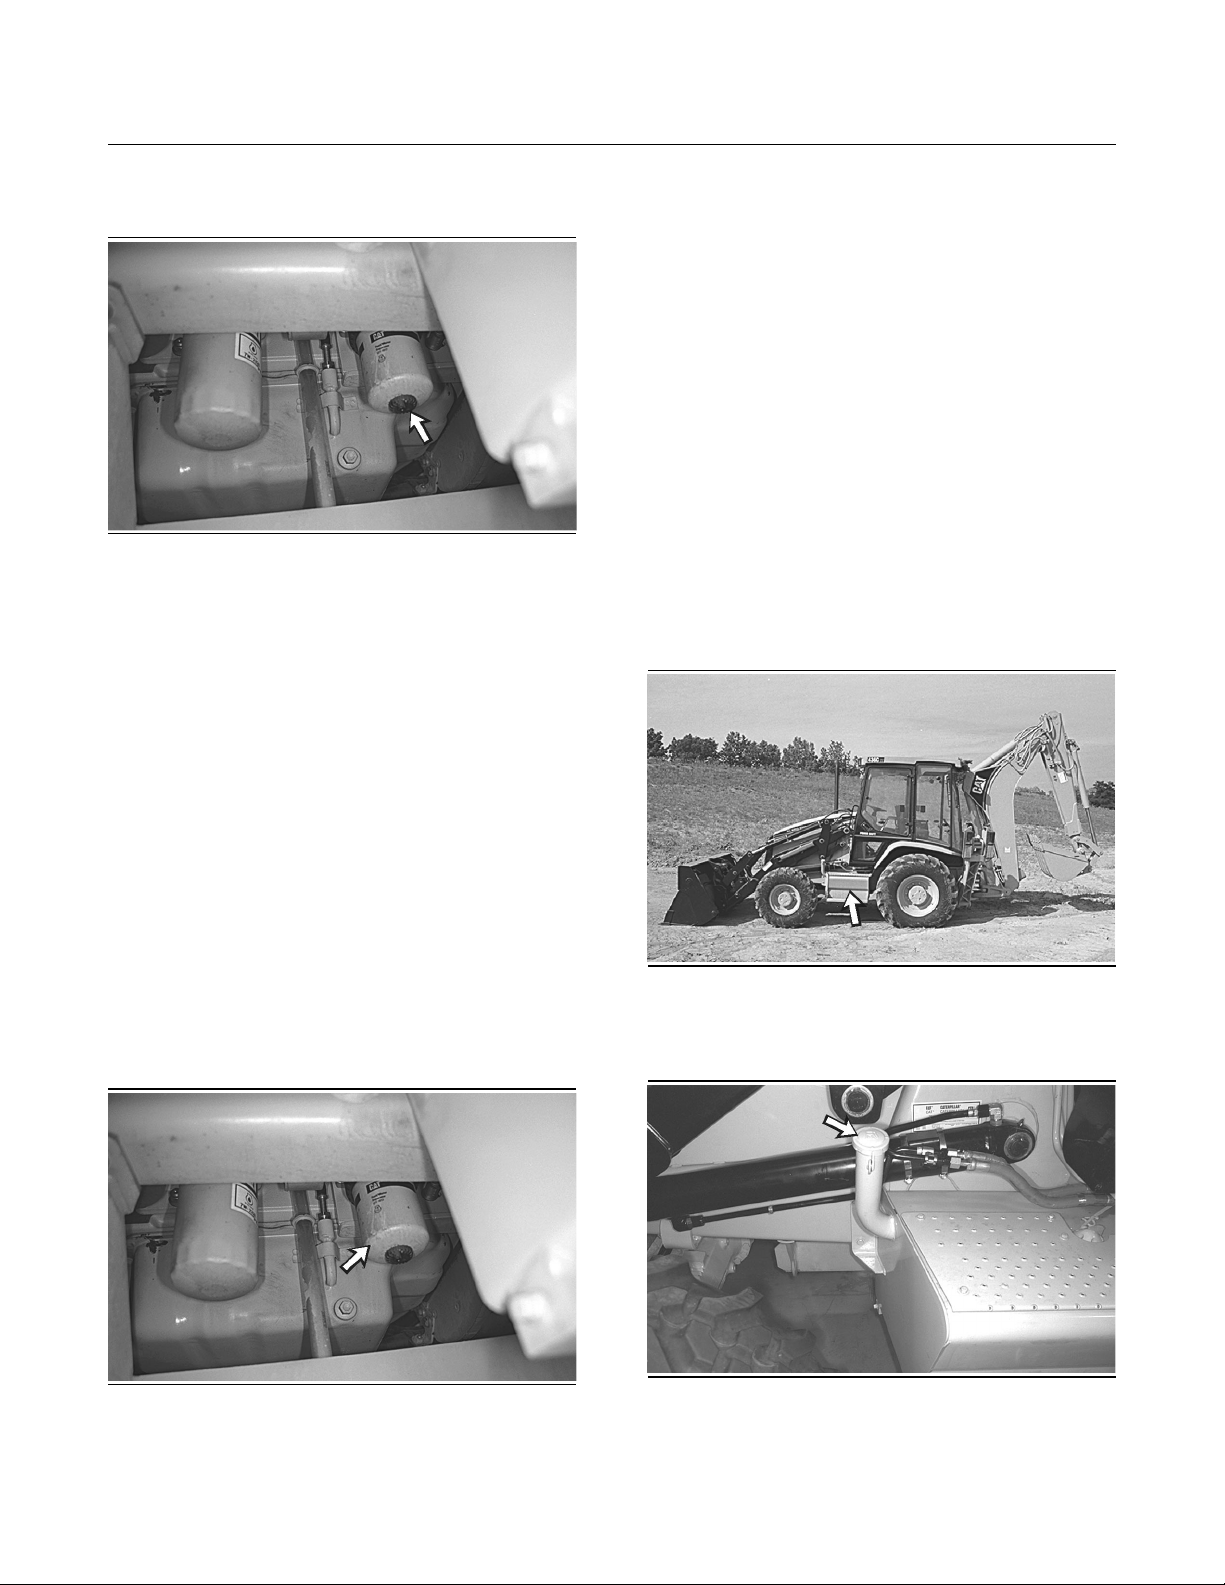
The water separator is located by the drain plug
for the engine crankcase.
Illustration 344
g00293551
1. Loosen the drain valve on the bottom of the fuel
filter. Allow the water and the sediment to drain
into a suitable container.
2. Tighten the drain valve.
3. If the engine fails to start, change the fuel filter. If
there is a power loss, change the fuel filter.
2. Clean the filter element mounting base . Remove
any part of the filter element gasket that remains
on the filter element mounting base.
3. Coat the seal of the new filter element with clean
diesel fuel.
4. Install the new filter element. Rotate the locking
ring clockwise in order to fasten the filter to the
mounting base.
5. Prime the fuel system in order to fill the filter
element with fuel. Refer to Operation and
Maintenance Manual, “Fuel System - Prime”.
i00669722
Fuel Tank Water and Sediment
- Drain
SMCS Code: 1273-543-M&S
i00675934
Fuel System Water Separator
Element - Replace
SMCS Code: 1263-510-FQ
The water separator element is located next to the
crankcase drain plug under the machine.
The machine uses water separator elements with
a push and twist collar.
Illustration 346
g00292670
The fuel tank is located on the left side of the
machine.
Illustration 345
g00291787
1. Remove the water separator element. Rotate the
locking ring counterclockwise in order to remove
the filter element. Discard the filter element
properly.
Illustration 347
g00292671
Slowly remove the fuel tank cap in order to relieve
pressure.
Page 31
216
Maintenance Section
Fuses - Replace
Illustration 348
g00292692
The fuel tank drain valve is located on the lower
right corner on the front of the fuel tank. Remove the
fuel tank drain plug. Allow the water and sediment
to drain into a suitable container. Install the fuel tank
drain plug. Replace the fuel tank cap.
i00609834
Fuses - Replace
SMCS Code: 1417
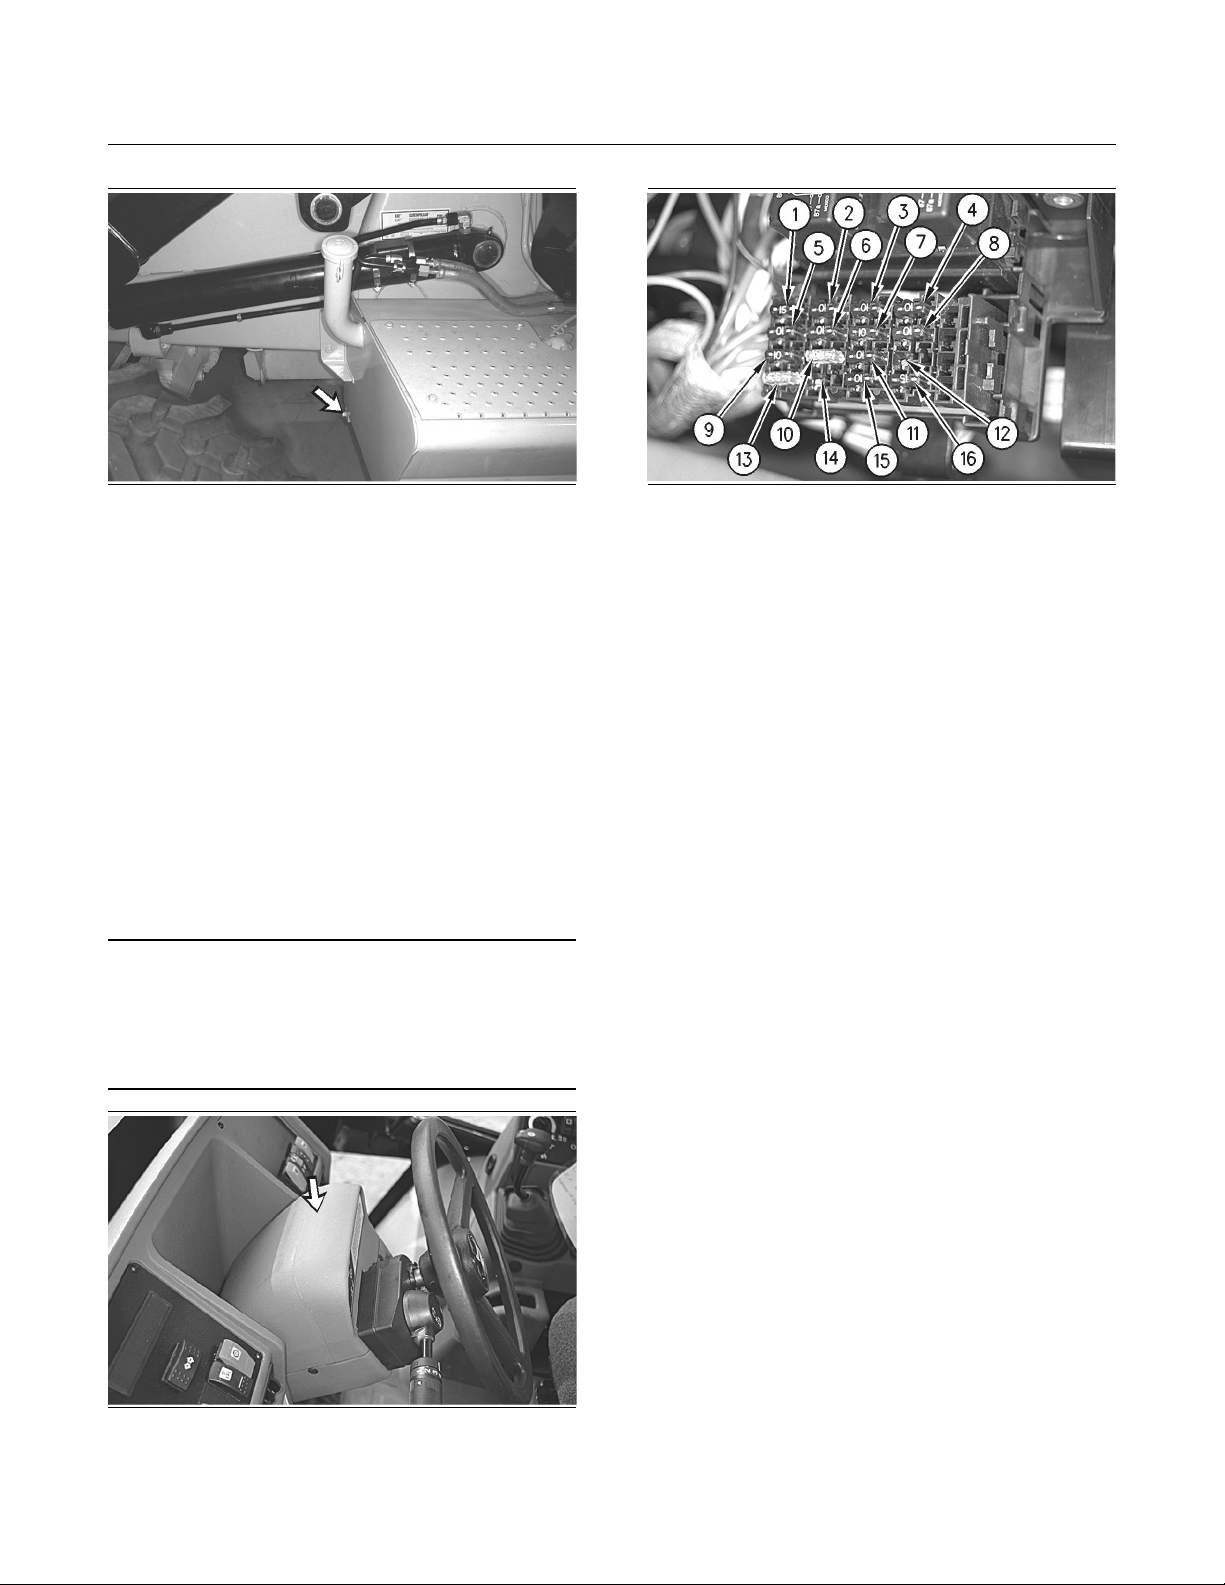
Fuses – Fuses protect the electrical system from
damage that is caused by overloaded circuits.
Replace the fuse if the element separates. If the
element of a new fuse separates, check the circuit.
Repair the circuit, if necessary.
NOTICE
Replace the fuses with the same type and size only.
Otherwise, electrical damage can result.
If itis necessary to replacefuses frequently,an electrical problem may exist. Contact you Caterpillar dealer
Illustration 350
Engine Start Switch (1) – 15 Amp
Horns (2) – 10 Amp
Lighter (3) – 10 Amp
Hazard Lights (4) – 10 Amp
Backup Alarm (5) – 10 Amp
Transmission (6) – 10 Amp
Bucket Positioner (7) – 10 Amp
All Wheel Steer (8) – 10 Amp
All Wheel Drive (9) – 10 Amp
Heater Fan (10) – 10 Amp
Gauges (11) – 10 Amp
Spare (12) – Open
Main Lights (13) – 30 Amp
g00287570
Illustration 349
g00287569
Remove the cover on the steering console in order
to access the main fuse panel.
Spare (14) – Open
Main Air Conditioner(15) – 25 Amp
Main Windshield Wipers (16) – 20 Amp
Note: Some of the main fuses are tied together with
the fuses in the headliner. For example, if all of the
lights are not functioning, check the main fuse for
the lights in the steering console. If one light is not
functioning, check the fuse in the headliner for the
specific light.
Page 32
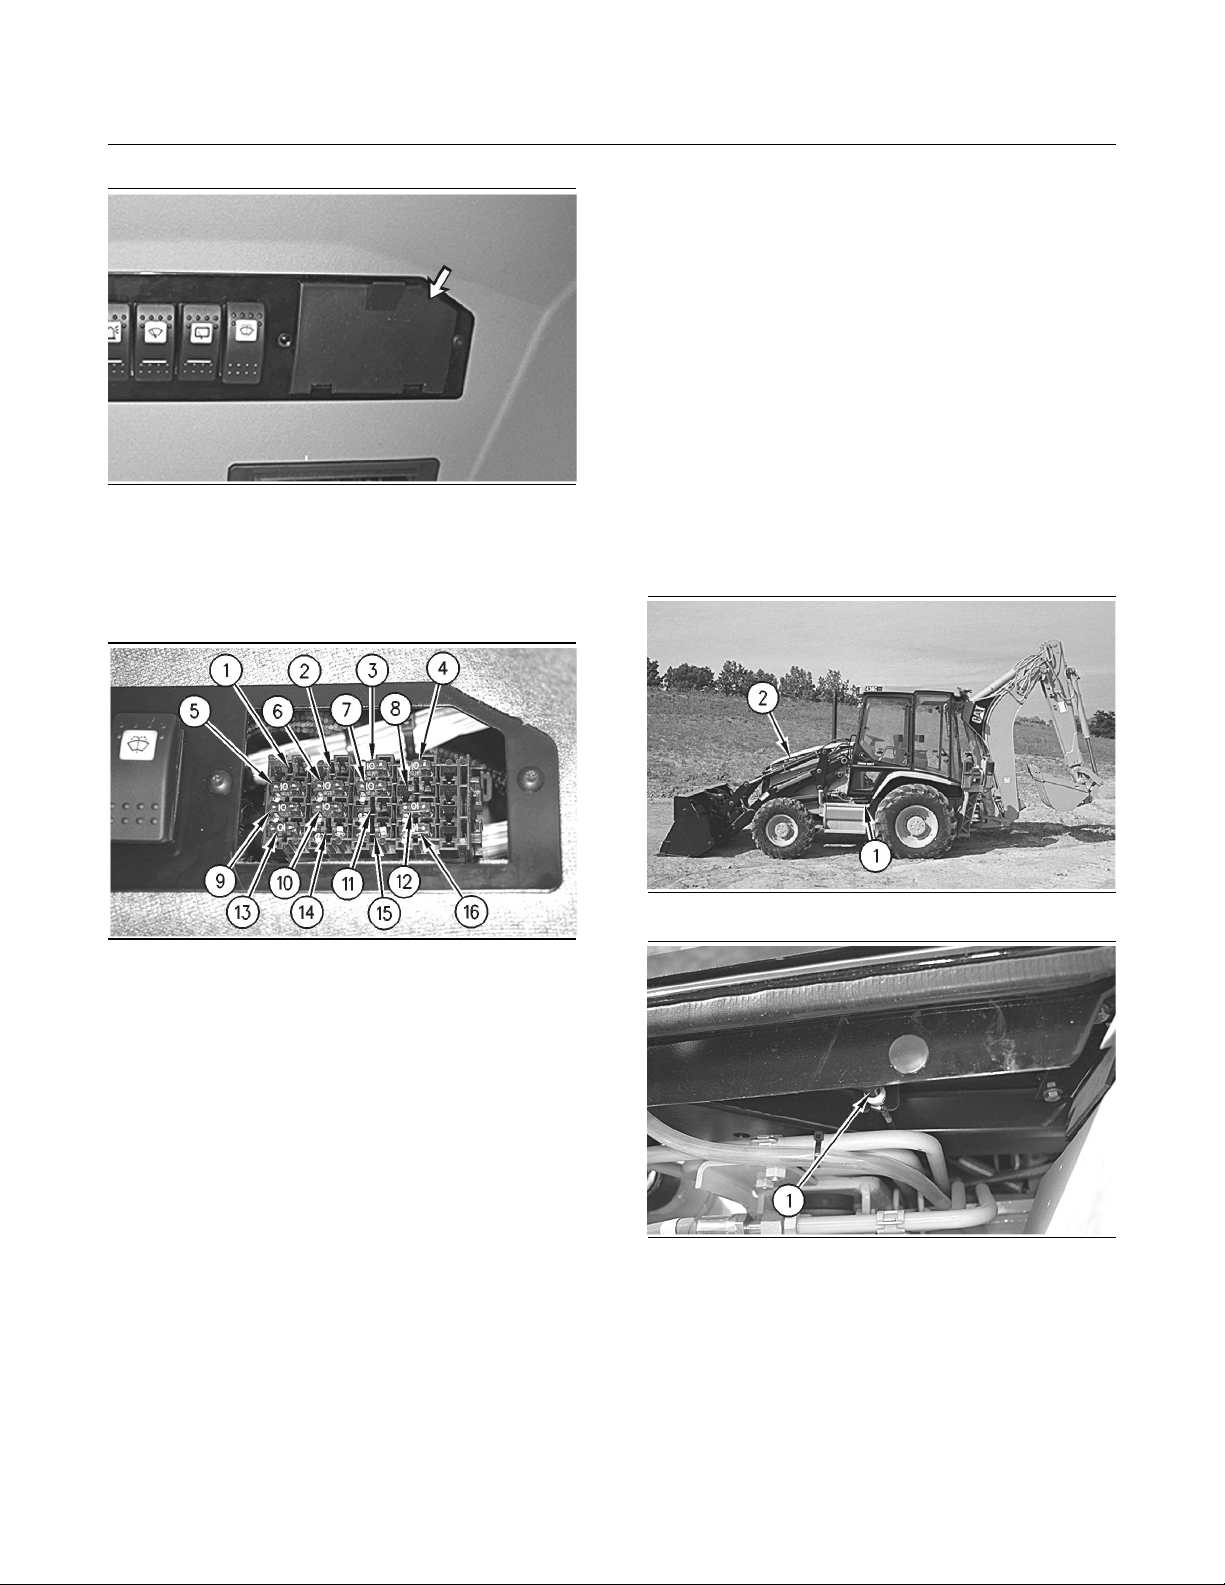
Illustration 351
g00287571
The fuse panel is located in the switch panel on
the headliner of the cab.
Remove the cover in order to access the fuses.
217
Maintenance Section
Hydraulic System Oil - Change
Radio Power (14) – 10 Amp
Air Conditioner Compressor (15) – 10 Amp
Air Conditioner Blower (16) – 10 Amp
i00611301
Hydraulic System Oil - Change
SMCS Code: 5056
Operate the machine for a few minutes in order to
warm the hydraulic system oil.
The machine should be level . Lower the bucket to
the ground and apply slight downward pressure.
Engage the parking brake and stop the engine.
Illustration 352
Spare (1) – Open
Spare (2) – Open
Left Tail Light (3) – 10 Amp
Right Tail Light (4) – 10 Amp
Rear Flood Lights (5) – 10 Amp
Auxiliary Rear Flood Lights (6) – 10 Amp
Radio Memory (7) – 10 Amp
Auxiliary Front Flood Lights (8) – 10 Amp
Front Windshield Wiper (9) – 10 Amp
Rear Windshield Wiper (10) – 10 Amp
Spare (11) – Open
g00287572
Illustration 353
Illustration 354
g00287385
g00287410
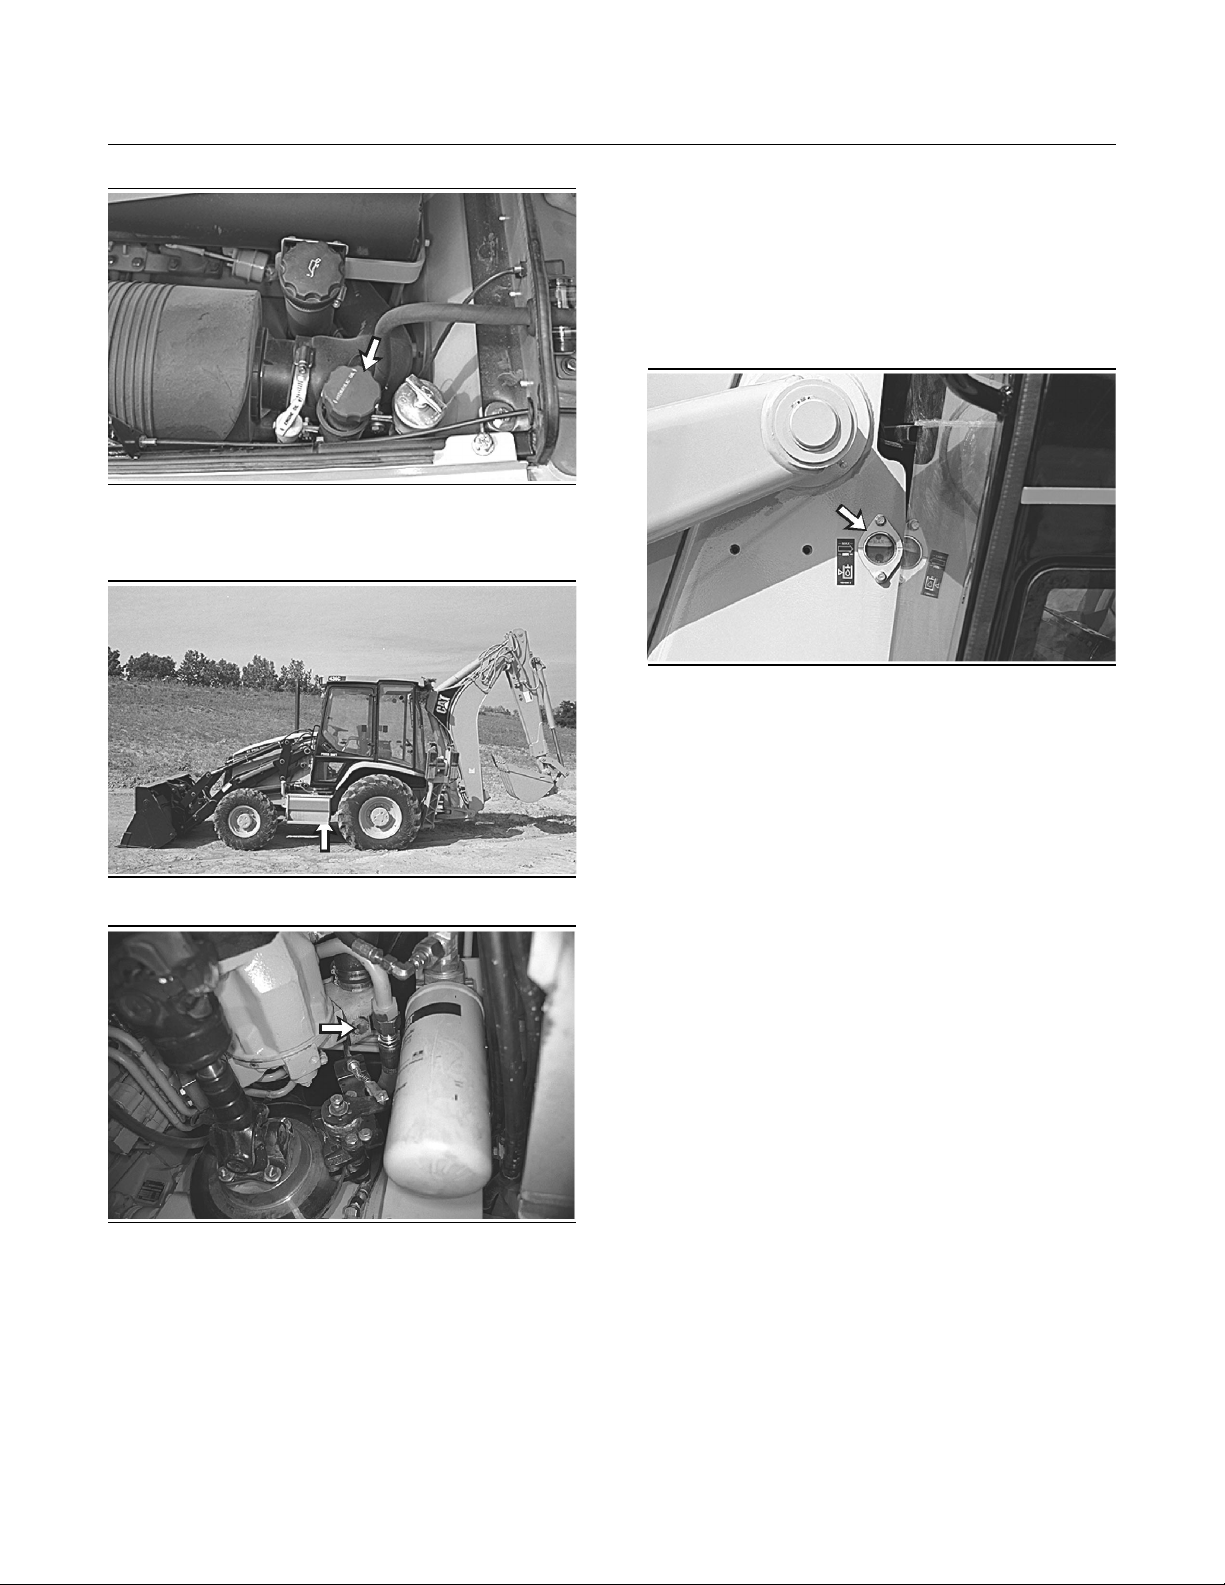
The hydraulic tank filler cap is located under the
access door on the top of the engine compartment.
1. Pull the hood release lever (1) in order to open
the engine access door (2) on the top of the
machine.
Rotating Beacon (12) – 10 Amp
Dome Light (13) – 10 Amp
Page 33
218
Maintenance Section
Hydraulic System Oil - Change
6. Inspect the hydraulic tank breather that is
located on a hose from the overflow container.
Replace the breather, if necessary.
7. Fill the hydraulic system oil tank. Refer to
Operation and Maintenance Manual, “Lubricant
Viscosities” and Operation and Maintenance
Manual, “Refill Capacities”.
Illustration 355
2. Remove the hydraulic tank filler cap.
Illustration 356
g00290718
g00290721
Illustration 358
g00290845
8. Maintain the hydraulic oil level in the sight gauge
between the “MIN” mark and the “MAX” mark.
Check the hydraulic oil level with the loader on
the ground and with the backhoe in the transport
position.
Note: The oil must be free of bubbles. If bubbles
are present in the oil, air is entering the hydraulic
system. Inspect the suction hoses and hose clamps.
9. Inspect the gasket on the hydraulic tank filler cap
for damage. Replace the gasket, if necessary.
10.Install the hydraulic tank filler cap.
Illustration 357
g00290722
3. Remove the drain plug on the flange that is
located on the hydraulic pump. Allow the oil to
drain into a suitable container.
4. Clean the drain plug and replace the drain plug.
Tighten the drain plug to a torque of 90 ± 10 N·m
(66 ± 7 lb ft).
5. Change the hydraulic system filter. Refer to
Operation and Maintenance Manual, “Hydraulic
System Oil Filter - Change”.
11.Close the access door.
Page 34
i00609992
Hydraulic System Oil Filter Replace
SMCS Code: 5056; 5068
219
Maintenance Section
Hydraulic System Oil Filter - Replace
Illustration 359
Illustration 360
g00287385
g00287410
1. Pull the hood release lever (1) in order to open
the engine access door (2) on the top of the
machine.
Illustration 362
g00290721
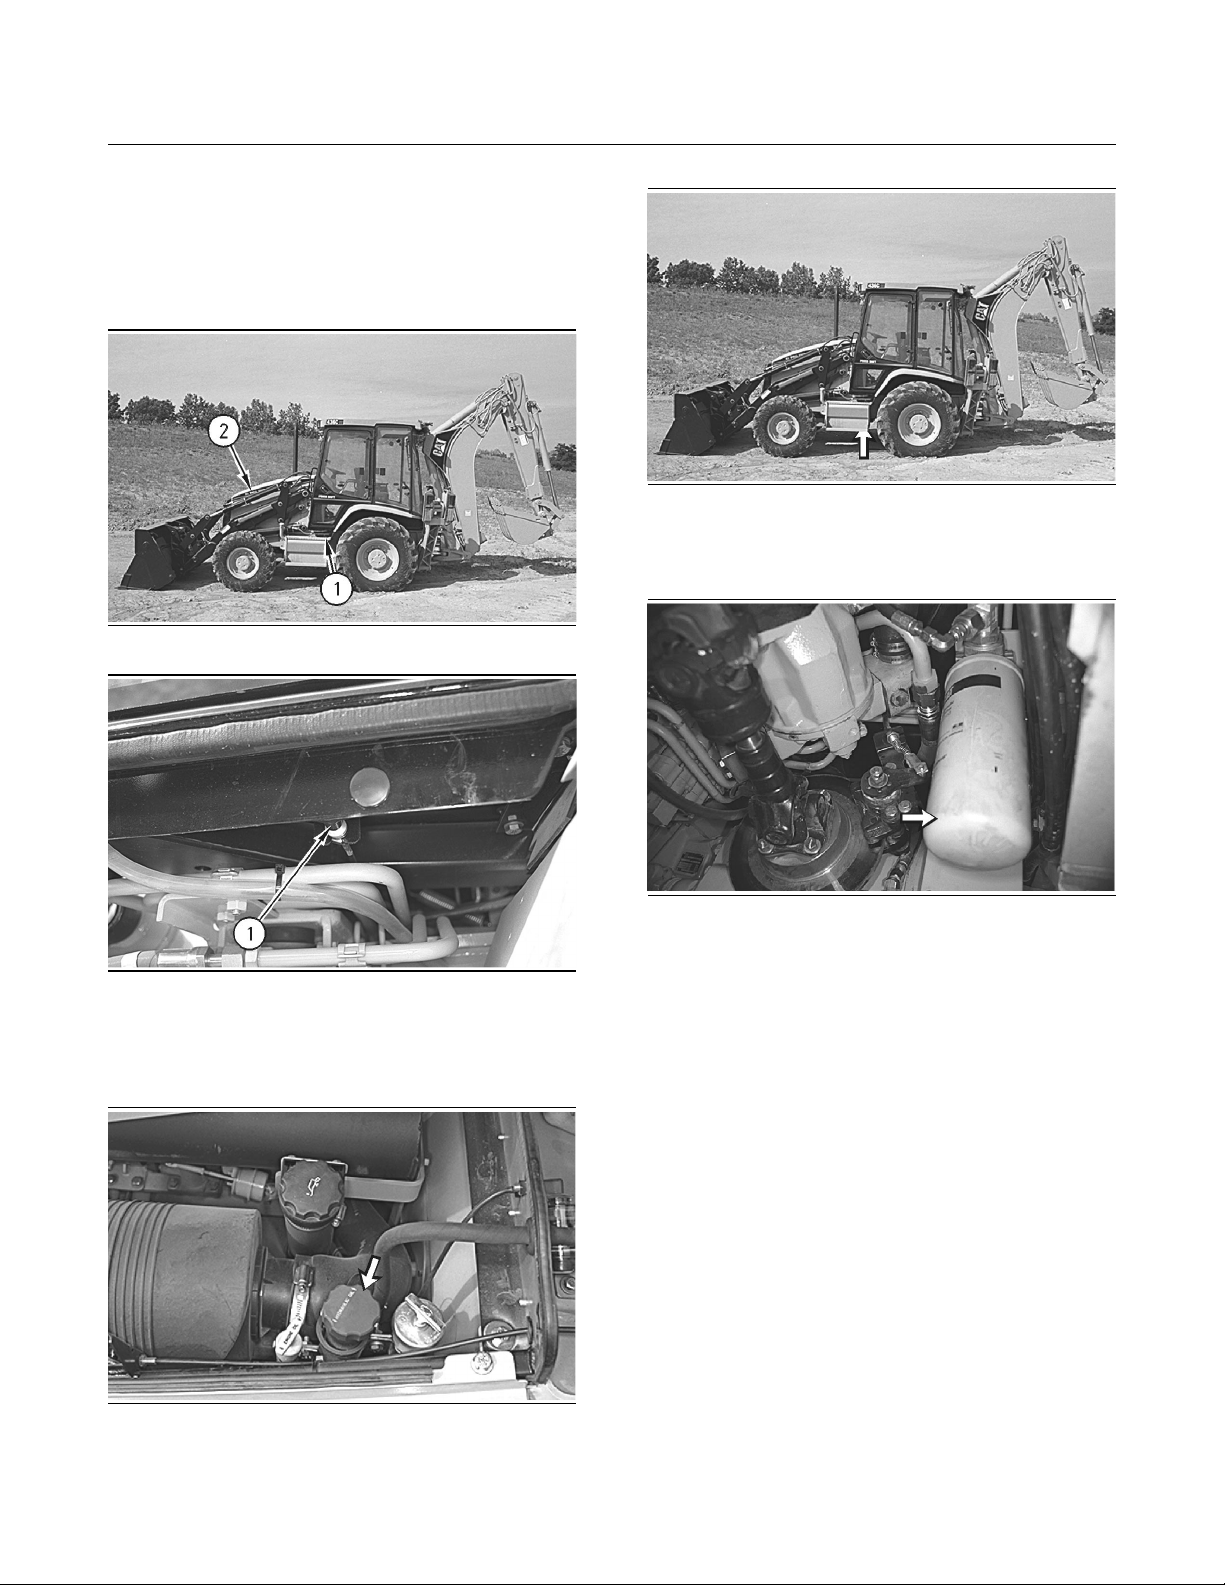
3. The hydraulic oil filter is located on the left side
of the machine.
Illustration 363
g00290851
4. Remove the filter element with a strap type
wrench.
5. Clean the filter element mounting base. Remove
any part of the filter element gasket that remains
on the filter element mounting base.
Illustration 361
g00290718
2. Remove the hydraulic tank filler cap that is
located under the access panel on the top of the
engine compartment.
6. Apply a light coat of oil to the gasket of the new
filter element.
7. Install the new filter element by hand. When the
gasket contacts the filter element mounting base,
tighten the filter element for an additional three
quarters of a turn.
8. Remove the hydraulic tank breather. Replace the
old breather with a new breather.
Page 35
220
Maintenance Section
Hydraulic System Oil Level - Check
i00661454
Kingpin Bearings (Front) Lubricate
(Two-Wheel Drive)
SMCS Code: 4314
Illustration 364
9. Maintain the hydraulic oil level in the sight gauge
between the “MIN” mark and the “MAX” mark.
Add oil, if necessary.
10.Inspect the gasket on the hydraulic tank filler cap
for damage. Replace the gasket, if necessary.
11.Install the hydraulic tank filler cap.
12.Close the access door.
g00290845
i00609994
Hydraulic System Oil Level Check
SMCS Code: 5056; 7479
Illustration 366
Apply lubricant to the grease fitting on the top of
each kingpin.
g00291789
i00661457
Kingpin Bearings (Rear) Lubricate
(All Wheel Steer)
SMCS Code: 4314
Illustration 365
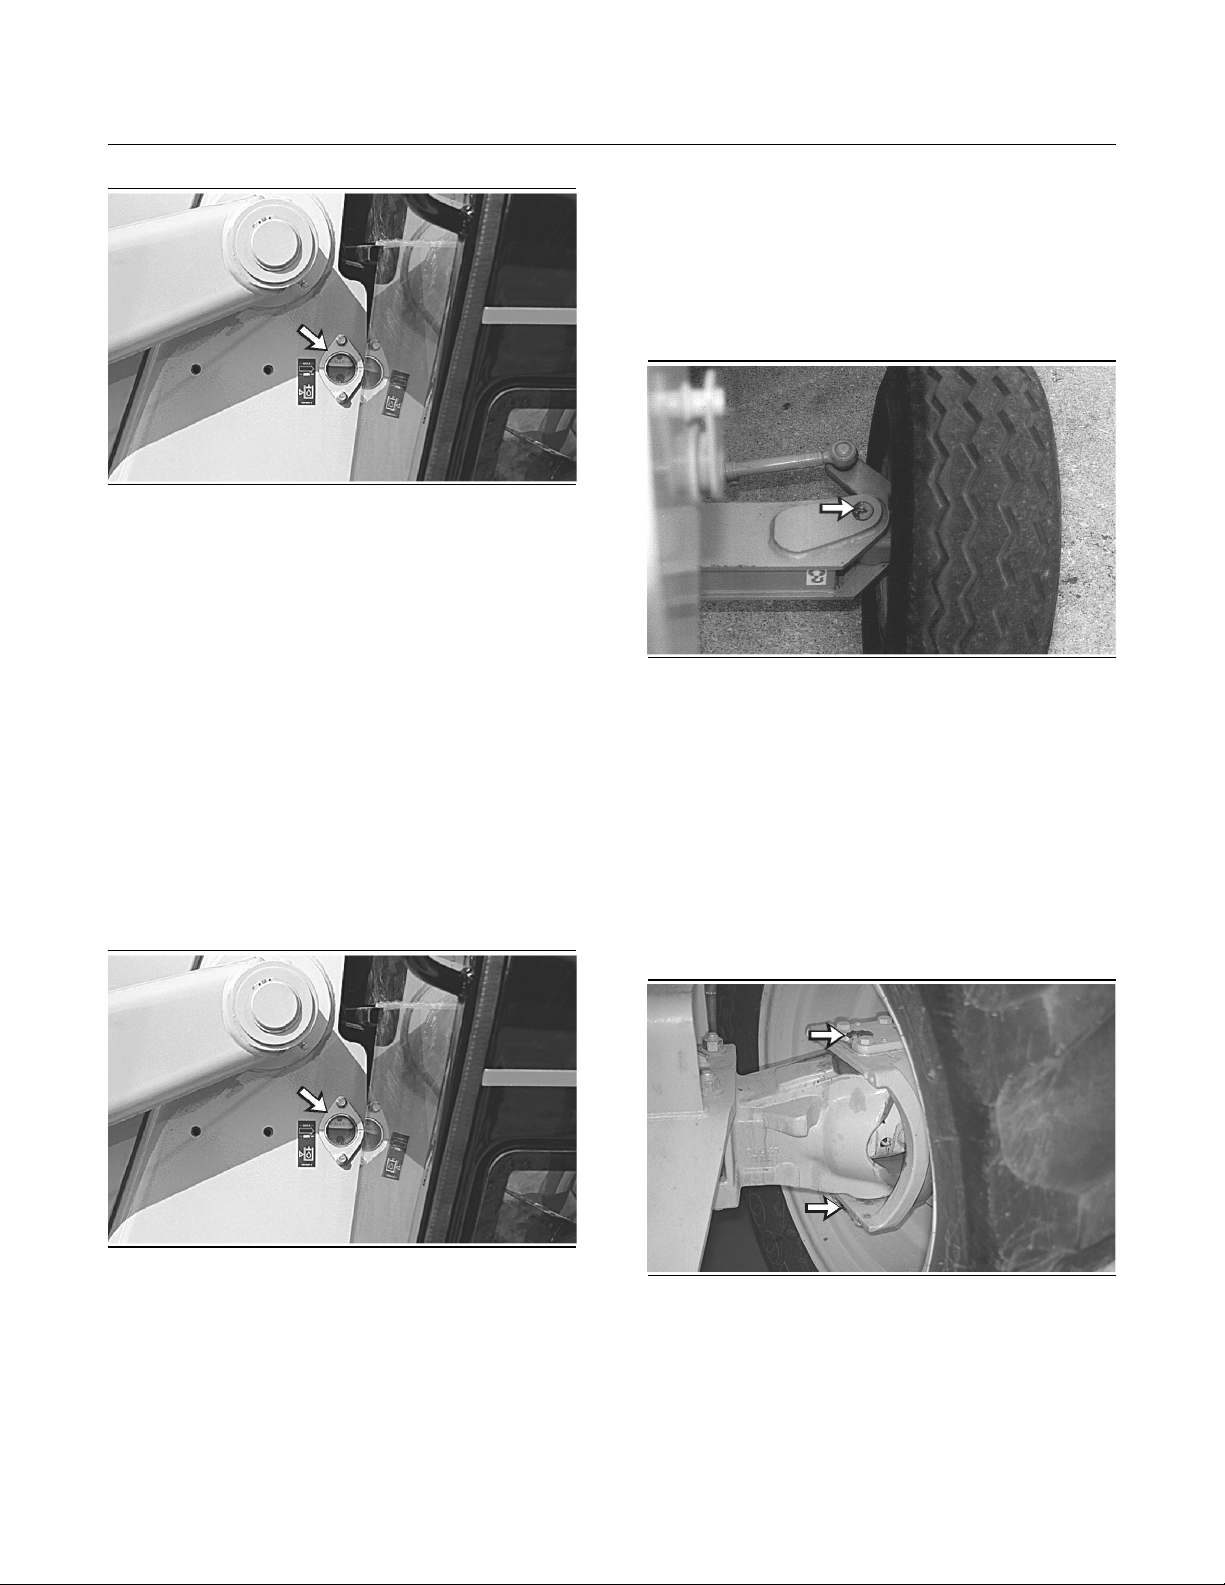
The sight gauge for the hydraulic tank is located on
the left side of the machine. Move the backhoe to
the transport position and lower the loader bucket
to the ground.
Turn off the engine. Wait about five minutes before
you check the hydraulic system oil level.
Maintain the oil level in the sight gauge between the
“MIN” mark and the “MAX” mark.
g00290845
Illustration 367
Apply lubricant to the grease fittings for the kingpin
bearings of the rear steerable axle. There is a total
of four grease fittings.
g00291790
Page 36
221
Maintenance Section
Loader Bucket, Cylinder, and Linkage Bearings - Lubricate
i01035226
Loader Bucket, Cylinder, and
Linkage Bearings - Lubricate
SMCS Code: 7069; 7070; 7071
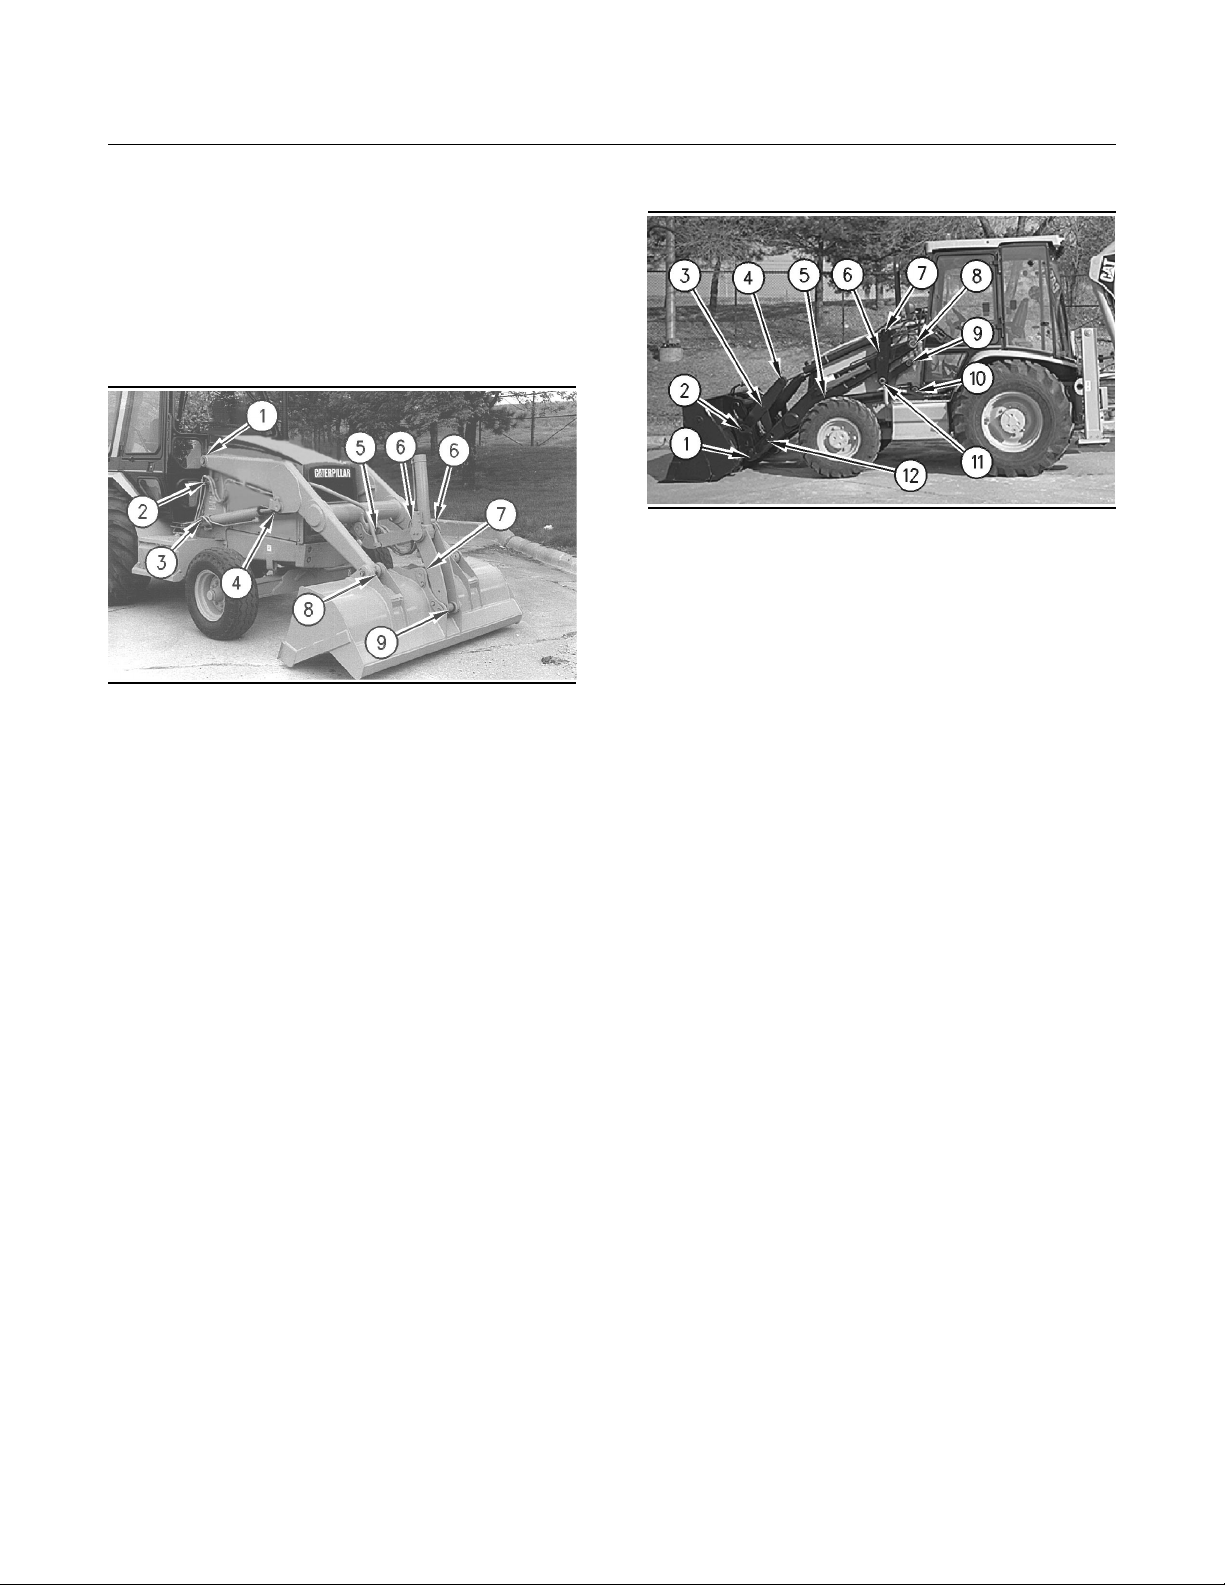
Single Tilt Machines
Illustration 368
Apply lubricant to the grease fittings (1) for the
frame and for the lift arm. There is a grease fitting
for each side of the machine.
g00291110
Parallel Lift Machines
Illustration 369
Apply lubricant to the grease fittings (1) for the
lower pivot pin of the quick coupler assembly. There
is a grease fitting for each side of the machine.
Apply lubricant to the grease fittings (2) for the
upper pivot pin of the quick coupler assembly. There
is a grease fitting for each side of the machine.
Apply lubricant to the grease fittings (3) for the
upper pivot pin of the tilt linkage. There is a grease
fitting for each side of the machine.
g00291114
Apply lubricant to the grease fitting (2) for the pivot
for the linkage of bucket positioner and lift kickout.
Apply lubricant to the grease fittings (3) for the
head end of the lift cylinder. There is a grease fitting
for each side of the machine.
Apply lubricant to the grease fittings (4) for the rod
end of the lift cylinder. There is a grease fitting for
each side of the machine.
Apply lubricant to the grease fittings (5) for the pivot
pin at the loader lift arm. There is a grease fitting for
each side of the machine.
Apply lubricant to the grease fittings (6) for the
pivot bearings for the bucket tilt cylinder. There is a
grease fitting in each linkage (four total).
Apply lubricant to the grease fitting (7) for the rod
end of the tilt cylinder.
Apply lubricant to the grease fittings (8) for the
lower pivot pins. There is a grease fitting for each
side of the machine.
Apply lubricant to the grease fittings (9) for the
upper pivot pin. There is a grease fitting for each
side of the machine.
There is a total of 17 grease fittings.
Apply lubricant to the grease fittings (4) for the rod
end of the tilt cylinder. There is a grease fitting for
each side of the machine.
Apply lubricant to the grease fittings (5) for the rod
end of the lift cylinder. There is a grease fitting for
each side of the machine.
Apply lubricant to the grease fittings (6) for the
center pivot pin of the parallel linkage. There is a
grease fitting for each side of the machine.
Apply lubricant to the grease fittings (7) for the
head end of the tilt cylinder. There is a grease fitting
for each side of the machine.
Apply lubricant to the grease fittings (8) for the
frame and for the lift arm. There is a grease fitting
for each side of the machine.
Apply lubricant to the grease fittings (9) for the
frame and for the parallel linkage. There is a grease
fitting for each side of the machine.
Apply lubricant to the grease fittings (10) for the
head end of the lift cylinder. There is a grease fitting
for each side of the machine.
Apply lubricant to the grease fittings (11) for the
lower pivot pin of the parallel linkage. There is a
grease fitting for each side of the machine.
Page 37
222
Maintenance Section
Oil Filter - Inspect
Apply lubricant to the grease fittings (12) for the
lower pivot pin of the tilt linkage. There is a grease
fitting for each side of the machine.
There is a total of 24 grease fittings.
i00052234
Oil Filter - Inspect
SMCS Code: 1318; 3067; 5068
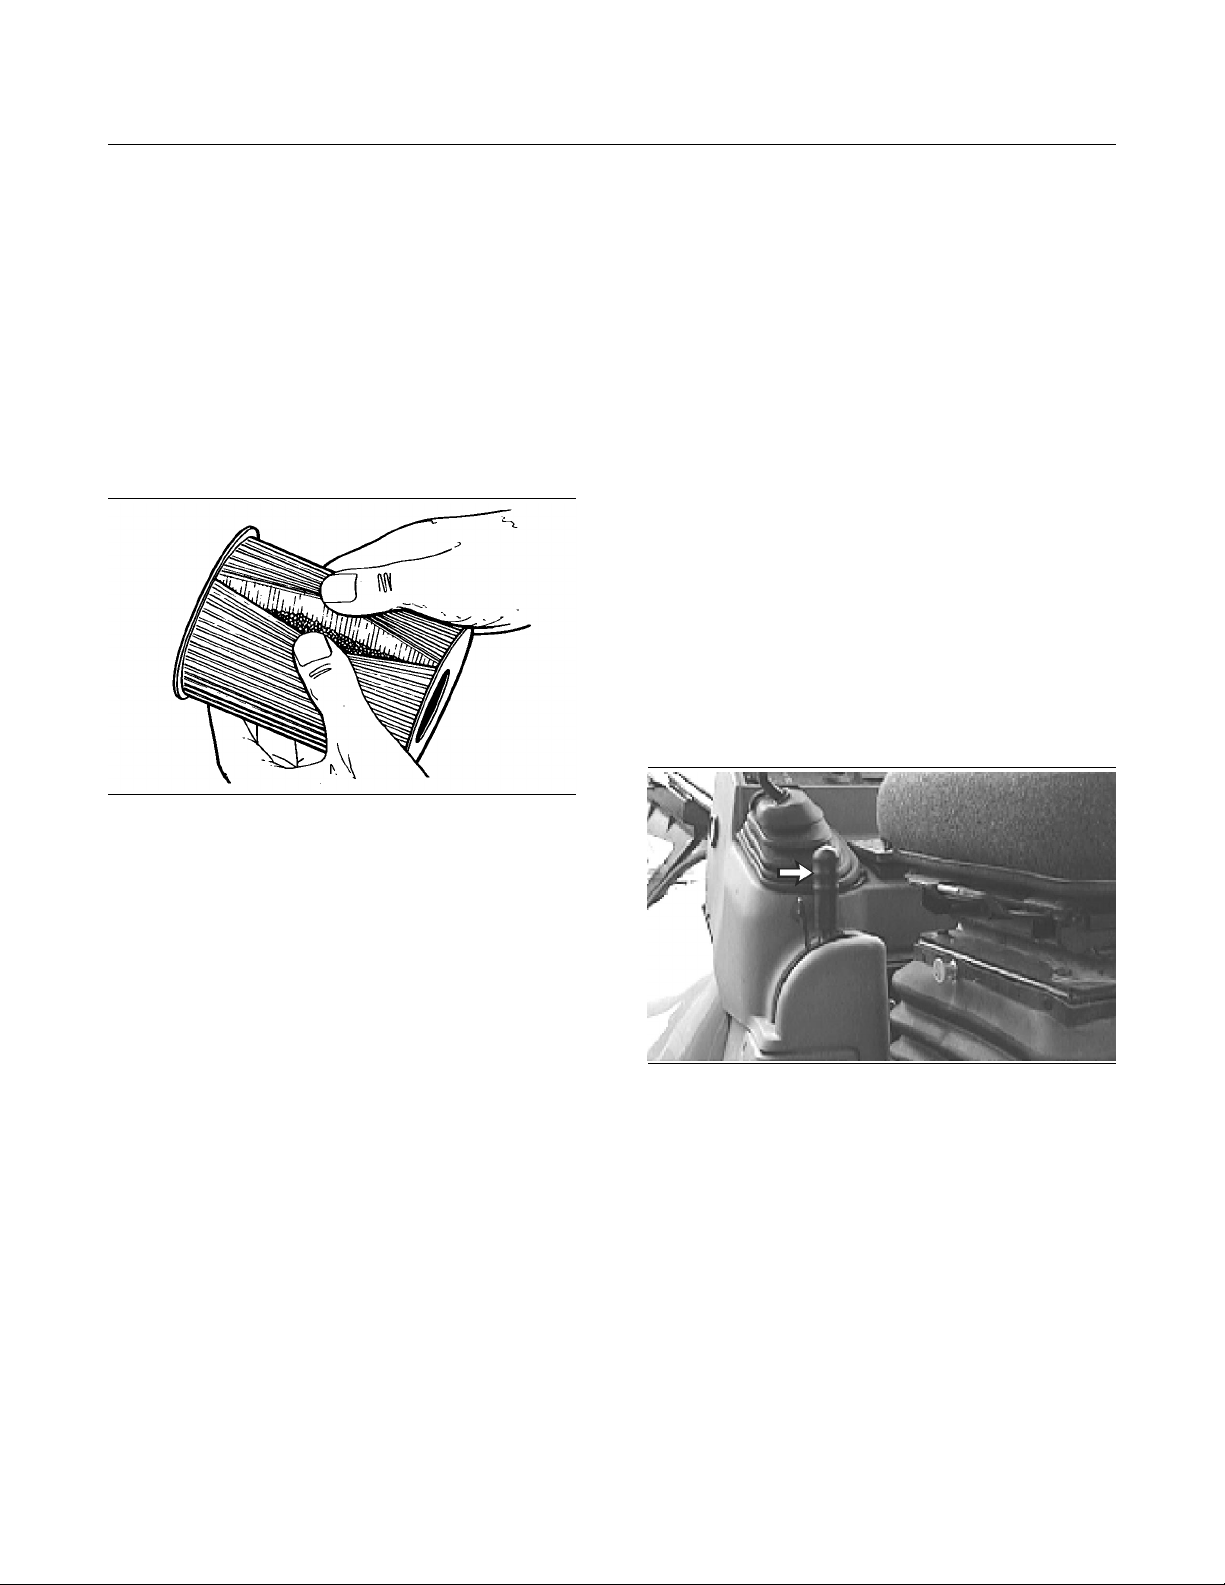
Inspect A Used Filter for Debris
i00999998
Parking Brake - Check/Adjust
SMCS Code: 4267
Check Procedure
Check the area around the machine. Make sure
that the machine is clear of personnel and clear
of obstacles.
Check the brakes on a dry, level surface.
Fasten the seat belt before you check the brakes.
The following checks are used to determine if the
parking brake is functional. These checks are not
intended to measure the maximum brake holding
effort. The brake holding effort that is required to
sustain a machine at a specific engine rpm varies
depending on the machine. The variations are the
differences in the engine setting, in the power train
efficiency, and in the brake holding ability, etc.
1. Start the engine. Raise the bucket slightly.
Illustration 370
The element is shown with debris.
Use a 4C-5084 Filter Cutter to cut the filter element
open. Spread apart the pleats and inspect the
element for metal and for other debris. An excessive
amount of debris in the filter element can indicate
a possible failure.
If metals are found in the filter element, a magnet
can be used to differentiate between ferrous metals
and nonferrous metals.
Ferrous metals can indicate wear on steel parts and
on cast iron parts.
Nonferrous metals can indicate wear on the
aluminum parts of the engine such as main
bearings, rod bearings, or turbocharger bearings.
Small amounts of debris may be found in the filter
element. This could be caused by friction and by
normal wear. Consult your Caterpillar dealer in
order to arrange for further analysis if an excessive
amount of debris is found.
Using an oil filter element that is not recommended
by Caterpillar can result in severe engine damage
to engine bearings, to the crankshaft, and to other
parts. This can result in larger particles in unfiltered
oil. The particles could enter the lubricating system
and the particles could cause damage.
g00100013
Illustration 371
2. Engage the parking brake.
3. If the machine is equipped with the standard
transmission, move the transmission speed shift
lever to THIRD gear. Move the transmission
direction control lever to FORWARD, to
NEUTRAL, and back to FORWARD. If the
machine is equipped with a power shift
transmission move the transmission control lever
to FOURTH SPEED FORWARD, to NEUTRAL,
and back to FOURTH SPEED FORWARD. This
is done in order to override the transmission
neutralizer for this test.
Note: Place machines that are equipped with all
wheel drive into two-wheel drive mode.
Note: The parking brake indicator light should come
on and the parking brake alarm should sound.
g00514581
Page 38
223
Maintenance Section
Radiator Core - Clean
4. Gradually increase the engine speed to high
idle. The machine should not move.
If the machine begins to move, reduce the engine
speed immediately and apply the service brake
pedal.
5. Reduce the engine speed. Move the transmission
to NEUTRAL. Lower the blade to the ground.
Stop the engine.
If the machine begins to move, reduce the engine
speed immediately and apply the service brake
pedal.
6. Reduce the engine speed. Move the transmission
to NEUTRAL. Lower the bucket to the ground.
Stop the engine.
Adjustment Procedure
If the machine moved during the test, perform the
following procedure in order to adjust the parking
brake.
If the machine moves during the parking brake
test, then perform the adjustment procedure again.
If you run out of adjustment on the parking brake
adjuster knob, refer to Systems Operation, Testing
and Adjusting, SENR1259, “Parking Brake Control Adjust”.
i00611590
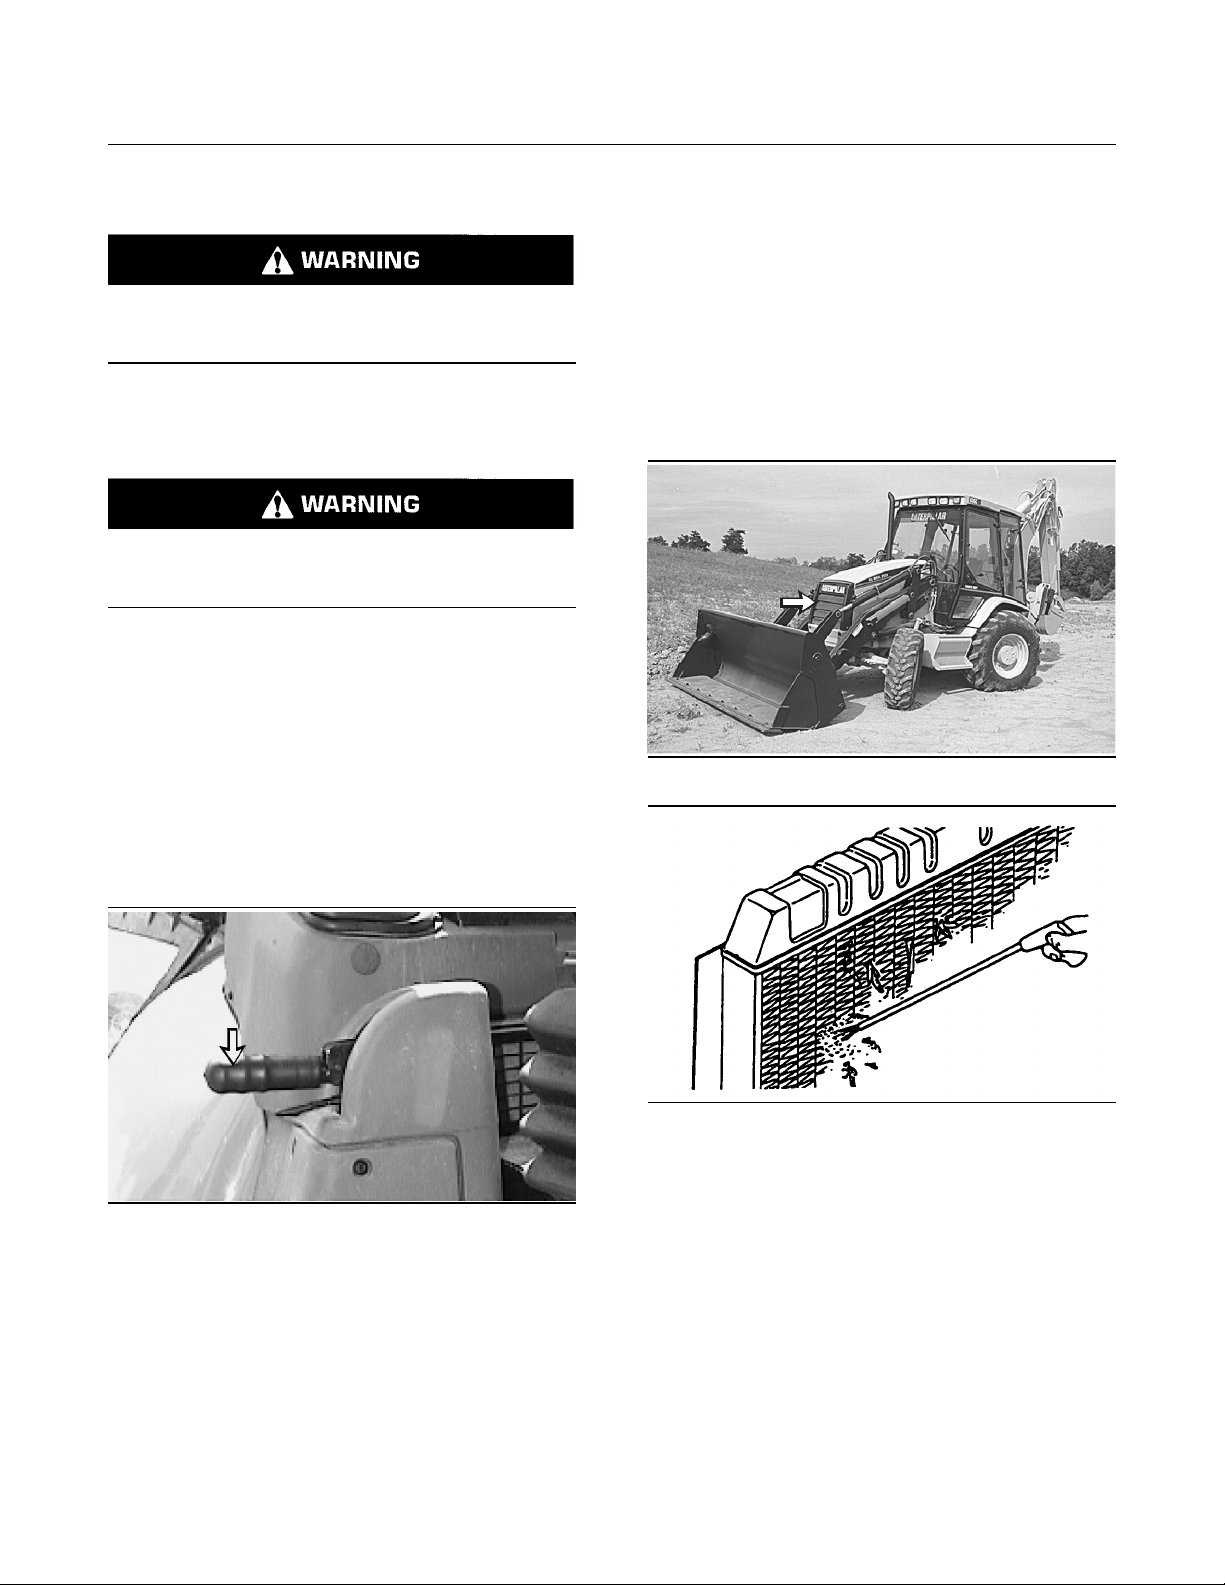
Radiator Core - Clean
SMCS Code: 1353
Illustration 373
g00287717
1. Apply the service brakes.
Illustration 372
g00514571
2. Disengage the parking brake.
3. As you view the parking brake adjuster knob from
the operator seat, turn the knob counterclockwise
for one quarter of a turn.
4. Repeat steps 1 to 6 in the check procedure.
Illustration 374
g00101939
You can use compressed air, high pressure water,
or steam to remove dust and other debris from the
radiator fins. However, the use of compressed air
is preferred.
Note: If necessary, tilt the oil cooler away from the
radiator in order to remove dust and debris between
the radiator and the oil cooler.
Page 39
224
Maintenance Section
Rollover Protective Structure (ROPS) - Inspect
i01035235
Rollover Protective Structure
(ROPS) - Inspect
SMCS Code: 7325
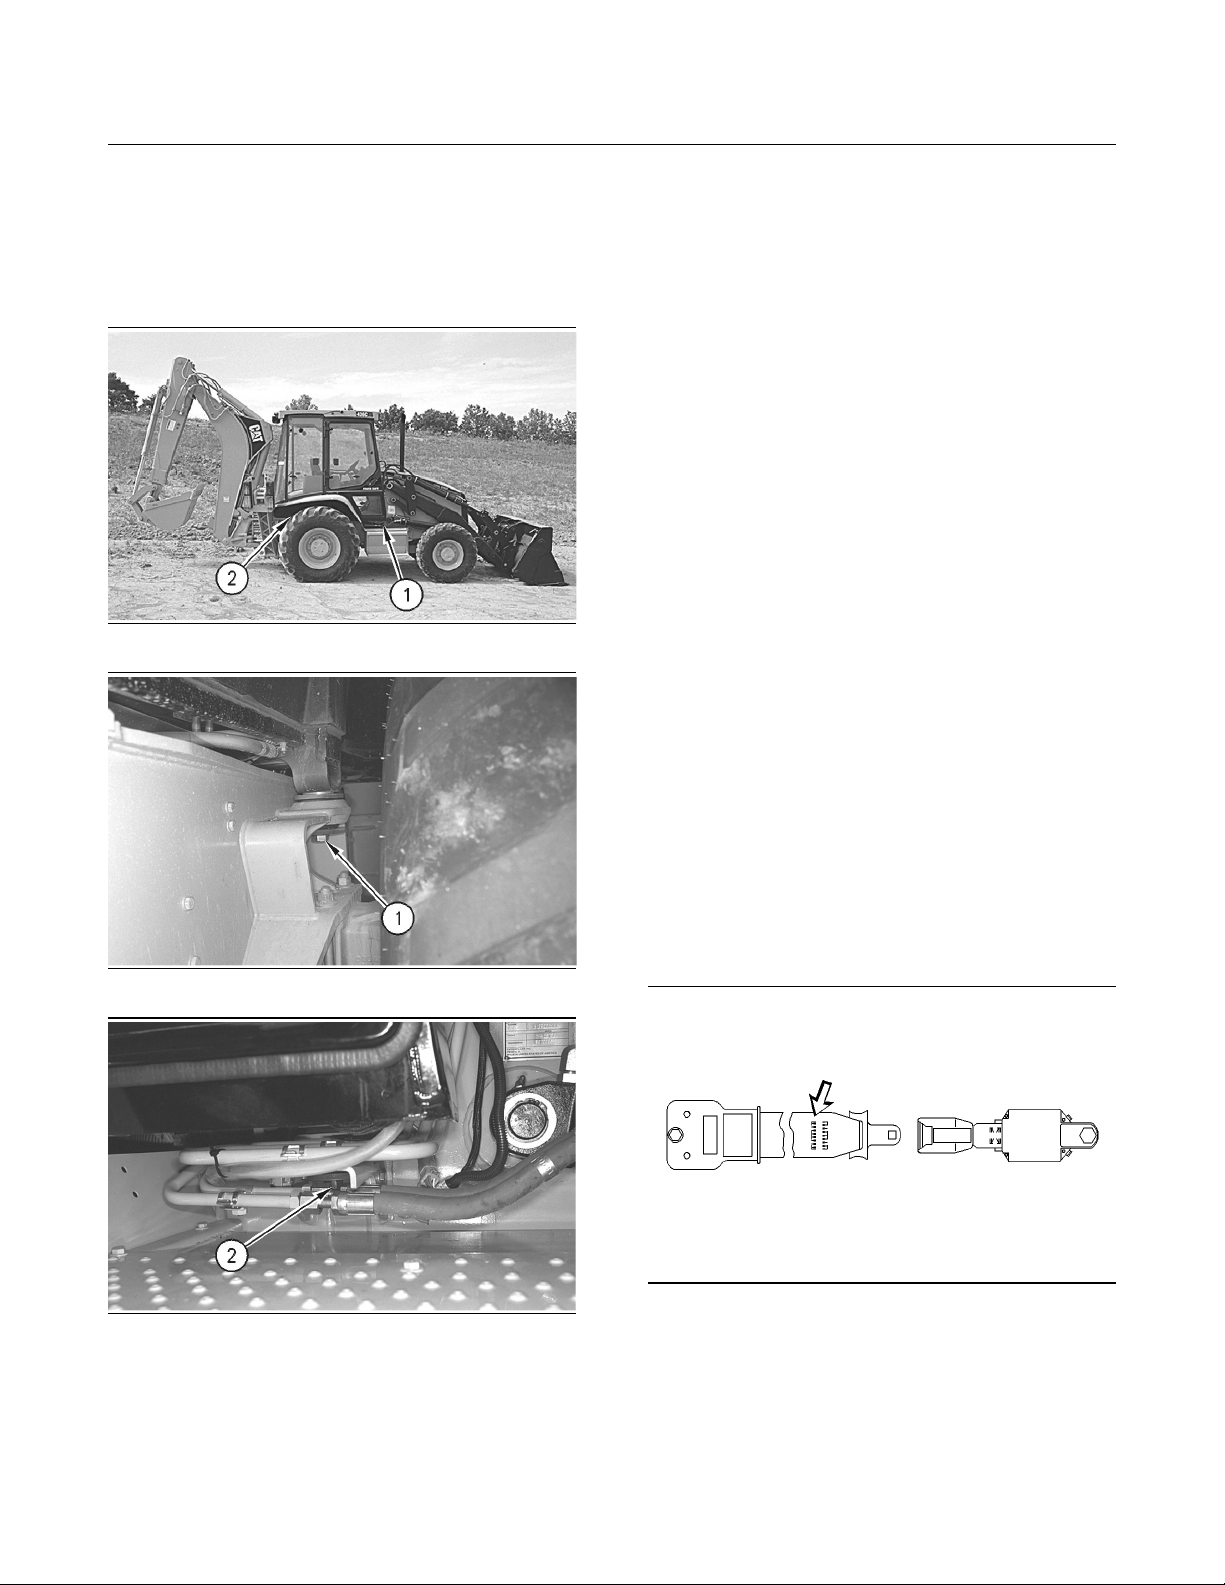
Illustration 375
g00293549
Tighten the M16 bolts (1) to a torque of
165 ± 30 N·m (122 ± 22 lb ft). Tighten the
M24 bolts (2) to a torque of 524 ± 100 N·m
(386 ± 74 lb ft).
Note: Apply oil to all ROPS bolt threads before
you install the bolts. Failure to apply oil to the bolt
threads can result in improper bolt torque.
2. Operate the machine on a rough surface.
Replace the ROPS mounting supports if the
ROPS emits a noise. Replace the ROPS mounting
supports if the ROPS rattles.
Do not straighten the ROPS. Do not repair the ROPS
by welding reinforcement plates to the ROPS.
Consult your Caterpillar dealer for repair of any
cracks in the ROPS.
i00317205
Seat Belt - Inspect
SMCS Code: 7327
Always check the condition of the seat belt and
the condition of the mounting hardware before you
operate the machine. Replace any parts that are
damaged or worn.
Illustration 376
Illustration 377
g00293546
g00293545
1. Inspect the ROPS for loose bolts or for damaged
bolts. Replace any damaged bolts or missing
bolts with original equipment parts only.
Regardless of the appearance of the seat belt, the
seat belt should be replaced at every three year
interval. A date label is attached to each seat belt.
Use this label in order to determine the age of the
seat belt.
Illustration 378
g00215958
Inspect the seat belt for webbing that is worn or
frayed. Replace the seat belt if the seat belt is worn
or frayed.
Check the buckle for wear or for damage. If the
buckle is worn or damaged, replace the seat belt
and/or the buckle.
Page 40
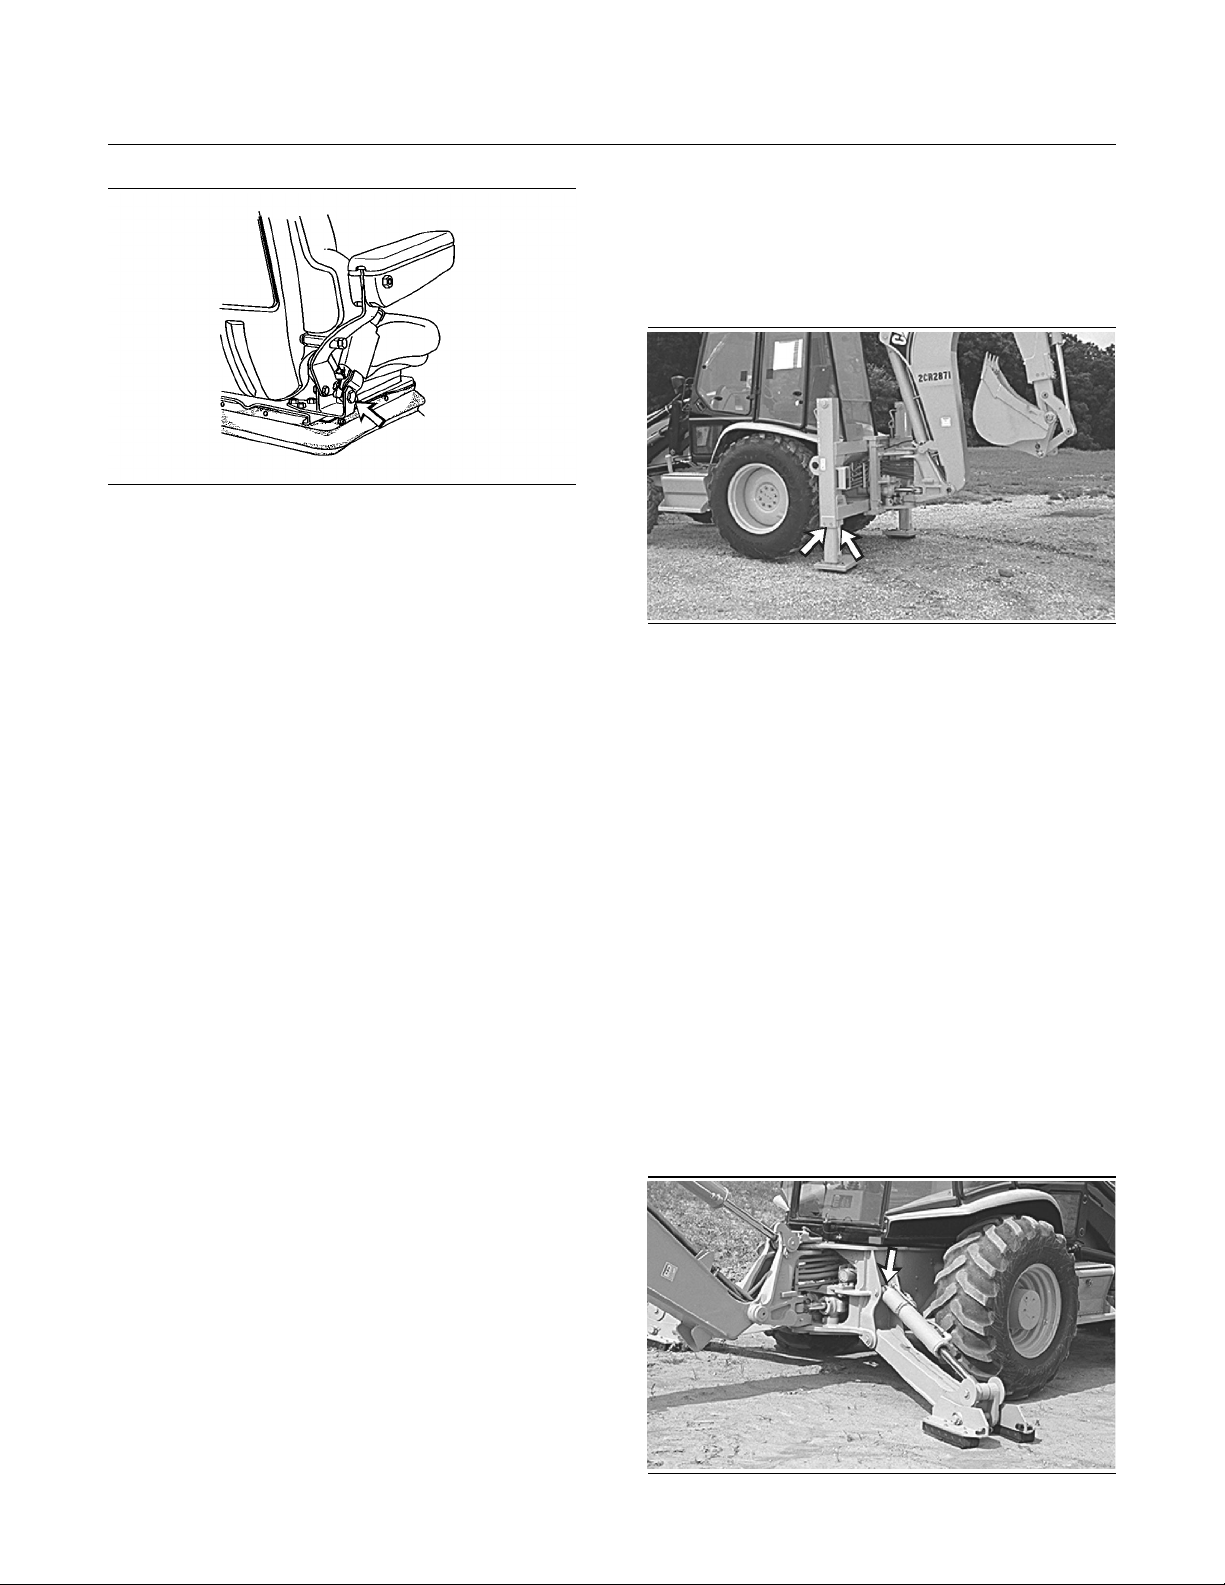
225
Maintenance Section
Secondary Steering Test
i00670147
Sideshift Stabilizer Wear Pads
- Inspect
SMCS Code: 7222-040
Illustration 379
Check the seat belt mounting hardware for wear or
for damage. If the seat belt mounting hardware is
worn or damaged, replace the seat belt mounting
hardware. Make sure that the mounting bolts are
tight.
g00038621
i00615000
Secondary Steering Test
(If Equipped)
SMCS Code: 4324
If hydraulic pressure is lost during machine
operation, the secondary steering system will
become active.
Note: With the machine at rest, the steering during
this test cycle may require more effort than normal
steering. Both hands may be required to steer.
Before you start the engine, turn the steering wheel
while the vehicle weight is on the front wheels. Turn
the front wheels from the center position to each
stop and return to the center position. Failure of the
front wheels to complete the above cycle indicates
a malfunction of the secondary steering system.
The machine should not be driven until the problem
is corrected.
Illustration 380
Check the stabilizers for slop. Shim the stabilizer
pads in order to maintain an acceptable fit and
reduce slop. Refer to the Service Manual for the
correct procedure.
Note: Do not excessively apply a silicone based
lubricant. Dirt can be attracted to the lubricant and
dirt can cause abrasion to the pad assemblies and
wear to the pad assemblies.
The stabilizer pads do not normally require any
lubrication. If the stabilizers become noisy, a small
amount of a silicone based lubricant may be
applied.
g00292882
i00615050
Stabilizer and Cylinder
Bearings - Lubricate
SMCS Code: 5468; 7222
All Wheel Steer (AWS) Machines
On AWS machines, the steering control will default
to the front wheels if the steering system hydraulic
pressure is lost.
Illustration 381
g00287719
Page 41
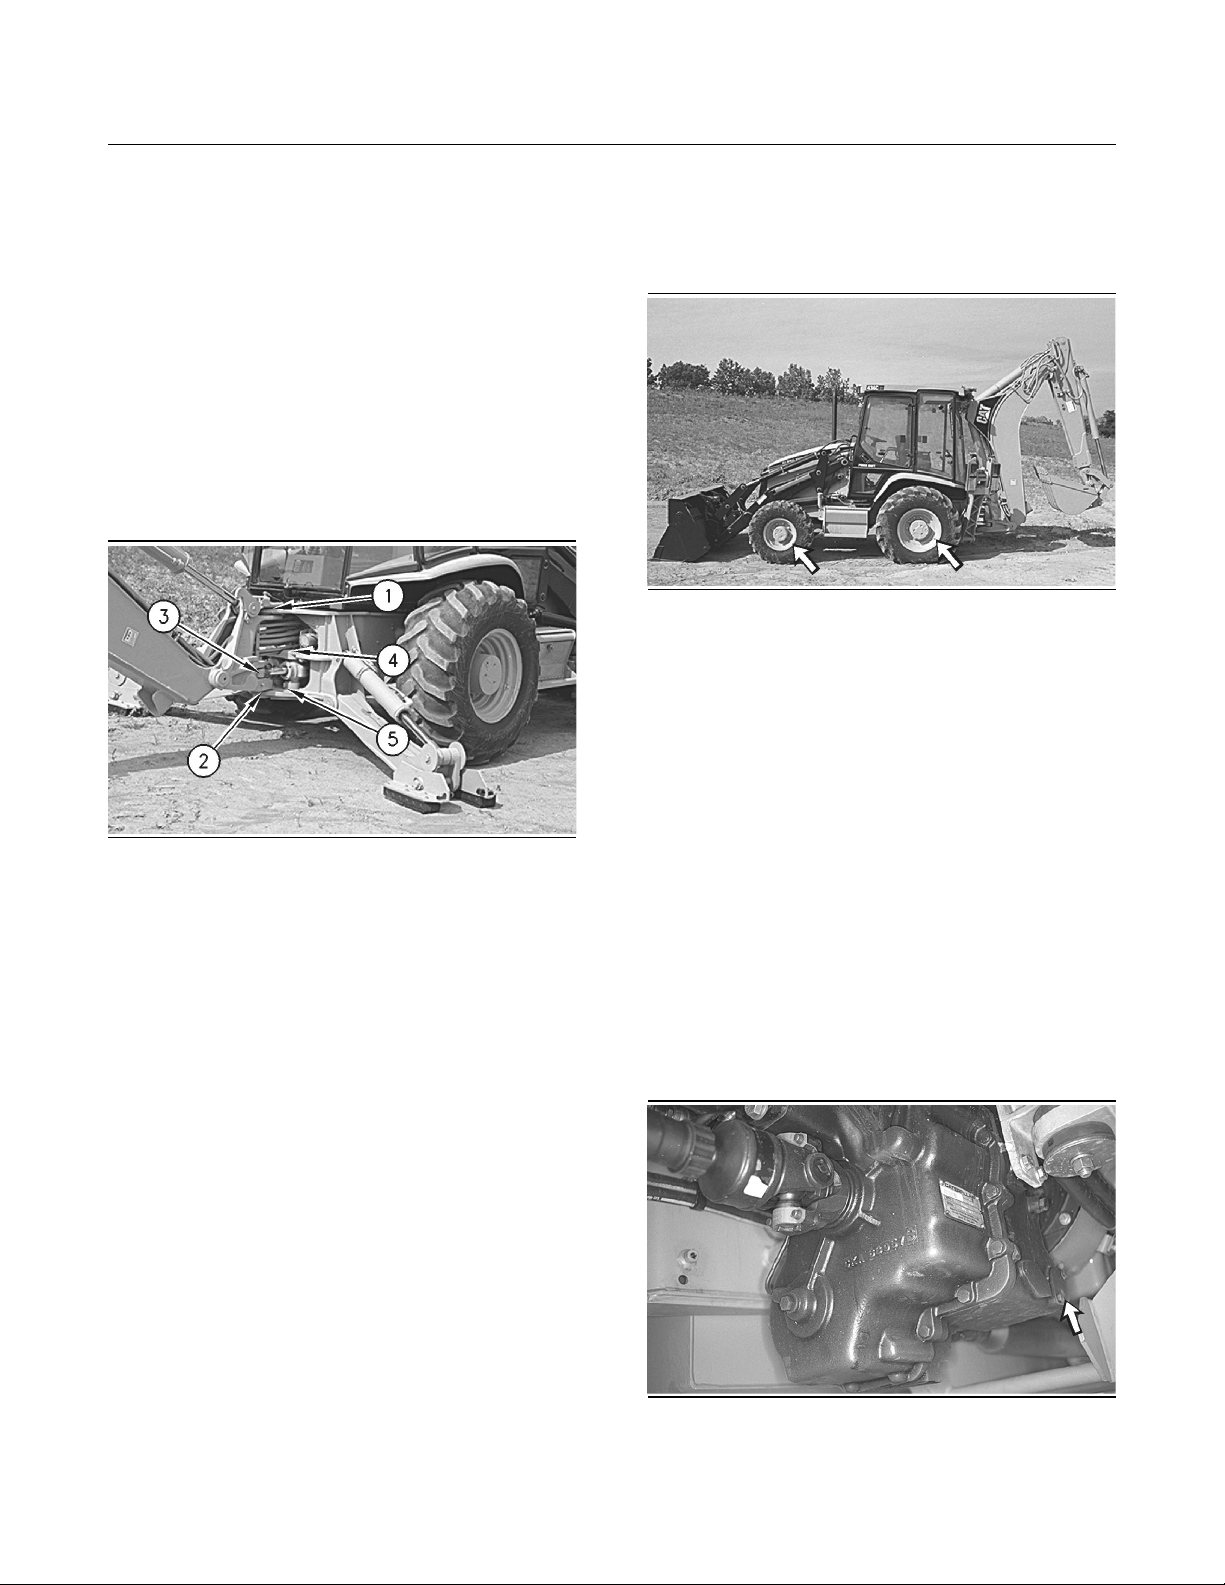
226
Maintenance Section
Swing Frame and Cylinder Bearings - Lubricate
Position the stabilizer, as shown.
Apply lubricant to the grease fitting for the head
end of the cylinder.
Repeat for the other stabilizer.
There is a total of two grease fittings.
i00615422
Swing Frame and Cylinder
Bearings - Lubricate
SMCS Code: 5105; 6506; 6507; 7063
i00615425
Tire Inflation - Check
SMCS Code: 4203
Illustration 383
Measure the tire pressure on each tire. Consult your
Caterpillar dealer for the correct load rating and for
the correct operating pressures.
Inflate the tires, if necessary. Refer to Operation and
Maintenance Manual, “Tire Inflation with Air” and
Operation and Maintenance Manual, “Tire Inflation
with Nitrogen”.
g00287414
Illustration 382
Apply lubricant to the grease fitting (1) for the top
swing pin.
Apply lubricant to the grease fitting (2) for the
bottom swing pin.
Apply lubricant to the grease fitting (3) for the eye
of the swing cylinder. Repeat for the other swing
cylinder.
Apply lubricant to the grease fitting (4) for the
bearing on the top of the swing cylinder. Repeat for
the other swing cylinder.
Apply lubricant to the grease fitting (5) for the
bearing on the bottom of the swing cylinder. Repeat
for the other swing cylinder.
There is a total of eight grease fittings.
g00287723
i00615434
Transmission Magnetic Screen
- Clean
SMCS Code: 3030
1. Drain the transmission oil. Refer to Operation
and Maintenance Manual, “Transmission Oil Change”.
Illustration 384
Magnetic strainer cover for the standard transmission
g00293338
Page 42
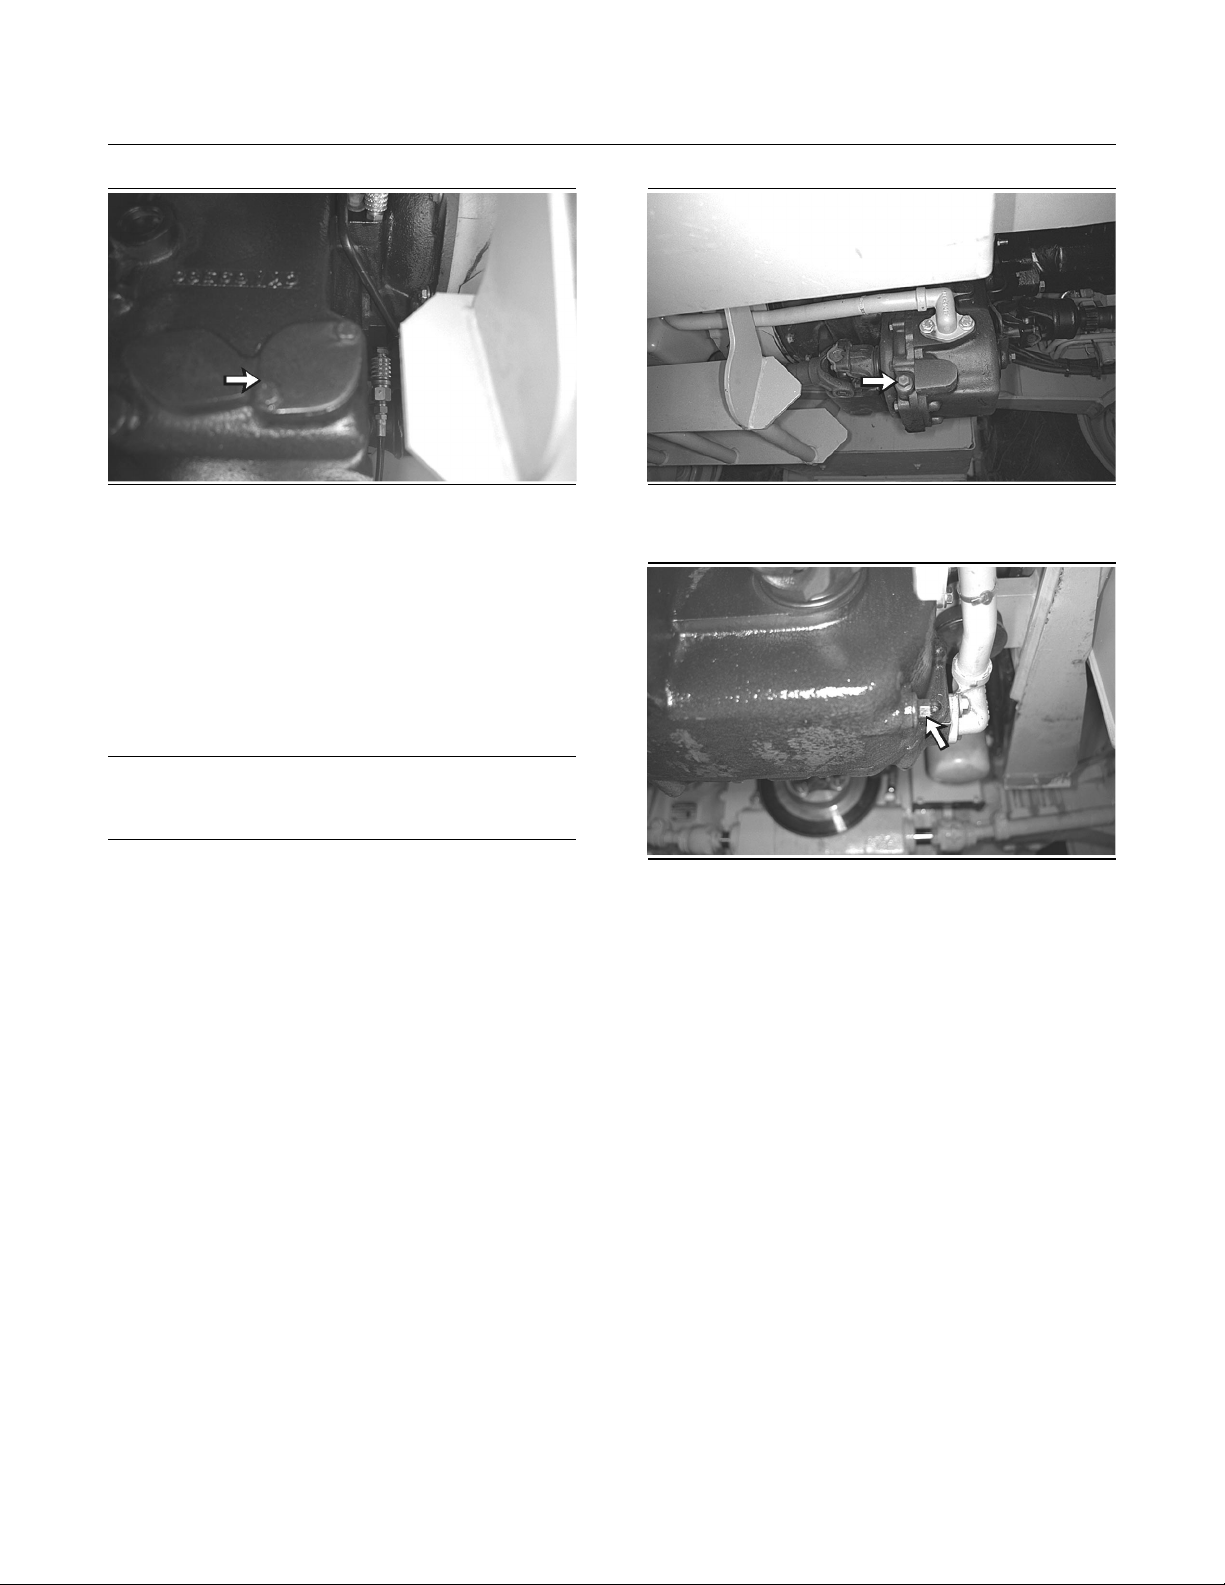
227
Maintenance Section
Transmission Oil - Change
Illustration 385
Magnetic strainer cover for the power shift transmission
g00293340
2. Remove the magnetic strainer cover.
3. Remove the magnets from the housing.
4. Remove the screen from the housing.
5. Wash the tube and the screen in a clean,
nonflammable solvent.
NOTICE
Do not drop or rap the magnets against any hard objects. Replace any damaged magnets.
6. Clean the magnets with a cloth, with a stiff bristle
brush, or with pressure air.
7. Install the magnets and the tube assembly into
the magnetic screen.
8. Install the magnetic screen.
9. Clean the cover and inspect the seal. Replace
the seal, if the seal is damaged.
10.Install the cover. Tighten the cover bolts.
11.Fill the transmission. Refer to Operation and
Maintenance Manual, “Transmission Oil Change”.
Illustration 386
Drain plug for standard transmission
Illustration 387
Drain plug for power shift transmission
g00290414
g00291272
1. Remove the transmission drain plug. Allow the
transmission oil to drain into a suitable container.
Clean the transmission drain plug and install the
transmission drain plug.
2. Change the transmission oil filter element.
Refer to Operation and Maintenance Manual,
“Transmission Oil Filter - Replace”.
3. Clean the transmission magnetic screen.
Refer to Operation and Maintenance Manual,
“Transmission Magnetic Screen - Clean”.
i00999666
Transmission Oil - Change
SMCS Code: 3030; 3080
Operate the machine for a few minutes in order to
warm the transmission oil.
The machine should be level. Lower the bucket to
the ground and apply slight downward pressure.
Engage the parking brake and stop the engine.
Page 43
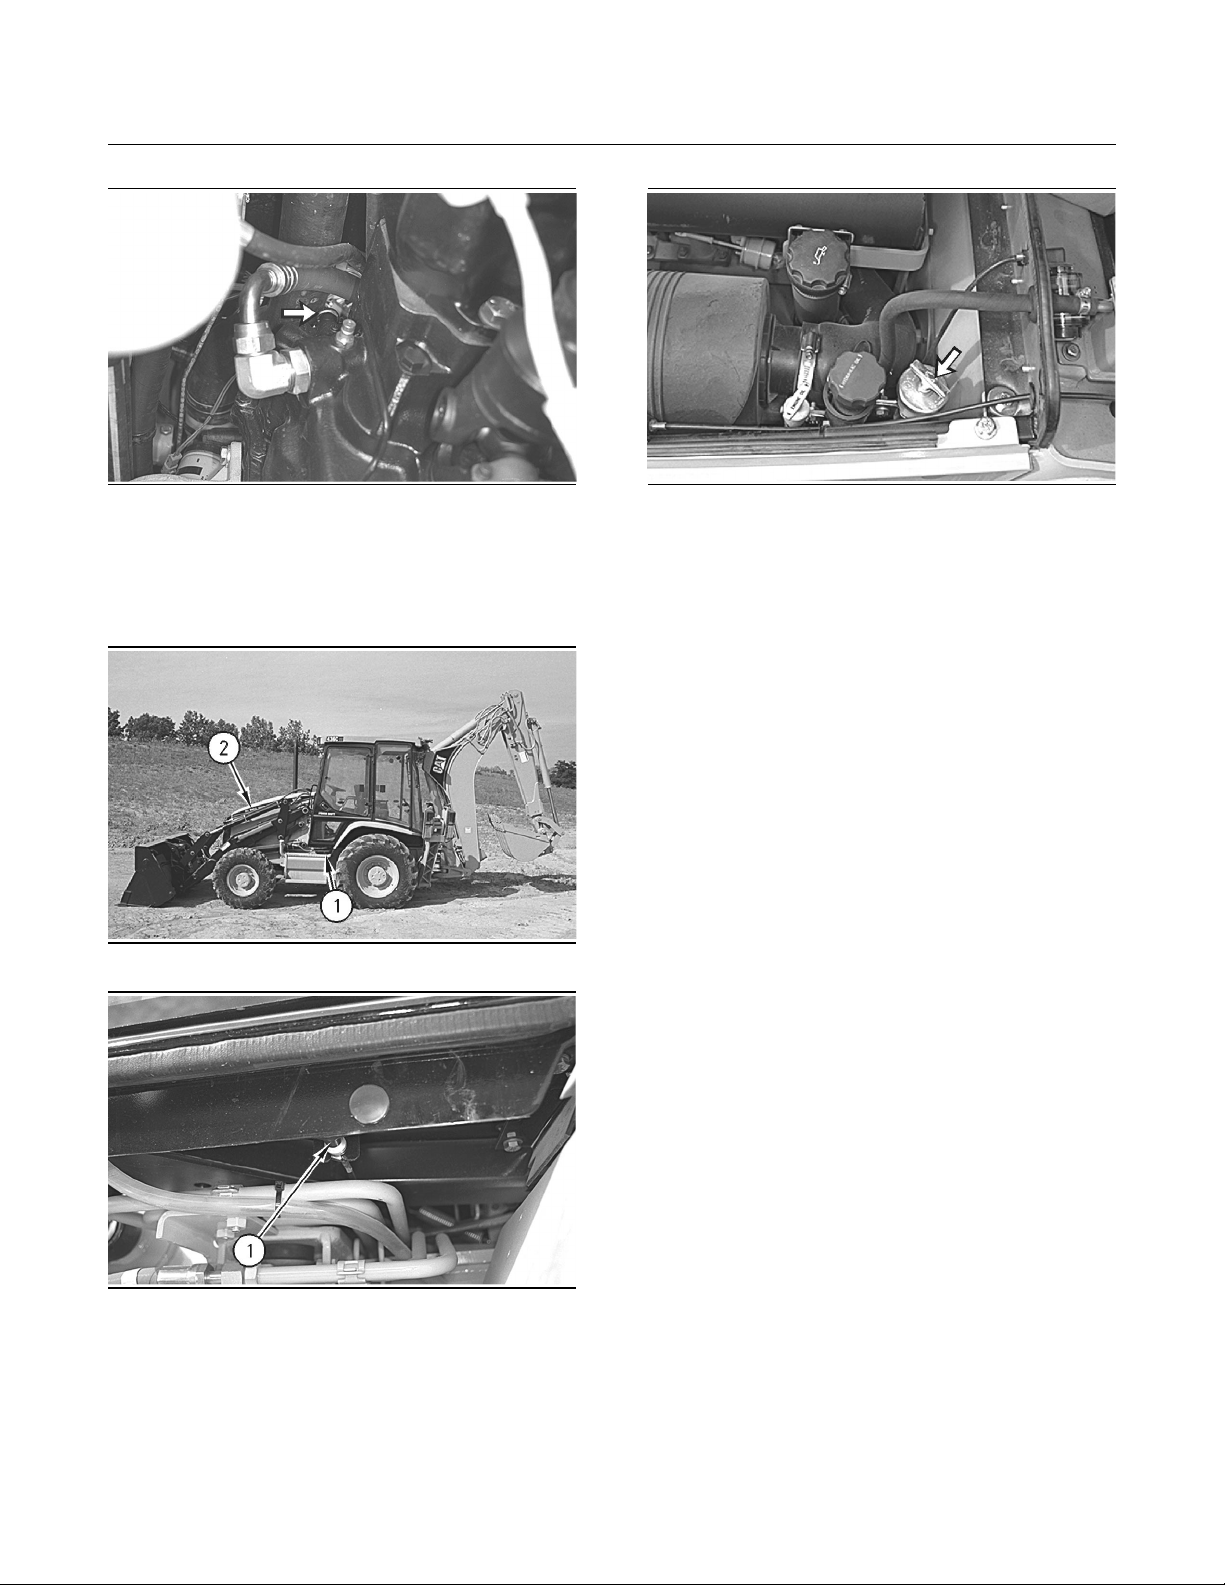
228
Maintenance Section
Transmission Oil - Change
Illustration 388
g00293359
4. Remove the transmission breather from the top
of the transmission case. Clean the breather
in clean nonflammable solvent and allow the
breather to dry. Replace the breather.
Illustration 389
g00287385
Illustration 391
g00291275
6. Remove the dipstick/fill cap and fill the
transmission with transmission oil. Refer to
Operation and Maintenance Manual, “Lubricant
Viscosities” and Operation and Maintenance
Manual, “Refill Capacities”.
7. Start the engine and run the engine at low idle.
Apply the service brake. Slowly operate the
transmission controls in order to circulate the oil.
8. Move the transmission control lever to NEUTRAL
and engage the parking brake. Inspect the
transmission for leaks.
9. Maintain the transmission oil level within the
crosshatched region on the “CHECK WITH
OIL WARM” side of the dipstick when the
transmission is warm. Add transmission oil
through the transmission filler tube, if necessary.
Note: The transmission can be checked with cold
transmission oil. Check the oil level with the cold
oil check side of the dipstick. The engine must be
stopped in order to do a cold oil check.
Illustration 390
g00287410
5. Pull the hood release lever (1) in order to open
the engine access door (2) on the top of the
machine.
10.Install the dipstick/fill cap and install the engine
access door.
11.Stop the engine.
Page 44
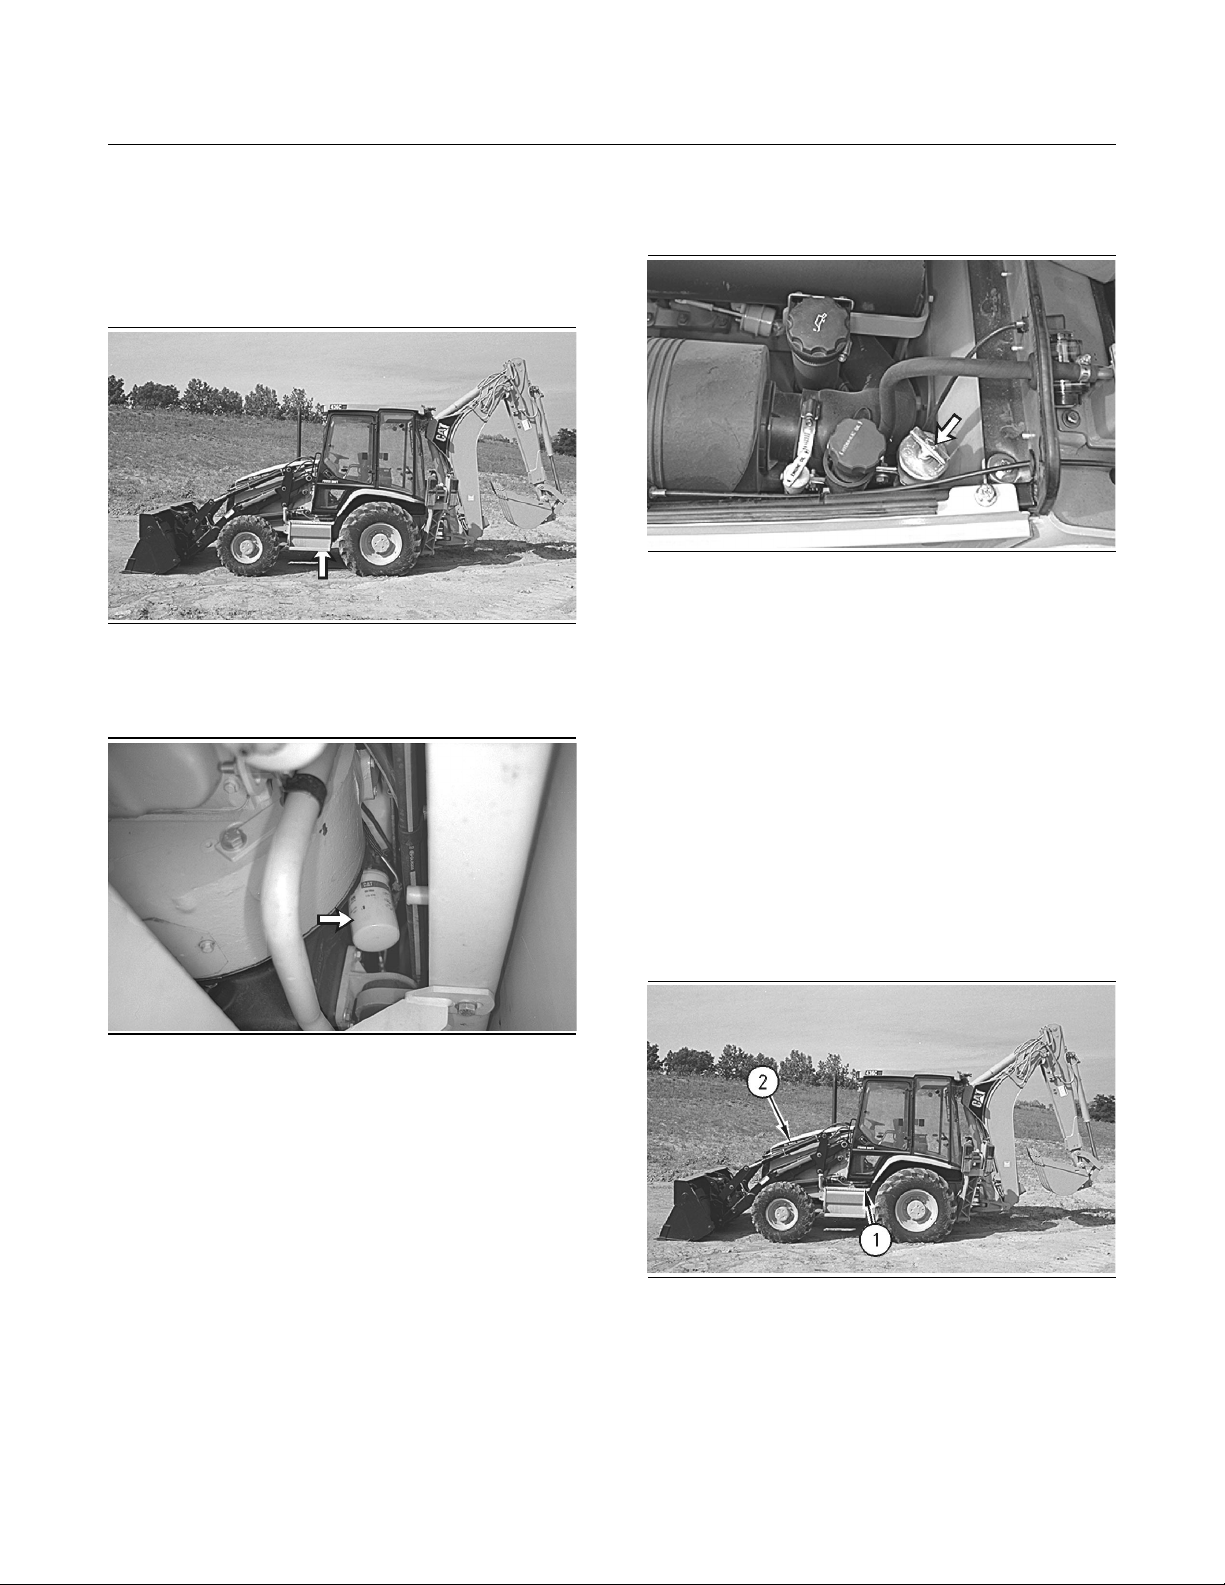
229
Maintenance Section
Transmission Oil Filter - Replace
i00617243
Transmission Oil Filter Replace
SMCS Code: 3067
Illustration 392
The transmission filter is located on the left side of
the machine .
g00293353
6. Move the transmission control lever to NEUTRAL
and engage the parking brake. Inspect the filter
element for leaks.
Illustration 394
g00291275
7. Maintain the transmission oil level within the
crosshatched region on the “CHECK WITH
WARM OIL” side of the dipstick when the
transmission is warm. Add transmission oil, if
necessary.
8. Stop the engine.
Illustration 393
g00293355
1. Remove the transmission oil filter element with a
strap type wrench.
2. Clean the filter element mounting base. Remove
any part of the filter element gasket that remains
on the filter element mounting base.
3. Apply a light coat of oil to the gasket of the new
filter element.
4. Install the new filter element by hand. When the
gasket contacts the mounting base, tighten the
filter element for an additional three quarters of a
turn.
i00999735
Transmission Oil Level - Check
SMCS Code: 3030; 3080; 3081
Check the transmission oil level while the machine
is on a level surface.
Illustration 395
g00287385
5. Start the engine and apply the service brake.
Slowly operate the transmission controls in order
to circulate the transmission oil.
Page 45
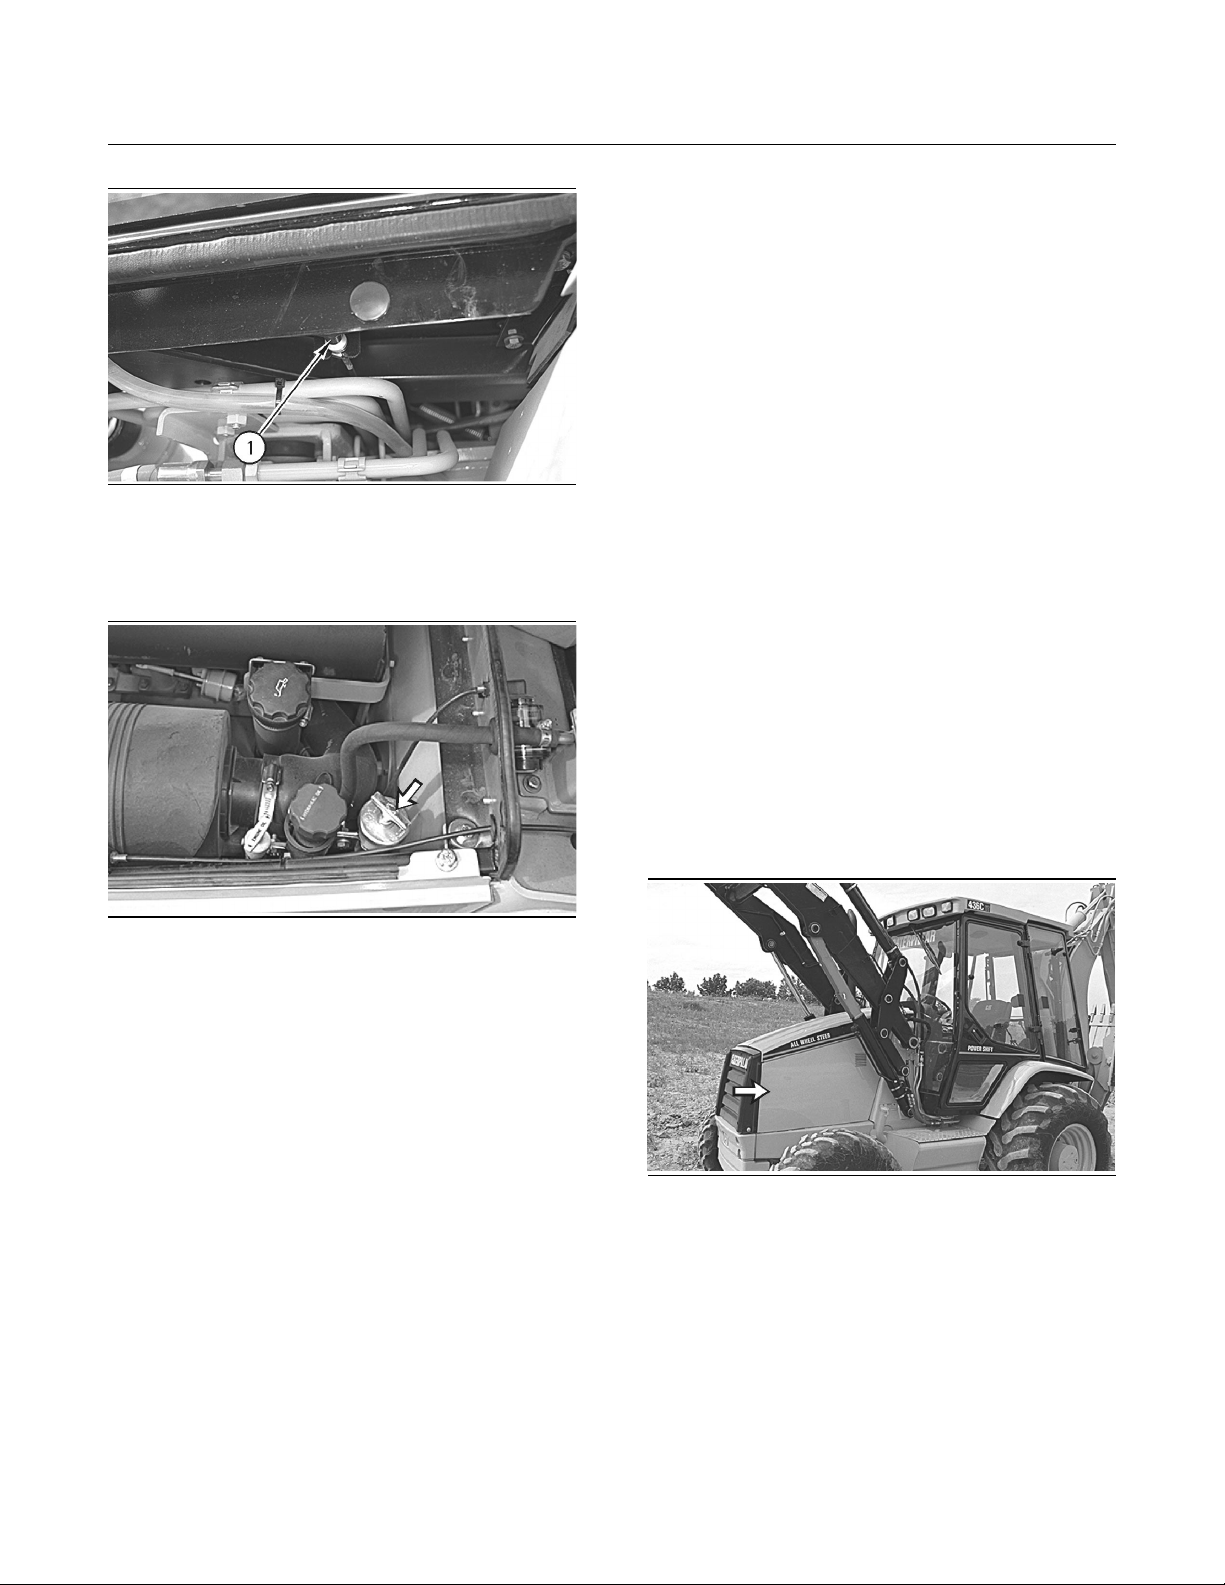
230
Maintenance Section
V-Belts - Inspect/Adjust/Replace
Illustration 396
g00287410
1. Pull the hood release lever (1) in order to open
the engine access door (2) on the top of the
machine.
i01035257
V-Belts - Inspect/Adjust/
Replace
SMCS Code: 1357
If new belts are installed, check belt adjustment
after 30 minutes of operation. For multiple belt drive
applications, always replace the belts in matched
sets. Replacing only one belt of a matched set will
cause the new belt to carry more load because the
older belts are stretched. The additional load on the
new belt could cause the new belt to break.
1. Empty the bucket. Remove the pin that secures
the loader lift arm brace to the left loader lift arm.
Raise the loader arm to the maximum height.
2. Position the loader lift arm brace over the left lift
cylinder rod with the flat end against the cylinder
end.
Illustration 397
g00291275
2. Remove the dipstick/fill plug for the transmission.
3. Maintain the oil level within the crosshatched
region on the “CHECK WITH OIL WARM” side
of the dipstick/fill plug when the transmission is
warm. Add transmission oil, if necessary.
Note: The transmission can be checked with cold
transmission oil. Check the oil level with the cold
oil check side of the dipstick. The engine must be
stopped in order to do a cold oil check.
4. Clean the dipstick/fill plug and install the
dipstick/fill plug.
3. Push the pin through the holes of the loader lift
arm brace and install the cotter pin.
4. Slowly lower the loader arms until the loader lift
arm brace contacts the top of the lift cylinder
and the bosses on the loader arm.
5. Stop the engine in order to inspect the belts.
Illustration 398
g00287238
6. Remove the engine access panel on the left side
of the machine.
Page 46
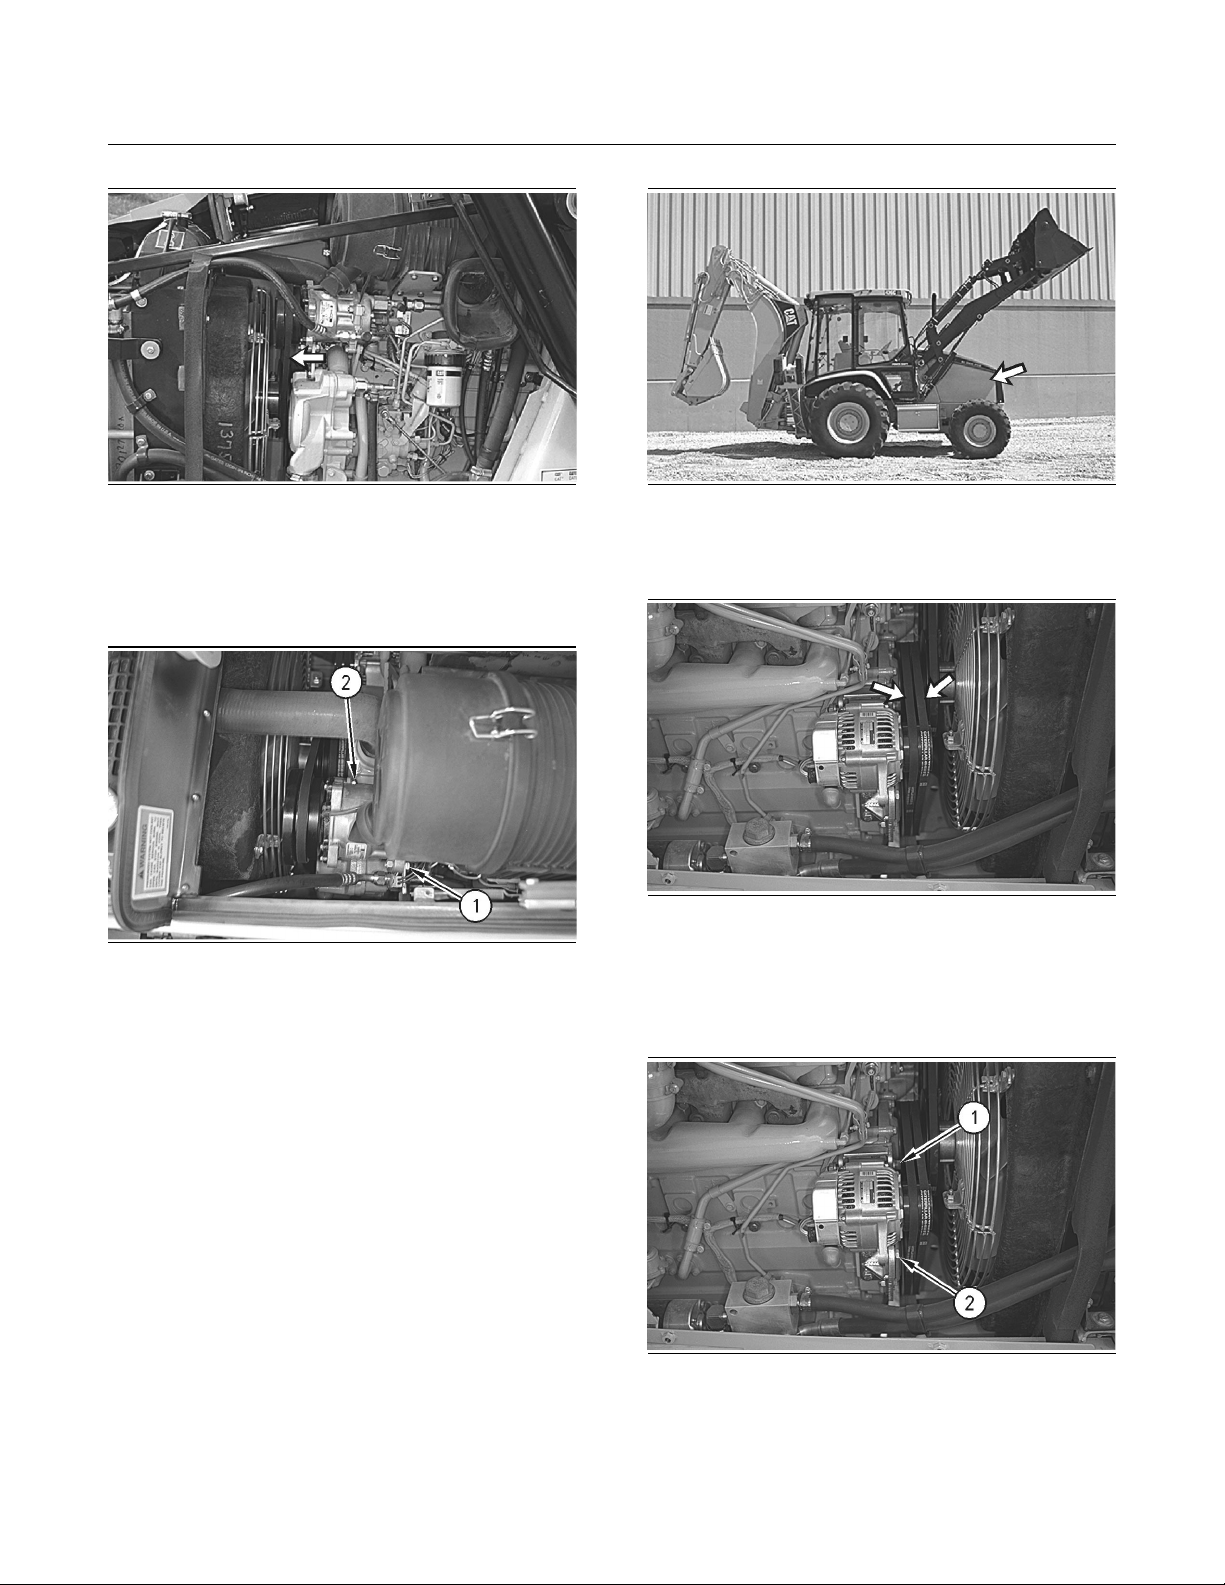
231
Maintenance Section
V-Belts - Inspect/Adjust/Replace
Illustration 399
g00287234
7. Inspect the condition of the air conditioner belt
and the adjustment of the air conditioner belt.
The air conditioner belt should deflect 10 mm
(0.38 inch) under 110 N (25 lb) of force.
Illustration 400
g00287235
8. Loosen the adjusting locknut (1). Loosen the
compressor bracket mounting bolt (2).
9. Move the compressor until the correct belt
tension is reached.
Illustration 401
g00287241
13.Remove the engine access panel on the right
side of the machine.
Illustration 402
g00287242
14.Inspect the condition of the alternator belts
and the adjustment of the alternator belts. The
alternator belts should deflect 10 mm (0.38 inch)
under 110 N (25 lb) of force.
10.Tighten the adjusting locknut (1). Tighten the
compressor bracket mounting bolt (2).
11.Recheck the belt deflection. If the amount of
deflection is incorrect, repeat Step 8 to Step 10.
12.Install the engine access panel.
Illustration 403
g00287243
15.Loosen the mounting bolt (1). Loosen the
adjusting locknut (2).
16.Move the alternator until the correct tension is
reached.
Page 47
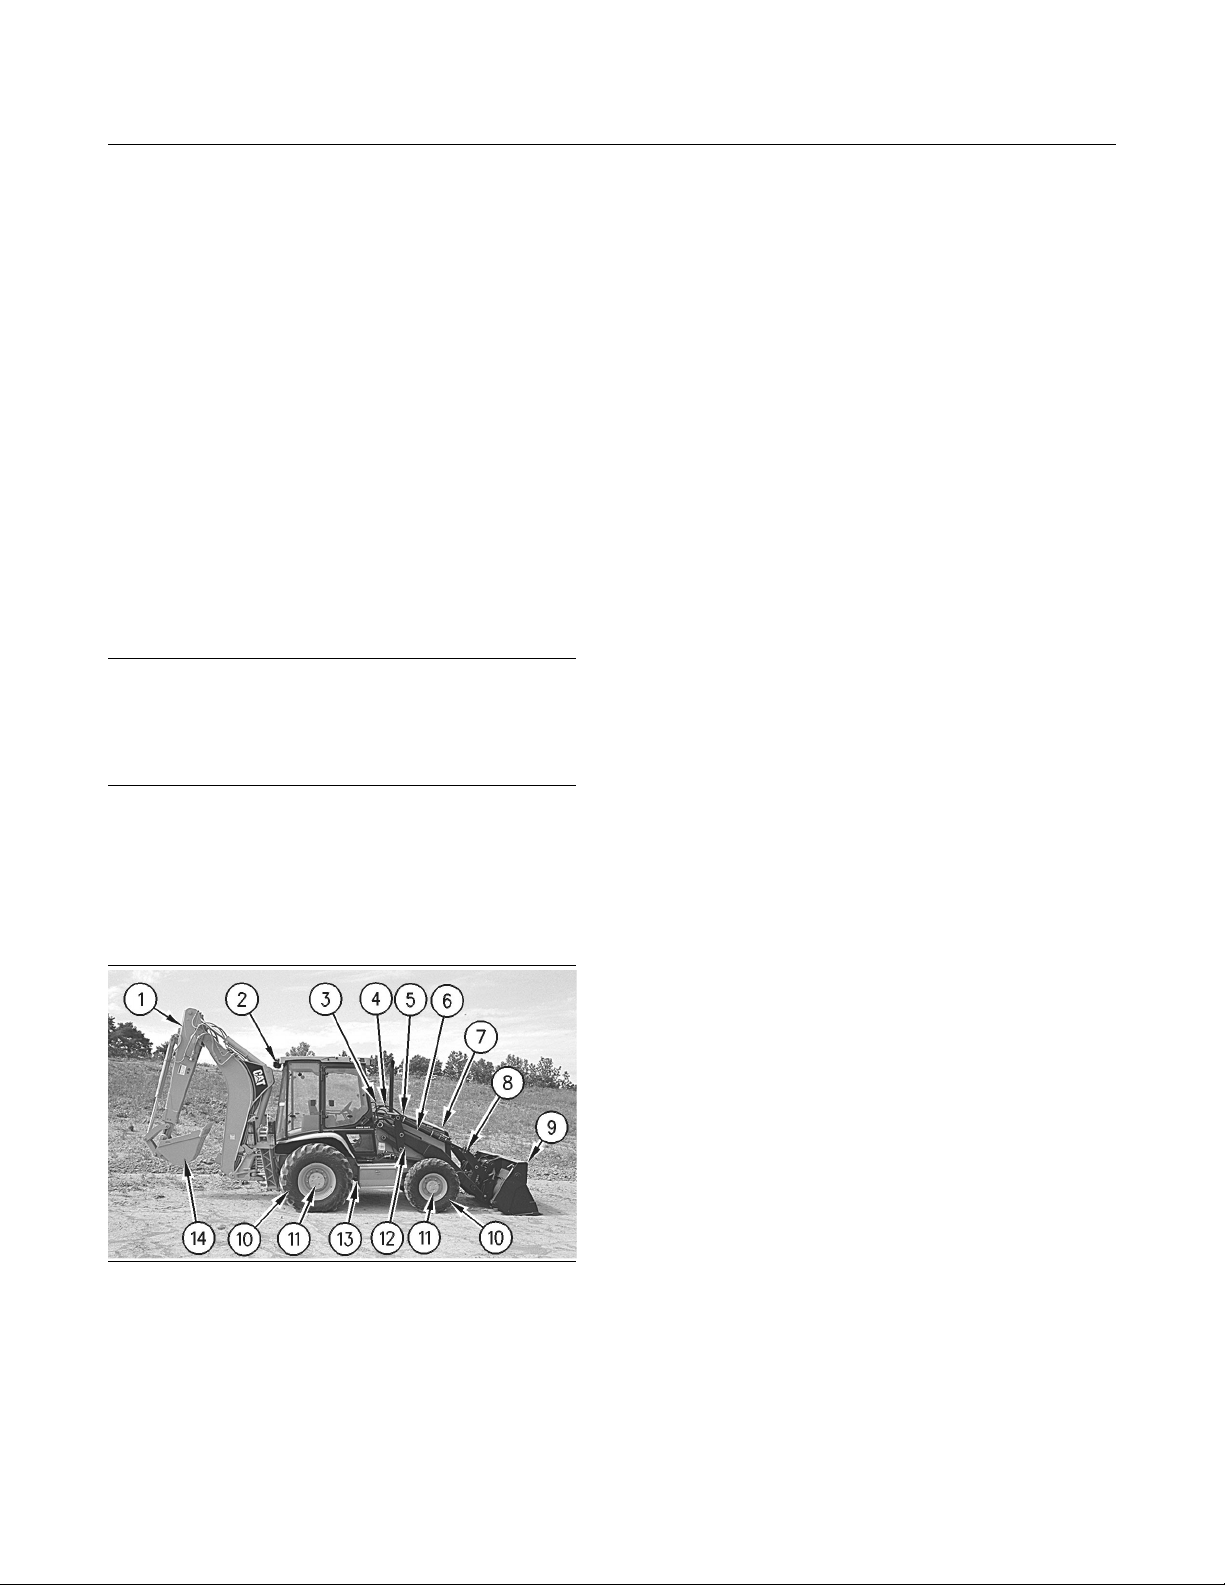
232
Maintenance Section
Walk-Around Inspection
17.Tighten the adjusting locknut (2). Tighten the
mounting bolt (1).
18.Recheck the belt deflection. If the amount of
deflection is incorrect, repeat Step 15 to Step 17.
19.Install the engine access panel.
20.Start the engine. Raise the loader arms to the
maximum height.
21.Remove the pin and replace the loader lift arm
brace to the stored position on the loader lift arm.
22.Lower the bucket to the ground.
i00615722
Walk-Around Inspection
SMCS Code: 7000
NOTICE
Accumulatedgrease andoil ona machineis afire hazard. Remove this debris with steam cleaning or high
pressurewater,at least every1000 hours oreach time
any significant quantity of oil is spilled on a machine.
Note: Inspect the machine for leaks. If leaks are
observed, find the source of the leak and correct the
leak. If leaks are suspected, check the fluid levels
more frequently than the recommended intervals.
If leaks are observed, check the fluid levels more
frequently than the recommended intervals.
Inspect the loader bucket (9) for damage or for
excessive wear. Inspect the linkage (8) for damage
or for excessive wear. Repair the bucket or the
linkage, if necessary. Replace any bucket teeth, if
necessary.
Inspect the transmission (13) for leaks. Inspect the
torque converter for leaks. Correct any leaks. Check
the hoses around the transmission.
Inspect the hydraulic system for leaks. Inspect the
hydraulic tank (4), cylinder rod seals, hoses and
tubes. Also inspect plugs, couplings and fittings.
Correct any leaks.
Inspect the engine compartment (6) for trash
buildup. Remove any trash buildup that is in the
engine compartment. Clean the screens on the
engine access doors.
Inspect the belts for the engine attachments (12) for
worn belts, for cracked edges or for frayed edges.
Replace any damaged belts.
Inspect the cooling system for leaks, for faulty
hoses, and for trash buildup. Correct any leaks and
remove any trash buildup from the radiator (7).
Inspect the tires (10) for damage and for proper
inflation. Replace any missing valve caps. Tighten
any loose bolts.
Inspect the axles (11) for leaks. Inspect the front
differential for leaks and the rear differential for
leaks.
Illustration 404
g00291276
Inspect the backhoe bucket (14) for damage or for
excessive wear. Inspect the backhoe linkage (1) for
damage or for excessive wear. Repair the bucket
or the linkage, if necessary. Replace any bucket
teeth, if necessary.
Check the torque on new wheels or repaired wheels.
Refer to Operation and Maintenance Manual,
“Wheel Nut Torque - Check”.
Inspect the engine air cleaner (5) for dirt buildup.
Remove the dirt from the engine air cleaner.
Service the air filter elements when the yellow piston
enters the red zone on the filter service indicator.
Inspect the steps and handholds (3). These objects
must be clean. Also, these objects must be in good
condition. Inspect the Rollover Protective Structure
(ROPS) for damage. Notify your Caterpillar dealer
for repairs, if necessary. Tighten any loose bolts on
the ROPS.
Make sure that the access covers and the guards
are secured. Inspect the access covers for damage
and the guards for damage.
Inspect the lights (2) for broken bulbs and for
broken lenses. Replace the bulbs or lenses, if
necessary.
Page 48
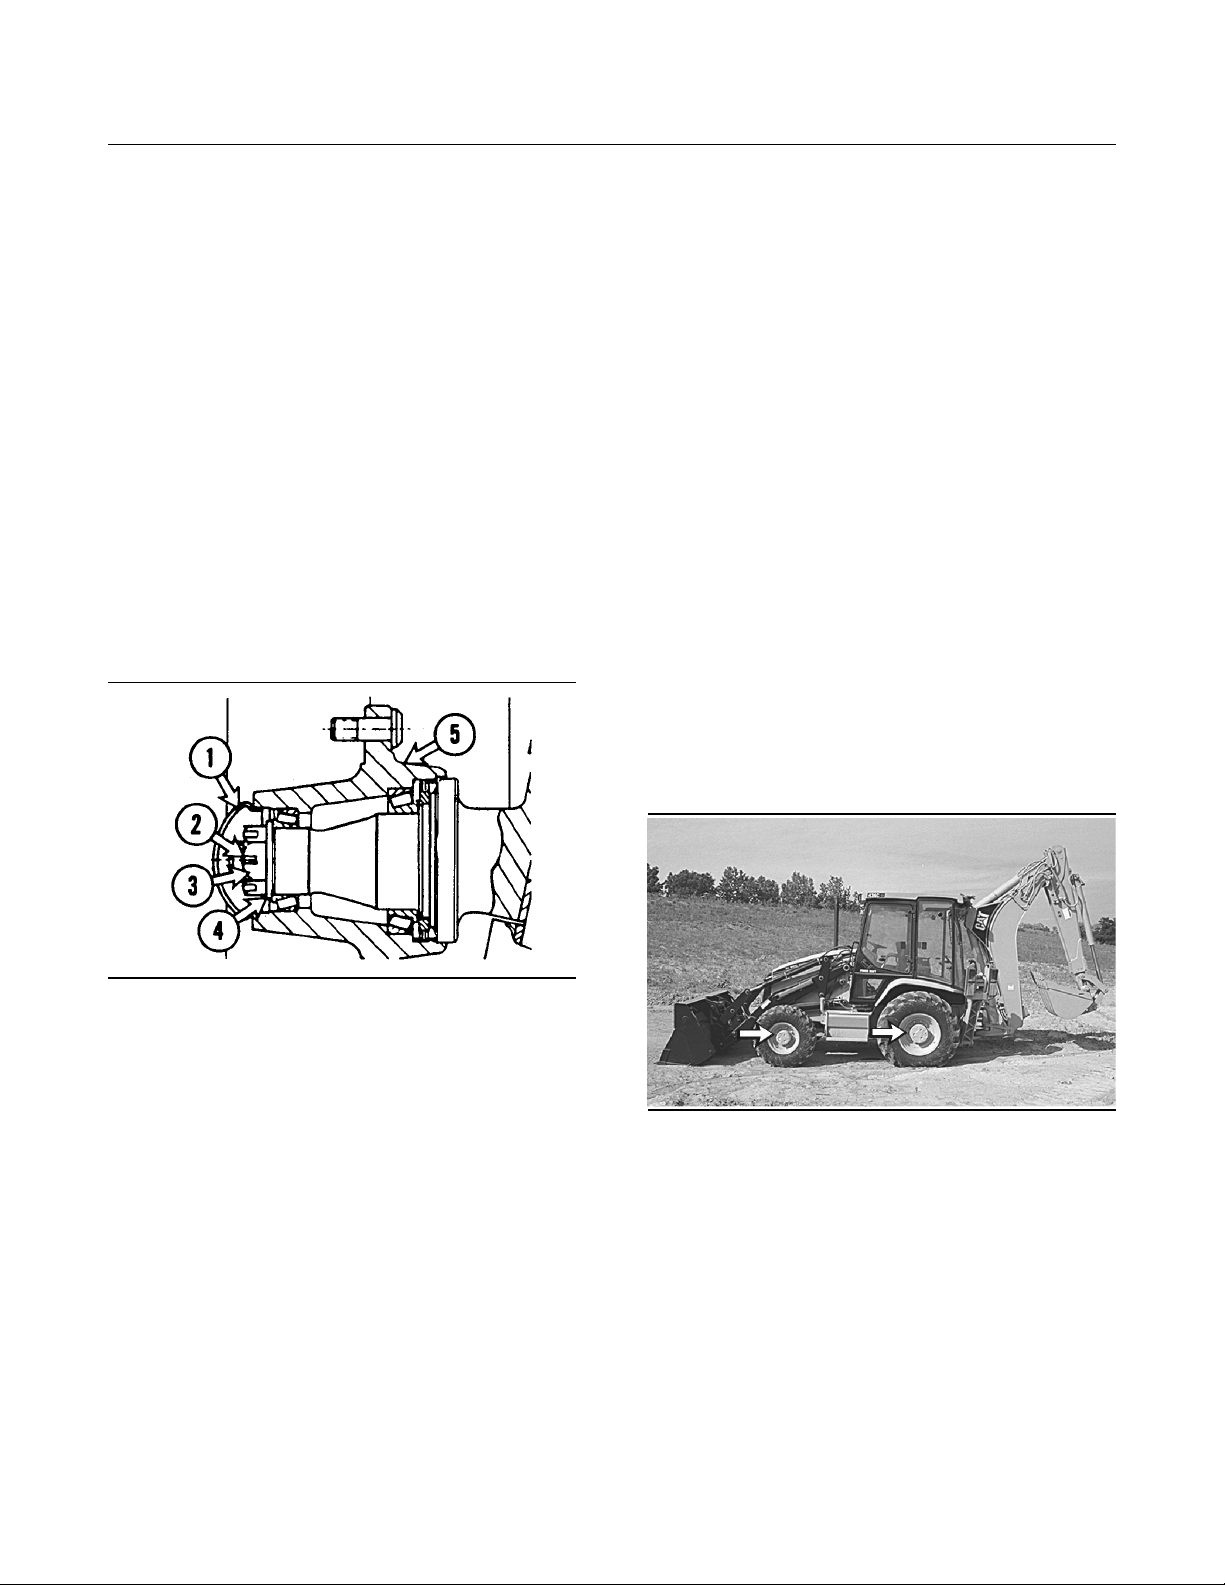
233
Maintenance Section
Wheel Bearings (Front) - Lubricate
Inspect the operator’s compartment for cleanliness.
Keep the operator’s compartment clean.
Adjust the rearview mirrors for best visibility.
i00615726
Wheel Bearings (Front) Lubricate
(Two-Wheel Drive)
SMCS Code: 4205; 4208
Use the following procedure for both wheels.
1. Raise the front wheels slightly off the ground.
2. Install sufficient blocking under the frame and
lower the machine to the blocking.
3. Remove the nuts and both wheels.
10.Pack a 6 mm (0.25 inch) layer of grease
between the bearing assemblies in the hub. Do
not fully pack the hub with grease.
11.Apply a 6 mm (0.25 inch) thick film of grease
on the spindle surface.
12.Install the hub, the bearings, the washer, the nut
and the wheel.
13.While you turn the wheel, tighten the nut (3) until
a slight drag is noticed. Back off the nut to the
nearest slot and install the cotter pin.
14.All bearing surfaces must make contact. The
wheel should turn freely within 0.025 to 0.25 mm
(0.001 to 0.010 inch) end play.
15.Install the hub cap.
16.Tighten the lug nuts to a torque of 400 ± 40 N·m
(295 ± 30 lb ft).
i00615727
Wheel Nut Torque - Check
Illustration 405
4. Remove the hub cap (1).
5. Remove the cotter pin (2), nut (3), and washer
(4).
6. Pull the hub assembly (5) until the cone and
roller assembly come out of the hub assembly.
Then, pull off the hub all the way.
7. Clean all of the parts in clean, nonflammable
solvent and allow the parts to air dry. Do not
use pressure air.
8. Inspect the roller assemblies for heat
discoloration and for wear. Inspect the seals for
damage. Replace any damaged parts.
g00107659
SMCS Code: 4051; 4199; 4200
Illustration 406
Check the torque on new wheels or repaired wheels
after every ten service hours until the specified
torque is maintained.
Put a drop of oil on all wheel studs on reassembly.
Torque the nuts to 400 ± 40 N·m (295 ± 30 lb ft).
Use a star pattern when you torque the nuts.
Check the nuts on all four wheels.
g00287728
9. Make sure that the grease gets packed between
the rollers and the cage on both bearings.
Force the grease through the bearing from the
large end of the rollers.
Page 49
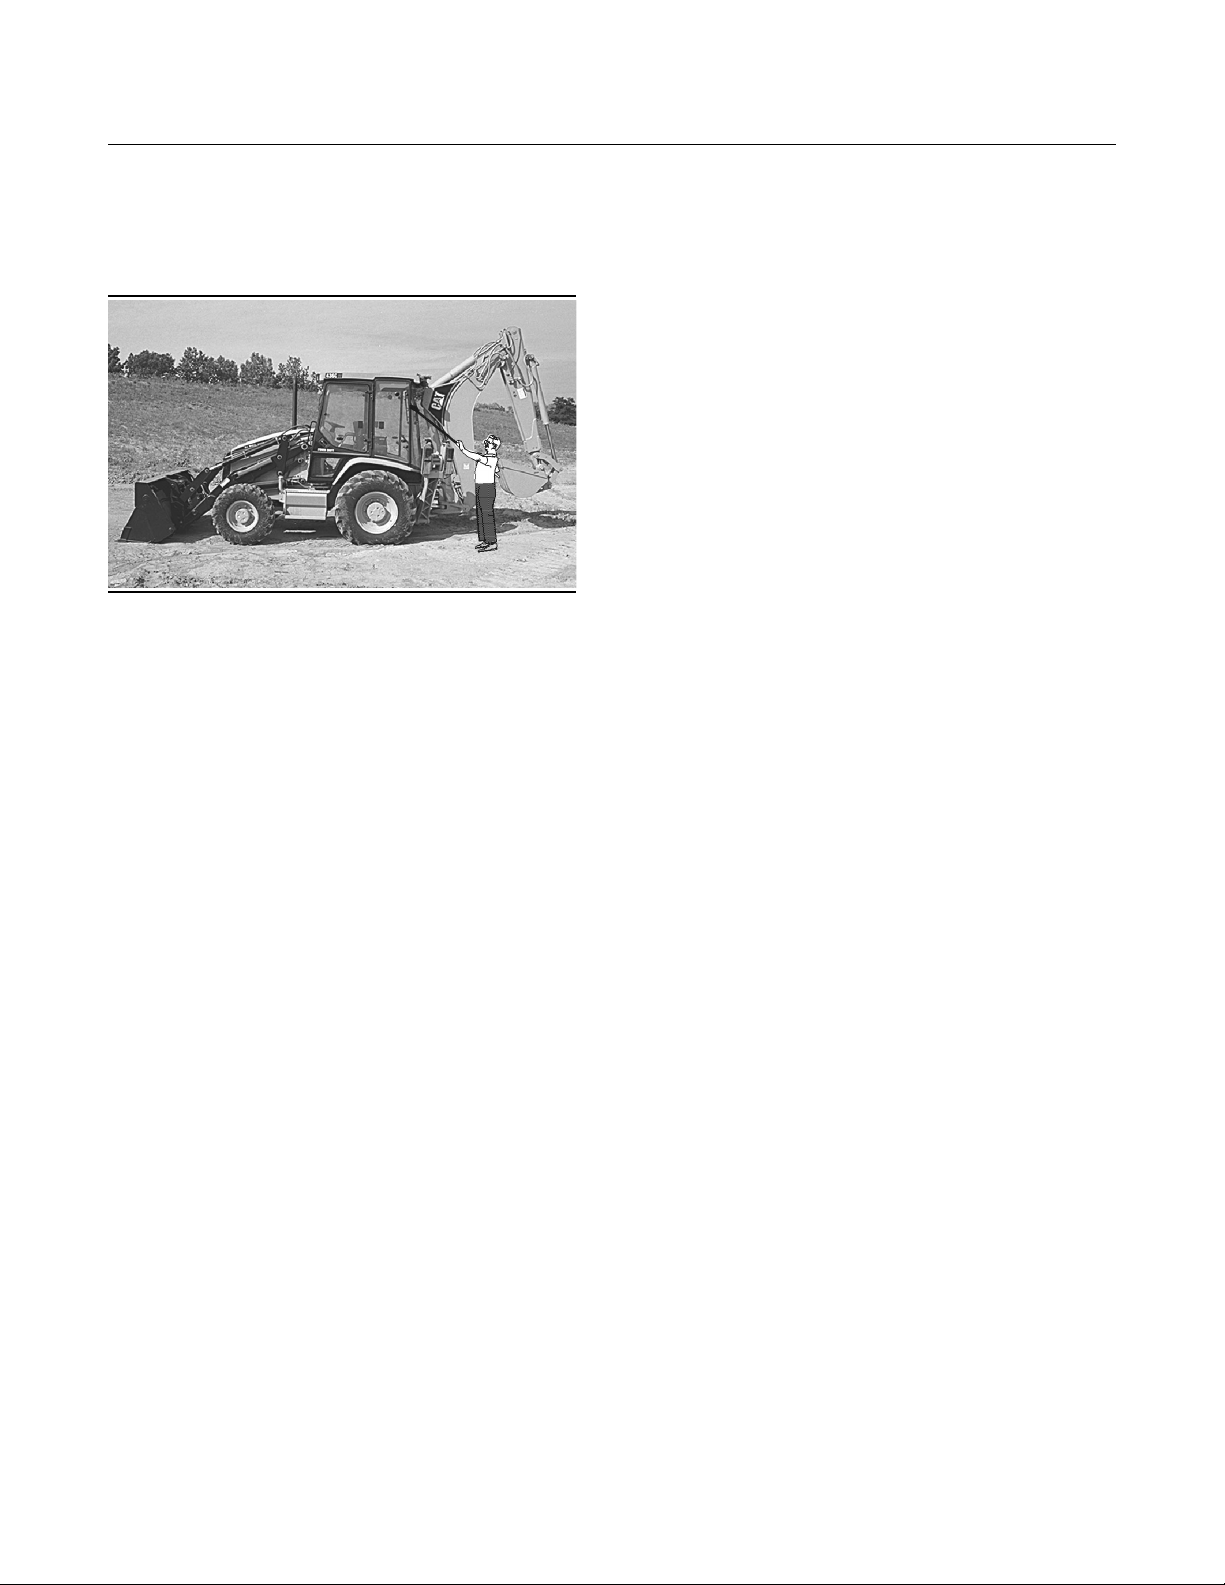
234
Maintenance Section
Windows - Clean
Windows - Clean
SMCS Code: 7310; 7340
i00615728
Illustration 407
Use commercially available window cleaning
solutions in order to clean the windows. Clean the
outside of the windows from the ground unless
handholds are available.
g00287727
i01193237
Window Wipers Inspect/Replace
SMCS Code: 7305
Inspect the condition of the wiper blades. Replace
the wiper blades if the wiper blades are worn or
damaged. If the wiper blades streak the window,
replace the wiper blades .
 Loading...