

Page 1
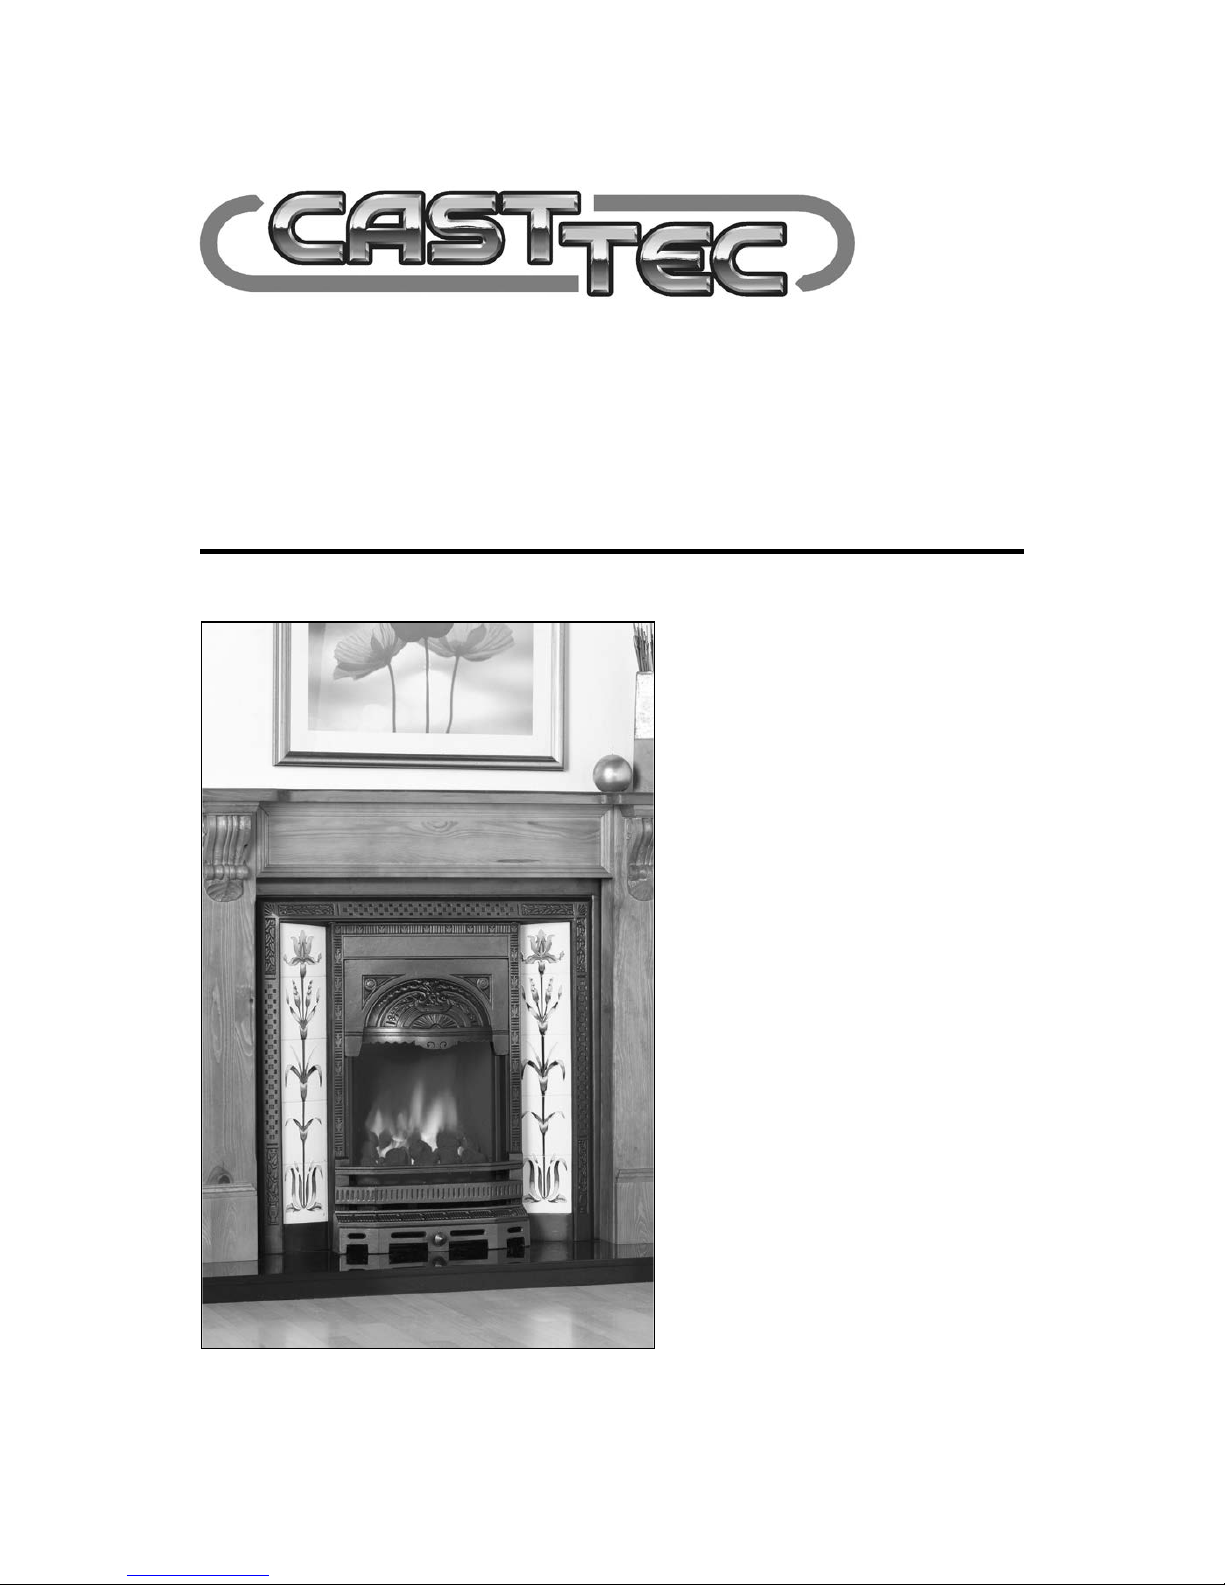
Integra HE Remote Control
Inset Live Fuel Effect Gas Fire
Installation and
Users Instructions
These instructions should be read by the
installer before installation and then should be
handed to the end user when the installation
is complete.
This is an official requirement and is the
responsibility of the fitter of this
appliance.
Having installed the appliance, the installer
should take the necessary steps to ensure
that the user fully understands how to operate
the appliance and is also made aware of the
fire’s basic cleaning and maintenance
requirements.
Page 2

SECTION PAGE
Notes for the Installer and End User 3
Installation Requirements 4
Installation Procedure - Standard 22” x 16” 5
Installation Procedure - Decorative Cast 7
Commissioning 8
Technical Data 8
Replacement Parts 8
Trouble Shooting (GAS SAFE Engineer Only) 9
User Instructions 12
Cleaning and Maintenance 17
Fire Front Specifications 18
Modular Coal Layout Instructions 19
Guarantee 24
Trouble Shooting (User) 24
CONTENTS
2
Page 3
This appliance has been designed, tested and manufactured to the British Standard BS 7977-1:2002 relating to
Radiant Convector Gas Appliances and must be installed by a qualified Gas Safe Registered Installer in
accordance with the Gas Safety (Installation and use) regulations 1994 and all other relevant standards.
This appliance must be connected in accordance with the National Regulations. The appliance must be sealed
into a non-combustible fireplace (Fig. 2) whose only opening must be through a Class I (7” or 175mm diameter)
or Class II (5” or 125mm diameter) chimney / flue of at least three metres in height.
Before installation, ensure that the local conditions, (identification of gas type and pressure) and the adjustment
of the appliance are compatible. Never place combustible material directly in front of this appliance. Floor
covering such as carpet is acceptable but must be a minimum of 300mm from the incandescent flame.
NOTES FOR THE INSTALLER AND END USER
3
This fire is a very effective heating appliance and must be fitted against a wall of non-combustible material as
classified in BS 476-4:1970 (2007).
An air vent is not normally required for this application because its input does not exceed 7kW. We recommend
that the chimney/flue is swept prior to installation of this appliance and that any flue restrictor or damper plate
should be removed or fixed in the open position. The chimney/flue must always generate a positive up draught to
ensure safe operation.
The installer must then establish that all the products of combustion are entering the flue within ten minutes of
lighting from cold. This can be verified by inserting a lit smoke match into the left and right hand ducts
immediately above the glass retaing strip. It should NOT be inserted into the central convector duct.
This operation should be carried out before fitting the trim and louvred panel (see ‘Spillage Test’ page 4).
An isolation valve must be fitted adjacent to the appliance. When closed, this will allow the complete burner and
control assembly to be disconnected for maintenance or repair in accordance with national regulations.
The gas supply should be provided by a semi rigid pipe with an 8mm diameter and should be no longer than 1.5
metres in length.
NOTE: When the gas supply pipe is passed through masonry or other brickwork always ensure that the end
of the pipe is covered to avoid any debris passing through into the appliance controls.
The appliance is fitted with an Oxygen Depletion Sensor (ODS) that monitors the room for products of
combustion. If products are detected, the ODS will automatically shut down the appliance. If this situation
arises, re-light the appliance, referring to the user instructions (page 12). If shut down re-occurs, a qualified
person must be called to thoroughly check the appliance. The spillage monitoring system (ODS pilot) must
not be put out of operation or be tampered with or adjusted by either the installer or the user. If the unit is
found to be at fault it should be replaced with the manufacturers original replacement parts.
Fireplace Opening
150mm (min)
50mm (min)
300mm (min)
Fig. 1
Fig. 2
195mm 512mm
612mm
Page 4

This appliance must only be installed in Great Britain or Ireland.
1. This fire is a natural gas appliance and has been designed for use with the following applications:
a) Class I - Conventional brick or stone chimney as used for a solid fuel fire with a cross sectional dimension of
225mm x 225mm (9” x 9”) or a lined flue with a minimum diameter of 175mm (7”), with the fireplace components
conforming to BS1251, or a builders opening a minimum of 560mm high and 406mm wide with a minimum depth
of 230mm to allow sufficient volume for debris collection (unlined chimney 12 dm3 and lined 2 dm3). To obtain this
depth it would not normally be necessary to remove the chair brick. Any permanent flue restrictions or variable
dampers are to be removed or locked in the fully open position. The chimney should also be swept prior to
installation.
b) Oversized Void - Where an oversized void is encountered it must be reduced in size by lining with bricks or
blocks or alternatively inserting a metal flue box. The nominal dimensions of the void should not exceed 650mm
wide x 475mm deep x 800mm high BS5871-2.
c) Class II - A double walled or insulated metal flue box built to the requirements of BS715 with an insulated flue
having a minimum diameter of 125mm (5”) and a minimum effective overall height of 3 metres (10’).
NOTE: If the flue box is to be used with an existing brick or stone chimney, a 125mm (5”) minimum diameter
flue liner conforming to BS715 may be used.
2. A non-combustible hearth must be provided to comply with current building regulations. Care should be taken to
prevent any damage being caused to surrounding soft furnishings or decoration, e.g. many embossed vinyl wall
coverings may become discoloured if placed too close to the appliance.
3. A suitable proprietary fire surround with 100
0
c rating may be used with a minimum clearance from hearth to
underside of shelf of 830mm, providing that the depth of shelf is 150mm or less.
4. Where the shelf depth is greater than 150mm, the minimum height clearance should be increased by 25mm
increments for each additional 12.5mm of shelf depth.
5. Minimum width between vertical sides of combustible surround should not be less than 800mm provided the
appliance is central to the surround and the surround legs do not exceed a 150mm profile.
6. If the 150mm profile is exceeded, the width of the surround (and the back panel) should be increased by
25mm for each additional 12.5mm of profile depth.
d) Pre-cast Flue conforming to BS 1289 Part 1 (It may be necessary to use a surround with a deeper rebate than
usual to accommodate a flush fit with certain starter blocks. Check the appliance dimensions against individual
applications.
FLUE FLOW TEST
A flue flow test (smoke test) is carried out to check the effectiveness of the flue and to ensure that there is no
leakage into another part of the premises (including any loft), or as appropriate other adjoining premises (this is
particularly important where a number of chimneys combine into a multiple stack).
The flue flow test should be carried out using a suitable smoke pellet which the pellet manufacturer claims to
generate 5m
3
of smoke in 30 seconds burn time.
These gas fires should have the flue flow test carried out with the appliance in position but not connected to the
gas supply so that the smoke test can be carried out with representative flue flow conditions.
A warm flue will be more effective than a cold flue. If the flue is reluctant to draw, which can be initially assessed
by lighting a smoke match at the intended position of the appliance flue connection, introduce some heat into the
flue for a minimum of 10 minutes using a blow torch or other means.
Other factors, such as weather conditions and a combination of materials used to construct the flue can all
influence the flue draught. The pre-heating process may require as much as half an hour before the flue behaves
satisfactory as a blow torch does not represent the volume of heat consistent with the normal appliance operation.
A Flue Flow Test should be checked as follows:
1. Carry out those visual checks as indicated previously, and continue only if satisfactory.
2. Establish that an adequate air supply is available for the combustion of the appliance
3. Close all doors and windows in the room that the appliance is to be installed.
4. Light a smoke pellet at the intended position for the appliance. Place the inset fire case into position.
5. The test is satisfactory if
- there is no significant escape of smoke from the appliance position.
- there is no seepage of smoke over the length of the flue.
- smoke is discharged only from the correct terminal.
VENTILATION
No special ventilation bricks or vents are required in the room containing the appliance, providing that normal
adventitious room ventilation exists. The installer must determine this by carrying out a spillage test.
SPILLAGE TEST
To check for satisfactory clearance of products of combustion, close all doors and windows and leave the fire
burning for ten minutes. Insert a lit smoke match into the left and right hand ducts immediately above the glass
retaing strip. It should NOT be inserted into the central duct. This operation should be carried out before fitting the
trim and louvred panel. All the smoke must be drawn into the flue. If spillage occurs, allow a further ten minutes
and repeat the test. Should spillage still occur turn the appliance off and seek expert advice. To continue the test:
If an extractor fan is situated in the room the test should be repeated with the fan running. If there is a connecting
room with an extractor fan the test should be repeated with all the doors to that room open and the extractor fan
running.
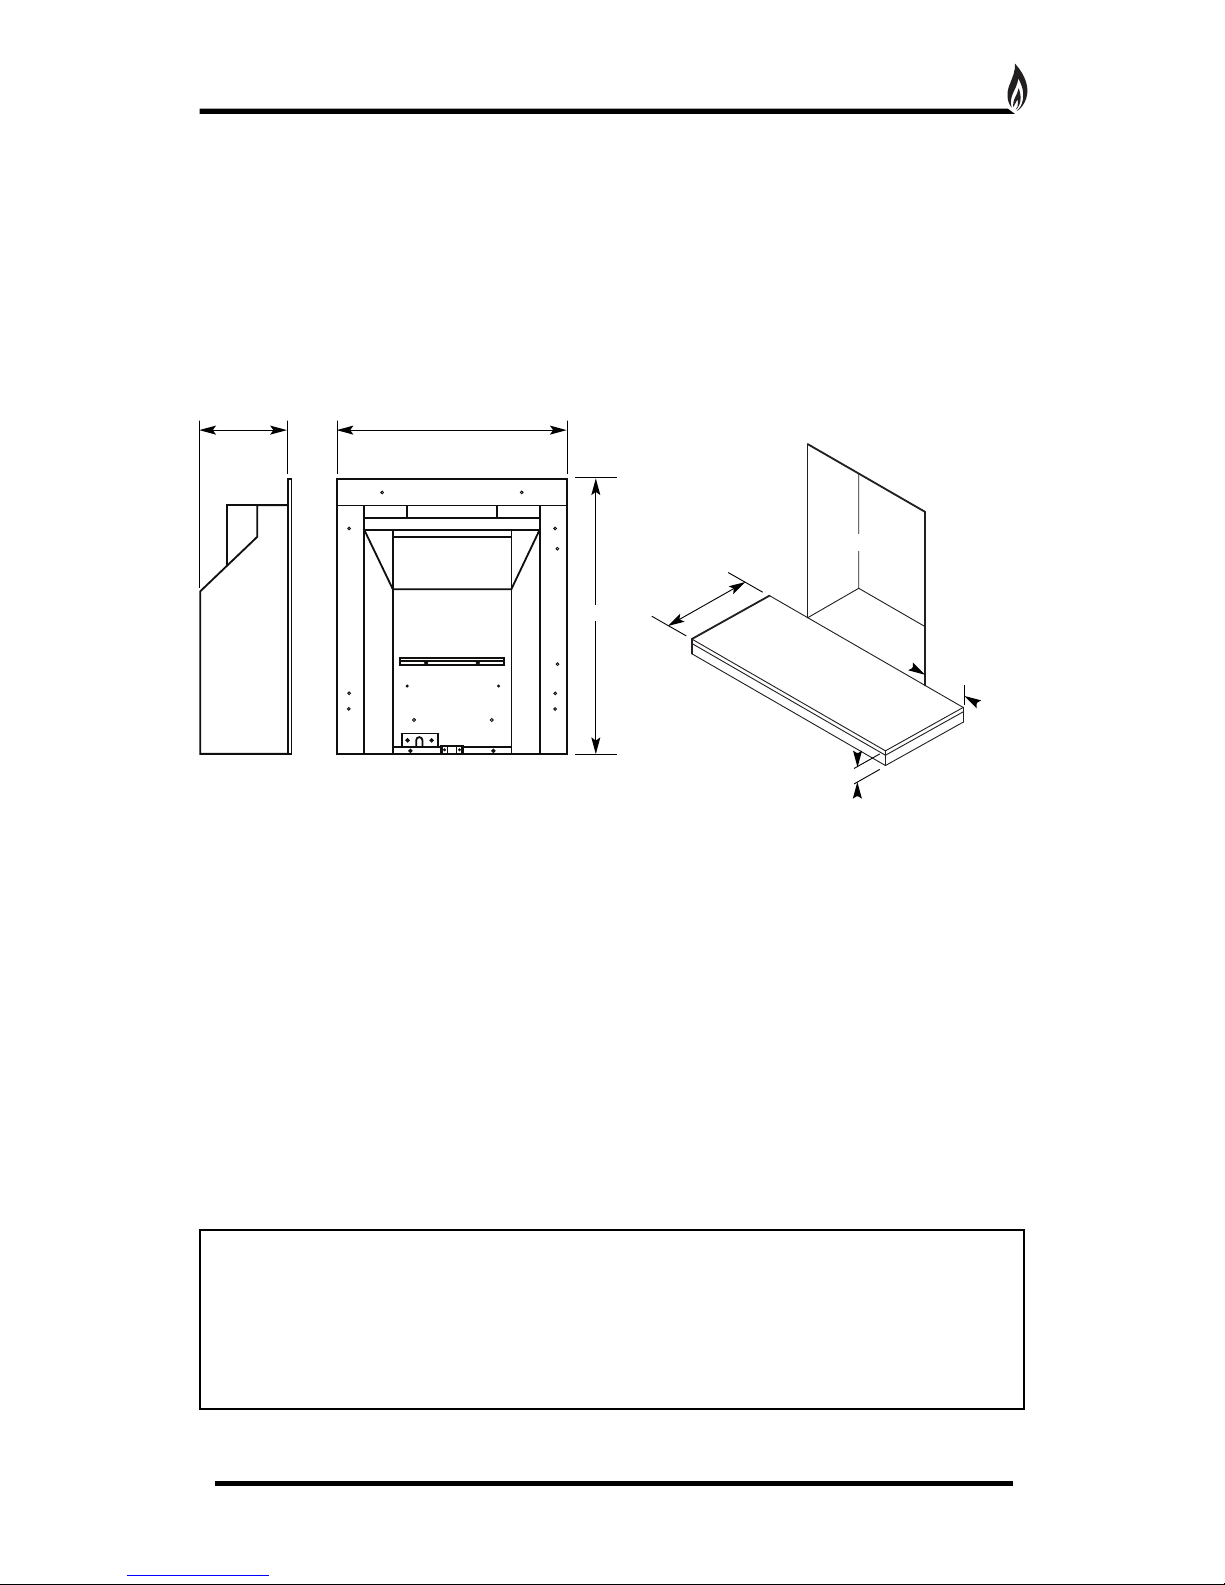
INSTALLATION REQUIREMENTS
4
Page 5
1. Carefully lift the appliance out of the packaging taking care not to damage the ceramic components in the
separate carton.
2. Remove the magnetic trim and store to one side to prevent any damage.
3. Remove the louvred panel by lifting
up and pulling forwards.
4. Slacken the five machine screws on
the top retaining strip (Fig. 3).
5. Unscrew the two securing screws
from the lower infill panel and remove the panel.
Tilt the glass forwards and slide out (Fig. 4).
6. Cut the foam sealing strip (in plastic bag supplied) to length and stick a continuous strip down the two sides
and across the top of the radiant box. When the box is placed against a flat surface the foam strip will form a
seal around the boxes flange.
7. Carefully lift the appliance into position in the fireplace opening and check that the flange of the radiant box
fits flush against the sealing face with no gaps present.
8. Remove the four screws that secure the burner tray to the box, two on the front leg and two at the rear of the
tray. Remove the burner tray and place to one side (Fig. 5).
INSTALLATION PROCEDURE FOR STANDARD 22” X 16” OPENING
5
Fig. 5
Burner tray
Blanking plate
Foam Sealing Strip
Magnetic Trim
2 x Securing Screws
Fig. 3
Fig. 4
5 x Machine Screws
Louvred Panel
Page 6
INSTALLATION PROCEDURE FOR STANDARD 22” X 16” OPENING CONTINUED
6
Radiant box
Hearth
Eye Bolts
Centre Line
Drill Holes for 4 eye bolts
on 112mm centre lines
between max and min height.
65mm
min
Fix the radiant box into the opening, securing into position using the cable fixing kit (Fig. 8). Do not cut off the
loose ends as the full length is required should the radiant box need refitting at any time. Coil up and securely
store underneath the burner tray.
1. Position the burner tray into the box in order to determine the length of 8mm gas supply needed and cut to
length.
2. Before making the final connection, thoroughly purge the supply pipe to clear any foreign matter, i.e. masonry
dust etc, as this could lead to blockages in the control valve and/or pilot assemblies.
3. Fix the burner in place using the four screws and make the gas connection. Carry out a gas soundness test.
ALTERNATIVE FIXING METHOD
Where the drilling of the back panel is not practical, an alternative
fixing method may be employed using the optional cable fixing kit
provided. Drill four holes in the rear of the fireplace opening (Fig. 7).
Securely fix the four eye bolts provided using suitable rawl plugs.
Feed one cable through each of the top holes in the rear of the
fire box.
115mm
max
500mm
min
550mm
max
112mm
112mm
Tension Nut
Cable Clamping Screw
Fig. 7
Fig. 8
Cable
Rectangular
Cutout
Insert cable into rectangular cutout
and feed the end back through the
small hole above the cutout.
Fixing
Holes
Fixing
Holes
Fixing Holes
9. When the burner tray has been removed, decide which
side of the appliance the gas supply will be entering the
radiant box and remove the relevant blanking plate. The
gas supply should be concealed as much as possible. Both
blanking plates MUST be re-fitted or this could seriously
impair performance.
10. With the radiant box placed in the opening, mark out
four of the eight fixing holes. Remove the box and carefully
drill and fit rawl plugs.
11. Pass the 8mm gas connection through the back of the
box and secure the box into place using four screws
(straight shank screws are recommended for marble).
Check that the outer flange of the appliance is completely
sealed against the back panel.
Fig. 6
Page 7
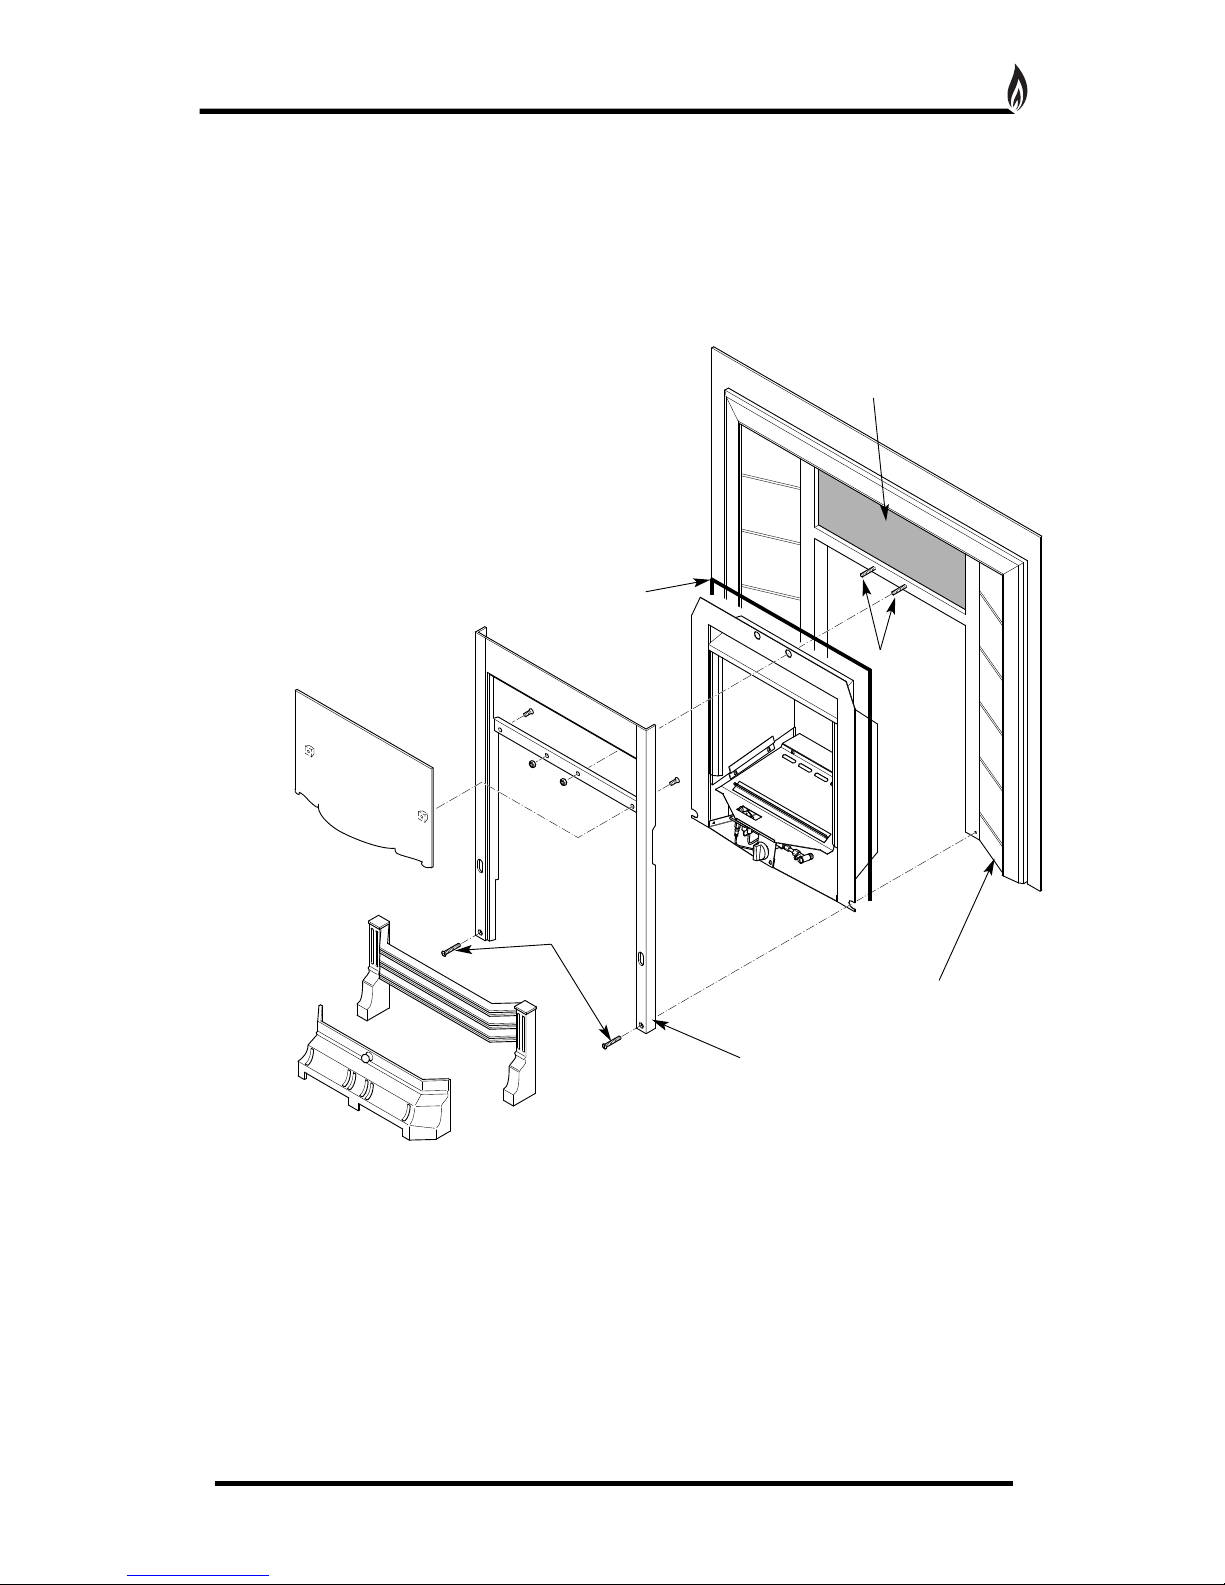
INSTALLATION PROCEDURE FOR DECORATIVE CAST SURROUND
7
1. Install the decorative cast surround into the fireplace opening and ensure it is fully sealed including the open
area above the fire (see Fig. 9).
2. Carefully lift the fire box out of the packaging taking care not to damage the ceramic components in the
separate carton.
3. Cut the foam sealing strip (in plastic bag supplied) to length and stick a continuous strip up one side, across
the top and down the other side of the rear of the radiant box. When the box is placed against the cast surround
the foam strip will form a seal around the boxes flange.
4. Lift the fire box on to the two studs at the top of the surround and
check that the flange of the radiant box fits flush against the sealing
face with no gaps present.
5. Locate the decorative frame on to the studs and secure with the
two nuts provided.
6. Insert the two screws into the lower holes in the decorative frame
and carefully tighten ensuring the fire box is securely clamped
between the frame and the surround.
Fig. 9
Decorative Cast
Surround
Securing
Studs
Securing Screws
Decorative Frame
ENSURE THIS AREA
IS SEALED
Foam Sealing Strip
Page 8
1. Modular Coal Set - The ceramic coals supplied with this appliance can be replaced at service intervals
depending on their condition. If the coals do require replacement, the consumer can do so provided that the
Ceramic Component Layout Instructions (pages 19-20) are adhered to. Under no circumstances should
additional/extra coals be added. Only genuine Legend replacement parts should be used.
Order Ref: EVCS01
2. Oxygen Depletion Sensing Pilot - In the unlikely event of a pilot failure, the pilot assembly should only be
replaced by a Gas Safe Registered Engineer. The user must not carry out this work.
Order Ref: LEG62
3. TESC Valve - In the unlikely event of control valve failure, the assembly should only be replaced by a Gas
Safe Registered Engineer. The user must not carry out this work. Order Ref: ETH02
4. Glass Panel - Should the glass become cracked or broken, the fire should not be used under any
circumstance.
Order Ref: LEG59
5. Glass Rope Seal - The integrity of the glass rope seal should be checked on service and replaced if
necessary by a Gas Safe Registered Engineer.
Order Ref: LEG58
COMMISSIONING
8
Gas Type Natural Gas (G20) Cat I
2H
Gas Connection 8mm
Number of Injectors One
Injector size Stereomatic 1.70mm
Control Max Operating Temperature 80
o
c
Inlet Pressure Cold 20 mbar
Heat Input (Gross) 4.6 kW (Full) 3.0 kW (Reduced)
Weight 10.4 kg
NOx Level Class 5
REPLACEMENT PARTS
TECHNICAL DATA
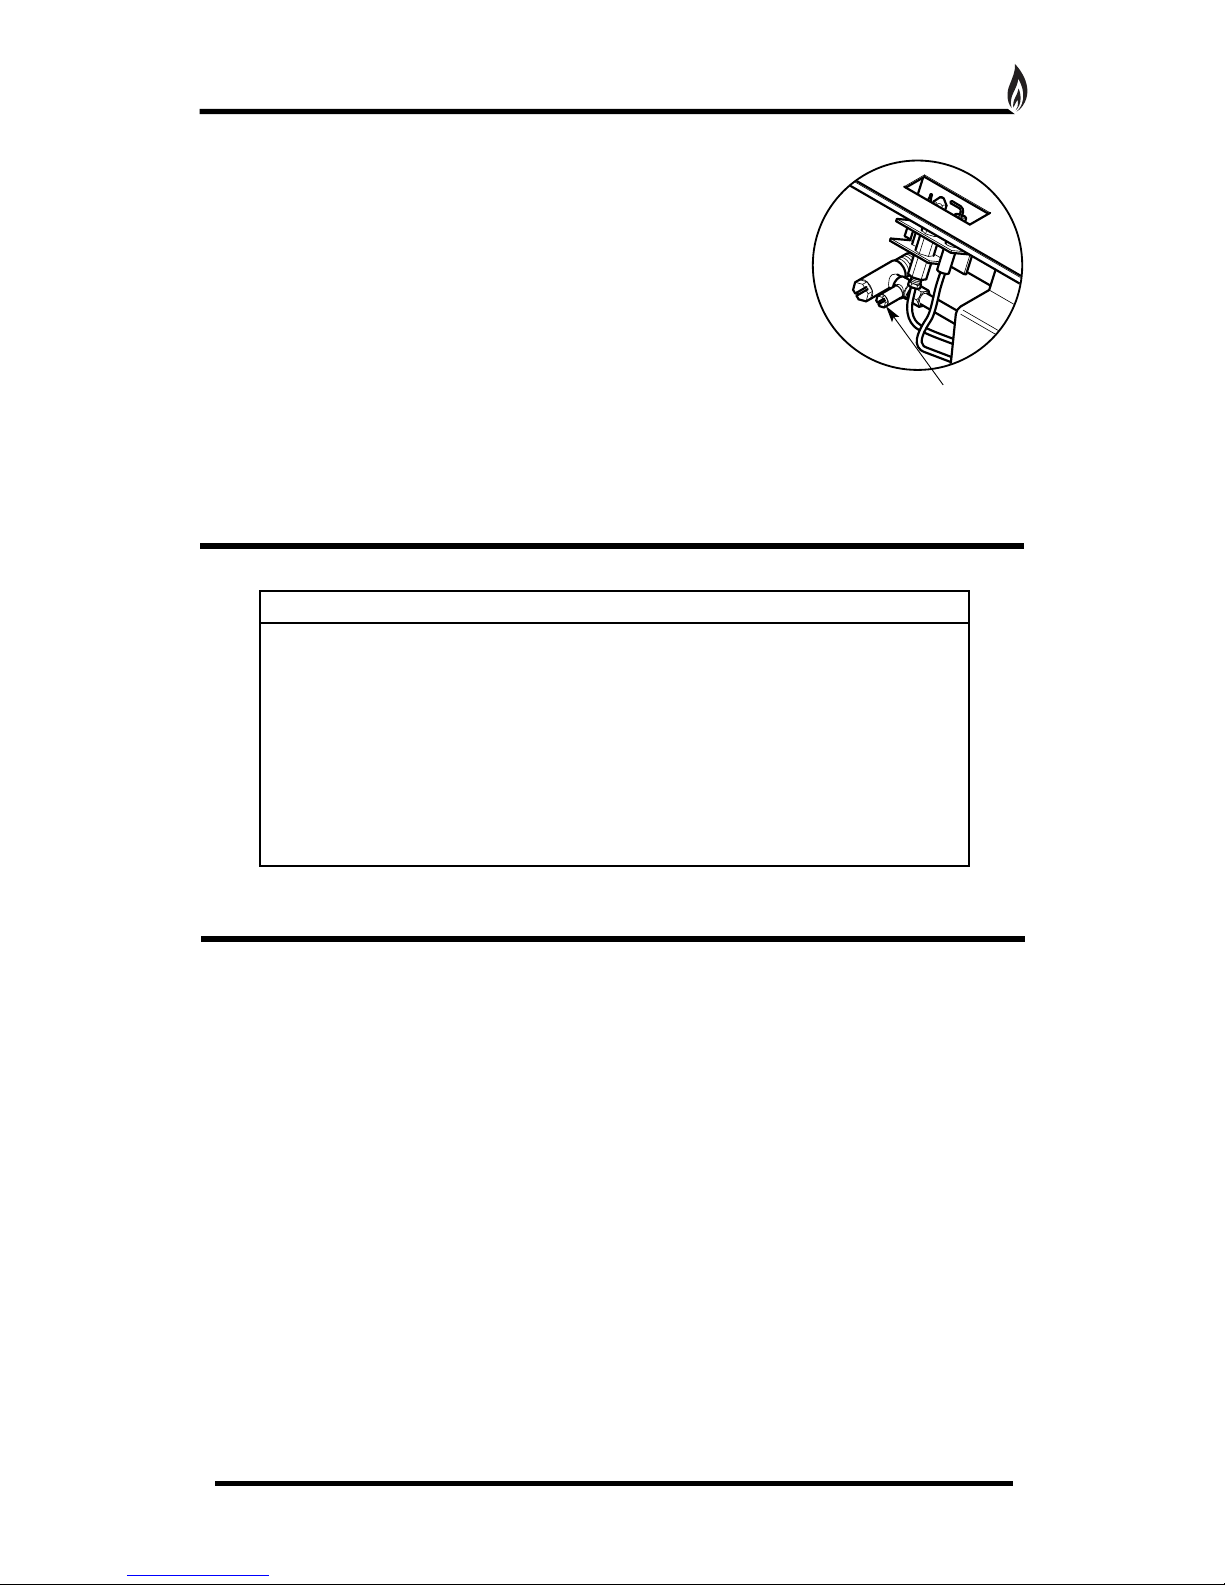
1. Unscrew the inlet pressure test point sealing screw (Fig. 10) and fit a manometer.
Consult the user instructions (page 12). Ignite the appliance and turn to the high position.
2. Take a pressure reading and consult the technical data (below) to establish the
correct working pressure.
3. Once the pressure has been checked and verified, turn off the appliance.
Consult the ceramic component set up diagrams (pages 19-20) and fit the
ceramics as per the instructions.
4. Re-install glass panel. The glass should be positioned centrally to ensure the
decorative trim will fit over it.
5. Carry out a Spillage Test (page 4).
Inlet Pressure
Test Point
Fig. 10
Page 9

TROUBLE SHOOTING (GAS SAFE ENGINEER ONLY)
9
NOTE: The purpose of the Error code is to give some information as to the potential reason for the fire not
starting rather than just no flame. The appearance of an error code does not mean there is necessary a fault
with the control or the appliance, it could be external factors outside the control that could cause error codes to
appear from time to time and they could just be a one off event , so please check and work through the
suggested service actions below before considering changing the control box. These codes are there to help
with a more certain and efficient servicing of the appliance. Changing the box without working through the guide
could lead to an unnecessary and expensive service and probably a repeat visit to fix the real fault.
SERVICING MUST ONLY BE CARRIED OUT BY COMPETENT PERSONAL WHO HAVE CURRENT
QUALIFICATIONS AND ACCREDITATION (I.E. GAS SAFE)
NOTE: After correcting fault, perform a restart to reset error display to normal standby mode. Also depending
upon the repair, air will need to be bled out of the system and it may take several start attempts to do so. E00
may appear and need to be reset a few times during the purging process, depending upon the length of supply
pipe. Bleeding the supply pipe via the isolation valve pressure test point will help speed up this process.
NOTE: Before undertaking any actions on the servicing as detailed below , replace the batteries in the control
and handset (if applicable) with new and know to be good batteries. Faulty batteries will cause error codes.
There is a difference between old and faulty batteries and they may give false errors if the batteries are faulty.
ALWAYS CHANGE ALL THE BATTERIES TOGETHER AND NOT JUST ONE OR TWO AND ALWAYS OF
THE SAME MAKE AND TYPE (I.E MANUFACTURER AND MODEL TYPE).
Generally : After replacing the batteries, to clear the error code perform a start cycle by pressing the start button
as normal. Then press again in the same way to attempt a new start cycle. The error code must be cleared this
way after every error code is displayed to start again.
Page 10

TROUBLE SHOOTING (GAS SAFE ENGINEER ONLY)
10
Reset control by pressing start button for 1 second and releasing. Then press again the same way
to attempt a normal start command. Repeat up to 10 times as necessary to see if this overcomes
the issue as it may resolve itself eventually.
Check to see if gas is present at gas appliance inlet. (Check gas supply is on, the gas line purged of
air and the supply pipework is free of blockages or contamination)
Rectify and perform start
cycle to clear the Error code.
Try to light the fire as normal.
No gas on appliance
inlet
Clean the pilot free of any dirt, dust carbon granules or lint, especially around the brass body of the
bunsen burner and its gas and electrical connection and the area around the flame ports and the
spark plug and electrode tip. Check the electrode gap is 3- 4 mm.
Rectify and perform start cycle
to clear the Error code. Try to
light the fire as normal.
Replace pilot if necessary
Pilot contaminated with
lint or other materials
Check ignition cable for damage and listen and watch for tracking out of spark to see if it is present
but not making it to the electrode tip on the pilot burner.
If cable damaged, replace
cable. Reset error by
performing a normal start
cycle and try to start again.
Replace pilot if necessary.
Reset and try again
Reset and try again
No Spark at Electrode
(fire not igniting pilot
burner)
Clear pipe and consider changing pilotPilot pipe or pilot injector
could be blocked)
E00
Code Comment Apperance Possible Cause Action
TESC locked due to
failed ignition
Red Led is
permanently on
TESC unit ( and
E00 on handset, if
used)
Temporary air
disturbance around pilot
burner
Check pilot pipe, check flame appearance of pilot flamesE01 Low current from
thermocouple but
flame: possibly CO
alarm
Flashing Red LED
on TESC Co ntrol
Pilot pipe blocked - no
gas reaching pilot
burner
Occurs if started ok then subsequently loss of thermocouple current. Check for flue problems. Fire
cuts out to prevent over heating
E02 Too high ambient
temperature ( >73 °C)
around control
Negative flue pull or
blocked flue or similar
Reset and try againCheck if connected correctly and terminations are soundE03 No, defective, or bad
connected
thermocouple
Bad connection
Reset and try againSensing flame on pilot when no flame should be there. Investigate.E04 False flame signal Occurs during stopping
fire
Reset and try againReplace batteriesE06 Too low voltage on
power supply to start
the burner
Weak or old or defective
batteries
Reset and try againReplace batteries / power adaptorE07 Power supply
breakdown during
peak current
consumption
Check/change all the
batteries or check power
adaptor. : Note always
change all batteries
together never only 1 or 2
Reset and try againReplace if necessaryE08 Error caused by
external pressure
switch
Check the pressure
switch
Reset and try againCheck pressure switch connections, check to see if jumpers are in place on back of TESC.E09 Error caused by
external pressure
switch
Pressures switch action
connection or jumpers
missing or not connected
properly
Reset and try againCheck pressure switch connections, check to see if jumpers are in place on back of TESC.E10 Error caused by
external pressure
switch
Pressure switch action
connection or jumpers
missing or not connected
properly
Reset and try againCheck switch for damage, contamination across terminals or damaged wiring. Disconnect wired
thermostat if fitted and try a start, if it works replace thermostat
E11 Short circuit on wired
thermostat (if used)
Check switch
Reset and try againCheck switch for damage, contamination across terminals or damaged wiring. Disconnect wired
thermostat if fitted and try a start, if it works replace thermostat
E12 Open circuit on wired
thermostat (if used)
Check wiring and
thermostat
Reset and try againCheck switch for damage, contamination across terminals or damaged wiring. Disconnect wired
thermostat if fitted and try a start, if it works replace thermostat
E13 Wired thermostat is
out of tolerance
Check wiring and
thermostat
Reset and try againClean as necessary. Replace switch panel as necessary if damaged or too contaminated.
disconnect wired control panel and try again – if it works replace wired control panel
E14 Button (-) sticks
either on TESC or on
wired control panel (if
used)
Check for contamination
around buttons
Reset and try againClean as necessary. Replace switch panel as necessary if damaged or too contaminated.
disconnect wired control panel and try again – if it works replace wired control panel
E15 Button (+) is shorted
to other buttons
either on TESC or on
wired control panel (if
used)
Check for contamination/
damage
Reset and try againClean as necessary. Replace switch panel as necessary if damaged or too contaminated.
disconnect wired control panel and try again – if it works replace wired control panel
E16 Button (ON/OFF) is
shorted to other
buttons either on
TESC or on wired
control panel (if used)
Check for contamination
/ damage and replace
wired switch panel if
necessary
Reset and try againJumpers on back of
valve missing
Check to see if jumpers
are in 10 way connector
Reset and try againCheck and clean around the area of the pilot for lint and other contamination. Check where the
thermocouple connects to the TESC control for the same contamination. Clean these areas.
E05 False flame signal Flame sensing on pilot
before start of ignition
sequence or after valve
has shut off.
Contamination of
electrode to ground
Reset and try againReplace PilotDefective thermocouple
Check and clearBlocked flue
Reset and try again
Check manual for correct placementPoor position of
Ceramic parts
Check flueChimney blocked
causing Co / Co2 to
build up in the room
build
Change pilot or thermocouplePilot thermocouple
defective / old
Clear error and restart to check ignition okPossible temporary air
disturbance on pilot
flame
Page 11

TROUBLE SHOOTING (GAS SAFE ENGINEER ONLY)
11
Reset and try againClean as necessary. Replace switch panel as necessary if damaged or too contaminated.
disconnect wired control panel and try again – if it works replace wired control panel
E17 Button (-) is shorted
to other buttons
either on TESC or on
wired control panel (if
used)
Check for contamination
/ damage and replace
wired switch panel if
necessary
Reset and try againClean as necessary. Replace switch panel as necessary if damaged or too contaminated.E18 Button (AUX) is
shorted to other
buttons on switch
panel
Check for contamination
/ damage and replace
wired switch panel if
necessary
Reset and try againCheck if wired correctly and replace IR eye if necessaryE19 Infrared receiver
defective (if used)
Check connection of IR
or damage - replace if
necessary IR eye
Reset and try againCheck if wired correctly and replace IR eye if necessaryE20 Illegal setup
parameters
Check connection of IR
or damage - replace if
necessary IR eye
Reset and try againUsually only a factory assembly error. Could happen if done in error in servicing.E21 Tried to config a
TESC as Clusterslave
while a wired
thermostat is
connected
Factory assembly
warning on setup
configuration not a
maintenance error
Reset and try againDisconnect thermostat before attempting using Easy test unit.E22 Tried to calibrate
TESC with TESC
easy test while a
wired thermostat is
connected
Not field error
Reset and try againIndicated that control has performed a high number of operations and so fire should be serviced and
control replacement should be considered as preventative maintenance. (should not really occur
before 10 years from new).
E23 Warning: end of life is
near, should be
replaced soon
Not field error
Reset and try againCheck and correct Thermocouple wiring. Replace thermocouple if necessaryE24 Thermocouple
doesn't reach final
current - damaged or
aged
Replace Pilot
Reset and try againCheck pilot thermocouple connections and connections to TESCE25 Poor thermocouple
signal
Tired or bad connection
of thermocouple or bad
or unstable flame on pilot
or poor grounding return
Reset and try againReplace with new USB power supply of the correct type.E26 Defective or wrong
wired USB-power
supply
Try again and if
repeatedly fails replace
Reset and try againCheck and correct Thermocouple wiring. Replace thermocouple if necessaryE48 Short circuit on
thermocouple, or
thermocouple
reversed polarity
Wrongly wired
Reset and try againCheck if and clean around the area of the pilot for lint and other contamination and clean. Check
where the thermocouple connect to the TSC control for the same contamination. Clean these areas.
E49 False flame signal Flame detected during
operation of fire when it
should not be detected contamination of
electrode circuit to
ground
Reset and try againCheck if and clean around the area of the pilot for lint and other contamination and clean. Check
where the thermocouple connect to the TSC control for the same contamination. Clean these areas.
E50 Internal error
Reset and try againCheck pressure switch connections , check to see if jumpers are in place on back of TESC.E51 Error caused by
external pressure
switch
Reset and try againE52 Error
Reset and try againE27 Error
Reset and try againE28 Error
Reset and try againE29 Error
Reset and try againE30 Error
Reset and try againE31 Error
Reset and try againE32 Error
Reset and try againE33 Error
Reset and try againE34 Error
Reset and try againE35 Error
Reset and try againE36 Error
Reset and try againE37 Error
Reset and try againE38 Error
Reset and try againE39 Error
Reset and try againE40 Error
Reset and try againE41 Error
Reset and try againE42 Error
Reset and try againE43 Error
Reset and try againE44 Error
Reset and try againE45 Error
Reset and try againE46 Error
Reset and try againE47 Error
Reset and try againE53 Error
Reset and try againE54 Error
Reset and try againE55 Error
Reset and try againE56 Error
Reset and try againE57 Error
Reset and try againE58 Error
Reset and try againE59 Error
Reset and try againE60 Error
Reset and try againE61 Error
Reset and try againE62 Error
Reset and try againE63 Error
Flame detected during
operation of fire when it
should not be detected contamination of
electrode circuit to
ground
Reset and try againCheck and correct Thermocouple wiring. Replace thermocouple if necessaryCheck pilot connections
Reset and try againClear pipe, replace pilot as necessaryPilot pipe may be
blocked completely
Code Comment Apperance Possible Cause Action
Page 12

USERS INSTRUCTIONS
12
Warnings
All parts of the appliance become hot while running and should therefore be considered to be
working surfaces.
A suitable guard may be required to take account of special hazards that exist in nurseries and other
places where there are young children, aged or infirm persons.
Curtains are not to be placed directly above the appliance.
It is recommended that combustible materials are not placed directly above this appliance.
This appliance should not be used if the glass door has been removed, broken or is open.
Fire Control
This control is situated on your fire. The drawing shows the main features of the control.
Check the power isolator switch is in the On position (I).
To start the fire, press the power button and hold for 1 second then release. The burner will light within around 1
to 10 seconds, adjust to the maximum power setting.
The power of the burner can be adjusted up and down by pressing the – and + buttons.
To stop the fire, simply press the power button again and the burner will stop.
If for any reason the fire should be switched off, either intentionally or unintentionally, no attempt should be made
to re-light the gas until at least 3 minutes have elapsed.
If you are not intending to use the fire for a long period (i.e. over summer time months), the battery life can be
extended even more by sliding the white isolator switch to the left (away from the On position to (O)).
Indicator light
Decrease flame
Increase flame
Battery compartment cover
Battery compartment
cover opening lever
Power button
White power isolator switch (sliding)
Fig. 11
Page 13

USER INSTRUCTIONS
13
Handset
Ensure the Power Isolator Switch on the front corner of Fire Control is in the on position (I).
Note: For safety reasons a button must be pressed and released for the command to be recognised. Keeping
hold of the button when pressing (unless otherwise instructed) will not be recognised as a command press.
Grasp around the handset to unlock its functions. The green unlock light will illuminate to show when the
handset is unlocked and ready to accept commands. (N.B. Keep a grip of handset to keep it unlocked, to
continue to operate the command buttons.)
Mode - MAN (Manual), Zzz (Snooze), thermostat or timed.
Time (12 hour or 24 hour display
In range of fire
(missing if not in range or if
fire controlled turned off)
Room temperature
can be set to
fahrenheit/celsius
Handset unlocked when
illuminated
To change handset
settings (see handbook)
Press to increase flame
Day of the week
Gas fire burner status
Battery condition
RC handset, FC fire control
Light sensor
(for display backlight)
To change mode
(see handbook)
Press to decrease flame
Power button – To start the fire, (after ensuring the fire control is turned on as described above), with one hand
grasp around the rear of both sides of the button area control. The green unlock light will illuminate. Keep the
handset held to keep the control unlocked, to enable operation of the buttons. Then with the other hand touch
and hold a finger on the power button for about 3 seconds. A short beep and a flash of the unlock light will
happen upon touching. When the word “pilot” appears at the bottom left hand corner of the display, immediately
release the power button. The Fire should be lit within a few seconds.
(N.B. If power button is held for more than a few seconds after second flash/beep/word pilot appears, the
command is ignored for safety reasons. Similarly if it is released too soon before the word “pilot” appears, the
command would also be ignored.
Fig. 12
Page 14

USERS INSTRUCTIONS
14
Operating instruction (Detailed)
THE HANDSET AND CONTROLS SHOULD ALREADY BE PAIRED AND THE DAY AND TIME SET
CORRECTLY.
SHOULD ANY ADJUSTMENTS BE NECESSARY SEE INSTRUCTIONS BELOW:
Setting the time
Following pressing “SET” at paring above, the display will be as shown, as the time is not set yet
and will progress automatically to the next screen shown below.
Note: the legend at the bottom shows the battery condition of both the batteries in the hand set
and in the fire control alternately. RC = Remote Control handset and FC = Fire control. The
control is designed to get the most out of the batteries but when eventually the display shows
they are spent(when the battery legend is a empty area, we recommend you change the batteries
in the handset before they are flat, to avoid having to re-program the time of day in again.
N.B. Pairing is not lost, even if the batteries are removed or flat.
Setting the display for 12 or 24 Hour display
As always when pressing the remote control buttons keep the control held to keep the green light
on and therefore handset safety feature, unlocked. The H indicates that it is time to set the timer
to either 24 hour display or 12 Hour (AM or PM ) display. Press the + or – button on the handset
to toggle between the two settings. When you are ready to confirm the setting you want press the
“SET” button to progress to setting the day of the week.
Setting the day of the week
Press and release the + and – buttons until the correct day of the week is shown on the display.
(Mo = Monday, Tu= Tuesday, We=Wednesday, Th=Thursday, Fr=Friday, Sa= Saturday and
Su=Sunday).
Press “SET” to accept the day of the week and to progress to setting the Hour of the day.
Note: Whilst doing this setup pressing “SET” advances to the next display and pressing “MODE”
will return you to the previous display setting.
Setting the Hour
Press and release the + or – button to change the hour to the correct hour and press set to store
and to move to setting the minute. Repeat this for setting the minutes.
Setting the temperature display to Celsius or Fahrenheit.
Press and release the + or - button to toggle between C and F. When the display shows the
desired symbol, press and release the “SET” button to store.
As the important settings above have now been done. Press and hold (not releasing straight
away) the “SET” button for a few seconds and this will exit the setup menu.
The control is now ready for use with the Fire Control.
Fig. 13
Fig. 14
Fig. 15
Fig. 16
Fig. 17
Page 15

USERS INSTRUCTIONS
15
Paging the handset
If you have misplaced the handset you can page it by pressing the + button only on the fire control for around 5
seconds. The handset will flash and make a noise to help you to locate it. Once you pick up the TESC it knows
you hold it and so the sound stops. The flashing and sound will last for 60 seconds each time the handset is
paged as described. If not found in 60 seconds,
page again and so on.
NOTE: Press “+” button ONLY, NOT “+” and “-” together. This will break the handset pairing and have to
reset handset to factory state and pair again.
Advanced settings Menu
In the event that you may want to change the other preset settings of the control features. Do not do a long
press and hold above but a normal short press and release will take you into the advanced settings area.
Advanced settings options are:-
• Back light –
• A = Automatic (default setting). The back light comes on in the dark but not in the light.
• 0 = Light never comes on.
• 1 = Light comes on when ever handset is unlocked.
• Display contrast – 8 levels from 0 to 7 (default level 4) .
• P = pairing with other devices other than the fire control. The hand set can pair with other modules to:-
• L= Operate an electric light – which is the dimmable in 9 steps
• F= operate an electric fan –which can have 9 speed levels
• A= operate an auxiliary contact to operate another device.
Other Modes than Manual Mode
Depending upon the model of Fire your handset maybe enabled to have some automatic features, namely,
Thermostat mode, timed thermostat mode and snooze mode. Snooze mode can be selected to work with in
conjunction with either manual or thermostatic modes. You can switch between modes at any time with the
handset unlocked by pressing and releasing mode button to toggle between modes.
Note: If at any time the power button is pressed during operation, this will stop the fire and exit any automatic
mode and return the handset to manual (MAN) operation mode.
Factory Reset of Display Handset (to enable handset to be paired again)
To reset a handset to factory conditions to enable it to be paired with a new control. Hold the handset to unlock.
Press and hold set until handset beeps and release the set button. PROG will be at the top left corner. Press
and release the mode button until the word SETUP is flashing in the top right corner.
Press and release SET to enter the SETUP menu.
Press and release the set button around 9 times until you see CA0 on the display.
Press then release the + (or – button) to change the display to CA1 and press and release the SET button again.
The word TESC will appear in the window to show that this handset is now reset and ready to pair again.
Snooze mode in manual operation
Snooze mode is a time period you can set which will turn off the fire after a certain time period has elapsed.
The snooze time period can be set before or during manual operation of the fire. Hold the handset to unlock as
described previously and press the mode button as many times as necessary until the word MAN and the Zzz
symbols are flashing at the top of the display. Press and release the set button and this will put the control into
Manual snooze mode.
The default time period for the snooze time period is 1:00 hour. Pressing the set button again will show you the
snooze time period remaining. This can be adjusted by pressing the “+” or “-“ buttons. The timer period that can
be set is from 1 minute to 4:00 hours.
After adjusting the time, press set again to enter the time setting required (or if left for a few seconds this time is
now stored and used).
Once this countdown timer has reached zero the fire will turn off (as if you had pressed off manually, it does not
recycle).
Page 16

USERS INSTRUCTIONS
16
Snooze mode in Thermostatic mode
The same thing as above can be done before or during a thermostatic mode operation (see below).
Thermostatic mode only
The handset has within it a thermostat sensor and this can be set so the fire will heat the room to match the
temperature set in the handset.
There are 3 temperature types that can be set:-
-Day mode temperature that has a sun symbol on the display – the default
temperature is 24 °C
- Night temperature that has a half moon symbol on the display- the default
temperature setting is 18 °C
-frost protection that has a snowflake symbol on the display – the default
temperature setting is 5 °C
Hold handset and press and release the mode button several times as necessary until the display has a
thermometer symbol flashing at the top of the display. Press the set button to enter this mode.
Press the set button again to see the temperature setting that is set and the mode (the default is 24 C ) and on
the left of the display is a sun symbol showing it’s the day temperature.
If a different set temperature is required, while the display is showing this set temperature , press the + and –
buttons to alter the setting. When finished either press set or leave and after a few seconds the new setting
will be accepted and the display will return to the time of day screen.
On the anniversary of the net minute of the clock, the set temperature will be compared to the actual
temperature displayed on the handset(i.e. the room ambient temperature around the handset).
Note: If at any time the power button is operated during Thermostat mode, the control will cancel any thermostat
operation and return the control to manual mode.
For ease of setting there are two other modes that can be selected as stated above. Night mode (moon symbol)
and frost protection setting (a snow flake). These can be selected (and adjusted if necessary) by pressing set
then mode while in thermostat mode. Pressing mode button toggles through from day to frost modes.
Note: As stated in an earlier section, snooze function can also be operated in conjunction with thermostat mode.
The thermostat symbol and the Zzz symbol will be on together when in this mode.
The remote control display handset supplied with this fire will have already been factory set and should
not need to be adjusted or re-paired. Read the operation instructions fully before attempting to de-pair
the handset.
De-pairing and re-pairing the handset.
Note: Reading this instruction fully, will help the user to carry out the quick set-up procedure, it may take a few
attempts to learn the sequence of commands due to the fast handset time-out period.
Should the handset fail to operate the fire control (and batteries are new), it may be necessary to re-pair it with
the gas fire control system.
To do this the handset may need to be returned to factory settings.
1. Pick up in a grasp to activate handset and then press set button until PROG shows on top left of screen.
2. Use the mode button pressing twice to show SETUP on top right of screen.
3. Again press SET button and H24 should show, scroll through menu with 9 more presses of set button until
CA0 shows, then immediately press + so CA1 shows, then again quickly press set so screen
shows 7ESC r4.
The handset is now ready for repairing with the gas fire control.
The handset must be within 1 metre of the fire when pairing and must be initially held to illuminate
and also initiate set up.
Simultaneously press the hold the – and + buttons on the gas fire control (i.e. not the handset)
unit the red neon on top left of fire control begins to flash rapidly, then immediately release – and
+ quickly pressing the power button below. An audible command signal is sent out to the handset
which is accepted by immediately pressing the set button (there is a 2 second time window to
press the power button or – and + will have to be repeated).
The handset will make a noise and the handset will show a pattern (7- - r).
Immediately Press the Set button on the illuminated handset to accept the command for pairing.
Scroll through the menu using handset SET button, adjusting the day, time with buttons – and + then press SET
button 6 times until screen shows a full display with wi- fi symbol.
Fig. 18
Page 17

It is recommend that this appliance is serviced at regular 12 monthly intervals. The chimney or flue
should also be checked regularly to ensure that all products of combustion are entering the flue and
there is no excessive build up of soot.
It is the users responsibility to ensure that the appliance is kept in a clean serviceable condition.
To remove the glass
1. Remove the magnetic trim.
2. Remove the louvred panel by lifting
up and pulling forwards.
3. Slacken the five machine screws on
the top retaining strip (Fig. 19).
4. Unscrew the two securing screws
from the lower infill panel and remove the panel.
Tilt the glass forwards and slide out (Fig. 20).
5. Clean the glass with a damp cloth. For stubborn stains use
a proprietary cream cleaner or ceramic hob cleaner.
Ceramic Components and Fuel Bed
Debris from any source should be removed with a soft brush.
Please ensure that any debris including soot deposits are
removed from the appliance and not left on the fuel bed.
It is recommended that the user should, on a regular quarterly
basis, carefully remove all ceramic components and thoroughly
clean the stainless steel burner strip and the pilot assembly.
Any build up of debris in this area could affect the
operation of the appliance (Fig. 21).
NOTE: It is common to find surface cracks in the ceramic components. This is due to the expansion and
contraction of the ceramic fibres caused by the intense heat that the burner generates. The cracks will not
affect the safe operation of this appliance. However great care must be taken when handling the ceramic
components as they will break if handled incorrectly. Do not use a vacuum cleaner to clean the ceramics.
Radiant Box Ceramic Liners - Use only a soft brush to remove any soot deposits from the ceramic liners
during cleaning as this is the only method that can be used to remove deposits. The ceramic liners are very
delicate and should be treated accordingly.
6. Reassemble in reverse order. The screws should be tightened enough to ensure the glass is sealed. The
glass should be positioned centrally to ensure the decorative trim will fit over it.
Trims and Frets - The trim and fret should be removed from the appliance for cleaning, please ensure that the
appliance has cooled thoroughly. Metal trims and frets maybe lacquer coated and therefore do not require
polishing.
CLEANING AND MAINTENANCE
17
Stainless Steel Burner Strip
Pilot Assembly
2 x Securing Screws
Fig. 19
Fig. 20
Fig. 21
5 x Machine Screws
Louvred Panel
Page 18

Fire fronts are now available in many different designs and finishes. The user can now choose their own
particular style of fire front to suit their individual fireplace setting, providing the fire front complies with the
following dimensions -
Fire Front - (X) Max: 210mm Min: 190mm
Ash Pan Cover - (W) Max: 90mm Min: 65mm
(Y) Max: 345mm Min: 320mm
SAFETY WARNING - This appliance has a naked flame and as with all heating appliances a fireguard
should be used for the protection of children, the elderly and infirm. Fireguards should conform to
BS 6539 (1984 Fireguards for use with solid fuel appliances). This fire is not fitted with an integral
guard. In normal use consideration may be given to the use of a fireguard confirming to BS 6539,
such that the approach to the naked flame is minimised.
FIRE FRONT SPECIFICATIONS
18
w
Y
X
Minimum area free space 15cm
2
Minimum area free space 5cm
2
Fig. 22
Page 19

MODULAR COAL LAYOUT INSTRUCTIONS
19
1. Place the main fuel bed on to the back section of the
metal burner tray. It is important that the front edge of
the fuel bed is located behind the burner strip, and the
holes in the fuel bed line up with the holes in the
Burner tray (Fig. 24).
3. Position the front coal piece on the front coal
retainer, making sure that the back edge is pushed up
against the front of the burner strip (Fig. 25).
CAUTION: The coals are extremely fragile and must be handled accordingly. Gloves should be worn
and any inhalation of dust should be avoided. The coals must be kept away from children at all times.
Never put additional coals on the fire. Never use coals other than those originally supplied, or
genuine Legend Spare Parts.
Fig. 23
Fig. 24
Fig. 26
Fig. 27
Fig. 25
Burner Strip
Burner Tray Holes
Fuel Bed Holes
Fuel Bed
4. Locate the remaining coal pieces in order as shown in Figs. 26 & 27.
Page 20

MODULAR COAL LAYOUT INSTRUCTIONS CONTINUED
20
Fig. 28
It is very important that all the coals are used and arranged as shown in order to
achieve the desired flame picture.
It may be necessary to remove some or all of the coals to clean them at some time.
Cleaning must only be done using a soft brush.
5. Finally check that all the coal pieces are ‘nested’ together correctly (Fig. 28) and a close fit is achieved on the
middle joint (this will stop gas surge through the gap).
Page 21

Page 22

Page 23

Page 24

Your appliance is guaranteed for one year from proof of purchase. Should the appliance prove defective within
that period we agree to repair or replace (at our discretion) the component or appliance provided that:
1. The user can produce a receipt for proof of purchase/installation.
2. The appliance has been supplied by an authorised stockist and has been installed by a qualified installer, all
installation and operating instructions have been strictly adhered to.
3. No alterations have been carried out on the appliance or component parts without our written consent.
4. The appliance has not been used for any purpose other than those intended.
5. The appliance has not been damaged accidentally or due to fair wear and tear.
Guarantee claims should be made through your appliance supplier. The Guarantee is restricted to UK Mainland
and is additional to your statutory rights.
TROUBLE SHOOTING (USER)
1. The Fire will not light.
Remove the decorative fret and ash pan door and check the pilot area for soot.
If soot is present remove all the loose coals and the front coal and thoroughly clean any debris
in and around the pilot area.
If the fire will still not light contact your installer.
2. The flames appear blue - excessive soot deposits.
The ceramic components including the coal need relaying (pages 19-20).
Too much or too little room ventilation. Seek professional advice.
3. Roaring noise coming from the pilot.
The front coal is not seated correctly. Turn the appliance off and allow to cool down. Re-seat
front coal, ensuring it is flat to the base of the front coal retainer (page 19).
4. All the Ceramic Components are discolouring.
The ceramic sets and liners are all manufactured from ceramic fibre. As these fibres are
naturally white, dyes are used to give a realistic appearance. These dyes discolour after they
have been subjected to intense heat. However the discolouration does not affect the operation
of the appliance. The realistic appearance can be restored with the use of a good replacement
dye that can be purchased from most good fireplace showrooms.
GUARANTEE
Unit 404 Glenfield Park Business Centre Blakewater Road Blackburn Lancashire BB1 5QH
Tel: 01254 695244 Fax: 01254 695255 Web: www.legend-fires.com Email: info@legend-fires.com
Draft B - 19/07/16
 Loading...