

Casti CAX-01, CAX-03, CAX-04 Quick Start Manual

Q
UICK START
G
UIDE
CAX-01/CAX-03/CAX-04
Option 1. Antenna and RF Cable Connections
1. Connect an antenna cable to the “ANTENNA IN" jack on the rear of the Converter Box.
2. Connect the “RF OUT” jack from the rear of the Converter Box to the “ANT IN” jack on your TV using
the RF cable supplied with the Converter Box.
3. Connect the AC power cable of the Converter Box to suitable wall outlet.
Note
※ CAX-03 and CAX-04 have analog pass-through.
~ These models are
capable of passing through the analog signal to the TV set in standby mode.
STEP 1: C
ONNECTIONS
• If you connect “RF OUT” of Converter Box to ANT. IN of your TV, you can watch the video and the
audio of the Converter Box on Ch.3 or Ch.4 of your TV. The RF output channels can be selected in
output channel of menu-option. (Refer to page 15 in user manual)
Converter Box’s Rear Panel
ANT IN
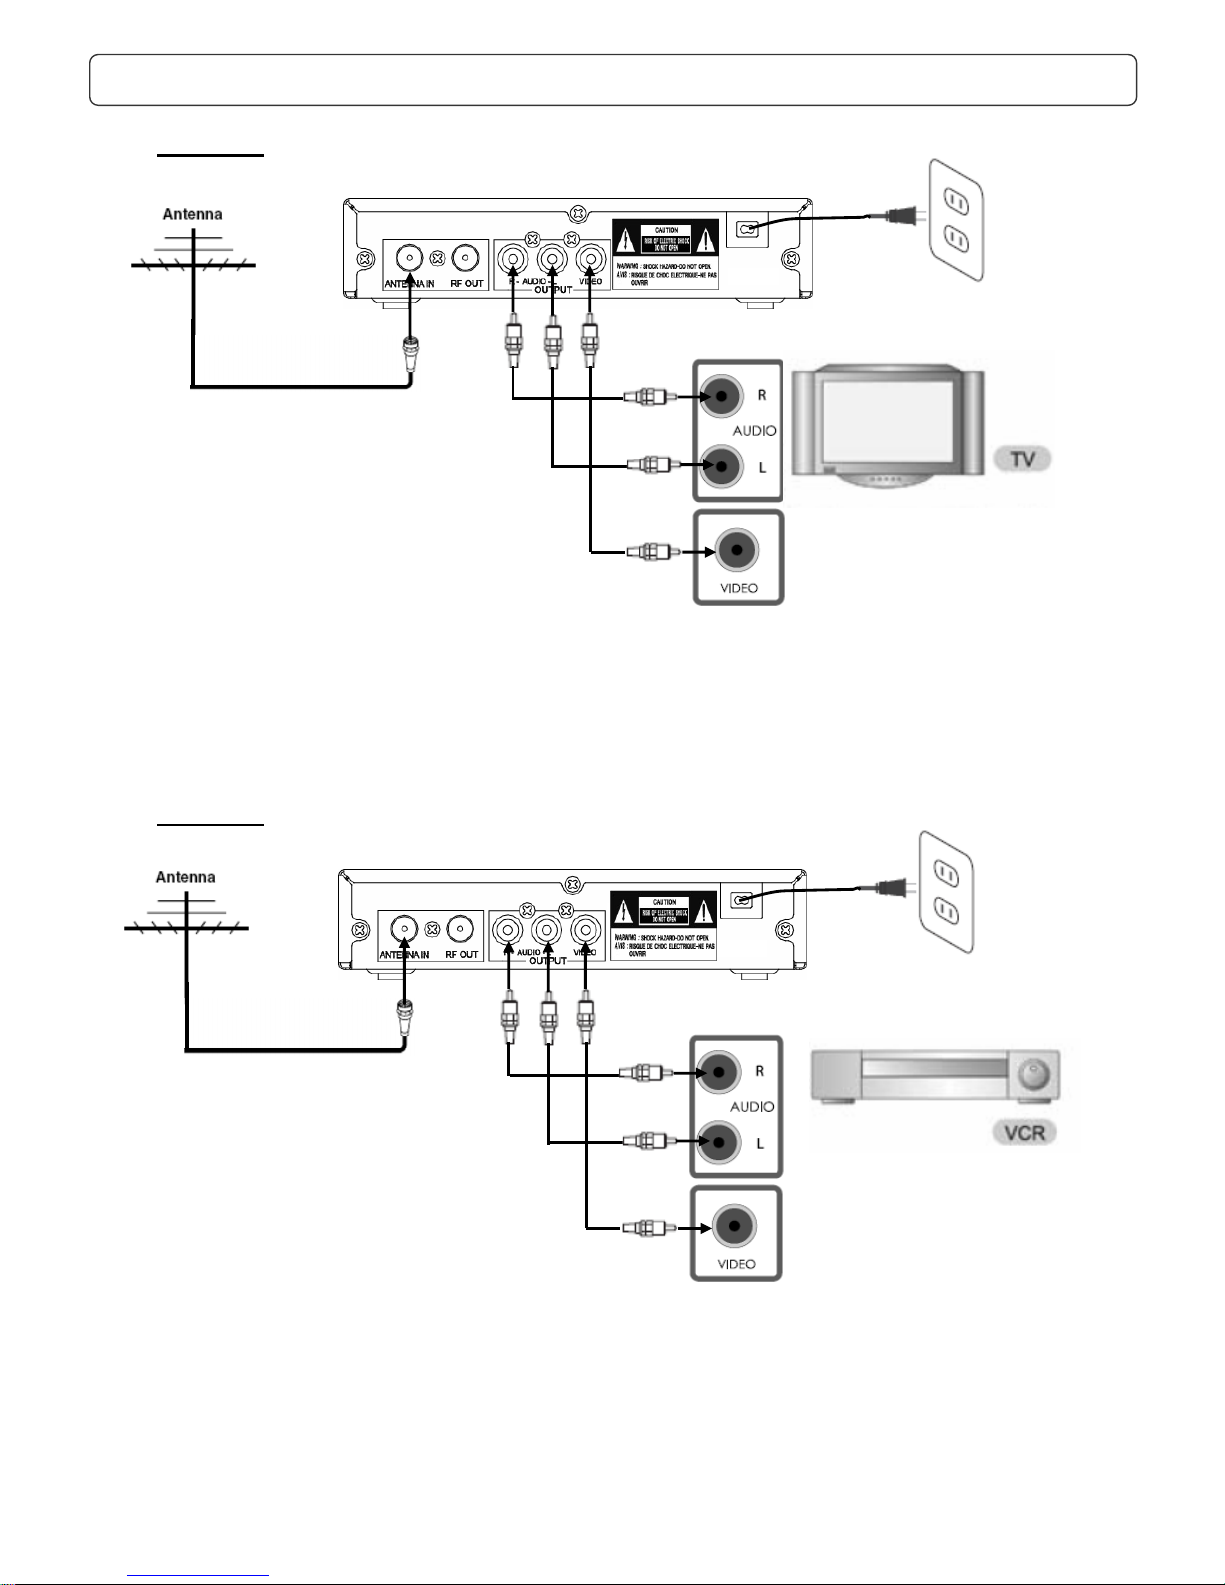
Option 2. Analog TV (Monitor) Connection with RCA Cables
1. Connect an antenna cable to the “ANTENNA IN" jack on the rear of the Converter Box.
2. Connect the “R-AUDIO-L” jacks and “VIDEO” jack from the converter box to the “A/V IN” jacks on
your TV using RCA-type cables.
3. Connect the AC power cable of the Converter Box to suitable wall outlet.
Option 3. VCR Connection with RCA Cables
1. Connect an antenna cable to the “ANTENNA IN" jack on the rear of the Converter Box.
2. Connect the L/R “AUDIO OUT” jacks and “VIDEO OUT” jack from the Converter Box to the “A/V IN”
jacks on your VCR using RCA-type cables.
3. Connect the AC power cable of the Converter Box to suitable wall outlet.
Converter Box Rear Panel
VCR Connection Panel
A/V IN
Converter Box Rear Panel
TV Connection Panel
A/V IN
CAX-01/CAX-03/CAX-04
Q
UICK
S
TART
G
UIDE
 Loading...