

Castex HS-1100, HS-1500, HS-1900 Operator And Parts Manual

HS-1100/HS-1500/HS -1900
U.S. PATENT NO.: D.343,932 & D.345,035
High Speed Floor Machine
Model No.:
608250 – HS-1100
607364 – HS-1500
607365 – HS-1900
Operator and Parts Manual
CASTEX INCORPORATED
12875 RANSOM STREET
HOLLAND MI 49424 U.S.A.
A TENNANT COMPANY
1–800-522–7839
616-786–2330
FAX: 1–800–678–4240
CUSTOMER S E RVICE: 1–800-964–9644
607368
Rev. 01 (08-99)

OPERATION
This manual is furnished with each new model. It
provides necessary operation and maintenance
instructions.
MACHINE DATA
Read this manual completely and understand the
machine before operating or servicing.
This machine will provide excellent service. However,
the best results will be obtained at minimum costs if:
The machine is operated with reasonable care.
The machine is maintained regularly - per the
machine maintenance instructions provided.
The machine is maintained with manufacturer
supplied or equivalent parts.
TABLE OF CONTENTS
SAFETY PRECAUTIONS 3. . . . . . . . . . . . . . . . . . . . . .
MACHINE COMPONENTS 4. . . . . . . . . . . . . . . . . . . .
Please fill out at time of installation for future reference.
Model No.Install. Date Serial No.-
2000 Tennant Company Printed in U.S.A.
Castex is a registered United States trademark of Tennant Company.
RECOMMENDED STOCK ITEMS 6. . . . . . . . . . . . . .
TROUBLE SHOOTING 7. . . . . . . . . . . . . . . . . . . . . . . .
MACHINE SETUP 4. . . . . . . . . . . . . . . . . . . . . . . . . . . . .
MACHINE OPERATION 5. . . . . . . . . . . . . . . . . . . . . . .
MACHINE MAINTENANCE 6. . . . . . . . . . . . . . . . . . . .
STORING MACHINE 6. . . . . . . . . . . . . . . . . . . . . . . . . .
SPECIFICATIONS 7. . . . . . . . . . . . . . . . . . . . . . . . . . . . .
PARTS LIST 8. . . . . . . . . . . . . . . . . . . . . . . . . . . . . . . . . .
ELECTRICAL DIAGRAM 14. . . . . . . . . . . . . . . . . . . .
2
HS-1100/1500/1900 (03–01)
SAFETY PRECAUTIONS
This machine is intended for commercial use. It is
suited to burnish floors in an indoor environment and
is not constructed for any other use. Use only
recommended burnishing pads.
The following safety alert symbols are used throughout
this manual as indicated in their description.
WARNING: To warn of hazards or unsafe
practices which could result in severe personal
injury or death.
FOR SAFETY: To identify actions which must be
followed for safe operation of equipment.
The following information signals potentially dangerous
conditions to the operator or equipment:
FOR SAFETY:
1. Do not operate machine:
– Unless trained and authorized.
– Unless operator manual is read and
understood.
– In flammable or explosive areas unless
designed for use in those areas.
– Unless cord is properly grounded.
– With damaged cord or plug.
– If not in proper operating condition.
– In outdoor areas.
– In standing water.
– With the use of an extension cord.
2. Before operating machine:
– Make sure all safety devices are in place
and operate properly.
3. When using machine:
– Do not run machine over cord.
– Do not pull machine by plug or cord.
– Do not pull cord around sharp edges or
corners.
– Do not unplug by pulling on cord.
– Do not stretch cord.
– Do not handle plug with wet hands.
– Keep cord away from heated surfaces.
– Do not release handle grips until pad
comes to a complete stop.
– Go slow on inclines and slippery surfaces.
– Report machine damage or faulty
operation immediately.
OPERATION
4. Before leaving or servicing machine:
– Turn off machine.
– Unplug cord from wall outlet.
5. When servicing machine:
– Unplug cord from wall outlet.
– Avoid moving parts. Do not wear loose
jackets, shirts, or sleeves.
– Use manufacturer supplied or approved
replacement parts.
WARNING: Hazardous Voltage. Shock or
electrocution can result. Unplug machine before
servicing.
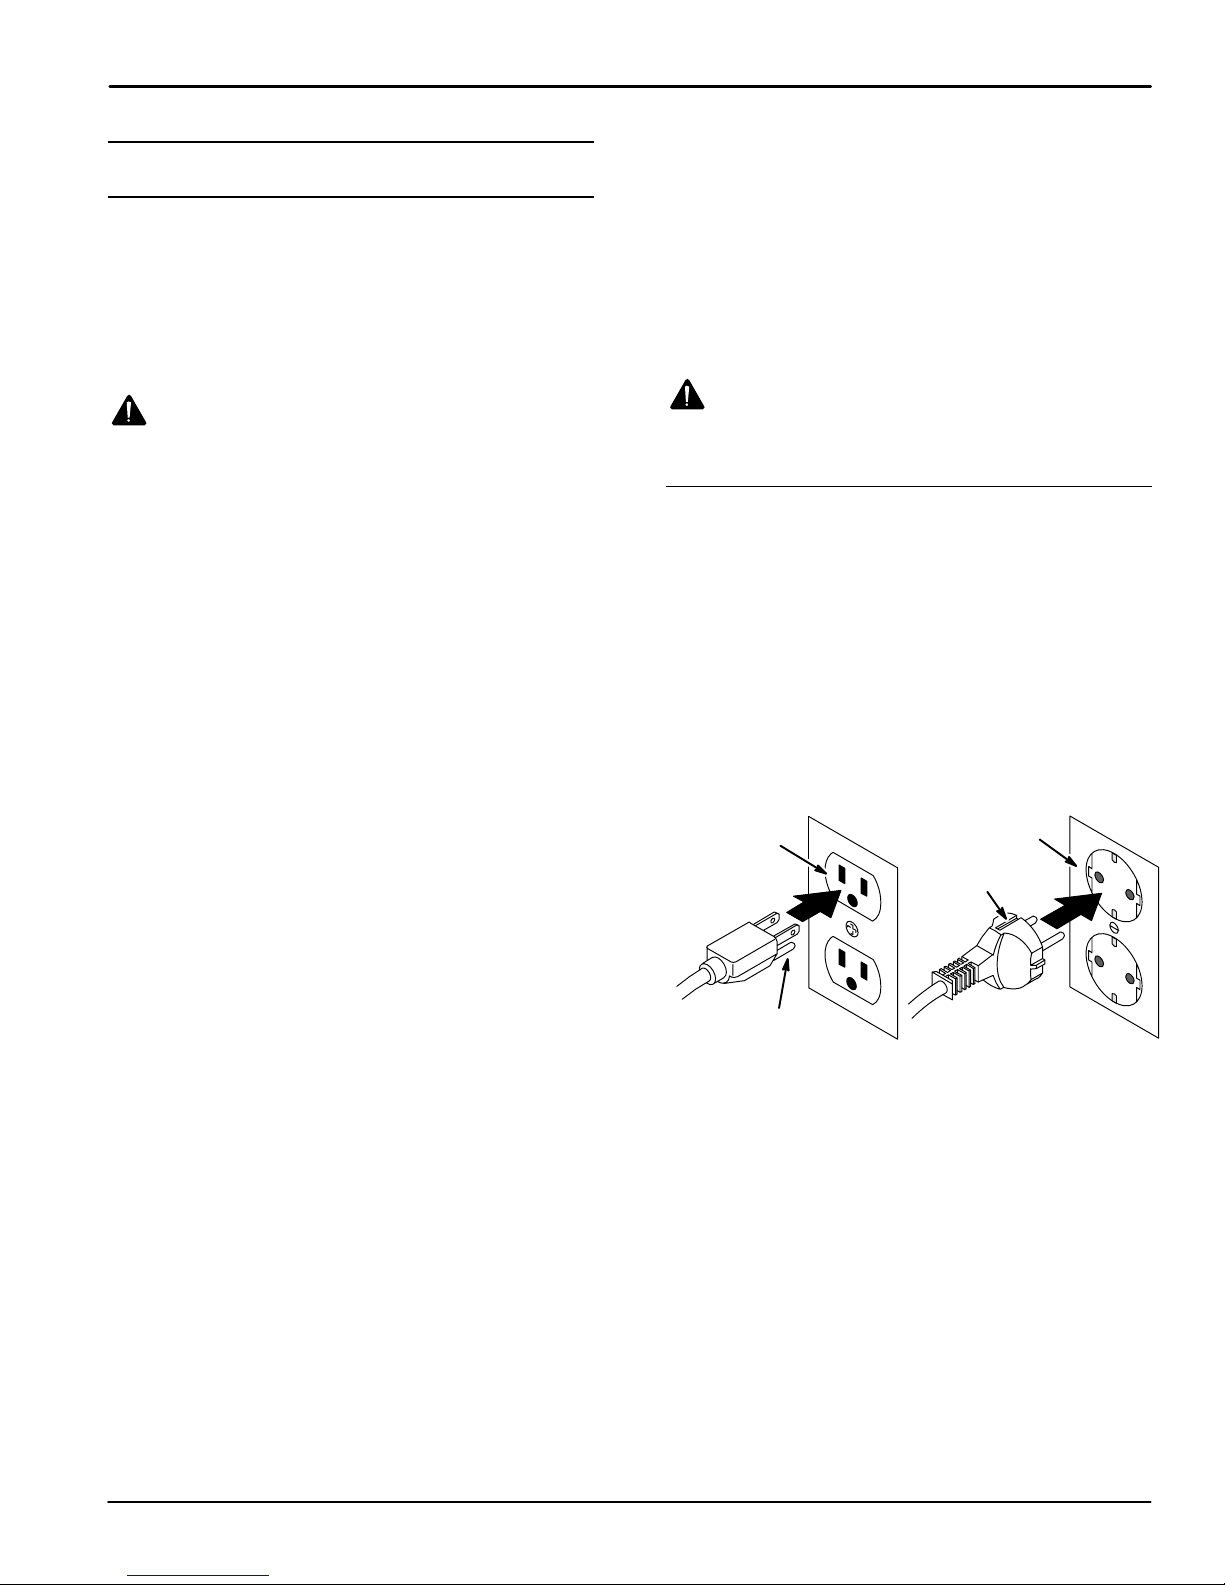
GROUNDING INSTRUCTIONS
Machine must be grounded. If it should
malfunction or breakdown, grounding provides a
path of least resistance for electrical current to
reduce the risk of electrical shock. This machine
is equipped with a cord having an
equipment–grounding conductor and grounding
plug. The plug must be plugged into an
appropriate outlet that is properly installed in
accordance with all local codes and ordinances.
Do not remove ground pin; if missing, replace
plug before use.
Grounded
3 Hole Outlet
Ground Pin
(120V)
Grounded Outlet
Grounding
Edge/hole
(230V/240V)
HS-1100/1500/1900 (03–01)
3

OPERATION
MACHINE COMPONENTS
1
2
7
6
3
12
9
11
2
4
10
5
13
MACHINE SETUP
1. Carefully check carton for signs of damage.
Report damages at once to carrier.
2. Unfold handle to the upright position and lock
handle using the handle lock knob (Figure 1).
FIG. 1
3. Install burnishing pad, with handle locked in the
upright position, carefully tilt machine back on
8
handle.
4. Remove centerlock from pad driver. Position
burnishing pad on pad driver and replace
centerlock securely (Figure 2).
1. Control Handle Grips
2. Control Triggers
3. Safety Lock Button
4. Circuit Breaker Button
5. Quick Release Power Cord Hook
6. 23 m (75 ft) Power Cord
7. Cord Grip
8. Handle Release Foot Lever
9. Motor Cover
10. Transport Wheels
11. Pad Driver
12. Burnish Pad
13. Handle Lock Knob
FIG. 2
NOTE: Burnishing pads are sold separately. Consult
your authorized distributor for pad recommendations.
Pad Specifications:
For 2000 RPM Burnishing.
25 mm (1.0 in) Thickness
510 mm (20 in) diameter with 90 mm (3.5 in) center
hole.
NOTE: Spray buffing is only recommended with the
1100 model. The 1500/1900 models should not be
used for spray buffing; circuit breaker may trip or
machine overloading may occur. The 1500/1900
models require more power at increased amp draw
due to higher speeds.
4
HS-1 100/1500/1900 (08–99)
OPERATION
5. Return machine to upright position after pad is
installed.
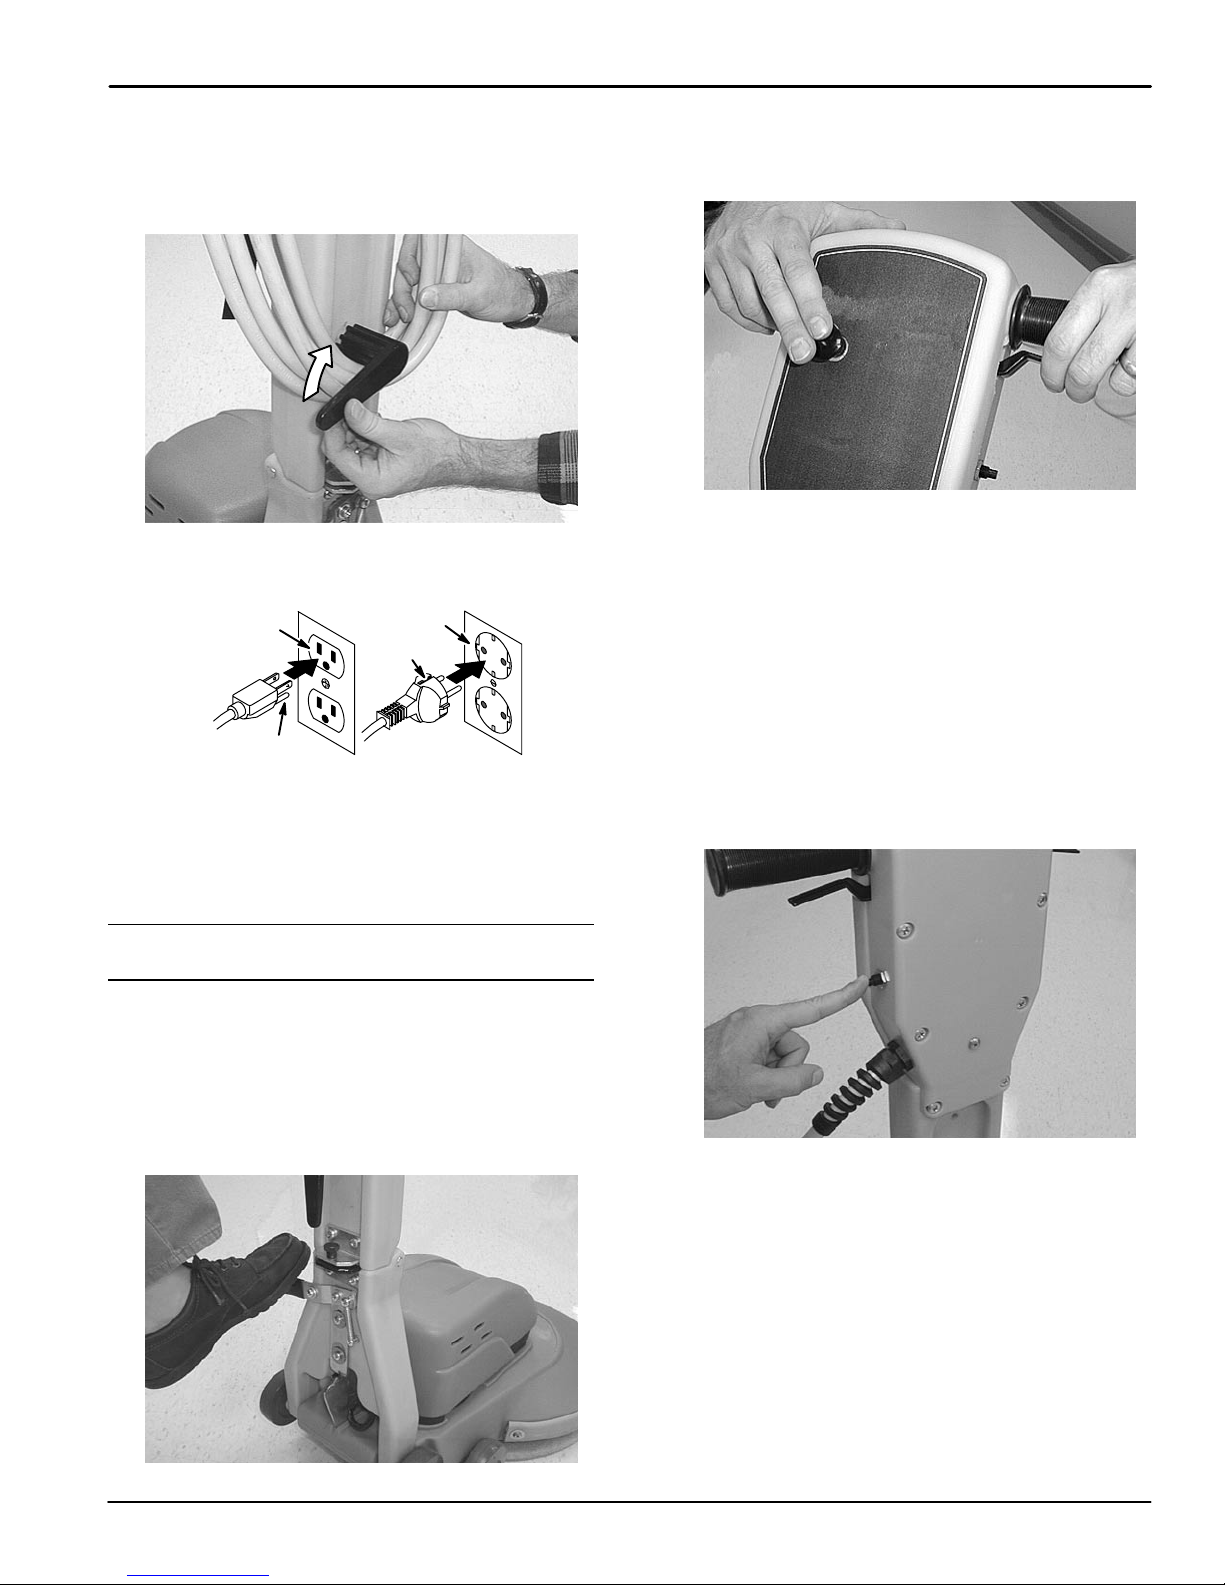
6. For easy power cord removal, pull and turn cord
hook upward (Figure 3).
FIG. 3
7. Plug power cord into a grounded wall outlet
(Figure 4).
Grounded
3 Hole Outlet
Ground Pin
Grounded Outlet
(120V)
Grounding
Edge/hole
FIG. 4
(230V/240V)
FOR SAFETY: Do not operate machine unless
cord is properly grounded or with the use of an
extension cord.
2. To begin burnishing, depress safety lock button
and pull triggers. Release safety lock button once
machine starts (Figure 6).
FIG. 6
ATTENTION: Use caution when starting out.
Machine will jolt when triggers are pulled.
3. Push machine forward or use a “W” pattern
motion.
ATTENTION: Keep machine moving to prevent
floor surface damage.
4. To prevent motor overload, periodically check pad
for excessive soil build-up. Turn pad over, clean or
replace when necessary.
NOTE: If circuit breaker trips while operating, unplug
power cord, wait 15 seconds and reset breaker switch
to resume operation ( Figure 7).
MACHINE OPERATION
FOR SAFETY: Do not operate machine unless
operator manual is read and understood.
NOTE: Before operating machine, be certain that
floor is dry and clean of debris.
1. Lower handle by stepping down on handle release
foot lever (Figure 5).
FIG. 5
HS-1 100/1500/1900 (03–01)
FIG. 7
5. To stop machine, release triggers and the safety
lock button will automatically engage.
FOR SAFETY: When using machine, do not
release handle grips until pad comes to complete
stop.
6. When finished burnishing, perform the
maintenance procedures.
5
 Loading...