

Skystar 600 Skylight Shade
[Roll Shades for Skylight Windows]
Installation Instructions
SKYSTAR
Installation Instructions
Thank you for purchasing your new Skystar™ skylight shade. It has been custom-made from the
highest quality materials to the dimensions you specified. With proper installation and care, it will
provide you with many years of beauty and trouble-free use.
Note: Unless the shade is very small, you will need an assistant to help with the installation.
Main Components
• Motor assembly
in fascia
• Shade assembly
in fascia
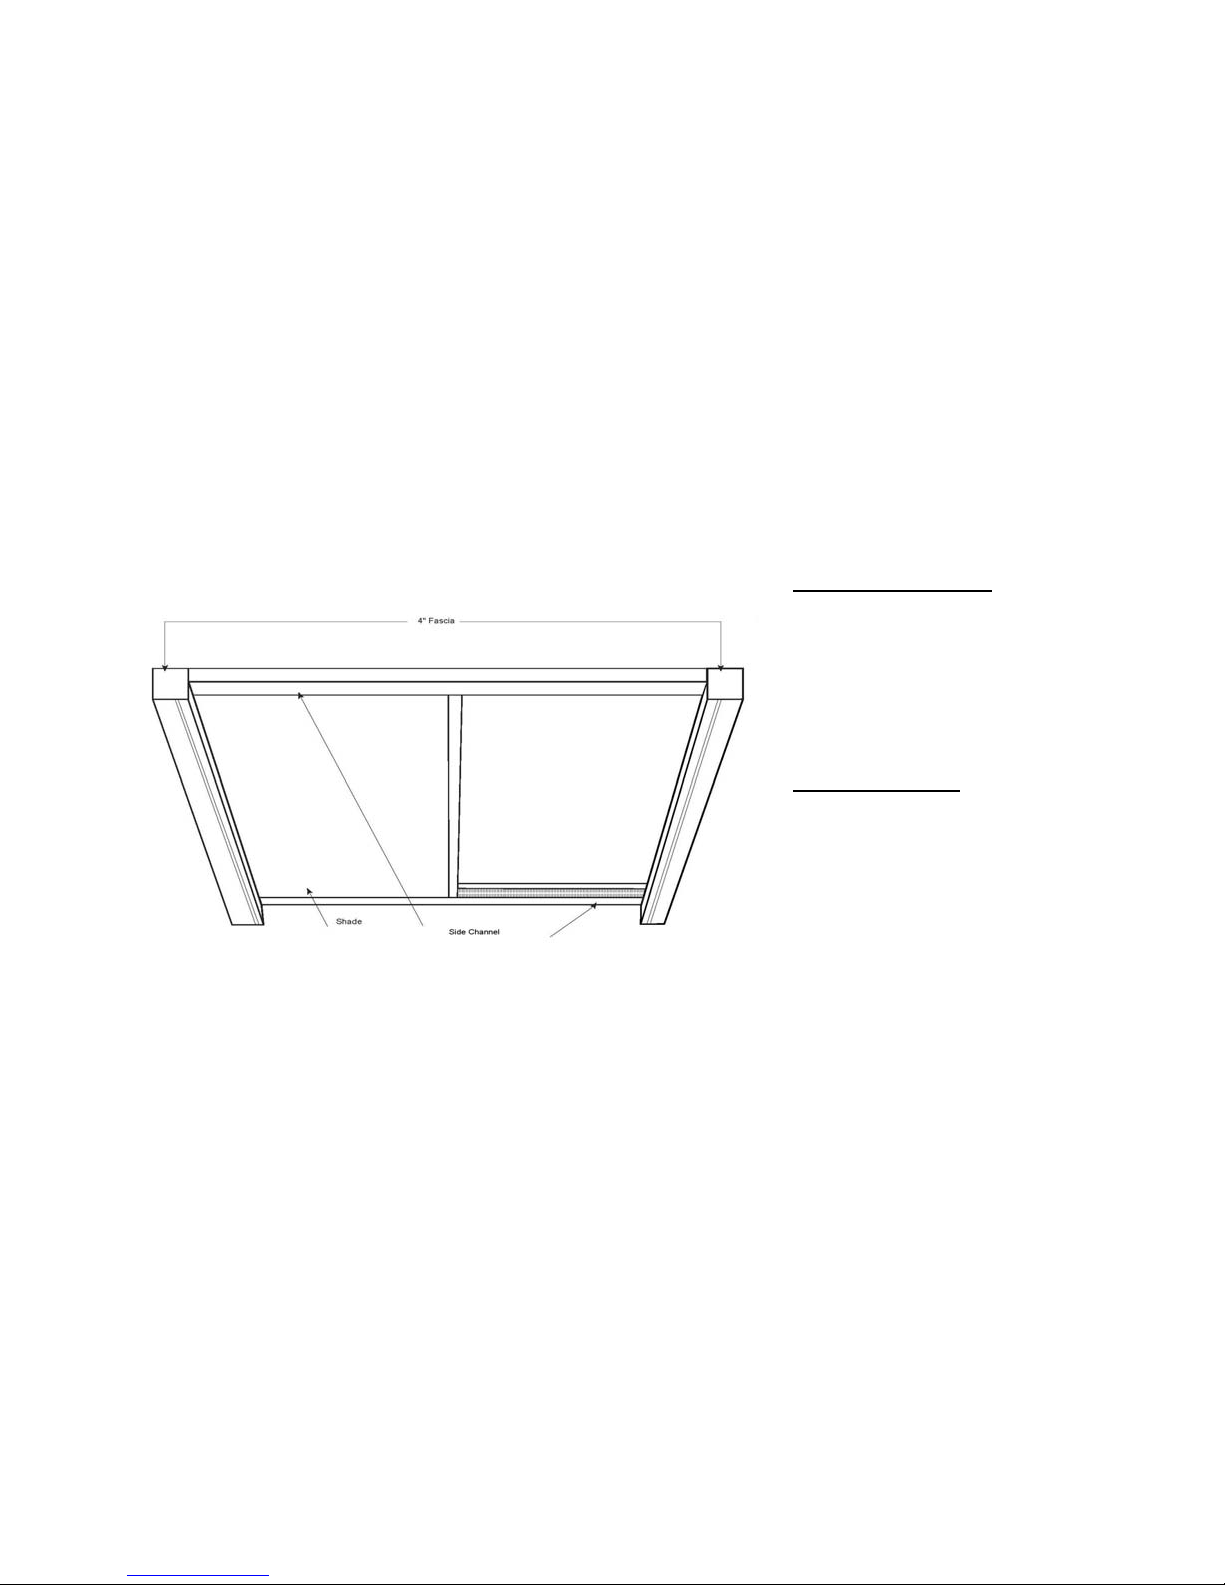
• Side channel x 2
Tools Required
• Metal measuring tape
• Level
• Awl
• Pencil
• Ladder or stepstool
• Power drill with the
Figure 1: Skystar Skylight Shade
Figure 1 Skystar 600 Skylight Shade
following bits:
− ¹⁄₄″ hex driver with
extended shaft
(8″ to 12″)
− Masonry drill bit
(if mounting
surface requires)
Skystar 600 Folding Skylight Shade Installation Instructions 1
SKYSTAR [Roll Shades for Skylight Windows] Installation Instructions
Rev. 5/1/2007
Rev. 6/12/2015
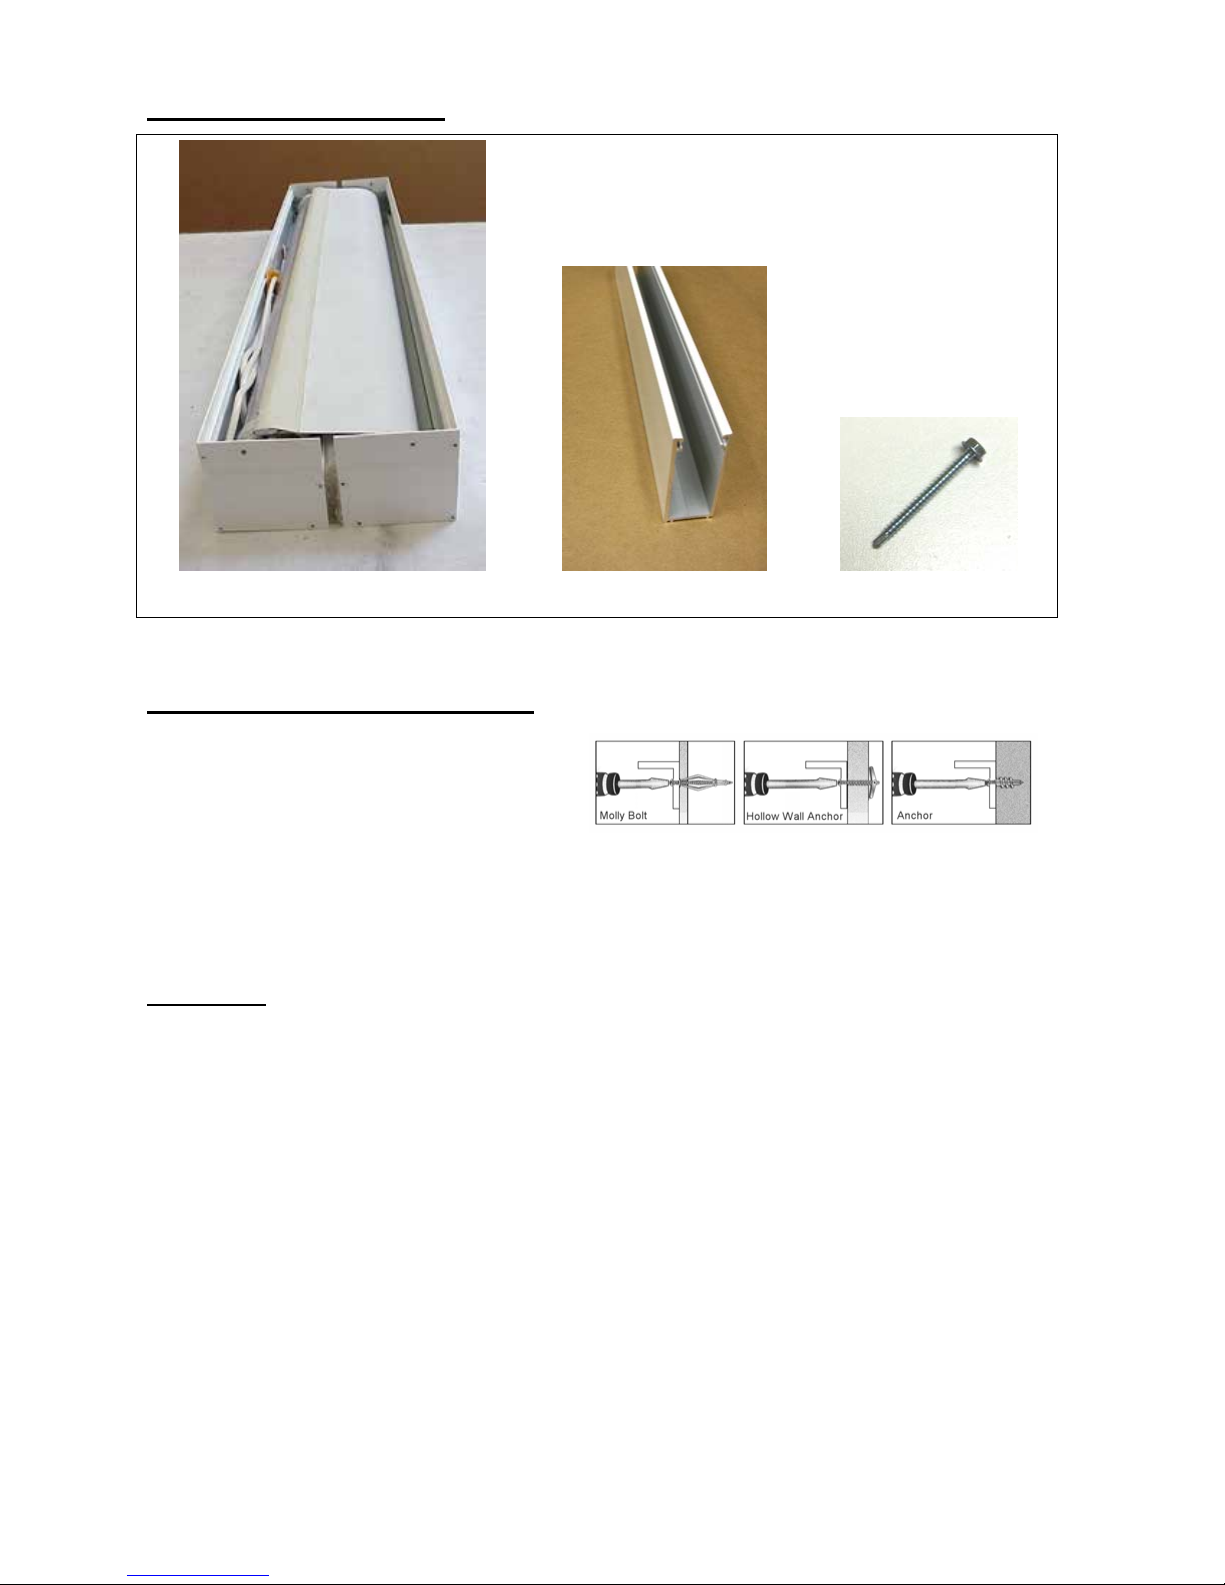
Components and Hardware
Shade and Motor Units Side Channel Mounting Screw
Figure 2 Components and Hardware
1
¹⁄₂
″ self-tapping hex head
Important Information on Fasteners
The shade components must be securely
attached to the mounting surface. The
screws included are self-drilling and can be
installed to metal or wood surfaces.
For other surfaces, use special fasteners
Figure 3 Special Fasteners
designed for your mounting surface (not included). See Figure 3 for examples. When selecting
your fastener, make sure it is designed to support the weight of the product being installed.
Follow the fastener manufacturer’s instructions carefully.
Definitions
For identification purposes, “top of the opening” refers to the side of the opening where the shade
roll is mounted; “bottom of the opening” refers to the side of the opening directly opposite the side
with the shade roll.
Skystar 600 Folding Skylight Shade Installation Instructions 2
SKYSTAR [Roll Shades for Skylight Windows] Installation Instructions
Rev. 5/1/2007
Rev. 6/12/2015

Installation Steps
Step 1: Attach the Shade Fascia
The shade is shipped as two connected units:
the motor fascia with the motor assembly,
and the shade fascia with the shade roll. The
two units are held together by the operating
cords and by the spring tension in the shade
roll.
Important: Do not remove either the shade
or the motor from their brackets. The springroller tension is set at the factory, and
removing either unit from its brackets will
change the tension setting.
• Keeping the two fascias together, have
an assistant hold the motor fascia while
you position the shade fascia in the top of
the opening with the smooth side facing
down. The shade can be mounted flush
with the lower edge of the opening, or
recessed, or in some cases dropped
slightly below the lower edge.
• Mark the position of the fascia, making sure it is level.
• Attach the shade fascia by drilling the self-tapping screws through the back of the fascia and
into the window frame. Place screws approximately 3″ from each end plus additional screws
about every 12″. To get the drill past the shade, you will need to use a hex driver bit with an
extended shaft and place the screws at a slight angle.
Figure 4 Motor and Shade Fascia Units
Step 2: Attach the Motor Fascia
• Attach the motor tester to the motor by connecting the color-matched leads to the motor cord
(instructions included separately).
• Pull the motor fascia out from the shade fascia and hold it in position in the bottom of the
opening. This extends the shade to its closed position.
• Operate the motor to open the shade. This allows access to the inside of the motor fascia.
• Hold the motor fascia in position at the same depth in the opening as the shade fascia. Make
sure it is level, and mark the location.
• Attach the motor fascia by drilling the self-tapping screws through the back of the fascia and
into the window frame. Place screws approximately 3″ from each end plus additional screws
about every 12″.
Step 3: Adjust the Motor Limits as Needed
• Operate the motor in both directions and ensure it is stopping in the correct positions. If the
stop positions are not correct, adjust them per the instructions included separately.
Important: Be sure the motor stops are correctly set before proceeding to the next step; manual
limit switches are not accessible after the side channels are in place.
Skystar 600 Folding Skylight Shade Installation Instructions 3
SKYSTAR [Roll Shades for Skylight Windows] Installation Instructions
Rev. 5/1/2007
Rev. 6/12/2015

Step 4: Attach the Side Channels
• Position each side channel against the side of the window frame, aligning the center of the
channel with the bottom rail of the shade.
• Attach each side channel to the window frame. (For convenience, a ¹⁄₄″ magnetic hex driver
bit with an extended shaft is recommended.) If you are installing to a metal or wood surface,
use the self-tapping screws provided to drill through the side channel and into the window
frame. For other surfaces, pre-drill a hole in the channel to accommodate the fasteners you
are using (special fasteners not included).
Place a screw about 1″ from each end plus additional screws approximately every 24″.
• Insert the bottom rail of the shade into the side channels.
When you have completed the installation, test the shade to make sure it operates correctly.
Then have the motor wiring completed by a qualified electrician.
Caring for Your Skystar Shade
Your Skystar™ shade will provide you with years of beauty and pleasure with minimal care and
cleaning. To care for your shade:
• Vacuum using a brush or dust head attachment.
• Dust lightly using a soft, clean cloth.
• Never immerse your shade in water or liquids of any kind.
• If necessary, wipe the solar fabric with a damp cloth. Allow the shade to dry completely
before opening.
• On some fabrics, a mild detergent solution can be used, if needed. Test on a small
inconspicuous area first. Be sure to rinse thoroughly and allow the shade to dry fully before
opening.
SKYSTAR [Roll Shades for Skylight Windows] Installation Instructions
Skystar 600 Folding Skylight Shade Installation Instructions 4
Rev. 6/12/2015
Rev. 5/1/2007
 Loading...