

Page 1
SERVICE MANUAL
& PARTS LIST
REF. NO. S/M-625
DEC 1998
MODULE NO.
QW-1789
MRG-121
R
(WITHOUT PRICE)
Ver. 1 Oct. 2001
Page 2

CONTENTS
1. SPECIFICATIONS: QW-1789........................................................................ 1
2. OPERATION CHART: QW-1789................................................................... 1
3. EXPLODED VIEW: QW-1789........................................................................ 2
4. PARTS LIST: QW-1789................................................................................. 3
5. PRECAUTIONS FOR REPAIR: QW-1789
5-1.HOW TO REMOVE THE BATTERY ....................................................... 4
5-2.HOW TO REMOVE CROWN WITH STEM ............................................. 4
5-3.HOW TO REMOVE HANDS ................................................................... 5
5-4.HOW TO INSERT THE BATTERY ......................................................... 5
Page 3
1. SPECIFICATIONS: QW-1789
Module (Movement No.) QW-1789
Display system Three hands & EL backlight
Accuracy setting Unadjustable
Accuracy ±20sec./month
Number of jewels 0
Time correction Crown type
Battery type CR2016
Battery life Approx. 3 years
Current consumption 1.18 µA maximum
Ambient temperature range –5°C ~ 55°C
Functions Shock resist
Notes: Conditions of battery life.
• EL backlight is used 3 times per day ------------------------------- 2 years
• EL backlight is used 5 times per day ----------------------------- 1.5 years
2. OPERATION CHART: QW-1789
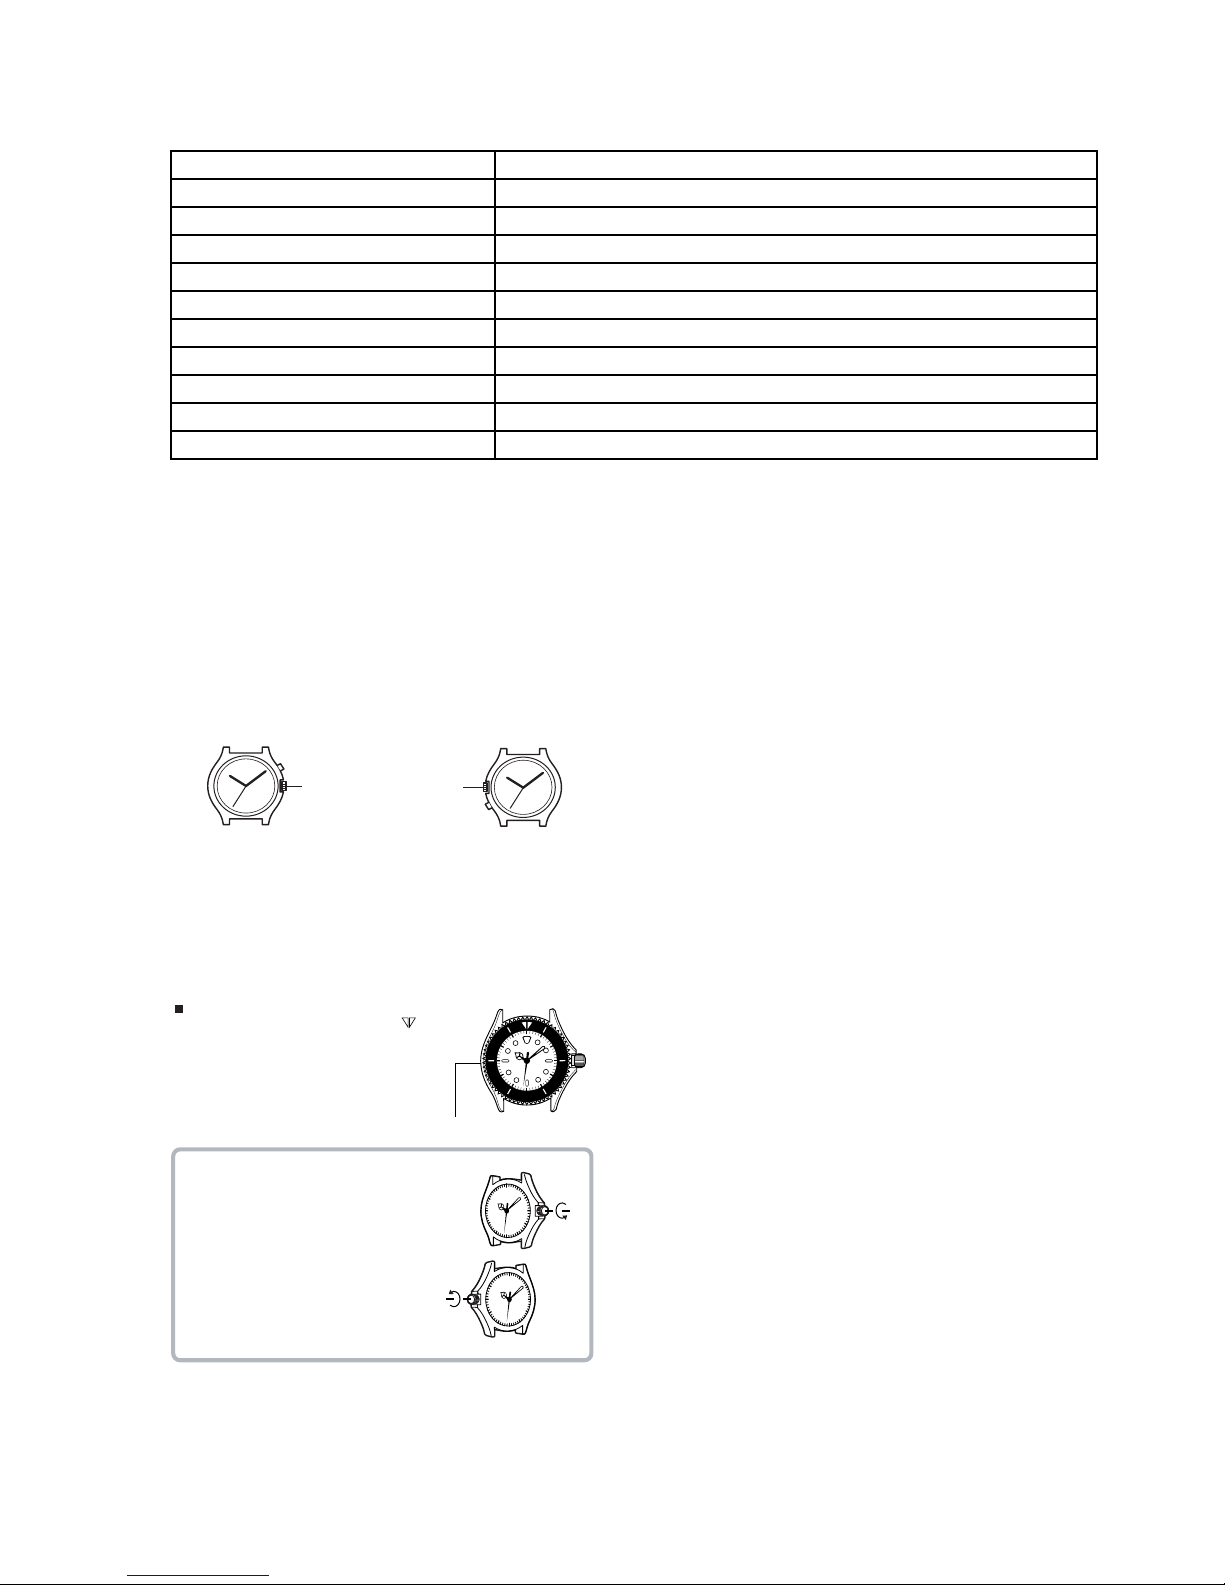
The physical configuration the watches covered by this User’s Guide differs according to model as shown below. Functions and operation procedures are identical, regardless of physical configuration.
LL
L
(Light button)
LL
Crown
Crown
(Light button)
LL
L
LL
To Set Time
1)Pull the crown out when the second hand is at 12 o’clock position and the second
hand stops.
2)Turn the hands clockwise and put the watch four or five minutes forward. Then
back them out.
3)In accordance with a time signal, push the crown in.
About the backlight
LL
• Pressing
L illuminates the display for about two seconds.
LL
• The backlight of this watch employs an electroluminescent (EL) light, which loses
its illuminating power after very long term use.
• Frequent use of the backlight shortens the battery life.
For watch with the elapsed time bezel
Rotate the elapsed time bezel to align the
with the minute hand.
After certain amount of time elapsed, read the graduation on the elapsed time bezel which the minute
hand points to.
The elapsed time is indicated.
• Some water resistant models are equipped
with a screw lock crown.
• With such models, you must unscrew the
crown in the direction noted in the illustration to loosen it before you can pull it out.
Do not pull too forcibly on such crowns.
• Also note that such watches are not water
resistant while their crowns are loosened.
Be sure to screw the crowns back in as far
as they will go after making any setting.
mark
Elapsed time bezel
10
50
20
40
30
— 1 —
Page 4

3. EXPLODED VIEW: QW-1789
Lubrication
Oil Moebius 9030
Grease Moebius 8200
3 Battery (CR2016)
6 2-11 (7435 8277)
9 2-11 (7435 8277)
A 2-15 (7437 7492)
B 2-10 (7436 9652)
D 2-9 (7436 9512)
Disassembling order: 1 to P
Reasembling order: P to 1
2-12 (7436 9666) 5
2-14 (7437 7541) 7
2-6 (7436 9547) 8
2-7 (7241 0215) 0
2-3 (7437 9221) C
2-2 (7436 9505) E
G 2-17 (7436 9540)
J 2-21 (7438 1881)
L 5 (7438 1846)
M 2-18 (7438 1867)
P 2-13 (7436 9694)
O 2-4 (7436 9554)
1 (7230 1013)
2-19 (7438 1860) F
2-22 (7438 1853) I
2-1 (7436 9498) K
2-8 (7436 9638) H
2-5 (7436 9631) N
Crown with stem 4
For the detailed information of
Crown with stem, refer
to Parts List (P/L) or Parts Price List
(P.P.L.) of each models.
1 2-16 (7435 8417)
2-20 (7235 0894) 2
— 2 —
Page 5

4. PARTS LIST: QW-1789
Note:1. Prices and specifications are subject to change without prior notice.
2. Spare parts are classified as follows according to their importance in after-sales service.
A Rank ----------------------------------------B Rank ----------------------------------------C Rank -----------------------------------------
3. Batteries in Bulk pack on the tray will be supplied from our Overseas Spare Parts Section under charge basis.
Batteries in Blister pack will be supplied from our Sales Department.
4. As for order/supply of spare parts, refer to the separate publication "GUIDE BOOK for spare parts supply".
Item Code No. Parts Name Specification Applicable QR
MODULE/WITH MOVEMENT QW-1789-01 MRG-121 / MRG-121T 1
1 7230 1013SPRING/COIL 1739 Q459872-1 QW-1789-01 2 A
2 7115 5628ANALOG BLOCK 5D1G202 QW-1789-01 1 A
2-1 7436 9498BRIDGE/CANNON PINION 5D3A601 QW-1789-01 1 C
2-2 7436 9505BRIDGE/TRAIN WHEEL 5D3A701 QW-1789-01 1 C
2-3 7437 9221COIL ASS'Y 5D3M202 QW-1789-01 1 A
2-4 7436 9554LEVER/RESET 5D3J301 QW-1789-01 1 C
2-5 7436 9631LEVER/SETTING 5D3R601 QW-1789-01 1 C
2-6 7436 9547LEVER/STOP 5D3I901 QW-1789-01 1 C
2-7 7241 0215PCB ASS'Y 5D3J408 QW-1789-01 1 A
2-8 7436 9638ROTOR 5D34J01 QW-1789-01 1 B
2-9 7436 9512SCREW D7010 QW-1789-01 1 C
2-107436 9652SCREW D7011 QW-1789-01 1 C
2-117435 8277SCREW D6005 QW-1789-01 2 C
2-127436 9666SCREW D7012 QW-1789-01 1 C
2-137436 9694STATOR 5D3M101 QW-1789-01 1 C
2-147437 7541SUPPORTER/PCB ASS'Y 5D30I60 QW-1789-01 1 C
2-157437 7492TERMINAL/BATTERY – 5D3L602 QW-1789-01 1 C
2-167435 8417WASHER 2A1S801 QW-1789-01 1 C
2-177436 9540WHEEL/FIFTH 5D3H501 QW-1789-01 1 B
2-187438 1867 WHEEL/MINUTE 5D3Q102 QW-1789-01 1 B
2-197438 1860 WHEEL/SECOND 5D1D202 QW-1789-01 1 B
2-207235 0894 WHEEL/SETTING 5D1Q206 QW-1789-01 1 B
2-217438 1881 WHEEL/SETTING 5D32R02 QW-1789-01 1 B
2-227438 1853WHEEL/THIRD 5D3C902 QW-1789-01 1 B
BATTERY/LITHIUM CR2016 QW-1789-01 1
-Very Important
-Important
-Less important
For the prices and minimum order/supply quantities of the above parts, refer to the Parts Price List P.P.L.-543.
Notes: Q— Used quantity
R— Rank
— 3 —
Page 6

5. PRECAUTIONS FOR REPAIR: QW-1789
5-1. HOW TO REMOVE THE BATTERY
1) Prepare a small precision driver.
2) Insert the screw driver between the battery and 9 o'clock side hook of the P.C.B. ass'y supporter.
3) Make some space between the hook and the battery.
4) Then the battery will come up.
5-2. HOW TO REMOVE CROWN WITH STEM
1) Remove the battery CR2016. (Refer to HOW TO REMOVE THE BATTERY)
Then you can see the setting lever through the hole at the point of arrow 1.
2) Unscrew the crown with stem.
3) Push the setting lever while the crown is pushed in. Use fine stick such as pin side of the band adjusting
tool.
Note: Do not push the setting lever with too much force.
4) Pull out slowly the crown with stem from the watch while pushing on the setting lever.
Note: To remove the crown with stem easily, pull it out with turning motion.
5) To fix the crown with stem, insert it with turning motion to prevent damaging of the sliding pinion.
1
3
4
2
5
— 4 —
Page 7

5-3. HOW TO REMOVE HANDS
Please remove the hands according to the following procedure.
1) Prepare the following tool, Hand removing spacer.
Code No. Parts Name Specification
1901 9721 Hand removing spacer WAT-JIG510
For the price of the above tool, please refer to P.P.L.-510.
2) Fix Hour, Minute and Second hands to the same direction.
3) Place Hand removing spacer on Dial with EL. Be sure the three hands are in the hole of
the hand removing spacer.
4) Remove the hands with the hand remover. Place the hand remover on the hand
removing spacer as shown below.
5) How to fix the hands are the same way as the other watches.
Hand remover
Hand removing spacer
Movement holder
5-4. HOW TO INSERT THE BATTERY
1) Place the new battery on the P.C.B. ass'y supporter.
2) Set the battery on 2 and 4 o'clock side of the hooks of the P.C.B. ass'y supporter.
3) Push down the battery at 9 o'clock side of the hook. Then the battery will be inserted.
4) Be sure not to break the gasket of the battery by 9 o'clock side hook on 3) procedure.
Short circuit of P.C.B ass'y
supporter and Battery.
Touching of the hook
to the gasket of Battery
— 5 —
Page 8

Ver. 1: Correction of parts list pages 2, 3
CASIO TECHNO CO.,LTD.
Overseas Service Division
Nishi-Shinjuku Kimuraya Bldg. 1F
5-25, Nishi-Shinjuku 7-Chome
Shinjuku-ku, Tokyo 160-0023, Japan
 Loading...